The WinForms Notepad Project: Cleaning Up and Publishing the App (Premium)
- Paul Thurrott
- Nov 21, 2019
-
0
I’ve spent the better part of the past ten days trying to implement some of the more difficult parts of Notepad and keep coming up short. But let’s move forward while I sort through that mess: This week, we’ll improve the scrollbars, clean up the status bar, and see what it looks like to publish our app to other computers.
Scrollbars
Last time, we added scrollbars to the application’s textbox, but the implementation was a bit basic: We just enabled both scrollbars (vertical and horizontal) and left it at that. Worse, this doesn’t reflect how Notepad really works. Notepad always displays the vertical scrollbar, but it only displays a horizontal scrollbar when word-wrap is disabled.
So let’s fix that.
First up, display Form1.vb [Design] and select TextBox1. Then, locate the ScrollBars property in the Properties pane and change it from Both to Vertical.
Now, we need to change this property when the user selects Format > Word Wrap. So, open Form1.vb and locate the WordWrapToolStripMenuItem_Click event handler. It should look something like this:
Private Sub WordWrapToolStripMenuItem_Click(sender As Object, e As EventArgs) Handles WordWrapToolStripMenuItem.Click
    If WordWrapToolStripMenuItem.Checked Then
        TextBox1.WordWrap = False
        WordWrapToolStripMenuItem.Checked = False
    Else
        TextBox1.WordWrap = True
        WordWrapToolStripMenuItem.Checked = True
    End If
End Sub
In the If block, add the line:
TextBox1.ScrollBars = ScrollBars.Both
Then, in the Else block, add the line:
TextBox1.ScrollBars = ScrollBars.Vertical
We also need to set TextBox1’s Scrollbars property when the form first loads, and do so after we read the value of My.Settings.MyWordWrap. If you look in Form1_Load, you will see the two following lines of code conveniently located right at the end of the event handler:
TextBox1.WordWrap = My.Settings.MyWordWrap
WordWrapToolStripMenuItem.Checked = My.Settings.MyWordWrap
So we need to add the following code after this, inside of the event handler:
If TextBox1.WordWrap Then
    TextBox1.ScrollBars = ScrollBars.Vertical
Else
    TextBox1.ScrollBars = ScrollBars.Both
End If
That should do it. If you test the app now, the scrollbars should change along with the Word Wrap setting configured by the user, and they should appear correctly when the app launches each time. (I am actually seeing a bug when I disable Word Wrap, close the app, and rerun it. But if I reenable Word Wrap, close, and re-run the app, it works properly. I don’t believe this is a bug in the app, though I could be wrong. If so, I can’t figure out what’s causing it. Let me know if you encounter this and/or have any ideas.)
Status bar cleanup
After a lot of experimentation with both caret positioning, which is not natively supported by the Textbox control, and text file encoding and formatting, which does not work consistently in .NET, I’ve decided to punt these parts of the status bar. I may or may not return to them in the future. But for now, let’s just remove the faux displays from the status bar and move on.
As you may recall, our app, like the real Notepad, has four status bar fields with textual displays, but only one of them, for the zoom, is working. So change the Text property for the other three—ToolStripStatusLabel2, ToolStripStatusLabel4, and ToolStripStatusLabel5—to an empty string. The result is an empty status bar, aside from that zoom field.
Publishing the app
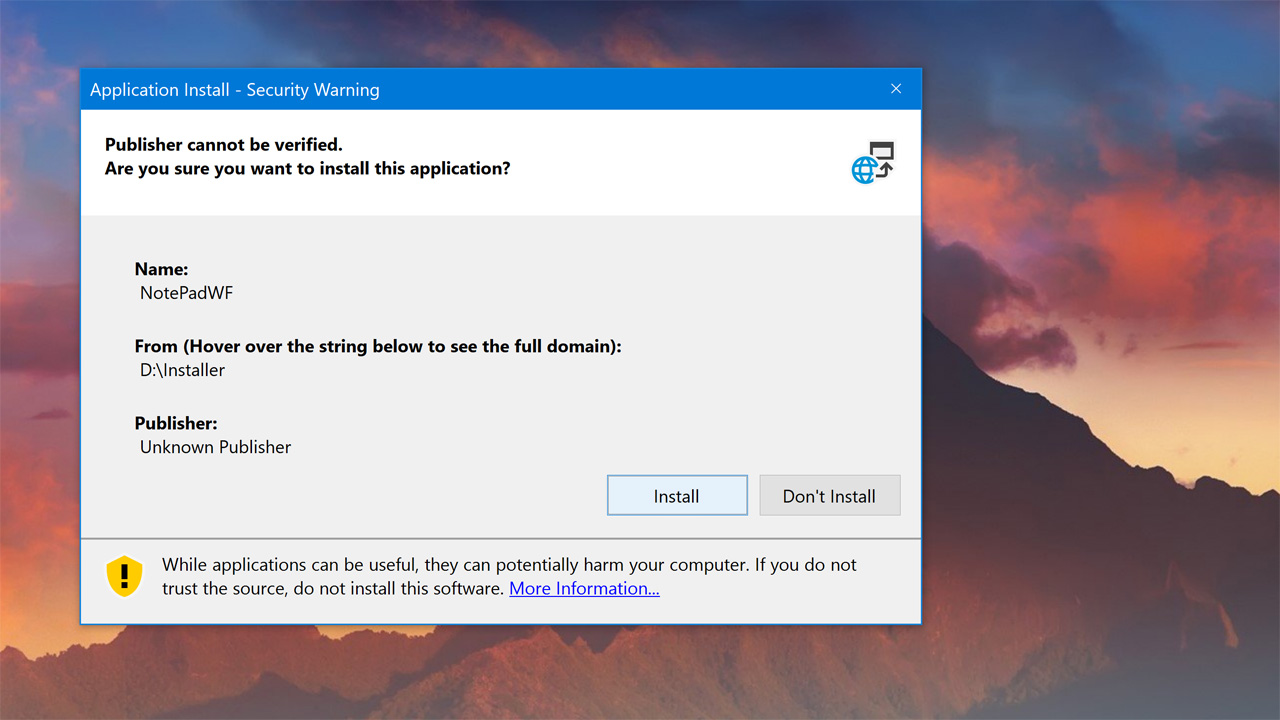
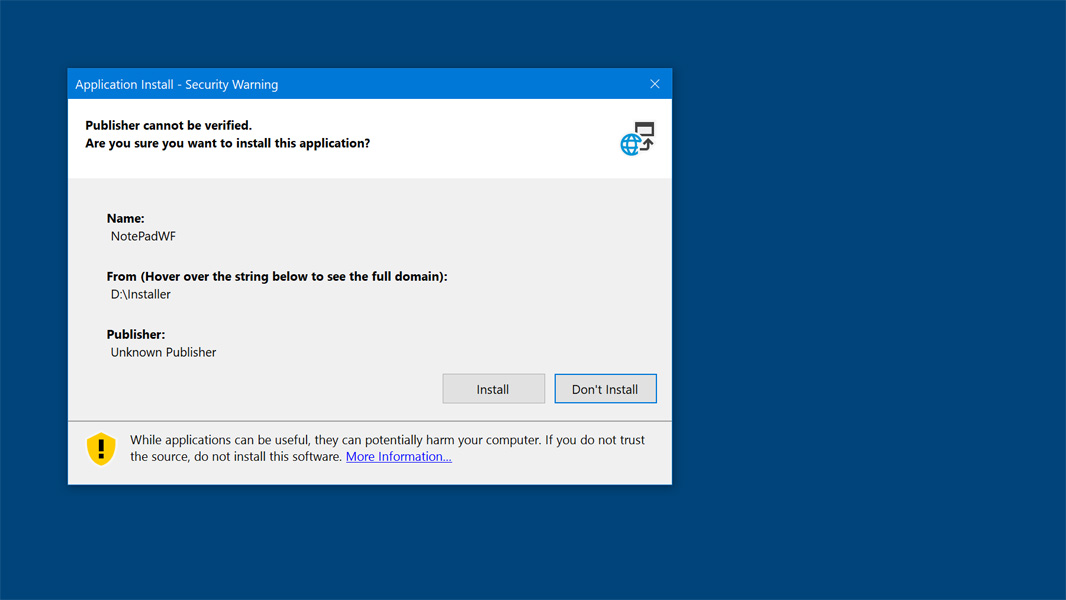
As our Notepad clone has gotten more mature, I’ve also experimented with Visual Studio’s application publishing capabilities and have used the resulting install files to install the app on other computers. This is easy enough: Right-click the project in the Solution Explorer pane and choose “Publish.”
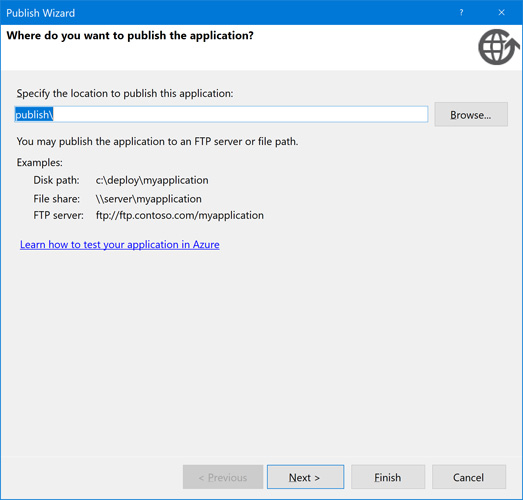
In the next steps, I choose “From a CD-ROM or DVD-ROM,” and then “This application will not check for updates.” Then, the wizard completes and generates the install files, which are put in a publish folder inside of the project’s folder structure. You can copy this folder over the network or via USB drive to install it on other PCs.
It’s pretty small, too: My version is under 4 MB. But that’s because it relies on the user having .NET Framework 4.7.2 on their PC. (If they don’t have this, they will be prompted to install it when they try to install your app.)
Side-note: In .NET Core, the successor to the .NET Framework, Microsoft is offering an option by which you can bundle the .NET runtime with your app. This will increase the install size significantly, but the install will be much easier for the user. We can’t switch to .NET Core yet because it doesn’t currently support all of the .NET Framework features and controls we’re using, but I’m expecting that to change, and will reexamine that when and if it does.
This is pretty useful for testing purposes, and it supports uninstall like other apps. But we’ll still want to make a few more changes before we really distribute this app to others. (For example, we can’t really use the original Notepad icon.) But we’ll save that work for another day.
More soon.

Gain unlimited access to Premium articles.
With technology shaping our everyday lives, how could we not dig deeper?
Thurrott Premium delivers an honest and thorough perspective about the technologies we use and rely on everyday. Discover deeper content as a Premium member.