The UWP Notepad Project (Redux): Find/Replace (Premium)
- Paul Thurrott
- Jul 08, 2020
-
2
For this installment of our UWP project, we’ll implement Find, Find Next, Find Previous, Replace, and Replace All with a fun new custom dialog.
And I am pretty proud of that dialog. But since I already wrote about how I designed the Find and Replace dialogs as a single ContentDialog back in The UWP Files: Find Your Way Back (Premium), you can read that if you’re interested. The short version is that we display the entire dialog when the user selects the Replace button, but we hide the middle two rows of controls—the “Replace with” textblock and textbox, the Replace button, and the Replace button—when they select the Find button.
To get started, let’s add the code for this new ContentDialog, called FindReplaceDialog, to our XAML. It should go right below the SavePrompt code and look like so:
<ContentDialog x:Name="FindReplaceDialog">
    <Grid Height="Auto" Width="Auto" Margin="0,10,0,0">
        <Grid.RowDefinitions><RowDefinition Height="Auto"/>
            <RowDefinition Height="Auto"/>
            <RowDefinition Height="Auto"/>
            <RowDefinition Height="Auto"/>
        </Grid.RowDefinitions>
        <Grid.ColumnDefinitions>
            <ColumnDefinition Width="Auto" />
            <ColumnDefinition Width="Auto" />
            <ColumnDefinition Width="Auto" />
        </Grid.ColumnDefinitions>
        <TextBlock Grid.Row="0" Grid.Column="0" Text="Find what:" HorizontalAlignment="Left" VerticalAlignment="Center" Margin="0,0,10,0" />
        <TextBox Name="FindReplace_FindTextBox" Grid.Row="0" Grid.Column="1" Width="200" Height="32" HorizontalAlignment="Left" VerticalAlignment="Top" Margin="10,0,10,0"  />
        <Button Name="FindReplace_FindButton" Grid.Row="0" Grid.Column="2" Content="Find" Width="110" HorizontalAlignment="Left" VerticalAlignment="Center" Margin="0,0,0,10"/>
        <TextBlock Name="FindReplace_ReplaceWithTextBlock" Grid.Row="1" Grid.Column="0" Text="Replace with:" HorizontalAlignment="Left" VerticalAlignment="Center" Margin="0,0,0,10" />
        <TextBox Name="FindReplace_ReplaceTextBox" Grid.Row="1" Grid.Column="1" Width="200" Height="32" HorizontalAlignment="Left" VerticalAlignment="Top" Margin="10,0,0,10"  />
        <Button Name="FindReplace_ReplaceButton" Grid.Row="1" Grid.Column="2" Content="Replace" Width="110" HorizontalAlignment="Left" VerticalAlignment="Center" Margin="0,0,0,10"/>
        <Button Name="FindReplace_ReplaceAllButton" Grid.Row="2" Grid.Column="2" Content="Replace All" Width="110" HorizontalAlignment="Left" VerticalAlignment="Center" Margin="0,0,0,10"/>
        <Button Name="FindReplace_CancelButton" Grid.Row="3" Grid.Column="2" Content="Close" Width="110" HorizontalAlignment="Left" VerticalAlignment="Center" Margin="0,0,0,10"/>
    </Grid>
</ContentDialog>
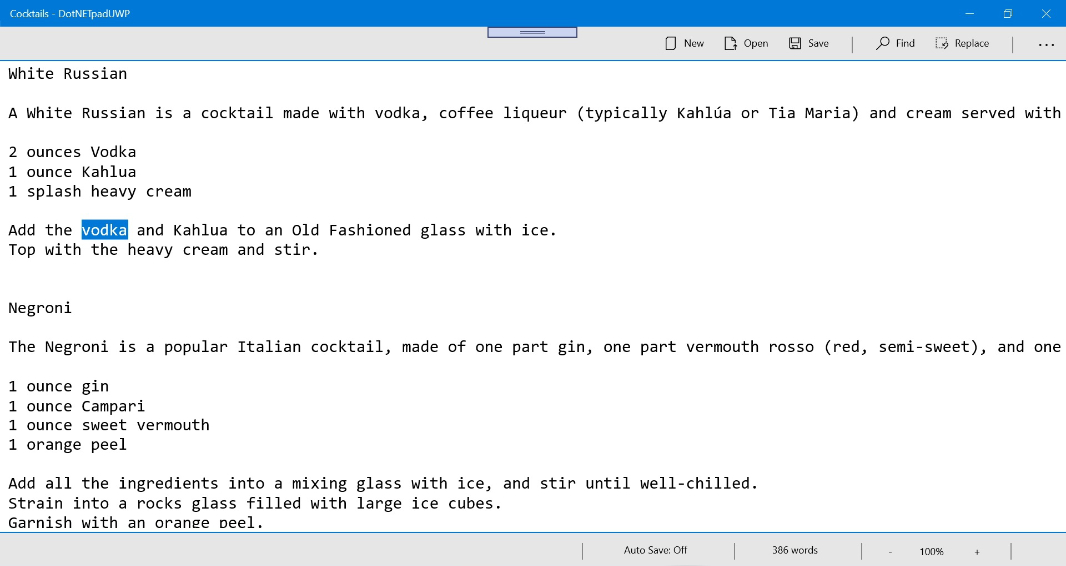
That’s a lot of code, but it’s really simple. And if you look at the Design view, you’ll see what it will look like (in Replace mode).

Next, let’s implement the Click event handlers for the Find and Replace buttons, respectively. Both will need keyboard shortcuts—CTRL + F for Find and CTRL + H for Replace—too, so you may as well add that code as well. When you’re done, the XAML for FindButton and ReplaceButton should look like so:
<AppBarButton Icon="Find" Label="Find" Name="FindButton" Click="FindButton_Click"><AppBarButton.KeyboardAccelerators><KeyboardAccelerator Modifiers="Control" Key="F" /></AppBarButton.KeyboardAccelerators></AppBarButton>
<AppBarButton Icon="ClearSelection" Label="Replace" Name="ReplaceButton" Click="ReplaceButton_Click"><AppBarButton.KeyboardAccelerators><KeyboardAccelerator Modifiers="Control" Key="H" /></AppBarButton.KeyboardAccelerators></AppBarButton>
Now, switch back to MainPage.xaml.cs, where you should see two new empty event handlers, FindButton_Click and ReplaceButton_Click.
Let’s start with FindButton_Click(). Since we’re displaying a dialog box, we’ll need to add the async keyword to the first line, as shown here:
private async void FindButton_Click(object sender, RoutedEventArgs e)
{
    // Hide UI elements for Replace and Replace All
    FindReplace_ReplaceWithTextBlock.Visibility = Visibility.Collapsed;
    FindReplace_ReplaceTextBox.Visibility = Visibility.Collapsed;
    FindReplace_ReplaceButton.Visibility = Visibility.Collapsed;
    FindReplace_ReplaceAllButton.Visibility = Visibility.Collapsed;

    FindReplaceDialog.Title = "Find";
    await FindReplaceDialog.ShowAsync();
}
This code hides the controls on the second and third rows of the dialog, sets the dialog’s title accordingly, and then displays the dialog. If you run the app now and click the Find command bar button (or type CTRL + F) you can see it in action.

You’ll have to hit ESC to get rid of the dialog, however: We haven’t written any code for the Close button yet.
Next up is ReplaceButton_Click(). Here, we make sure to display the controls in the second and third rows before setting the dialog’s title accordingly. And again, we need to make this event handler async because we’re displaying a dialog.
private async void ReplaceButton_Click(object sender, RoutedEventArgs e)
{
    // Show UI elements for Replace and Replace All
    FindReplace_ReplaceWithTextBlock.Visibility = Visibility.Visible;
    FindReplace_ReplaceTextBox.Visibility = Visibility.Visible;
    FindReplace_ReplaceButton.Visibility = Visibility.Visible;
    FindReplace_ReplaceAllButton.Visibility = Visibility.Visible;

    FindReplaceDialog.Title = "Replace";
    await FindReplaceDialog.ShowAsync();
}
If you followed along with the previous versions of this app, you may remember that a reader, Michael Lerch, provided me with the code for Find, Find Next, Find Previous, Replace, and Replace All for the original Windows Forms/Visual Basic version of the app. And that I converted that to C# for a version of that app that I developed privately and then ported it to the Windows Presentation Foundation (WPF) version of the app. I’ll be doing so again here for the UWP version.
Michael created two helper functions, FindTheText() and FindTextIndex(), so we’ll add the new versions of those to the code first. Add this at the end of the MainPage class definition in MainPage.xaml.cs, right below the ReplaceButton_Click() event handler:
private async Task FindTheText()
{
    if (FindLastIndexFound > -1)
        TextBox1.Select(FindLastIndexFound, findText.Length);
    else
    {
        MessageDialog messageDialog = new MessageDialog("Cannot find " + (char)34 + findText + (char)34);
        await messageDialog.ShowAsync();
    }
}

private void FindTextIndex(int FindFromIndex, bool FindPreviousIndex)
{
    string text = TextBox1.Text;
    if (FindPreviousIndex == false)
    {
        FindLastIndexFound = text.IndexOf(findText, FindFromIndex);
        if (FindLastIndexFound == -1)
        {
            // If text is not found, try searching from the beginning
            FindLastIndexFound = text.IndexOf(findText, 0);
        }
    }
    else
    {
        FindLastIndexFound = text.LastIndexOf(findText, FindFromIndex);
        if (FindLastIndexFound == -1)
        {
            //  If text is not found, try searching from the end
            FindLastIndexFound = text.LastIndexOf(findText, text.Length - 1);
        }
    }
}
These methods rely on three global variables that we haven’t added yet, so you’ll see red squigglies everywhere. To fix this, scroll back up to the top of MainPage.xaml.cs and add this after the code for the other global variables:
// For Find and Replace
string findText = "";
string replaceText = "";
int FindLastIndexFound = 0;
Next, we need to create Click event handlers for the four buttons in FindReplaceDialog: FindReplace_FindButton, FindReplace_ReplaceButton, FindReplace_ReplaceAllButton, and FindReplace_CancelButton. The code for the first three comes directly from my conversion of Michael’s original code, so there’s probably not much reason to explain most of this again. Here are the four event handlers in full, since each needs that async keyword:
private async void FindReplace_FindButton_Click(object sender, RoutedEventArgs e)
{
    findText = FindReplace_FindTextBox.Text;

    // Find text from current cursor position
    FindTextIndex(TextBox1.SelectionStart, false);

    if (FindLastIndexFound > -1)
        await FindTheText();

    FindReplaceDialog.Hide();
}

private async void FindReplace_ReplaceButton_Click(object sender, RoutedEventArgs e)
{
    findText = FindReplace_FindTextBox.Text;
    replaceText = FindReplace_ReplaceTextBox.Text;

    // Find text from current cursor position
    FindTextIndex(TextBox1.SelectionStart, false);

    if (FindLastIndexFound > -1)
    {
        TextBox1.Text = TextBox1.Text.Substring(0, FindLastIndexFound) + replaceText + TextBox1.Text.Substring(FindLastIndexFound + findText.Length);
        FindReplaceDialog.Hide();
    }
    else
    {
        MessageDialog messageDialog = new MessageDialog("Cannot find " + (char)34 + findText + (char)34);
        await messageDialog.ShowAsync();
    }
}

private async void FindReplace_ReplaceAllButton_Click(object sender, RoutedEventArgs e)
    {
        findText = FindReplace_FindTextBox.Text;
        replaceText = FindReplace_ReplaceTextBox.Text;

        // Find text from the beginning of the document
        FindTextIndex(0, false);

        if (FindLastIndexFound > -1)
        {
            string NewText = TextBox1.Text.Replace(findText, replaceText);
            TextBox1.Text = NewText;
        }
        else
        {
            MessageDialog messageDialog = new MessageDialog("Cannot find " + (char)34 + findText + (char)34);
        await messageDialog.ShowAsync();
        }
}

private void FindReplace_CancelButton_Click(object sender, RoutedEventArgs e)
{
    FindReplaceDialog.Hide();
}
That last one is new to this version of the app because we have to handle the Cancel button manually. Pretty straightforward.
If you test Find and Replace now, you’ll find that it all mostly works, but it’s only slightly more elegant than the InputBox-based implementation we used in earlier versions of the app. And there are lots of little problems. For example, you need to make sure the cursor is in the textbox before you start trying to find text. Typing Enter in the Find box doesn’t automatically fire off the Find action. There’s no notion of testing for case. And the dialog doesn’t stay on-screen so you can keep finding more text. And others, I’m sure.
These problems are all (probably) solvable. But because I’m a bit over UWP at this point and feel that the WPF version of the app is superior in most ways already, I’d rather focus my efforts elsewhere and just move on as soon as possible. That said, I do have what I think is a cool implementation for Find Next and Find Previous which partially makes up for the fact that the dialog doesn’t stay on-screen. Assuming the user knows what the keyboard shortcuts for these commands are, that is.
What I did was create two more command bar buttons for Find Next and Find Previous and then add the appropriate XAML to add the correct keyboard shortcuts to each command. Of course, I don’t really want Find Next and Find Previous buttons in the command bar. But as it turns out, if you hide them, the keyboard shortcuts won’t work. To do so, just give each a Width of 0. And even though they don’t appear on-screen, the keyboard shortcuts still work.
To do this, open MainPage.xaml and locate the tag for FindButton. Make space between that line and the tag for ReplaceButton and add the following:
<AppBarButton Label="Find Next" Name="FindNextButton" Width="0" Height="0"><AppBarButton.KeyboardAccelerators><KeyboardAccelerator Key="F3" /></AppBarButton.KeyboardAccelerators></AppBarButton>
<AppBarButton Label="Find Previous" Name="FindPreviousButton" Width="0" Height="0"><AppBarButton.KeyboardAccelerators><KeyboardAccelerator Modifiers="Control" Key="F3" /></AppBarButton.KeyboardAccelerators></AppBarButton>
Then, create a Click event handler for each.
FindNextButton_Click will look like so:
private async void FindNextButton_Click(object sender, RoutedEventArgs e)
{
    if (findText.Length > 0)
    {
        FindTextIndex(FindLastIndexFound + findText.Length, false);
        await FindTheText();
    }
}
And FindPreviousButton_Click will look like this.
private async void FindPreviousButton_Click(object sender, RoutedEventArgs e)
{
    if (findText.Length > 0)
    {
        FindTextIndex(FindLastIndexFound, true);
        await FindTheText();
    }
}
Now, when you’ve performed a Find operation successfully using the dialog, you can use F3 or CTRL + F3 to find more instances of that same text back and forth in the current document. (And they won’t do anything if you didn’t already try Find, which is fine.)
When we’re done with this project, I may look into updating the WPF version of the app to use custom dialogs for Find and Replace and see whether we can’t make them more elegant and utilize all that missing functionality. The nice thing about WPF is that you can create custom XAML interfaces pretty easily, just as with UWP, and I suspect that making that version of the app a bit better is doable.
But first, we need to complete this version as much as possible. And we still have lots to implement, including Zoom, Auto Save, and more.
More soon.

Gain unlimited access to Premium articles.
With technology shaping our everyday lives, how could we not dig deeper?
Thurrott Premium delivers an honest and thorough perspective about the technologies we use and rely on everyday. Discover deeper content as a Premium member.