Modernizing .NETpad Step-By-Step, Part 2: Next Steps (Premium)
- Paul Thurrott
- Sep 01, 2024
-
0
This time, we’ll look at some basic code refactoring, add a few small features and other changes, and redesign .NETpad’s menu system.
Separate application state variables from MainWindow
I wrote about my code refactoring efforts twice this past summer, most recently regarding what I think of as application state. Some of this is related to user settings that are loaded when the app starts, configured by the user while it runs, and saved again when the app closes. But some of it is temporary and only needed by the app while it’s running.
In the original version of .NETpad, all application state is handled the same way: I created what I think of as global variables in the MainWindow class and then use them throughout the code. But those variables are only global to that window/class. And because .NETpad uses several sub-windows that need to access some of this data, it’s tedious to so using that original design. So I moved all non-user setting variables related to application state out of MainWindow and put them in the App class (App.xaml.cs). And in updating the app, I also created a few more application state variables as well.
So let’s get that started.
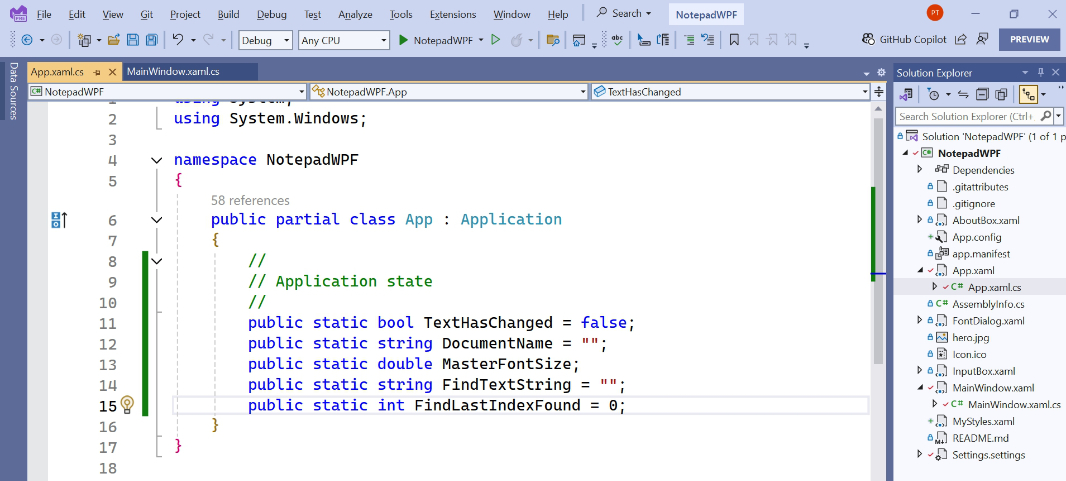
Open MainWindow.xaml.cs and examine the top of the MainWindow class code block, where you will see several “global” variables.
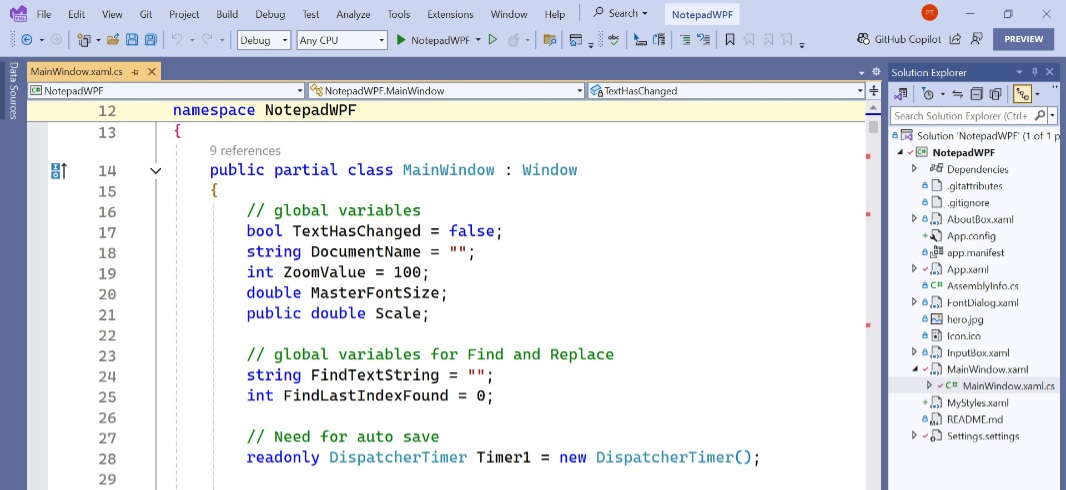
Three of these are tied to user settings that will be loaded at run-time and saved as needed. These will stay where they are.

The rest are runtime application state variables, and so those are moving to App.xaml.cs.
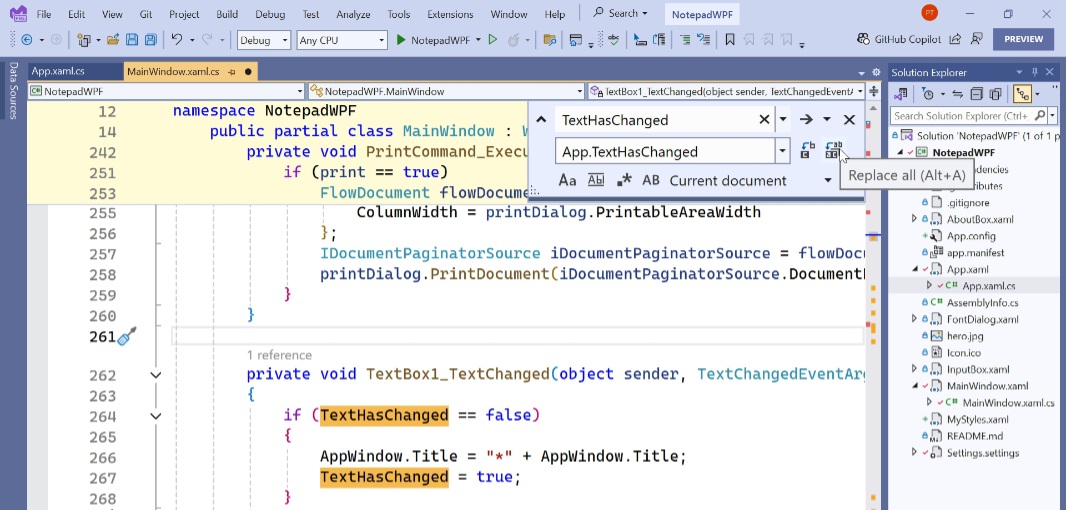
If you were to run the app now, it would fail hard: There is code all over MainWindow.xaml.cs that relies on those variables, and now that they are elsewhere, outside the scope of the MainWindow class, they are no longer visible or accessible. And so we need to change each reference to each of those five variables. As an example, the TextHasChanged variable is currently accessed like so:
if (TextHasChanged == false)
But this needs to change to the following:
if (App.TextHasChanged == false)
The App addition fully qualifies the variable name, making it visible to the code in MainWindow (and, later, other classes/windows). So we have to do a find/replace operation (Ctrl + H) throughout MainWindow.xaml.cs in which we replace TextHasChanged with App.TextHasChanged.
Then, do the same for DocumentName, MasterFontSize, FindTextString, and FindLastIndexFound.
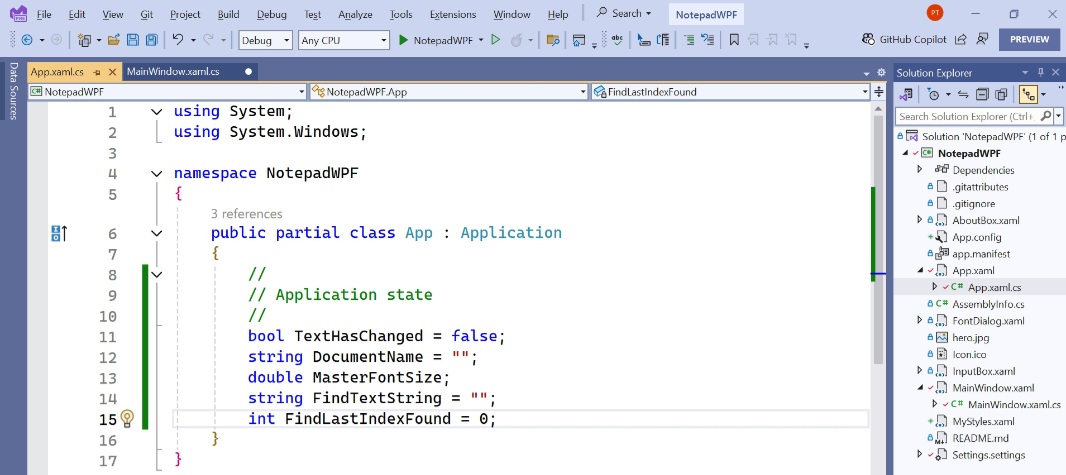
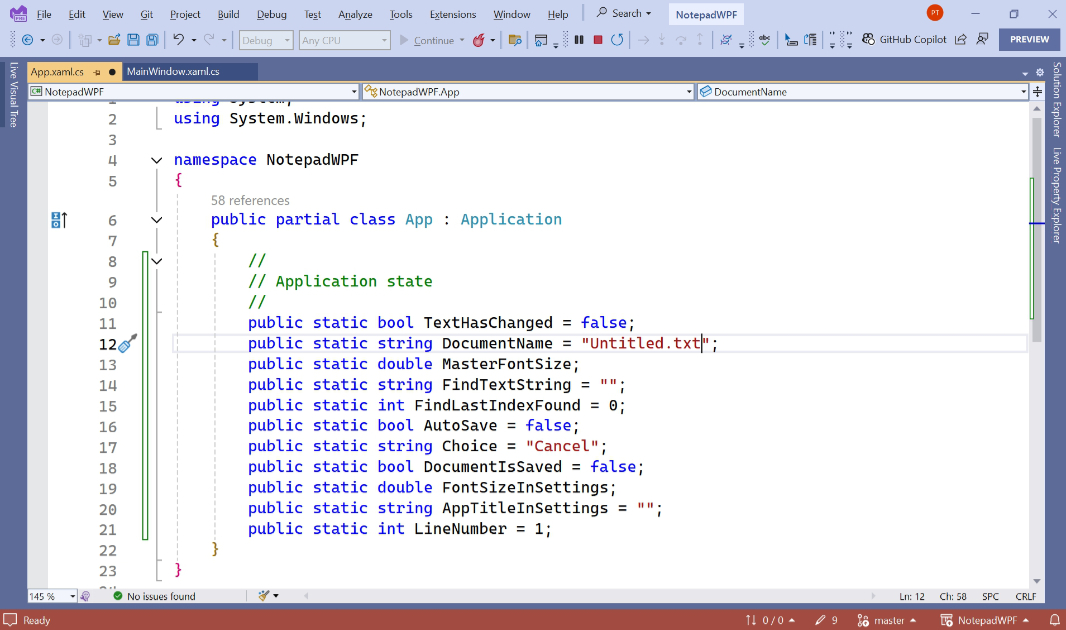
Then, open App.xaml.cs and add the public static modifiers to each of the application state variables. Public makes each variable public to the entire app–visible and accessible from any class–while static ensures that only a single instance of that variable is created throughout the app.
Now, run the app, which builds the code and saves any unsaved files. It should just run normally. This is one goal of code refactoring: We’ve improved the code without impacting the user experience.
Before moving on, let’s add a few more application state variables. We don’t need these yet, but we will as we make further adjustments to the app. Add the following:
public static bool AutoSave = false;
public static string Choice = “Cancel”;
public static bool DocumentIsSaved = false;
public static double FontSizeInSettings;
public static string AppTitleInSettings = “”;
public static int LineNumber = 1;
Also, let’s change the default value of DocumentName from “” (empty string) to “Untitled.txt”. When this is done, App.xaml.cs should look something like this.
Separate the non-event handlers from MainWindow
To help with readability and code cleanliness, we’re also going to move the non-event handling methods in MainWindow.xaml.cs to a new C# file.
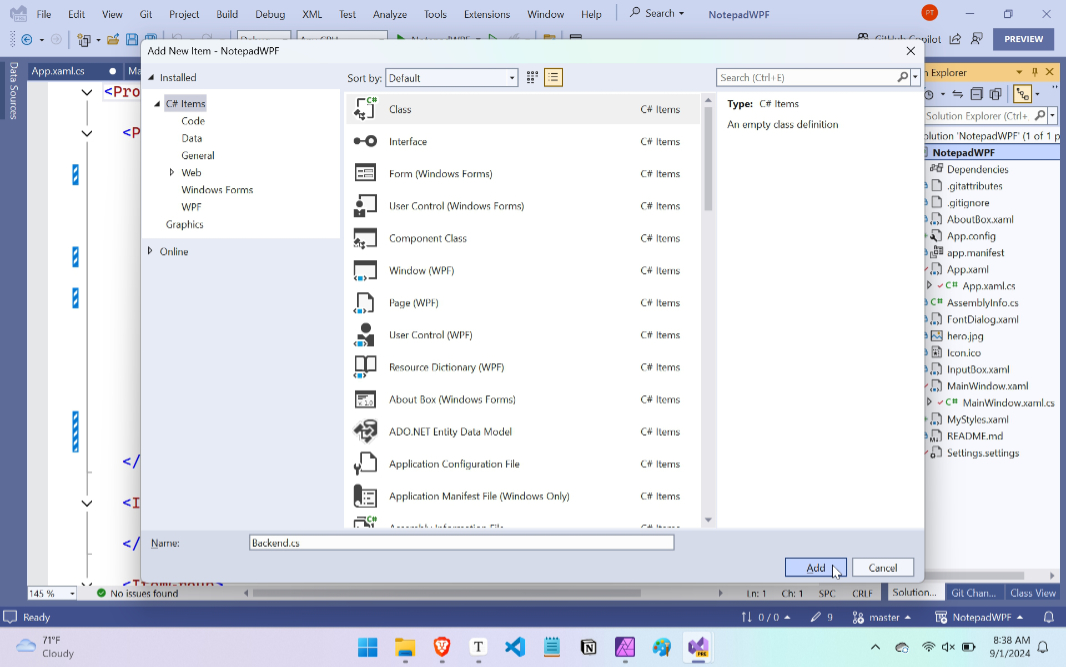
To do so, right-click “NotepadWPF” in Solution Explorer and choose Add > Class. In the Add New Item window that appears, name this new file Backend.cs and click “Add.”
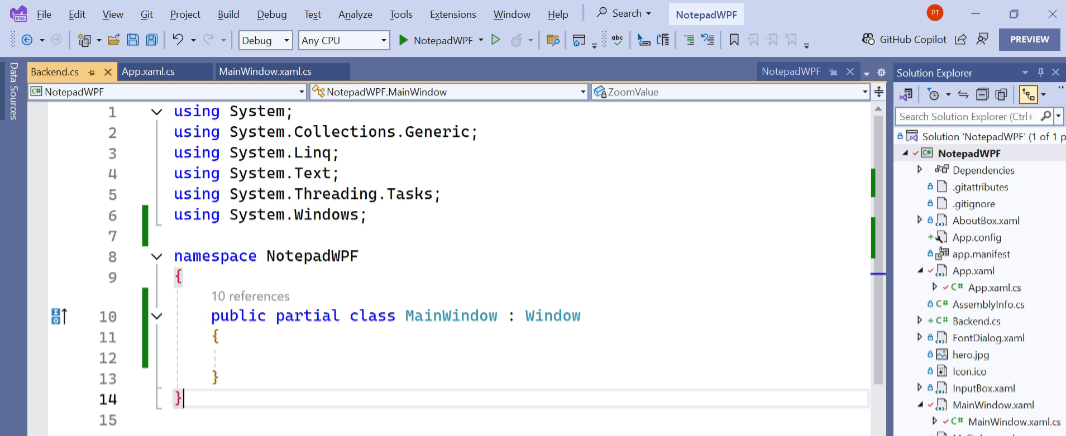
When you do, Backend.cs is added to your project and the file opens in Visual Studio. As you can see, this is a new C# class called Backend that’s part of the NotepadWPF namespace. We could use it like that, but I am instead taking advantage of C#’s partial class capabilities and how WPF separates class definitions between XAML and C# files. For example, the MainWindow class consists of XAML code in MainWindow.xaml.cs and C# code in MainWindow.xaml.cs. So we’re going to modify Backend.cs that its code becomes a second block of C# code that’s used to define the complete MainWindow class.
That is, we will change this:
internal class Backend
To this:
public partial class MainWindow : Window
We also need to add a using System.Windows; line to the using area at the top of the file. When this is done, Backend.cs will resemble the following.
Now, we need to move many methods from MainWindow.xaml.cs to Backend.cs. Some are part of a #region ScaleValue Dependency Property code block that includes a ScaleValueProperty variable declaration, so all that has to move, plus these methods:
- OnCoerceScaleValue()
- OnScaleValueChanged()
- OnCoerceScaleValue()
- OnScaleValueChanged()
- ScaleValue()
And then several other standalone methods:
- CalculateAppScale()
- SaveSettings()
- ChangePositionText()
- Save()
- SaveAs()
- DisplaySavePrompt()
- FindTheText()
- FindTextIndex()
We also need to add the following to the using section at the top of the file:
using System.IO; using Microsoft.Win32;
And with that, the app should compile and run normally.
There’s a lot of code cleanup to do–as part of that refactoring work I rewrote and restructured a lot of this code–but this initial part of the project is just about modernizing the existing codebase. So I’ll leave that to a later update.
Make a few small feature additions and other changes
That said, there are a few small changes that make sense to add now.
Change the project SDK
The first is to address a code warning you may have seen each time you run the app:

To fix this, double-click “NotepadWPF” in Solution Explorer to display the project file’s raw XAML. The top line currently reads as:
<Project Sdk=”Microsoft.NET.Sdk.WindowsDesktop”>
Change that to:
<Project Sdk=”Microsoft.NET.Sdk”>
No more warnings.
Implement Ctrl + W
This missing feature persisted through various new versions of the app I made this past summer, somehow. But it eventually bugged me enough that I fixed it. You can close the app by choosing File > Exit, by clicking the “Close” window button, or by typing Alt + F4. But you can’t close it by typing Ctrl + W. And it seems like that should work.
To implement this change, open MainWindow.xaml and locate the <Window.InputBindings> block near the top. There are four key bindings there, for Save as, Zoom in, Zoom out, and Zoom default. So let’s add a fifth:
<KeyBinding Key=”W” Modifiers=”Ctrl” Command=”Close” />
That’s it. Now it works. (And if the current document needs to be saved, you’ll be prompted first.)
Another way to toggle Auto save
This is another one I’ve wanted to implement for a while and never did for whatever reason. You can toggle .NETpad’s Auto save feature on/off from the File menu. And, later in this article, we’ll create a settings pane that includes this feature. But we display the status of Auto save in the app’s status bar. And I’ve long felt that double-clicking that item should trigger the Auto save on/off dialog too.
To make that happen, open MainWindow.xaml and scroll down to the block. This block contains five Status bar items, each of which contains a Text block that displays some status information. The first is named “AutoSaveText” and that’s the one we’re looking for.
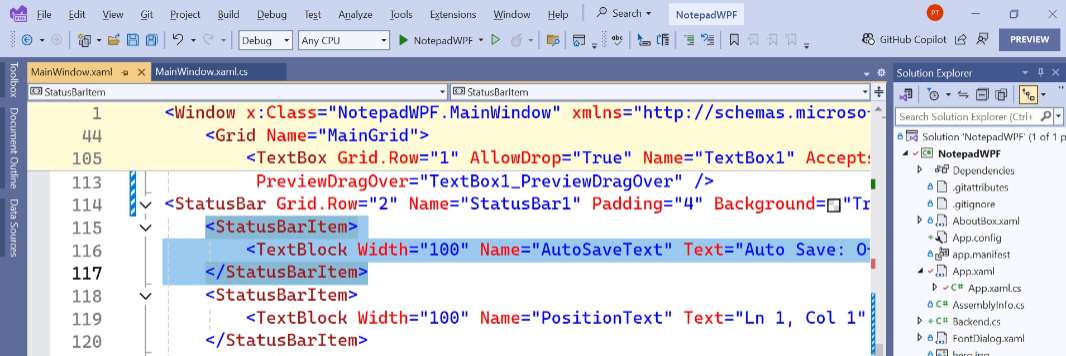
If TextBlock supported a DoubleClick() event, this would be easy. But it doesn’t. So we’ll need to wrap that in a control that does support DoubleClick() while not otherwise changing its look or feel. I chose a ScrollViewer. So inside the first StatusBarItem block but outside the TextBlock, add the following code (in bold):
<ScrollViewer Focusable=”False” IsTabStop=”False”
MouseDoubleClick=”AutoSaveMenu_Click”
VerticalScrollBarVisibility=”Disabled”
HorizontalScrollBarVisibility=”Disabled”>
<TextBlock Width=”100″ Name=”AutoSaveText” Text=”Auto save: Off” Margin=”5,0,10,0″ />
</ScrollViewer>
Because its MouseDoubleClick() handler points to a pre-existing event handler, there’s nothing to add in MainWindow.xaml.cs. It just works: When you double-click that text, the Auto save dialog appears.
There are a few other changes I’ve made, but they can wait. We have more important work to do first…
Update the menu system
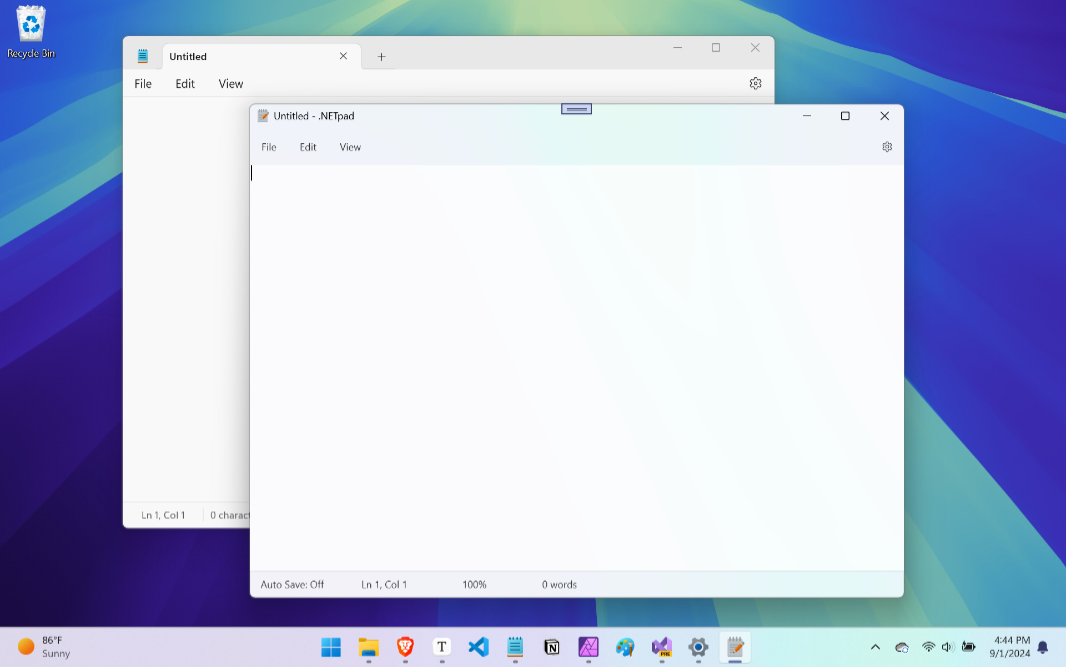
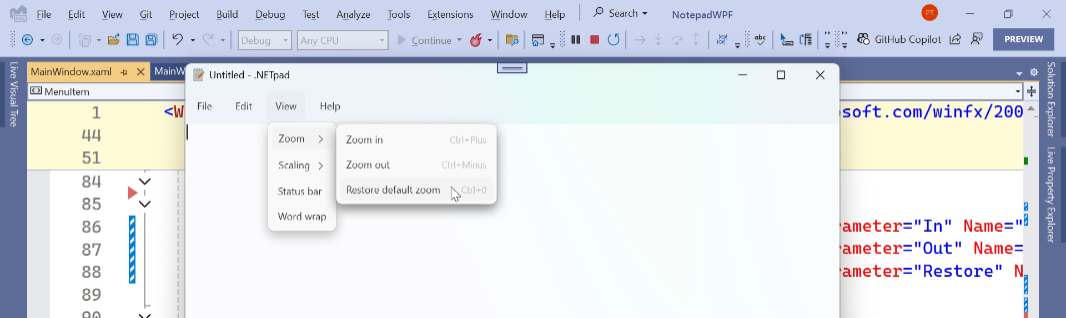
As part of its own Notepad modernization efforts in Windows 11, Microsoft updated the app’s menus to have fewer top-level items and a new Settings “gear” icon over on the far right.
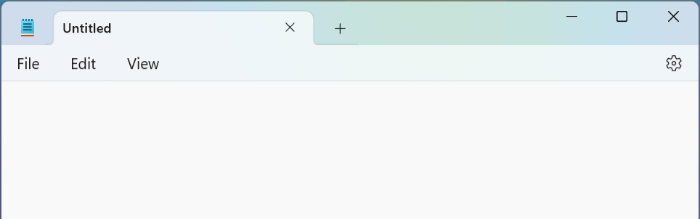
There’s more. It also rearranged the contents of the remaining three menus, and removed a few items. And it uses mixed case (“Word wrap”) instead of all caps (“Word Wrap”) for menu item names, in keeping with modern app design patterns.
We will change the .NETpad menu to (mostly) match these changes.
This is straightforward work. Ignoring the Settings icon for a moment, we can start by deleting the Format top-level menu item after we move the two menu items it contains, “Font” and “Word Wrap.”
“Font” is moved to the bottom of the “Edit” menu, below a new separator.

“Word Wrap” is moved to the bottom of the “View” menu, below “Status bar.”
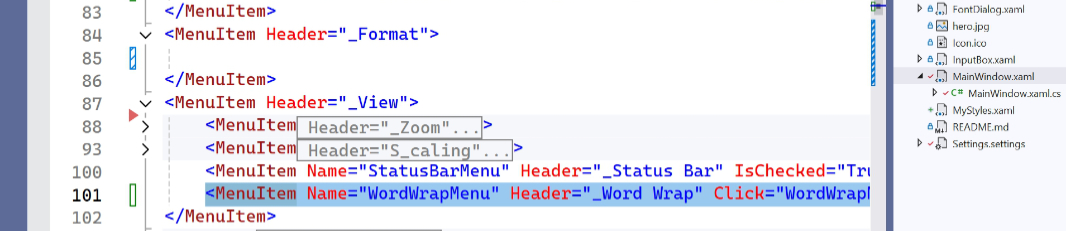
With that done, delete the now-empty “Format” menu block.
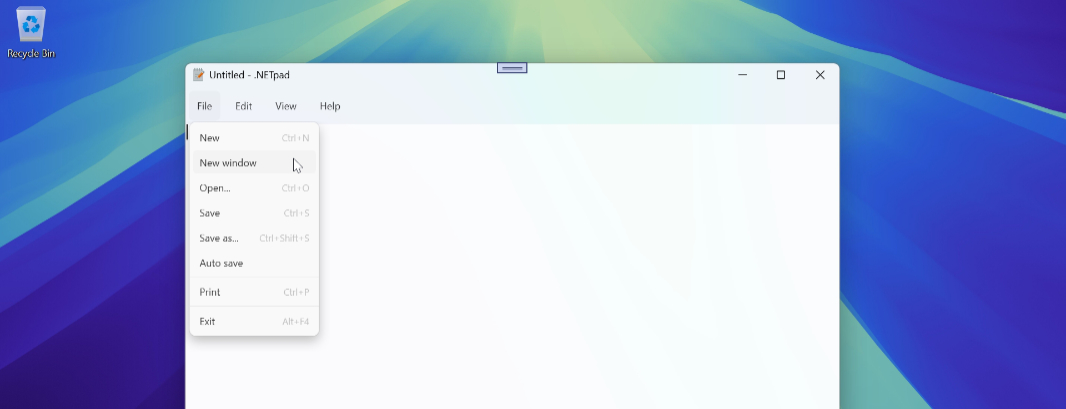
The “File” menu only needs minor changes. No menu items are being moved or removed, but three, “New Window,” “Save As,” and “Auto Save,” need to be updated with mixed-case headers (“New window,” “Save as,” and “Auto save,” respectively).
“Edit” requires similar work. Notepad removed its “Search with Bing” menu item, as it’s available in a text box context menu we don’t support, so we’ll leave that alone for now. Just change the “Find Next,” “Find previous,” “Replace all,” and “Select all” headers to be mixed case. (“Time/Date” remains as-is.)
Ditto for the “View” menu, though be sure not to miss the “Zoom” sub-menu items.
Finally, just delete the “Help” menu item block. The “About” info will appear at the bottom of the settings pane we’ll add later.
Implement the Settings icon
In Notepad, a Settings (gear) icon appears to the far right of the app menu. There’s no way (with WPF) to add that normally to the menu bar–perhaps with a spacer and then another top-level menu item–but that’s OK. I figured out a reasonable workaround.
The trick is to wrap the current menu in a Grid that has three columns: One for the menu, one for a spacer, and one for a new menu that has a single item, for that Settings gear icon
In the original implementation of .NETpad, the main app window is a simple Grid with three rows, one for the menu bar, one for the text box, and one for the status bar. In making this change, we will replace the menu bar row with that new Grid (as the menu will be contained inside). So the top-level design remains. It’s still a simple three-row Grid.
To get started, collapse the top-level MenuItem blocks inside the Menu block. Then, separate that block from the code above and below it to give yourself some room to work.
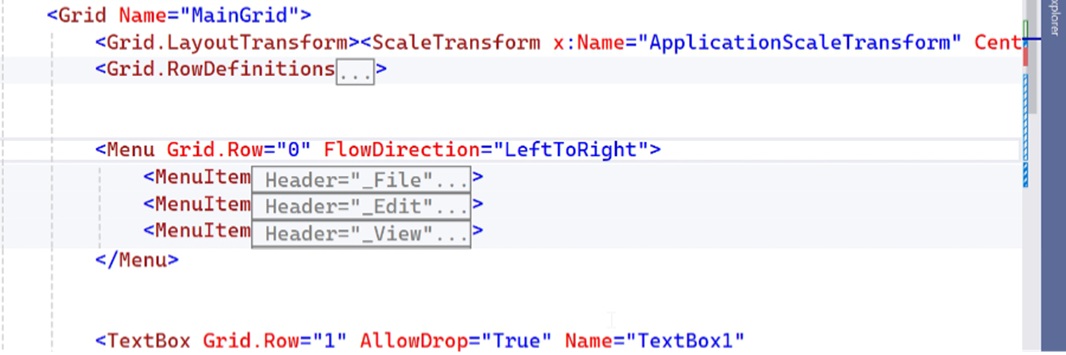
Add the following code above the Menu block.
<Grid.ColumnDefinitions>
<ColumnDefinition Width=”Auto” />
<ColumnDefinition Width=”*” />
<ColumnDefinition Width=”Auto” />
It will look something like this:

Change the Grid.Row=”0″ code in the Menu block (not the MenuGrid) to read as Grid.Column=”0″.
Then, add the following code below the Menu block:
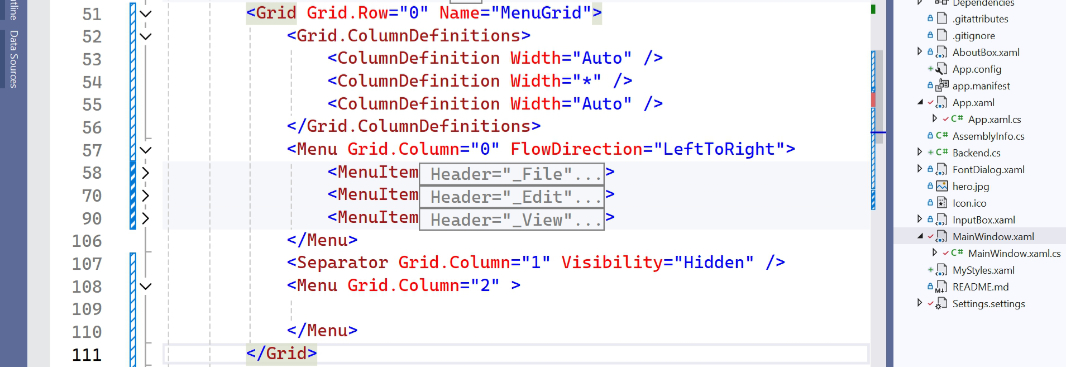
If you run the app now, you won’t see any changes. It looks just as it did before. But that will change when we add that Settings icon.
There are different ways to do this, but I’m using a Menu item inside a Menu block. I may change this in the future, as I’m still working on getting the gear icon to spin in place when it’s selected (as it does in Notepad). But for now, it’s close enough.
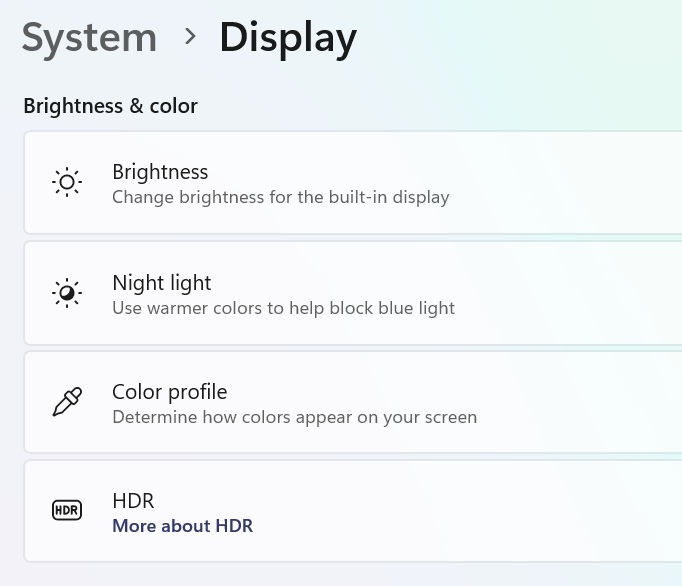
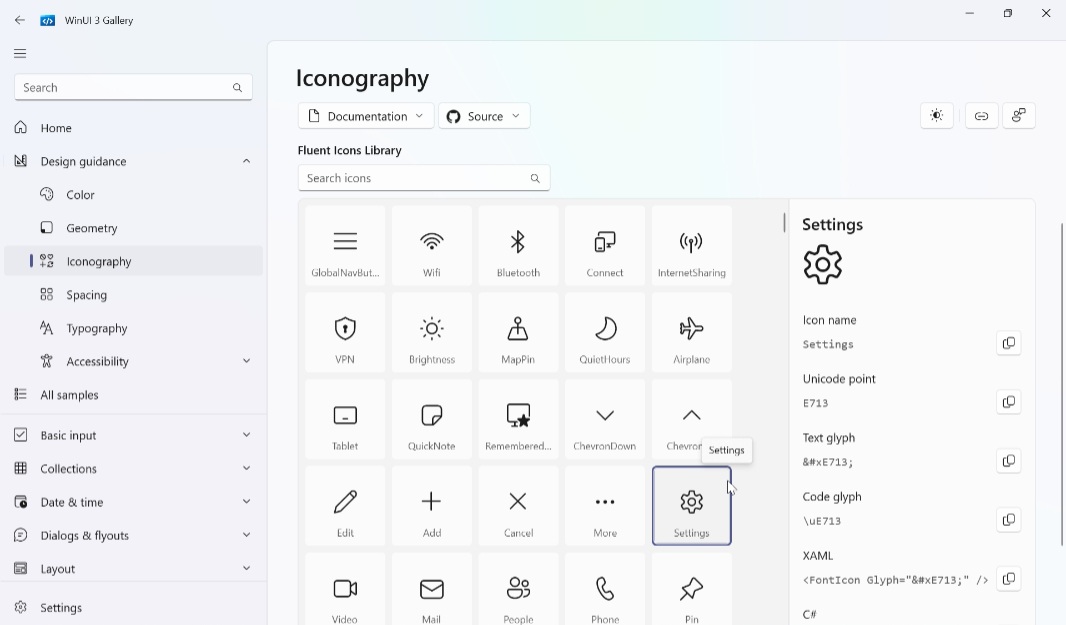
To implement this icon, we need to use the Segoe Fluent Icons, which Microsoft uses to define user interface glyphs that it and third-party developers can use in their apps. These glyphs are styled to match the WinUI 3 user interfaces you see throughout Windows 11, and we will use them more extensively in the coming settings pane work. But here’s a typical example from the Settings app in Windows 11: The icons on the left of each area are Segoe Fluent Icons glyphs.
I use the WinUI 3 Gallery app to find the right glyphs to use in my apps and the code I need to access them. For the Settings gear icon, this was easy enough: It’s one of the first glyphs in the list.
Here’s the code I used to add this to the app:

And when you run the app, it will look a lot like the same interface in Notepad. Mission accomplished.

Next up: Implement a settings pane
The next step is to implement a settings pane like the one that Notepad now uses. I wrote about my work on this previously in Modernizing .NETpad: Unexpected Design Progress (Premium) and Modernizing .NETpad: Settings, UI Changes, Spell Check, and More (Premium). And I had expected to provide step-by-step instructions here. But this post is getting a bit long, so I’ll split that off into a separate article I’ll publish soon. Once that’s done, we’ll move onto the various dialogs this app needs.

Gain unlimited access to Premium articles.
With technology shaping our everyday lives, how could we not dig deeper?
Thurrott Premium delivers an honest and thorough perspective about the technologies we use and rely on everyday. Discover deeper content as a Premium member.