Modernizing .NETpad Step-By-Step, Part 7: Clean-Up in Aisle WPF (Premium)
- Paul Thurrott
- Sep 24, 2024
-
2
In this final phase of this year’s .NETpad modernization project, we’ll clean up the code a bit and make a few minor UI changes.
Why
Even I sometimes forget what the point of this app was originally. But if you go back to the OG version of the app, the OG Windows Forms version, which I had created to teach myself Visual Basic .NET and that app framework, I had had an idea. A theory that one could create most of a complete WinForms app without writing a single line of code. And that the code could be minimal, like connective tissue. It would bind the UI bits together and respond to events, and in doing so, make this nearly finished thing a completely finished thing.
As it turns out, I was wrong: Yes, it’s incredible how much of an app you could build using just Windows Forms and its VB-inspired visual development tools. But you still needed to write code. And as I moved forward through different versions of the app using different frameworks, the coding requirements changed and expanded dramatically. Starting with WPF, even the user interface was built using code, though this time it was XML-based XAML code, not C# code. Code that is quite verbose. And that style of development has continued to this day; all subsequent Microsoft app frameworks have used the same basic model.
Because of this, my goals shifted. Starting with the OG WPF version of the app. I knew there would be a lot of coding, but I was curious about duplicating as much of the real Notepad as possible. The WinForms version looked like Notepad, but it was a bit bare-boned. How much more could I do from a functional perspective? What I found out was, quite a bit. But not always perfectly. Some of this was my own limitations. But Microsoft’s support of WPF has always been spotty, and even in the early days, I had to roll my own Font dialog and Input box because this environment didn’t natively support those Windows features for reasons I’ll never understand.
By the time 2024 rolled around, Microsoft had shipped Windows 11 with yet another an all-new user interface theme and improved support for system-wide light and dark modes. It had shifted from UWP to the Windows App SDK for new apps, and it had shifted from Xamarin Forms to .NET MAUI for cross-platform mobile apps. And then, at Build 2024 in May, it announced the unexpected: WPF was back from the dead, sort of. Microsoft would officially support modernizing existing WPF apps with Windows 11 theming support. This project was born.
I want to make .NETpad look and work as much as possible like Notepad in Windows 11. But the goal for this specific version is a bit different than before. Like real developers, I have this legacy app that I’d like to modernize so that it looks and runs as well as possible in Windows 11. There are other possibilities for the future, including ground-up new versions of .NETpad in WPF and the Windows App SDK, both of which I’ve looked at (and done, to some degree). But this version, this project, is all about that existing code base and going to war with the army you have.
The only questions was, how much of Notepad’s functionality could I duplicate?
I had so many successes early on that I briefly thought I could do it all. But long-standing bugs in WPF and new bugs in that theming support brought me back down to earth. And until and unless Microsoft fixes these issues, some modern Notepad features are impossible with native WPF, and painful if I choose to try some third-party add-ons. So I stuck to what I could do using just WPF and my limited capabilities for this first pass. This article marks the conclusion of that work. If there is more to come, and I hope there is, it will have to wait on Microsoft.
OK, let’s wrap this up.
A bit of UI fit and finish work
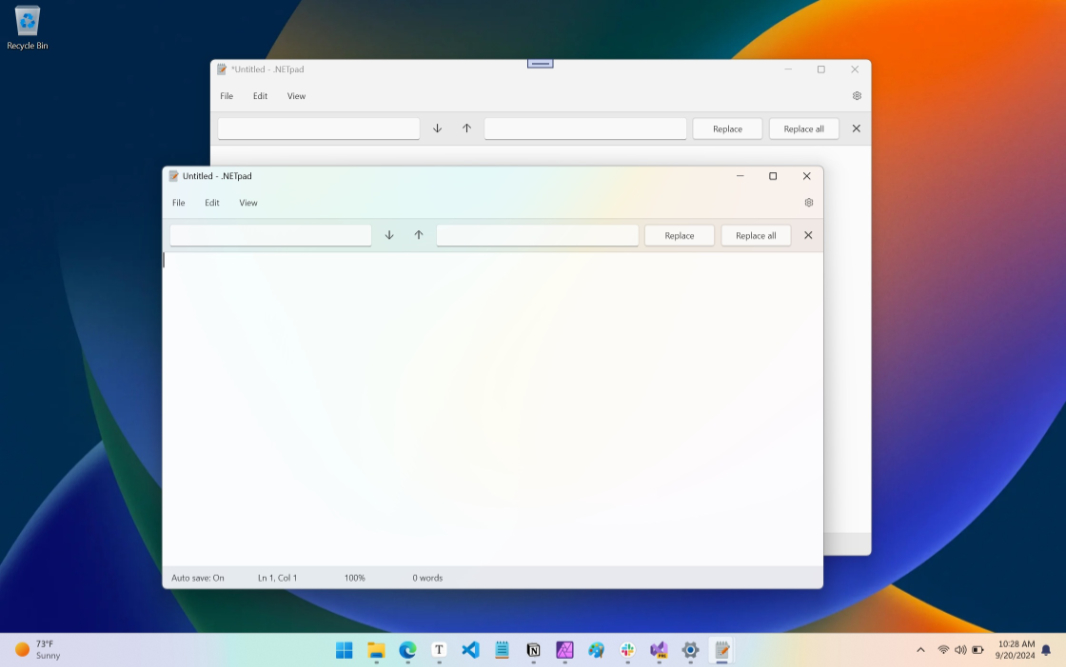
As I worked through the Find/Replace functionality I described in the previous two installments, I was bothered by a few things. Some were functional, and related to my decision to use a pane instead of a dialog, issues that will require more time and effort to resolve. But some were just visual, and could perhaps be solved quickly, in time for this final post in the series.
I tried to make the Find/Replace pane look as native as possible, and I guess I did a pretty good job. But there were design flourishes I’d wanted to make, similar to the accent-colored default buttons you see in the custom Content dialogs, but hampered by the style/resource bugs in WPF and its Windows 11 theming support. Thwarted, I simply plowed forward, putting that in a growing to-do list that can only be completed if Microsoft formally addresses the underlying issues.
And then I had an idea. It felt like a good idea, too. This could make sense, could make the current design a little more bearable until Microsoft does its part. And so I experimented with the code to make sure it would work. And found that it would.
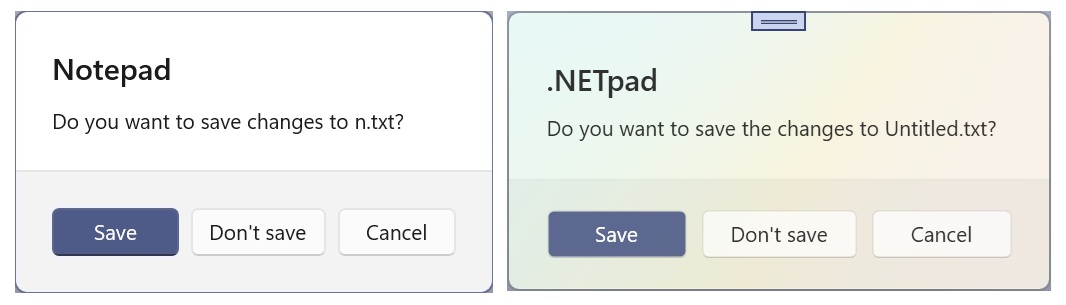
As you may recall, I went off the reservation, if slightly, when I designed the custom Content dialogs that we use for Save confirmation, Auto save, and some other functions. That is, they are very close to the real thing, but with a little embellishment: Where the bottom half of these dialogs in Windows 11 (and thus in Notepad) use a solid background fill (a light gray when Windows 11 is in light mode), my version is translucent, giving the dialogs a bit more personality.
My idea was to use that same effect on the Find/Replace pane and, as I thought about it, on the status bar on the bottom of the app as well. This would make the app more attractive, at least to my eyes, and more differentiated from Notepad. Plus, it would feel more consistent since we’re using that effect on the dialogs already. While implementing this, I also pumped up the Find next, Find previous, and Close pane glyphs to be bold and offer better contrast. Here’s what to do.
First, open ContentDialog.xaml and locate the code for the BottomBorder border control at the root of the bottom half of the dialog. You’ll see the following code there:
Background=”{DynamicResource LayerOnMicaBaseAltFillColorSecondaryBrush}”
We need to apply this property value to the Find/Replace pane. So Copy that to Clipboard, open MainWindow.xaml, and locate the XAML code for the FindReplaceGrid grid. Then, paste that in there.

Next, let’s do the same for the status bar. This is in MainWindow.xaml, too, of course, towards the bottom of the file. Add the same code to the XAML for the StatusBar1 status bar.

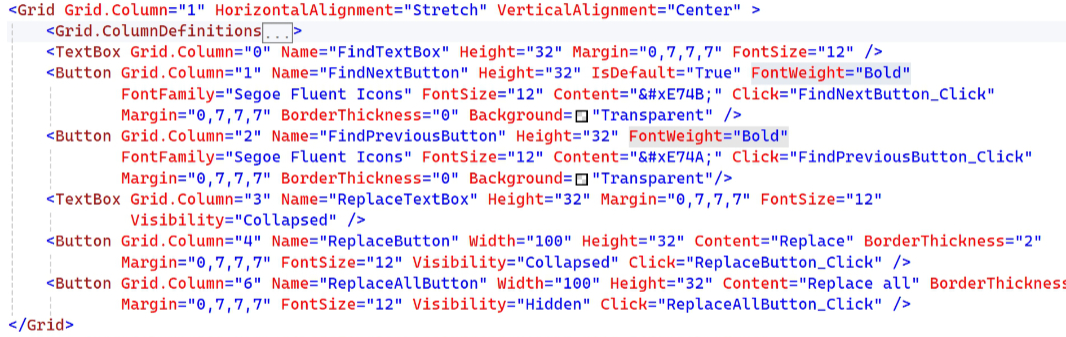
Now, let’s perk up those three buttons a bit. There are more sophisticated ways to do this–we should really be using styles here, at the least–but I didn’t want to waste too much time on something so minor, so we’ll blunt force it. Just add the code FontWeight=”Bold” to the XAML for FindNextButton, FindPreviousButton, and CloseFindReplaceButton.
One more thing: That Close pane button has always seemed shifted to the left a bit more than I’d like; ideally, it would line up vertically with the “Settings” gear icon above it. So locate the Column.Definition block for the Border inside FindReplaceGrid and change the fourth column definition from 10 to 5.

Now, when you run the app, you can see the changes. Nice!
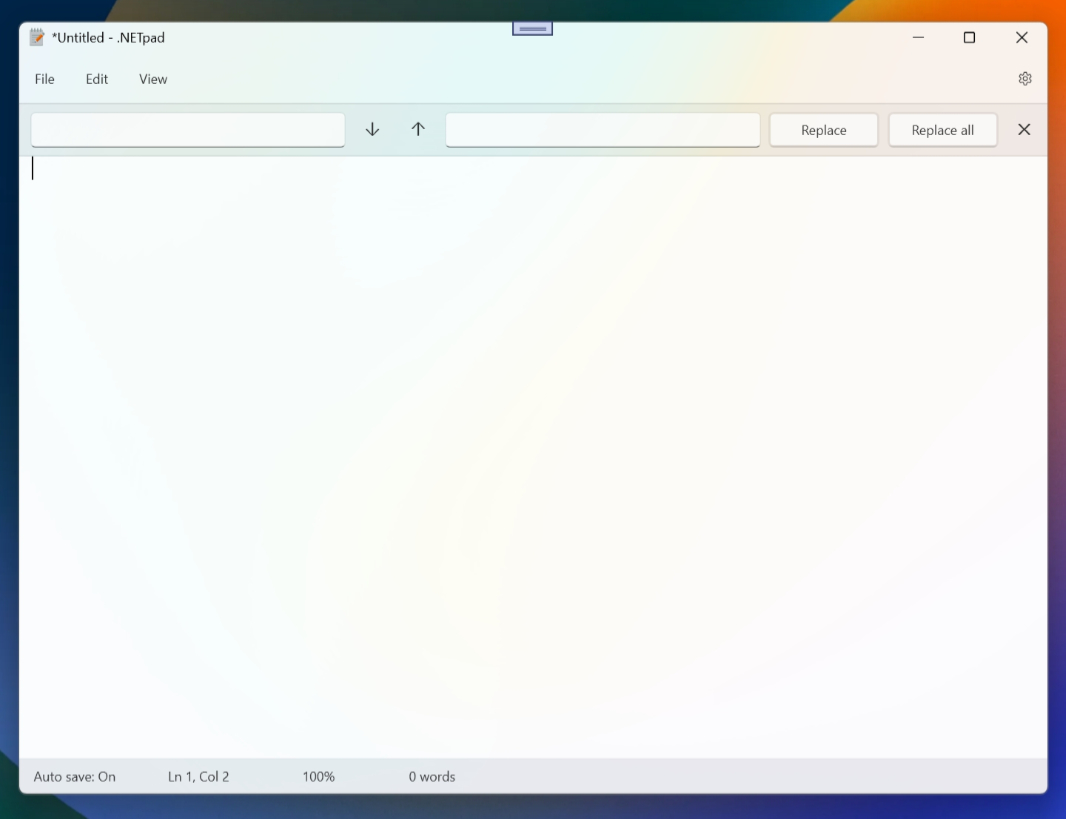
Sometimes, it’s the little things.
Basic code refactoring
Before I started documenting how to modernize .NETpad using these step-by-step posts, I discussed some of my work refactoring its code to be cleaner, more efficient, and more maintainable. I also made other similar changes later, as when I moved some of the “global” variables into App.xaml.cs to make them app-level variables. Some of this work made its way into this project already, but much of it has not. And so here, I will attempt to bring the codebase we’re working with up-to-date.
This isn’t straightforward: I’ve restarted this project several times this past summer, sometimes started with the OG code base (as I used in these step-by-step posts) and sometimes starting from scratch. And this means I have multiple versions of this updated app, some with different improvements than the others. I’ve mentioned previously that I’ll be publishing a modernized WPF version of .NETpad to GitHub, and I will. But it’s not clear yet which version that will be. It could be this version–the one I’m modernizing as I write this–or one I started from scratch. We’ll see.
In the meantime, here are the broad strokes of this work in the rough order I did them. In going through this now, I realized I had done some of this work in these step-by-step posts as well, so there was less to do than I had thought. Which is nice, actually.
Logical separation of event handlers and back-end logic
As an amateur/enthusiast developer, I am always learning, and I wanted the modernization of .NETpad to include the underlying code and not just its user interface. There are all kinds of theories about how one might organize code in a project like this. And in Modernizing .NETpad: Refactoring the Code (Premium) and Modernizing .NETpad: Application State (Premium), I explored a few of them, including popular design patterns like Model-View-ViewModel (MVVM), which I feel is too complex for an app like .NETpad. But there’s no reason it can’t be more modular, with a logical separation of code.
And so I stuck with the simplest approach imaginable. At its core, .NETpad has a XAML file the represents the main app window’s user interface (MainWindow.xaml.cs), and a “code-behind” C# file that represents its backend logic. But that C# file includes both event handlers–methods tied to specific events fired by specific UI controls–and other methods that are not event handlers. Let’s call them helper methods. This can be code that’s called from within those event handlers. And ideally, at least some of it will be code that’s called repeatedly, where we replace redundancies–the same code repeated in multiple event handlers–with individual blocks of code. If we separate these things, event handlers and helped methods, the net result is better readability, simpler debugging, and easier updating down the line.
We did a good chunk of this work when we started this project: In Step 2, we created a file called Backend.cs to contain the non-event handler helper methods. We also moved “app-level variables”–what I had thought of as “global” variables until fairly recently–out of the top of the partial class declaration in MainWindow.xaml.cs and into App.xaml.cs where, arguably, they belong. Both of these changes were things I had come to during my summer refactoring work. But there’s a bit more to do.
Scrolling through MainWindow.xaml.cs, I didn’t fine any non-event handlers, so that separation is already done. But we still need to reorganize the order of the methods in both files logically. In MainWindow.xaml.cs, we’ll order them roughly into order they appear in the main app window’s user interface. And in Backend.cs, we’ll reorder them according to topic or type (Find and replace, Save/Save as, and so on).
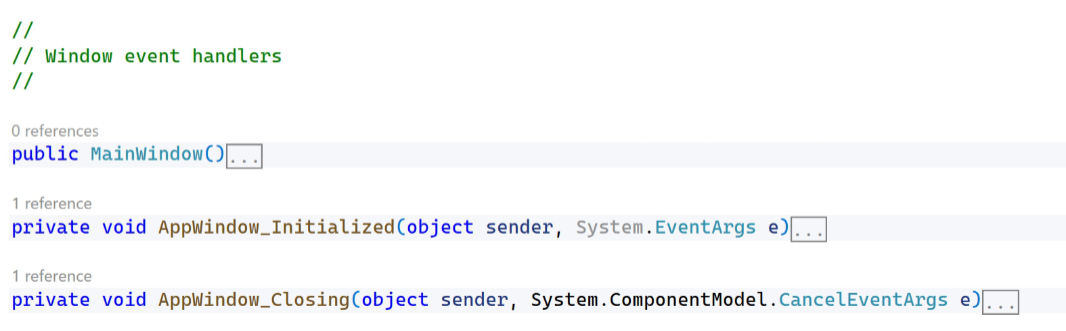
I also like using comments to separate each of the event handler/method groups. For example, MainWindow.xaml.cs has three window-related event handlers:
- MainWindow() (the constructor)
- AppWindow_Initialized()
- AppWindow_Closing()
And so we might call out this group like so. (With each event handler collapsed in Visual Studio for readability purposes.)
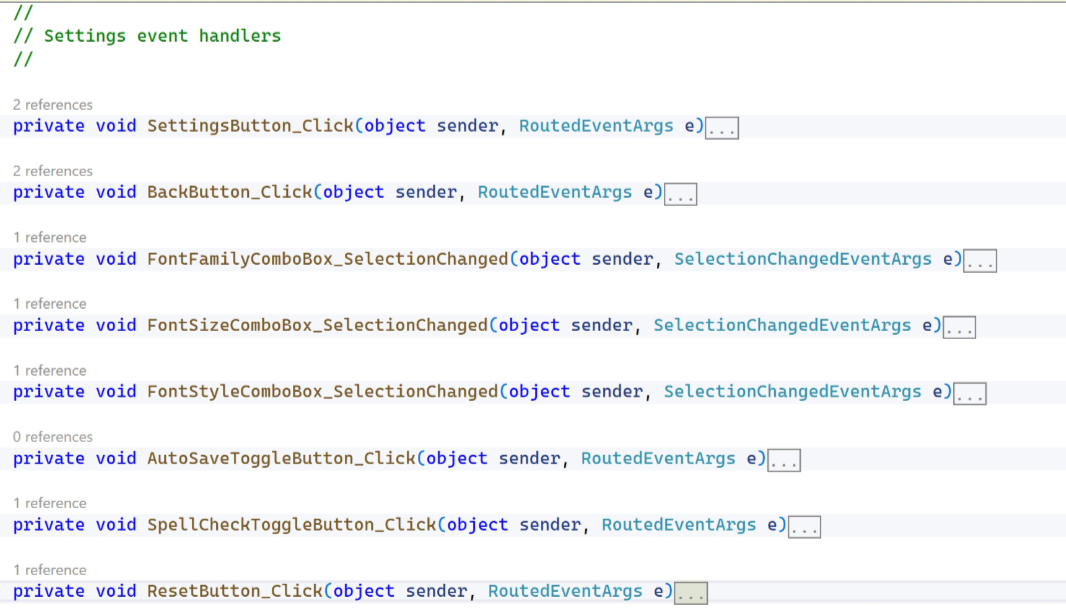
From there, we can use whatever grouping, but I have groups for File menu, Edit menu, View menu, Find/Replace pane, Text box, Timer, and Settings event handlers, respectively. I ordered each event handler in each section in the order they appear in the UI when possible.
And while I had planned a pass to remove superfluous old event handlers later in the process, once everything was organized, there was only one left: The old AboutMenu_Click() event handler. So I just deleted that.
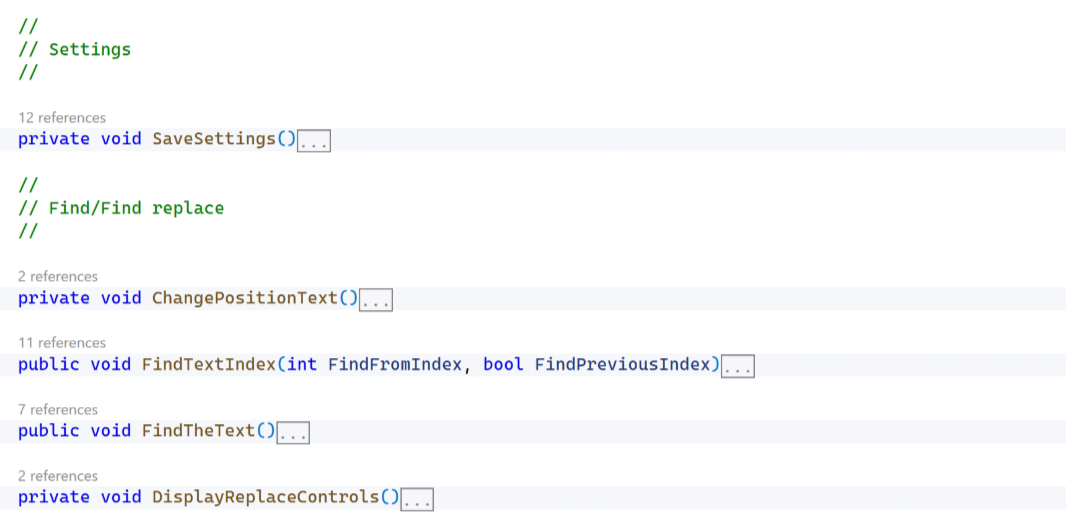
Backend.cs is a little looser, but I ended up with sections for App scaling, Settings, Find/Replace, Save and Save as, and Content dialogs. There were no real surprises in there, and, unless I missed something, no old methods to remove.
Move big code blocks into new methods
In this and the next step, we’ll move some code out of MainWindow.xaml.cs and into Backend.cs for readability purposes: I want to keep MainWindow.xaml.cs as short and readable as possible, while Backend.cs can stay true to its name and remain in the background, unseen and untouched for the most part.
The first of the two steps is pretty straightforward, to look for long bits of code inside of event handlers that could just be put into a helper method and filed away for posterity. And there is one obvious example: In Window_Initialized(), we read in a slew of app settings so the user gets a customized experience. It’s a lot of rote code to look at and scroll by, so let’s get rid of it.
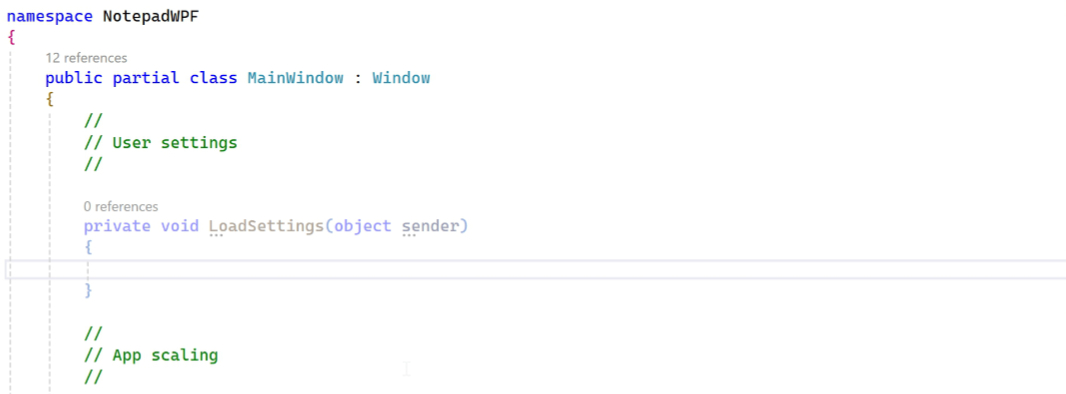
First, create a help method in Backend.cs called LoadSettings(). Some of the methods we’ll use inside this need to access the object that triggered an action, and so we’ll pass the sender of the containing event hander, which is the main app window. Also, we’ll need a new User settings section for this.
Then, we can just insert the call to that method inside Window_Initialized().
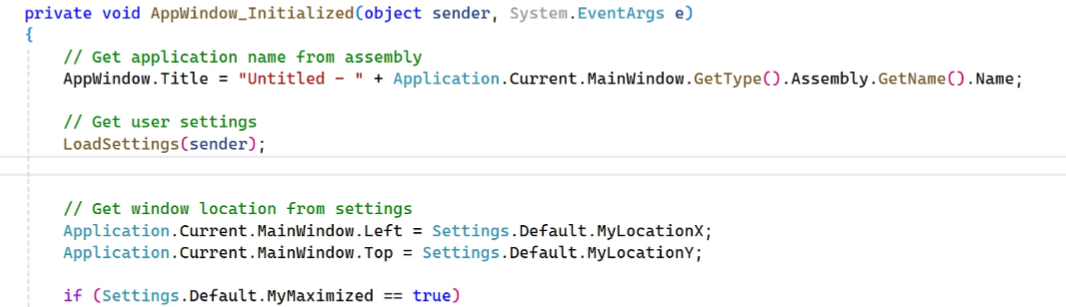
And then, we can Cut the subsequent lines of code that access the user settings. And then paste that into LoadSettings() in Backend.cs. And it should just keep working normally. When we’re done, Window_Initialized() is much leaner and easier to understand.
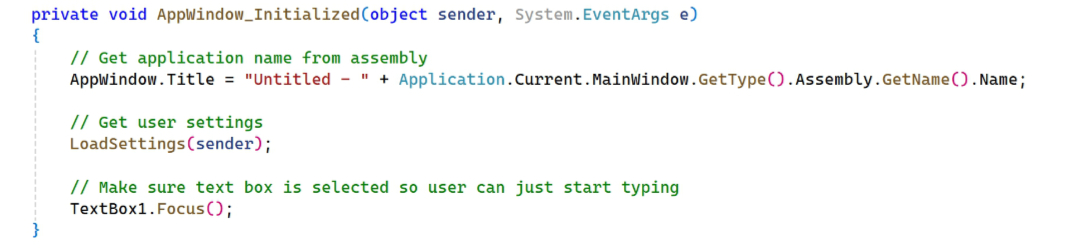
And that should do it: I didn’t see any other lengthy event handlers that would benefit from this type of change.
Put repeated and redundant code in new methods
Related to the above, there are almost certainly multiple instances of redundant code blocks throughout this project that would benefit from creating individual help methods that could then be referenced from each original location. This will help will readability, but also with maintainability, as there’s only one place to edit in the future if we make changes. (Plus, having multiple instances of the same code can lead to errors later, as we might change one instance of redundant code but not another mistakenly.)
The most obvious example of this type of issue, to me, is the related Save() and SaveAs() methods (in Backend.cs). At some point this past summer, I created a single (and kind of unwieldy) SaveOrSave() method that consolidated those into a single place. But when I started documenting this version of the app in the step by step posts, I ended up sticking with the older Save() and SaveAs() methods, and just made a few changes to the code that calls them (as in OnTimerElapsed(), which examines the state of two app-level variables and chooses accordingly).
Long story short, as I write this, I’m not sure which is the better approach: You’re going to do logic somewhere and trigger the right action (Save or Save as). Does it matter where that happens? Maybe not. Anyway, for now, I will leave that alone, but finding and removing (well, consolidating) redundant code is a worthwhile exercise. So I may revisit this again in the future.
Code quality: Choose efficiency over readability with an eye on future improvements
During my code refactoring work this past summer, I also went through the code to see where Visual Studio made recommendations on coding changes and, for the most part, I accepted those. These changes are tied to two things, I believe, coding standards, which evolve over time and inform the Visual Studio suggestion engine, and coding efficiency, which does the same. Long story short, I don’t always agree with the changes from stylist or readability perspectives. But I have mostly just accepted them.
We’ve already implemented most of that as we updated and modernize the app. So there’s no much to do here per se. But there are some warnings that Visual Studio flagged and we didn’t yet address. They don’t prevent the app from running properly, but from a clean code perspective, I like to resolve those things. So let’s take a look.
You can see the warnings called out in the Visual Studio status bar, at the bottom.
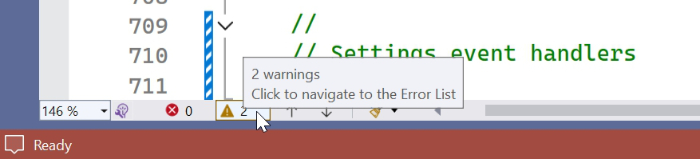
When you click that, the warnings will appear in the Error List pane. They’re both for the same warning, and related to nullable annotations that we added in some places earlier. But not in these two places.

If you double-click a warning, Visual Studio will display the offending code block in the relevant file in an editor window.
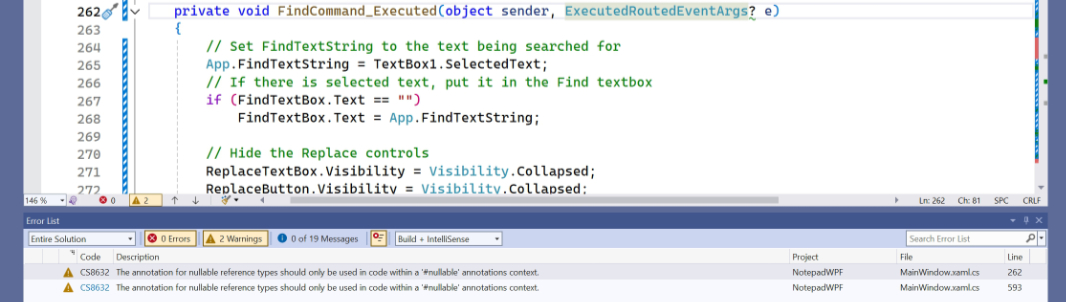
As noted, we “fixed” this type of warning before by putting the offending inside #nullable annotation blocks (with a #nullable enable header and a #nullable disable footer). And doing so for the first of the two warnings, tied to the FindCommand_Executed() event handler, does at least remove the first of those two warnings.

But the other one is a bit trickier: This one is related to an inline variable (NewText) that’s created as part of the ReplaceAllButton_Click() event handler.

I ran into all kinds of issues trying to fix this one, so I removed that ? annotation in the NewText declaration to trigger the warning that was behind it being there in the first place. And was surprised when that cleared out the warning. Hilarious.
Anyway, it now looks like this:

There are more sophisticated roads to take here, related to debugging skills and understanding where Visual Studio can help with code quality. But one big possibility for the future that I will at least explore is using GitHub Copilot to improve code quality. So we can save that for later too.
More cleanup
We already removed the old AboutMenu_Click() event handler, but we can also delete entire files we’re no longer using. These include AboutBox.xaml, FontDialog.xaml, and InputBox.xaml, and their corresponding C# code-behind files. You can delete each in turn from the list of files in the project in the Solution Explorer pane. (Note that deleting the XAML files will also delete the corresponding C# files automatically.)

Everything should work normally after they’re gone.
Wrap it up
And I think that will do it, for now: There’s always more to do, and I have a long list of missing features and other changes I’d like to make. But I needed to limit this specific project to what is possible today using the half-assed Windows 11 theming support Microsoft is giving to WPF developers in .NET 9, which ships in about two months, in November. And since .NET 9 just entered the release candidate phase and Microsoft hasn’t updated this functionality even once since its sole preview release in May, I don’t see that support improving until .NET 10 if ever. So this is where things are at for the moment.
I hope there’s more. I would like to implement the tabbed user interface, of course, and correctly theme the app, two features that are basically impossible in pure WPF today. But I have some ideas about working around that too. So I suspect we’ll return to this app in the future.
For now, I’ll let this sit as-is. And when .NET 9 is finalized, I’ll take another look and post the updated code as a new project in GitHub, as I did with the original version of the app. See you then.

Gain unlimited access to Premium articles.
With technology shaping our everyday lives, how could we not dig deeper?
Thurrott Premium delivers an honest and thorough perspective about the technologies we use and rely on everyday. Discover deeper content as a Premium member.