The WinForms Notepad Project: Find, Find Next, and Find Previous (Premium)
- Paul Thurrott
- Jan 09, 2020
-
7
I’ve been working on the Find, Find Next, Find Previous, and Replace/Replace All commands for well over a month now. There are lots of challenges to implementing this functionality, especially for a non-programmer such as myself. But there are also some important challenges related to implementing this functionality in the same manner as the original Notepad. And I’ve found myself butting up against my own limitations again and again as a result.
For an inkling to what I mean, consider an earlier issue I had in trying to duplicate the dialog box that Notepad provides when you go to exit the application with an unsaved document. My original assumption was that this dialog was created specifically for Notepad, and that I would have to manually create a reasonable facsimile of it (a tedious task). But as readers informed me, it’s actually a Task Dialog, a UI that was first implemented for Windows Vista. Task Dialogs are not natively supported by Windows Forms for some reason, though Microsoft had at one time made them available via a separate download that is no longer officially available. So my eventual workaround was to simply use a Message Box; it doesn’t look exactly like the dialog that the real Notepad uses, but it is at least a clean, native UI, and it provides exactly the same functionality (in this case). Problem solved.
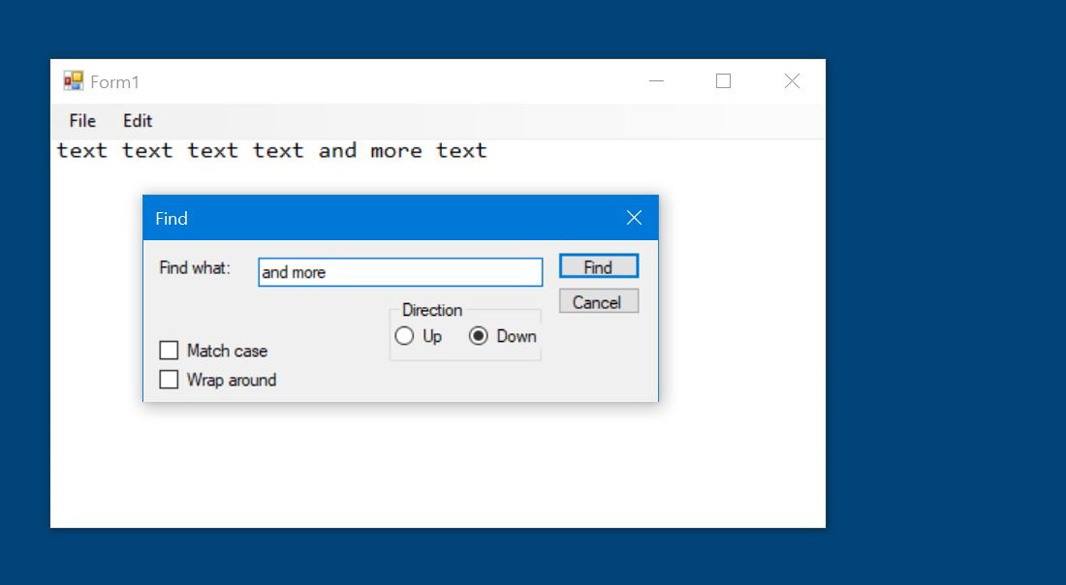
Now consider how Microsoft implements Find, Find Next, Find Previous, and Replace in Notepad. The Find and Replace commands trigger the two custom dialog boxes shown below. They appear over the main application window and as you interact with them you can cause text to be highlighted and change in the text box in the main application window, in real time; that is, the dialogs stay floating above the main window as you use them. And there are other complexities, including when to even make these commands available; for example, if there is no text in Notepad, then the commands are all grayed out.

To implement these things correctly, I’d have to manually recreate each dialog in Visual Studio, which, again, is tedious. I’d have to handle all of their various nuances—the “Match case” and “Wrap around” options, for example. And I’d have to figure out how to keep these dialogs visible while highlighting or changing the text in the main application’s textbox.
In preparation for this work, I did create the Find dialog to some reasonable degree. And I did figure out how to find text in the textbox. But keeping that dialog displayed while the user clicked “Find Next” repeatedly to move through each instance of that text was one issue I ran into.
After wasting a lot of time on this part of the problem, I finally created a version with a Find panel built-in to the main application window, the theory being that it would be easier to highlight text as the user clicked Find Next, since it was all in the same window. And I did make some headway with that design.

But then a reader, Michael Lerch, bailed me out. Over a series of emails, he provided me with rough working code for Find, Find Next, Find Previous, and Replace (and Replace All, which is part of the Replace dialog in Notepad). I joked about wanting to figure this out for myself, but the reality is I really needed the help.
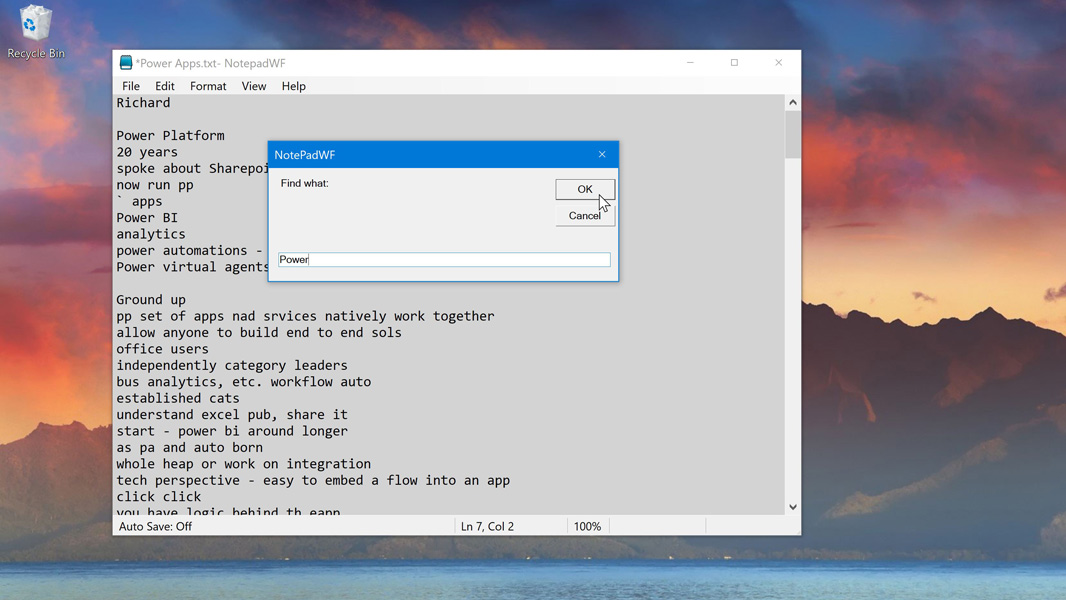
Michael’s implementation uses something called an Input Box, which is a simple dialog box provided by Windows Forms, sort of like a Message Box that prompts the user for some input. It’s not particularly attractive, and it doesn’t let you do what Notepad does, where you can keep the dialog above the main application window while doing your thing. But the important bit is that it (mostly) works. It’s an incredible first step. And if I want to build this out to be more like Notepad, I can try to do so.
But first things first.
To test his code, I first created a new project with a menu bar, text box, and status bar. I created an Edit menu with Find, Find Next, Find Previous, and Replace items, and made sure that they had the same shortcut keys as the similar commands in the real Notepad. And then I added the code that Michael provided to each of the menu items’ respective event handlers. And then I spent a lot of time testing it.
When I felt a bit more familiar with the code, I finally added it to the actual NotepadWF project. I also re-added the Go To functionality (which, like Find, Find Next, Find Previous, and Replace/Replace All, is accessed via the Edit menu) that I had worked up earlier.
And it kind of works. It’s a bit rough.
So what I’m going to do is document how to add these commands to NotepadWF over two articles, starting here with Find, Find Next, and Find Previous. Next time around, we’ll add Replace, Replace All, and Go To. And then we’ll need some fit and finish work, not just to this functionality but to some other desperately broken parts of the application (most notably Print). And after all that is done, I’ll think about implementing Find, Find Next, Find Previous, and Replace/Replace All using custom-created dialog boxes that expose all of the extra functionality we see in the real Notepad.
Yeah, I had hoped to be done with this thing by the end of last month. Ah well.
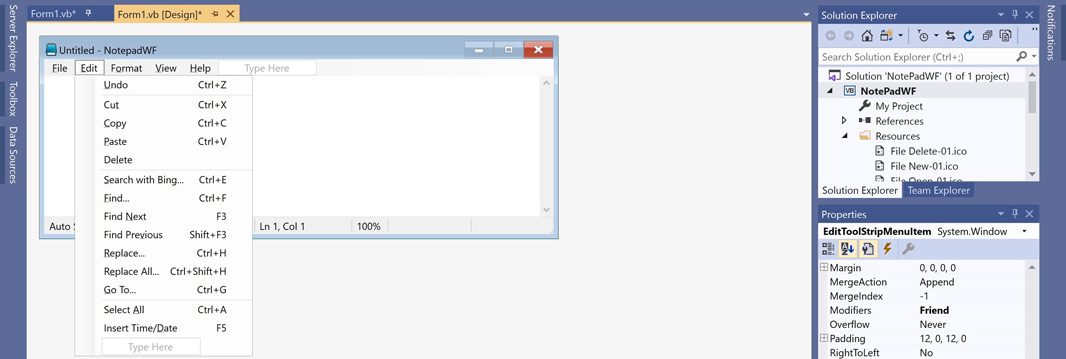
The first step, of course, is to create the Find, Find Next, Find Previous, Replace, Replace All, and Go To menu items under Edit as shown here. (Replace All, again, is not present in the original Notepad, but since we’re using Input Boxes to implement these commands, it needs to be separate for now.) I assume you know how to do that, and to name each menu item according to the style we’ve been using all along (FindToolStripMenuItem, FindNextToolStripMenuItem, and so on).
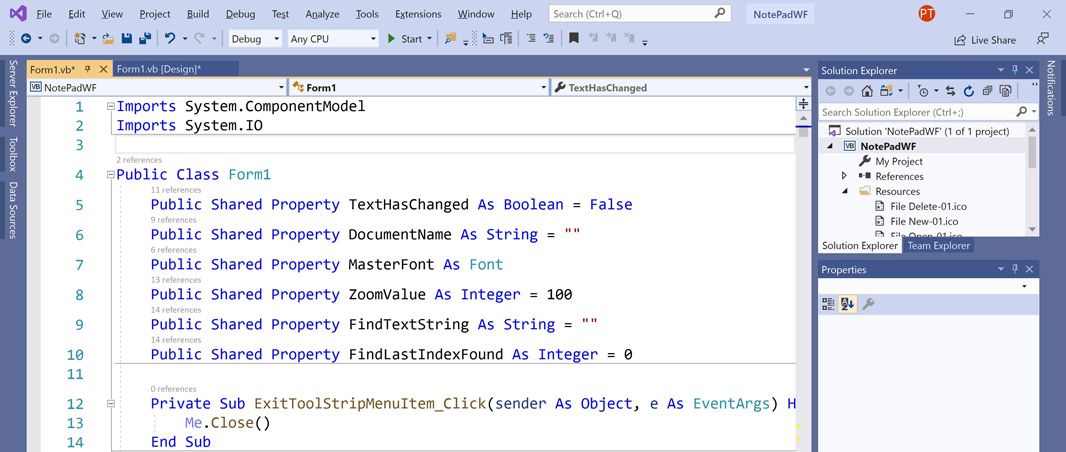
Before we can implement each of those commands’ event handlers, we need to create two more properties and two custom methods. As you may recall, properties are added inside the class for Form1 and above all of the event handlers in Form1.vb, and we are already using several, including TextHasChanged, DocumentName, and a few others. Add the following two property declarations in that area of the code:
Public Shared Property FindTextString As String = ""
Public Shared Property FindLastIndexFound As Integer = 0
When you’re done, it should look like so:
Now, at the very bottom of Form1.vb, right above End Class, we need to add those two new custom methods. They are:
Private Sub FindTheText()
    '
End Sub

Private Sub FindTextIndex(FindFromIndex As Integer, FindPreviousIndex As Boolean)
    '
End Sub
That first method, FindTheText, will be called from Find, Find Next, and Find Previous. And FindTextIndex will be called from Find, Find Next, Find Previous, Replace, and Replace All. Here’s the full code for each:
Private Sub FindTheText()
    If FindLastIndexFound > -1 Then
        TextBox1.Select(FindLastIndexFound, Len(FindTextString))
    Else
        MessageBox.Show(Me, "Cannot find " + Chr(34) + FindTextString + Chr(34), "Notepad", vbOKOnly, vbInformation)
    End If
End Sub

Private Sub FindTextIndex(FindFromIndex As Integer, FindPreviousIndex As Boolean)
    Dim Text As String = TextBox1.Text

    If FindPreviousIndex = False Then
        FindLastIndexFound = Text.IndexOf(FindTextString, FindFromIndex)
        If FindLastIndexFound = -1 Then
            ' If text is not found, try searching from the beginning
            FindLastIndexFound = Text.IndexOf(FindTextString, 0)
        End If
    Else
        FindLastIndexFound = Text.LastIndexOf(FindTextString, FindFromIndex)
        If FindLastIndexFound = -1 Then
            ' If text is not found, try searching from the end
            FindLastIndexFound = Text.LastIndexOf(FindTextString, Len(Text) - 1)
        End If
    End If
End Sub
OK, with that out of the way, create the event handlers for FindToolStripMenuItem, FindNextToolStripMenuItem, and FindPreviousToolStripMenuItem.
Here’s FindToolStripMenuItem_Click:
Private Sub FindToolStripMenuItem_Click(sender As Object, e As EventArgs) Handles FindToolStripMenuItem.Click
    CheckTimerInterval()

    FindTextString = InputBox("Find what:")
    ' Find the text from the current cursor position
    FindTextIndex(TextBox1.SelectionStart, False)
    FindTheText()

    ResetTimerInterval()

End Sub
This one has the CheckTimerInterval() and ResetTimerInterval() calls we added recently elsewhere to ensure, in this case, that a save prompt won’t occur while the InputBox is displayed. But the meat of the method is those three lines of code in the middle, which in turn prompt the user for the text they wish to find, discover the current caret position in the application’s text box and then find that text using the FindTheText method.
Next up is FindNextToolStripMenuItem_Click and FindPreviousToolStripMenuItem_Click, which simpler and don’t require those CheckTimerInterval() and ResetTimerInterval() because they don’t display any dialog boxes. In both cases, we’re finding the caret position and then finding the next instance of the previously-requested find text.
They will look like so:
Private Sub FindNextToolStripMenuItem_Click(sender As Object, e As EventArgs) Handles FindNextToolStripMenuItem.Click
    FindTextIndex(FindLastIndexFound + Len(FindTextString), False)
    FindTheText()
End Sub

Private Sub FindPreviousToolStripMenuItem_Click(sender As Object, e As EventArgs) Handles FindPreviousToolStripMenuItem.Click
    FindTextIndex(FindLastIndexFound, True)
    FindTheText()
End Sub
To test the Find, Find Next, and Find Previous commands, you will want to add some text (or open a document) and experiment. You will find bugs. But the basics are there. You can find text, find the next instance of text, and find previous instances of text. Usually.
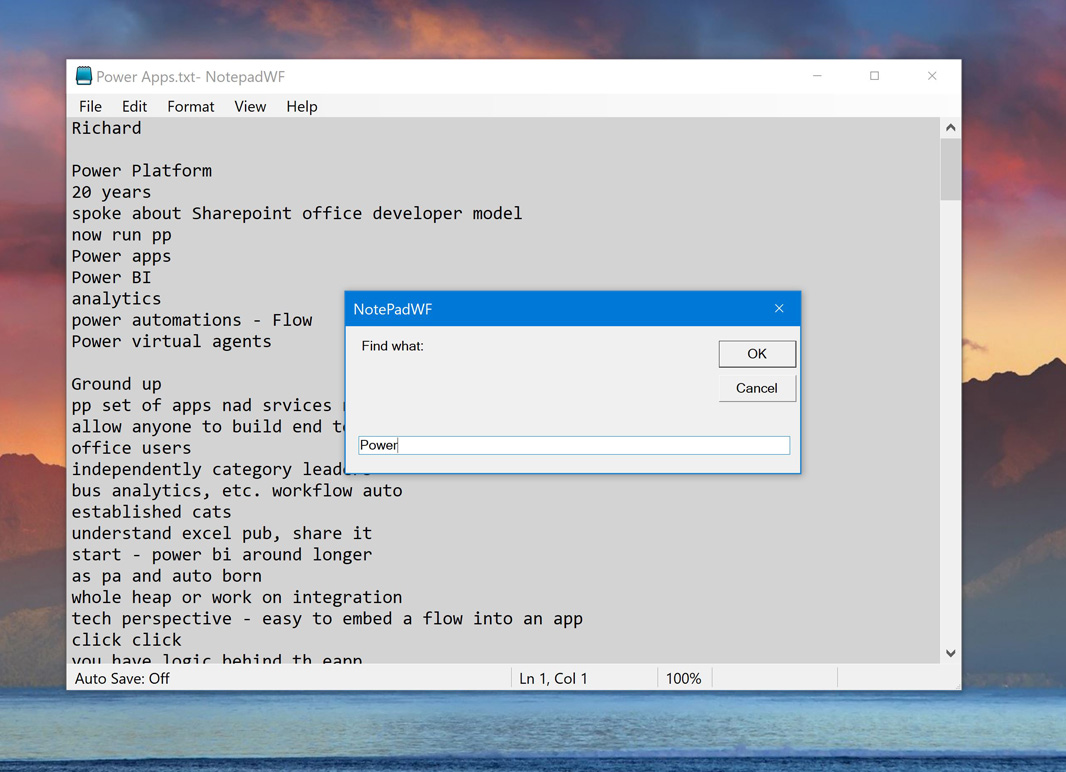
There are some obvious bugs. For example, we aren’t testing for case, so “Power” and “power” are different words, and trying to find one will not result in finding the other. The various commands we’re handling here should be grayed out or made available in the Edit menu accordingly, and we’re not doing that. And probably many others. Normally, I wouldn’t be comfortable putting something like this out in this state. But who am I kidding? I’ve done it before. (Print is still broken.) And I needed outside help to even get this far. Thanks again, Michael.
Next time, we’ll add Replace, Replace All, and Go To. And then we’ll see if we can’t fix some bugs and, maybe—just maybe—do these commands right. But this is a good place to stop for now. We will all want to test this code before proceeding.

Gain unlimited access to Premium articles.
With technology shaping our everyday lives, how could we not dig deeper?
Thurrott Premium delivers an honest and thorough perspective about the technologies we use and rely on everyday. Discover deeper content as a Premium member.