The WPF Files: The Final Piece of the Puzzle (Premium)
- Paul Thurrott
- Mar 10, 2020
-
6

To complete my quick-and-dirty port of .NETpad to WPF and .NET Core, I had to overcome one final obstacle: Keyboard shortcuts.
There are many such obstacles in WPF. For example, I previously highlighted font support as one of the areas in which Microsoft really dropped the ball in moving from Windows Forms to Windows Presentation Foundation (WPF): Developers who wish to provide font customization access to their users will either need to roll their own Font dialog or jump through some hoops to use the old WinForms version and then deal with all the incompatibilities between its underlying Font class/object and the new font-related classes and objects provided by WPF.
That’s a mess, but it’s only one example. And in looking at my quick-and-dirty port of .NETpad from C#/WinForms/.NET Framework to C#/WPF/.NET Core, there was one final hurdle to overcome and it, too, is another example of Microsoft dropping the ball. I’m referring, of course, to keyboard shortcuts.
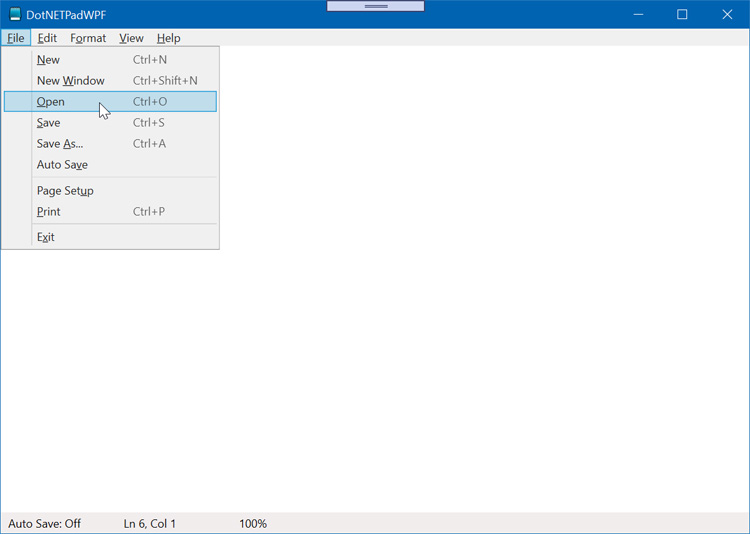
Consider the WinForms versions of .NETpad. If the user wants to access the Open command, which provides a system Open file dialog so that they can open an existing file, they can either navigate to File > Open or they can tap the CTRL + O keyboard shortcut. Linking that keyboard shortcut to the Open menu item’s Click event handler is simple: You just select the Open menu in the designer and then locate the ShortcutKeys property in the Properties pane. Visual Studio provides a nice interface for configuring exactly the keyboard shortcut you want.

When you configure this property, the keyboard shortcut also appears in the Open menu to the right of the Open text. And you could also optionally use the ShortcutKeyDisplayString property to customize that text if needed. We did this in the VB version of .NETpad for the Zoom In and Zoom Out menu items, because the default display strings (Ctrl+OemPlus and Ctrl+OemMinus) were not ideal. But whatever: It was simple.
WPF uses a completely different and far more complex system for assigning keyboard shortcuts to menu items and other commands. There are all kinds of reasons and rationale for this new system, which I’m not going to describe in any detail. My point is only that they took something simple and just over-designed it. It’s a hot mess that involves binding keyboard shortcuts to built-in commands or custom commands.
Built-in commands—common application actions like New, Open, Save, and so on—are easiest, but they require you to make changes to the applicable window’s XAML and C# code. On the XAML end, you can add a <Window.CommandBindings> section in which you declare these bindings. For example, if you just want to add a CTRL + O keyboard shortcut for the Open command, it could look like so.
<Window.CommandBindings>
    <CommandBinding Command="Open" CanExecute="OpenCommand_CanExecute" Executed="OpenCommand_Executed" />
</Window.CommandBindings>
Then, you need to create two methods, OpenCommand_CanExecute and OpenCommand_Executed, in the C# code, plus remove the reference to OpenMenu_Click from the XAML declaration of the Open menu item. Previously, it looked like this:
<MenuItem Header="_File">
    <MenuItem Command="Open" Name="OpenMenu" Header="_Open" InputGestureText="Ctrl+O" Click="OpenMenu_Click" />
</MenuItem>
So that Click=”OpenMenu_Click” bit needs to go.
Over in the C# file, you can delete OpenMenu_Click() and add the following:
private void OpenCommand_CanExecute(object sender, CanExecuteRoutedEventArgs e)
{
    e.CanExecute = true;
}

private void OpenCommand_Executed(object sender, ExecutedRoutedEventArgs e)
{
\\ code that used to be in OpenMenu_Click()
}
When you test the application, you can see that the “Ctrl+O” shortcut text appears next to the Open command. And that typing CTRL + O works as expected.
That’s nice. But then you need to repeat this process for every menu command for which there are built-in commands. And after that, you need to figure out custom commands. Which is even more work.
Consider View > Zoom > Zoom In, Zoom Out, and Restore Zoom. To create keyboard shortcuts for those three commands—Ctrl+Plus, Ctrl+Minus, and Ctrl+0, respectively—I had to create a <Window.InputBindings> section in my XAML code like so:
<Window.InputBindings>
    <KeyBinding Key="OemPlus" Modifiers="Ctrl" Command="NavigationCommands.Zoom" CommandParameter="In" />
    <KeyBinding Key="OemMinus" Modifiers="Ctrl" Command="NavigationCommands.Zoom" CommandParameter="Out" />
    <KeyBinding Key="D0" Modifiers="Ctrl" Command="NavigationCommands.Zoom" CommandParameter="Restore" />
</Window.InputBindings>
These bindings differ from the earlier command bindings in two important ways: They require me to specify the keyboard shortcut components via the Modifiers and Key attributes. And they each reference the same method, but pass a different parameter so that I can handle each accordingly. Previously, each command mapped to its own command processing method.
As before, I needed to remove the references in the Click event handlers in the XAML. But I also needed to add some XAML so that these menu items knew which commands and parameters to use. And I added some XAML to specify the new shortcut key text via the InputGestureText attribute. So that section of the XAML now looks like so:
<MenuItem Header="_Zoom">
    <MenuItem Command="NavigationCommands.Zoom" CommandParameter="In" Name="ZoomInMenu" Header="Zoom _In" InputGestureText="Ctrl+Plus" />
    <MenuItem Command="NavigationCommands.Zoom" CommandParameter="Out" Name="ZoomOutMenu" Header="Zoom _Out" InputGestureText="Ctrl+Minus" />
    <MenuItem Command="NavigationCommands.Zoom" CommandParameter="Restore" Name="RestoreDefaultZoomMenu" Header="_Restore Default Zoom" InputGestureText="Ctrl+0" />
</MenuItem>
Over in the C# file, I again added the two new methods, like so.
private void ZoomCommand_CanExecute(object sender, CanExecuteRoutedEventArgs e)
{
    e.CanExecute = true;
}

private void ZoomCommand_Executed(object sender, ExecutedRoutedEventArgs e)
{
    switch (e.Parameter)
    {
        case "In":
            // code from ZoomInMenu_Click()
            break;
        case "Out":
            // code from ZoomOutMenu_Click()
            break;
        case "Restore":
            // code from RestoreDefaultZoomMenu_Click()
        break;
    }
}
In case it’s not obvious, that switch statement replaces what used to be three different Click event handlers, one each for Zoom In, Zoom Out, and Restore Default Zoom. So I pasted the code from each into the appropriate case block and deleted them when done. Every one of the menu commands that doesn’t map to a built-in command is a special case, and each requires its own bit of custom coding.
Fun!
OK, it’s not fun. It’s stupid. But at least I got it (mostly) working. As of this writing, I’m just a few commands away from finishing. And this was the last major hurdle before completing this app.
Obviously, there is a lot of fit and finish work required in the code. But that was the entire point of this exercise: To see how quickly I could complete the WPF version of the app. And as I noted earlier, it did come together faster than I had anticipated, despite the many roadblocks.

Gain unlimited access to Premium articles.
With technology shaping our everyday lives, how could we not dig deeper?
Thurrott Premium delivers an honest and thorough perspective about the technologies we use and rely on everyday. Discover deeper content as a Premium member.