The WinForms Notepad Project: Fixes, File New, and Zoom (Premium)
- Paul Thurrott
- Oct 30, 2019
-
10
With basic file save capabilities out of the way, let’s do a bit of fit and finish work and add some more new features.
First up, a few improvements to the existing code.
Exception handling
Mojohill mentioned that the SaveToolStripMenuItem_Click event handler was throwing an exception related to permissions and suggested putting the line with the method System.IO.File.WriteAllText in a Try block. He’s right, and I meant to do that originally. So the SaveToolStripMenuItem_Click event handler should now look like so:
If DocumentName <> "" Then
    Try
        System.IO.File.WriteAllText(DocumentName, TextBox1.Text)
        TextHasChanged = False
        Me.Text = Me.Text.Replace("*", "")
    Catch ex As Exception
        MessageBox.Show(ex.Message)
    End Try
Else
    SaveAsToolStripMenuItem_Click(sender, e)
End If
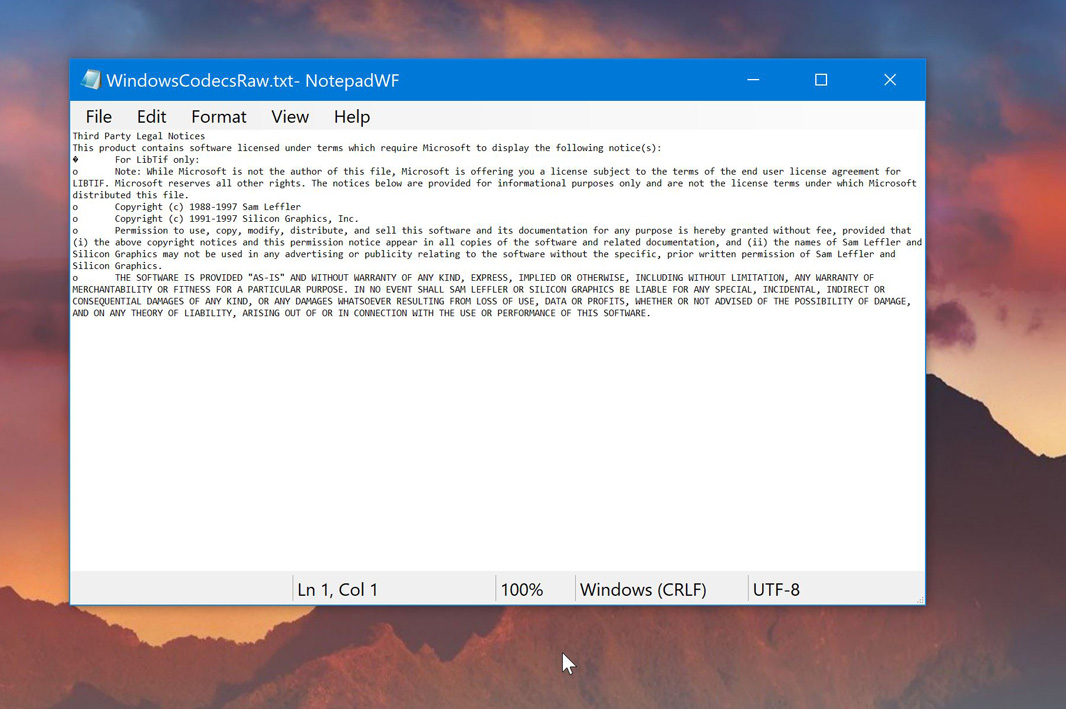
Of course, this won’t solve his problem, and the document still won’t get updated. But it will prevent the application from crashing and will explain why in a message box. For example, when I tried to edit a text file in C:\Windows.old\WINDOWS\SysWOW64 and then save it, I got the following error:
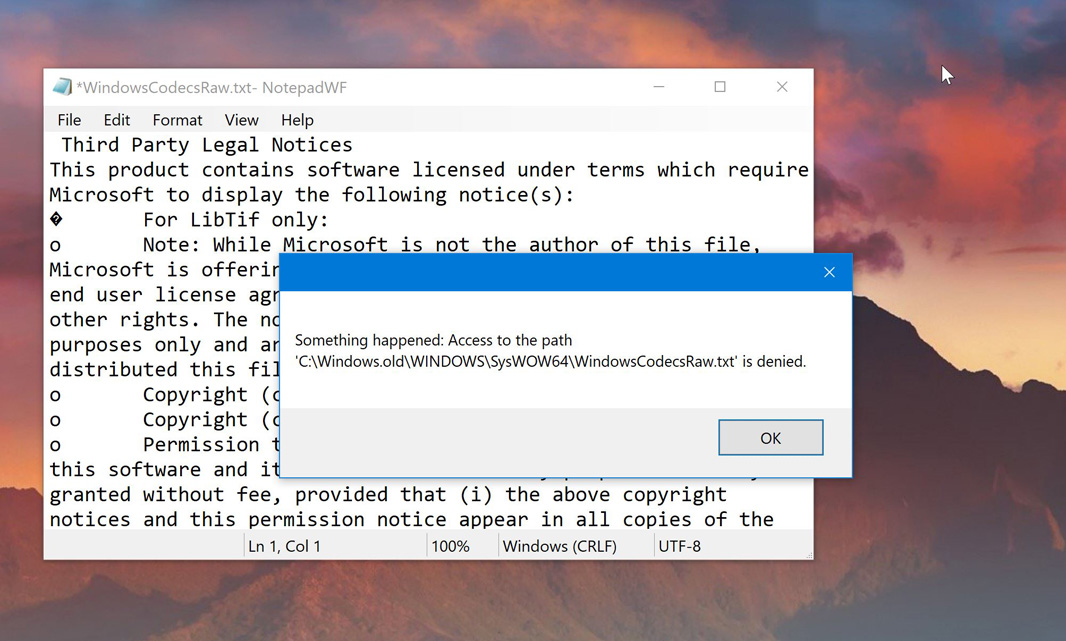
If anyone is getting this message box on the Save command, let me know so we can figure out how to really fix it. And while we’re at it, let’s change all the Catch blocks in Form1.vb to match what we used here, so we can always tell the user what’s wrong.
Form1_Closing event handler
I forgot to add file saving capabilities to the Form1_Closing event handler, which currently looks like this:
Private Sub Form1_Closing(sender As Object, e As CancelEventArgs) Handles Me.Closing
    If TextHasChanged Then
        Dim SavePrompt As DialogResult = MessageBox.Show("Do you want to save changes?", "NotepadWF", MessageBoxButtons.YesNoCancel)
        If SavePrompt = vbYes Then
            ' Display a Save Dialog here
        ElseIf SavePrompt = vbNo Then
            Application.Exit()
        Else
           e.Cancel = True
        End If
    Else
        Application.Exit()
    End If
End Sub
My bad. But this one is easy to fix: Just replace the commented out line (‘ Display a Save Dialog here) with:
SaveFileDialog1.ShowDialog()
OK, let’s add some new commands now, too.
File > New
The real Notepad has a File > New command that lets the user start over with a blank document. You already know how to add this menu item to the File menu of our application in the designer: Right-click File > Open and then select Insert and then MenuItem from the context menu that appears. Then, name this new menu item as &New and change its ShortcutKeys property to CTRL + N.
As for its Click event handler, we need to check to see whether there were any pending changes to the document they were already working on and then prompt them to save it if they’d like. If this sounds familiar, it’s because the Form1_Closing event handler works very similarly. After thinking about whether there was a more efficient way to do this, I copied and pasted the body of the Form1_Closing event handler and then changed it to accommodate our DocumentName and TextHasChanged properties. Now looks like so:
If TextHasChanged Then
    Dim SavePrompt As DialogResult = MessageBox.Show("Do you want to save changes?", "NotepadWF", MessageBoxButtons.YesNoCancel)
    If SavePrompt = vbYes Then
        SaveFileDialog1.ShowDialog()
    ElseIf SavePrompt = vbNo Then
        TextBox1.Text = ""
    End If
Else
    TextBox1.Text = ""
End If
TextHasChanged = False
DocumentName = ""
Me.Text = "Untitled - NotepadWF"
Test that to make sure it works as expected.
Zoom
I mentioned previously that the TextBox control we’re using doesn’t support zooming, which is too bad: The RichTextBox control we originally used does support this neat feature. But rather than worrying too much about this, I figured we could work around this limitation by just changing the font size on the fly.
This will create only a small problem in the future. As you may recall, we let the user select the font, font style, font size, and other attributes by selecting Format > Font. But what we don’t do—yet—is save this change. That’s a feature for a future time, but the way to think about this now is that “zoom” will only change the display temporarily whereas actually using Format > Font will make a configuration change that persists. This should work pretty well.
If you look at the real Notepad, you’ll see that the top-level View menu item contains a Zoom menu item that has three sub-menu items of its own—Zoom In, Zoom Out, and Restore Zoom Level—and that each has a shortcut key as well.
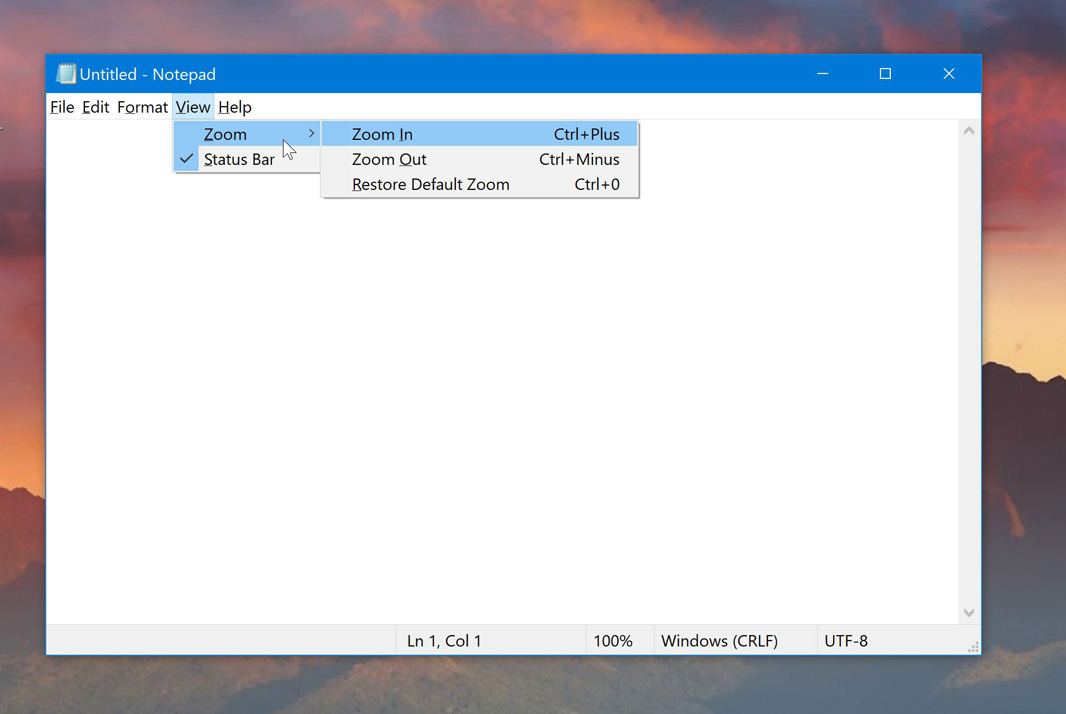
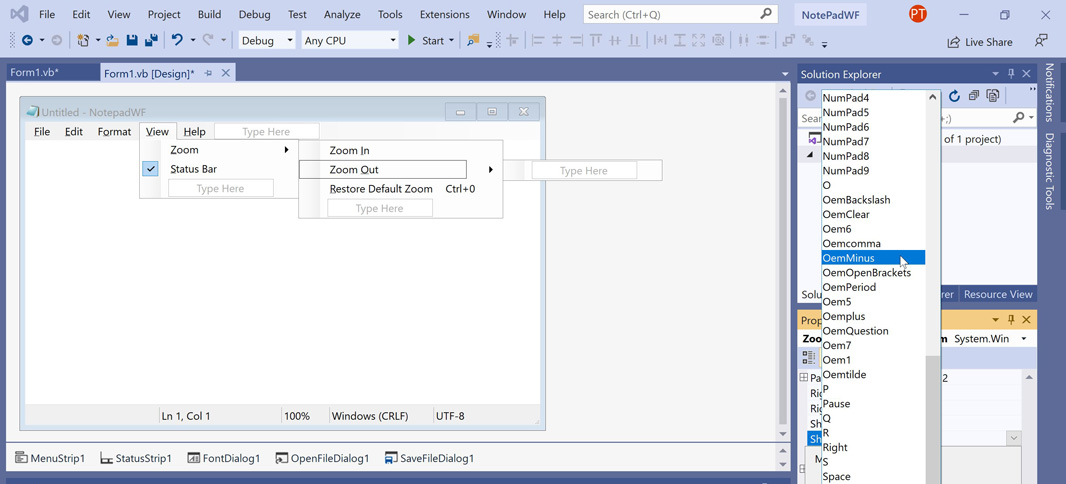
So we’ll need to create each of those menu items. I assume you know how to do that now, and how to name them correctly (&Zoom, Zoom &In, Zoom &Out, and &Restore Default Zoom, respectively). But there is one wrinkle: When you go to configure the ShortcutKeys properties for ZoomInToolStripMenuItem and ZoomOutToolStripMenuItem, you will discover that you can’t add a “+” or “-“ character as a keyboard shortcut modifier. Those characters are not available in the list.
That’s OK: You can use “OemPlus” and “OemMinus” instead.
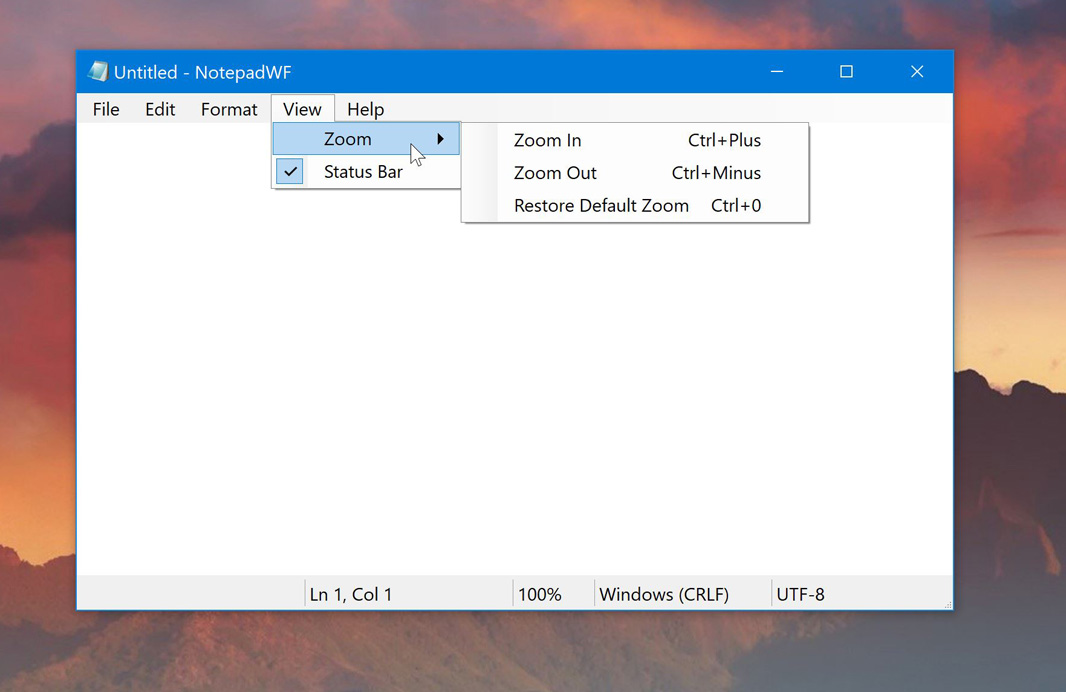
There’s just one problem: When you run the application, you’ll see that the Zoom In and Zoom Out menu items actually use “Ctrl+OemPlus” and “Ctrl+OemMinus” as their displayed keyboard shortcuts.
That’s no good. But in researching a solution, I discovered that menu items have a ShortcutKeyDisplayString property that lets you customized the displayed keyboards shortcut. We’ll want to change those property values when the application starts, so open Form1vb [Design] and double-click on the form’s title bar to display the Form1_Load event hander. Add the following two lines of code inside this event handler:
ZoomInToolStripMenuItem.ShortcutKeyDisplayString = "Ctrl+Plus"
ZoomOutToolStripMenuItem.ShortcutKeyDisplayString = "Ctrl+Minus"
Now, run the application again. Problem solved.
Now we need to write the code that will zoom the text displayed in TextBox1 in and out, and then restore it to its default font size, which is currently hard-wired to 12 points. (Yes, we’ll change that later when we figure out how to save and load application state in the future.)
We don’t want to allow the font to get too big, and we can’t let it go below 1, since the font size must be a positive number. So we can restrict the font size from 1 to 72, since 72 is the biggest font size that Notepad’s Font dialog supports (without the user typing in their own value).
Double-click Format > Font > Zoom In in the designer to create the ZoomInToolStripMenuItem_Click event handler. Then, add this small block of code, which makes sure that the font size isn’t one point below the maximum before making the change.
If TextBox1.Font.Size <= 71 Then
    TextBox1.Font = New Font(TextBox1.Font.Name, TextBox1.Font.Size + 1)
End If
(If you’re wondering about the weird syntax, it’s because Font.Size is read-only. This is the best way to change the font size that I could find.)
Then, double-click Format > Font > Zoom Out in the designer to create the ZoomOutToolStripMenuItem_Click event handler. Here, we’re checking that the font size is at least 2 points before making it any smaller.
If TextBox1.Font.Size > 2 Then
     TextBox1.Font = New Font(TextBox1.Font.Name, TextBox1.Font.Size - 1)
End If
Finally, double-click Format > Font > Restore Default Zoom in the designer to create the RestoreDefaultZoomToolStripMenuItem_Click event handler. Then, add the following one line of code inside this code block:
TextBox1.Font = New Font(TextBox1.Font.Name, 12)
And that should do it.
When you run the application now, you should be able to make the text really small using View > Zoom > Zoom Out (or CTRL + -, which is easier, since you can hold it down or do it repeatedly).
And you should likewise be able to make it really big using View > Zoom > Zoom Out (or CTRL + +).
Finally, View > Zoom > Restore Default Zoom or CTRL + 0 will restore the font to its original size, 12 points.
That’s pretty cool, but we still need to change the display of that Zoom field in the status bar. I’m going to leave that for the next installment since changing the font size by one point doesn’t map well to the percentages we’ll display there. So that’s a problem to solve on another day.
More soon…

Gain unlimited access to Premium articles.
With technology shaping our everyday lives, how could we not dig deeper?
Thurrott Premium delivers an honest and thorough perspective about the technologies we use and rely on everyday. Discover deeper content as a Premium member.