The WPF Notepad Project: Font Dialog (Premium)
- Paul Thurrott
- Mar 21, 2020
-
8
When I first started coding the WPF version of .NETpad, I was frustrated by how it turned tasks that were simple in Windows Forms into complex if not impossible tasks. Those things still frustrate me sometimes, but I’ve also come to embrace some of the unique features that make WPF vastly superior, at least in some ways, to WinForms. Key among those features is XAML, the declarative XML-based language that Microsoft created to describe user interfaces.
We used XAML early on in this series to construct the main application window for .NETpad, which is, by nature very simple. But we’ll also use XAML to various build some custom dialogs, starting with the Font dialog. Among other things, these custom dialogs will give us a chance to install .NETpad with a bit more of a modern flavor. Take it a step beyond being a basic desktop application.
I’m happy about that. One of my goals with the WPF version of .NETpad is to bridge past with the present, and so all of the windows we’re creating in WPF purposefully embrace this framework’s resolution independence and display scaling capabilities. And in the custom dialogs, the controls I’m using, like buttons, are bigger than what you’d typically see in a legacy desktop application and are perhaps a bit more similarly sized to controls in mobile Universal Windows Platform (UWP) apps. That’s by design.
Anyway. Let’s get started.
The first thing we need to do is add a new window to the application. You can do so by right-clicking the project name in Solution Explorer and choosing Add > New Item and the looking around in the resulting Add New Item window, but it’s quicker to just choose Add > Windows (WPF) since that will auto-select the right option in that same window.
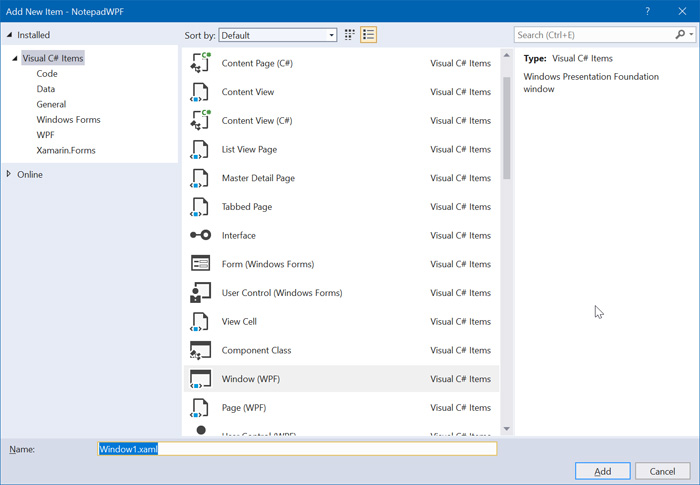
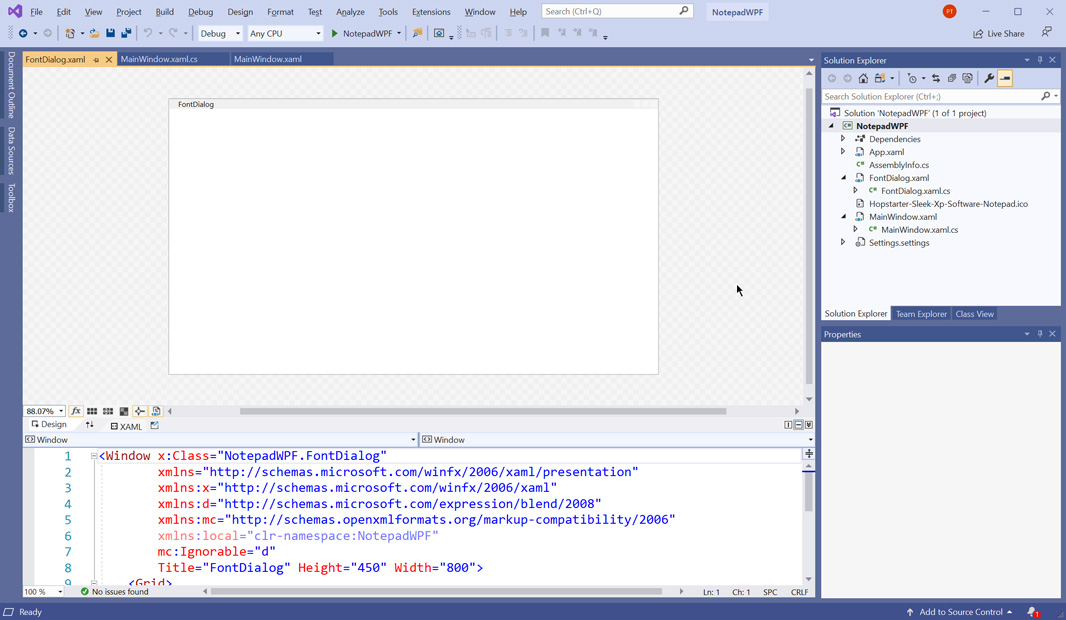
Rename the window to FontDialog.xaml and click Add. When you do, the new window opens up in Visual Studio in a split view with both Design and XAML panes.
Before messing with the new window, let’s handle the event that displays it: The user clicking Format > Font in the main application window. In MainWindow.xaml, locate and select the tag for the FontMenu menu item. Then, switch the Properties pane to display Events and double-click next to Click to create an empty FontMenu_Click event handler. (You may have done that in an earlier article; if so, just locate FontMenu_Click in MainWindow.xaml.cs.)
We need to perform three basic tasks in this event handler, so let’s add the following comments inside FontMenu_Click to explain what we’ll be doing:
// Save settings so that the Font dialog has the correct font information

// With the settings saved, display the Font dialog

// When the dialog is closed, change the font settings if needed

Under the first comment, add this single line of code:

SaveSettings();
Yes, we could write code that only saves the font-related settings, but we have so few settings, I don’t think it’s worth worrying about.
Under the second comment, we’ll add the code that displays the Font dialog. That will look like so:
FontDialog fontDialog = new FontDialog
{
    Owner = this
};
fontDialog.ShowDialog();
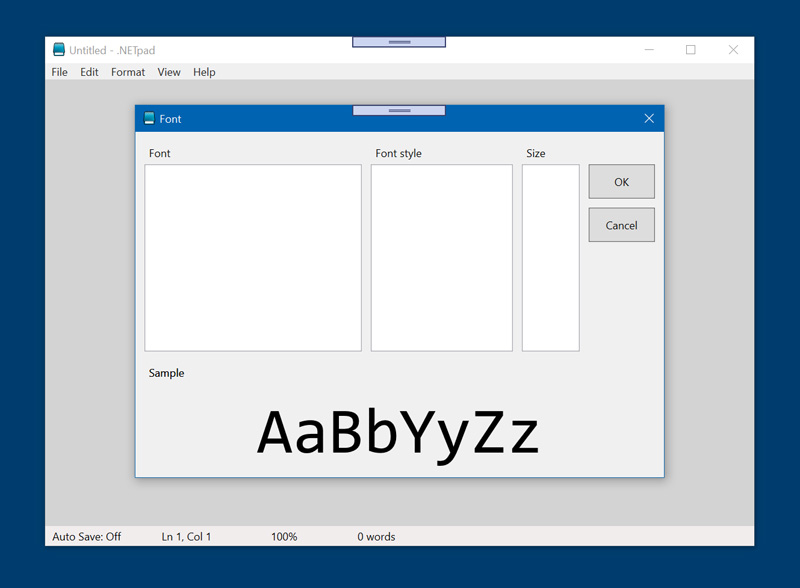
At this point, you can test it if you want: An empty (and resizable) Font dialog will appear over the main application window. Obviously, we have a lot more work to do.
![]()
Next, we can block out what it is that we’re going to do if the user closes the Font dialog using the OK button we’re going to add later. (If the user clicks Cancel, we will ignore any changes they made.) When that happens, the font information is written to settings, so we’re going to need to read that information here and then apply it to the textbox in the main application window.
To get started, add the following code under the third comment inside FontMenu_Click:
if (fontDialog.DialogResult == true)
{
    // Read FontFamily from settings

    // Read FontSize from settings

    // Read Bold from settings

    // Read italics from settings
}
Now, we simply have to write the code that does all that. Most of it is pretty straightforward and resembles the similar code we wrote for AppWindow_Initialized early on. When we’re done, that if loop will look like so:
if (fontDialog.DialogResult == true)
{
    // Read FontFamily from settings
    string fontName = Settings.Default.MyFontFamily;
    TextBox1.FontFamily = new FontFamily(fontName);

    // Read FontSize from settings
    TextBox1.FontSize = Settings.Default.MyFontSize;
    MasterFontSize = Settings.Default.MyFontSize;

    // Read Bold from settings
    if (Settings.Default.MyFontBold == true)
        TextBox1.FontWeight = FontWeights.Bold;
    else
        TextBox1.FontWeight = FontWeights.Normal;

    // Read italics from settings
    if (Settings.Default.MyFontItalic == true)
        TextBox1.FontStyle = FontStyles.Italic;
    else
        TextBox1.FontStyle = FontStyles.Normal;
}
With that out of the way, let’s look at the Font dialog. First up: A few basic properties related to the window title, size, and position, and its resize mode. That is, we don’t want the user to be able to resize the window.
Open FontDialog.xaml and double-click on the XAML button in the divider to display only the XAML (instead of the default split view). Replace the text that current reads as Title=”FontDialog” Height=”450″ Width=”800″ with the following:
WindowStyle="SingleBorderWindow"
WindowStartupLocation="CenterOwner"
Title="Font" Height="420" Width="600" ResizeMode="NoResize"
Now, when you run the application, the Font window is a bit more orderly.

Next, we can start defining the Font dialog’s user interface using XAML code. If you think back to the main application window, you’ll recall that it’s an incredibly simple design with a grid consisting of three rows. The Font dialog is more complex because we will need multiple rows and columns, and this time it’s the columns that really determine the visual design. But it’s still simple enough to be mostly handled by a grid, the simplest XAML layout panel. (That said, we’ll be adding a second panel inside of this grid later as well.)
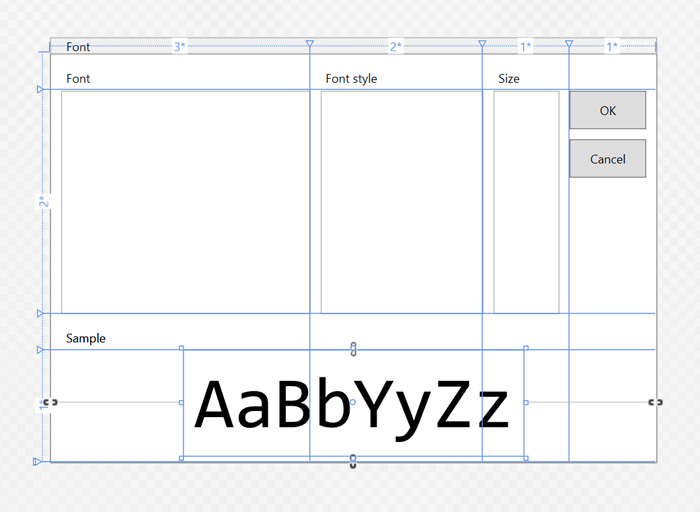
Basically, we need four columns from left to right: A large column to display the available font names, a medium-sized column to display the available font styles, a medium-sized column to display the available font sizes, and a small column for the OK and Cancel buttons, which will be stacked vertically with OK on the top. It won’t be this colorful, but the basic layout looks like so, minus the colors:

To implement these columns in XAML, we need to add a ColumnDefinitions section inside of the <Grid> and </Grid> tags. That looks like so:
<Grid.ColumnDefinitions>
    <ColumnDefinition Width="3*" />
    <ColumnDefinition Width="2*" />
    <ColumnDefinition Width="2*" />
    <ColumnDefinition Width="1*" />
</Grid.ColumnDefinitions>
We’re also going to need several rows, from top to bottom: A row with labels for the three font-related list boxes, a row for the list boxes, a row for the sample text label, and a row for the sample text. So add the following section inside the grid but below the section you just added:
<Grid.RowDefinitions>
    <RowDefinition Height="Auto" />
    <RowDefinition Height="2*" />
    <RowDefinition Height="Auto" />
    <RowDefinition Height="1*" />
</Grid.RowDefinitions>
With that out of the way, we can begin building the actual user interface, starting with the first row. This row will display three labels that describe the three font-related list boxes below them. Also, we will use a consistent set of padding values for these and future UI elements in the Font dialog so that everything lines up nicely and is visually separated.
Add the following XAML code below the row definitions you just added:
<Label Grid.Row="0" Grid.Column="0" Margin="10,10,0,0">Font</Label>
<Label Grid.Row="0" Grid.Column="1" Margin="10,10,0,0">Font style</Label>
<Label Grid.Row="0" Grid.Column="2" Margin="10,10,0,0">Size</Label>
If you’re curious, you can switch to the Design view (by clicking the Design button/tab at the bottom of the code window) and see how the UI is progressing as you go.

Now, we can add the second row, which consists of those three font-related list boxes and, eventually, the OK and Cancel buttons. Add the following XAML below the three labels you just added:
<ListBox Grid.Row="1" Grid.Column="0" Name="FontList" Margin="10,0,0,0" />
<ListBox Grid.Row="1" Grid.Column="1" Name="FontStyleList" Margin="10,0,0,0" />
<ListBox Grid.Row="1" Grid.Column="2" Name="FontSizeList" Margin="10,0,10,0" />
And, again, peek at the Design view to see how it’s all lining up.

For the two buttons, we need to add another panel so that they line up vertically. There are probably many ways to do this, but I used a StackPanel, since it seems especially well-suited to this kind of layout. So add the following XAML code below the list boxes:
<StackPanel Grid.Row="1" Grid.Column="3" Orientation="Vertical">
    <Button Name="OKButton" Margin="0,0,10,10" Padding="10" Height="Auto" VerticalAlignment="Top" Content="OK" />
    <Button Name="CancelButton" Margin="0,0,10,10" Padding="10" Height="Auto" VerticalAlignment="Top" Content="Cancel"/>
</StackPanel>

The next two rows include a sample text label and the sample text itself. So add the following code below the list box definitions:
<Label Grid.Row="2" Grid.ColumnSpan="4" Margin="10,10,0,0">Sample</Label>
<Label Grid.Row="3" Grid.ColumnSpan="4" Name="SampleLabel" Padding="10" VerticalAlignment="Top" HorizontalAlignment="Center">AaBbYyZz</Label>
And, again, check out Design view to see how it looks.

Later, we’re going to dynamically adjust the look of that sample text based on the font used by the application and configured in this dialog. But for now, it might help just to see how that sample text will change by hard-coding some values. So change that second label you just added to look like so:
<Label Grid.Row="3" Grid.ColumnSpan="4" Name="SampleLabel" Padding="10" VerticalAlignment="Top" HorizontalAlignment="Center"
       FontFamily="Consolas"
       FontStyle="Normal"
       FontSize="72"
       >AaBbYyZz</Label>
And, again, check the Design view to see the change.
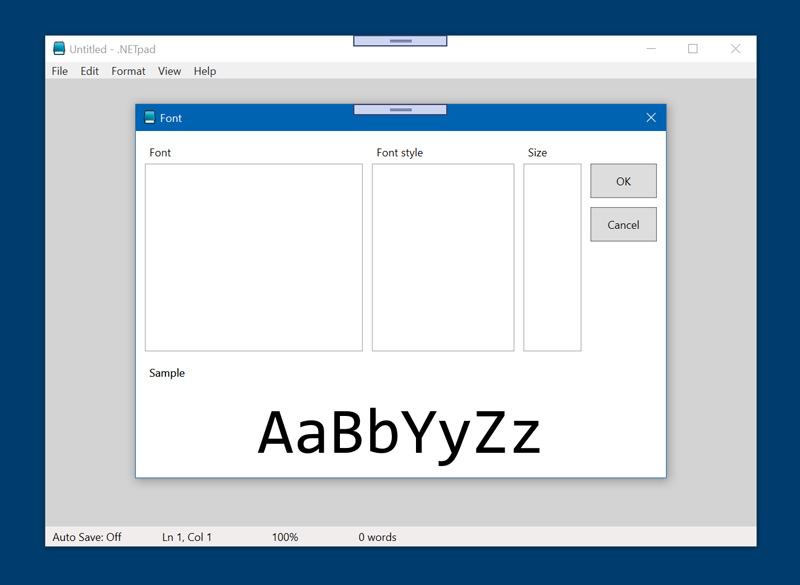
You can also run the application to get a feel for how it looks over the main application window.
Open FontDialog.xaml.cs. At the top of the file, you’ll see a lot of grayed-out lines in the using section. Hover over that and choose “Remove unnecessary usings” from the pop-up help that appears.
Next, let’s add a line of code to the Font dialog’s constructor—FontDialog()—that styles the background of the Font dialog to be a less stark and more natural color (than white). There are probably many ways to do that, but here I’m using the system control color, which is a light gray by default. Add this code below InitializeComponent(); in the constructor:
// Set the window background color
SetResourceReference(BackgroundProperty, SystemColors.ControlBrushKey);
You can see the change by running the application.
Much better.
Before continuing, let’s get rid of the hard-coded sample text font configuration. In FontDialog.xaml, find the SampleLabel tag and replace it with the original version:
<Label Name="SampleLabel" Grid.Row="3" Grid.ColumnSpan="4" Padding="10" VerticalAlignment="Top" HorizontalAlignment="Center">AaBbYyZz</Label>
OK, now for the hard stuff. When the Font dialog appears, we need to populate the three font-related list boxes with the appropriate values, select the choice in each that matches the font the application is using, and then display the sample font using those values as well. Let’s start by blocking that all out with comments. Add the following comments below the line of code you just wrote:
// Set the correct font properties for the sample text

// Populate the Font list box

// Populate the Font Style list box

// Populate the Font Size list box

// Select the correct font name in the Font list box

// Select the correct font style in the Font style list box

// Select the correct font size in the Size list box

// Set the focus to the Font list box
Setting the sample text font properties is straightforward, as we’ve done this kind of thing before. So add the following code under that first comment:
string fontName = Settings.Default.MyFontFamily;
SampleLabel.FontFamily = new System.Windows.Media.FontFamily(fontName);
SampleLabel.FontSize = Settings.Default.MyFontSize;
if (Settings.Default.MyFontBold)
    SampleLabel.FontWeight = FontWeights.Bold;
else
    SampleLabel.FontWeight = FontWeights.Normal;
if (Settings.Default.MyFontItalic)
    SampleLabel.FontStyle = FontStyles.Italic;
else
    SampleLabel.FontStyle = FontStyles.Normal;
The second task here, populating the Font list box, can be done automatically using a WPF feature called data binding to populate the first list box with a collection that contains all of the fonts on the PC automatically. Impressively, this can be done in the XAML file, so it doesn’t require any C# code. Switch to FontDialog.xaml and locate the definition for the FontList list box. Add the ItemsSource property shown below:
<ListBox Name="FontList" Grid.Row="1" Grid.Column="0" ItemsSource="{x:Static Fonts.SystemFontFamilies}" Margin="10,0,0,0" />
This change shows up in the designer, too, but you can get a better feel for it by running the application.
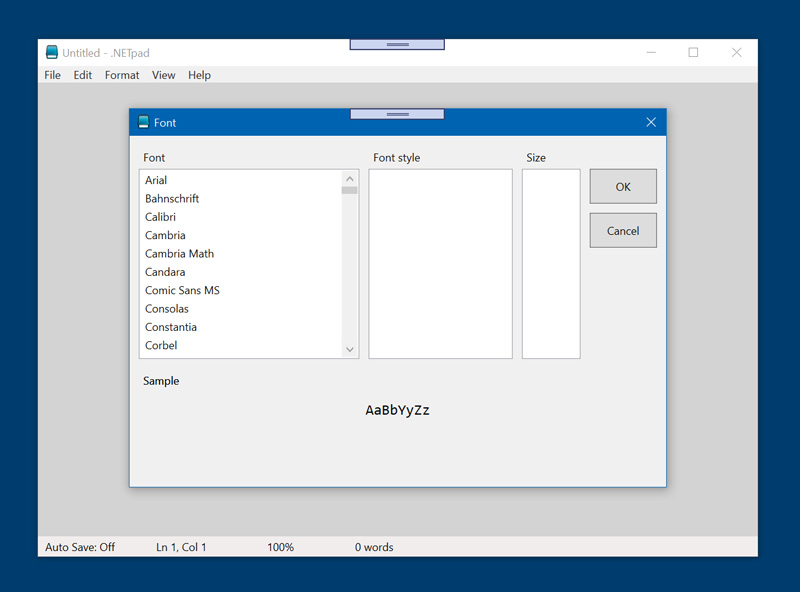
Pretty cool, right?
Since we don’t need to write any C# code to populate that list, we can delete the comment to that effect (it reads as // Populate Font Style list box) and move on to the next task, which is populating the Font style list box.
We can’t auto-populate Font Style (or Size) using a system data binding. But we can still populate both using data binding. In these cases, we’ll create lists—one for the font style and one for the size and then bind those lists to the appropriate list boxes.
In FontDialog.xaml, add ItemsSource=”{Binding}” to the FontStyleList and FontSizeList list box definitions. They should look something like this when you’re done:
<ListBox Name="FontStyleList" Grid.Row="1" Grid.Column="1" ItemsSource="{Binding}" Margin="10,0,0,0" />
<ListBox Name="FontSizeList" Grid.Row="1" Grid.Column="2" ItemsSource="{Binding}" Margin="10,0,10,0" />
Now, in FontDialog.xaml.cs, let’s add the code we need to create a list of font styles and then bind that to FontStyleList. Do so under the comment that reads // Populate Font Style list box:
List<string> fontStyle = new List<string>
{
    "Normal", "Italic", "Bold", "Bold Italic"
};
FontStyleList.DataContext = fontStyle;
The List keyboard will throw up a warning, so you’ll need to add System.Collections.Generic to the using section as prompted.
Now, we’ll make a similar list for the font sizes and bind that to FontSizeList. Add this code below the comment // Populate Font Size list box:
List<double> fontSize = new List<double>
{
    8,9,10,11,12,14,16,18,20,22,24,26,28,36,48,72
};
FontSizeList.DataContext = fontSize;
Run the application so you can see that the Font dialog is starting to come together.

Next, we have to select the correct font name, font style, and font size in each of the text boxes. That is, if you haven’t changed the default font used by the application, “Consolas” should be selected in the first list box, “Normal” should be selected in the second, and “16” should be selected in the third. Since the selected item could be below the viewable area of the list box, we will also need to scroll down to that item so that it is visible.
Selecting the correct font name and font size is straightforward: We can use a simple for loop in each case. But the middle instance, for font style, is complicated because WPF splits the style into two objects, FontWeight and FontStyle. So we’ll just work around that.
First, let’s select the correct font name. Here’s the code:
for (int x = 0; x <= Fonts.SystemFontFamilies.Count; x++)
    if (FontList.Items[x].ToString() == SampleLabel.FontFamily.ToString())
    {
        FontList.SelectedItem = FontList.Items[x];
        FontList.ScrollIntoView(FontList.Items[x]);
        break;
    }
The Fonts keyboard will trigger a warning, so be sure to add System.Windows.Media to the using section as prompted. Then, run the app to see that the correct font is selected in the first list box.

Pretty neat.
OK, let’s move on to the font style. As noted, we need to navigate between two different font objects—FontWeight and FontStyle—to map the user’s style choice correctly. The resulting code is, yes, amateurish looking, but after trying and failing with more sophisticated code blocks, I caved because this just works. I know.
if (SampleLabel.FontStyle == FontStyles.Normal)
    FontStyleList.SelectedIndex = 0;
if (SampleLabel.FontStyle == FontStyles.Italic)
    FontStyleList.SelectedIndex = 1;
if (SampleLabel.FontWeight == FontWeights.Bold)
    FontStyleList.SelectedIndex = 2;
if (SampleLabel.FontWeight == FontWeights.Bold && SampleLabel.FontStyle == FontStyles.Italic)
    FontStyleList.SelectedIndex = 3;
Next, we can handle the font size more elegantly:
for (int x = 0; x < fontSize.Count; x++)
if (fontSize[x].ToString() == SampleLabel.FontSize.ToString())
{
    FontSizeList.SelectedIndex = x;
    FontSizeList.ScrollIntoView(fontSize[x]);
    break;
}
Finally, add this one line of code to put the focus in the font name list box when the window appears:
FontList.Focus();
Now run the app, and voila! Looking good.

Before getting to the OK and Close button Click event handlers, there is one more thing to do: We need to handle the events that occur when the user selects a new font, font style, or size in the Font dialog’s various list boxes. Those changes need to be applied to the sample text so that the user can preview the changes before accepting them. We will do so using a SelectionChanged event handle for each.
To get started, open FontDialog.xaml and locate the three list box definitions in the XAML. In turn, select each, display events in the Properties pane, and then double-click next to SelectionChanged. When you’re done, you’ll have three empty SelectionChanged event handlers in FontDialog.xaml.cs:

FontList_SelectionChanged is straightforward: Just add the following code to that event handler:
string fontName = FontList.SelectedItem.ToString();
SampleLabel.FontFamily = new System.Windows.Media.FontFamily(fontName);
Likewise, FontSizeList_SelectionChanged, the third of our new event handlers, is likewise simple. Here’s the code:
string size = FontSizeList.SelectedItem.ToString();
SampleLabel.FontSize = Convert.ToDouble(size);
(The Convert keyword will trigger a warning, so be sure to add System to the using section as prompted.)
FontStyleList_SelectionChanged requires a lot more code thanks to Microsoft splitting FontWeight and FontStyle into two different classes. But that’s OK, the code is still easily understood. Add this to the FontStyleList_SelectionChanged event handler:
switch (FontStyleList.SelectedItem.ToString())
{
    case "Normal":
        SampleLabel.FontStyle = FontStyles.Normal;
        SampleLabel.FontWeight = FontWeights.Normal;
        break;
    case "Italic":
        SampleLabel.FontStyle = FontStyles.Italic;
        SampleLabel.FontWeight = FontWeights.Normal;
        break;
    case "Bold":
        SampleLabel.FontStyle = FontStyles.Normal;
        SampleLabel.FontWeight = FontWeights.Bold;
        break;
    case "Bold Italic":
        SampleLabel.FontStyle = FontStyles.Italic;
        SampleLabel.FontWeight = FontWeights.Bold;
        break;
}
Run the application and play around with the font name, style, and size items to see how they impact the sample text.

We’re getting close. All that’s left is to code the Click event handlers for the OK and Cancel buttons so that we can actually save the chosen font configuration and use it in the app’s textbox. As always, you need to select each button in turn in the XAML file, switch the Properties pane to the Events list, and then double-click next to Click. When you’re done, you will have two empty Click event handlers in FontDialog.xaml.cs.
private void OKButton_Click(object sender, RoutedEventArgs e)
{

}

private void CancelButton_Click(object sender, RoutedEventArgs e)
{

}
Now, let’s code those button event handlers. Cancel is the easiest: In this case, we’re not applying any font changes, so we can return “false” as the result of the dialog and close the window. Add the following code to CancelButton_Click:
this.DialogResult = false;
this.Close();
The OK button code isn’t complex but it’s a bit more involved, so I added some comments. Add the following code inside OKButton_Click:
// Copy FontFamily to settings
Settings.Default.MyFontFamily = SampleLabel.FontFamily.ToString();

// Copy FontSize to settings
Settings.Default.MyFontSize = SampleLabel.FontSize;

// Copy FontWeight to settings
if (SampleLabel.FontWeight == FontWeights.Bold)
    Settings.Default.MyFontBold = true;
else
    Settings.Default.MyFontBold = false;

// Copy FontStyle to settings
if (SampleLabel.FontStyle == FontStyles.Italic)
    Settings.Default.MyFontItalic = true;
else
    Settings.Default.MyFontItalic = false;

this.DialogResult = true;
this.Close();
And that should do it. Be sure to test this functionality thoroughly.

Gain unlimited access to Premium articles.
With technology shaping our everyday lives, how could we not dig deeper?
Thurrott Premium delivers an honest and thorough perspective about the technologies we use and rely on everyday. Discover deeper content as a Premium member.