The WPF Notepad Project: App Scaling (Premium)
- Paul Thurrott
- May 04, 2020
-
0

It’s been a while since I’ve updated the Windows Presentation Foundation (WPF) version of .NETpad, but this is something I’ve been thinking about for a long time: The ability to scale the entire app’s user interface up or down according to the user’s wishes.
In fact, I worked on this feature on and off for a while but never really found a suitable solution. The problem, I think, is that I was going about it wrong: Instead of trying to scale the entire application, I was just trying to scale the menu at the top and the status bar on the bottom, leaving the textbox between them unchanged. But if you just scale the entire thing, it works.
The impetus for this feature, oddly enough, is the Universal Windows Platform (UWP) version of .NETpad. UWP apps tend to have larger UI elements than traditional desktop apps because of the platform’s touch-first mobile origins. And while the UWP version of .NETpad is/was challenging and frustrating in many ways, I have grown to really like the look of slightly larger UIs. I figured this would be a good look for the WPF version of the app, too.
In the future, we may be able to use WinUI 3 to port the UWP user interface over to WPF. (Though I’m not sure I want to do that.) But in the meantime, retaining the legacy menu-based UI in the WPF version while adding a scaling option seems like a nice interim step.
The solution I’m providing here is not my own, at least not for the most part. Instead, I’m leaning on the expertise of Jacob Johnston, who solved this problem on his Inchoate Thoughts website almost a decade ago. So I’ve taken his code and adapted it to my needs.
To get started, dust off your Visual Studio project for the WPF version of .NETpad and open MainWindow.xaml, which contains the XAML code that defines our app’s user interface. At the very top, you should see some attributes related to the Height and Width of the Window, which we’ve named AppWindow. We’re going to make the default Width of the app a bit bigger than before (I think the original value was 400) and define minimum Height and Width values. So the relevant line should be replaced with this:
Title="Untitled - .NETpad" Height="600" Width="800" MinHeight="600" MinWidth="800"
Next, as Mr. Johnston describes, we need to apply a LayoutTransform to the Grid that defines our UI at a high level. And that grid will need a name now. So locate the line that currently reads as <Grid> and change it to:
<Grid Name="MainGrid">
Then, open up space right below there, and right above the <Grid.RowDefinitions> tag and add the following:
<Grid.LayoutTransform>
    <ScaleTransform x:Name="ApplicationScaleTransform"
                CenterX="0"
                CenterY="0"
                ScaleX="{Binding ElementName=AppWindow, Path=ScaleValue}"
                ScaleY="{Binding ElementName=AppWindow, Path=ScaleValue}" />
    </Grid.LayoutTransform>
Those references to ScaleValue will each have a red squiggly under them, but we’ll be create a property with that name soon that will clear that right up.
Next, we need to create some menu-based commands that will let the user configure the scaling. There are lots of ways to do this, but I’m creating a sub-menu off of View with four choices. So scroll down to the definition of StatusBarMenu and create space right above it (and right below the block of XAML for the Zoom submenu). Then, add the following code:
<MenuItem Header="App S_caling">
    <MenuItem Header="100% (Default)" Name="Scale100Menu" IsChecked="True" />
    <MenuItem Header="125%" Name="Scale125Menu" IsChecked="False" />
    <MenuItem Header="150%" Name="Scale150Menu" IsChecked="False" />
    <MenuItem Header="175%" Name="Scale175Menu" IsChecked="False" />
</MenuItem>
(You can obviously edit this however you want, if you prefer different scaling values.)
Now, create Click event handlers for each of the four scaling choices. (As you will recall, there are a few ways to do that, but the easiest I’ve found is to select each line in turn, switch the Properties pane to the Events list, and then double-click the textbox next to Click.) We’ll add the code for those event handlers later. For now, let’s turn to the set of custom methods created by Jacob Johnston, which we’ll add to MainWindow.xaml.cs. Only one of them needs to be changed in any way.
At the top of MainWindow.xaml.cs, we define a top set of four global variables, as I call them: TextHasChanged, DocumentName, ZoomValue, and MasterFontSize. We need to add a fifth, for the scaling functionality:
double Scale;
Below the rest of the global variables (the bottom one should be Timer1), we need to add most of the code that Johnston created:
// For app scaling
// from inchoatethoughts.com/scaling-your-user-interface-in-a-wpf-application
#region ScaleValue Dependency Property
public static readonly DependencyProperty ScaleValueProperty = DependencyProperty.Register("ScaleValue", typeof(double), typeof(MainWindow), new UIPropertyMetadata(1.0, new PropertyChangedCallback(OnScaleValueChanged), new CoerceValueCallback(OnCoerceScaleValue)));

private static object OnCoerceScaleValue(DependencyObject o, object value)
{
    MainWindow mainWindow = o as MainWindow;
    if (mainWindow != null)
        return mainWindow.OnCoerceScaleValue((double)value);
    else
    return value;
}

private static void OnScaleValueChanged(DependencyObject o, DependencyPropertyChangedEventArgs e)
{
    MainWindow mainWindow = o as MainWindow;
    if (mainWindow != null)
        mainWindow.OnScaleValueChanged((double)e.OldValue, (double)e.NewValue);
}

protected virtual double OnCoerceScaleValue(double value)
{
    if (double.IsNaN(value))
        return 1.0d;
    value = Math.Max(0.1, value);
    return value;
}

protected virtual void OnScaleValueChanged(double oldValue, double newValue)
{

}

public double ScaleValue
{
    get
    {
        return (double)GetValue(ScaleValueProperty);
    }
    set
    {
        SetValue(ScaleValueProperty, value);
    }
}
#endregion
Johnston’s original code changes the scaling dynamically as the app window is resized: The bigger it gets, the bigger the app’s UI gets, and vice versa. But I don’t want that. Instead, we’re going to manually set the scaling to specific values. So I’ve replaced his CalculateScale() method with a new method, which you should add right below that #endregion bit:
private void CalculateAppScale(double scale)
{
    double value = Math.Min(scale, scale);
    ScaleValue = (double)OnCoerceScaleValue(MainGrid, value);
}
OK, jump down to the bottom of MainWindow.xaml.cs, where you will find the four empty Click event handlers we added earlier. In each case, we’re going to set our global variable Scale to a particular value (where 1 equals 100 percent scale, 1.25 equals 125 percent scale, and so on), pass that value to CalculateAppScale() to change the app scaling, and then set the Checked property of the four scaling menu items accordingly. (I wish there was a more elegant way to do that, but I don’t see a way to group checkable menu items in WPF as you can with radio buttons.)
The code for Scale100Menu_Click() is:
Scale = 1;
CalculateAppScale(Scale);
Scale100Menu.IsChecked = true;
Scale125Menu.IsChecked = false;
Scale150Menu.IsChecked = false;
Scale175Menu.IsChecked = false;
The code for Scale125Menu_Click() is:
Scale = 1.25;
CalculateAppScale(Scale);
Scale100Menu.IsChecked = false;
Scale125Menu.IsChecked = true;
Scale150Menu.IsChecked = false;
Scale175Menu.IsChecked = false;
The code for Scale150Menu_Click() is:
Scale = 1.5;
CalculateAppScale(Scale);
Scale100Menu.IsChecked = false;
Scale125Menu.IsChecked = false;
Scale150Menu.IsChecked = true;
Scale175Menu.IsChecked = false;
The code for Scale175Menu_Click() is:
Scale = 1.75;
CalculateAppScale(Scale);
Scale100Menu.IsChecked = false;
Scale125Menu.IsChecked = false;
Scale150Menu.IsChecked = false;
Scale175Menu.IsChecked = true;
If you run the app now and choose a scaling value in the menu, you should see the user interface of the app scale accordingly.

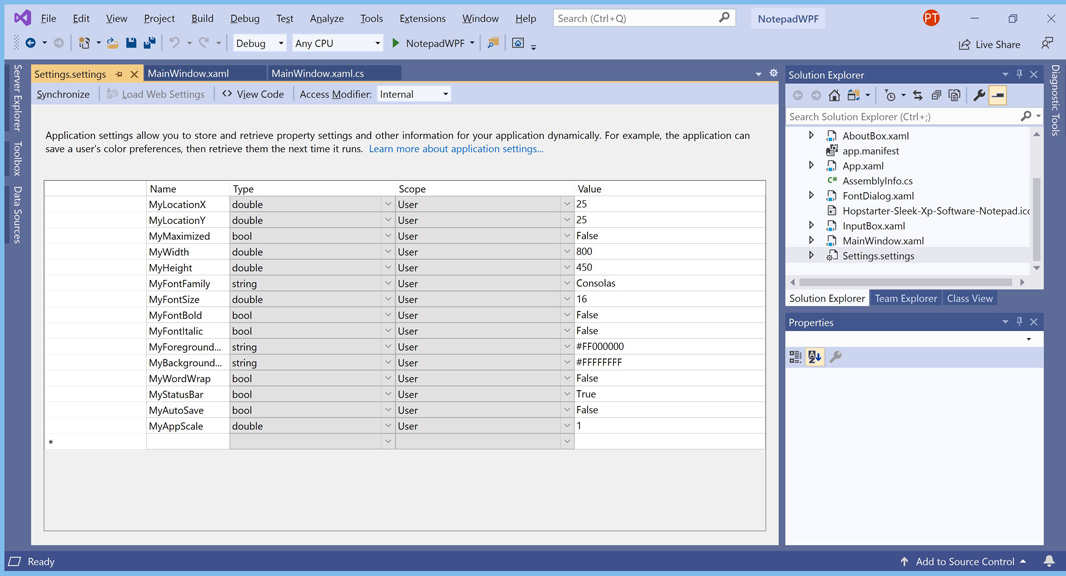
So that’s great. But we have to save this setting when the app closes and set the scaling accordingly when the app restarts. So let’s add a user setting. Open Settings.settings and add a new user setting:
Name: MyAppScale
Type: double
Scope: User
Value: 1
Next, locate AppWindow_Initialized() in MainWindow.xaml.cs. In this method, we read all of our user settings and configure the app accordingly. Right above the last lines of code in that method, where we make sure the text box is selected so the user can just start typing, add the following block of code:
// Get Scaling from settings
Scale = Settings.Default.MyAppScale;
CalculateAppScale(Scale);
Scale100Menu.IsChecked = false;
Scale125Menu.IsChecked = false;
Scale150Menu.IsChecked = false;
Scale175Menu.IsChecked = false;
switch (Scale)
{
    case 1:
        Scale100Menu.IsChecked = true;
        break;
    case 1.25:
        Scale125Menu.IsChecked = true;
        break;
    case 1.5:
        Scale150Menu.IsChecked = true;
        break;
    case 1.75:
        Scale175Menu.IsChecked = true;
    break;
}
And the last step, of course, is to ensure that we save the setting when the app closes. Locate SaveSettings() and scroll down to the bottom. Right above the line of code in which we save the settings, add:
// Save Scaling
Settings.Default.MyAppScale = Scale;
And that should do it.

Gain unlimited access to Premium articles.
With technology shaping our everyday lives, how could we not dig deeper?
Thurrott Premium delivers an honest and thorough perspective about the technologies we use and rely on everyday. Discover deeper content as a Premium member.