The UWP Notepad Project (Redux): File Open and Custom Dialogs (Premium)
- Paul Thurrott
- Jul 08, 2020
-
0
If you followed along with my series The UWP Files, you will recall that me coming to grips with asynchronous programming was a major stumbling block that required weeks of research and work on my part before I finally figured it out. But there was another problem, too. As it turns out, some of the issues I had experienced were related to the invisible firing of event handlers that I briefly mentioned in the previous installment in this series.
Well, I’d like to put all that behind me now. But before we can move forward, we need to briefly discuss asynchronous programming and how it’s used in the Universal Windows Platform (UWP). In previous frameworks—Windows Forms and the Windows Presentation Foundation (WPF)—the code we wrote always ran synchronously, which is to say in order from beginning to end. Consider the following pseudocode:
line of code;
doSomething();
another line of code;
When the doSomething() method is called, the next line of code (“another line of code”) won’t run until doSomething() completes executing.
But in asynchronous programming, it’s possible to run methods asynchronously. This means that that “another line of code” can execute before doSomething() completes executing. In interactive and graphical applications, this is desirable at times when synchronous code execution can cause the application to appear to hang or stall because it has to wait on some time-consuming operation to complete.
For our purposes, asynchronous programming is being forced on us: In UWP, the APIs for file operations and dialogs are implemented asynchronously. So we have to do things a bit differently.
For example, consider the following made-up code in which we have a method called DisplayMessageBox() that, well, displays a message box (which has been renamed to message dialog in UWP). If UWP allowed us to do this synchronously, like we would have in WinForms or WPF, that code might look like so:
private void DisplayMessageBox
{
    MessageDialog messageDialog = new MessageDialog("Hello!");
    messageDialog.Show();
}
But that’s not how UWP does things. Instead, this method in UWP would look something like this:
private async Task DisplayMessageBox
{
    MessageDialog messageDialog = new MessageDialog("Hello!");
    await messageDialog.ShowAsync();
}
There are several differences.
First, while you can return void on an asynchronous method, you should never do that unless you’re in an event handler (as with a button click or whatever). So we return a Task instead. This can be treated like void if you don’t need to do anything with it, but if the method does need to return a value, you can do so in the form of Task<T>—like Task<int> (or whatever)—and use the return keyword in the method to output the value need (int in this case).
Second, the async keyword indicates that we’re going to do something asynchronously inside the method. (That something is the ShowAsync method.)
Third, the await keyword indicates that whatever follows it—in this case, the displaying of the message box—can happen asynchronously but that code execution in DisplayMessageBox will suspend until it is done; in this case, execution will wait until the message box is closed somehow by the user. (You can only await an asynchronous method that returns a Task.)
Fourth and finally, Microsoft has renamed the message box’s Show method to ShowAsync as a matter of style only; this helps indicate to developers who access this API that the ShowAsync method is asynchronous. But it could have been named anything; the “Async” bit in the name was a choice not a requirement.
OK, let’s put this to use.
As a text editor, .NETpad needs to open and save files. So we need logic to determine whether the current document needs to be saved and, if so, whether it was previously saved or is a new document. In the latter case, and in other circumstances—like when the user has an unsaved document but tries to start a new document—we need to prompt the user about possibly saving it first. And then honor their choice accordingly.
We did this all before in the WinForms and WPF versions of this app, of course, and the UWP version will be similar. We will handle the Click events for the Open and Save command bar buttons. We will create a SavePrompt custom dialog. And we will create Save() and SaveAs() methods since the code they will contain will be called from multiple places (or, in response to multiple events, I guess.)
Let’s start with opening a file.
In MainPage.xaml, locate the definition of the OpenButton app bar button, and create a blank Click event handler. The first step is to define what UWP calls a FileOpenPicker, which is really just a File Open dialog now, though it was originally a Metro-style interface. Anyway, add the following code to OpenButton_Click:
// Display Open File dialog and let the user open a new document
FileOpenPicker fileOpenPicker = new FileOpenPicker
{
ViewMode = PickerViewMode.List
};
fileOpenPicker.FileTypeFilter.Add(".txt");
Since this is a file operation, we’ll build a try-catch block next so that any raised exceptions won’t crash the app. Add the following code:
try
{

}
catch (Exception ex)
{
    //
}
Now we can try to open the file that the user selects. This works similarly to file access in WinForms or WPF, but using UWP’s more modern asynchronous StorageFile APIs. Add the following code inside the try block:
StorageFile file = await fileOpenPicker.PickSingleFileAsync();
if (file != null)
{
    TextBox1.Text = await FileIO.ReadTextAsync(file);
}
Here, we see the await keyword for the first time. Actually, for the first two times. And the red squiggly line underneath indicates that we need to add the async keyword to the OpenButton_Click method as well. It goes before the return type, which is void, and is OK only because this is an event handler. (Otherwise, you would typically return a Task.) In other words, that method definition should now start like this:
private async void OpenButton_Click(object sender, RoutedEventArgs e)
As we did in earlier versions of the app, we’ll display a message box—sorry, a MessageDialog—if there’s an exception. And as noted up top, you call ShowAsync, an asynchronous method, to display it. So add the following code inside the catch block (replacing the two comment characters):
MessageDialog messageDialog = new MessageDialog(ex.Message);
await messageDialog.ShowAsync();
OK, it’s moment of truth time. Run the app and click the Open button. A File Open dialog will appear.

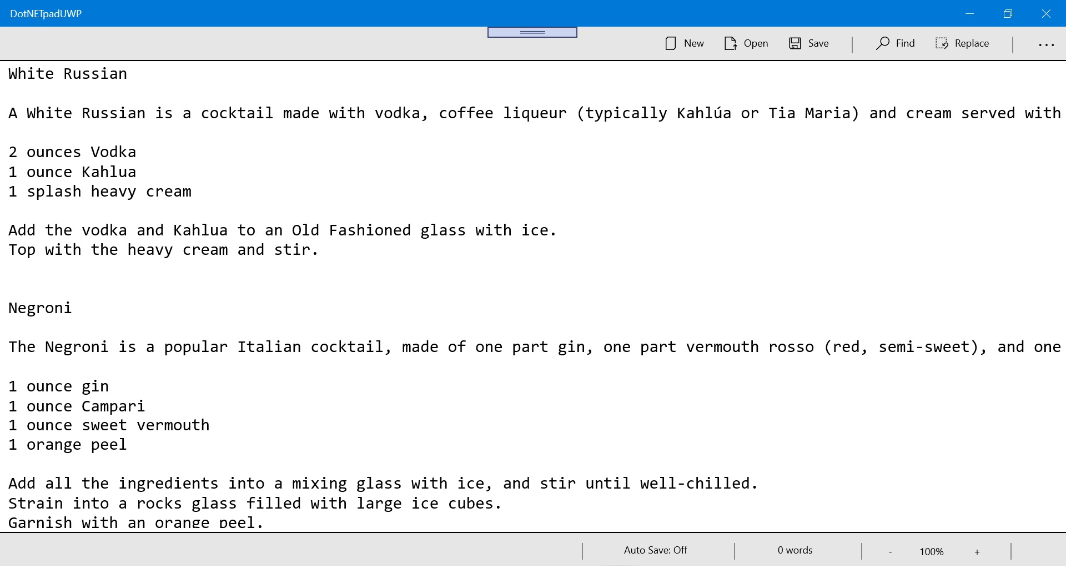
Now, navigate to a text file and open it. The file should display its contents in the app’s text box.
So far so good. But before we proceed with save file operations, I think it’s time to start adding some functionality related to the state of the currently-loaded document. We need to add some global variables to indicate whether the text has changed (and thus needs to be saved), the document name, and the application name so we can construct some title bar text that makes sense.
In MainPage.xaml.cs, scroll up to the top and find the global variables we added for the font and non-font settings. Below that, add the following:
// For the textbox
public bool TextHasChanged = false;
public string DocumentName = "";

// For the title bar
string AppName = ApplicationView.GetForCurrentView().Title;
Next, locate Page_Loading(). Right now, it contains only a call to ReadSettings(). Above that, add the following code:
// Display default title bar text
ApplicationView.GetForCurrentView().Title = "Untitled" + AppName;
And since we’re here, also add the following below the ReadSetting() call to ensure that the textbox has the focus when the application starts and the user can just start typing:
// Focus the textbox
TextBox1.Focus(FocusState.Programmatic);
OK, with that out of the way, let’s go back to OpenButton_Click(). We need to add some more code to the if clause inside the try block that updates the application’s title bar, the value of TextHasChanged, and the DocumentName:
ApplicationView.GetForCurrentView().Title = file.DisplayName + AppName;
TextHasChanged = false;
DocumentName = file.DisplayName;
Now, run the application. When it appears, the title bar will read as “Untitled – DotNetpadUWP.”

And when you open a file, that title bar text will change to indicate the opened file:

At this point, OpenButton_Click appears to be almost done. But there are two more things to do. First, we need to add a keyboard shortcut to the Open button so that typing CTRL + O also opens that File Open dialog. And second, we need to make sure that there isn’t an unsaved document already loaded in .NETpad when the user tries to open a new file. If there is, we will open a Save prompt to give them the option of saving it first.
The keyboard shortcut is much easier to implement, so let’s do that first.
As you may recall, adding a keyboard shortcut to a command in WPF was either really easy—for built-in commands like Open and New—or really tedious. Fortunately, this was fixed in UWP: It’s always easy, and you can do it right from XAML. So switch over to MainPage.xaml.cs and locate the OpenFile tag, which currently looks like so:
<AppBarButton Icon="OpenFile" Label="Open" Name="OpenButton" Click="OpenButton_Click" />
That “/>” bit at the end is used to close the tag. But you could also rewrite the tag with a separate end tag. So edit it to look like so:
<AppBarButton Icon="OpenFile" Label="Open" Name="OpenButton" Click="OpenButton_Click">
</AppBarButton>
This is necessary when you need to contain another tag (or tags) representing another item (or items) within the current tag. And we need to do this to add one or more keyboard accelerators—i.e. keyboard shortcuts—to OpenFile. So add the following XAML between OpenFile’s beginning and ending tags:
<AppBarButton.KeyboardAccelerators><KeyboardAccelerator Modifiers="Control" Key="O" /></AppBarButton.KeyboardAccelerators>
When you do so, Visual Studio will automatically expand the code to appear on multiple lines as shown here:

I don’t happen to like this style because it makes the XAML file long to read once you’ve made similar additions to the other controls (as we will over time). And while Visual Studio will fight it, I prefer to put the entire OpenFile tag, including its contained keyboard accelerator, on a single line like this:
<AppBarButton Icon="OpenFile" Label="Open" Name="OpenButton" Click="OpenButton_Click"><AppBarButton.KeyboardAccelerators><KeyboardAccelerator Modifiers="Control" Key="O" /></AppBarButton.KeyboardAccelerators></AppBarButton>
When I add keyboard accelerators going forward, you’ll see this single line style. But you can, of course, format your own XAML as you prefer.
Anyway. When you run the app now, typing CTRL + O will display the Open File dialog like God intended.
Next, we will create our custom Save Prompt dialog. In WPF, this kind of thing would occur in a separate set of files, a XAML file that defined the user interface and a C# code-behind file for any associated event handlers and other code. I assume this is still possible in UWP, but I’ve instead implemented all of the custom dialogs inside of MainPage.xaml. This adds a few complexities during design time, but I like the way it works.
The question is, where to put it?
MainPage.xaml currently has this rough structure:
<Page>
    <SplitView Name="SettingsPane">
        <Grid>
            <CommandBar Name="MainCommandBar" />
            <TextBox Name="TextBox1" />
            <StackPanel Name="StatusBar" />
                <CommandBar />
            </StackPanel>
        </Grid>
        <SplitView.Pane>
            <ScrollViewer>
                <StackPanel>
                     <!-- Settings pane here -->
                </StackPanel>
            </ScrollViewer>
        </SplitView.Pane>
    </SplitView>
</Page>
We put the XAML for the Settings pane at the bottom of the file, mostly just to get it out of the way. And we could likewise implement the Save prompt in a variety of places, since it will only appear on screen when summoned. I believe it has to appear within the <Grid> and </Grid> tags, but regardless I’ve placed it right before the ending Grid tag (</Grid>). So find that tag and open up a line before it, and right below the ending StackPanel tag for the status bar (</StackPanel>).
Then, add the following code:
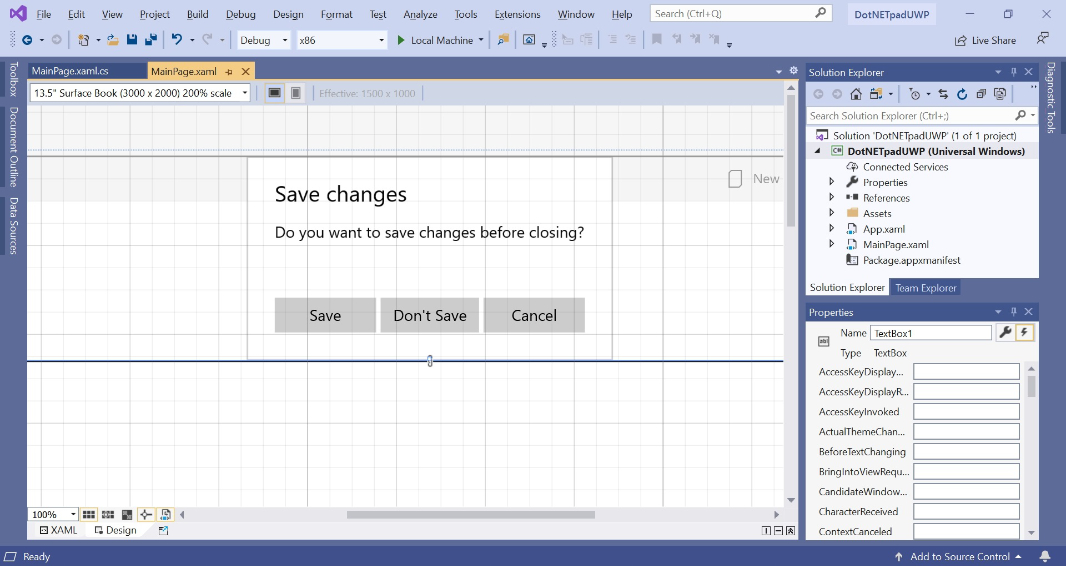
<ContentDialog x:Name="SavePrompt"
                       Title="Save changes"
                       Content="Do you want to save changes before closing?"
                       PrimaryButtonText="Save"
                       SecondaryButtonText="Don't Save"
                       CloseButtonText="Cancel">
</ContentDialog>
It should look like this in your XAML code:

The XAML for the Save Prompt couldn’t be easier. I’m using a ContentDialog, which is new to UWP and is very versatile. You can get a preview of how it will look by switching to Design view.
OK, let’s go back MainPage.xaml.cs. We’re going to write a custom method called DisplaySavePrompt() that will determine whether the Save prompt needs to be displayed and then behaves accordingly and returns a Boolean value, which is true if the user selects “Save” or “Don’t Save” but false if they select “Cancel.” Then, we will call this method from OpenButton_Click() and, eventually, some other button click event handlers as well.
Under OpenButton_Click(), make some space and add the beginnings of a new custom (and async) method like so:
private async Task<bool> DisplaySavePrompt()
{

}
(You’ll see red squigglies under most of that because we haven’t added an await operator somewhere inside there yet.)
DisplaySavePrompt() needs to make two checks in turn, to see whether TextHasChanged is true and whether DocumentName is blank. If TextHasChanged is false, it doesn’t matter if the document is new or a previously-saved file; there’s nothing to save, so there’s no need to even display the Save prompt.
But if TextHasChanged is true, something needs to be saved; if DocumentName is blank, then we need to do a SaveAs() (which we’ll be writing eventually.) If TextHasChanged is true and DocumentName is not blank, then we simply save the file that was already saved, using a Save() method, overwriting it.
The basic form of those checks looks like so and can be added to the DisplaySavePrompt() method:
// Determines whether the document needs to be saved
// Displays the Save prompt or Save As dialog as needed
// And returns true unless the user selects Cancel

if (TextHasChanged == true)
{
    if (DocumentName.Length == 0)
    {
        // In this case, it's a new document
        // Display the Save prompt
        // Do a SaveAs() if the user chooses Save
    }
    else
    {
        // In this case, it's a previously-saved document
        // Display the Save prompt
        // Do a Save() if the user chooses Save
    }
}
return true;
We need to display the Save prompt in the if clause and in the else clause. In each case, I’m using a switch statement to take the correct action based on what the user chooses and then returning a Boolean value. (It’s only false when the user cancels out of the Save prompt, which will ultimately cancel the execution of whatever event handler calls this method.)
Add the following code under the comments in the if clause:
ContentDialogResult result = await SavePrompt.ShowAsync();
switch (result)
{
    case ContentDialogResult.Primary:
        await SaveAs();
        break;
    case ContentDialogResult.Secondary:
        // Don't save
        break;
    case ContentDialogResult.None:
        // Cancel everything
        return false;
}
Then, add the exact same code to the else clause, but replace SaveAs() with Save().
Save and SaveAs() don’t yet exist, so you’ll see red squigglies under those references. For now, let’s just add the empty methods below DisplaySavePrompt():
private async Task Save()
{

}

private async Task SaveAs()
{

}
OK, let’s look at OpenButton_Click() again. We need to make two changes.
First, we need to make the local variable file a global variable, since we’re going to need this object when we go to later save the file it represents. So find the line that current reads:
StorageFile file = await fileOpenPicker.PickSingleFileAsync();
And remove the StorageFile bit at the beginning so it looks like so:
file = await fileOpenPicker.PickSingleFileAsync();
Now, scroll up to the long list of global variables we create at the beginning of the MainPage definition and add:
// For file operations
StorageFile file;
Then, return to OpenButton_Click(). The second change is to wrap all of the code that’s already inside that event handler with the following:
bool result = await DisplaySavePrompt();
if (result == true)
{
    // existing code in the method goes here
}
In other words, the code we already wrote for OpenButton_Click() will only execute if the DisplaySavePrompt() method returns a true value.
Finally, we need to write some code that will change TextHasChanged to true. Otherwise, that Save prompt will never display. As you may recall, in the WinForms and WPF versions of the app, we performed the most basic of tests in the text box’s TextChanged event handler. And so we’ll do the same here.
Find the TextBox1 tag in MainPage.xaml.cs and create a blank TextChanged event handler. Then, add the following code, which will change TextHasChanged to true when needed plus implement the Word Count feature.
if (TextHasChanged == false)
    if (TextBox1.FocusState == FocusState.Keyboard | TextBox1.FocusState == FocusState.Pointer)
        TextHasChanged = true;
    int Count = System.Text.RegularExpressions.Regex.Matches(TextBox1.Text, @"[\S]+").Count;
    WordCountButton.Content = Count.ToString() + " word";
    if (Count != 1)
        WordCountButton.Content += "s";
You may be curious about the extra FocusState checks at the top. This is workaround for a weirdism in UWP where TextHasChanged would for some reason be true after opening a file; the idea is to make sure that the value is only changed when the user interacts with the text box.
Now we can finally see the Save prompt in action. Run the application and test it. There are two key tests: You make any change to the blank untitled (and unsaved document) and click Open. And you open a File, make any change, and then click Open again. In both cases, the Save prompt should appear.
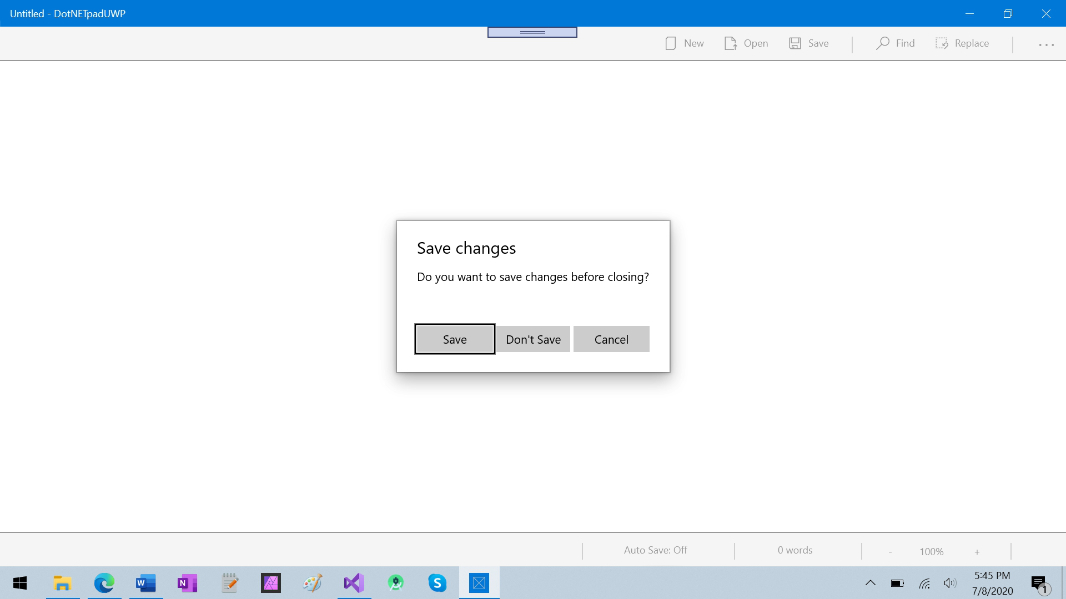
In either case, if you click Save, then the Open File dialog appears; we haven’t written Save() or SaveAs() yet. If you click Don’t Save, the Open File dialog appears. And if you click Cancel, you just return to the app and no Open File dialog appears.
Oh, and Word Count works.
We covered a lot of ground here, so we’ll handle the rest of the app’s file operations—via Save(), SaveAs(), and the Click event handler for SaveButton, next time.
More soon.

Gain unlimited access to Premium articles.
With technology shaping our everyday lives, how could we not dig deeper?
Thurrott Premium delivers an honest and thorough perspective about the technologies we use and rely on everyday. Discover deeper content as a Premium member.