The UWP Notepad Project (Redux): New, Save, and Save As (Premium)
- Paul Thurrott
- Jul 08, 2020
-
0
With File Open and the Save prompt out of the way, we can move forward to the other app commands that involve file operations. This includes the New button, which needs to perform the same checks as we did with File Open, and the Save button, which will call our now-empty Save() or SaveAs() methods as needed.
Let’s start with the New button.
As with the Open button, we can’t just reset everything and present a new empty document to the user; we need to make sure that there isn’t something that needs to be saved first. And that means we can simply use the same basic code structure that we created for OpenButton_Click in NewButton_Click. But NewButton_Click doesn’t exist yet, so create that now. (I assume you know how by now.)
In NewButton_Click, let’s add that same check we used in OpenButton_Click:
private async void NewButton_Click(object sender, RoutedEventArgs e)
{
    bool result = await DisplaySavePrompt();
    if (result == true)
    {

    }
}
Note that you’ll need to add the async keyword to the top line as shown since we’re using await inside the event handler.
DisplaySavePrompt() determines whether anything needs to be saved. If so, it prompts the user accordingly. If the user chooses “Save” or “Don’t Save,” it returns true, indicating that we can move forward. But if they choose “Cancel,” it returns false, so we don’t do anything, essentially ignoring the original “New” request. If nothing needs to be saved, DisplaySavePrompt() also returns new, so we can move forward.
Inside of that if block, we just need to add some code that resets a few global variables to their default values and changes the app title bar text accordingly. So add the following there and try not to freak out about my inconsistent variable naming style as I just did:
TextBox1.Text = "";
file = null;
TextHasChanged = false;
DocumentName = "";
ApplicationView.GetForCurrentView().Title = "Untitled" + AppName;
We also need to add the CTRL + N keyboard shortcut to the New button. So open MainPage.xaml, locate the NewButton tag, and edit it as we did earlier for OpenButton to include a similar set of keyboard accelerator tags. When you done, the whole line will look like so:
<AppBarButton Icon="Document" Label="New" Name="NewButton" Click="NewButton_Click"><AppBarButton.KeyboardAccelerators><KeyboardAccelerator Modifiers="Control" Key="N" /></AppBarButton.KeyboardAccelerators></AppBarButton>
You can run and test this now, by making a change to a blank document and clicking New, or by opening a document and making a change and then clicking new (or typing CTRL + N). The goal is to display the Save prompt when it’s necessary; remember that DisplaySavePrompt() calls Save() or SaveAs() as needed, but we haven’t written those methods yet, so nothing will actually be saved yet.
OK, let’s head on to the Save button next.
First, create SaveButton_Click. When the user explicitly clicks Save, we should just save the document, even if there’s nothing new to save. After all, they may want to save new blank document before writing. So the check is pretty simple.
Modify SaveButton_Click() as shown here, including that async keyword:
private async void SaveButton_Click(object sender, RoutedEventArgs e)
{
    if (DocumentName.Length == 0)
        await SaveAs();
    else
        await Save();
}
If there’s no saved document, we do a SaveAs(). If there is, we do a Save().
Next, be sure to add the keyboard shortcut for CTRL + S in MainPage.xaml.cs too:
<AppBarButton Icon="Save" Label="Save" Name="SaveButton" Click="SaveButton_Click"><AppBarButton.KeyboardAccelerators><KeyboardAccelerator Modifiers="Control" Key="S" /></AppBarButton.KeyboardAccelerators></AppBarButton>
OK, let’s move on to the actual save file operations, starting with Save(). This one is easy because this method is only called when we know we have an existing file, so we just need to wrap the file operation in a try-catch block like so:
try
{
    await FileIO.WriteTextAsync(file, TextBox1.Text);
}
catch (Exception ex)
{
    MessageDialog messageDialog = new MessageDialog(ex.Message);
    await messageDialog.ShowAsync();
}
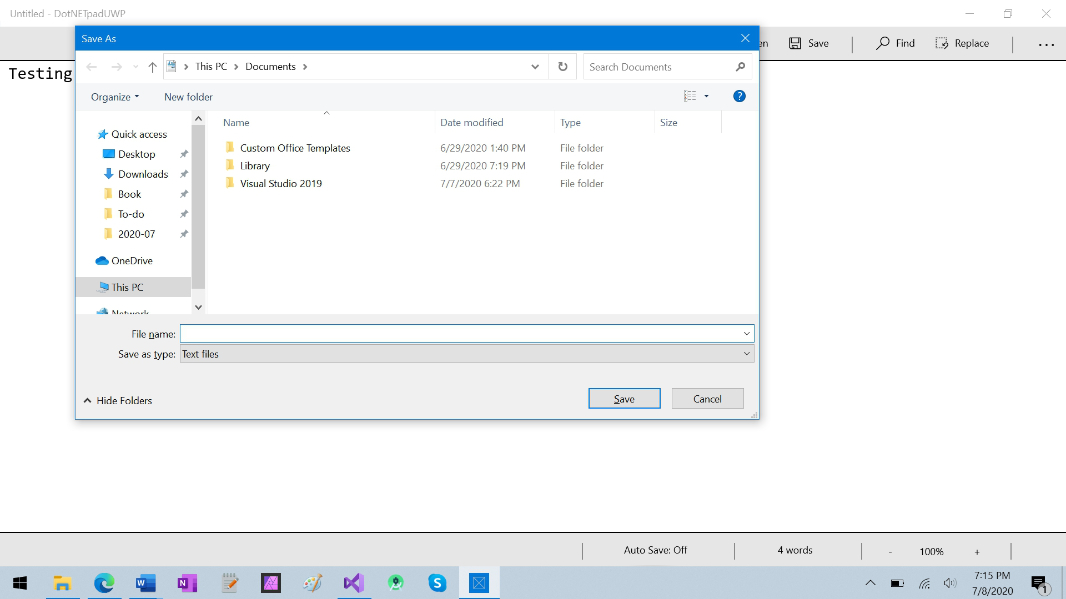
SaveAs(), meanwhile, will resemble OpenButton_Click in that we need to display a file picker—i.e. a Save dialog—and then proceed accordingly, with the actual file operations happening in a try-catch block. Here’s the code:
// Display a Save As dialog
FileSavePicker fileSavePicker = new FileSavePicker();
fileSavePicker.FileTypeChoices.Add("Text files", new List<string>() { ".txt" });

try
    {
    file = await fileSavePicker.PickSaveFileAsync();
    if (file != null)
    {
        await FileIO.WriteTextAsync(file, TextBox1.Text);
        ApplicationView.GetForCurrentView().Title = file.Name + AppName;
        TextHasChanged = false;
        DocumentName = file.Name;
    }
}
catch (Exception ex)
{
    MessageDialog messageDialog = new MessageDialog(ex.Message);
    await messageDialog.ShowAsync();
}
Now, you can test it. Clicking Save (or typing CTRL + S) should display a Save As dialog is nothing has been saved yet. Otherwise, it will quietly overwrite the previously saved document.
That’s probably a good place to stop. Next time, we’ll look at Find/Replace, which will require us to get a little creative with another ContentDialog.
More soon.

Gain unlimited access to Premium articles.
With technology shaping our everyday lives, how could we not dig deeper?
Thurrott Premium delivers an honest and thorough perspective about the technologies we use and rely on everyday. Discover deeper content as a Premium member.