Operation SSD Swap is a Success ⭐
- Paul Thurrott
- Oct 18, 2025
-
13
After a several-year detour in which laptop makers sacrificed serviceability for thinness, we’re back in a good place. All the laptops I’ve reviewed over the past few years are serviceable, most to some degree by the end user. And that means that we can replace parts when they break or upgrade certain components. And that we can do so without violating a warranty.
I just experienced that.
As you may know, I recently reviewed the HP OmniBook 5 16-inch, an inexpensive Snapdragon X-based consumer laptop that with terrific performance, battery life, and reliability despite its modest internal components. I love this laptop and find it superior to most x64 laptops costing three times as much or more. But as I noted in my review, the entry-level configuration that I purchased has one downside: It came with 256 GB of SSD storage. And 256 GB is not enough, not for my needs. Not for anyone’s, I think.
And so I set out to upgrade that SSD and replace it with a larger-capacity drive.
? First steps
The first thing I did was something I do in the course of writing any laptop review: I found its maintenance and service guide to see what was possible and saved a copy locally so I could refer to it when the time came to upgrade the SSD.
The second also occurred while writing the review: I looked up my specific OmniBook 5 configuration, of course, but also the other available configurations, and this told me that the part in question is a PCIe Gen4 NVMe SSD on an M.2 card. Which is about as standard these days as standard can be.
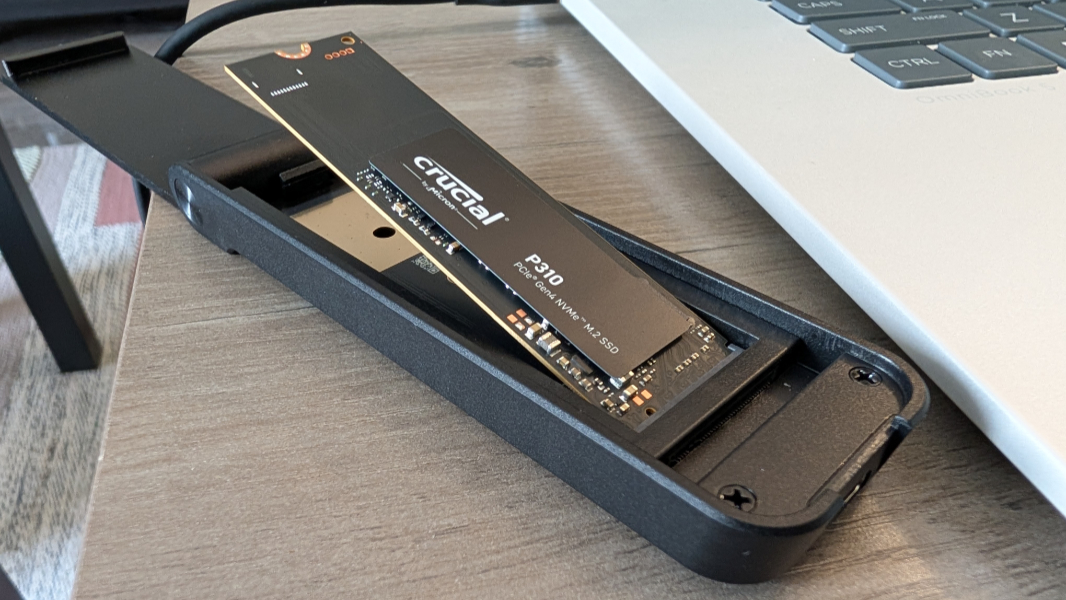
Next up, I searched Amazon Mexico for that type of SSD and found a 1 TB Crucial SSD for about MXN$1560, which is roughly $85 USD. (This drive is $69 at Amazon’s US store, so that’s not bad. Electronics are often quite expensive in Mexico.) I ordered it this past Sunday, the day I finished my review, and it arrived here the next day.
And then I realized I had more to do. Probably.
? Getting ready
There were two ways I could replace the drive:
- I could create Windows 11 (on Arm) installation media, swap out the drives, and then boot the PC with the installation media, install Windows 11 on Arm to the empty new SSD, and hope for the best. It’s likely that I could get the drivers going over Windows Update once I signed in, and I may have to connect the laptop to Ethernet first. But HP has a nice download for these drivers, too. So the probability of success was pretty good.
- I could clone my existing 256 GB SSD to the new 1 TB SSD and not lose my configuration with all my installed apps and synced data. That approach was most appealing to me, but it would require a bit of work.
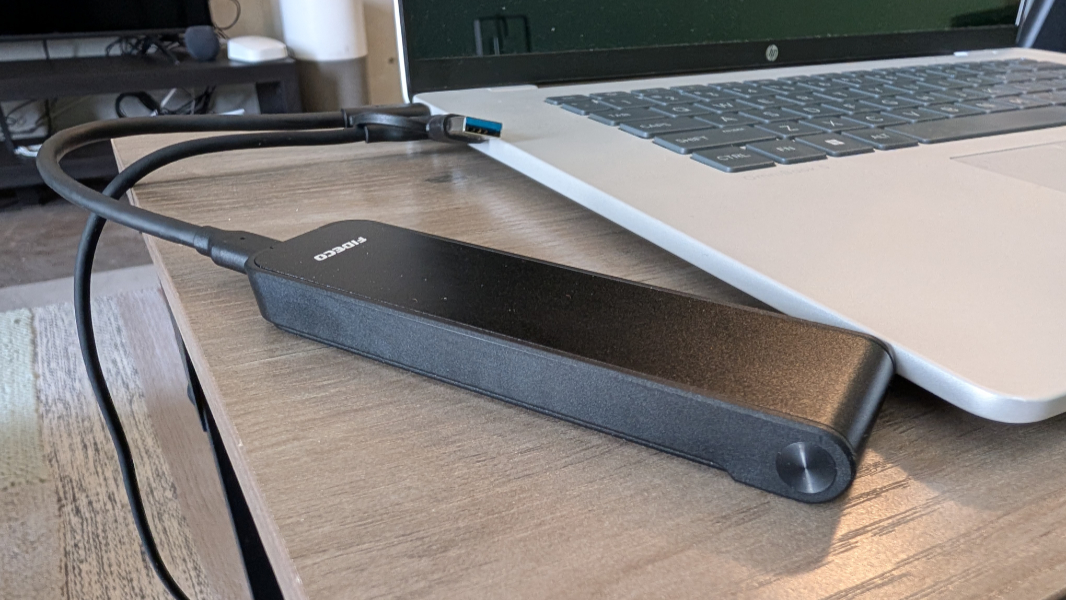
I decided to try the second approach, but that meant I needed a way to connect the new SSD to the laptop via USB. I have such a thing for HDDs in Pennsylvania, but I’ve never owned a USB-based SSD enclosure. So I did as before and searched Amazon Mexico for something suitable. This is a one-off thing so I went for cheap cost and quick shipping, and I landed on the FIDECO M.2 NVMe SSD Enclosure, which has a 10 Mbps USB 3.2 Gen 2 cable with Type-C and Type-A ends. I paid MXN$329 for this, which is about $18 UD. (It’s about $13 on the U.S. Amazon site.) I ordered that on Tuesday and it arrived the next day.
Thursday was unusually busy because I had to prepare for and then record three episodes of Hands-On Windows. And Fridays are always busy because of Ask Paul. But I really wanted to get this done as quickly as possible, so I did some of the work both days, each day after all the other work was done.
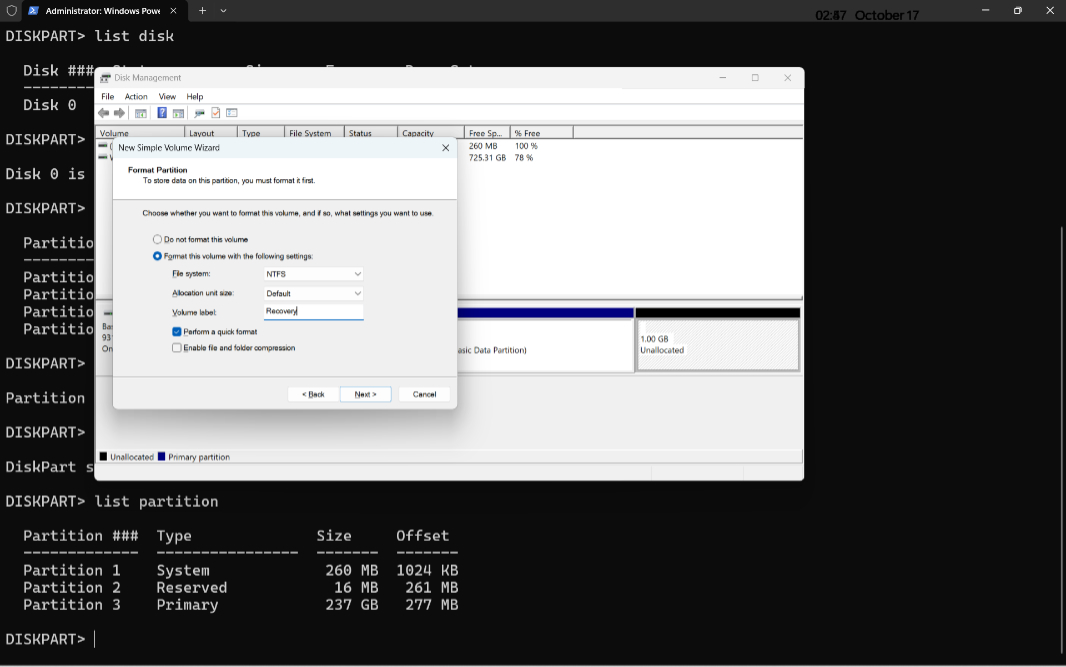
Late Thursday, I unpacked the SSD and the enclosure and put the former in the latter. Then I connected it to the laptop and looked at Disk Manager to see if it showed up. It did, so I created a simple volume and formatted it with NTFS. Which wasn’t necessary, frankly, but I just wanted to make sure both parts were working.
Then, I set out to image the existing SSD. There’s a free version of Acronis True Image that many seemed to recommend, but that wouldn’t successfully install, I assume because of Windows 11 on Arm. And that was something else I hadn’t really considered. I suddenly wished I had researched this earlier and tried to install a few options.
But what are you going to do? I Googled to find out which imaging apps would work with Windows 11 on Arm and found something called Macrium Reflect pretty quickly. There’s a free version (for 30 days), and it did install successfully. And when I pointed it at both drives, the internal SSD and the new SSD in the enclosure, it seemed like it would work fine. It was time to get to work.
? Cloning the SSD
I had never heard of Macrium Reflect, but it seems straightforward enough and there was an obvious Clone Disk function. And so I gave it a shot, figuring that the worst thing that would happen is it didn’t work and maybe I’d have to go with my first (clean) install option.
It seemed to go great. I chose the internal SSD as the source drive to clone and the external enclosure-based SSD as the destination. I made sure each of the partitions on the internal SSDs was selected. And then I was prompted to schedule the backup, so I scheduled it for the next minute and away it went.

The entire cloning process took about 20 to 25 minutes, which was quicker than expected. And then a File Explorer window opened, displaying the contents of the new disk, a clone of the internal disk.
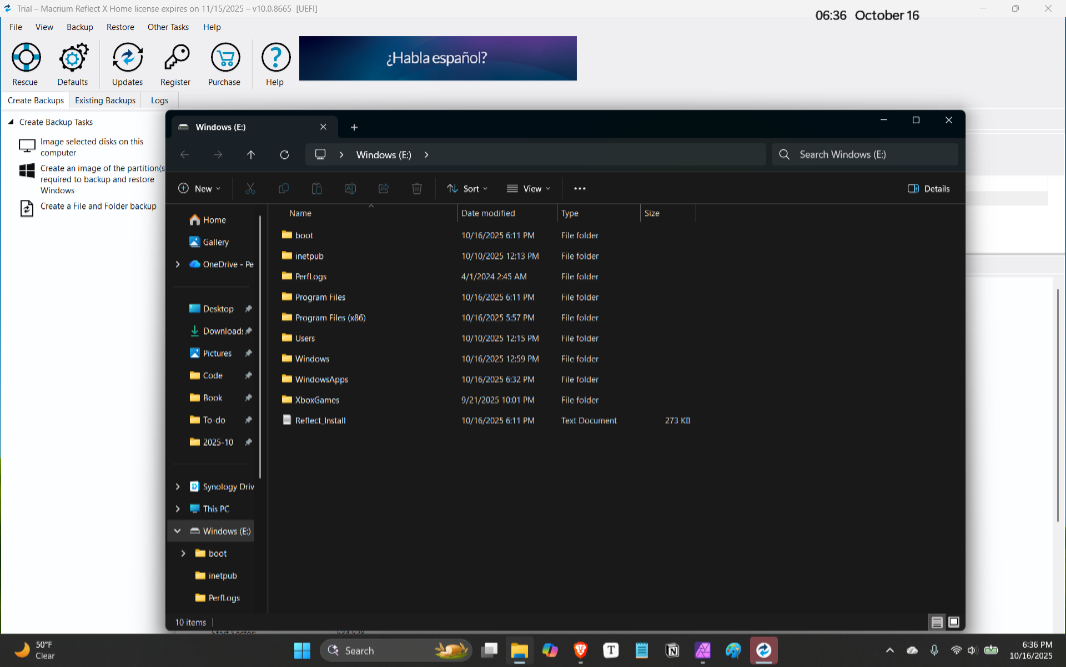
And that’s when I realized I hadn’t considered something else. The drive I had cloned was 256 GB. The drive I was cloning to is 1 TB. And the drive that Macrium Reflect created, at least the C: drive I could see, was also 256 GB. I mean, of course.
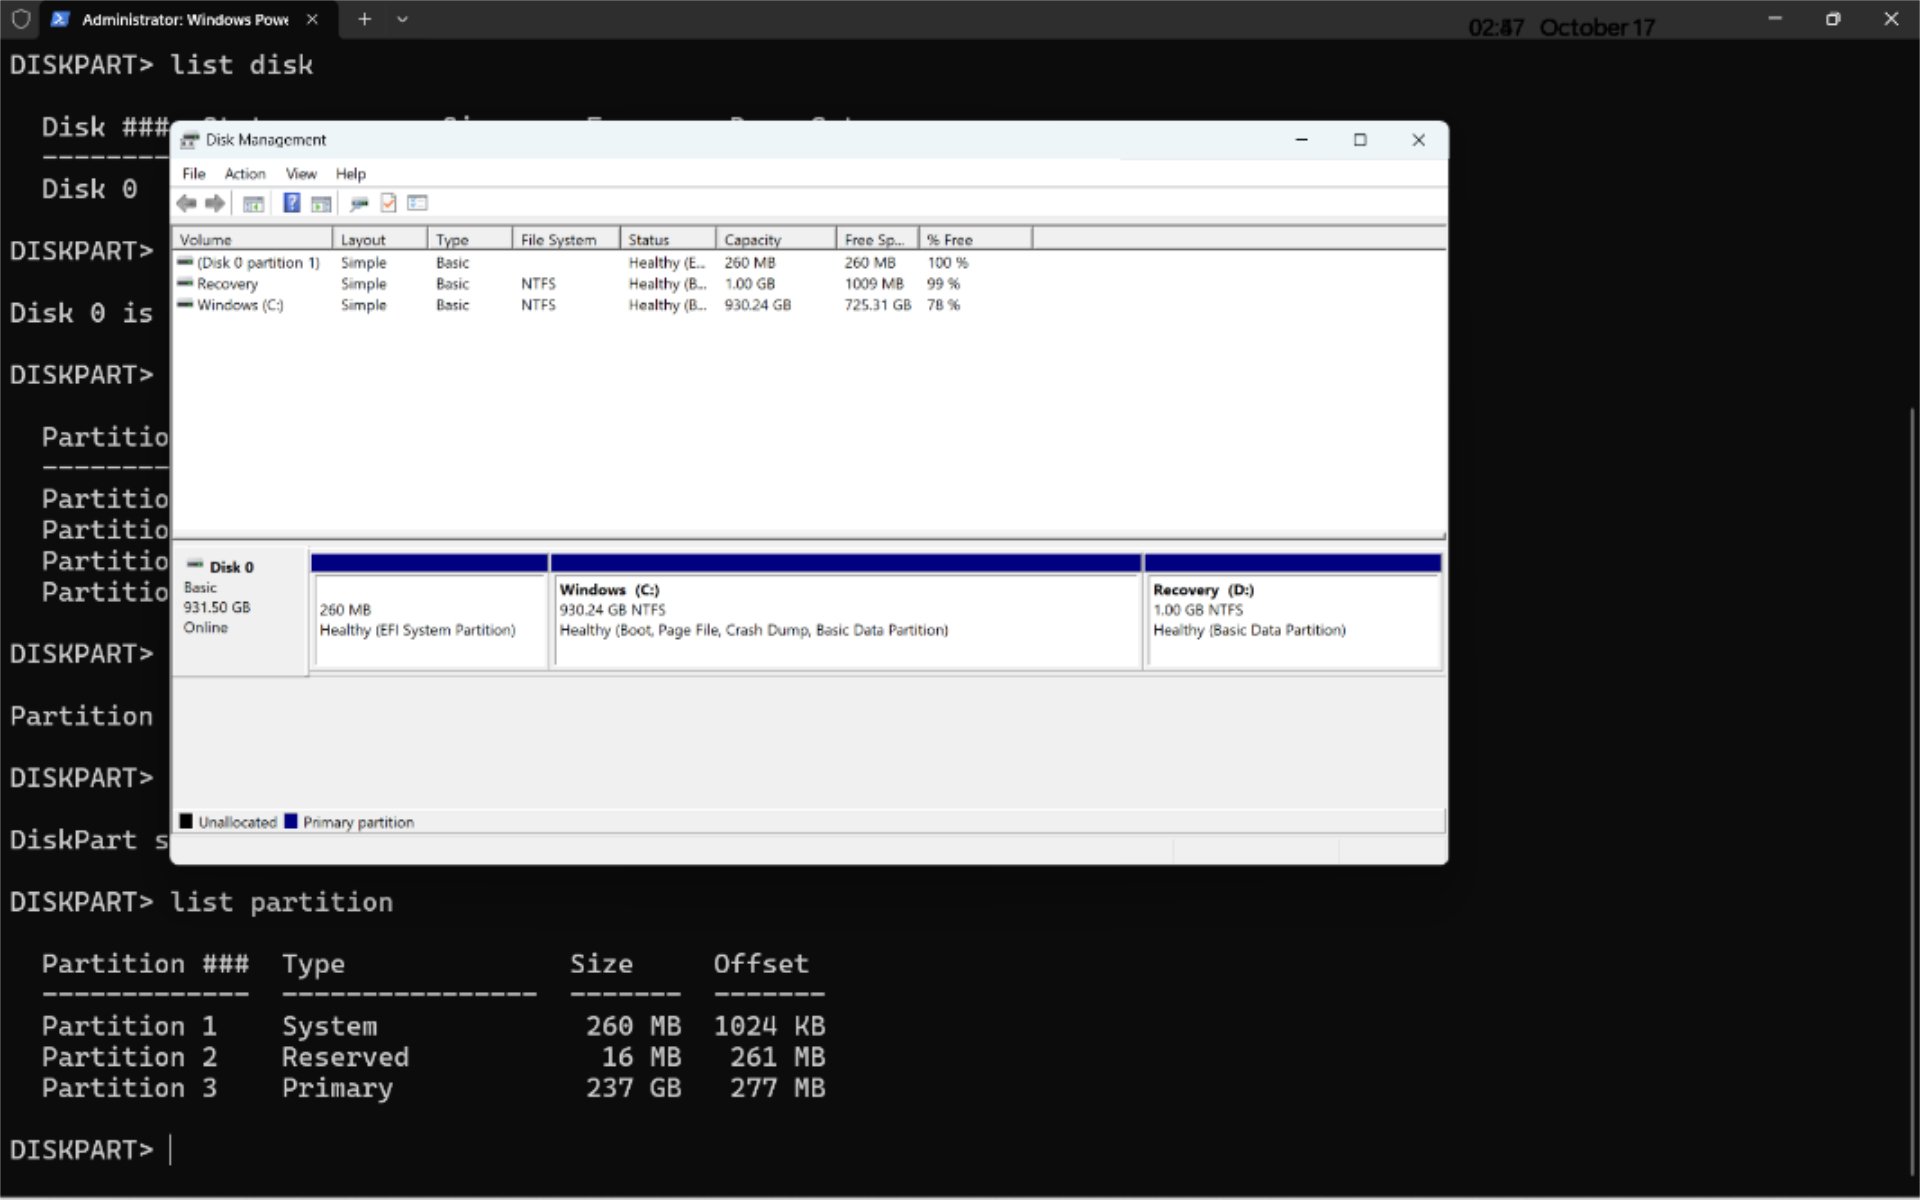
So I looked at the disk using Disk Management and, sure enough, there was about 700 GB of empty space at the end of the drive.
![]()
No problem. I would simply expand the C: drive to take up that space after I had swapped out the drives. But that would need to wait for the next day. It was time for dinner.
? Open SSD surgery
Friday afternoon, I got back to work on this again. Using HP’s maintenance and service guide as a, um, guide, I turned off the laptop, flipped it upside down, and unscrewed the four exposed Philips head screws.
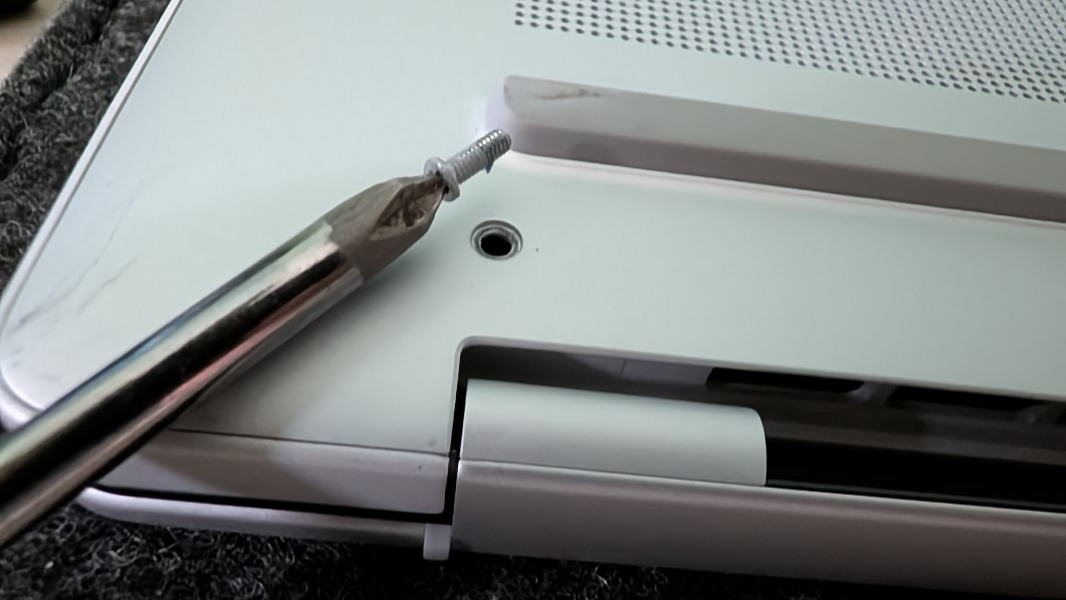
The guide recommends using a suction cup for part of the next step, but I didn’t have such a thing, so I simply started popping off the bottom laptop cover, starting in one rear corner, using a very small flat-head screw driver. That worked fine, and I had it off pretty quickly.
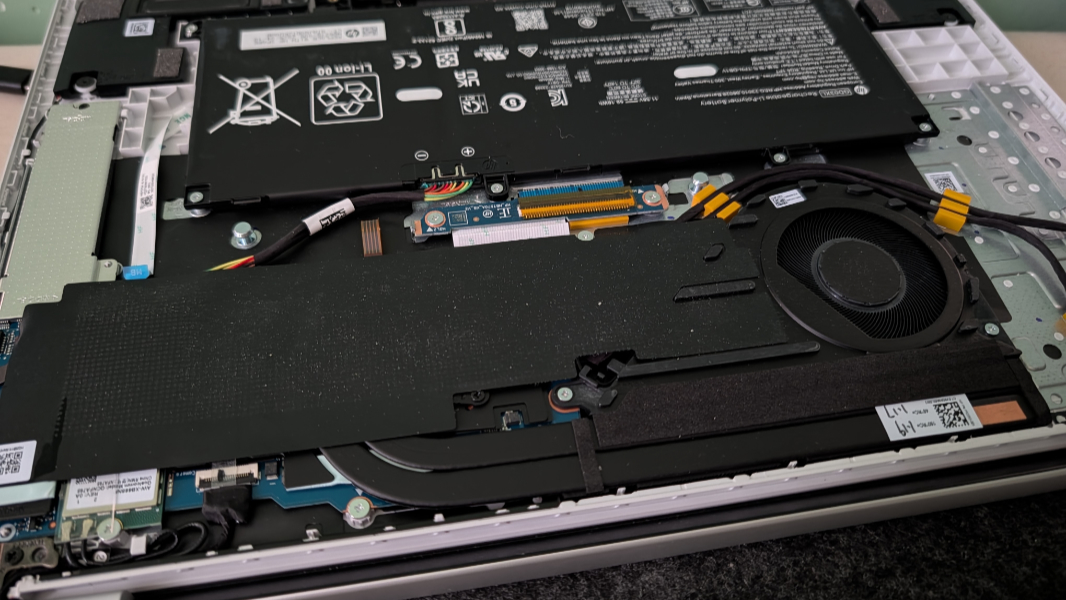
From there, I disconnected the battery—safety first—which required me to partially pull off a paper-thin cover over the cooling components and one corner of the SSD.
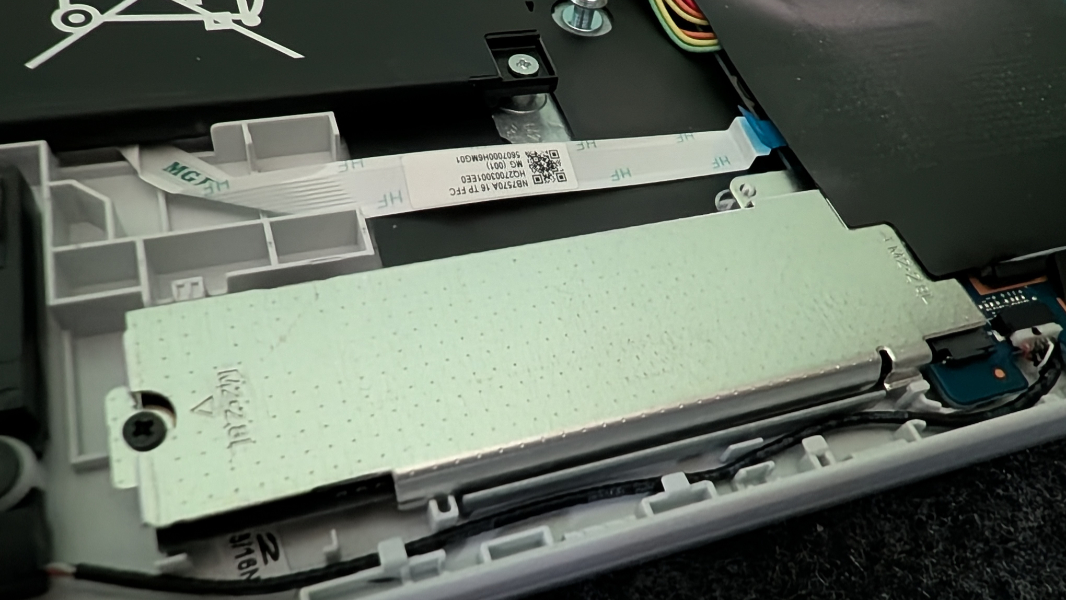
With that done, I unscrewed the two Philips head screws holding down the SSD, which was protected inside a metal cover.
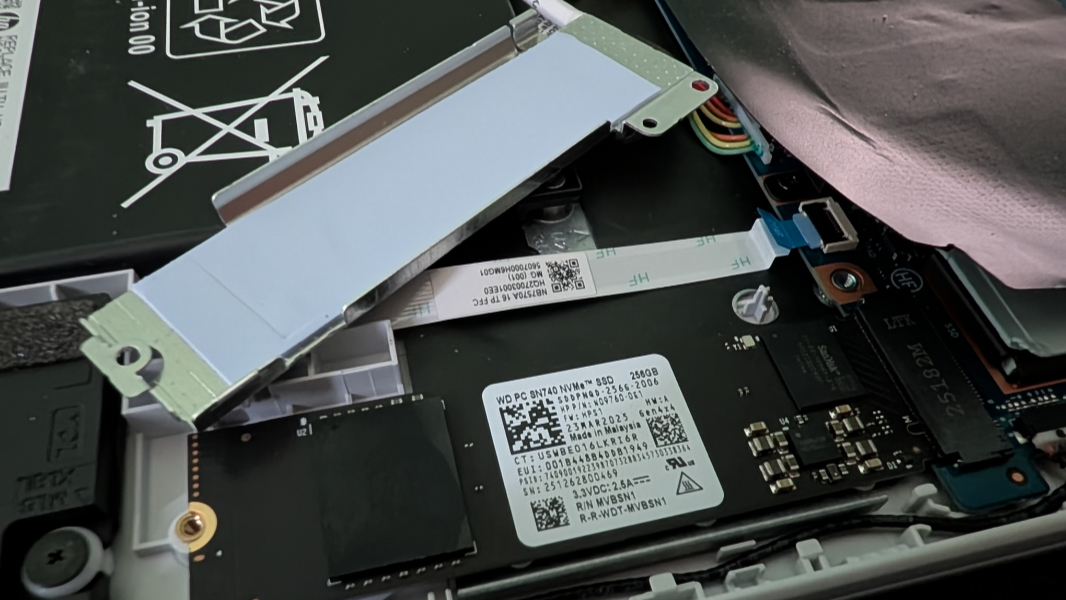
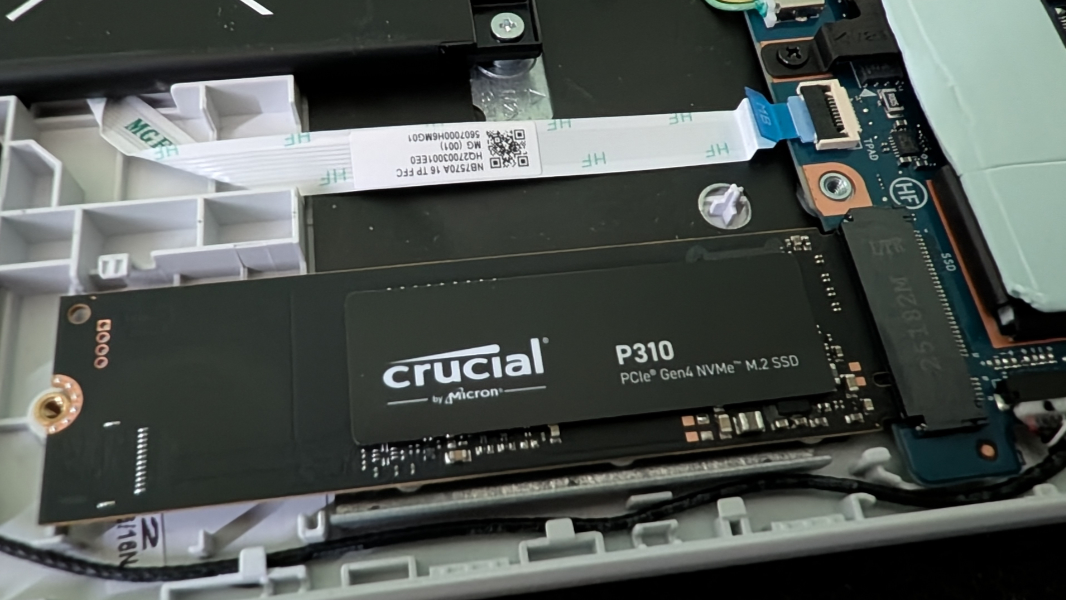
The installed SSD popped out easily, of course, and the new SSD slid into place just as easily, with a thermal pad that came with it below it.
Then I replaced and screwed in the cover, reconnected the battery power cable, reapplied the cooling components cover, and put the laptop bottom panel over the exposed innards without clipping it back on.
Then it was go time: I carefully righted the laptop, opened the lid, and held my breath. I pressed the power button on the laptop, a white light appeared on it, and then the laptop booted up normally, like nothing had happened. Windows Hello facial recognition saw me immediately—you gotta love Snapdragon X—and I was back at the Desktop I had cloned along with the rest of the drive the night before. Success!
So I shut it down, flipped it back over again, and clipped the bottom cover to the laptop around each of the edges. Then I put the screws back one by one, and that was that.
There was just one problem, of course. That 700 GB or so of empty space. It was time to play with the partitions.
?️ Fun with partitions
As before, I could see in Disk Management that there was a lot of empty space on the end of the new SSD. No problem, I thought, I would simply right-click the C: drive and choose “Expand” from the context menu that appeared.
Except, of course, that there was no such option. Disk Manager can only expand a partition when there is empty space next to the partition. But the empty space was at the end of the disk. And between the two was the recovery partition.
Quick aside. One of the computers I have here kept throwing an error message about the recovery partition being full every time that I tried to install a new Insider build. This had happened enough times that I had gotten good at accessing the recovery partition from the command line, deleting some fonts to get back the space, and then I could update the OS.
Eventually, this became tedious enough that I resized the recovery partition to be big enough to just work. That process is interesting: You basically disable the recovery partition from the command line, delete the partition using Disk Management, create a new empty and drive letter-less partition that’s a little bigger, and then go back to the command line to reenable the recovery partition in this bigger new partition. It’s more time-consuming than I just made it sound, but it does work. (I will likely write more about this in the 25H2 edition of the Windows 11 Field Guide.)
Armed with that background, I figured I could simply just do the same thing with the laptop with the new SSD. I could disable and delete the current recovery partition, expand the C: drive to fill most of the empty space on the SSD (leaving 1 GB of space at the end), create a new empty and drive letter-less partition, and then reenable the recovery partition.
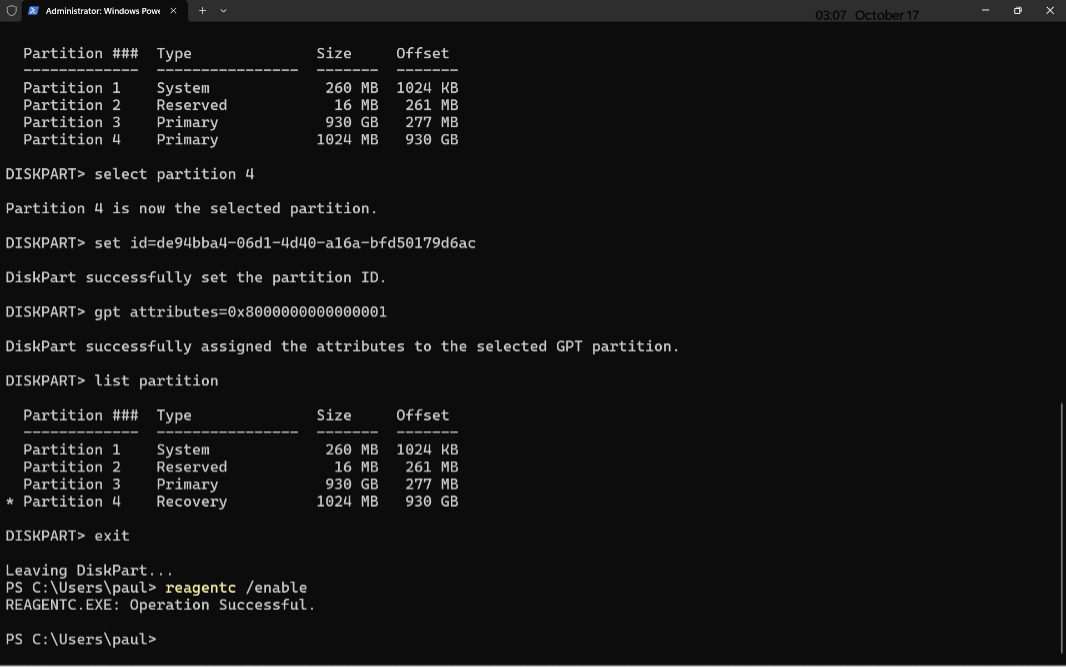
So that’s what I did.
Rather than step through that entire process, which, again, is tedious and time-consuming, I will point you to this blog post, which explains the process nicely. I followed those instructions (not for the first time) and soon had a C: drive that filled most of the SSD and a functioning recovery partition. Success!
Is this process for the faint of heart? No, but I feel like I could have simply used that first approach with an empty disk, the installation media, and some drivers and made it work. If that didn’t activate for some reason, I have a few Windows 11 product keys looking for a home, and that would have been fine. (And yes, Windows 11 is still activated normally on this PC after the surgery.)
But I didn’t need to do that. The OmniBook is alive and well with a new SSD, and now its one shortcoming has been resolved. Excellent.

Gain unlimited access to Premium articles.
With technology shaping our everyday lives, how could we not dig deeper?
Thurrott Premium delivers an honest and thorough perspective about the technologies we use and rely on everyday. Discover deeper content as a Premium member.