Living with Chromebook: Docking (Premium)
- Paul Thurrott
- Oct 14, 2019
-
11
While Chromebooks are compatible with USB-based docks, the experience is a bit limited and less than ideal in my experience.
At least it does work, if partially: As I discovered recently, Chrome OS is incompatible with Thunderbolt 3, and I couldn’t get any of my Chromebooks to work with my Thunderbolt 3 Dock, even as a basic USB dock or hub.
That problem temporarily scuttled my desire to have a one-cable solution on my primary work desk, where I had hoped to mix and match between various review laptops and PCs but continue utilizing the same display, speakers, keyboard, mouse, podcast microphone interface, and other peripherals. But with Plugable coming to the rescue with a USB-C dock, I’ve gotten close to what I wanted. OK, it’s a two-cable solution, since the dock won’t power devices. But it’s close. Close enough for Rock n’ Roll, as Stephen King would say. Maybe close enough for me as well.
And, if I’m serious about really using a Chromebook more to do real work, it’s essential. I’ve been quietly writing more and more on the two Chromebooks I’ve been testing this year, the HP Chromebook x360 14 and the Acer Chromebook 714. And I’ve recently tried using it with the Plugable USB-C Dock at my desk instead of the NUC.
Yes, Google’s hardware partners do sell some Chrome OS-based desktop PCs called Chromebox, but they’re not nearly as common as Chromebooks, and I don’t have one on hand for testing. Honestly, such a thing would probably work better, especially since what I really want is the single external display, not some combination of the Chromebook’s display and the external display. But here we are.
And it’s … OK.
If you’re familiar with how Windows handles an external display with a laptop or other portable computer, you’ll find the related functionality in Chrome OS to be on the quaint side. Windows uses a handy Project capability to determine how the second display is utilized—with PC screen only, duplicate, extend, and second screen only modes—and there are settings for handling the position of each screen with regard to each other, how the taskbars work across each display, and so on. (The WINKEY + P keyboard shortcut brings up the Project pane and is crucial for those who use this feature regularly.)
Chrome OS offers some but not all of this functionality.
When I connect the USB hub to a Chromebook, it adds the external display in extended mode, which works as it does in Windows: You get a different desktop on each display and each display utilizes its native resolution (1080p on the Chromebook and 144p on the external display). Each display likewise shows the same taskbar and icons.

You can also make scaling adjustments to each using the Display Size setting in Chrome OS Settings > Displays. This interface also provides a Windows-like Arrangement setting by which you can virtually arrange where each display sits in relation to the other.
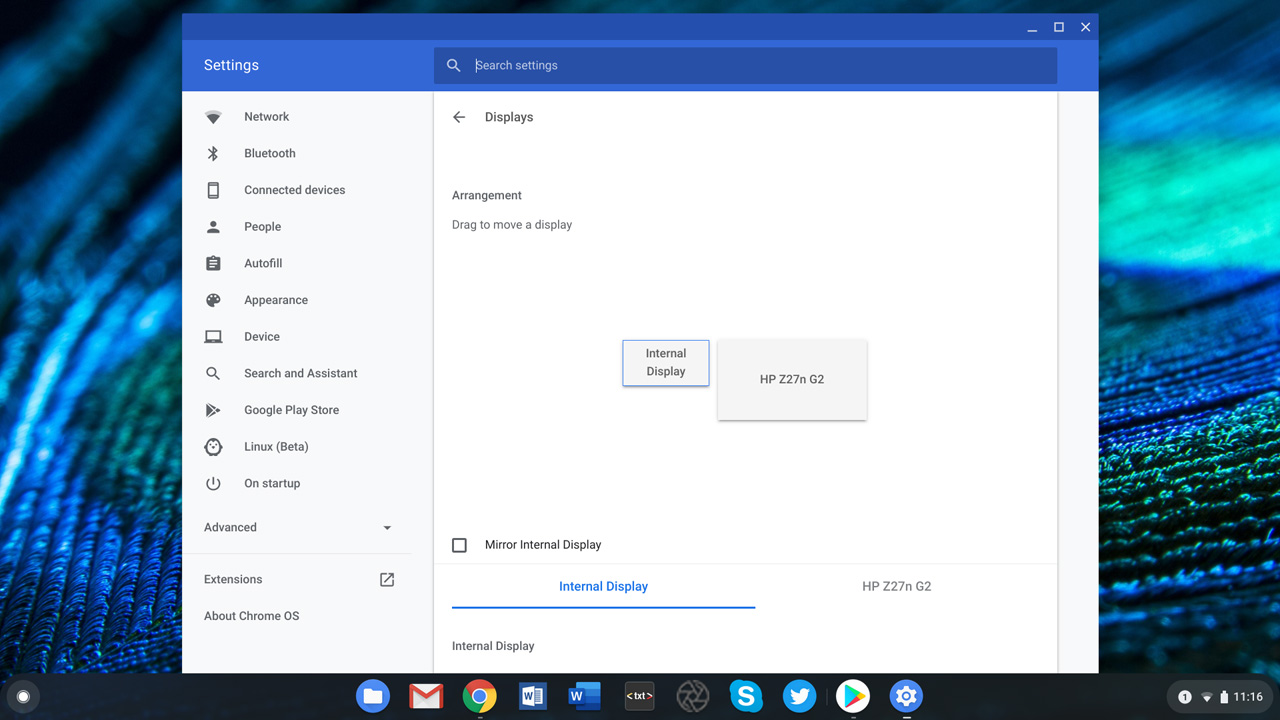
So far, so good. But Chrome OS doesn’t offer the “second screen only” mode that I want (nor does it offer a “PC screen only” mode). Instead, the only change you can make is to mirror the two displays, an option that is identical to the “duplicate” mode in Windows. Here, as in Windows, the least capable display wins, so my 1440p display is switched to 1080p (and whatever Display Size setting I’ve configured).

And it … works. I mean, I can get work done. It’s just not necessarily ideal.
The performance is mostly fine; that is, I don’t experience much lag when using either Chromebook while docked to an external display and my normal peripheral set. The duplicated display, while not exactly what I want, is workable, and instead of closing the Chromebook display lid, I simply close it most of the way and deal with the resulting light, which can change as I do things on-screen. But the display, of course, is not being used in its native 1440p resolution. That’s not great, and it would be a deal-breaker if this was somehow my normal daily workflow. (I guess at that point, I’d just invest in a Chromebox.)
Chrome OS keyboard shortcuts seem to translate to the PC keyboard logically enough: I use the Chromebook keyboard shortcut for taking a screenshot fairly often, and CTRL + F5 does the trick (since the F5 key is in the same position as the Switch Windows key on a Chromebook, which is used with CTRL to take a screenshot).
And … yeah. That’s where it’s at.
Is this is a common usage scenario? Maybe not. But with Chrome OS now offering Linux application support and the ability to run real developer environments like Visual Studio Code and Android Studio, the need is certainly there, at least for certain scenarios. But it’s not just for power users. For someone like me who likes to work at a desk with a bigger display and a real keyboard and mouse, making this work from a Chromebook is key. And I feel like it’s not quite there.

Gain unlimited access to Premium articles.
With technology shaping our everyday lives, how could we not dig deeper?
Thurrott Premium delivers an honest and thorough perspective about the technologies we use and rely on everyday. Discover deeper content as a Premium member.