Hands-On: Clipchamp for Windows 10/11
- Paul Thurrott
- Apr 26, 2022
-
25
The Microsoft Store version of Clipchamp, which is now included in Windows 10 and 11, appears to be a packaged version of the web app. But the real question here is how this video editing app measures up against the more sophisticated free and paid alternatives.
But first, a bit of housekeeping.
When Microsoft first added Clipchamp to Windows, it was still subject to some limitations that made it untenable for most. Key among those limitations being that you could only output video in 480p (Standard Definition) for free; you could pay $9 per month for 720p exporting and an incredible $19 per month for 1080p exporting.
I have some good news and some bad news. After the obvious outcry from its customers, Microsoft removed the output caps and now allows free users—and customers of all its pricing tiers—to output in 1080p. This change alone makes Clipchamp minimally viable. But the bad news is that those pricing tiers still exist. Those who pay $9 now get unlimited cloud storage and unlimited stock audio access. For $19 per month, you get everything from the $9 tier plus a branding kit. And for $39 per month (woof!), you get all of the above plus unlimited image and video stock access.
I will be focusing on the free version. And to do so, I will try to emulate a video I created previously using Adobe Premiere Elements 2022, which is paid, and some free online tools like Shocut and Davinci Resolve.
The video consists of several core assets: the raw video that my wife and/or I shot with a smartphone while in Mexico City, an opaque title card for a now-imaginary YouTube channel called “Eternal Spring,” a transparent title card for this particular video, a YouTube subscribe/notification pop-up (that I got free from Pixabay), and some background music (which I got free from YouTube; it’s licensed for this usage). The transitions are all straight-up wipes. Pretty basic, in other words.
Because I’m using the free version of Clipchamp, all of those assets will need to be stored on my PC. I don’t see that as a huge limitation, since that’s how most people work anyway, regardless of which video editing product they use.
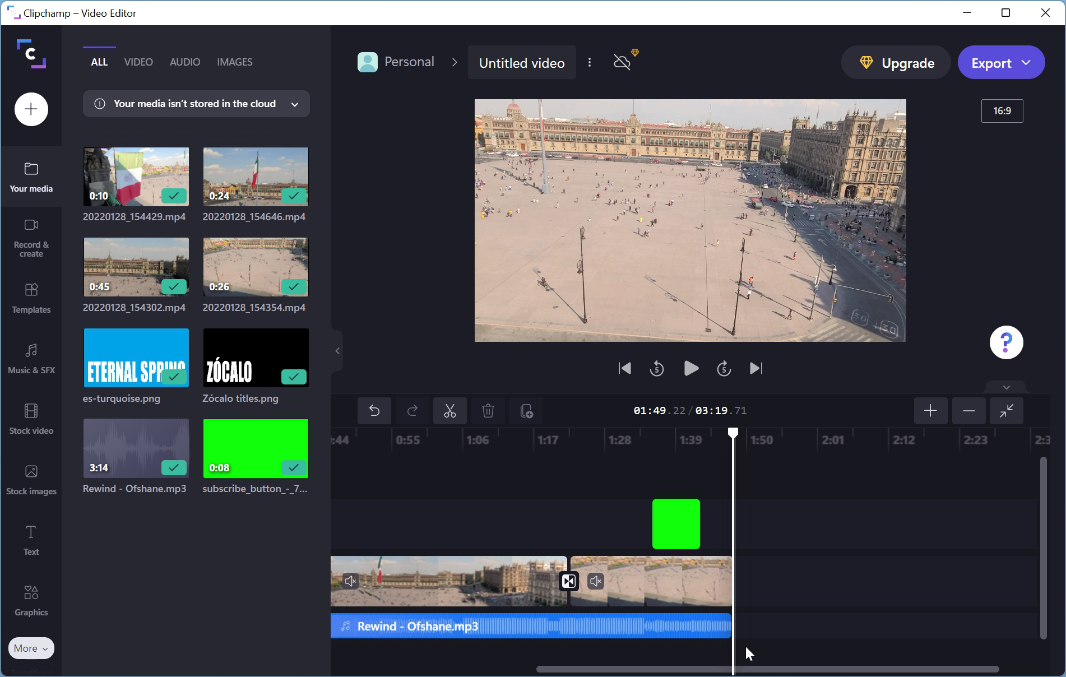
To get started, I ignored the templates and other quick-start guides and chose “Create a video,” which brings up Clipchamp’s timeline view, a feature Microsoft promotes pretty heavily despite it being a standard feature of all decent video editors. (The reason for this, I believe, is that the video editor built into the Windows Photos app only provides a storyboard view. But Windows Movie Maker—remember that?—provided both views back in the day.)
As prompted, I then dragged some media—in this case, four video files, onto the timeline. Curiously, they did not go onto the timeline but instead were imported into the Your media pane. So I dragged them from there to the timeline in the order I wanted. That was easy enough, and Clipchamp was smart enough to place each clip next to the one before it with no gaps as expected. Then, imported my two title cards, the YouTube pop-up, and the background music.
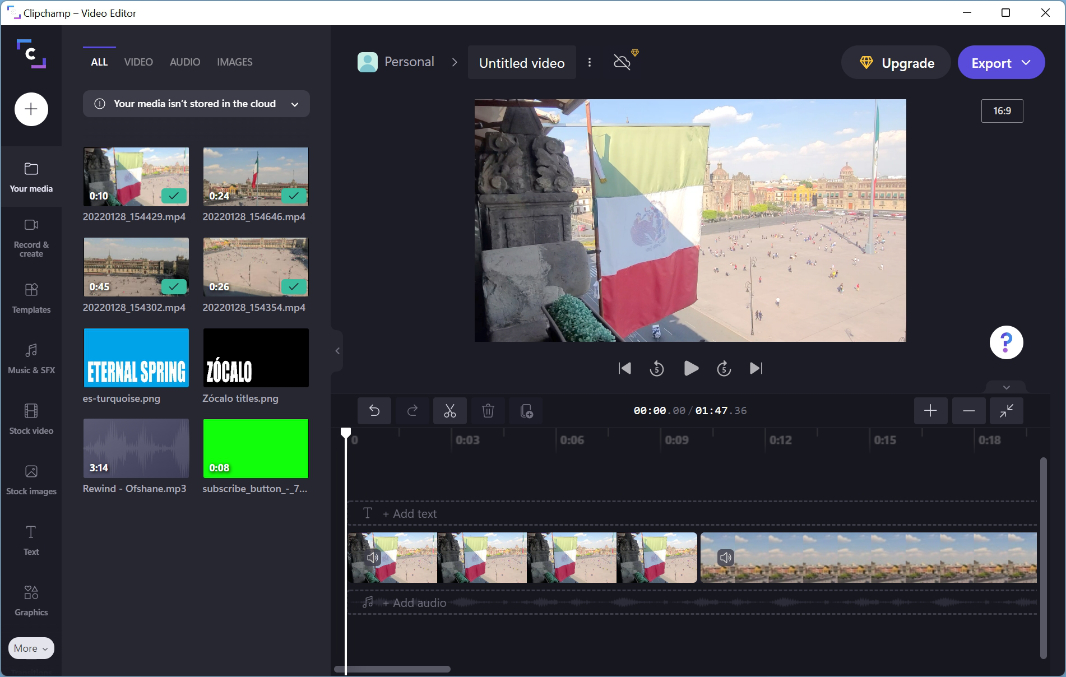
Adding the opaque title card to the beginning of the timeline was a basic drag-and-drop operation. But I was curious how Clipchamp would handle the transparent video title, since I wanted that to appear over the beginning of the video. By default, the timeline doesn’t indicate that you can have multiple video tracks, but dragging the title above the existing video timeline actually worked. Nice!

To create a wipe transition between two clips in Adobe Premiere Elements, I open the Transitions pane, choose the Cross Dissolve transition, and drag it between two clips in the timeline (and repeat as necessary). Clipchamp offers a similar Transitions pane, and a little help pop-up indicates that adding transitions with this app works the same way. So I found the Cross fade transition and dragged it between each clip. A handy green “Add transition” button appears as you drag it over.

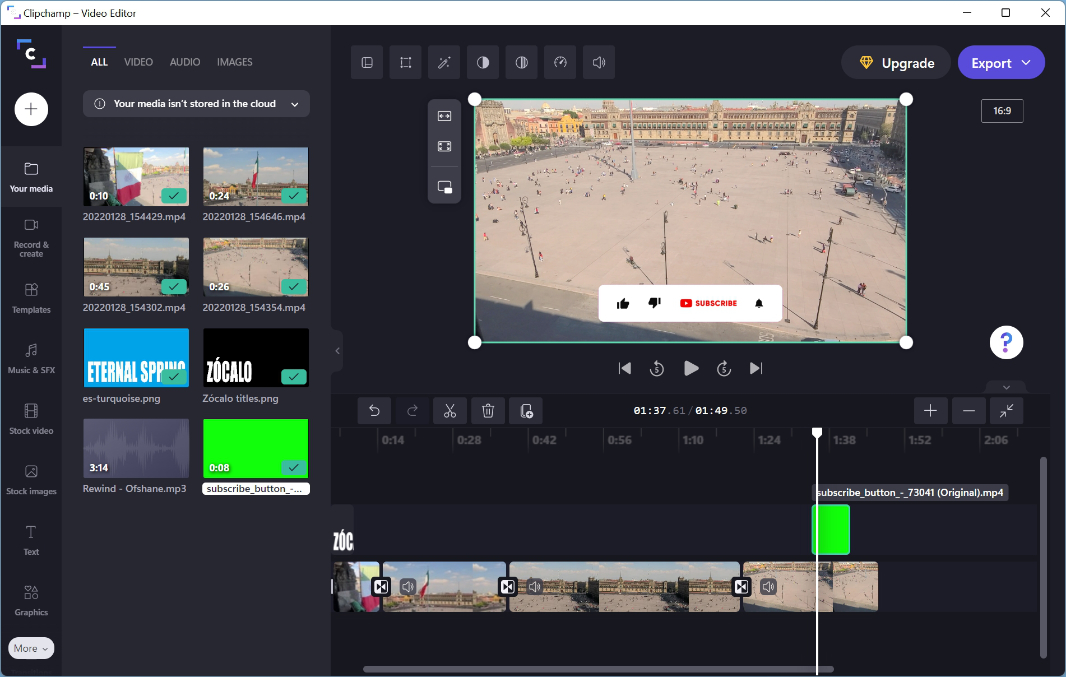
Next, I wanted to see how the YouTube pop-up worked: this little video uses a green screen effect, and you need to access the Green Screen Key effect in Premiere Elements to make it transparent. Here, again, I was happily surprised as Clipchamp works the same way. You drag the video clip above the video you want it to appear over in the timeline and position it. Then, select the Filters button at the top of the app, scroll down until you find Green screen, and then select that. The thumbnail of the video in the timeline doesn’t change—it still looks green—but when you preview that part of the video, you’ll see that it’s transparent now as desired. Impressive.
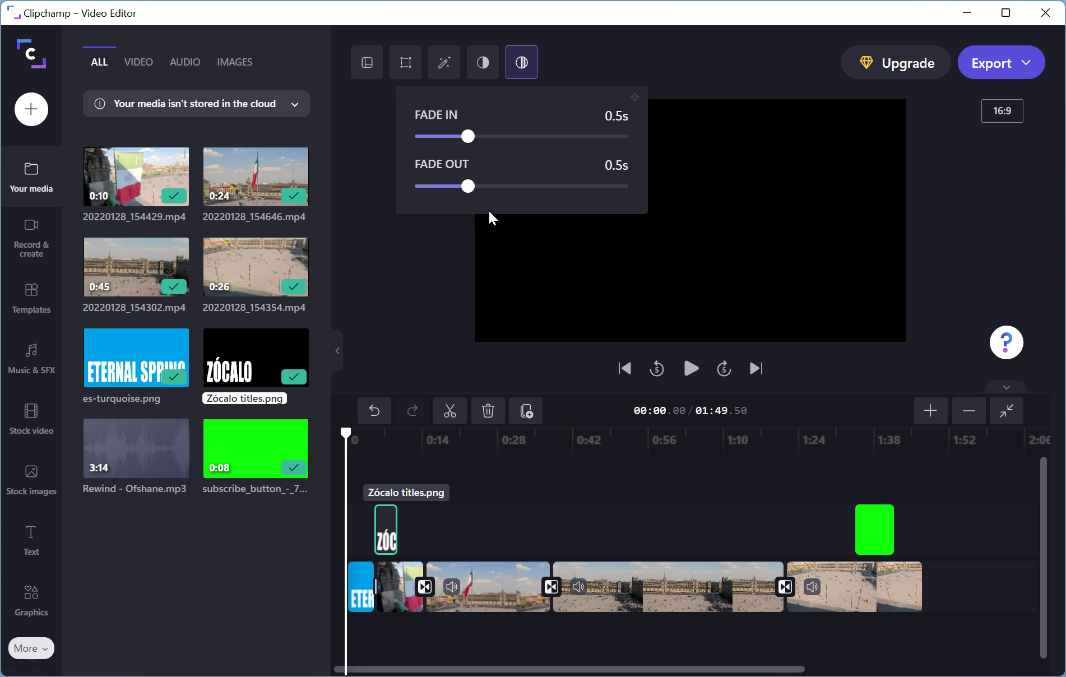
Next up, I added some fade effects as I like the transparent video title to fade in and out. So I selected that clip in the timeline, selected the Fade button at the top of the app, and then chose a half-second fade for both Fade in and Fade out.
Next up, I needed to remove the background audio that came with the videos. Normally, I’d prefer not to do that, but we weren’t really paying attention or making these videos for any particular reason, and so we talk over it in bits and there is some background noise. In Premiere Elements, you can separate the audio from a video clip and then delete it. But in Clipchamp, it’s even easier: just click the Volume icon in the middle of each clip to mute the audio for each. Nice.

Of course, that needs to be replaced with some music. So I dragged the music clip into the timeline, aligning it with the start of the first “real” (non-title) clip.

The music clip is longer than the video clips, so I next needed to split the music clip. This was easy, too: I just had to position the play-head at the end of the last video clip, right-click the music clip, and choose “Split.” Then, I could delete the extra clip and be done with it.
Of course, I want the end of the video to fade out too, so I added a one-second fade-out to the audio and a half-second fade-out to the final video clip.

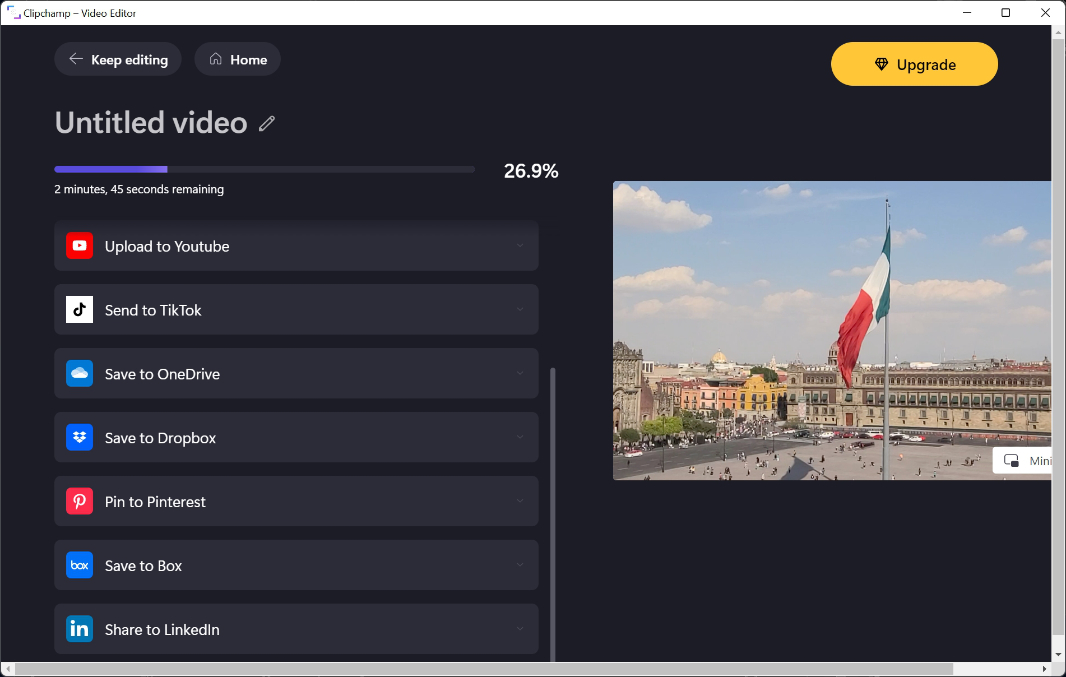
And that, folks, is pretty much everything I needed to do to recreate the videos I’ve been making with much more sophisticated—and paid—video editing tools. I am surprised to report that this was all possible with Clipchamp, which, frankly, didn’t seem all that impressive to me. The only left to do was export it, which was also obvious enough. The wizard even includes options to save to Google Drive, YouTube, TikTok, OneDrive, and other services, but I prefer to do that myself.
Video export wasn’t particularly fast, and it appeared to occur in 1:1 time with the video. Tools like Premiere Elements do export more quickly, for whatever that’s worth.
But whatever. Overall, I’m impressed. And you can see the final result on YouTube, if you’re curious. Not bad for a free tool that Microsoft bundles with Windows.