Tip: Install Windows 11 Version 25H2 With a Local Account
- Paul Thurrott
- Oct 11, 2025
-
10
While the initial version of Windows 11 version 25H2 works like previous versions when it comes to workarounds that enable one to install the system using a local account, that’s about to change. This past week, Microsoft released new preview builds of Windows 11 to the Dev (25H2) and Beta (24H2) channels of the Windows Insider Program, and in addition to several new features there was one unwelcome new deprecation.
“We are removing known mechanisms for creating a local account in the Windows Setup experience (OOBE),” Microsoft explained in the release notes. “While these mechanisms were often used to bypass Microsoft account setup, they also inadvertently skip critical setup screens, potentially causing users to exit OOBE with a device that is not fully configured for use. Users will need to complete OOBE with internet and a Microsoft account to ensure the device is set up correctly.”
Power users who rely on this capability have known this was coming for years. As long ago as early 2022, Microsoft warned that it would require an Internet connection and a Microsoft account to clean install Windows 11. And Microsoft did briefly ship this limitation in Insider builds that year, though it quietly backed off from implementing it in shipping versions of Windows 11.
And who knows? Maybe Microsoft will back off yet again. I doubt it, but it’s fair to say that reactions to this change in the enthusiast community are overwhelmingly negative. That doesn’t surprise me, we overreact to every change. But as I wrote in my defense of requiring individuals to install Windows 11 with an online account, the negativity is unfounded. Even if Microsoft somehow disabled every single workaround, you would still be able to use Windows 11 with a local account. All you have to do is set up the PC with an MSA and then use the “Sign in with a local account instead” link in the Settings app to convert that sign-in account to a local account.
Not that it matters. Now that I’ve tested the latest Dev build on a real computer, I can confirm that you can still set up Windows 11 version 25H2 using a local account. In fact, there are several ways to do it, including the well-known domain workaround. But because that only works in Windows 11 Pro, I will document two workarounds here that should work on any Windows 11 product edition.
Method 1: Bypass network requirement
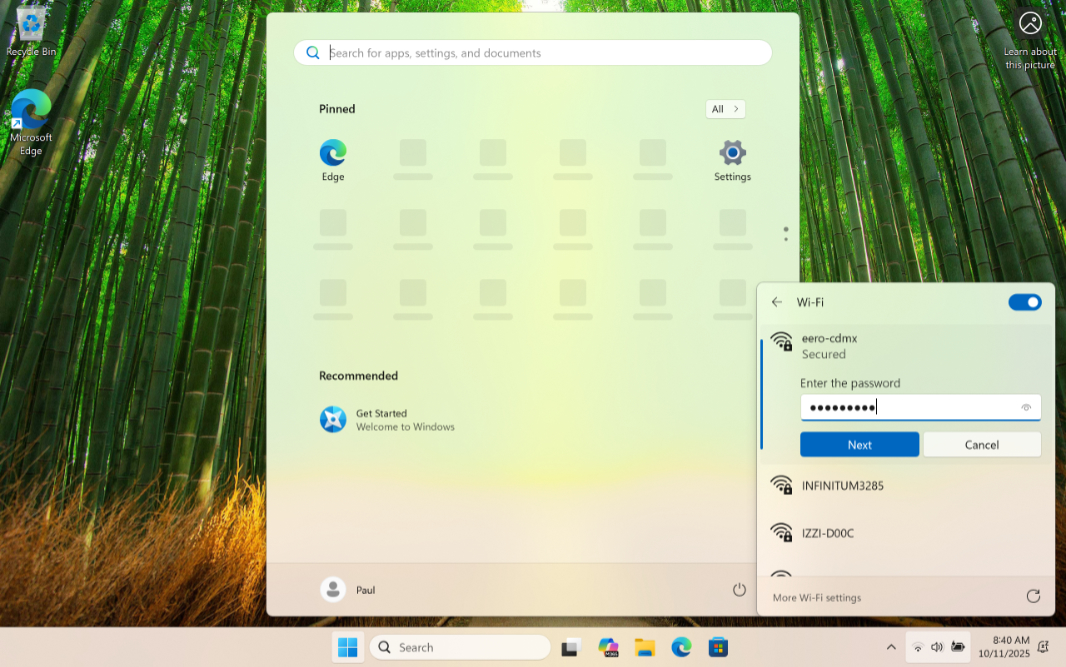
To date, the most well-known workaround to installing Windows 11 offline with a local account is the one I document in the current edition of the Windows 11 Field Guide: You open a command line window during the Out of Box Experience (OOBE) by typing Shift + F10, and then you type oobe\bypassnro and tap Enter to reboot the PC, restart the OOBE, where you could then access an “I don’t have internet” link instead of connecting to a Wi-Fi network. In case it’s not obvious, the bypassnro command stands for bypass network requirement option. And yes, it no longer works in the latest Dev (and Beta) build.
But there is another way to accomplish this. Here’s how.
- Start a clean install of Windows 11. When the OOBE appears, type Shift + F10 to open a command line window.
- Select the command line and type the following command.
reg add HKLM\SOFTWARE\Microsoft\Windows\CurrentVersion\OOBE /v BypassNRO /t REG_DWORD /d 1 /f
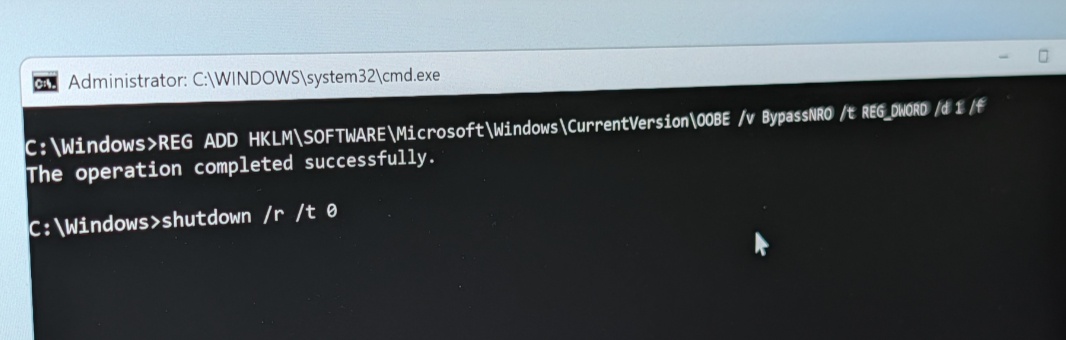
- After tapping Enter, type the following command to reboot the PC:
shutdown /r /t 0
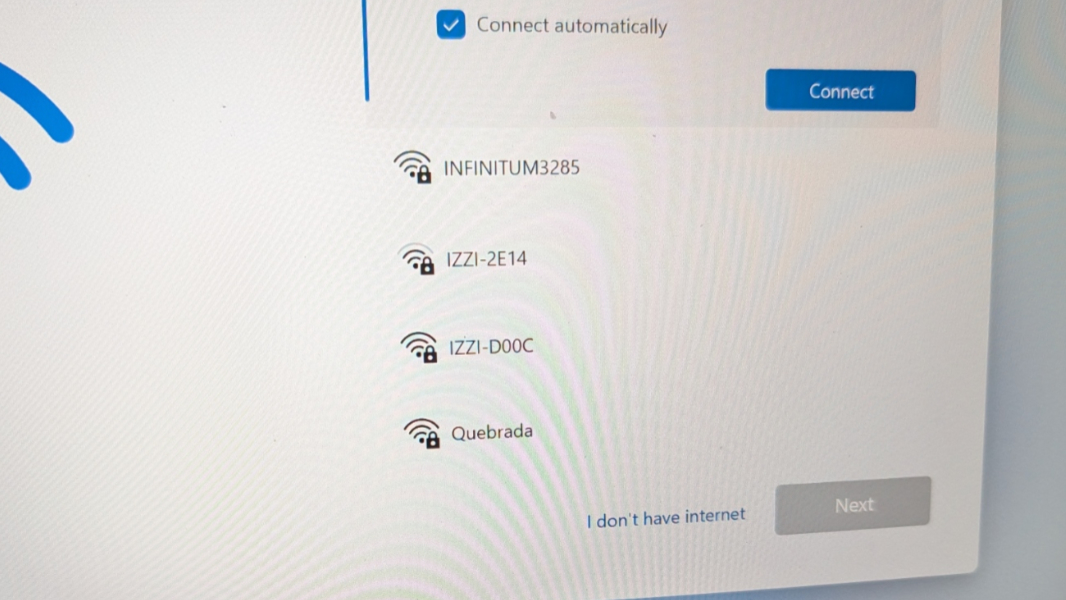
- The OOBE will restart. Navigate to the “Let’s connect you to a network screen.” There, you will find an “I don’t have Internet” link as with the previous workaround.
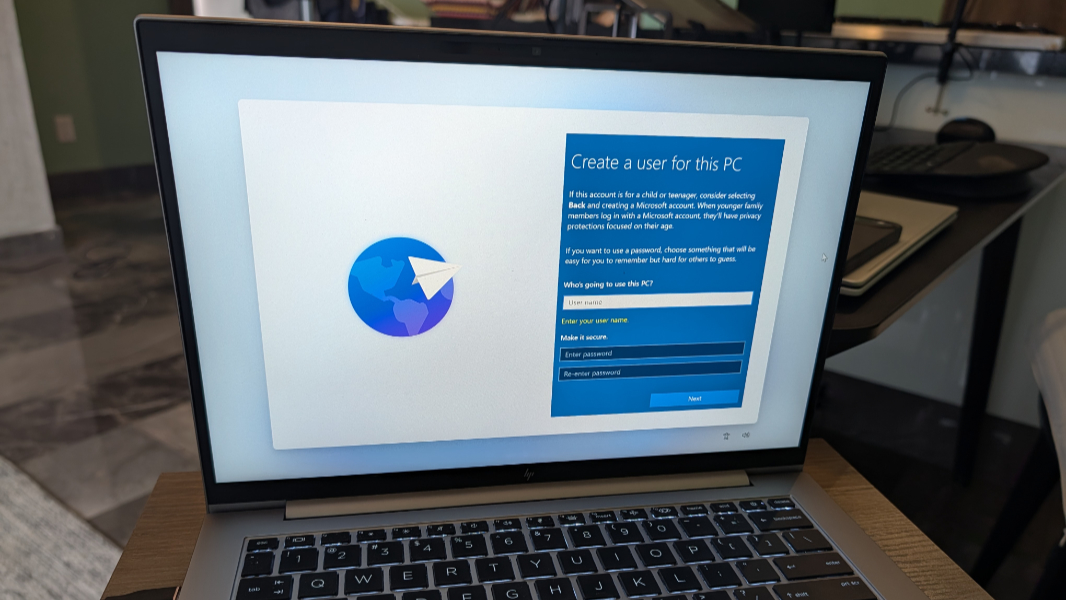
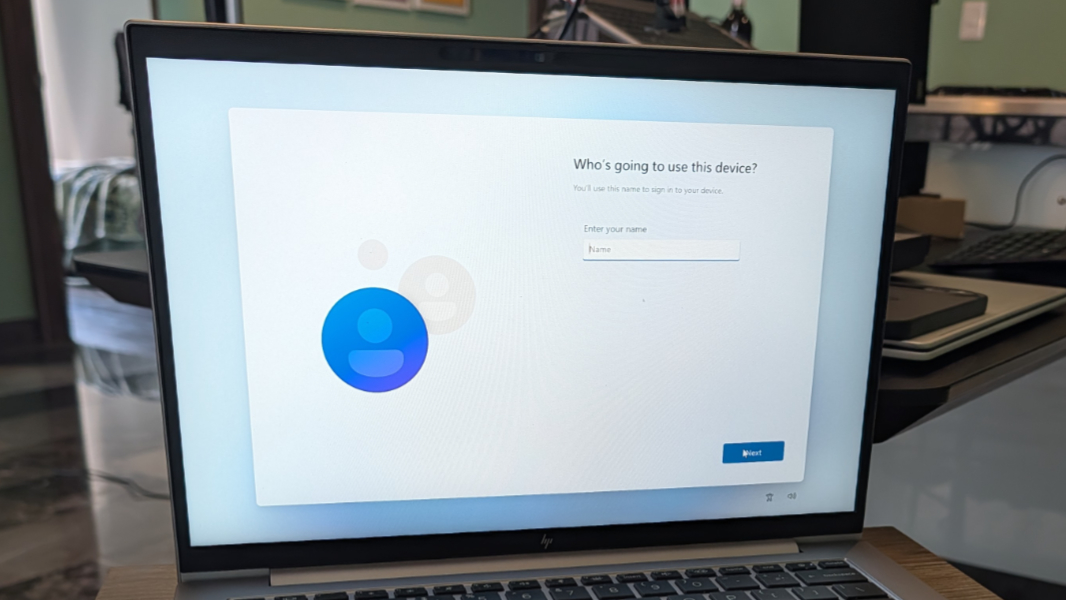
- Click that, click past the license agreement, and a “Who’s going to use this device?” screen appears so you can create a local account.
- After doing that, you only have to deal with one more OOBE screen, “Choose privacy settings for this device.” After a short time, you will land on the Desktop, where you can connect to Wi-Fi and configure Windows 11 normally.
Method 2: WinJS
Incredibly, Windows 11 still includes the WinJS library (Windows Library for JavaScript) that first debuted in Windows 8 so that app developers could write mobile apps in familiar HTML and JavaScript. And there is an Application namespace within this library with various functions, one of which—restart—I believe is undocumented. But you can access this command from a secret developer console in the OOBE to cause it to restart and use a hidden local account setup screen.
Here’s how.
- Start a clean install of Windows 11. When the OOBE appears, type Ctrl + Shift + J to open the developer console, which appears as a full screen overlay above the OOBE. You’ll see a > prompt in the top left of the screen.
- Type the following command (this is case sensitive) and then tap Enter:
WinJS.Application.restart(“ms-cxh://LOCALONLY”)
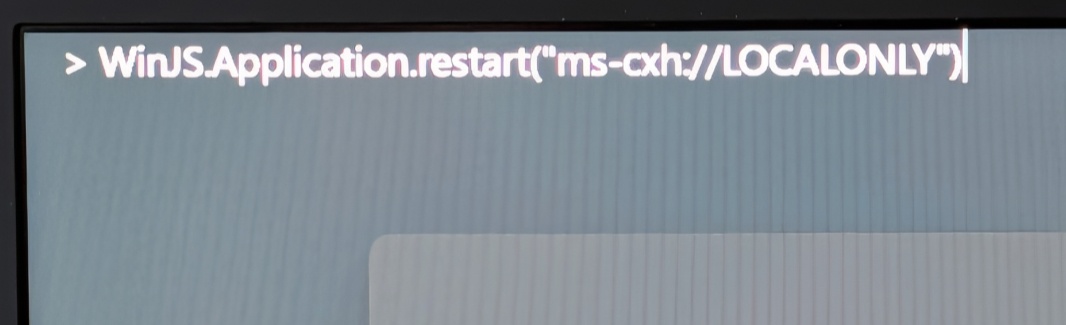
- Hit ESC until the developer console disppears.
- Now, create your local account in the new “Create a user for this PC” screen.
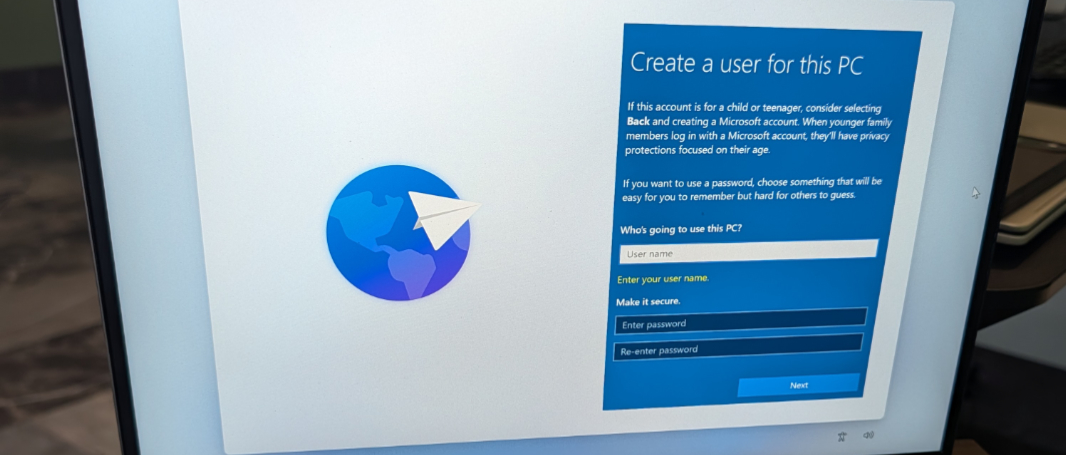
- Once that’s done, you will have only one more OOBE screen to deal with, “Choose privacy settings for this device,” and then you’ll be dumped into the Desktop, where you can connect to Wi-Fi and configure Windows 11 normally.
Final thoughts
As noted, there are other workarounds that still work, but I want to focus on the simplest and most universal, so these are the two I will add to the 25H2 edition of the Windows 11 Field Guide.
As always, I strongly recommend not doing this: Using an MSA sign-in is safer and the right choice for everyone, including power users who know more about this system than most. But I also respect the desire to have this choice. As does Microsoft, as it turns out. The unspoken contract I wrote about this past week is alive and well.