The WinForms Notepad Project: Fixing Zoom and Edit Commands (Premium)
- Paul Thurrott
- Nov 03, 2019
-
7
In this 11th installment of our start programming project, let’s fix zoom and implement several of the Edit menu commands.
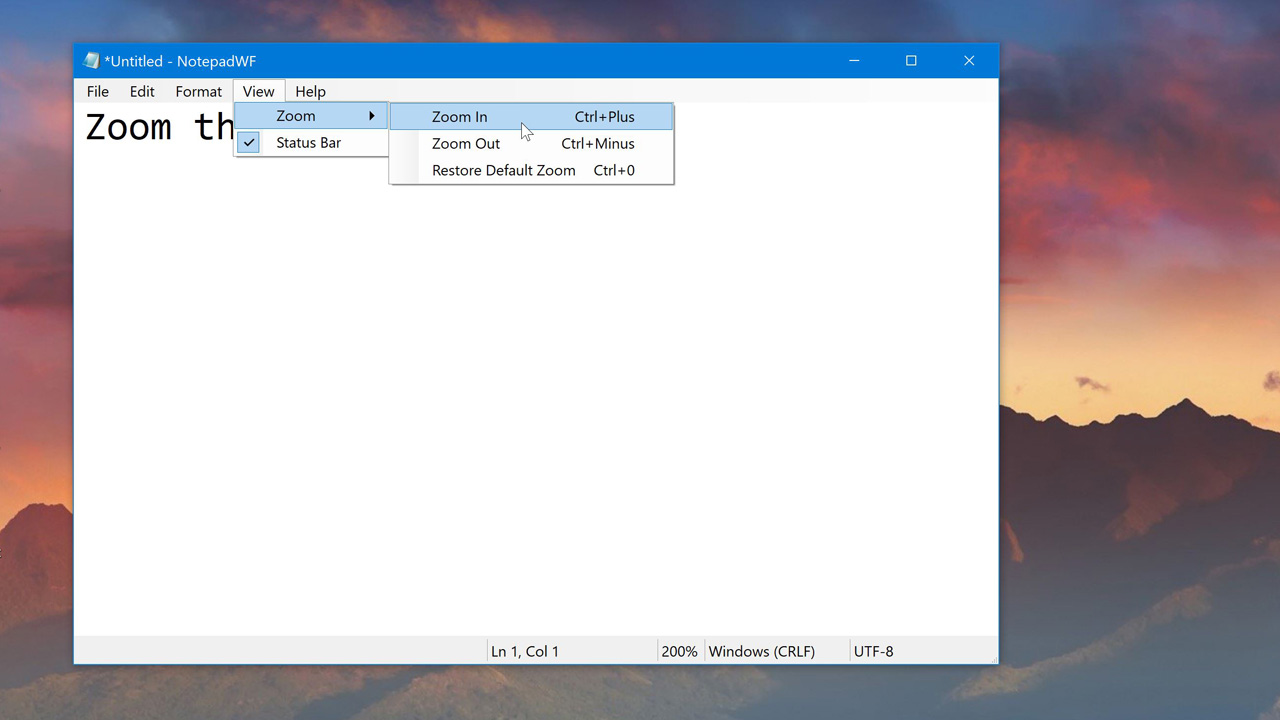
Fixing zoom
The way that we originally implemented Zoom In and Zoom Out was somewhat arbitrary and doesn’t resemble the way the new Notepad works: Instead of zooming the view, these menu items increase/decrease the size of the font displayed by TextBox1 by one point (and they only work within a somewhat arbitrary range of 1 to 72 points.) As bad, changing the zoom value (really the font size) doesn’t change the Zoom value in the status bar. And whatever the “zoom” value was set to persist with the app.
As noted earlier, this would have been an easy fix with a RichTextBox, which supports a Zoom property that changes the zoom level of the view, and not the underlying font size. But we’re currently using a TextBox, so we’ll need to work around this. And the workaround I came up with is to maintain the font that persists across application runs in a second property and to update this “master font” property only when required: When the application starts, when the user changes the font (using Format > Font), and when the application closes. That way, we can change the value of TextBox1.Font.Size on the fly using the Zoom In and Zoom Out menu items and not worry about saving the wrong font size when the application closes.
This will require a bit of extra code, of course. And we’re going to need two more Form 1 properties, one to store this “master font” and one to store the current zoom value. So open Form1.vb, scroll all the way to the top if needed, and add the following two property declarations under the two (for TextHasChanged and DocumentName) that are already there:
Public Shared Property MasterFont As Font
Public Shared Property ZoomValue As Integer = 100
(This proliferation of form properties, which I think of as global variables, may or may not be the most efficient way to handle this. Let me know if you have an opinion about that.)
Next, locate the Form1_Load event handler. And then find the line:
TextBox1.Font = My.Settings.MyFont
Add the following two lines of code below that.
MasterFont = TextBox1.Font
This will duplicate the font used by our text box into the MasterFont property so that it can persist if the user “zooms” the text box display. We have our original font, with its size, stored separately.
Next, find Form1_Closing. We need to ensure that the MasterFont, and not TextBox1.Font, is what’s written to the appropriate app setting. Locate the following line:
My.Settings.MyFont = TextBox1.Font
Now, change this to read:
My.Settings.MyFont = MasterFont
Going forward, we’re going to need to change the display of the zoom level in the status bar as the user changes the “zoom” level and chooses a new font. And right now, that control has a non-memorable name like ToolStripStatusLabel3 or similar. So open Form1.vb [Design], select that field in the status bar, and then rename it to ZoomToolStripStatusLabel in the Properties pane.
Now, locate FontToolStripMenuItem_Click. This is the event handler that fires when the user displays the system Font dialog. Currently, if they do make a change, that change is made to TextBox1.Font. But we also need to make the same change to MasterFont, reset the zoom value to its original value (100), and then display the correct zoom value (100%) in the status bar. So, edit the event handler to look like so when you’re done:
FontDialog1.Font = MasterFont
If FontDialog1.ShowDialog = Windows.Forms.DialogResult.OK Then
    TextBox1.Font = FontDialog1.Font
    MasterFont = FontDialog1.Font
    ZoomValue = 100
    ZoomToolStripStatusLabel.Text = ZoomValue.ToString + “%”
End If
Now, there is a question here about the zoom. If the user has zoomed the display to, say, 200 percent and then chooses a new font, the “zoom” level (really the font size displayed) will change with it. That’s probably not the correct behavior, but given that we’re implementing a workaround here, let’s leave that as-is for now and then decide collectively if we need to be a bit more sophisticated here later.
Next, we have to address the Click event handlers for the Zoom In, Zoom Out, and Restore Default Zoom menu items. Each is going to be a complete wipe and replace, so you can delete the code in each of these event handlers and replace them with what’s described below.
Instead of allowing an arbitrary “zoom” range of 1 to 72 points as before, now the application will work more like Notepad: It will zoom between 10 and 500 percent. (That’s why ZoomValue is 100 to start with; the text is “zoomed” to 100 percent.)
Use the following for ZoomInToolStripMenuItem_Click:
If ZoomValue < 500 Then
    ZoomValue += 10
    TextBox1.Font = New Font(TextBox1.Font.Name, ((MasterFont.Size * ZoomValue) / 100))
    ZoomToolStripStatusLabel.Text = (ZoomValue).ToString + "%"
End If
Here, we’re changing the “zoom” level (really increasing the font size) by 10 percent each time the user selects Zoom In. (If you’re not familiar with the += syntax, that’s shorthand for ZoomValue = ZoomValue + 10.) We’re updating TextBox1.Font accordingly, since that’s what the user sees and works with. But not MasterFont, since we don’t want the “zoom” changes to persist when the application closes. And then we’re updating the zoom display in the status bar.
The ZoomOutToolStripMenuItem_Click event handler works similarly, except that now we’re checking for the lower bound of the acceptable zoom level (10).
If ZoomValue > 10 Then
    ZoomValue -= 10
    TextBox1.Font = New Font(TextBox1.Font.Name, ((MasterFont.Size * ZoomValue) / 100))
    ZoomToolStripStatusLabel.Text = (ZoomValue).ToString + "%"
End If
And then there’s RestoreDefaultZoomToolStripMenuItem_Click, which has to reset the text box’s font to the master font and then make the appropriate changes to the Zoom display in the status bar and to our ZoomValue property.
TextBox1.Font = MasterFont
ZoomToolStripStatusLabel.Text = "100%"
ZoomValue = 100
Finally, there’s the Form1 Closing event handler. Here, we just need to make one change: Instead of saving the value of TextBox1.Font to My.Settings.MyFont, we’ll save the value of MasterFont instead. So, find the line that currently reads as:
My.Settings.MyFont = TextBox1.Font
And change it to:
My.Settings.MyFont = MasterFont
If you run the application now, it should mostly work. I’ve identified a few minor problems, one of which is that the Zoom field in the status bar resizes the first time we change that value. Obviously, the status bar layout is not ideal right now, so we’ll get to that and a few other fixes as part of a fit and finish pass later.
OK, let’s add some more of Notepad’s commands to our application.
Edit menu commands
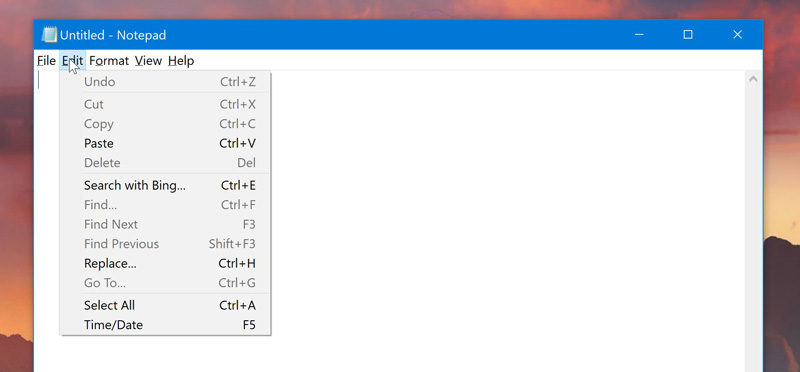
If you look at Notepad’s Edit menu, you’ll see that it contains numerous commands contained within three discrete groups. We haven’t addressed any of these commands yet, so let’s do at least some of that now.
Actually, I think we have everything we need to implement most of these commands, but I’ll leave Find, Find Next, Find Previous, Replace, and Go To for the future; these items may be problematic because we’re using a TextBox control instead of a RichTextBox control, so we’ll examine them later.
But we still have several menu items we can implement under the Edit menu: Undo, Cut, Copy, Paste, Delete, Search with Bing, Select All, and Time/Date. Each has a keyboard accelerator, indicated by the underlined character in each. And each has a keyboard shortcut.
Before adding any of those menu items, observe how the text box we’re using already supports most of those commands (Undo, Cut, Copy, Paste, Delete, and Select All) if we know the keyboard shortcuts. That is, we can type CTRL + A to select all the text, type CTRL + X to cut, and type CTRL + V to paste. That’s nice, but we’re going to run into an issue when we configure the relevant menu items to use those keyboard shortcuts.
What does this mean? Let’s use “Select All” as an example. Before adding the Select All menu item, that command works fine (with a keyboard shortcut). But if we assign CTRL + A to the Select All menu item, that will override the default behavior. And that means that CTRL + A will no longer work. So we’ll need to accommodate that with code. That is, we will need to make CTRL + A (and the related Select All menu item) select all of the text normally.
We’ll get to that. (And most of those commands are surprisingly easy to implement.) But first, let’s add the menu items. Since you should understand how to add these menu items to the project by now, I’ll proceed with only a little guidance. After adding each menu item, remember to add the three separators by right-clicking the item below where the separator will appear; then, choose Insert > Separator. And ensure that each item is named in keeping with the default style we’ve been using (UndoToolStripMenuItem, CutToolStripMenuItem, and so on). Do not change/edit the ShortcutKeys value for the Delete menu item pnly. (This is explained below.)
When you’re done, the Edit menu should look something like so:
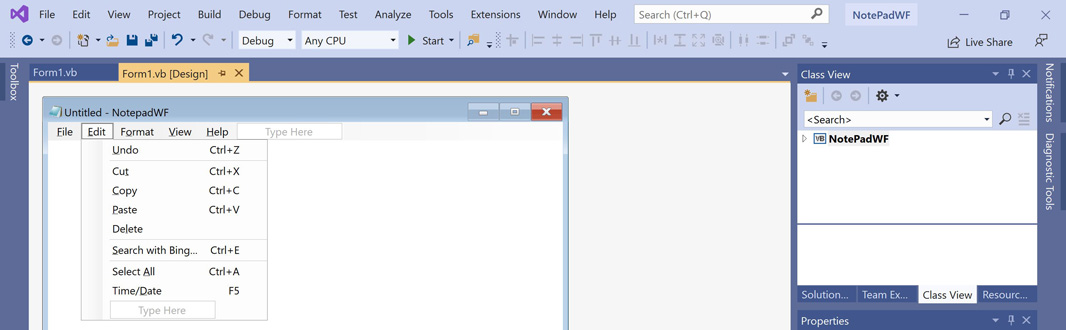
If you run the application, you’ll see what I mean about the keyboard shortcuts: CTRL + A no longer selects all of the text, CTRL + C no longer copies, and so on. So we’ll need to write code for each of the related menu item’s Click event handlers—for Undo, Cut, Copy, Paste, Delete, and Select All—to make these commands work properly again, regardless of whether the user accesses them from the menu system or using keyboard shortcuts.
For most of these—Undo, Cut, Copy, Paste, and Select All—this is incredibly easy because the TextBox control has methods that implement these actions.
Thus, the Click event handler for the Undo event handler should read as follows:
TextBox1.Undo()
And then you can fill out the remaining event handlers as follows:
Cut:
TextBox1.Cut()
Copy:
TextBox1.Copy()
Paste:
TextBox1.Paste()
Select All:
TextBox1.SelectAll()
This is another great example of how Visual Studio and a (semi) modern framework like Windows Forms does the hard work for you: You don’t need to worry about where the caret is in the text, whether any text is selected, or whatever. It’s all done for you.
Well, almost all of it. The one exception here is Delete. I had expected to see a TextBox.Delete method or similar, but it doesn’t exist. So I did a bit of research around emulating key presses in code and, sure enough, .NET provides a SendKeys method for this very reason. (I think classic VB had something similar.) And so we still only need a single line of code in the Click event handler for the Delete menu item. It looks like so:
SendKeys.Send("{DEL}")
But we also have to change how we handle that keyboard shortcut. If we leave “Del” associated with DeleteToolStripMenuItem’s ShortcutKeys property, pressing DEL (or choosing Edit > Delete) won’t work. So, remove the value of ShortcutKeys if you added that. And then add the following line to the Form1_Load event handler:
DeleteToolStripMenuItem.ShortcutKeyDisplayString = "Del"
(I placed this line under the other two ShortcutKeyDisplayString assignments.)
If you test the application now, all of those commands—Undo, Cut, Copy, Paste, Delete, and Select All—should work normally, from both the menu and with keyboard shortcuts.
That leaves Search with Bing and Time/Date.
If you look at how Search with Bing works in the real Notepad, it opens a browser window, navigates to Bing.com, and searches for the text that’s selected in Notepad. I figured this would be simple enough: You can obviously start other applications from Visual Basic, and passing a web browser a string that will trigger a Bing search should be easy too.
But in researching this, I discovered there’s an easier way: You can simply pass that URL to Process.Start and Windows will open the default web browser automatically and then browse to the passed URL. That’s the desired behavior, rather than specifying a particular web browser.
I also needed to research the format of the URL, which I figured would be identical to that which occurs when you use address bar search in any major web browser. And that URL looks like so when Bing is set to your default search engine:
https://www.bing.com/search?q=%s
That %s variable is a string that represents the value the user is searching for.
Given all that, implementing Search with Bing is easy: Open its Click event handler and add the following single line of code:
Process.Start("https://www.bing.com/search?q=" + TextBox1.SelectedText)
That works fine. But I ended up wrapping it in a Try exception handling block inside an If-Then block just in case a blank or spurious URL somehow impacted our application. I’m honestly not sure this one is required, but now my SearchWithBingToolStripMenuItem_Click event handler reads like so:
Try
    If TextBox1.SelectedText <> "" Then
        Process.Start("https://www.bing.com/search?q=" + TextBox1.SelectedText)
    Else
        Process.Start("https://www.bing.com")
    End If
Catch ex As Exception
    MessageBox.Show(ex.Message)
End Try
It seems to work properly either way.

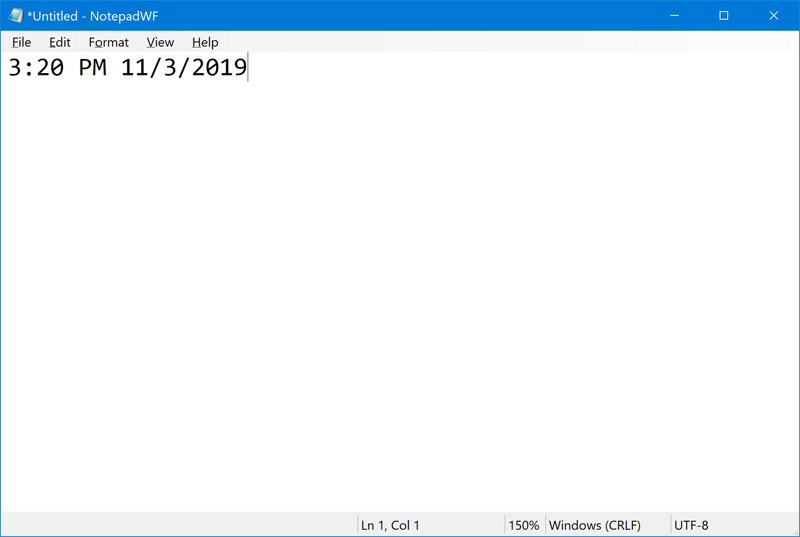
As for the Time/Date, this one is even easier. If you use this command in the real Notepad, you’ll see that it inserts the time and date at the caret/selection like so:
9:59 AM 11/3/2019
These are both displayed in a very particular format, and since Visual Basic/.NET provides many Time and Date objects and methods, it’s just a matter of either formatting each on the fly correctly or, ideally, simply finding methods that return the time and date in those formats automatically.
I was able to use the latter approach. So the code in the Click event handler for the TimeDate menu item should look like so:
TextBox1.SelectedText = Now.ToShortTimeString + " " + Now.ToShortDateString
Test extensively. And please let me know if you discover any issues.
What’s next?
As we move into the final phases of this first project, I can identify the following missing features:
Page Setup and Print. Notepad lets you configure how it will print documents and then actually print them. These capabilities are available in Visual Basic/.NET but can be a bit tedious to figure out. So I’m working on that.
Find, Find Next, Find Previous, Replace, and Go To. These commands are available in the Edit menu and I’ve not yet researched whether it’s possible (or at least reasonably possible) to implement them against a TextBox control. I will get to that.
About box. We built a basic About box previously, but we need to customize it. That should be pretty easy.
Status bar. We’ve only implemented one of the four fields in the status bar and the formatting/layout is off. I should be able to fix the layout. Not sure about implementing the other fields yet.
Beyond those, we have the aforementioned fit and finish work, and I’m sure there are some bugs. (I’m using this app now instead of Notepad, so I suspect I’ll uncover some issues in doing so.) Plus, we need to look at publishing and distributing the app.
I’ll have more as soon as possible, but it may be after Ignite because of the schedule this week.

Gain unlimited access to Premium articles.
With technology shaping our everyday lives, how could we not dig deeper?
Thurrott Premium delivers an honest and thorough perspective about the technologies we use and rely on everyday. Discover deeper content as a Premium member.