The WinForms Notepad Project: New Icon, Auto Save (Premium)
- Paul Thurrott
- Dec 26, 2019
-
17
As I continue to put off the really hard bits, here’s how to change the icon and add a quick and dirty auto-save feature.
New icon
Way back at the beginning of this project, I wrote about how you can add an icon to your application and to each form that needs to display it. Of course, I also borrowed the icon from the real Notepad, which is out-of-date (it literally dates back to 2006 and Windows Vista) and not something we can really use in our own application. But I just needed a placeholder until I could figure out a better icon.
Over the past two months, I’ve explored creating an icon from scratch and editing an existing icon to make something acceptably unique. But I’ve been unhappy with the results. Here’s a particularly terrible example, in which I lightly edited the Microsoft Word icon (which I’m not even that big of a fan of).
![]()
For now, I’m giving up on this. Instead, I’ll be using a free (for non-commercial use) icon I found online back in October and have been holding onto ever since, just in case. It’s not perfect, but it does meet a few of my requirements: Unlike the actual Notepad icon, it faces forward instead of at an angle, and it’s colorful and vibrant. I may replace it again in the future if I find something better. But let’s just use this for now.
To use it in our application, we need to download the icon (in ICO format) and then add it to the Resources folder in our project. (We did this before for the original Notepad icon as well, so the folder is already there.)
To change the icon in application settings, right-click the project name in Solution Explorer and choose Properties. Then, navigate to the Application tab and select the icon from the list under “Icon:”.
![]()
Save and close application settings. Then, open Form1.vb [Design], select the form’s title bar to select Form1, and find the Icon property in the Properties pane. Change this to the same icon. (It will be located in C:\Users\<your user name.\source\repos\NotePadWF\Resources by default when you’re presented with an Open File dialog.)
![]()
Run the application to make sure the icon appears in both the application title bar and in the taskbar.
![]()
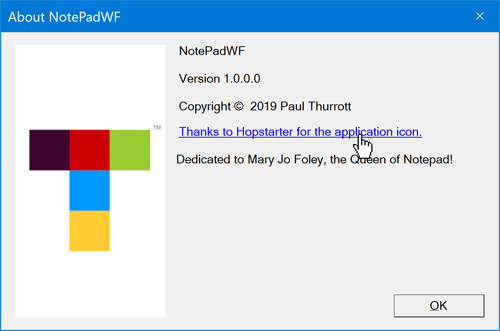
There’s one more thing to do: The icon we’re using requires that we credit its creator for making the icon and that we provide a link to them. The obvious place to do this is the About box, and Visual Basic even provides a control called a LinkLabel that looks like a web URL and lets us open a web browser and navigate to any URL.
If you open AboutBox1.vb [Design], you’ll see that this dialog was pre-fabbed by Visual Studio, and it has a specific layout which makes adding a LinkLabel (or any other arbitrary control) a bit difficult. But since the Company Name label is pretty pointless in our case, we can just delete that and replace it with a LinkLabel. So just select that control in the designer and press DELETE. Gone.
Now, drag in a LinkLabel from the Toolbox and position it roughly where it should go in the empty space where the Company Name label used to be. To match the rough layout of the other labels there, you’ll need to change its Margin property to 19, 0, 10, 0 in the Properties pane. Then, change its Text property to “Thanks to Hopstarter for the application icon.” (No quotes.)
Curiously, there’s no URL or Link property (or whatever). Instead, you must handle the LinkLabel’s Click event and then write your own code to navigate to a specific URL with a web browser. We already did that for the “Search with Bing” command, so we can just use that code. So, double-click the LinkLabel to open the code editor to LinkLabel1_LinkClicked. Then, add the following line of code there:
Process.Start("http://www.iconarchive.com/show/sleek-xp-software-icons-by-hopstarter/Notepad-icon.html")
Now, when you run the app and view the About box, you will see the thank you link. And when you click it, the right page will open in your default browser. Our conscience is clear.
Auto Save
Auto Save has been one of the top feature requests since I introduced the idea of expanding on the functionality provided by the real Notepad. There are a couple of ways to handle this kind of thing, I guess. For example, you could auto-save the current document on some schedule—every 30 seconds, perhaps—or you could just continuously auto-save if there are any changes.
Microsoft Word and the other main Office applications do the latter, but only if the document is saved in OneDrive (or SharePoint). But that doesn’t sound like a good idea for our app, since we’re not doing particularly sophisticated change detection, and it’s unlike that saving a document every time you change a single character is necessary. For example, if you add a space to a document and then delete it, the document doesn’t need to be saved again, since it hasn’t technically changed anymore; but our Notepad clone still registers it as needing to be saved. Twice.
We could “fix” this functionality and make it more sophisticated, and honestly, that’s not a bad idea. But for now, let’s just let the user toggle Auto Save on and off, and when the feature is on, auto-save on a set schedule. I’ve chosen 30 seconds, but you can, of course, change this to whatever interval you feel is best.
We could also let the user configure the auto-save interval. But this is complicated because our app, like Notepad, doesn’t have an Options dialog or whatever. I have an idea for working around that. But for now, let’s just hard code it at 30 seconds and see how it works.
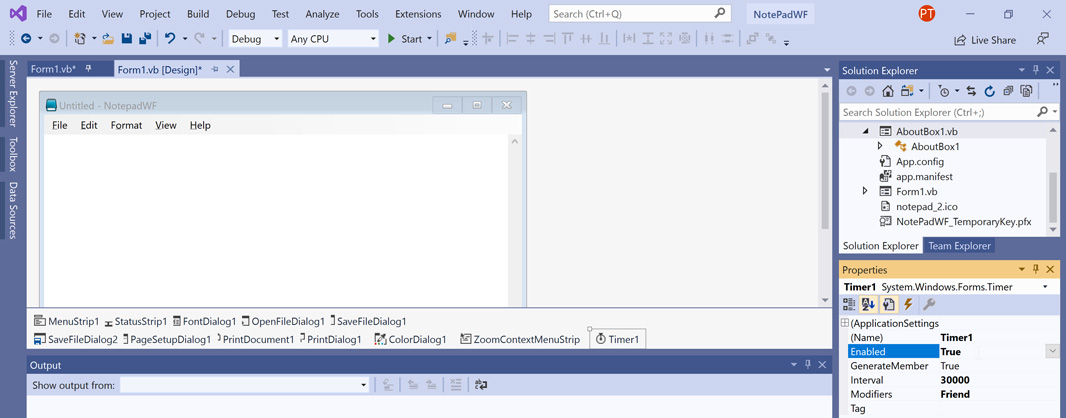
The first step is to add a Timer component to the project. You will find this in the Toolbox, and like the menu, status bar, and various dialogs we’re using, it will appear below the form in the components pane.
Timer1, as this new component is called, has one property of interest: Interval. The Interval property determines how often the component’s Tick event handler will trigger. But it’s measured in milliseconds, so we need to do a little math. 30 seconds = 30000 milliseconds, so change Timer1’s Interval property to 30000.
With that out of the way, we will need to create a new application setting to save and load the user’s preference for this feature (i.e. whether it is enabled or not) each time the application closes and opens, respectively. And then we’ll need to think about how we’ll let the user toggle an Auto Save feature on and off.
Adding the application setting is easy enough: Right-click the project name in the Solution Explorer pane and choose Properties from the context menu that appears. Then, navigate to the Settings pane and add a new setting with the following values:
Name: MyAutoSave
Type: Boolean
Scope: User
Value: False
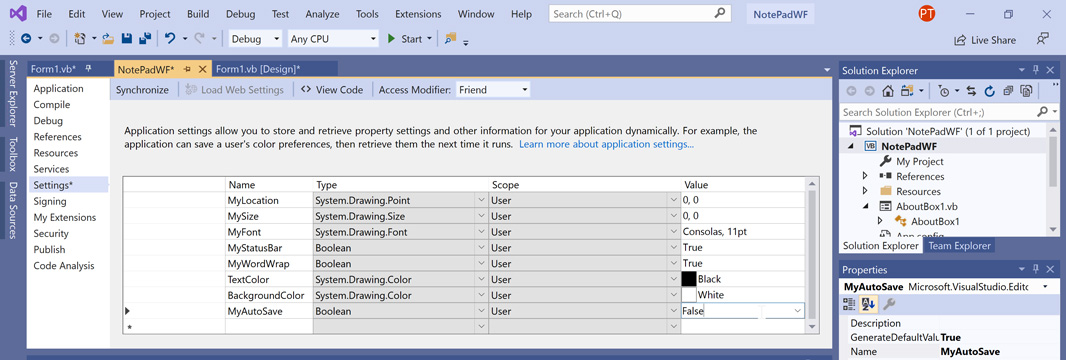
When you’re done, save and then close application settings.
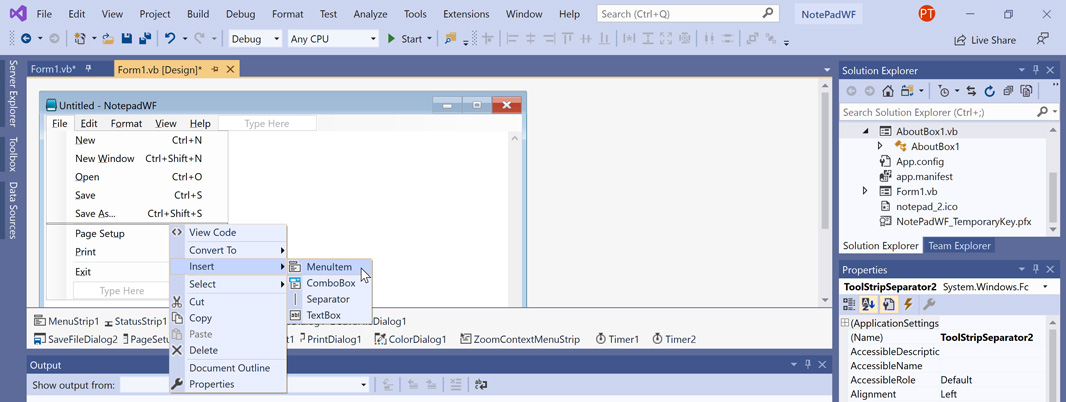
As for where this feature will appear in the UI, the menu is an obvious place, and since our other Save-related commands are in the File menu, let’s put it there, under Save and Save As. To do so, open Form1.vb [Design], open the form’s File menu, and right-click on the divider under Save As. Select Insert > Menu Item from the pop-up menu that appears.
Visual Studio will insert a new menu item with a terrible name like ToolStripMenuItem4 or similar. Select this and change its Name property (in the Properties pane) to AutoSaveToolStripMenu. Then, change its Text property to “Auto Sa&ve” (no quotes).
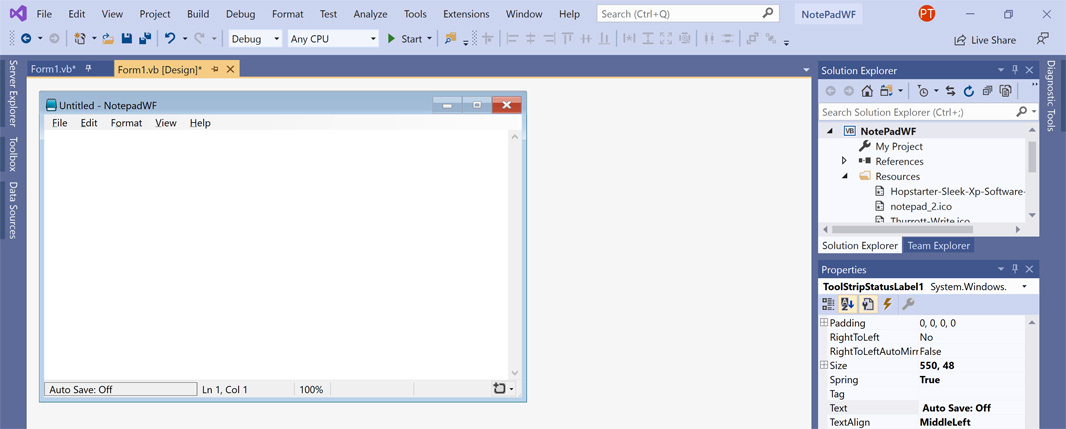
While we’re at it, let’s add an Auto Save display to the status bar, too. That way, we can always tell whether this feature is enabled. The leftmost status bar field (the one with its Spring property set to True so that it takes up all of the remaining space in the status bar) is a good candidate since we’re not using it (and hadn’t planned to).
Currently, that field is named ToolStripStatusLabel1 but since we’re going to start accessing it in code, we had better give it a more self-descriptive name. So open Form1.vb [Design], select that field and change its Name property to AutoSaveToolStripStatusLabel. Then, change its Text property to “ Auto Save: Off” (no quotes, and note the purposeful extra space at the beginning).
As for the code itself, we have a number of additions to make. We will need to check the state of the Auto Save menu item when the app closes and save the MyAutoSave application setting accordingly. We will need to load the MyAutoSave application setting and change the Auto Save menu item’s Checked property and AutoSaveToolStripStatusLabel’s Text property accordingly. We will need to write code for the Auto Save menu item’s Click event handler. And we will need to write code for Timer1’s Tick event handler as well.
That’s a lot to think about. So let’s work through it.
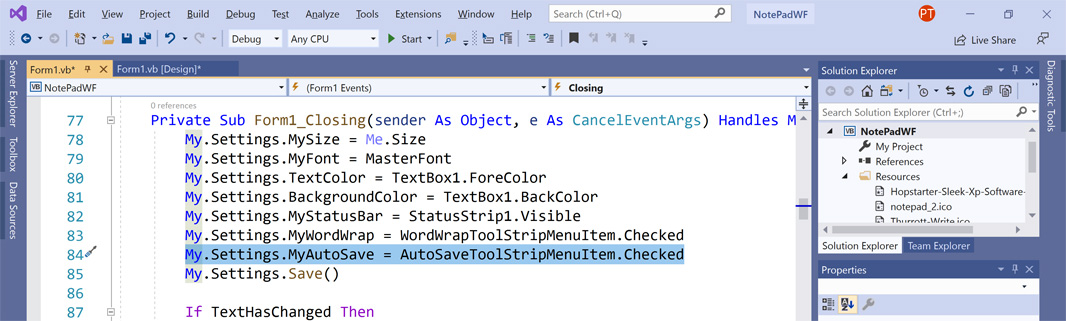
Saving the MyAutoSave application setting is simple enough. In fact, it’s just one line of code, which we need to add to Form1_Closing. (To get there, open Form1.vb [Design] and double-click on the form’s title bar to open Form1_Open in the code editor. Then, select Closing from the right-most drop-down above the code editor.) The line you’re adding is:
My.Settings.MyAutoSave = AutoSaveToolStripMenuItem.Checked
Add this, as shown in the screenshot, between the saving of the MyWordWrap application setting and the My.Settings.Save() method call:
Reading the MyAutoSave application setting, in Form1_Load, is likewise simple, but we have to also add a checkbox to the Auto Save menu item (or not) and change AutoSaveToolStripStatusLabel’s Text property as well. So display Form1_Load in the code editor. You should see a block of code in there like so:
WordWrapToolStripMenuItem.Checked = My.Settings.MyWordWrap
    If TextBox1.WordWrap Then
    TextBox1.ScrollBars = ScrollBars.Vertical
Else
    TextBox1.ScrollBars = ScrollBars.Both
End If
Below that, add the following:
AutoSaveToolStripMenuItem.Checked = My.Settings.MyAutoSave
If AutoSaveToolStripMenuItem.Checked Then
    Timer1.Enabled = True
    AutoSaveToolStripStatusLabel.Text = " Auto Save: On"
Else
    Timer1.Enabled = False
    AutoSaveToolStripStatusLabel.Text = " Auto Save: Off"
End If
Now, open Form1.vb [Design] and find File > Auto Save in the form. Double-click it to display a blank AutoSaveToolStripMenuItem_Click event handler. Add the following code:
If AutoSaveToolStripMenuItem.Checked Then
    AutoSaveToolStripMenuItem.Checked = False
    AutoSaveToolStripStatusLabel.Text = " Auto Save: Off"
Else
    AutoSaveToolStripMenuItem.Checked = True
    AutoSaveToolStripStatusLabel.Text = " Auto Save: On"
End If
In this state, you should be able to run the application, toggle File > Auto Save on or off, close the application, and re-run the application, and see that the Auto Save menu item is checked (or not) and the status bar text is set accordingly. It doesn’t “do” anything per se. But now we can add the code that really makes this work.
First, it’s a good idea to prompt the user to make sure they’re serious about enabling or disabling auto-save since it’s such a big change. We can use a Message Box for that, of course. And we also need to enable or disable the timer; if the user enables auto-save, then the timer will enable too, setting off the 30-second countdown to the next auto-save.
Long story short, the AutoSaveToolStripMenuItem_Click should now look like this:
If AutoSaveToolStripMenuItem.Checked Then
Timer1.Enabled = False
If MessageBox.Show(Me, "Click OK to disable Auto Save.", "Disable Auto Save", vbOKCancel) = vbOK Then
AutoSaveToolStripMenuItem.Checked = False
AutoSaveToolStripStatusLabel.Text = " Auto Save: Off"
Else
Timer1.Enabled = True
End If
Else
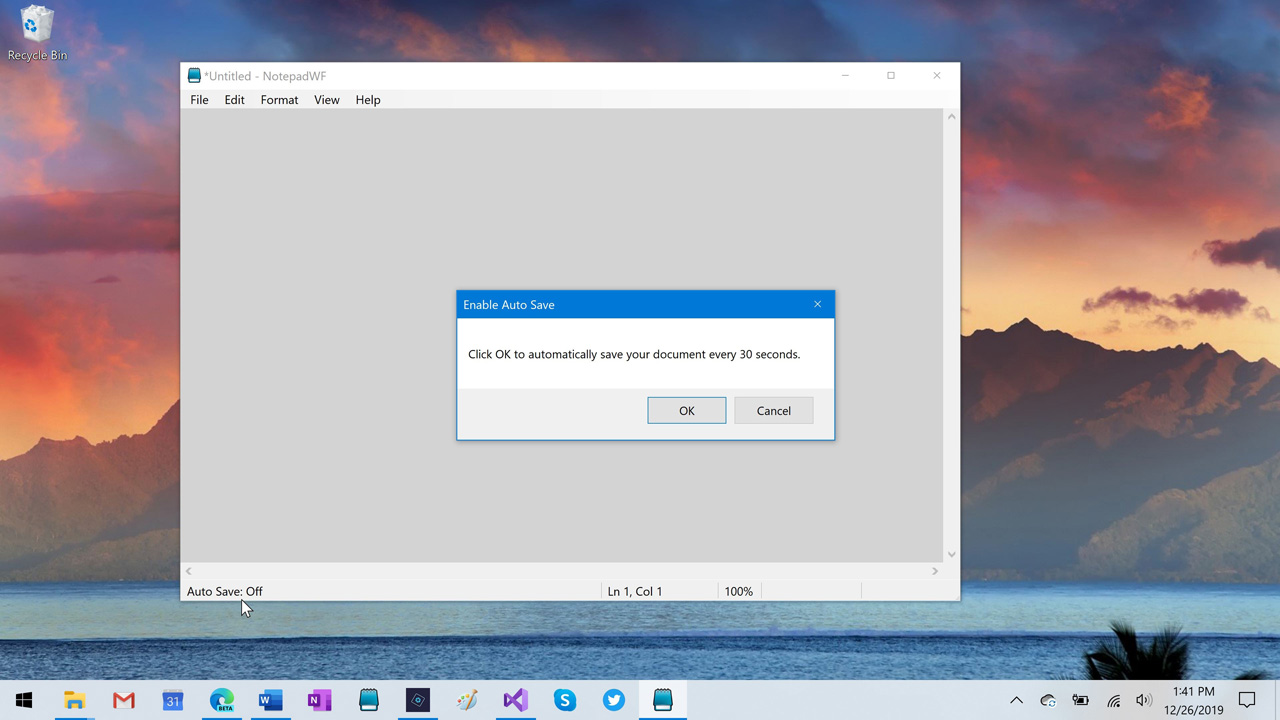
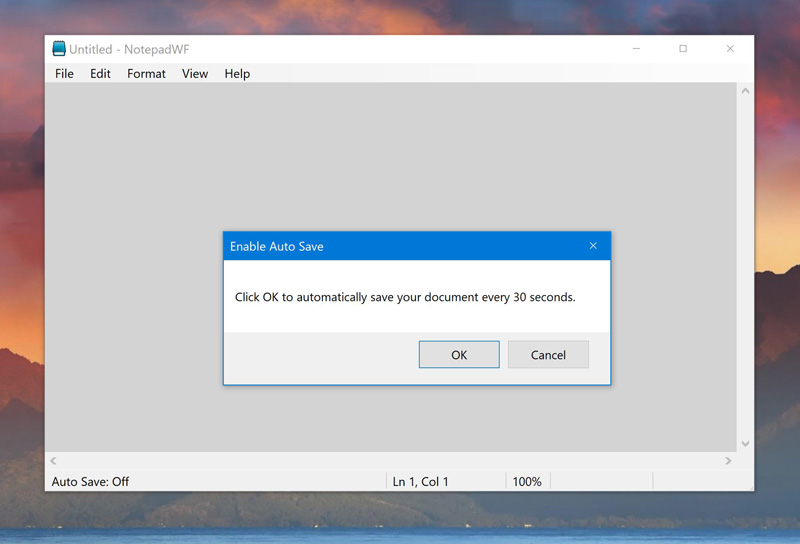
If MessageBox.Show(Me, "Click OK to automatically save your document every 30 seconds.", "Enable Auto Save", vbOKCancel) = vbOK Then
AutoSaveToolStripMenuItem.Checked = True
AutoSaveToolStripStatusLabel.Text = " Auto Save: On"
Timer1.Enabled = True
End If
End If
This should work properly if the user selects File > Auto Save. You’ll see a prompt either way, and then auto-save will be enabled or disabled as directed by the user.
Of course, we want this to work if the user clicks (or right-clicks) the Auto Save status bar label too. So open Form1.vb [Design] and double-click the AutoSaveToolStripStatusLabel to open its Click event handler in the code editor. Delete that, and with AutoSaveToolStripStatusLabel still selected in the middle drop-down above the code editor, select MouseUp from the right-most drop-down to display an empty MouseUp event handler. Add the following line of code:
AutoSaveToolStripMenuItem_Click(sender, e)
Now, you can toggle Auto Save from the File menu or from the status bar.
But we’re not done yet: We have to handle Timer1’s Tick event too. This is the event that fires, in our case, once every 30 seconds. And that’s easy enough: If the text in the TextBox has changed since the last time this event fired, we will need to initiate a save routine. And since we are already handling that in the SaveToolStripMenuItem’s Click event handler, we can just call that.
To do this, display Form1.vb [Design] and double click on Timer1 in the component area below the form. The code editor will appear and display an empty Timer1_Tick event handler. Add the following code:
If TextHasChanged Then
    SaveToolStripMenuItem_Click(sender, e)
End If
And that should do it. The SaveToolStripMenuItem_Click event handler does everything we need it to do, from actually saving the document (and prompting with a Save As dialog if needed) to removing the “*” character from the application’s title bar. You can (somewhat laboriously) watch it work by enabling Auto Save, typing a space in a blank document, and waiting 30 seconds: After that interval elapses, a Save As dialog will appear.
More soon.

Gain unlimited access to Premium articles.
With technology shaping our everyday lives, how could we not dig deeper?
Thurrott Premium delivers an honest and thorough perspective about the technologies we use and rely on everyday. Discover deeper content as a Premium member.