The WPF Notepad Project: About Box and Edit Menu (Premium)
- Paul Thurrott
- Mar 22, 2020
-
4
In this installment, we’ll create an About box for the WPF version of .NETpad and start building out the Edit menu.
About box
As we did with the Font dialog, we’ll be creating our own customized dialog for the application’s About box. But this will be a much simpler window. Simpler, even, than the main application window.
To get started, open MainWindow.xaml and locate the Help menu item, which is currently empty. Add some space between <MenuItem Header=”_Help”> and </MenuItem> and add the following line of XAML:
<MenuItem Name="AboutMenu" Header="_About" />
Then, create a Click event handler for this menu item. (I assume you know how do this by now, as we’ve done similarly several times already.) It will appear in MainWindow.xaml.cs:
private void AboutMenu_Click(object sender, RoutedEventArgs e)
{

}
Now, we can create the About box. Right-click on the project name in the Solution Explorer pane and choose Add > Window (WPF). In the Add New Item that appears, rename the new window to AboutBox.xaml and click Add. The new window will appear in the split view in Visual Studio.

Double-click the XAML button in the splitter to display only the XAML file. Then, locate the code that currently reads as Title=”AboutBox” Height=”450″ Width=”800″ and replace it with:
WindowStyle="SingleBorderWindow"
WindowStartupLocation="CenterOwner"
Title="AboutBox" Height="300" Width="350" ResizeMode="NoResize"
Now, return to MainWindow.xaml.cs and add the following code to the AboutMenu_Click event handler:
AboutBox aboutBox = new AboutBox
{
    Owner = this
};
aboutBox.ShowDialog();
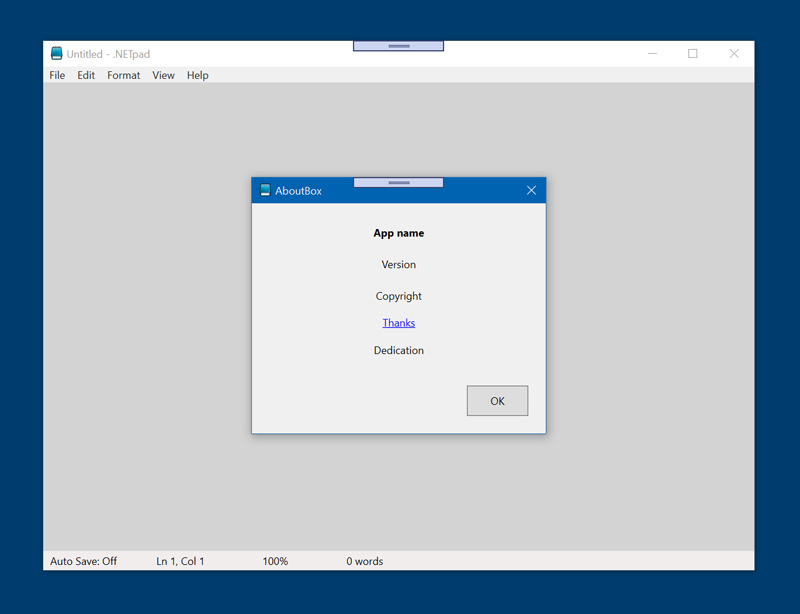
Now, you can run the application and test Help > About to get an idea of how this thing will look.
![]()
OK, let’s design the dialog using XAML. This won’t be difficult: In keeping with my goals of making our custom dialogs as modern as possible, we’ll lose the convoluted design from the WinForms version of this About box and just display a few lines of text for the application name, version number, and copyright, plus a linked thank-you to the app’s icon designer (which he requires) and a dedication. And then a single OK button.
If you add that up, that’s six rows—five for each line of text plus one for the button. So add the following row definitions inside of the Grid tags in AboutBox.xaml:
<Grid.RowDefinitions>
    <RowDefinition Height="Auto" />
    <RowDefinition Height="Auto" />
    <RowDefinition Height="Auto" />
    <RowDefinition Height="Auto" />
    <RowDefinition Height="Auto" />
    <RowDefinition Height="*" />
</Grid.RowDefinitions>
Now, we can add the five lines of text, which will be implemented mostly with labels. (We’re using a textblock for the thank you because it requires a hyperlink.) Add the following XAML below those row definitions:
<Label Name="AppNameLabel" Grid.Row="0" Content="App name" FontWeight="Bold" Margin="20,20,20,10" HorizontalAlignment="Center" />
<Label Name="VersionLabel" Grid.Row="1" Content="Version" Margin="20,0,20,10" HorizontalAlignment="Center" />
<Label Name="CopyrightLabel" Grid.Row="2" Content="Copyright" Margin="20,0,20,10" HorizontalAlignment="Center" />
<TextBlock Name="ThanksTextBlock" Grid.Row="3" Text="Thanks" Margin="20,0,20,10" TextDecorations="Underline" Foreground="Blue" HorizontalAlignment="Center" />
<Label Name="DedicationLabel" Grid.Row="4" Content="Dedication" Margin="20,0,20,10" HorizontalAlignment="Center" />
Then, add a StackPanel so we can align the OK button correctly to the bottom right of the window:
<StackPanel Grid.Row="5" Orientation="Vertical" HorizontalAlignment="Right" VerticalAlignment="Bottom">
    <Button Name="OKButton" Margin="0,0,20,20" Width="70" Height="35" HorizontalAlignment="Right" VerticalAlignment="Bottom" Content="OK" />
</StackPanel>
You can check out the Designer view for an idea of how this will look.

OK, now add a Click event handler for the OK button in the About box. Once AboutBox.xaml.cs appears with that empty event handler, take a second to remove all the unnecessary (gray) include lines in the using section at the top.

Let’s make two quick additions to this file. Inside of the constructor (public AboutBox()) and below InitializeComponent(); add the following code, which will color the background of the About Box similarly to what we did with the Font dialog:
// Set the window background color
SetResourceReference(BackgroundProperty, SystemColors.ControlBrushKey);
Then, add the following code to OKButton_Click:
this.Close();
Now, we can run the application and see how the About box looks with some basic text.
Very nice. But now we need to replace all that boilerplate text with the actual information we want to display. Some of this will be derived from the application’s settings. Some will be hard-coded, but in a perfect world, we’d get this information from localized resources. Maybe someday.
For now, add the following code to the AboutBox constructor, and below the code we added earlier to change the color of the dialog:
// Populate the window title and labels in the About box
this.Title = "About " + Application.Current.MainWindow.GetType().Assembly.GetName().Name;
AppNameLabel.Content = Application.Current.MainWindow.GetType().Assembly.GetName().Name + " (WPF version)";
VersionLabel.Content = "Version " + Assembly.GetExecutingAssembly().GetName().Version.ToString();
CopyrightLabel.Content = "Copyright © " + System.DateTime.Now.Year + " " + FileVersionInfo.GetVersionInfo(Assembly.GetEntryAssembly().Location).CompanyName;
ThanksTextBlock.Text = "Thanks to Hopstarter for the application icon";
DedicationLabel.Content = "Dedicated to Mary Jo Foley, the Queen of Notepad!";
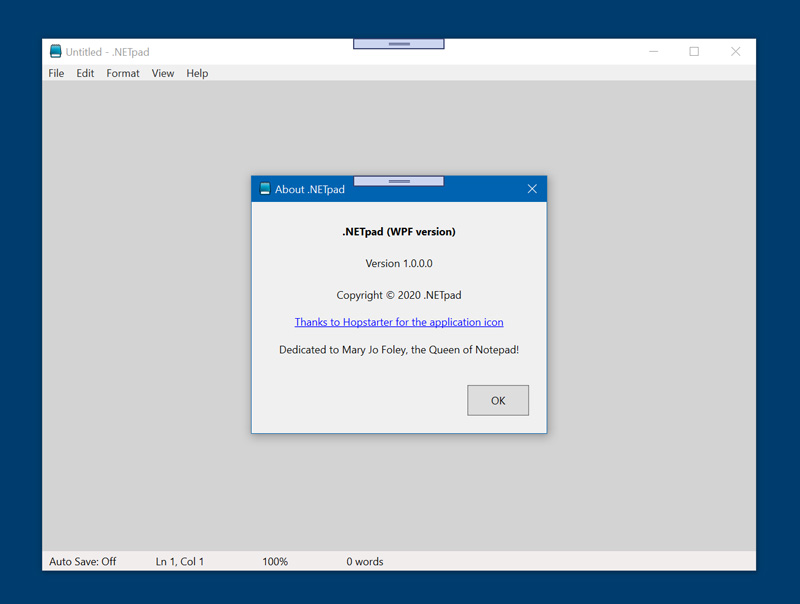
Two of those keywords—Assembly and FileVersionInfo—will trigger warnings in Visual Studio. So be sure to add System.Reflection and System.Diagnostics to using as prompted. Then, run the application again and take a look at the About box.
Now we need to deal with that text block: The user should be able to click on the hyperlink and navigate to the webpage specified by the app icon’s designer. Text blocks, unlike labels, do support this functionality. But they do not support a Click event for some reason. So we’ll use MouseUp instead.
To do so, select the text block tag in the XAML file, display the list of events in the Properties pane, and double-click next to MouseUp. A blank MouseUp event handler will appear in AboutBox.xaml.cs:
private void ThanksTextBlock_MouseUp(object sender, System.Windows.Input.MouseButtonEventArgs e)
{

}
As you may recall, we used Process.Start to implement New Window earlier, so it stands to reason that this will work fine for displaying a URL using the default browser. (We did something similar in the Windows Forms version of the app earlier, too.) So add the following line of code inside ThanksTextBlock_MouseUp:
Process.Start("http://www.iconarchive.com/show/sleek-xp-software-icons-by-hopstarter/Notepad-icon.html");
Now, run the application and try clicking on the hyperlink text in the About box. Oops.
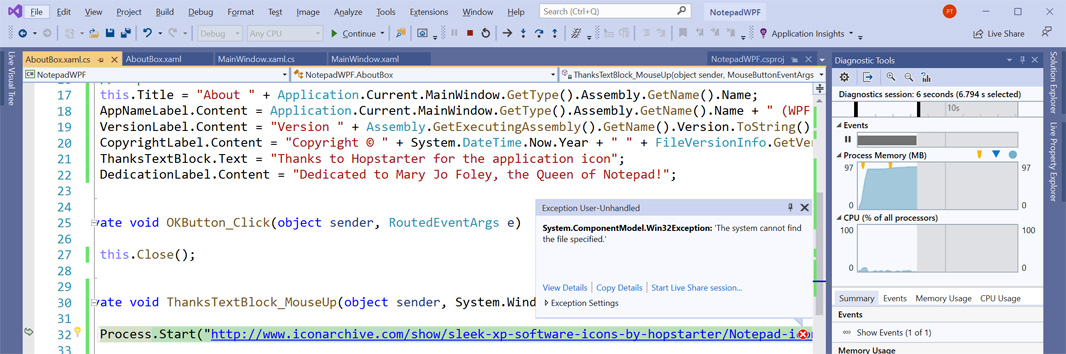
I had to research this one as the error message doesn’t really describe the problem. Long story short, this is caused by a restriction introduced in .NET Core, but there’s a workaround. So replace the code inside ThanksTextBlock_MouseUp with the following:
ProcessStartInfo processStartInfo = new ProcessStartInfo
{
    FileName = "http://www.iconarchive.com/show/sleek-xp-software-icons-by-hopstarter/Notepad-icon.html",
    UseShellExecute = true
};
Process.Start(processStartInfo);
Now, when you test it, it will work, and the icon author’s webpage will display in your default browser. There is one other problem, of course: The mouse cursor doesn’t change into a hand pointing cursor (what I think of as the “Hamburger Helper” cursor for the some reason). I never did figure that out, and while it’s a minor point, it’s something I’ll look at again in a fit and finish pass when we’re done with the app.
So, for now, that should do it for the About box.
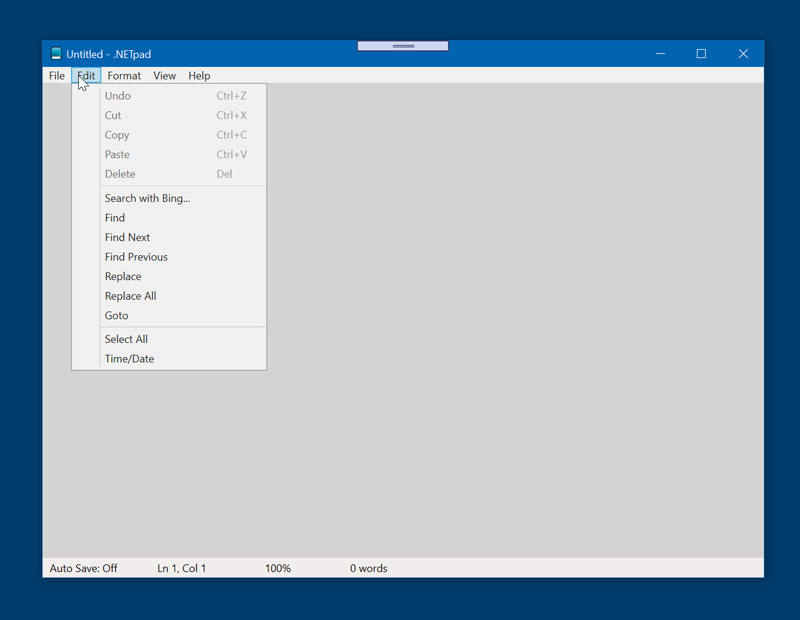
Edit menu
We’ve completely ignored the Edit menu so far, so let’s fix that. The first step, of course, is to fill in the Edit menu with all the menu items it contains.
To get started, open MainWindow.xaml and locate the Edit menu item. Create some space between <MenuItem Header=”_Edit”> and </MenuItem> and add the following to build out the menu:
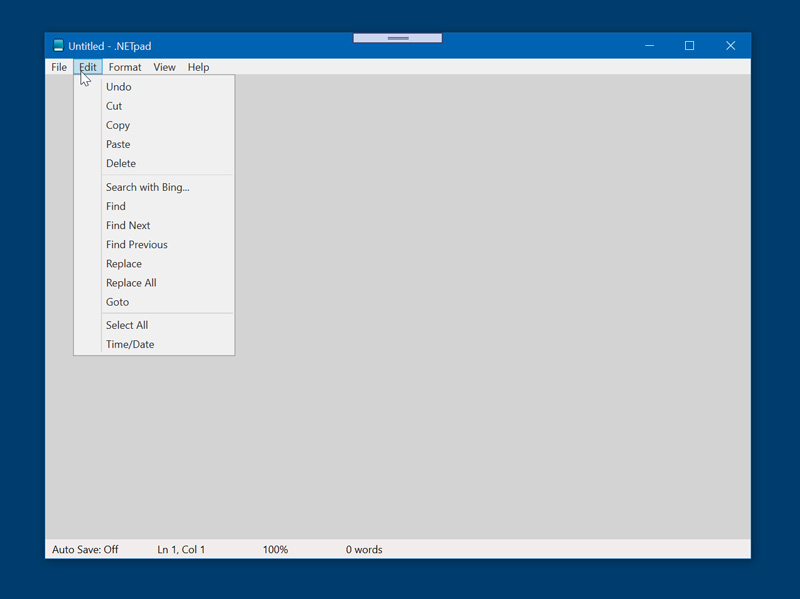
<MenuItem Name="UndoMenu" Header="_Undo" />
<MenuItem Name="CutMenu" Header="Cu_t" />
<MenuItem Name="CopyMenu" Header="_Copy" />
<MenuItem Name="PasteMenu" Header="_Paste" />
<MenuItem Name="DeleteMenu" Header="De_lete" />
<Separator />
<MenuItem Name="SearchWithBingMenu" Header="_Search with Bing..." />
<MenuItem Name="FindMenu" Header="_Find" />
<MenuItem Name="FindNextMenu" Header="Find _Next" />
<MenuItem Name="FindPreviousMenu" Header="Find Pre_vious" />
<MenuItem Name="ReplaceMenu" Header="_Replace" />
<MenuItem Name="ReplaceAllMenu" Header="Replace A_ll" />
<MenuItem Name="GoToMenu" Header="_Goto" />
<Separator />
<MenuItem Name="SelectAllMenu" Header="Select _All" />
<MenuItem Name="TimeDateMenu" Header="Time/_Date" />
You can run the application now and check out our empty Edit menu.
As you might recall, I struggled with the Find, Find Next, Find Previous, and Replace/Replace All functions the first time around, but was bailed out by a reader. This time, there are new challenges, but all of them are related to WPF commands: With one exception, all of the Edit menu items will be implemented using commands, and while I can’t honestly say that I came up with an approach that works in all cases all the time, I did get everything here working. I’m guessing there are more efficient solutions, but I’m never going to be a WPF expert.
Undo, Cut, Copy, Paste, and Delete
We’ll get to that. For now, let’s start with the first five Edit menu items—Undo, Cut, Copy, Paste, and Delete—most of which are pretty easy to implement. In fact, WPF will automatically handle the enabling and disabling of the menu items that we link to the underlying commands; for example, Copy won’t be available unless there is something in the Clipboard that can be copied.
To see how this works, add a Command property to each of these menu items. When you’re done, that section of XAML will look like so:
<MenuItem Command="Undo" Name="UndoMenu" Header="_Undo" />
<MenuItem Command="Cut" Name="CutMenu" Header="Cu_t" />
<MenuItem Command="Copy" Name="CopyMenu" Header="_Copy" />
<MenuItem Command="Paste" Name="PasteMenu" Header="_Paste" />
<MenuItem Command="Delete" Name="DeleteMenu" Header="De_lete" />
If you run the application now, you’ll see that WPF has automatically filled in the keyboard shortcut hint for each of these items in the menu.
Even better, almost everything works fine, whether you use a menu item (like Edit > Cut) or a keyboard shortcut (like CTRL + X). As noted, WPF automatically makes the menu items enabled or disabled as appropriate.
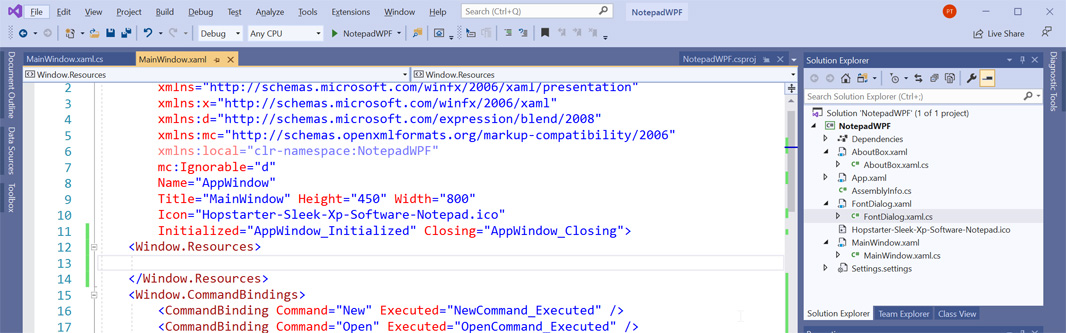
There is one small exception: While the Delete keyboard shortcut (DEL) works fine, selecting Edit > Delete does not. In fact, the menu item is always disabled.
I don’t know the why of that, but I do know how to fix it: Open MainWindow.xaml and locate the Window.CommandBindings section. Open up some space between the command bindings for Close and NavigationCommands.Zoom and add the following line of XAML:
<CommandBinding Command="Delete" Executed="DeleteCommand_Executed" />
Then, open up MainWindow.xaml.cs and create the DeleteCommand_Executed command handler at the bottom of the MainWindow class declaration:
private void DeleteCommand_Executed(object sender, ExecutedRoutedEventArgs e)
{

}
Now, we need to write some code that will impersonate a keypress. You may recall this was very easy in WinForms. It is not very easy in WPF. It looks like so:
if (Keyboard.PrimaryDevice != null)
{
    if (Keyboard.PrimaryDevice.ActiveSource != null)
    {
        KeyEventArgs keyEventArgs = new KeyEventArgs(Keyboard.PrimaryDevice, Keyboard.PrimaryDevice.ActiveSource, 0, Key.Delete)
        {
            RoutedEvent = Keyboard.KeyDownEvent
        };
        InputManager.Current.ProcessInput(keyEventArgs);
    }
}
Now, when you run the application, select some text, and then choose Edit > Delete, it works.
Search with Bing
OK, let’s look at the next item in the Edit menu, Search with Bing. As you may recall, this command will open the Bing website in your default browser if no text is selected. But if text is selected, it will search Bing for the selected phrase.
This was easy in WinForms, but we already know from implementing a hyperlink in the About box that it will require a bit more work in WPF. No worries.
To get started, open MainWindow.xaml and locate the Window.CommandBindings section. Open up some space between the command bindings for Delete and NavigationCommands.Zoom and add the following XAML:
<CommandBinding Command="{StaticResource SearchWithBingCommand}" Executed="SearchWithBingCommand_Executed"/>
Then, locate the SearchWithBing menu item and add a command property so that the entire line now looks like this:
<MenuItem Command="{StaticResource SearchWithBingCommand}" Name="SearchWithBingMenu" Header="_Search with Bing..." />
Yes, this is new. But there’s more. We also need to create a new Window.Resources section to the XAML file to associate a keyboard shortcut—in the case, CTRL + E—with this particular command. I did so above the Window.CommandBindings section:
Now, add the following XAML code inside of that Window.Resources section:
<RoutedUICommand x:Key="SearchWithBingCommand" Text="SearchWithBing"><RoutedUICommand.InputGestures><KeyGesture>Ctrl+E</KeyGesture></RoutedUICommand.InputGestures></RoutedUICommand>
Finally, we need to create the actual command handler in MainWindow.xaml.cs:
private void SearchWithBingCommand_Executed(object sender, ExecutedRoutedEventArgs e)
{

}
And then add the following code, which is based on the text block-based hyperlink we created earlier. The difference here, of course, is that we have to account for whether any text is selected.
ProcessStartInfo processStartInfo = new ProcessStartInfo
{
    UseShellExecute = true
};

if (TextBox1.SelectedText.Length >= 0)
    processStartInfo.FileName = "https://www.bing.com/search?q=" + TextBox1.SelectedText;
else
    processStartInfo.FileName = "https://www.bing.com";

Process.Start(processStartInfo);
OK, now run the application and look at the Edit menu. You should see that the Search with Bing item has a keyboard shortcut hint (“Ctrl + H”) next to it. And that this menu item (and keyboard shortcut) works fine whether any text is selected or not.

But the big question here, of course, is what the heck is up with all that coding: We needed to add a command binding, a route UI command for the keyboard shortcut, and a command handler just to implement Search with Bing. Get used to it: We’re going to do the same for most of the remaining items in the Edit menu.
But not today. This is probably a good place to stop for now.

Gain unlimited access to Premium articles.
With technology shaping our everyday lives, how could we not dig deeper?
Thurrott Premium delivers an honest and thorough perspective about the technologies we use and rely on everyday. Discover deeper content as a Premium member.