The WPF Notepad Project: Drag-and-Drop and Publish (Premium)
- Paul Thurrott
- Mar 28, 2020
-
5
With the WPF version of .NETpad now roughly functionally identical to the WinForms version, I’m starting to think about additional unique features. The two I’m most interested in are things that I never got to with the previous versions: Making .NETpad the default application for text files and supporting drag-and-drop.
I’m still investigating the first one, but it doesn’t work right now (and it won’t work in any of the WinForms versions either). Vaguely, this requires the app to be able to handle startup parameters so that you could run the app from the command line and pass it the name of a file to open. (Something like .NETpad C:\Users\paul\Desktop\textfile.txt.) This is curiously difficult in WPF, but I’m working on it.
I have, however, figured out drag-and-drop, by which I mean the ability to drag a text file onto the application and have it open that file. So let’s take a look at that, and at Visual Studio’s very limited WPF application publishing capabilities.
Drag-and-drop
While Microsoft documents WPF drag-and-drop on its own site, I found the start of a good solution for this action from Stack Overflow, a vital resource for any developer. The answer found there has us create textbox Drop and PreviewDragOver event handlers, the first of which reads the full path and name of the file being dropped onto the textbox and then displays that information in the textbox.
To get started, open MainWindow.xaml and locate and select the line of XAML defining TextBox1. Add an AllowDrop property to TextBox1:
AllowDrop="True"
Then, display the available event handlers in the Properties pane and double-click next to Drop to create TextBox1_Drop in MainWindow.xaml.cs. Then, repeat that process for PreviewDragOver so that you create an empty TextBox1_PreviewDragOver event handler in MainWindow.xaml.cs as well.
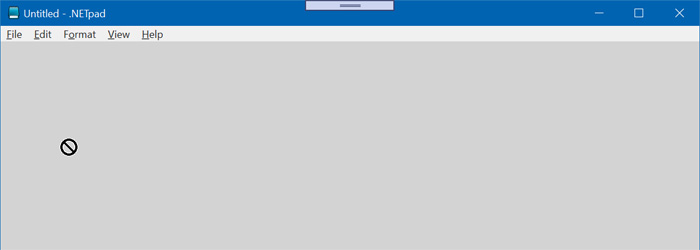
If you run the app now and try to drag a text (or other file) onto the textbox, the cursor will change to indicate that you cannot drop the file.
That AllowDrop property indicates that we wish to allow drag-and-drop, but we can add code to TextBox1_PreviewDragOver that will indicate that we are actually handling the event that occurs when we drag a file over the textbox. So add the following code to TextBox1_PreviewDragOver:
e.Handled = true;
If you run the app now, you’ll see that the mouse cursor changes into a more positive form when you drag a file over the textbox, indicating that we can drop it.

As for actually handling the drop part of the drag-and-drop operation, that’s obviously what TextBox1_Drop is for. The Stack Overflow solution just writes the name of the file your dragging onto the textbox, so we’ll start there. Add the following code to TextBox1_Drop:
if (e.Data.GetDataPresent(DataFormats.FileDrop))
{
    string[] files = e.Data.GetData(DataFormats.FileDrop) as string[];
    if (files != null && files.Length > 0)
    {
         ((TextBox)sender).Text = files[0];
    }
}
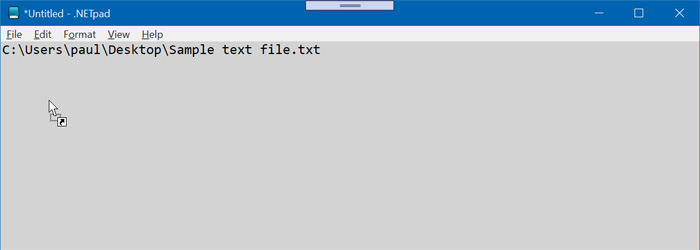
Now, run the application again. When you drag a text file over the textbox and drop it, the path and name of that file replace whatever was in the textbox previously.
We obviously need to make a few changes. First, the dropped file should open in .NETpad, and appear in the text box. And less obviously we need to make some checks to ensure that we’re saving whatever text was already there if necessary.
First, let’s just open the file. Replace the line that currently reads ((TextBox)sender).Text = files[0]; with:
TextBox1.Text = File.ReadAllText(files[0]);
Now, test it again. The file should open in .NETpad normally.

You may have noticed, however, that when you drag a file into the application that the title bar changes to indicate that TextHasChanged is now true, so that when you close .NETpad, it prompts you to save the file. This will need to be addressed in the checks we’ll be adding too.
Let’s start with checking whether we need to save what .NETpad is displaying before opening the dragged file. At the top of TextBox1_Drop, above the code that’s already there, add the following:
if (TextHasChanged)
{
    bool result = DisplaySavePrompt();
    if (result == false)
        return;
}
In case it’s not obvious, that second if block will exit TextBox1_Drop if the user clicks Cancel in the Save prompt that’s displayed in DisplaySavePrompt, canceling the drag-and-drop operation. Run the application now to test this. It should work as expected.
But we’re not quite done: We still need to make a few changes after the dropped file is opened. That is, we need to reset the application’s title bar text to reflect the name of the opened file, change TextHasChanged back to false, and change the DocumentName global variable (as I think of it) to the name of the file (sans path and extension). These changes need to occur inside the if blockthat tests whether the files array of string is null whether the length of files is greater than zero, and below the other code that is there currently. Add the following four lines of code:
string filename = Path.GetFileNameWithoutExtension(files[0]);
AppWindow.Title = filename + " - " + Application.Current.MainWindow.GetType().Assembly.GetName().Name;
TextHasChanged = false;
DocumentName = filename;
There is, of course, one other problem. And it’s a big one. What happens if you drag a non-text file onto the textbox and drop it? Bad things, potentially. You could see garbage display, as shown here (with a dropped PDF file). Or, the application could crash.

We need to check that the file being dropped is a text file, since .NETpad only supports text files. Most text files use a .txt extension, so I’ll test for that. If someone needs to open a text file with a different or no extension, they’ll just need to use the other methods for opening files.
To do so, we need to grab the extension for the dragged file, test to see whether it matches the string “*.txt”, and then display an error message in a MessageBox if it does not. That means that the if block that starts with the line if (files != null && files.Length > 0) will need to be moved within another if block. Since this is hard to describe, here’s all of the code for TextBox1_Drop so you don’t miss anything:
private void TextBox1_Drop(object sender, DragEventArgs e)
{
    if (TextHasChanged)
    {
        bool result = DisplaySavePrompt();
        if (result == false)
            return;
    }

    if (e.Data.GetDataPresent(DataFormats.FileDrop))
    {
        string[] files = e.Data.GetData(DataFormats.FileDrop) as string[];
        string extension = Path.GetExtension(files[0]);
        if (extension == ".txt")
        {
            if (files != null && files.Length > 0)
            {
                TextBox1.Text = File.ReadAllText(files[0]);
                string filename = Path.GetFileNameWithoutExtension(files[0]);
                AppWindow.Title = filename + " - " + Application.Current.MainWindow.GetType().Assembly.GetName().Name;
                TextHasChanged = false;
                DocumentName = filename;
            }
        }
        else
            MessageBox.Show("Drag and drop supports plain text (*.txt) files only", Application.Current.MainWindow.GetType().Assembly.GetName().Name, MessageBoxButton.OK, MessageBoxImage.Error);
        }
}
Now, when you try to drop a non-text file on the application, it will just display an error message.

I suppose there should be some exception handling in there since we’re performing file operations. And you could make an argument for testing for the file type on the drag and disallowing it if it’s not a text file. If we did it that way, we wouldn’t need to ever display an error message. But whatever. I’m OK with it the way it is.
Publish
WPF takes a minimalist approach to publishing your application, and it makes even Windows Forms seems feature-packed by comparison. Basically, you are given a directly full of files that you can take to some third-party Setup utility. Or, you can publish a large, single-file and portable version of the app that you can distribute however you like; that latter option requires .NET Core, which we’re using, and it basically puts all of the parts of .NET Core you need right in the EXE, allowing side-by-side installs of different .NET Core versions. (This is a unique advantage of .NET Core vs. the .NET Framework.)
Before getting to that, however, let’s look at the application properties to make sure that everything is configured correctly. Right-click on the project name in the Solution Explorer pane and choose “Properties.”

Then, navigate to the Package tab.
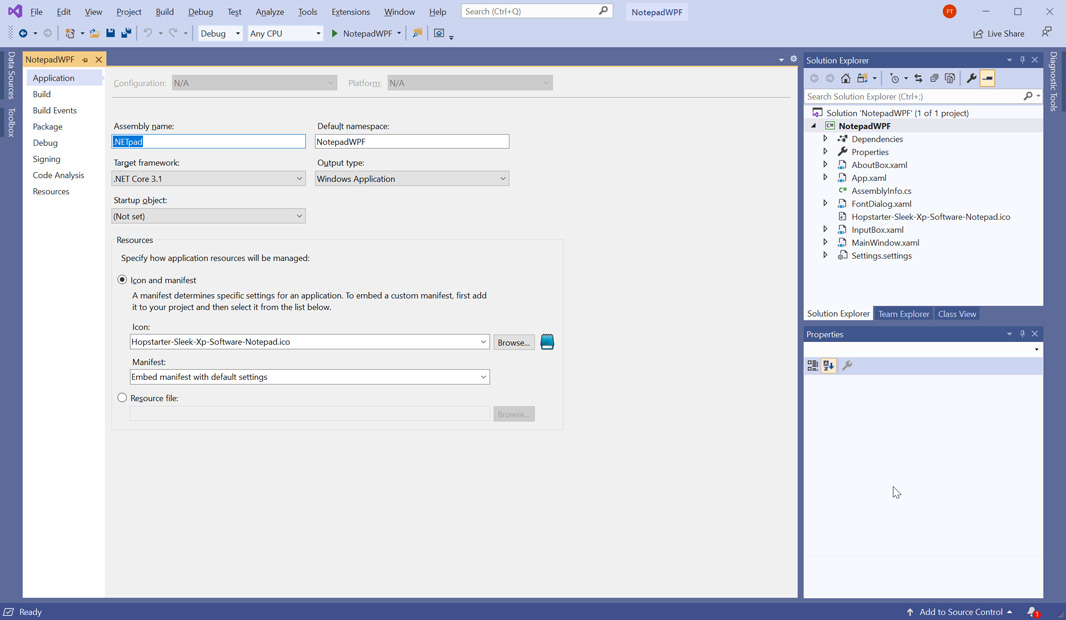
We’re going to need to make some changes here. I recommend setting the Authors, Company, and Copyright fields accordingly, configuring the Icon File field to be the application icon file, and changing the Assembly version and Assembly file version files to 2.0.0.0. (Where the 1.x versions of the application are the WinForms versions and 2.x is for WPF.)

When you run the application after making changes here, it will revert to its default user settings; this is normal. But if you display the About box, you will see the changes reflected there as well.

OK, close the properties view. Then, right-click the project name in the Solution Explorer pane and choose “Publish.” The first time you do so, you’ll be prompted to pick a publish target which, in this case, only lets you choose the folder to which the application and its supporting files will be published.

Click Create Profile and you’ll see the Publish page you’ll be dealing with going forward.
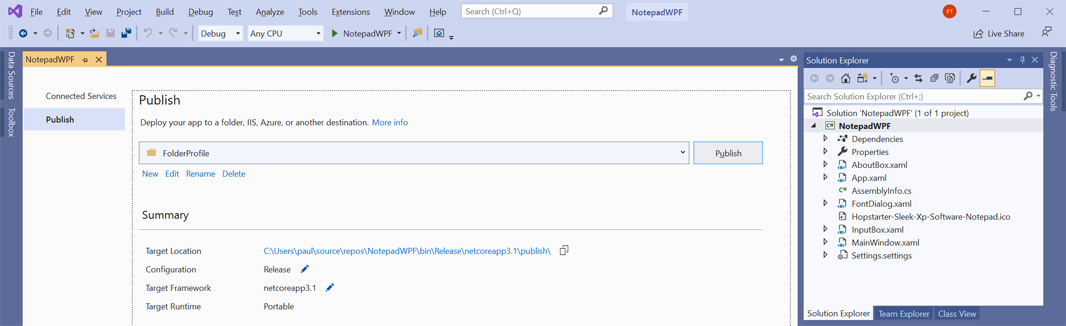
There’s not a lot going on here. If you click Publish, Visual Studio will create a runnable instance of you application (using a release configuration and not the debug configuration used during development) to whatever folder you selected. You can see this folder and its contents by clicking the URL next to Target Location.

If you run .NETpad from there, it will run with its default user settings and you can pin it to the taskbar or Start menu as desired. You could also copy it to another folder (say, under Program Files) or another PC and run it from there. But since this application relies on .NET Core 3.1, you’d need to install that on whatever PC you intend to use the app on as well. What’s missing, of course, is any sense of an install routine. With WPF, you’re expected to roll your own.
There is one other option of note, however: If you click the Edit Configuration (pencil) icon next to Configuration, you’ll get a Profile Settings window that lets you make some useful configuration changes.

Among them is the ability to create a self-contained deployment (under Deployment Mode) that includes the necessary .NET Core files with your application files. And if you choose that option, you’ll see three additional options appear under File Publish Options, including one that lets you produce a large single file application.
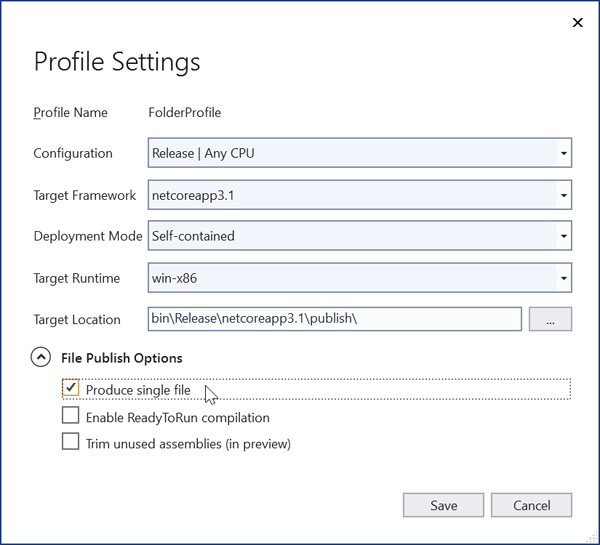
If you choose the self-contained option, that initial publish stage will take a lot longer and the number of files in your publish folder will grow dramatically, but the user running the app won’t need to install .NET Core 3.x separately.
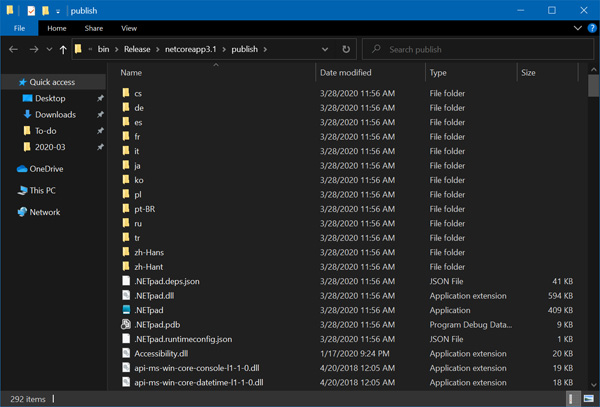
And if you choose the single-file option, the resulting application EXE will be much bigger: 140 MB vs 409 KB, because it contains everything all in one file. (That second file, .NETpad.pdb, is for debugging and does not need to be distributed to users.)

Which you choose to use is, of course, up to you. But the single-file option is obviously the simplest. And even at 140 MB, it’s not all that big compared to many applications.
The future
While part of me would like to wrap up this project as quickly as possible so I can move on to more modern frameworks, there is also a part of me that also wonders about other ways in which we could improve this application. I don’t have any immediate plans to implement any of this, but these are some of the things I’m thinking about.
Application scaling. WPF supports scaling transformations that could theoretically allow us to create an option for scaling the entire application manually, which would be a nice accessibility feature. Plus, a 110 or 120 percent scale would get us somewhere close to what the UWP version of the app looks like.
More custom dialogs. Having implemented a custom Font dialog, About box, and Input Box in the first pass, I’m curious about maybe replacing all of the other legacy windows we use—Message Box, Print dialog, and Color dialog—with custom dialogs of my own creation. It might be more work than is worth it, but it would give the app a more consistent look.
Ideas from the past. I’m still interested in the things we talked about for the WinForms version of the app, like adding WinUI/modern features, implementing internationalization, and so on. In many ways, the WPF version of this app has become “the” app in that it is newer and somewhat more modern, so if I go forward with any of that, I’d likely do so with the WPF version now, not the WinForms version.
Code fit-and-finish. I think about fit-and-finish in two ways: The appearance/functionality of the application as experienced by a user and the underlying code itself. A bit of both may be in order. Many professional developers will look at the quick-and-dirty code I’ve written and cringe in some cases, and that’s fine. But I hope you understand that I was shooting for both speed of completion and code readability. And maybe some of what I figured out will surprise you in a good way too. Anyway, I’m always interested in tips and comments about improving the app in any way.
More soon, assuming I figure out how to make .NETpad the default for text files.

Gain unlimited access to Premium articles.
With technology shaping our everyday lives, how could we not dig deeper?
Thurrott Premium delivers an honest and thorough perspective about the technologies we use and rely on everyday. Discover deeper content as a Premium member.