Snapped: Adventures in Snapdragon Dev Kit Recovery (Premium)
- Paul Thurrott
- Dec 19, 2024
-
8
back in May, offering developers a high-end Snapdragon X configuration in a (previous generation) Mac Mini-like form factor. But you know this story: After months of silence and delays, , but not before shipping a few hundred units–for free–to the first who preordered it.
I never understood the point of this product. Developers who need to target Windows 11 on Arm with their apps should use a real Snapdragon X-based Copilot+ PC, not because they’re readily available, but because they are laptops with touch displays. What developers should be doing, as part of their testing, is seeing how their apps perform on real-world hardware. To this day, there’s no such thing as a Snapdragon X desktop PC, and even when that’s no longer true, laptops will remain the mainstream form factor.
That, and the several Snapdragon X-based PCs I received for review, plus the one I bought, explain why I never ordered the Snapdragon Dev Kit. I do a lot of my app development work on these Snapdragon X laptops, and Visual Studio and the apps I make work perfectly well on this platform. Having a high-end version of it in a desktop form factor isn’t necessary.
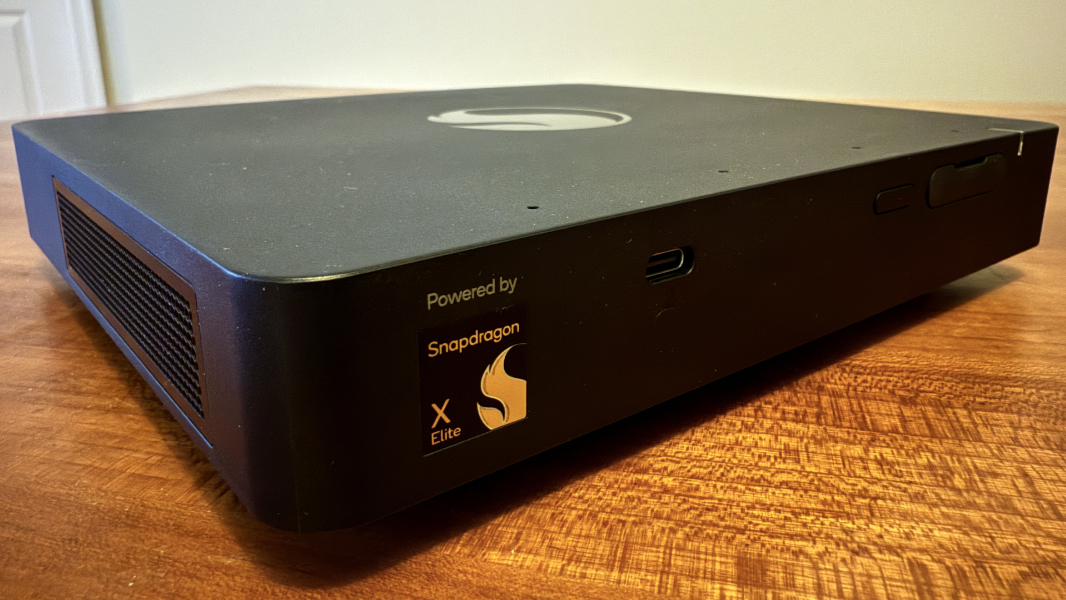
But it is interesting. Qualcomm makes 12 variants of its Snapdragon X system-on-chip (SoC) for PCs, and the most powerful of them, the Snapdragon X1E-00-1DE found in the Dev Kit, is elusive and almost impossible to find in shipping PCs. Plus, I am a fan of small form factor (SFF) PCs, especially NUCs. And with Windows 11 on Arm winning me over this year thanks to its performance, compatibility, reliability, and efficiency, the Dev Kit is an interesting nexus of things I like.
If you watch Windows Weekly, you know that Leo and Richard both purchased Dev Kits back when preorders went live over the summer. And that each waited for months for it to arrive. Arrow Electronics, which manufactured the Dev Kit for Qualcomm, would occasionally email them and other customers with humorously off-base shipping estimates. And then one day, out of nowhere, they shipped. And then Qualcomm canceled the product and refunded both of them. Nice.
Leo offered to ship me the Dev Kit after he experimented with it a bit, so I of course accepted. And it arrived Monday, right after , in a bit of bad timing. But I planned to get started immediately nonetheless. So I unpacked the Dev Kit, finding the PC, its large external power supply, and the promised USB-C-to-HDMI dongle in the box along with two tiny pamphlets, one of which with two QR codes for documentation that no longer exists. And off I went.
Well, not exactly.
Leo didn’t reset the Dev Box before shipping it, so it booted into the lock screen of an already configured PC. Not a problem, I thought. I know a bit about Windows and, more specifically, Windows recovery. And I had prepared for this moment by creating a , a , and . I was sure at least one of these would let me access the recovery partition I expected to find on the PC. And if not, then I would simply do a clean install. I’ve done this possibly a million times. .
Without getting too deep in the weeds here, I never got it to work. If you think about Windows recovery when you have a PC that boots but you can’t actually access Windows, what you’re left with are two basic options. You can boot with a USB device–that’s what those three options I prepared were for–or you can interrupt the normal boot process and get into the firmware (UEFI/BIOS) and/or on-disk Windows Recovery Environment (WRE) and then go from there, either with Reset this PC or a clean install. But the Dev Box isn’t a normal PC. From what I can tell, there isn’t a normal (for a PC) firmware, at least not that I found. And I never once got it to boot from USB.
What I did find was that I could interrupt the boot process and enter a command line “BDS menu” (which I initially misread as “BIOS menu”) by pressing the Windows key when the Snapdragon logo appeared onscreen after a reboot. This menu has 9 options, as you can see here.
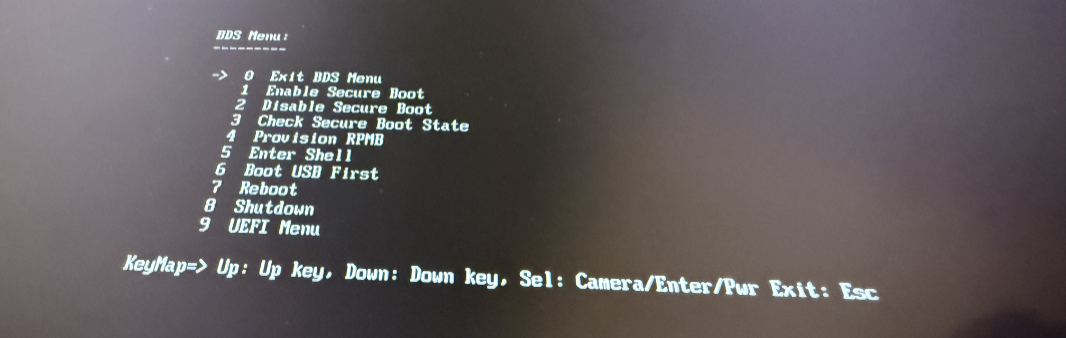
The most obvious option here is number 6, “Boot USB First.” And sure enough, when I first examined this option, the feature was disabled. So I enabled it, figured that would do it. But it did not: As noted, I never once got this PC to boot from USB. And I tried everything. Multiple recovery drives on different media. Every USB port on the system, front and back. Pressing various keys in case there was an invisible message I wasn’t seeing. It would not boot from USB. What it would do was display the Windows logo with a “Please wait…” message, which experience tells me is a good sign, and that the WRE is about to load off USB. But it never did. And after a lot of weirdness, it would simply boot into the normal lock screen.
There’s a bit more going on here, but it’s immaterial. In short, the PC has three power light states–blue, green, and red–and it often pauses and even appears to power off or go to sleep while booting in those times that I’m trying to interrupt it. (I would often get to the lock screen, click Power, and then hold down the Shift key while selecting “Reboot,” because that will normally display a boot menu on reboot, but not in this case.) But whatever. It never worked.
In the end, I realized that all I could do was to ask Leo to give me his PIN so I could sign in with his sign-in account and then immediately reset the PC. I had prepared a logical response to whatever privacy concerns and was prepared to show him the screen at all times so he could see I wasn’t doing anything wrong with his account. But he was fine with it, and as Windows Weekly started yesterday, I logged in, opened Settings, and used Reset this PC to reset it. Done and done.
But I still want to figure out how to recover this thing. And while I haven’t spent too much time on it yet, here’s what I’ve tried.
First, I rebooted into that BDS this morning to further examine the other options. Which reminds me that there are a few things I’ve not mentioned.
I experimented with disabling Secure Boot, but that required me to know (or, more accurately, get) the BitLocker Recovery Key. I can do that now, of course, so this is something I’m going to look at again (in tandem with disabling BitLocker on the C: drive). But before I reset it, this meant I couldn’t boot the PC normally, so I re-enabled it.
That “Provision RPMB” option is related to a special tamper-resistant partition on the disk–called the Replay Protected Memory Block partition–that’s common on smartphones and is thus likely tied to the Snapdragon chip. I never screwed with that–this thing seems fragile enough as it is, and the warning it gives you is scary–but it appears to be a TPM-like design, perhaps simpler. (and elsewhere, I assume).
I had hoped the “Enter Shell” option would prove useful, but this is an unfamiliar command line environment called UEFI Interactive Shell v2.2 that some Googling tells me is a way to run UEFI shell commands. (.) But what could I use this for? Based on the onscreen text, the firmware is actually that was originally contributed by Intel (yes, really) and used by Arm Reference Platform devices. But unless I’m missing something–always a possibility–there’s nothing obvious in there about getting the system to boot from a USB device. Typing “exit” got me out of there.
I obviously looked at the UEFI Menu, but this too came up blank. The “Fastboot” option was an obvious choice, but it doesn’t do anything, doesn’t even work, from what I can tell. I was hoping to disable it to see if there would be some onscreen text or at least have more time to try key presses.
And … that was pretty much that.
But now I can boot into Windows normally. And that means I could do two things: Use this system to make a recovery drive. And then use Settings to try to reboot the PC into the firmware that doesn’t exist so I can then boot from USB. Or something.
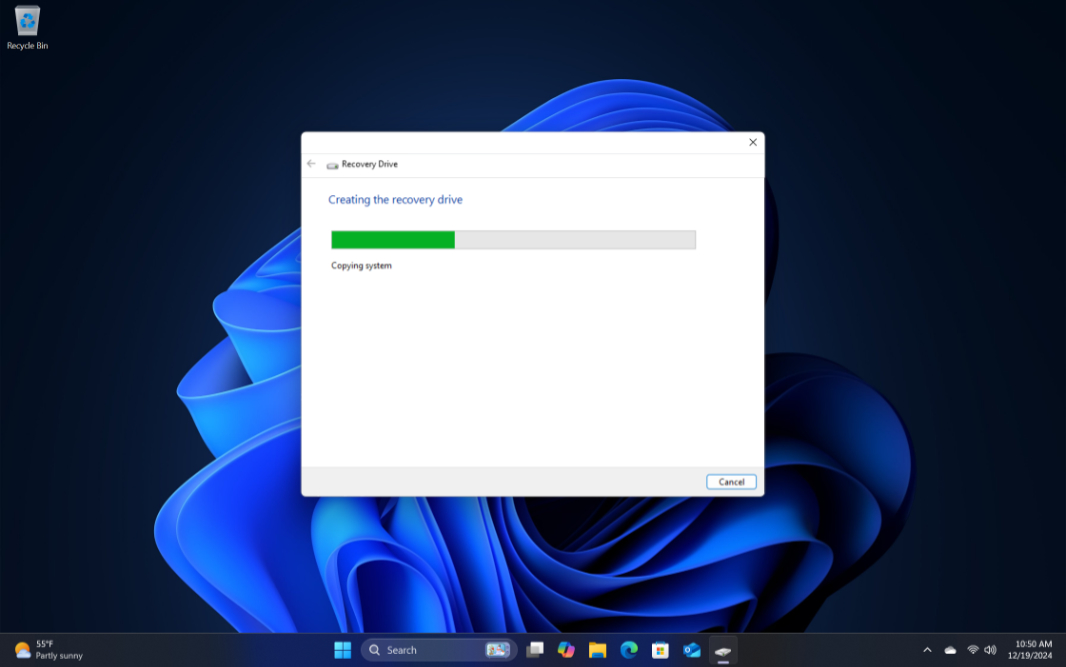
But these efforts, to date, have been similarly fruitless. The Windows Recovery drive wizard runs normally, and it even works now, though my first several attempts failed in a way I’d never seen before: I would select the USB flash drive to use, click “Next,” the wizard would just close. But this morning, I successfully made a recovery drive (leaving the “Back up system files to the recovery drive” option enabled).
The trick, of course, is booting the PC from USB. Which I still haven’t figured out.
Curious how it would handle doing so triggered from Settings, I gave it a shot: If you open the Settings app, navigate to System > Recovery > Recovery options, you’ll see an “Advanced startup” choice with a “Restart now” button. This is normally a no-brainer, but given my previous experiences with this thing, I had doubts about what that would do. Would I even see a WRE? Would I get an option to boot from USB?
Hilarious.
What happens is that the PC reboots, the Snapdragon logo appears, the Windows logo appears, and then it does the weird little sleep/red power light cycle I’m starting to hate with a burning passion, and then it appears to go to sleep. Or something. It just sits there, mocking me.
As for the recovery drive I made, I have no idea how to force the Dev Kit to boot from it or any other USB drive. It just doesn’t work.
One final wrinkle for today.
I mentioned above that I had trouble making a recovery drive yesterday. During that little escapade, I figured I should use the legacy Disk Management MMC to wipe out the USB flash drive and then reformat it. But when I opened this tool, I saw something I’ve never seen before. The internal storage, a 512 GB SSD drive, was partitioned into 15 (!) partitions. One is the C: drive, of course, and there is a recovery partition, which is interesting. But the rest are mostly-tiny and many are described only as “OEM partition.”
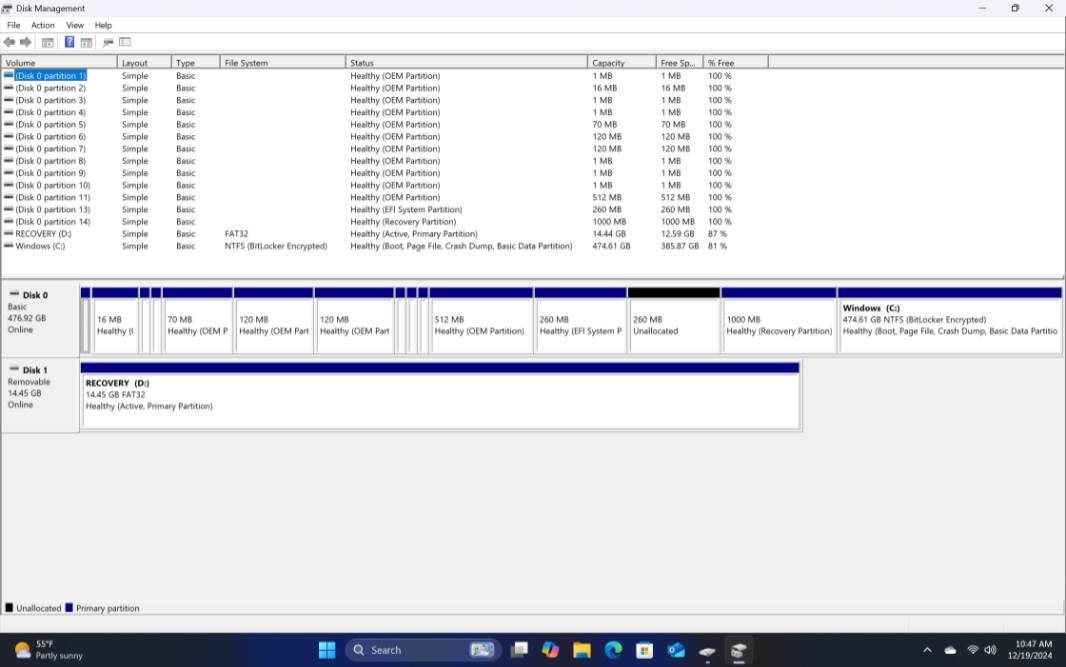
If you’re not familiar with this tool, my Surface Laptop 7 is more typical. Here, we see a more standard configuration with three partitions: The C: drive, a recovery partition, and a EFI system partition. Normal.
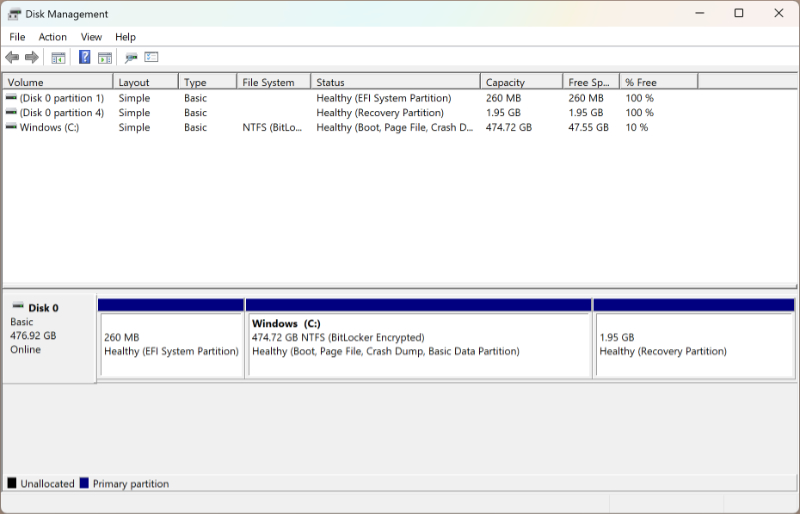
I have no idea what’s going on with the Dev Kit’s disk layout. If I can figure out how to boot from USB, I will absolutely wipe this out and see whether I can’t get a simpler and cleaner partitioning scheme going on a clean install. But for now, I can’t touch any of this. It’s just weird.
I’ll have more soon, including some general impressions about the device and how it works now that Windows is up and running. But this is a minefield of potential problems, and I want to make sure I really can recover it, and from USB, before I screw around with it further. I’m starting to understand why Qualcomm pulled the plug on this thing.
Let me know if you have any thoughts about any of this. There’s a peculiar amount of “new” here, to me. Maybe this is more familiar to someone else.

Gain unlimited access to Premium articles.
With technology shaping our everyday lives, how could we not dig deeper?
Thurrott Premium delivers an honest and thorough perspective about the technologies we use and rely on everyday. Discover deeper content as a Premium member.