Tip: The Windows File Share Workaround
- Paul Thurrott
- Jan 10, 2024
-
23
Like other personal computing platforms, Windows 11 offers modern ways to share files between devices. But that’s sometimes not enough: Some users, in particular those with NAS devices or PCs being used as home servers, need traditional file shares too. And though this functionality has existed in Windows for decades, it’s never been updated to support the accounts and sign-in methods we use today. The result? Confusion.
To be clear, this will not be a concern for most people. Even I will occasionally just email myself a screenshot or other file from a phone, tablet, or PC to the PC where I need it. But there are more elegant methods built-in to Windows 11, including OneDrive, which has a unique Share experience and PC sync capabilities, Phone Link, which helps bridge the phone/PC divide, and Nearby Sharing, which I use almost every single day to transfer screenshots for the book between PCs. There are also third-party solutions. For example, Google’s Nearby Share app for Windows (soon to be renamed to Quick Share) helps those with Android phones and Windows PCs share files in either direction.
But these methods all have their own limitations and complications. For example, Nearby Sharing requires Wi-Fi and/or Bluetooth, two networking technologies not present in the desktop PC in my office. And this feature is also disabled by default, which is understandable but hurts discoverability. Sometimes nothing works as well as a traditional file share. Which is nearly impossible to configure in Windows 11 today, assuming you use this system as most do, by signing in with a Microsoft account (or, in workplaces, a Microsoft work or school account).
(This is also a problem with Remote Desktop, another decades-old solution that has likewise never been updated to accommodate the modern world. These issues are related, but one problem at a time.)
Skip the next section if you just want to know the workaround.
This does not work
Anyone who wants to get file shares to work over their home network has likely gone down the rabbit hole in which you Google or Bing the topic. And it seems simple enough. The AI-powered summarizer in Brave Search describes this process like so:
“To share files over the network, open the file or folder “Advanced Sharing” settings, enable sharing, and set the permissions. To access a network shared folder on Windows 11, open File Explorer > Network, and open the remote computer to access remote files. If you have already file sharing configured on Windows 11, you also need to configure the remote computers to allow users to access the files remotely.”
Oh, if only.
Here’s what the experience is like if you try that (and this assumes that you’re signed in to the same Microsoft account on both PCs, both configured with Administrator privileges).
I want to create a shared folder on the first PC, which I’ll “PC-2” here. So I create that folder (or select an existing folder), right-click it, and choose “Properties” from the context menu that appears. This launches the folder’s Properties sheet, so I navigate to the Sharing tab. Logical enough.
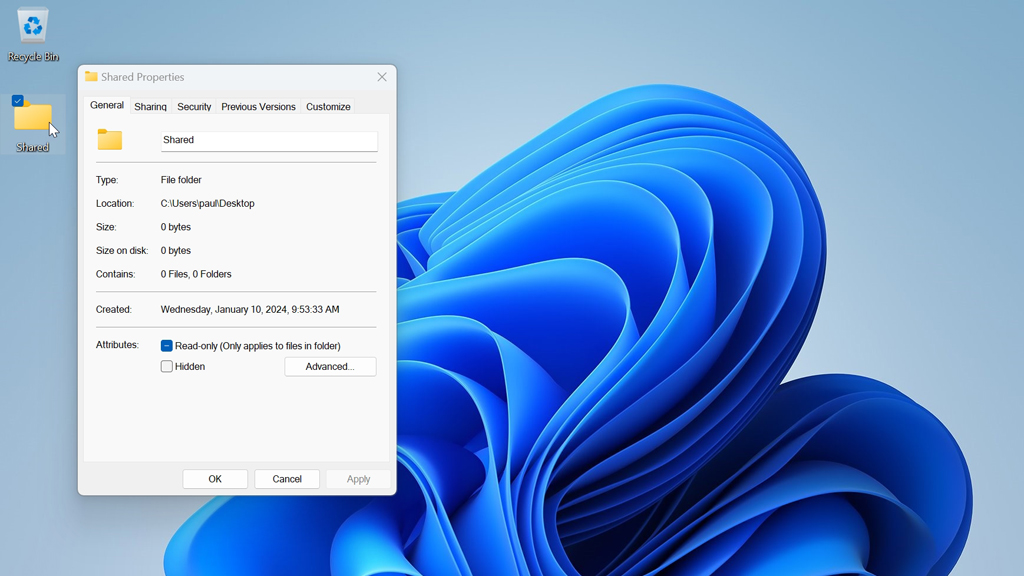
There are two ways to share this folder, both of which are over 20 years old: “Simple sharing,” which debuted in Windows XP, and “Advanced sharing,” which dates back to NT in the 1990s.
Most mainstream users would probably choose Simple sharing—it’s simple, right?—so I click “Share” under “Network File and Folder Sharing” to display the Network access window. This looks promising: It already lists my MSA in the list of people to share with, and that user account is described as the “Owner.” Perfect.

So I click “Share” and am prompted that network discovery and file sharing needs to be enabled. Here, a mainstream user could get tripped up, but the correct choice is the first one, “No, make the network that I am connected to a private network.” So I select that and Windows tells me that the folder is now shared, and it even gives me the network address, which I can right-click and copy to the Clipboard. Great! (I click “Done” and close the shared folder’s property sheet.)

Now I move to PC-2. Here, I will try to connect to the network share I just created on PC-1.
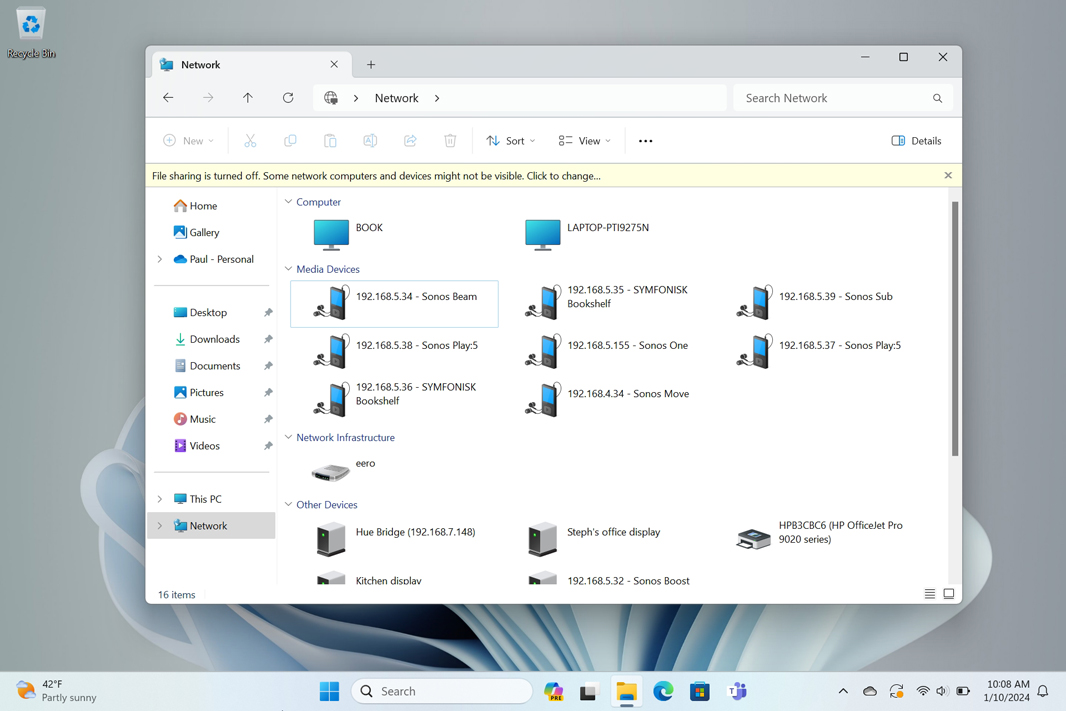
The first step is to open File Explorer and navigate to Network (which is at the bottom of the navigation pane). This interface tells me via a yellow status banner, that “File sharing is turned off” and that “Some network computers and devices might not be visible.” That said, I can see the PC with the shared folder.
So, I click the yellow banner and select “Turn on network discovery and file sharing.” Oddly, this doesn’t prompt me about private and public networks, but when I look at the network type in Settings > Network & internet, I can see that it was correctly configured as a private network on PC-2 as well. Good.
Now, I double-click PC-1’s icon (“Book”) in Network to view the available folder shares. A Windows Security window appears, asking me to sign in. That’s odd: I’m using the same sign-in account on both PCs, and Windows should just pass through my credentials.
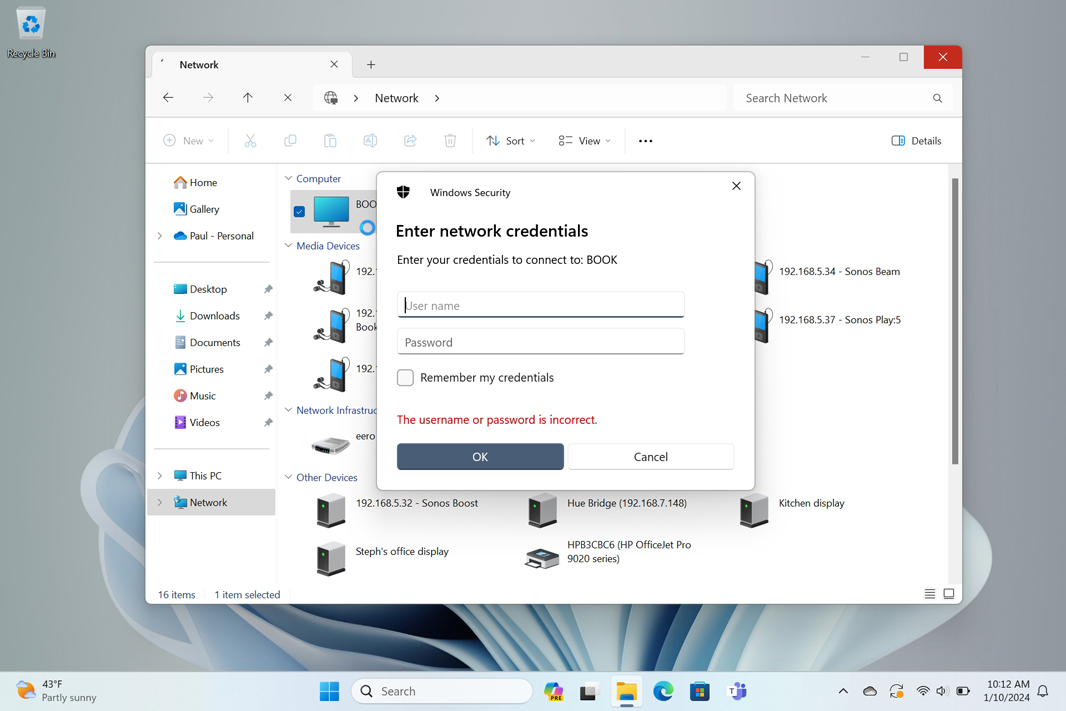
And you can try whatever you’d like here: No combination of usernames and passwords will work. You are locked out of your own share despite doing everything correctly.
Now what?
I’m still trying to figure out the magic combination of configurations that would allow someone with a Microsoft account to share the content of a folder over a home networking using a documented, official method. But given the many times I’ve failed to do this myself, I’m increasingly worried this does not exist. And so I can only offer a workaround for now. And that is:
The local account workaround
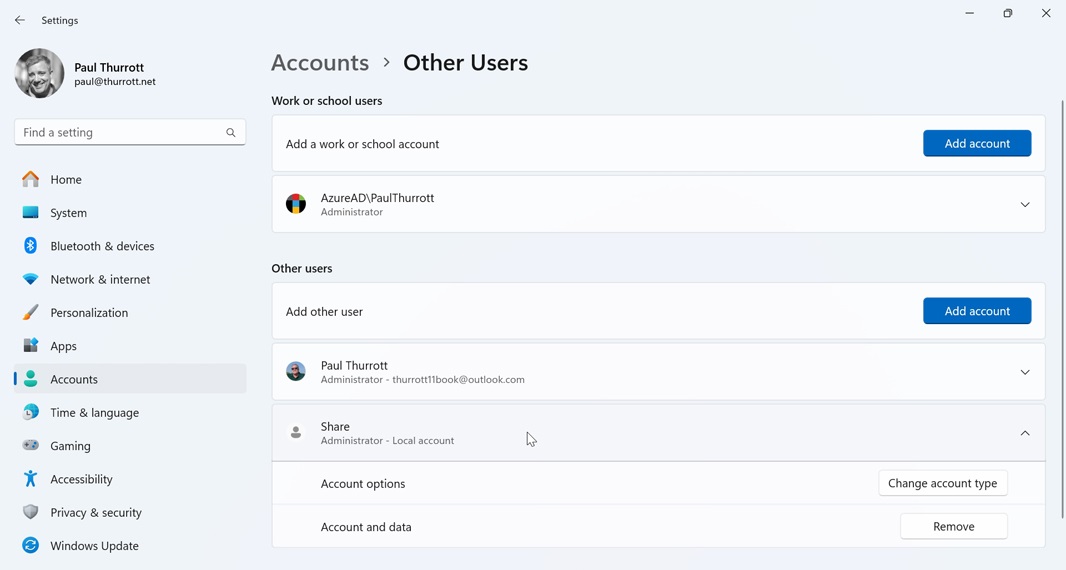
On PC-1, Create a new local sign-in account on each PC (in Settings > Accounts > Other users > “Add account”). You will need to get by Microsoft’s attempts to make you use a Microsoft account (“I don’t have this person’s sign-in information” > “Add a user without a Microsoft account”), and I strongly recommend adding a password to this account, which will likewise require you to provide the answer to three security questions for recovery purposes. Just do it, as this is a sign-in account and you’re about to give it full access to your PC.
Then, give that user Administrator privileges.
Then, do the same thing on PC-2, add the same local account with the same username and password.
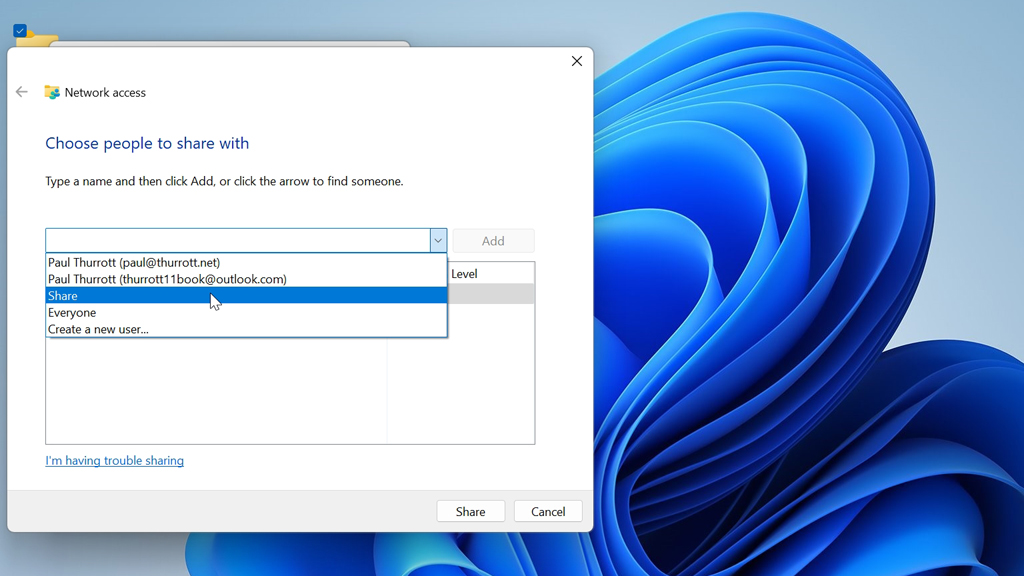
Then, go back to the folder you’re sharing on PC-1 and add that new user to the share. Right-click, Properties, Sharing tab, “Share,” will get you to the Network access (“Choose people to share with”) window. Click the drop-down next to “Add” and select that new local user.
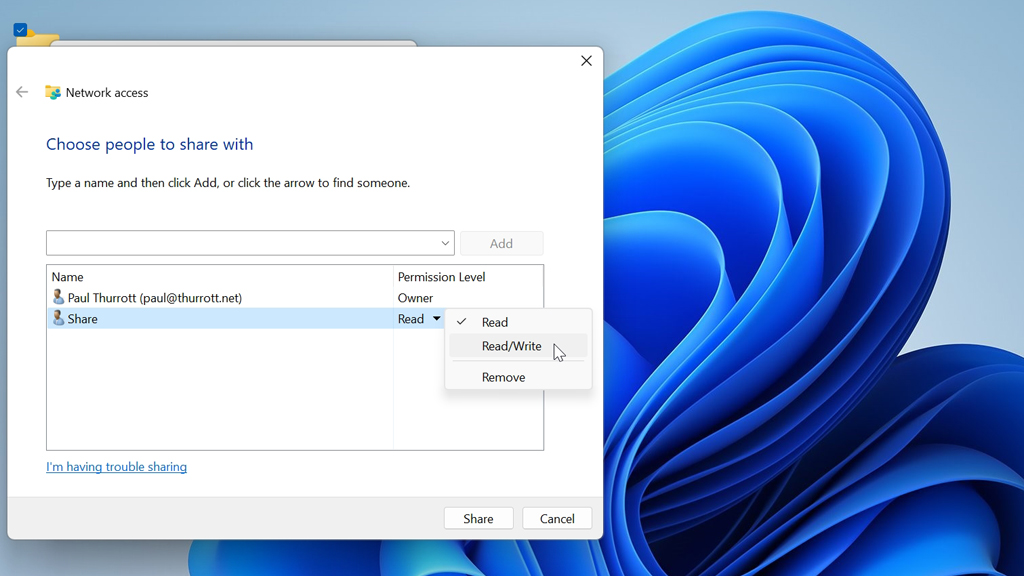
Then, click the “Permission Level” drop-down next to the local user in the list and choose “Read/Write” (or whichever permissions you prefer). Click “Share” and then click “Close” in the folder’s properties sheet.
To test that this works, go back to PC-2, open File Explorer, navigate to Network and double-click PC-A (“Book” in my case). Enter the username and password for the local account when prompted, and optionally check “Remember my credentials.”

(If you get a “PC is not accessible error,” the network configuration isn’t correct. Aside from the obvious (both PCs should be on the same network, each configured as a private network), make sure that public folder sharing is off and password protected sharing is on: You configure these in Settings > Network & internet > Advanced network sharing > All networks.)
You’ll have to navigate to the share and optionally make a shortcut to get there directly (or map a drive). Copy or create a file in the share in PC-1 from PC-2 to make sure it’s all good.

But you can also use Advanced sharing on PC-A to give that folder a share name so you can access it directly. Just be sure to give “Full Control” to “Everyone” in Permissions. When you do this, you can navigate right to \\PC-A\SHARE-NAME (\\book\shared in my case).
I’m going to keep working on this. Surely, there is a more elegant solution than this.