Switcher 2026: Minimizing the Microsoft in Windows 11 ⭐
- Paul Thurrott
- May 18, 2026
-
7
Here’s a curious conundrum: You use Windows 11, but you also want to minimize your use of other Microsoft products and services. In other words, you wish to use Windows as originally intended, as an OS platform for running the apps and services you prefer, and ideally without the constant nagging to switch back to the Dark Side.
This is, of course, reasonable and possible. Indeed, the computers I use myself are configured such that they bear little resemblance to the system Microsoft shovels at customers via its PC maker partners. Getting from the maximalist default Microsoft/PC maker configuration to my more minimalist needs isn’t difficult or time consuming. But what if you want to go further than I typically do? That is, what if you wanted to skip the Microsoft account (MSA) sign-in, the Microsoft Store, OneDrive, and even Microsoft Edge? What might that look like?
Per the editorial From the Editor’s Desk: Inconvenient ⭐️, this desired state is a bit more inconvenient than accepting the defaults, meaning it will take more time and a bit more work. But the result is also interesting and useful, and it provides an alternative to leaving Windows for Linux, a Mac, or whatever else. It’s not my preferred configuration per se, but given all the time I’ve spent in Linux recently, I can see the similarities. It’s like the best of both worlds.
Initial setup
To test this type of configuration, I started with two of my own laptops, both of which are based on Windows 11 on Arm and Snapdragon X: The Surface Laptop 7 and HP OmniBook 5. Because these are my PCs and neither is new in a box, I used Reset this PC on both to start over. But I could also have created my own Windows 11 install media using Rufus, the publicly available Windows 11 ISO, and, optionally, Tiny11 Builder, to start fresh too. There are advantages to that, but since I’ve written about this a lot over the past several months and describe the process in my book De-Enshittify Windows 11, I wanted to try a more manual approach this time. A more inconvenient approach, if you will.
The Surface Laptop 7 uses Windows 11 Pro, while the OmniBook 5 uses Windows 11 Home. This is important because using a local account with Windows 11 Pro is “better” for one important reason, described below. But you can install either, from the get-go, with a local account (instead of an MSA or Microsoft Work and School account) if you prefer.
I didn’t reconfigure the two PCs at the same time, I did this back-to-back. But in both cases, I chose to “remove everything” in Reset this PC, waited the 20 minutes or so that each required to do its thing, and then was briefly blinded as the stark white Windows Setup Out of Box Experience (OOBE) appeared so I could step through that process and configure each PC.
If you’re not familiar with the OOBE, you can find a step-by-step guide in the Install chapter of the Windows 11 Field Guide. But I didn’t see most of that. After Next-ing past the first three screens of this wizard-based experience–Is this the right country or region?, Is this the right keyboard layout or input method?, and Want to add a second keyboard layout?–I landed on the screen Let’s connect you to a network. This lists the available Wi-Fi networks so you can connect to the Internet and continue with Setup.
I didn’t do that. Instead, I typed Shift + F10 to open a command line window, selected that window (it’s curiously not selected when it opens), typed the following command line, and then tapped Enter:
oobe\bypassnro
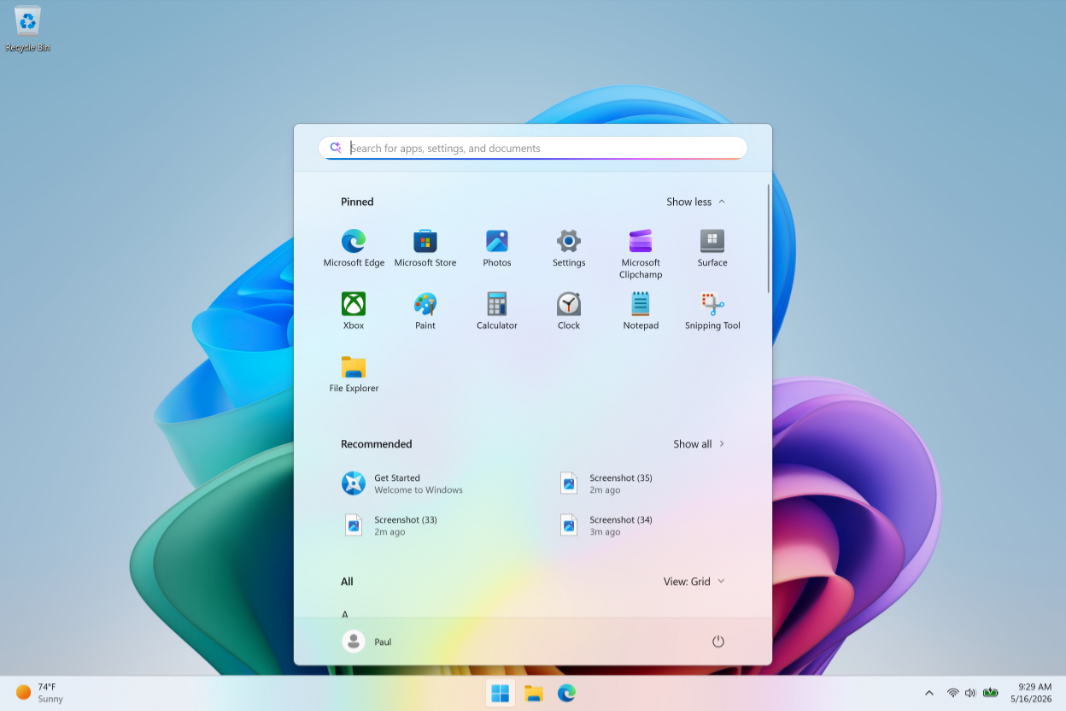
The PC rebooted, the OOBE restarted, I stepped through those same three screens, and then I was back at the Let’s connect you to a network screen as before, but with a twist. In addition to the list of available Wi-Fi networks, this screen now included a new option, “I don’t have Internet,” at the bottom of the display. So I chose that, which let me create a new user account (Paul) instead of forcing me to sign in with an MSA or Microsoft Work or School account. I skipped creating a “super-memorable” password–yes, I left it blank–and then a very truncated version of the OOBE followed, basically just the Choose privacy settings for your device screen. And then I was dumped into a very minimalist Windows 11 install with a nearly empty Start menu.
Initial Windows 11 configuration
With that, it was time to connect to the Wi-Fi, at which point the Start menu fills out a bit.
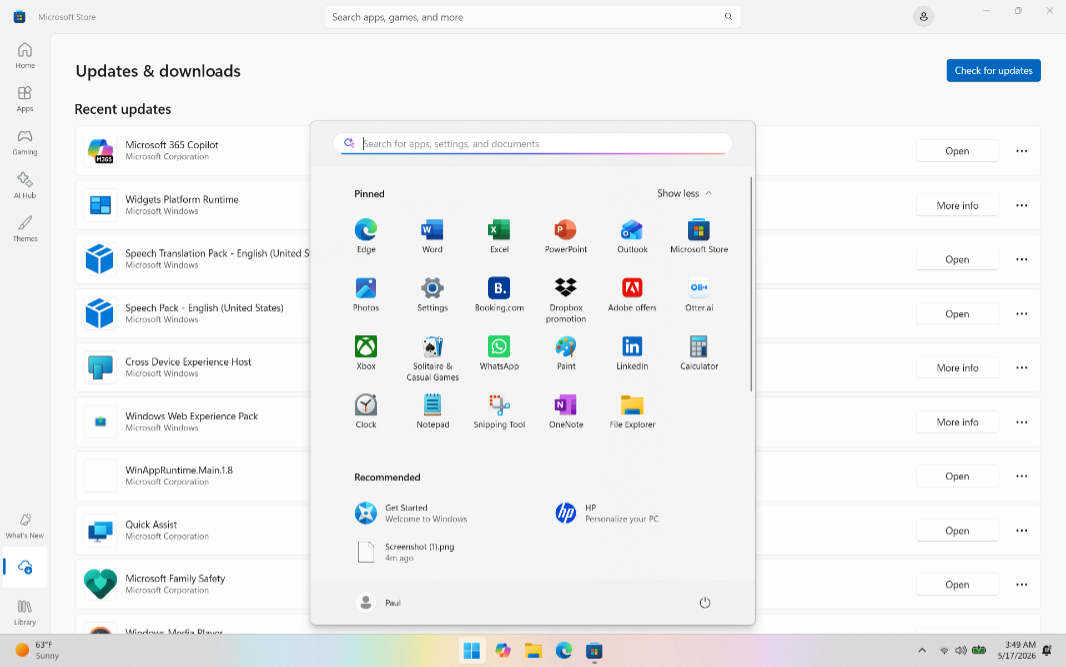
Then, I installed any and everything in Windows Update, including the drivers and whatever else in Advanced options > Optional updates, and used the Microsoft Store to get all the in-box apps up-to-date. I rebooted as needed and checked both places multiple times until that was all done.
While that was happening and after, the account security configuration got underway. This all happens in Settings > Users > Sign-in options.
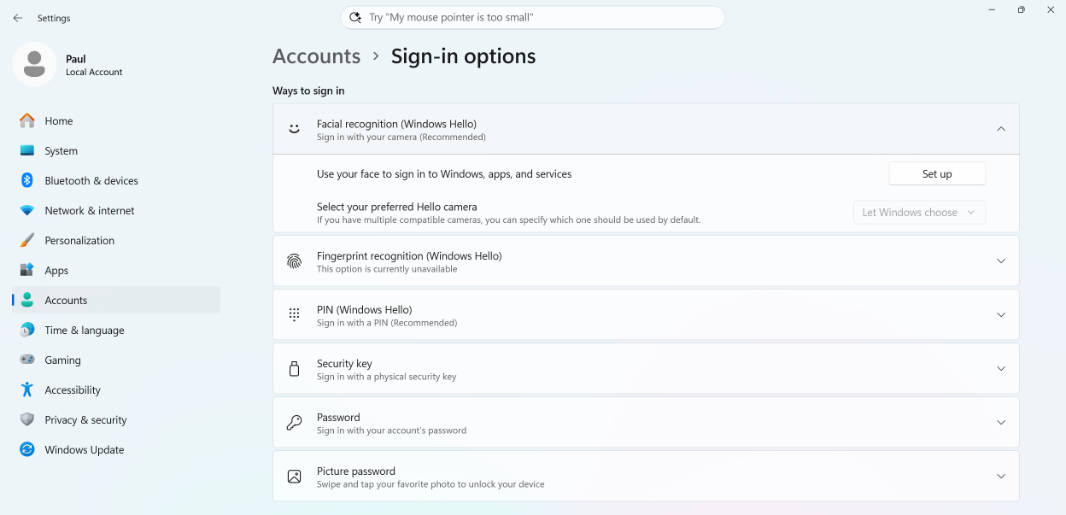
- Add a password to the local sign-in account.
- Add a PIN to the local sign-in account.
- Add a Windows Hello facial recognition sign-in to the local sign-in account. (Neither laptop supports fingerprint recognition). In my case, this included improving recognition so I could scan my face with and without glasses. And I enabled “Enhance facial recognition,” which required a reboot.
- Disable the option “Use my sign-in info to automatically finish setting up after an update” in Settings > Accounts > Sign-in info.
Enable encryption on the system drive
One of the issues with not signing in to Windows 11 with an online account (meaning an MSA or Microsoft Work or School account) is that the system disk isn’t automatically encrypted. There’s a good reason for that, as you need access to the recovery key and when you sign in with an online account, and that key is automatically saved to your OneDrive. But that means you will need to manually enable disk encryption, which will trigger you saving that key somewhere.
How you do so varies between Windows 11 Pro and Home.
Enable encryption using Windows 11 Pro
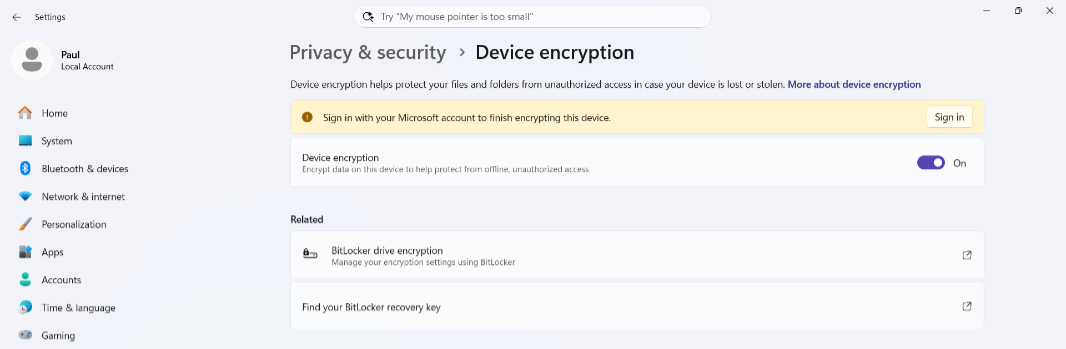
If you have Windows 11 Pro, this is easy: Open the Settings app, navigate to Privacy & security > Device encryption, and click the option “BitLocker drive encryption” to launch the BitLocker Drive Encryption control panel. There, just click the option “Turn on BitLocker” next to the system disk. You will be prompted to back up your recovery key, with the choices being “Save to your Microsoft account,” “Save to a file,” and “Print the recovery key.”
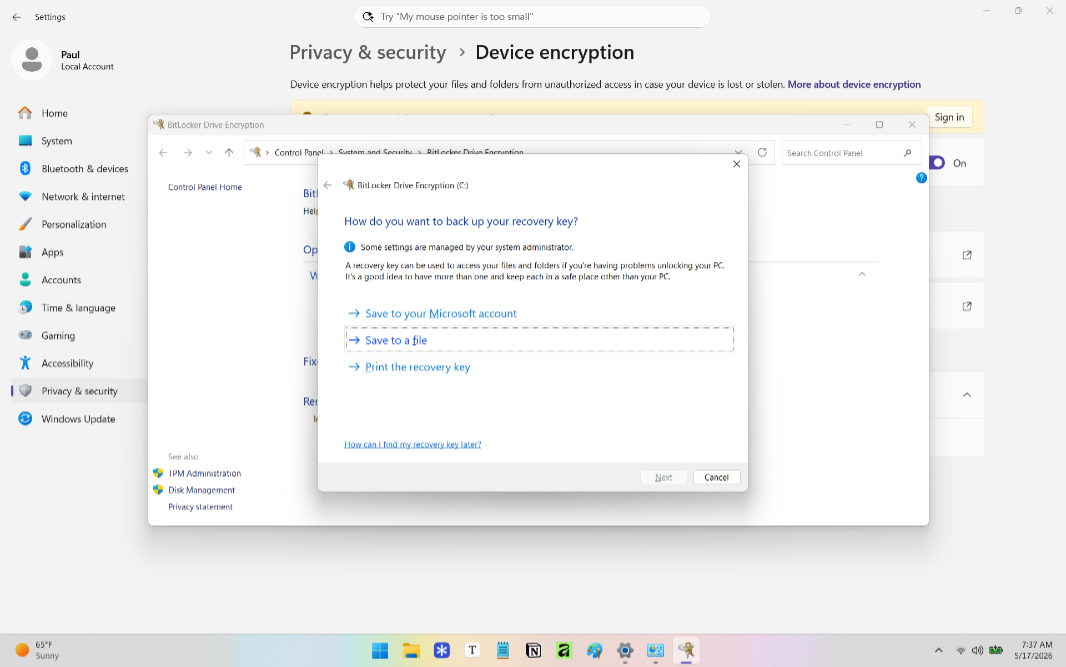
Since the goal is to avoid Microsoft as much as possible, I chose the “Save to a file” option and saved it to my NAS on the local network. You can save the key anywhere but on the system disk you are encrypting–which makes sense, you don’t store the keys to a safe in that safe–so a second HDD, USB drive, or whatever else will work fine. But it’s on you to keep it safe and accessible.
Enable encryption using Windows 11 Home
If you are using Windows 11 Home and navigate to Settings > Privacy & security > Device encryption, you will see the same options as above. But the “BitLocker drive encryption” option doesn’t work because Windows 11 Home doesn’t include that feature. So your only obvious recourse is to sign in with your MSA per the yellow info box at the top.
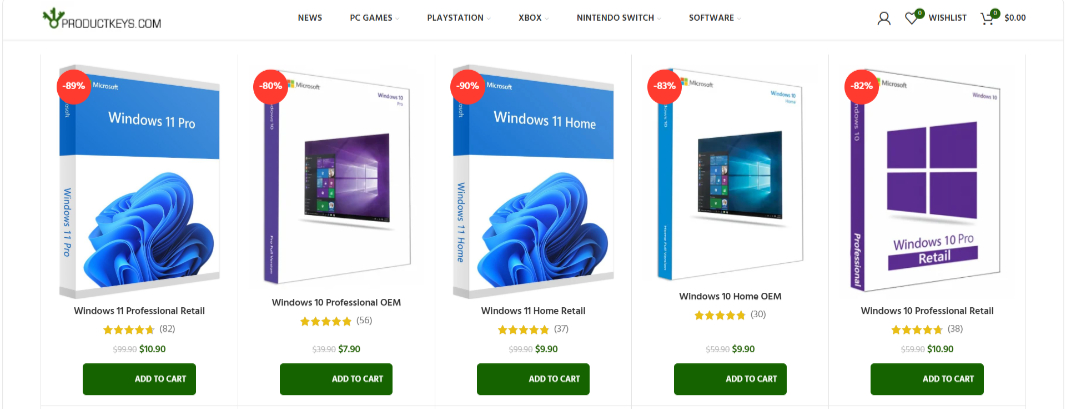
I mean, you could do that. But I didn’t want to. This left a few obvious options. I could use a third-party solution, which seems like a waste of time and effort since this functionality is built into Windows. Or I could upgrade to Windows 11 Pro. This can be expensive–if you click that “BitLocker drive encryption” option in the Settings app in Windows 11 Home, it opens the Microsoft Store app where you can pay full list price–or … not. I just went to the Product Keys website on a different PC and purchased a Windows 11 Pro retail key for $10.90, which is a lot more reasonable.
With that out of the way, I found Activation settings with Start search, clicked “Change” next to “Change product key,” entered the key, and let it do its thing, which included a reboot for the offline upgrade.
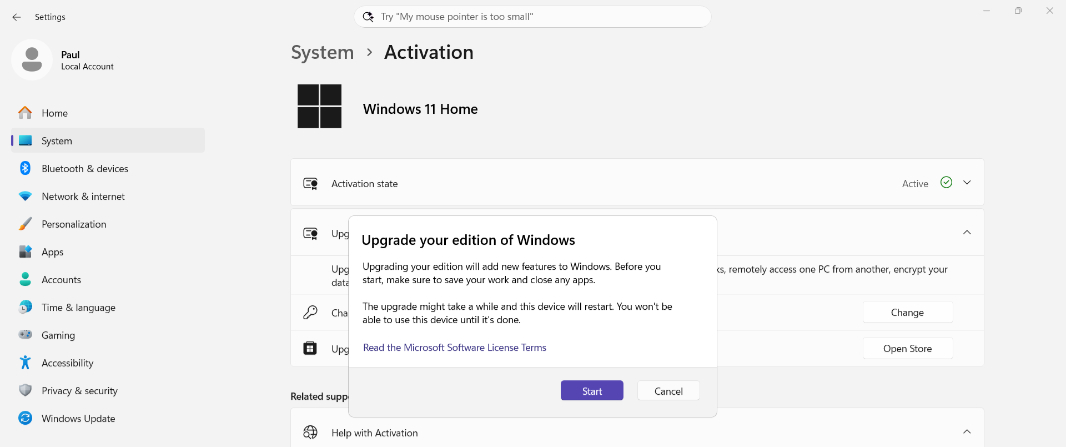
Then, I checked the activation status before going back to Settings > Privacy & security > Device encryption. From there, it works as before: You can now enable BitLocker drive encryption normally and save the backup key wherever you want. As with the other PC, I saved mine to the NAS.
Remove Microsoft apps and services
You can uninstall many apps (including crapware and other PC maker bundles) in Start and the Settings app (in Apps > Installed apps). But because a handful of apps I see out there (like McAfee) have components that can only be uninstalled through the Control Panel, I head there first. You can find Control Panel with Start search and then navigate to Programs > Uninstall a program.
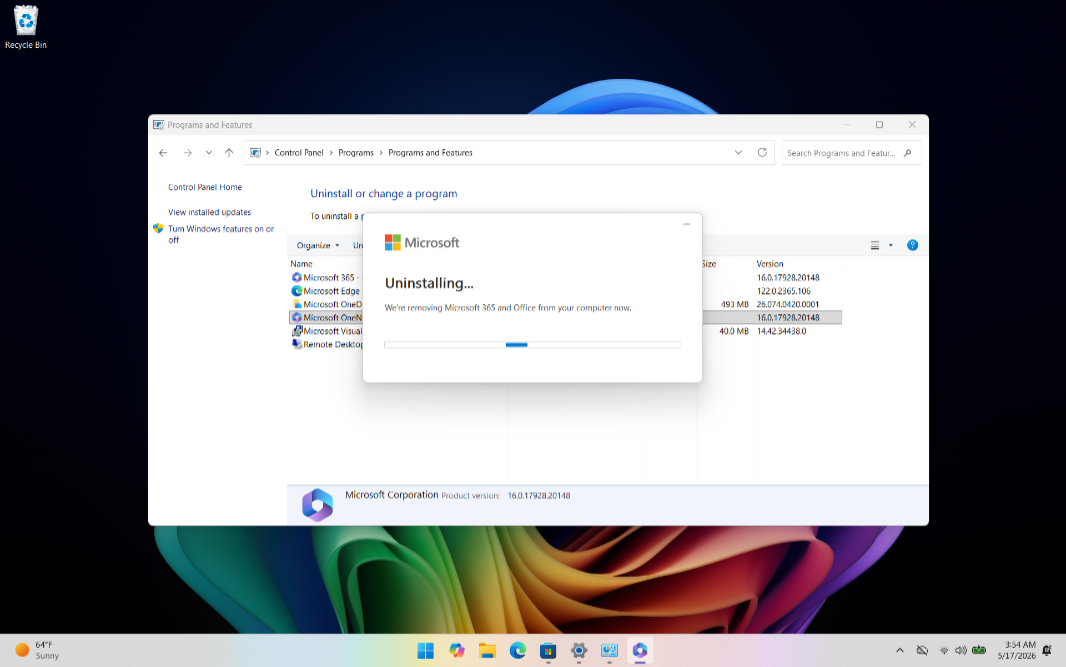
Here, I found and uninstalled the following:
- Microsoft OneDrive
- Microsoft OneNote
- Microsoft 365
If you live in the EU, you can uninstall Microsoft Edge too. Here in the U.S., we can’t do that, but we can use a third-party tool like Win11Debloat (see below) if that’s required. I chose to leave Edge on the PCs, as I like having a secondary web browser around just in case. But I did configure it correctly. This means disabling all the terribleness in the first-run experience as described in the Set Up Microsoft Edge Correctly … Whether You Use It Or Not chapter in the Windows 11 Field Guide.
Once that was done, I culled the crap out of the Start menu. On the Surface Laptop, this was quick, just LinkedIn and a few other things. But on the HP, this required more work. There were Booking.com, Dropbox promotion, Adobe offers, Otter.ai, and other nonsense in Start, some of which can’t be uninstalled normally but instead require you to right-click the shortcut, choose “Open file location,” and then manually delete the thing in File Explorer.
Then, I went through the full list of installed apps in Start (previously in All apps, now in All on the main Start menu view, preferably in Grid view) and removed superfluous in-box apps I’ll never use. This includes superfluous nonsense like News, Copilot (if present), Microsoft 365 Copilot (if present), Mixed Reality Link, and whatever else. Your mileage/needs may vary.
Why not do all this before getting all the in-box apps up-to-date? In my experience, the apps you manually uninstall can later be reinstalled by the Store app. So I cull them later and that usually does the trick.
Install the apps and services you want
Next up, it was time to install the apps I actually use. I typically use a command line script that bulk installs apps via the Windows Package Manager (winget) to do this. But this time, I decided to just do it manually and only choose web-based installs instead of any Microsoft Store-based installs.
To ease the process, I opened a Terminal window with Administrator privileges so I could avoid a stream of User Account Control (UAC) dialogs. Then I typed the following to see which apps needed to be updated:
winget update
There wasn’t much in either case since these were clean installs. But you can install just about every pending update (with rare exceptions typically triggered by Store-based app installs that manage their own updates, something I did not have to think about here) with the following command:
winget update –all –silent
The –all bit ensures that all pending app updates are installed, and the –silent bit ensures there will be no UAC prompts (which only works in an admin terminal).
Once that was done, I started searching for and installing apps. This generally starts with something like:
winget search app-name
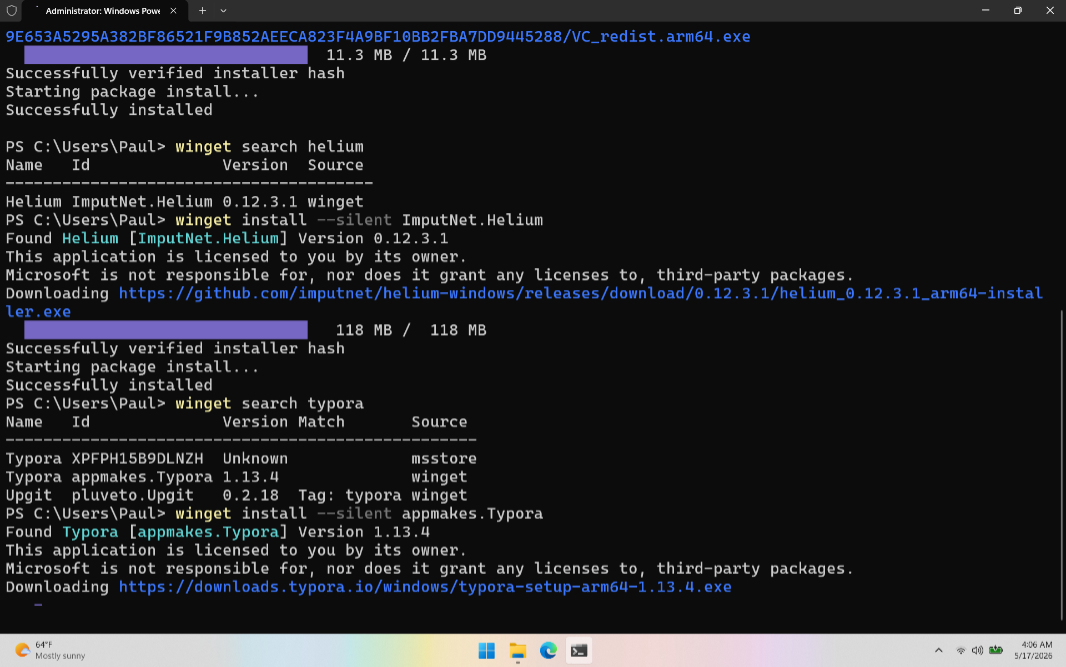
So, for example, the first app I wanted to install was a web browser (see below, too). I used the following to find Helium:
winget search helium
This provided the following output:

I selected “ImputNet.Helium” from that output, copied it to the clipboard (Ctrl + C) and then typed/pasted the following to install this app:
winget install –silent ImputNet.Helium
And off it went. That one was nice because there’s only a single result, but in some cases, like VisualStudio, you will get many results, so it’s important to choose the right one.
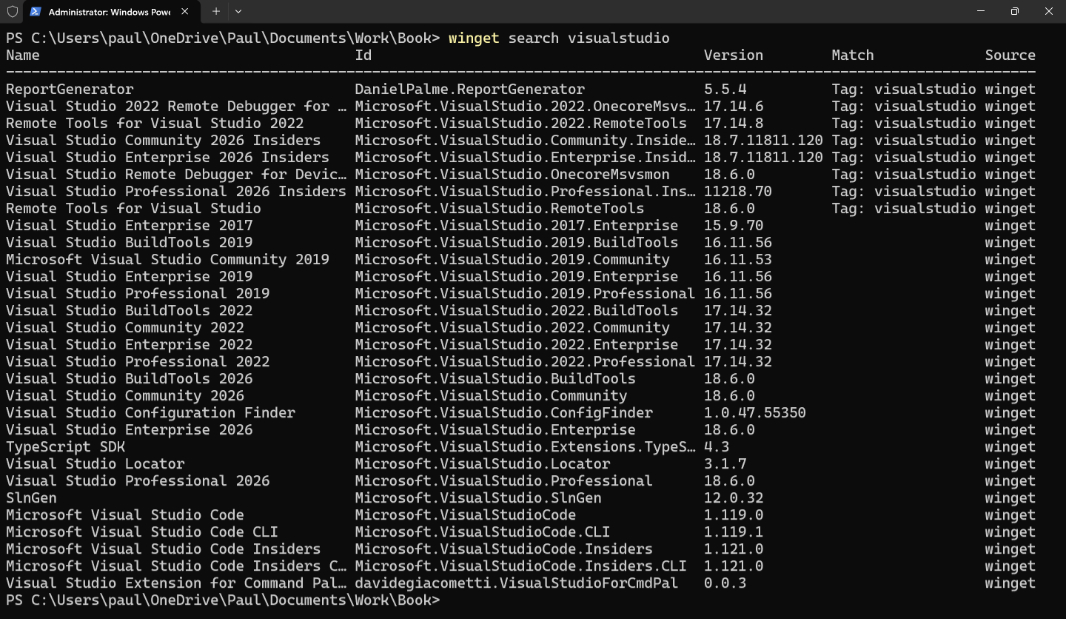
Note, too, that web-based installs always use names like Microsoft.PowerToys whereas Store-based app installs use alphanumeric codes like XP89DCGQ3K6VLD. They are each clearly called out with winget (web) and msstore source names in the output as well.

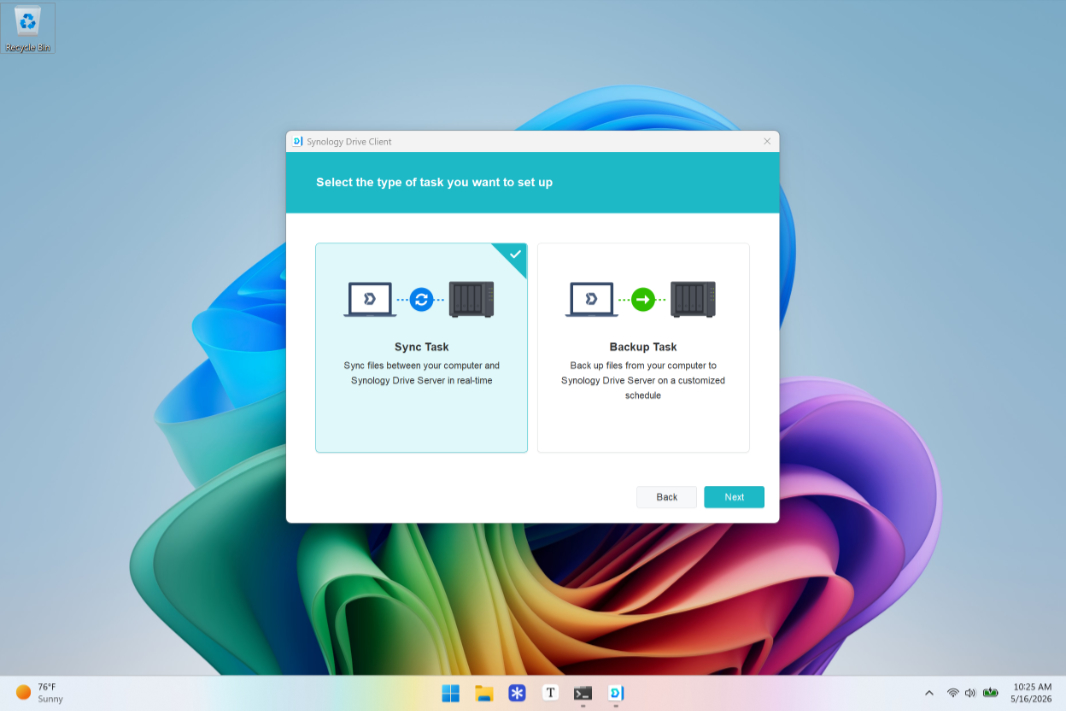
I used winget to install all the apps I typically use, including Affinity, Notion, PowerToys, Typora, Synology Drive Client (see below), Visual Studio Code, Visual Studio 2026 Community, and others.
Web browsers, default browsers, and Microsoft Edge behaviors
Almost everyone who uses Windows installs Google Chrome or some other web browser. You can do so using Edge, but I recommend just using winget, as above.
If you sign in to your web browser or otherwise have settings sync enabled (Brave, for example, has a unique system for this), let that install your extensions and then sign into those (like your password manager) as needed. Otherwise, you need to install extensions: You can find the Chrome Web Store easily enough for any Chromium-based browser, including Helium (which, interestingly, does not support settings sync).
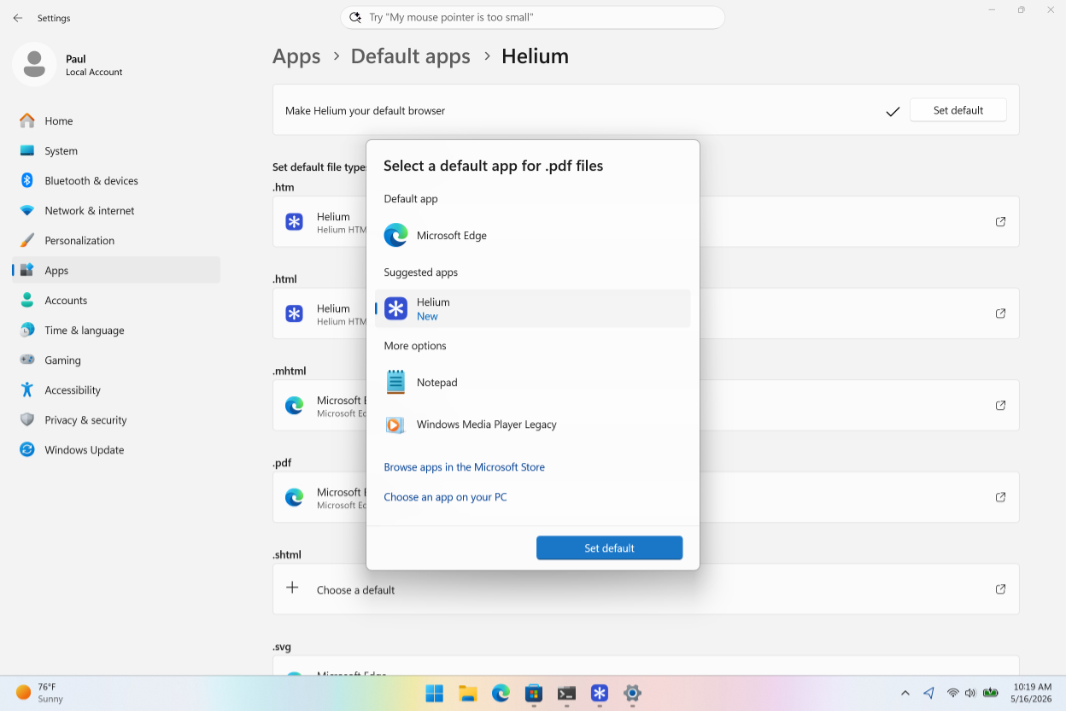
Once that’s done, you should configure the browser you prefer as the default in Settings > Apps > Default apps; select your favorite web browser, click “Set default” on that screen, and then reconfigure the .pdf extension to open in that app, too, so Edge doesn’t launch.
Speaking of Edge, it will still steal opens from your default web browser if you click a link in Widgets, Search highlights, and others. If you don’t want that to happen, and you don’t, you can use the free MSEdgeRedirect utility to make sure Windows 11 always uses your default web browser. This is described in the De-Enshittify Windows 11: Microsoft Edge ⭐ chapter of De-Enshittify Windows 11.
Cloud storage
If you use OneDrive, there’s no reason to uninstall it, of course. But if you use another cloud storage service with Windows, uninstalling OneDrive can make sense. There are just two things to do: Install the cloud storage client you do use and then configure File Explorer (as below) to remove any OneDrive dependencies or vestigial features.
In my case, I installed the Synology Drive Client via winget and then configured it for my NAS. As with OneDrive and other top-tier cloud storage services, you can use a File On Demand feature to sync files and folders that you always want available offline, so I did that too, in File Explorer, and put shortcuts to the folder locations I access a lot in the navigation bar.
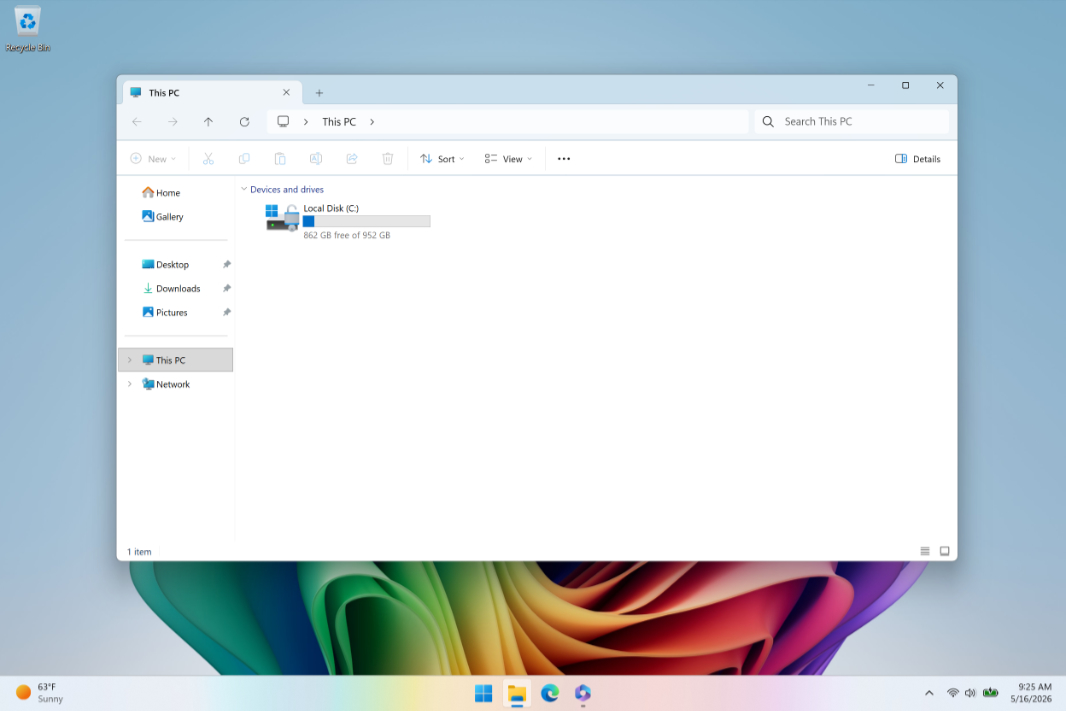
Configure File Explorer
Microsoft is busy “fixing” File Explorer right now, but you don’t have to wait for that work to complete to fix it for yourself right now. If you run File Explorer before getting too far into the configurations described below, you will see three things that I always want to change:
- The app opens to a default Home screen with Quick access, Recent, Favorites, and Shared views
- There is a Paul – Personal (in my case, when I sign in with an MSA) or OneDrive entry in the top section of the navigation bar
- There is a Gallery entry in the top section of the navigation bar
That Home screen is slow to load and I never use any of those views, so I configure File Explorer to open to “This PC” instead. To achieve that, click “See more” (“…”) in the File Explorer toolbar and then select “Options” from the menu that appears. In the Folder Options dialog, I change “Open File Explorer to:” to This PC as noted. I also uncheck “Show recently used files,” “Show frequently used folders,” and “Show files from Office.com.” If you leave the middle option enabled, Windows 11 will customize your File Explorer navigation pane with folder locations you visit a lot, and I hate that.
Uninstalling OneDrive as described earlier removes the OneDrive entry from File Explorer. But it curiously leaves the Gallery item behind. If you want to still use this, you can, you just need to tell it which folder(s) to use for image sources.
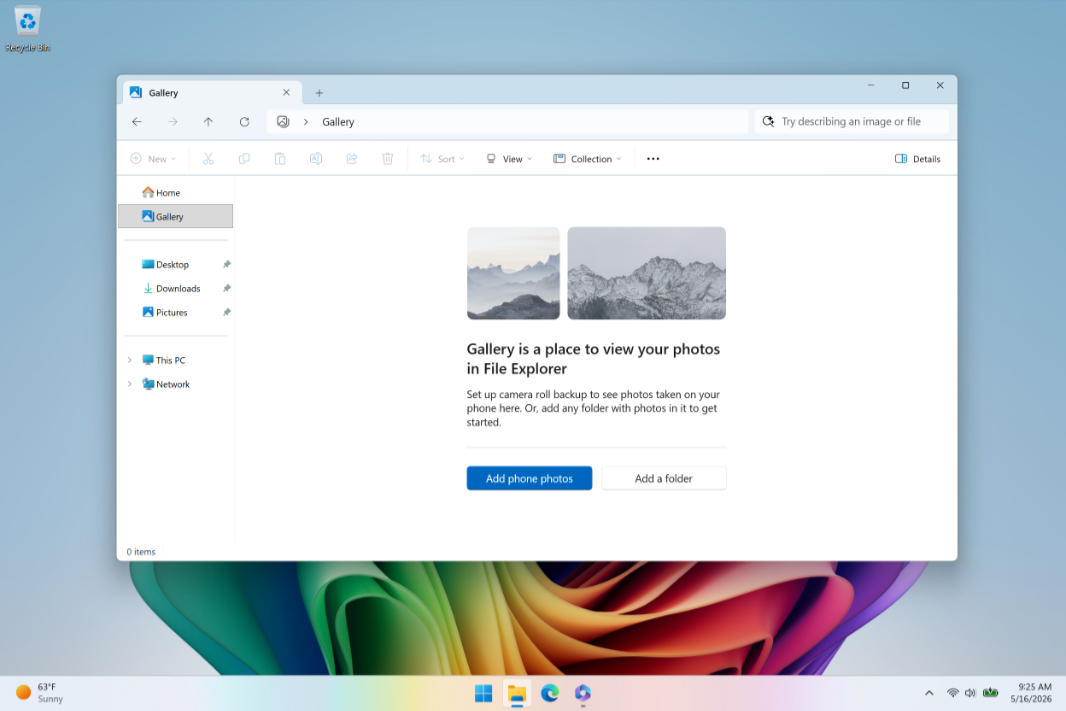
But I don’t need this feature, so I remove it. There’s no user interface for that in File Explorer or elsewhere in Windows 11, God forbid. So I save a Registry key shortcut to do this on my NAS with some other Windows/apps-related files. It contains the following:
[HKEY_CURRENT_USER\Software\Classes\CLSID{e88865ea-0e1c-4e20-9aa6-edcd0212c87c}] “System.IsPinnedoNameSpaceTree”=dword:00000000
Running this file, which I had saved as Remove Gallery from File Explorer.reg, exorcises Gallery from File Explorer.
This is unrelated to File Explorer, but I also have a Registry key file to disable CAPS LOCK. It contains the following:
[HKEY_LOCAL_MACHINE\SYSTEM\CurrentControlSet\Control\Keyboard Layout] “Scancode Map”=hex:00,00,00,00,00,00,00,00,02,00,00,00,00,00,3a,00,00,00,00,00
And speaking of keyboard keys I never want to use, there is the mystery that is the Copilot key. I hate the Copilot key.
Disable the Copilot key
If your keyboard has a Copilot key, my apologies. It can be found between the Right Alt key and the arrow keys on most modern laptop keyboards, and it’s there on both the PCs I used for this experiment. As noted, I hate it. I hate it because I’m a clumsy typist and hit it mistakenly. I hate it because doing so launches Copilot or Microsoft 365 Copilot, depending on the PC, and I don’t ever want to see those apps. And I especially hate it because when you uninstall those apps, it will launch the Settings app, which navigates to Bluetooth & devices > Keyboard and selects the option “Customize Copilot key on keyboard” when I inadvertently tap it. And none of the available choices are “Do nothing.”
Microsoft is going to soon update Windows 11 so that you can configure this key to be Right Ctrl, which is what this key was on most keyboards before Microsoft forced this nonsense on us all. But for now, I use the Keyboard Manager utility in PowerToys to reconfigure this key to duplicate whatever key is directly to its right. On most laptops, this is Left arrow. And this change works wonderfully: If I clumsily tap the Copilot key, the computer will perform a Left arrow key press instead. Which is probably what my stupid finger meant to do in the first place.
Disable all tracking and many annoyances
Microsoft uses telemetry to send configuration and usage information from your PC to its servers so that it can quickly determine if issues are widespread and then, theoretically, fix them for everyone. You can disable the “Send optional diagnostic data” option in Settings > Privacy & security > Diagnostics & feedback to minimize the data you’re forced to provide. But you cannot stop transmitting that data entirely without using a third-party utility.
I describe this in greater detail in the De-Enshittify Windows 11: Make Windows 11 Respect Your Privacy chapter in De-Enshittify Windows 11, but I recommend using Win11Debloat to stop this behavior and disable many of the other annoyances in Windows 11, like all the ads and suggestions.
Other configuration changes
There are so many other things that I configure in Windows 11 when I set up a new PC or reset any existing PC, as I did with these two computers. Some of these are very specific to how I like to do things. For example:
- Remove the Search and Task view items from the Taskbar in Settings > Personalization > Taskbar because they’re superfluous and can be triggered with keyboard shortcuts (Winkey + Tab and Winkey + S, respectively)
- Rename the PC in Settings > Home by clicking “Rename” near the top
- Display the battery percentage on the battery icon in the system tray in Settings > System > Power & battery
- Change “Energy saver” to “Turns on at 10 percent” (not 30 percent) in Settings > System > Power & battery
- Change the screen and sleep timeouts to 20/25 minutes on battery and 30 minutes on power in Settings > System > Power & battery
- Disable Adaptive color if enabled in Settings > Display as it just makes everything pink
- Enable Night light to come on from sunset to sunrise in Settings > Display
- Adjust the display scale in Settings > Display according to the screen and my preferences
- Enable the highest refresh rate and, if available, Dynamic refresh rate in Settings > Display > Advanced display
- Turn off Edge tabs from appearing in Alt + Tab in Settings > Multitasking
- Open “Snap window” in Settings > Multitasking and disable the option “Show snap layouts when I drag a window to the top of my screen” because I hate that feature SO much
- Enable Nearby sharing because I use and rely on this feature, in Settings > Nearby sharing. If you sign in with a local account and/or didn’t name your PC during initial Setup, you should also rename the PC as displayed by Nearby sharing
- Disable Drop tray (the new name for Drag tray) because it’s as annoying as that Snap thing noted above, in Settings > Multitasking now
- Enable “End Task” in Settings > Advanced; this adds an “End task” item to the context menu that appears when you right-click a running app shortcut in the Taskbar
- Disable three-finger touchpad gestures in Settings > Bluetooth & devices > Touchpad, though I usually wait until I trigger this mistakenly and find it annoying
- Disable “Use the Print screen key to open screen capture” in Settings > Bluetooth & devices so that it works like it used to, by copying the screen image to the Clipboard instead of running Snipping Tool
- Configure a theme in Settings > Personalization > Themes that has no sounds and an inverted mouse cursor so I can a) stop being annoyed by sounds and b) can stop playing a little game I call “where is my mouse cursor”? Tied to this, PowerToys includes a Light Switch utility that auto-switches between Light and Dark modes with sunset/sunrise, and a Find My Mouse utility that helps you find the mouse cursor by tapping Ctrl twice. Nice
- Once I connect to a second screen, I go into Settings > Personalization > Taskbar and change Taskbar behaviors > “When using multiple displays, show my taskbar apps on” to “Taskbar where window is open.”
- Disable “Show search highlights” in Settings > Privacy & security > Search so that Start search results are less cluttered and only show local files in the default view
- Configure Widgets to not activate on mouse hover and to disable all notifications. These changes occur in the Widgets settings interface, and the result is a weather forecast display and nothing else on the Widgets button on the Taskbar
There are probably others, but this could go on forever. What I end up with at the end of all this is a minimalistic, clean install of Windows 11. One could make it even more minimalistic by using a tool like Win11Debloat, of course. But this puts me in a good place.
I will keep using these PCs and monitor how or whether they retain the changes I’ve made. But I feel like this is a reasonable path forward for just about anyone, and especially those who don’t mind getting their hands dirty a bit. Please let me know if I’m missing anything.

Gain unlimited access to Premium articles.
With technology shaping our everyday lives, how could we not dig deeper?
Thurrott Premium delivers an honest and thorough perspective about the technologies we use and rely on everyday. Discover deeper content as a Premium member.