Search (23H2) (Archived)
- Paul Thurrott
- Dec 09, 2023
-
0
As with its predecessors, Windows 11 offers an integrated Search feature that’s accessible from the Taskbar or the Start menu. Search helps you find apps and documents on your PC as you would expect, but it also searches the web and can find other types of files on your PC. There is also a search feature built into File Explorer so that you can easily find documents and other files.
Get to know Search
By default, Windows 11 displays a prominent Search box on the Taskbar.

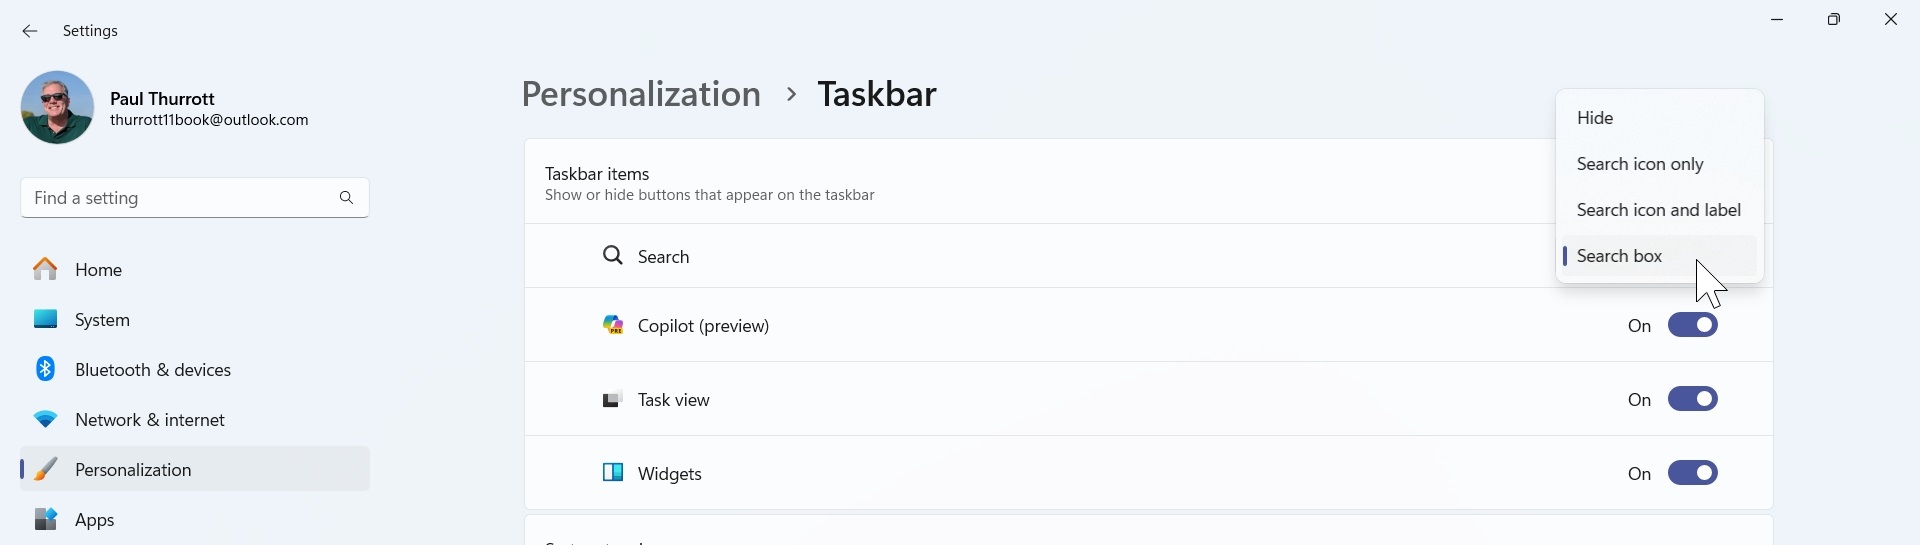
But this Taskbar item can be configured to display as a more normally sized Search icon or a Search icon with a label. You can also hide the Search icon/box altogether if you’d like.

To configure how Search appears on the Taskbar, right-click an empty area of the Taskbar and choose “Taskbar settings” from the context menu that appears. In the Settings window that appears, select the option you prefer.
To initiate Search, click the Search item on the Taskbar.
Microsoft really wants you to use Search because its built-in web integration requires you to use Microsoft Edge (no matter which web browser you chose as the default), Bing, and MSN, and you thus be exposed to Microsoft’s web advertising services.
Here are a few other ways to access Search:
– Open Start and select the Search field at the top of the window.
– Tap WINKEY and just start typing your search query.
– Type WINKEY + S (or, oddly, WINKEY + Q).

Search provides the following interfaces:
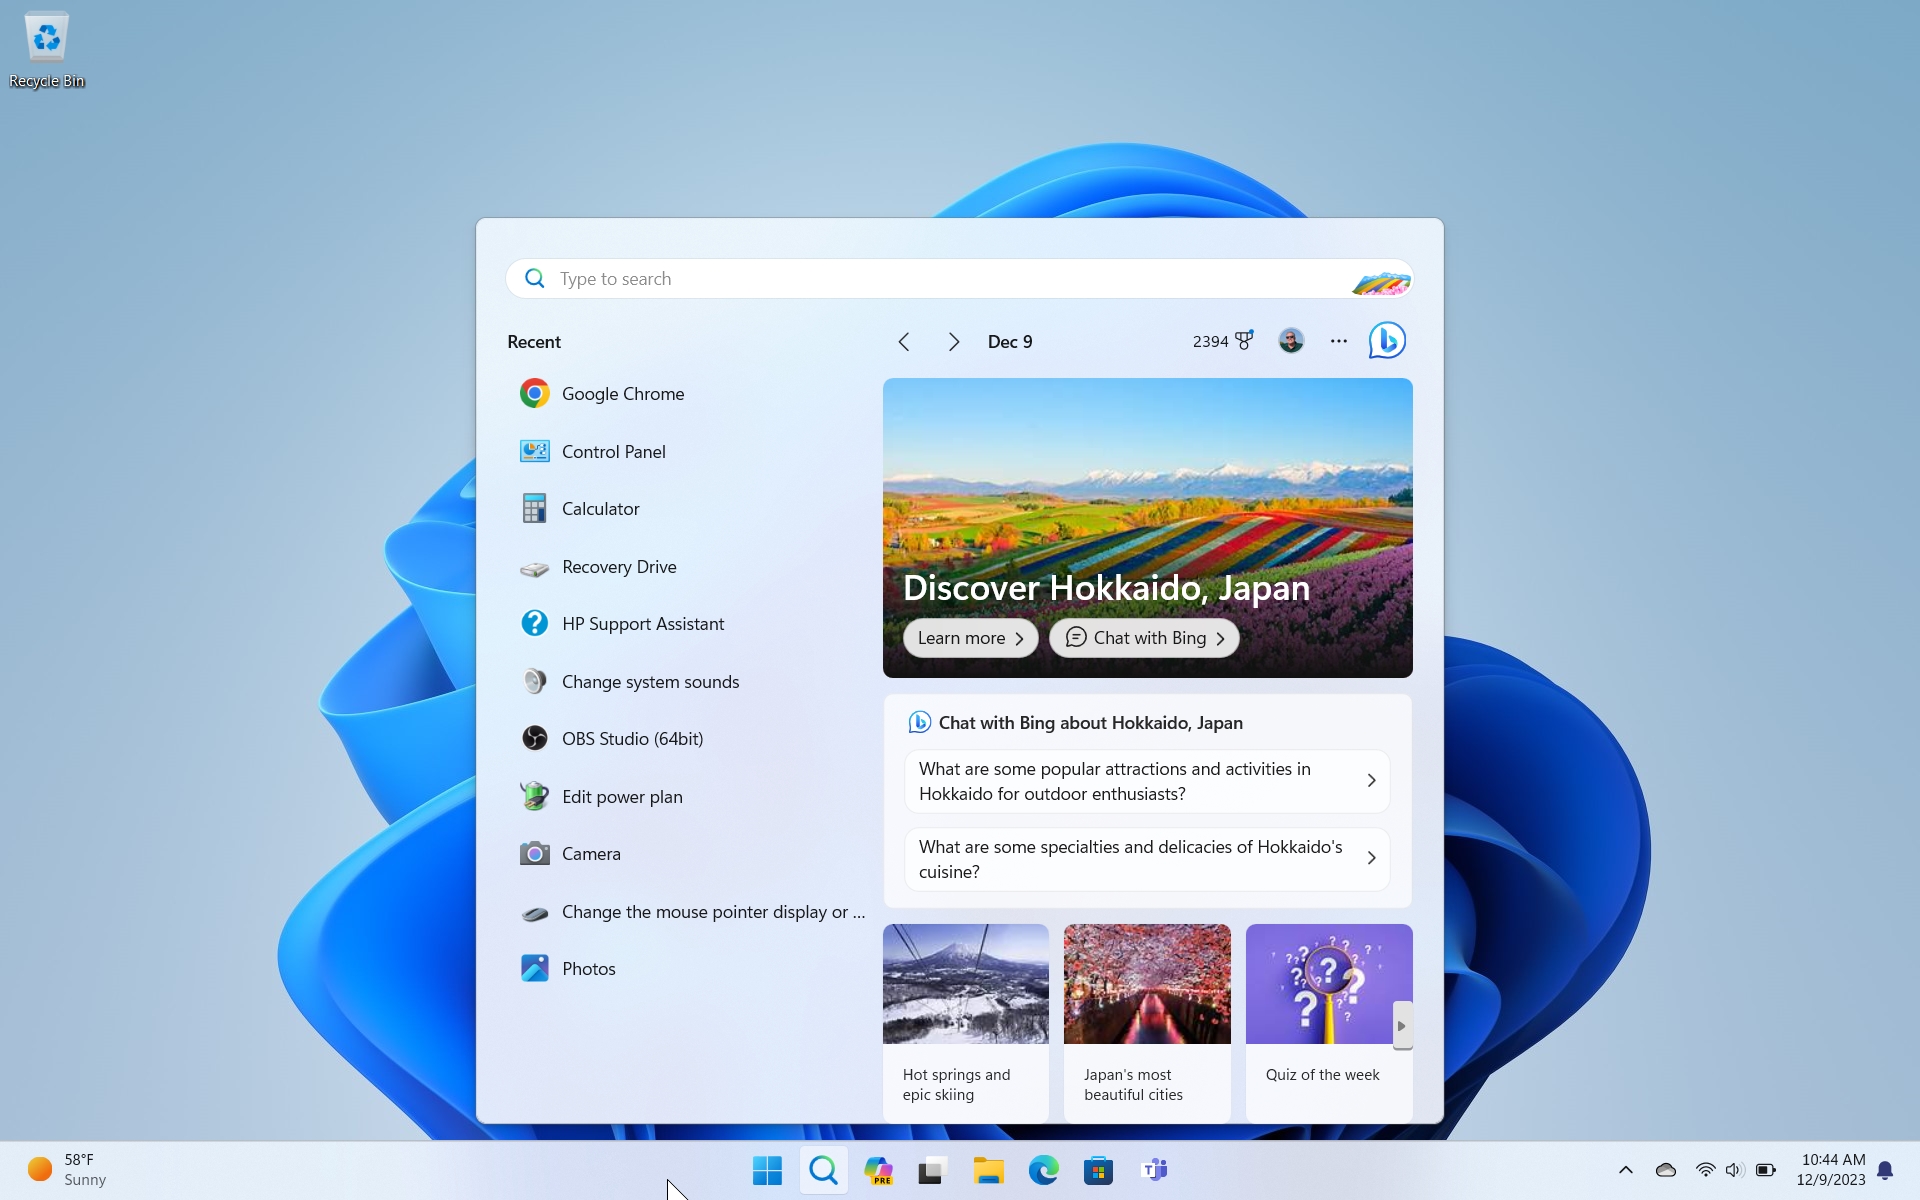
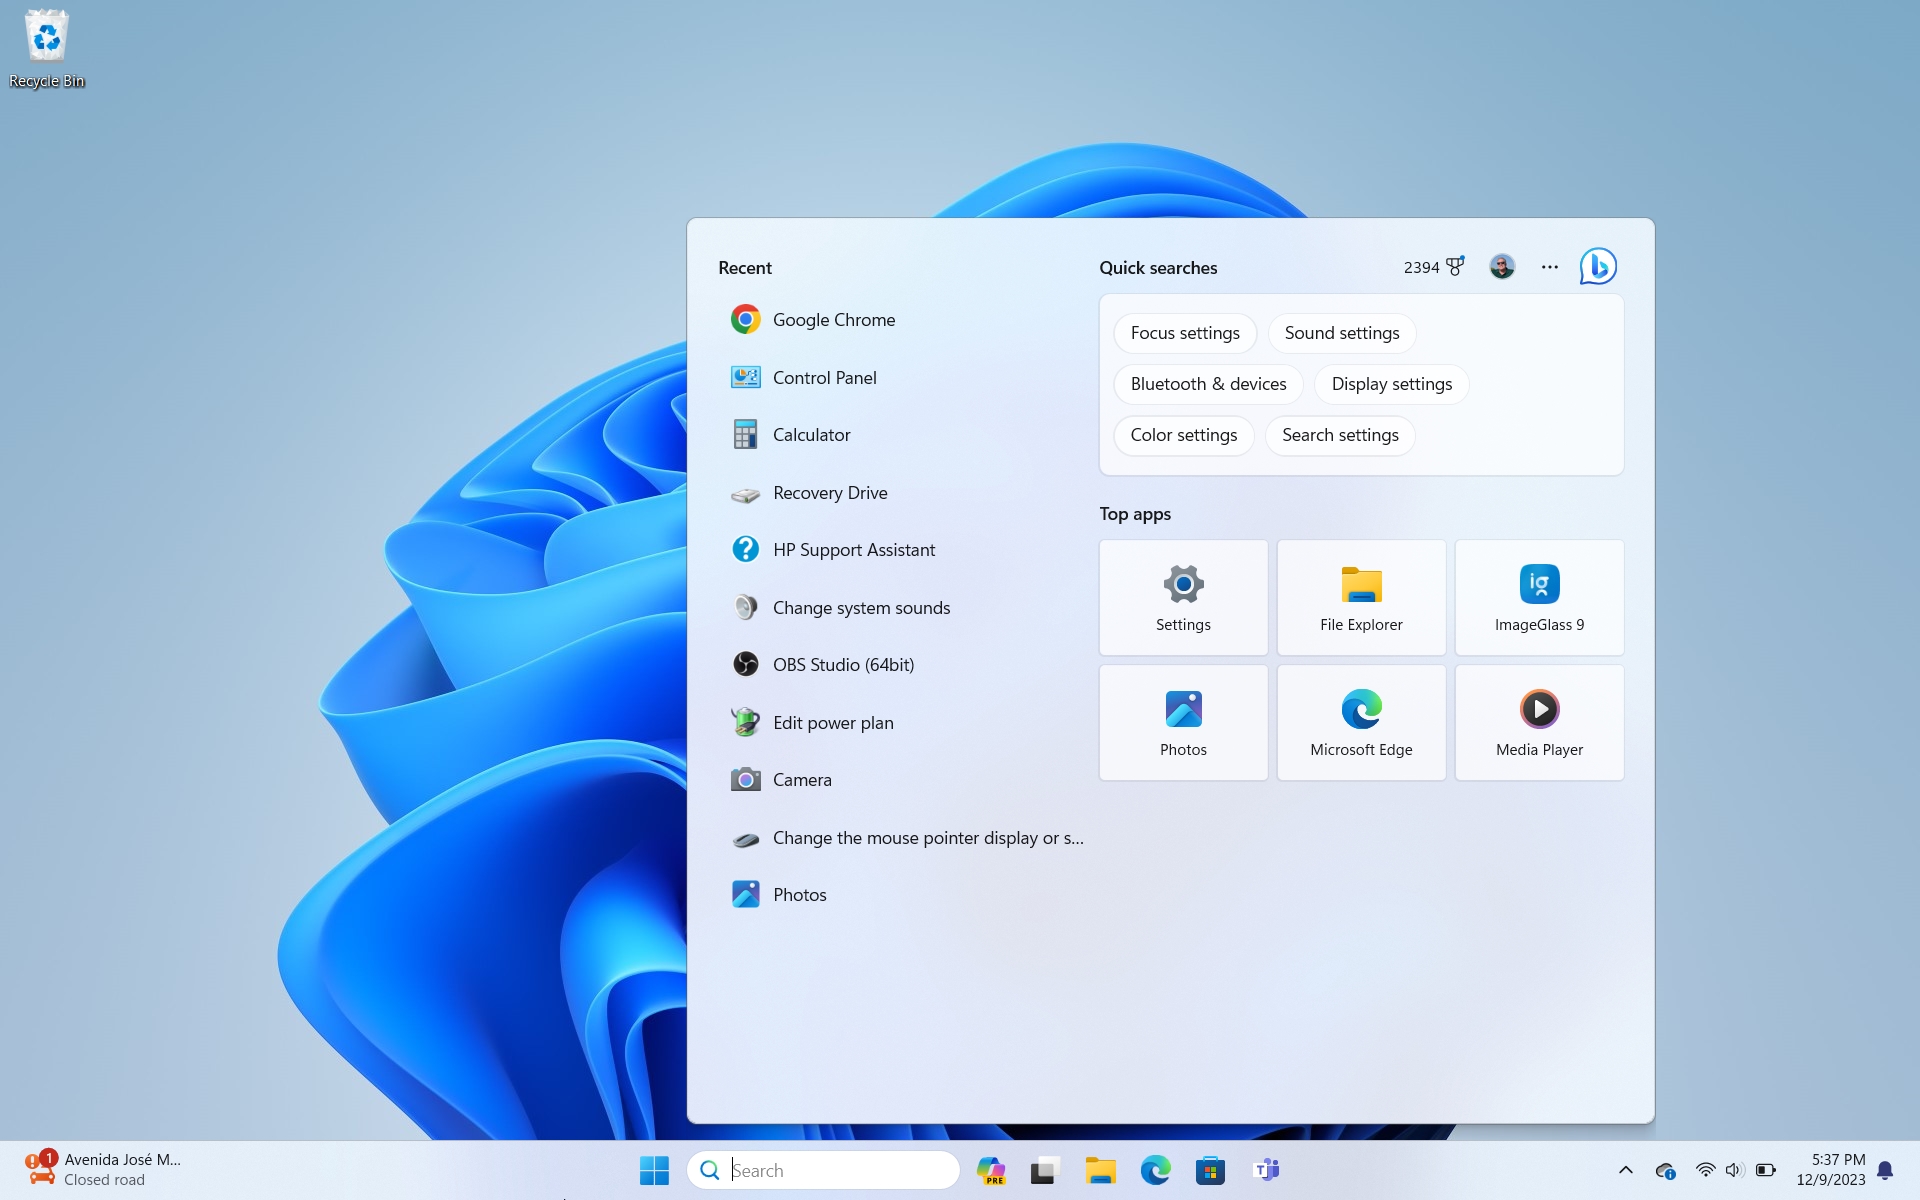
Search bar. If you configured the Search item on the Taskbar as an icon or icon with a label, or chose to hide it, Search will display a prominent Search box at its top. This control is auto-selected when Search opens so that you can simply start typing to initiate a new search query.
If you left the Search item configured as a Search box, you will instead type your query in that box when you click it and Search will not display its own Search box.
Recent. On the left, you will see a columnar list of the apps and system settings you searched for most recently.
You can remove any item from the Recent list. Just mouse-over it and select the small “Remove from device history” (“x”) button that appears to its right.
You can also access other features related to any item in this list by right-clicking it. The options you see will vary by item.
Search highlights. The largest area of Search is taken up by a feature called Search highlights that exists solely to distract the user into clicking on one of its links so you can–wait for it–launch Microsoft Edge (again, even if you chose a different default web browser) and access Microsoft websites like Bing or MSN that are monetized using Microsoft’s advertising services.
Search highlights is a problem, but you can at least disable it. We explain how later in this chapter.
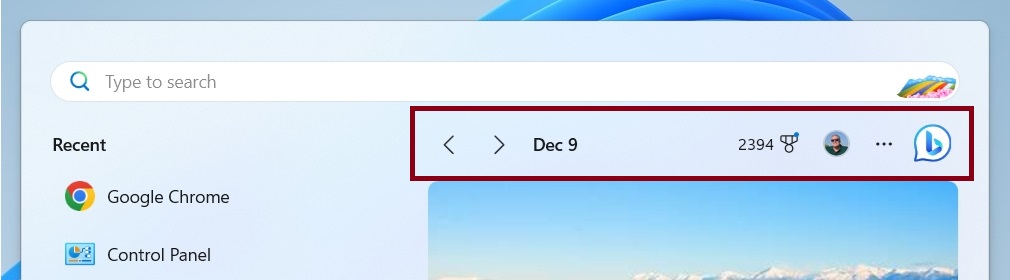
At the top of Search highlights, you will see date navigation controls (so you can go back to the previous week’s worth of Search highlights distractions), plus date, Microsoft Rewards balance, user profile, Options, and Copilot with Bing Chat items, the latter of which opens a Microsoft Edge window–regardless of which web browser you’ve chosen as your default–so that you can interact with Microsoft Copilot on the Bing website.
As you begin typing–remember, you came here to find something specific–Search switches to a search results view, which provides a column on the left with search results and a right column that displays details about whatever item is selected on the left.
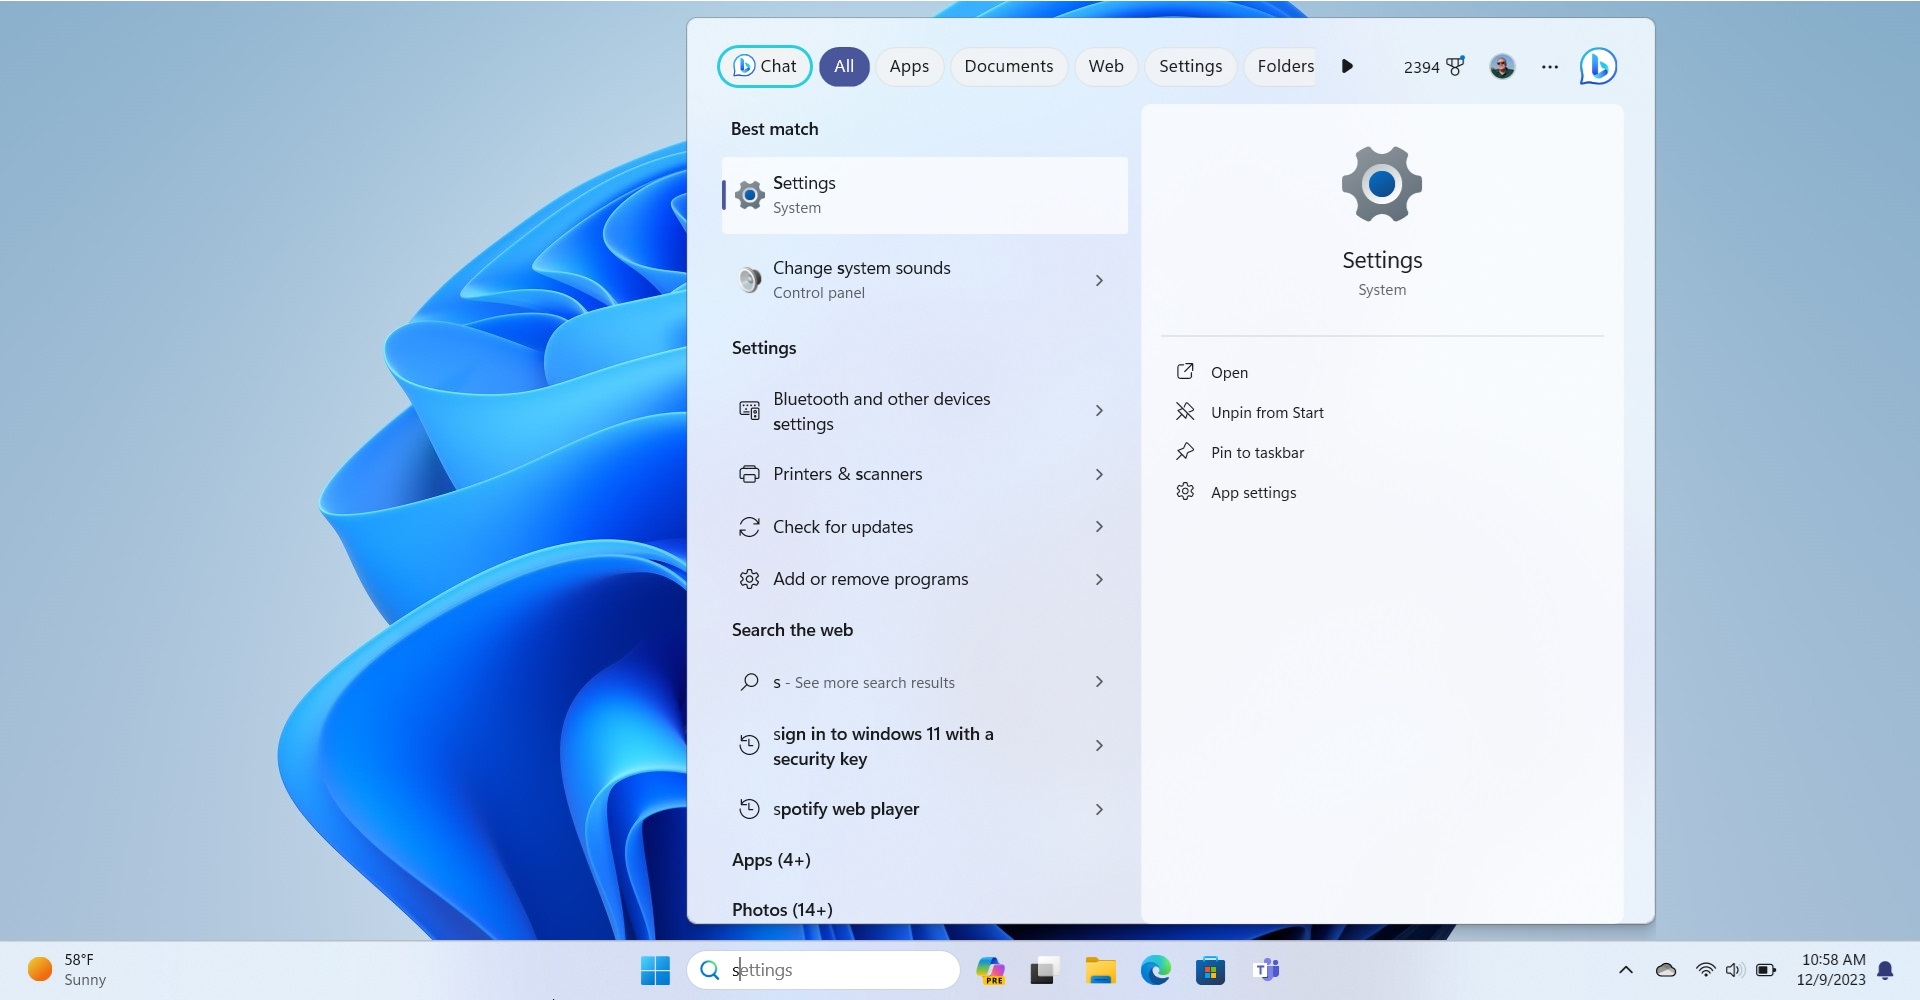
You can filter the results by clicking one of the tabs–Apps, Documents, Web, and so on–at the top.
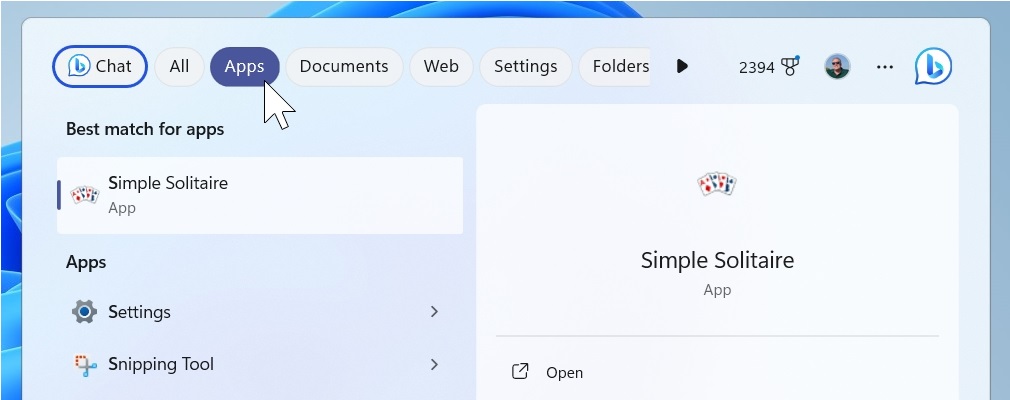
You can use the arrow keys on your PC’s keyboard to navigate through the results list. As you do, the right column will change to show you more information about whichever item is selected.

To open a selected item, type ENTER or just click it with the mouse.
Search is a great way to find apps you don’t use all that often and settings of any kind. (Though you can also launch the Settings app and search from there.) But it’s less good for finding files stored on the PC or in your OneDrive cloud storage: You should use File Explorer instead, as noted in the next section.
We also don’t recommend using Search to search the web, because doing so forces you to use Microsoft’s web browser and its lackluster Bing search service. Instead, use the web browser and Internet search service you prefer and search the web from that app.
Search for files with File Explorer
In addition to Search, Windows 11 lets you search for files using File Explorer. We usually start with Search, but File Explorer-based search might be the more obvious choice for those who often find themselves spelunking around in the file system or just prefer working with File Explorer.
To search for files this way, open File Explorer (WINKEY + E) and, optionally, navigate to a specific location in the file system where you believe what you’re searching for might be.
This isn’t strictly necessary, however, as you can search all your PC’s storage from the File Explorer home page.
Then, select the Search box in the upper right of the File Explorer window.
You can get there more quickly by typing CTRL + F.
As you type, File Explorer will begin searching through the file system. It will display its progress inline in its Address bar, and results will be displayed in the main view area.


If you double-click a folder in the results view, File Explorer will navigate to that folder and display it normally. You can return to the search results view by navigating Back.
You can also navigate back by typing ALT + LEFT ARROW.
If you double-click a file in either results view, it will open using its default app. For example, a text file will open in Notepad by default.
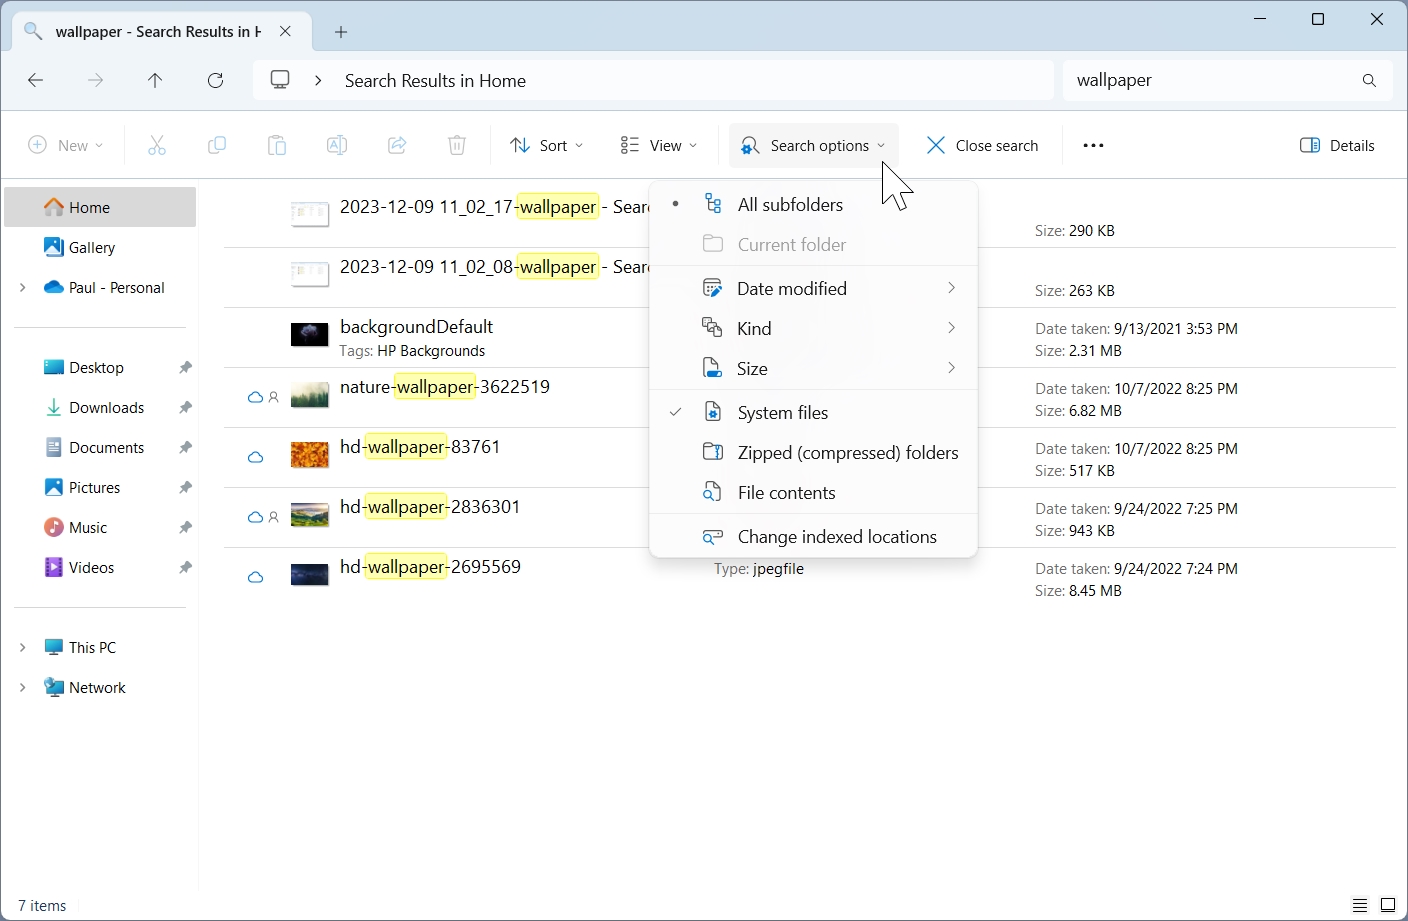
Be sure to check out the advanced features provided by the “Search options” command bar button: here, you can filter the search results using a wide range of options.

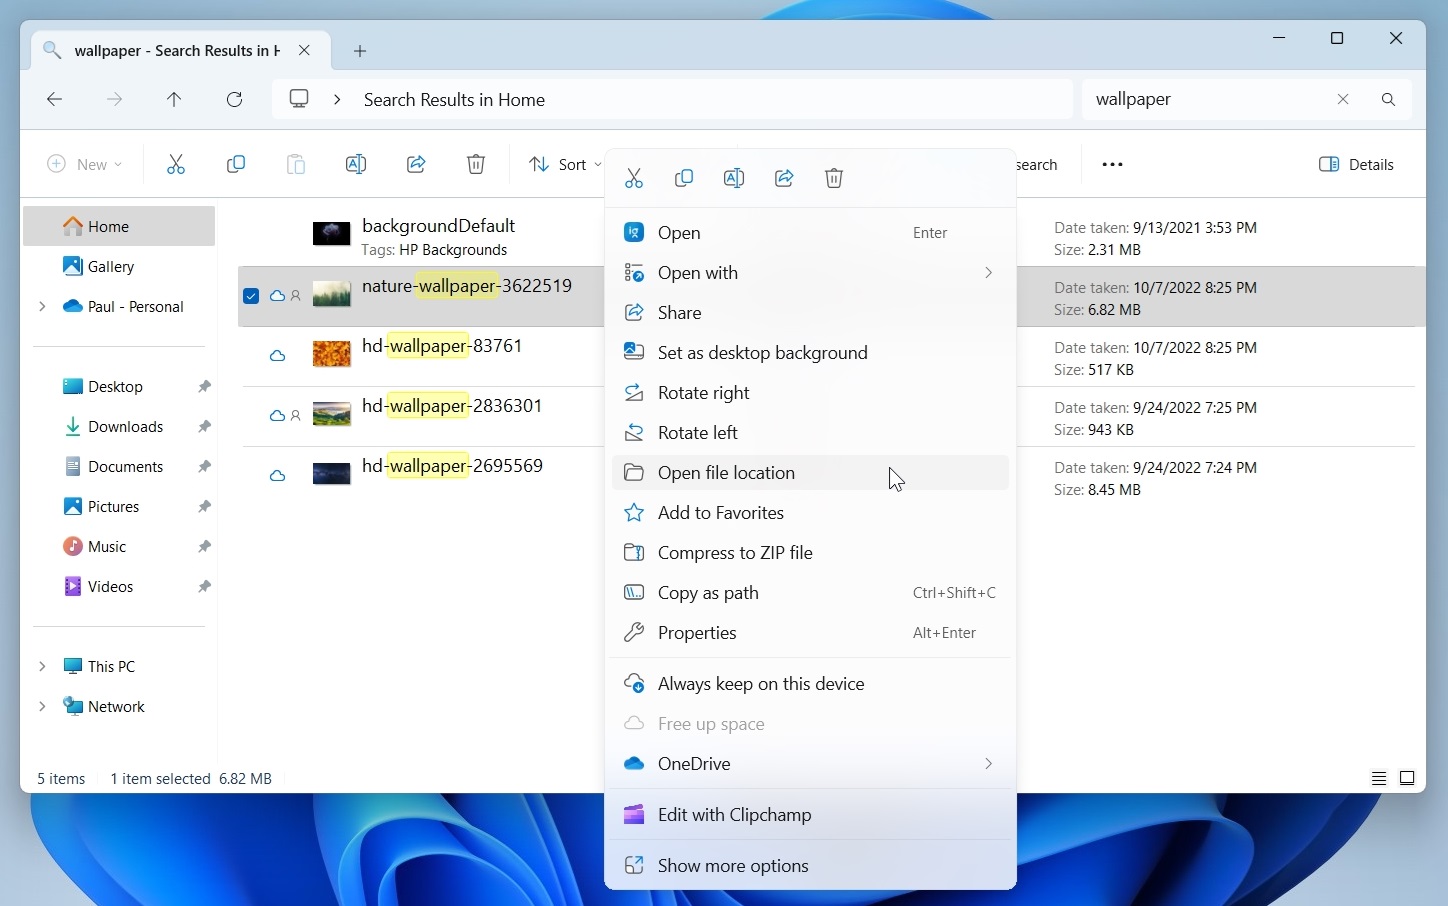
You can also access additional features by selecting a file or folder in the results and right-clicking it. When you do so, a context menu of relevant options appears. For example, you can navigate to the folder that contains the selected file by choosing “Open file location.”
Configure Search
Search is configured via two different pages in the Settings app. Fortunately, you can find a link to each by opening Search, clicking “Options” (“…”), and then choosing “Search settings” or “Indexing options” from the menu that appears.

If you choose “Search settings,” Settings will open and navigate to Privacy & security > Search permissions. This page has settings related to Search’s web search functionality, history, and Search highlights.
If you choose “Indexing options,” Settings will open and navigate to Privacy & security > Searching Windows. This page has settings related to local file search and how the indexing functionality in Windows works.
Each is discussed in the following sections.
Configure Search permissions
The Search permissions page in the Settings app provides several options, some of which you will probably want to configure differently than the defaults.
Key settings to consider here include:
Cloud content search. By default, Search will include content from the OneDrive, Outlook, and Bing data associated with your Microsoft account in its search results. If this is not useful to you, find the “Microsoft account” option under “Cloud content search” and set it to “Off.”
There is a similar option for those who sign-in with a Microsoft Work or school account.
Search highlights. As noted previously, Search highlights is a distraction designed to put you in front of low-quality web content and Microsoft’s online advertising. To disable this feature, scroll down to “More settings” and set “Show search highlights” to “Off.” Now, when you open Search, it will display useful lists of quick searches and top apps instead of Search highlights.
Disabling Search highlights also removes the graphical “content suggestion” that is otherwise found in the Search box on the Taskbar or in Search.
Configure Search indexing
Search examines the content in your PC’s file system and catalogs the words and metadata they contain to create an on-disk database called an index that it then uses to provide search results more quickly. This process, called indexing, starts the first time you sign into Windows on a PC, and it takes Search a few hours to create the initial index. After that, Search will run in the background and update the index as needed, making changes as you add, edit, and remove data and files.
For the most part, you can just let Search do its thing as it will not index or re-index while you are actively using the PC. But there are some index-related options worth examining, especially if you store documents and other files in non-standard folder locations.
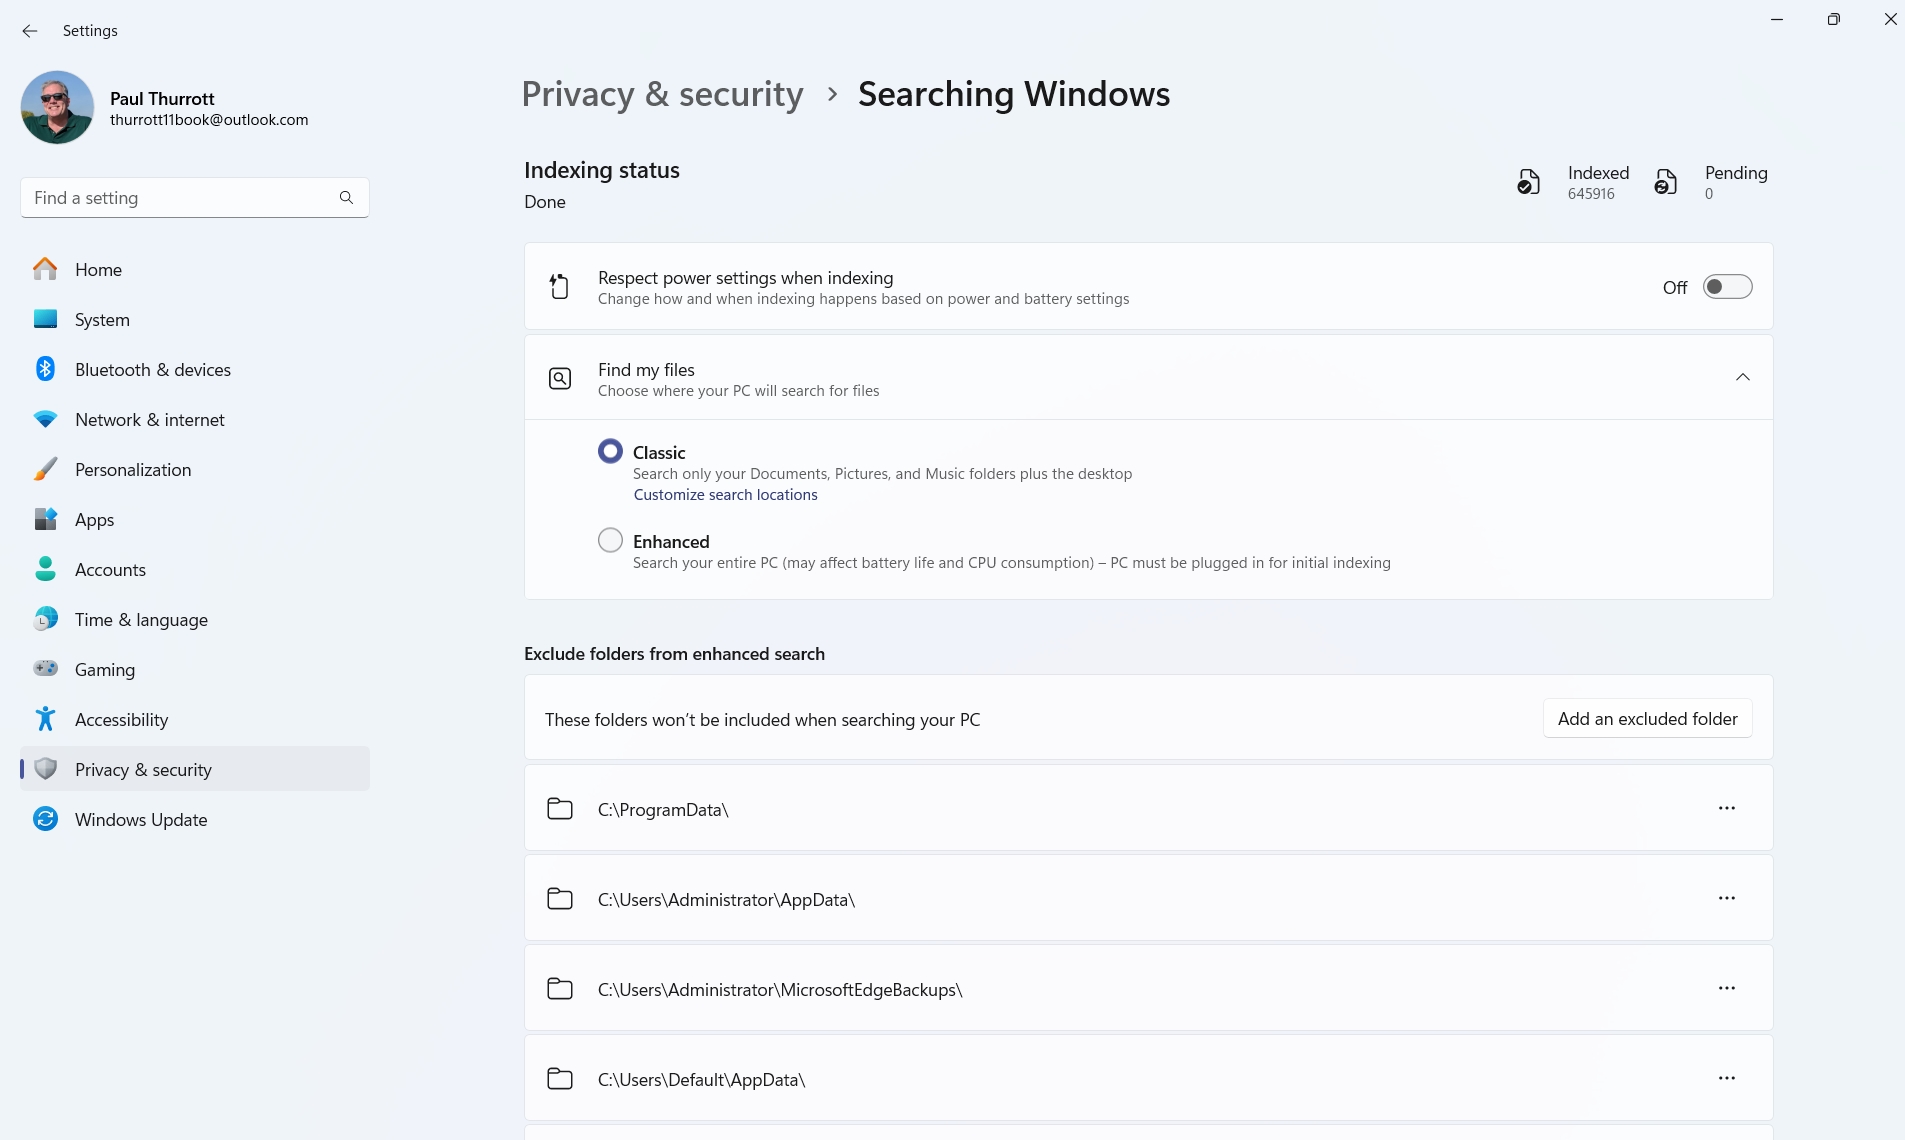
These options are found in the Searching Windows page in Settings.
Most of them are related to which locations Search will index. By default, Search indexes only your Desktop, Documents, Music, and Pictures folders. But you can customize which locations it indexes in various ways.
These include:
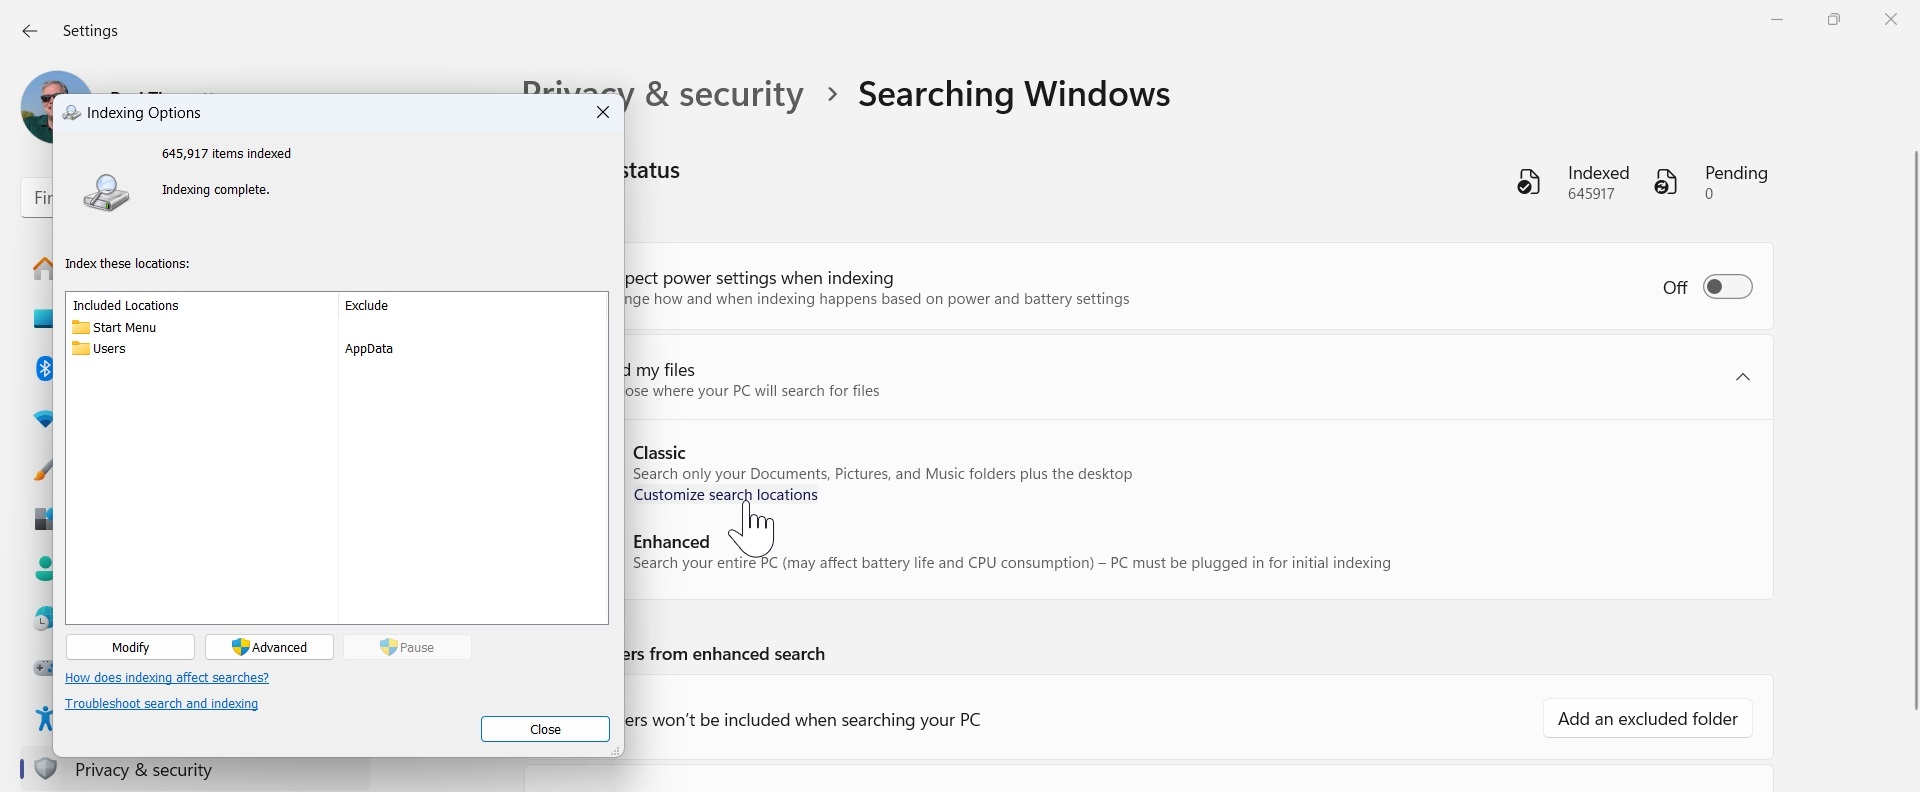
Search the entire PC. To search the entire PC instead of just the four user folders noted above, change “Find my files” from “Classic” to “Enhanced.” Note that doing so can impact the performance and battery life of your PC because indexing and re-indexing that much data is more resource-intensive. If you have a laptop or other portable PC, it has to be plugged into power for the initial indexing.
Remove locations from enhanced search. Because searching the entire PC is so resource-intensive, Microsoft removes select folder locations from that index. You can see the list under “Exclude folders from enhanced search,” but you can also add other folder locations to exclude by clicking “Add an excluded folder.”
Add or remove search locations. To arbitrarily add, remove, or otherwise customize which folder locations that Search indexes, more advanced users can click “Customize search locations” under “Classic” to launch the legacy Indexing Options control panel. This tool is complicated but it gives you fine-grained control over indexing locations.

Gain unlimited access to Premium articles.
With technology shaping our everyday lives, how could we not dig deeper?
Thurrott Premium delivers an honest and thorough perspective about the technologies we use and rely on everyday. Discover deeper content as a Premium member.