Internet Connectivity
- Paul Thurrott
- Jun 23, 2026
-
0
Windows 11 supports Wi-Fi, Ethernet, and cellular data connections along with Airplane mode and Mobile hotspot capabilities.
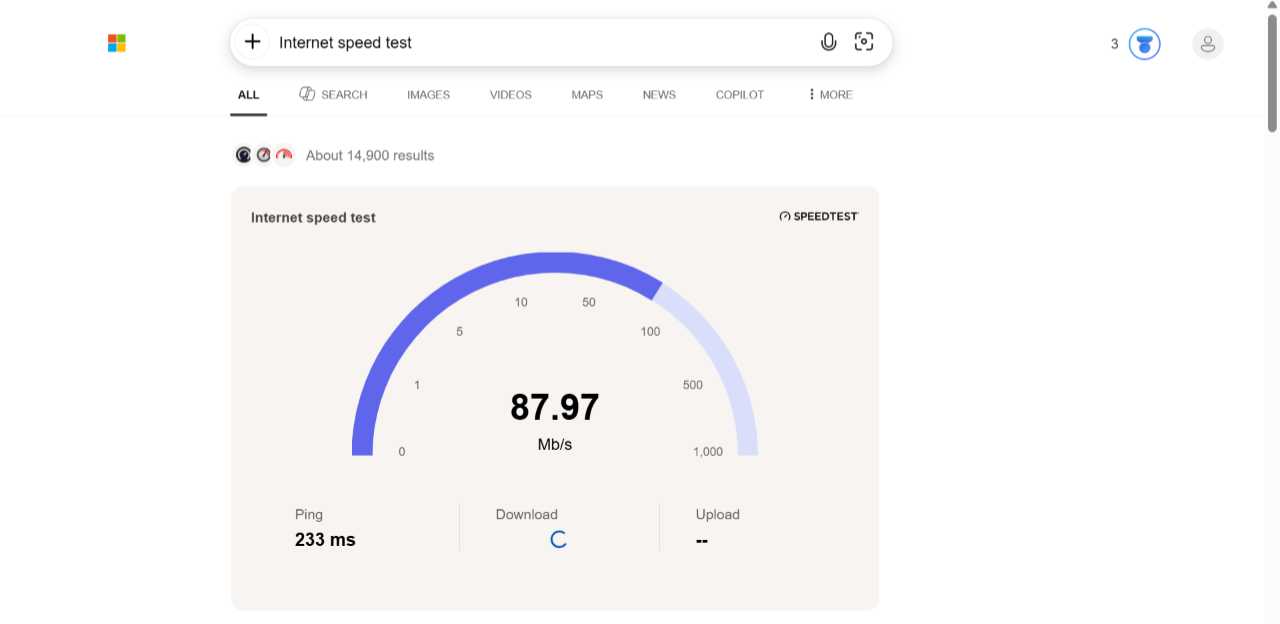
New to 2026, it also lets you perform a quick network speed test if it’s not clear whether you’re connected to the Internet or you want to make sure you’re using the fastest connection type. The network speed test is available from Quick settings in the Taskbar in the following places:
- Right-click. If you right-click the “Network” system tray icon, you will see a “Perform speed test” option in the context menu that appears.

- Wi-Fi, Ethernet, and Cellular quick settings. If you click the right side of the “Wi-Fi,” “Ethernet,” or “Cellular” quick setting buttons, you will see a “Test internet speed” button (with no label) at the bottom of the window.
When you click either of these items, your default web browser will open a new tab and display a Bing search for “Internet speed test” that displays a graphical speed test above the results so you can perform the test immediately. Just click “Start” to see your download and upload speeds.
Wi-Fi
Windows 11 supports Wi-Fi (“wireless fidelity”) networks, allowing you to wirelessly connect to the Internet, access connected PCs, printers, and other devices, and share your Internet connection with other PCs and devices.
Because Windows 11 requires you to be connected to the Internet when you first set up your PC, it’s likely that you have already configured your PC to work with at least one Wi-Fi network. But if you own a laptop or other portable PC and use it in different locations, you will need to connect to, and potentially configure, Windows 11 to use other Wi-Fi networks as well.
Find and connect to a Wi-Fi network
If you bring your PC to a hotel, airport, coffee shop, or another place with a Wi-Fi network for the first time, the “Network” icon in the notification area of the Taskbar will resemble a globe with a strikethrough symbol overlay to indicate you’re offline.

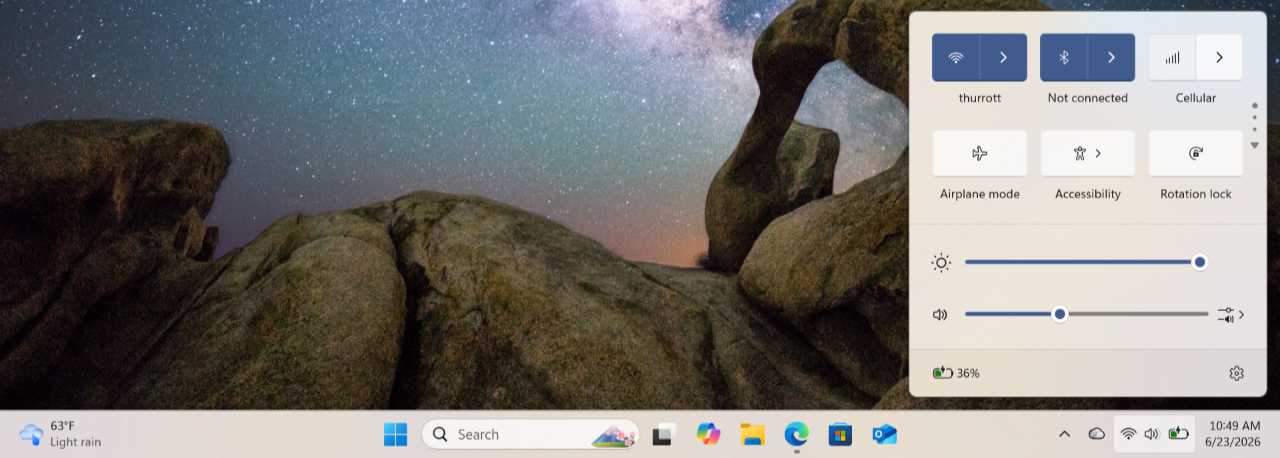
You can find and connect to any available Wi-Fi networks with Quick settings, which is accessed by clicking the “Network,” “Sound,” or “Battery” icons in the system tray on the right side of the Taskbar.
Keyboard shortcut: You can more quickly open Quick settings by typing Windows key + A.
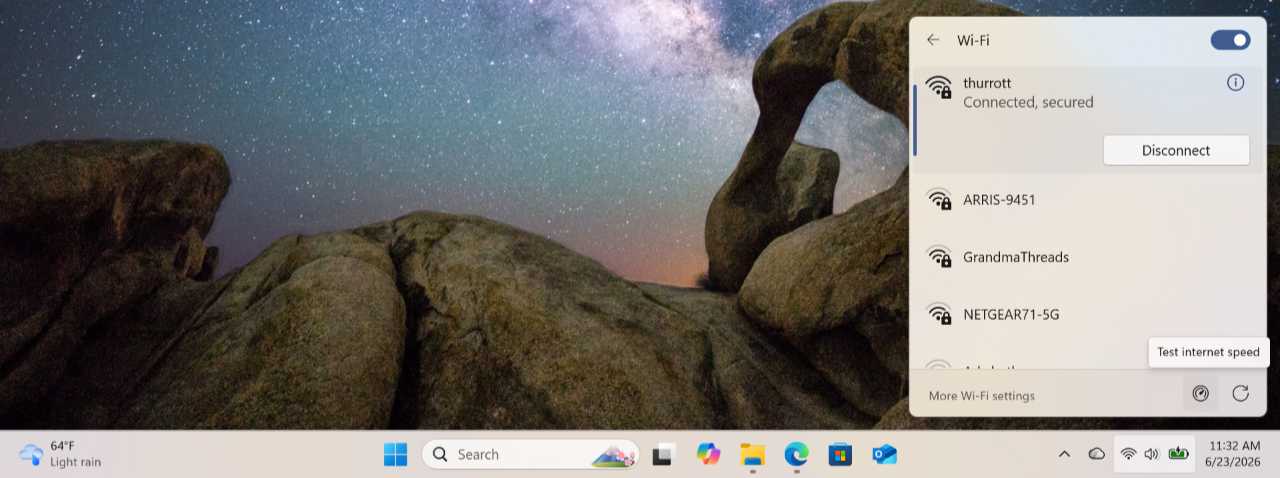
If Wi-Fi is enabled, the “Wi-Fi” quick settings button will display in an enabled state (using your configured accent color) and will note that Wi-Fi networks are “Available.” To see which networks are in range, click “Manage Wi-Fi connections”–the right half of the Wi-Fi quick settings split button that’s marked with the “>” label–to display the list of available Wi-Fi networks.
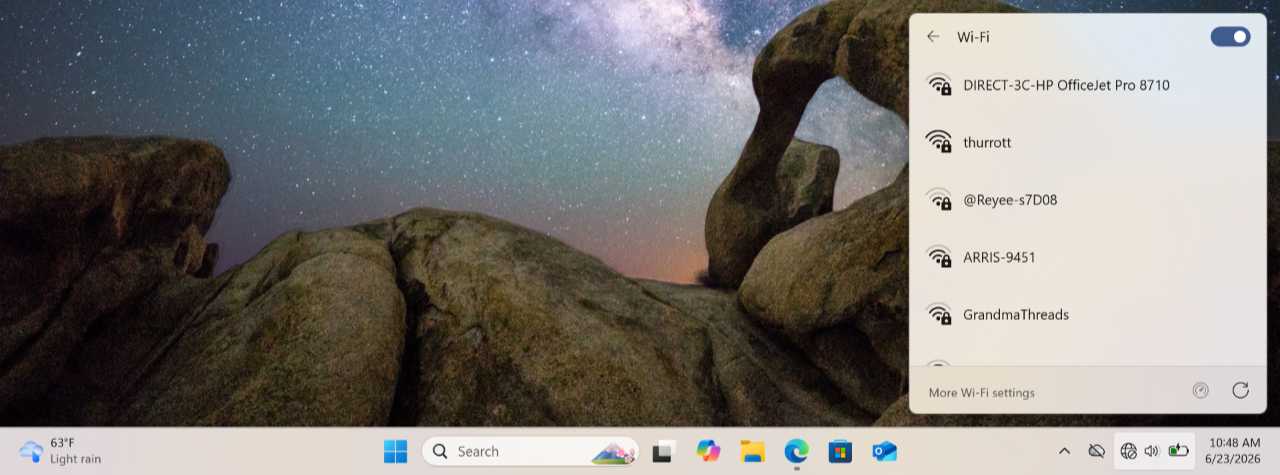
Private Wi-Fi networks, like those you might access at home or at work, display an icon with a lock overlay, indicating that you have to enter a password before you can connect. Public Wi-Fi networks, like those you might access at a hotel, airport, or coffee shop, will not have a lock overlay; these networks will still typically require you to authenticate somehow via a website after the connection is made but before you are connected to the Internet.
To connect to a Wi-Fi network, click it in the list. It will expand to display a “Connect automatically” option and a “Connect” button.
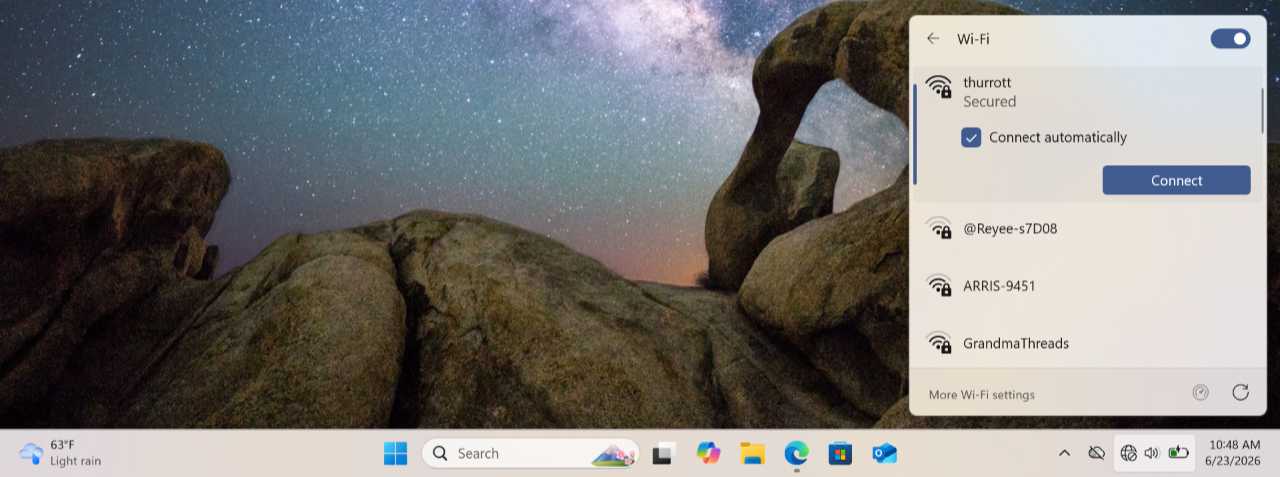
Click “Connect automatically” if this is a trusted Wi-Fi network that you use regularly. (Do not select this option at a hotel, airport, or another public place you visit infrequently or are perhaps doing so for the only time.) Then, click “Connect.”
If this network is private, you will be prompted to enter its password. When you’re done, click “Next” to complete the connection. When you do, the “Network” icon in the notification area will change to a Wi-Fi symbol that indicates the strength of the network when you’ve successfully connected. And the “Wi-Fi” quick setting button in Quick settings will indicate the name of the Wi-Fi network in its label.
Configure a Wi-Fi network
By default, Windows 11 configures all Wi-Fi networks with a public network profile that prevents your PC from being discovered by other devices–and their potentially malicious owners and software–remotely. Despite that name, a public network is typically the right choice, even if you’re using a trusted network at home, work, or elsewhere. But you can configure a Wi-Fi network as a private network if you wish to share files with others or connect to printers on the same network.
Tip: Don’t confuse public and private Wi-Fi networks with public and private network profiles. The former are types of Wi-Fi networks that you, as a user, cannot change. The latter is a Windows 11 networking term that refers to whether your PC is discoverable over that network. Put simply, they are two different things that confusingly use the same terminology.
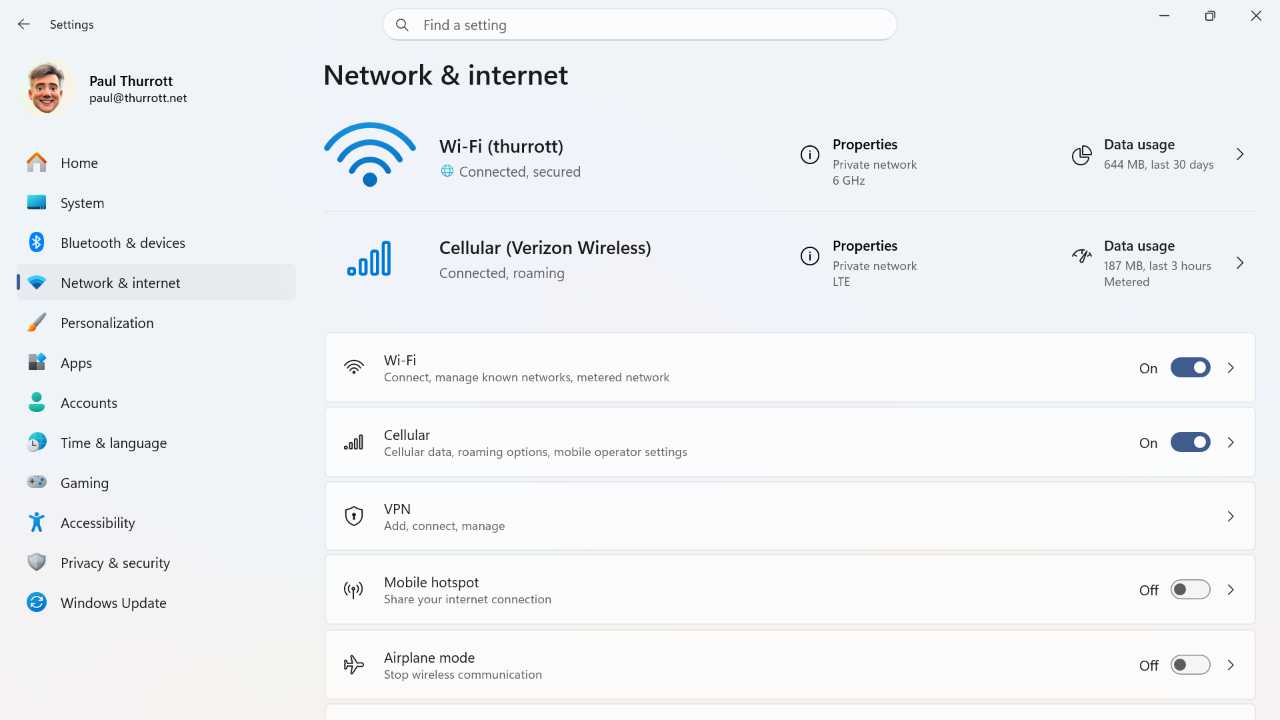
To configure the current Wi-Fi network, open the Settings app and navigate to Network & internet > Wi-Fi. Then, select “Wi-Fi name properties” to display the properties page for that Wi-Fi network.
Tip: Alternatively, open Quick Settings, click “Manage Wi-Fi connections,” and then click “More Wi-Fi settings.” Then, click the “Wi-Fi name properties” item.
For the most part, Wi-Fi will just work. But the following options are worth examining and knowing about.
- Wi-Fi network password. Click the “Show” button to see the password for the current Wi-Fi network. You can use the QR code to add this Wi-Fi network to your phone: Just scan the code with your phone’s camera.
Tip: To find the password for other saved Wi-Fi networks, open Wi-Fi settings, click “Manage known networks,” and click the Wi-Fi network in the list. Then, click “Show” next to “Wi-Fi network password.”
- Connect automatically when in range. When you first connected to this Wi-Fi network, you were presented with a “Connect automatically” choice. This option will be configured according to the choice you made at the time, but you can reconfigure it here.
- Network profile type. Here, you can choose between configuring this connection as a public or private network for discoverability and sharing purposes. Unless you have specific needs, this should be configured as “Public network (Recommended).”
- Metered connection. Most Wi-Fi networks are not metered–meaning they do not have a data cap and are a cellular data connection–so this option is usually set to “Off” by default. However, if you are using Windows 11’s mobile hotspot feature or tethering your smartphone to share its Internet connection, this should be configured to “On” to minimize data usage.
- Random hardware addresses. This privacy protection feature is curiously disabled by default. When enabled, it will create a random hardware address so that it seems like a different device to other devices on the same network. You can optionally configure this feature to change the hardware address every day for additional security.
Tip: If you do enable “Random hardware addresses,” you will need to disconnect from the Wi-Fi network and then reconnect for it to take effect.
- IP and DNS server assignment. Most users won’t need to change the default IP and DNS server configurations, but if your ISP, workplace, or other trusted organization that manages the network instructs you to make changes, this is where you can do so.
- Advanced Wi-Fi network properties. Click the “Edit” button next to this option to display the legacy Wireless Network Properties control panel, which is rarely needed these days. This interface allows you to manually configure the security features your Wi-Fi adapter uses, but this is automatically configured optimally by Windows 11.
Disconnect from or forget a Wi-Fi network
Windows 11 stores the name and password of all the Wi-Fi networks you connect to so that you can seamlessly connect to them again if you return or use another PC. However, you may sometimes connect to the wrong Wi-Fi network or wish to manually disconnect from it without disabling your PC’s Wi-Fi radio.
Tip: If you sign in to Windows 11 with a Microsoft account, this Wi-Fi network data is also synced to your account so it’s available on any PC you use.
You can do both from Quick settings: Click “Manage Wi-Fi connections”–again, the right half of the Wi-Fi quick settings split button–to display the list of available Wi-Fi networks. Then, right-click the Wi-Fi network you wish to change to diplay a context menu. There are three options:
- Disconnect/Connect. Choose this to disconnect (or connect) to the selected Wi-Fi network.
- Properties. Select this to display the properties page for the selected Wi-Fi network in the Settings app as described in the previous section.
- Forget. Click this to remove the name and password of this Wi-Fi network from Windows 11 and your Microsoft account.
Ethernet
Windows 11 supports wired Ethernet networks, allowing you to reliably connect to the Internet and access other connected PCs, printers, and other devices on the same network.
Ethernet is more common in workplaces than in homes, but if you’re lucky enough to have a wired Ethernet connection, you will experience faster speeds and better reliability than is generally possible with Wi-Fi or cellular data connections.
Connect to an Ethernet network
To use an Ethernet network, you need to physically connect your PC to an Ethernet port on your router or elsewhere in your home using an Ethernet cable. Once you do so, the “Network” icon in the Taskbar system tray will change to indicate that the connection is now available and working properly.

Configure an Ethernet network
By default, Windows 11 configures all Ethernet networks with a public network profile that prevents your PC from being discovered by other devices–and their potentially malicious owners–remotely. As with Wi-Fi networks, this is often the right choice, even if you’re using a trusted network at home. But you can configure an Ethernet network as a private network if you wish to share files with others or connect to printers on the same network.
To configure the Ethernet network, open the Settings app and navigate to Network & internet > Ethernet. The Ethernet properties page appears.
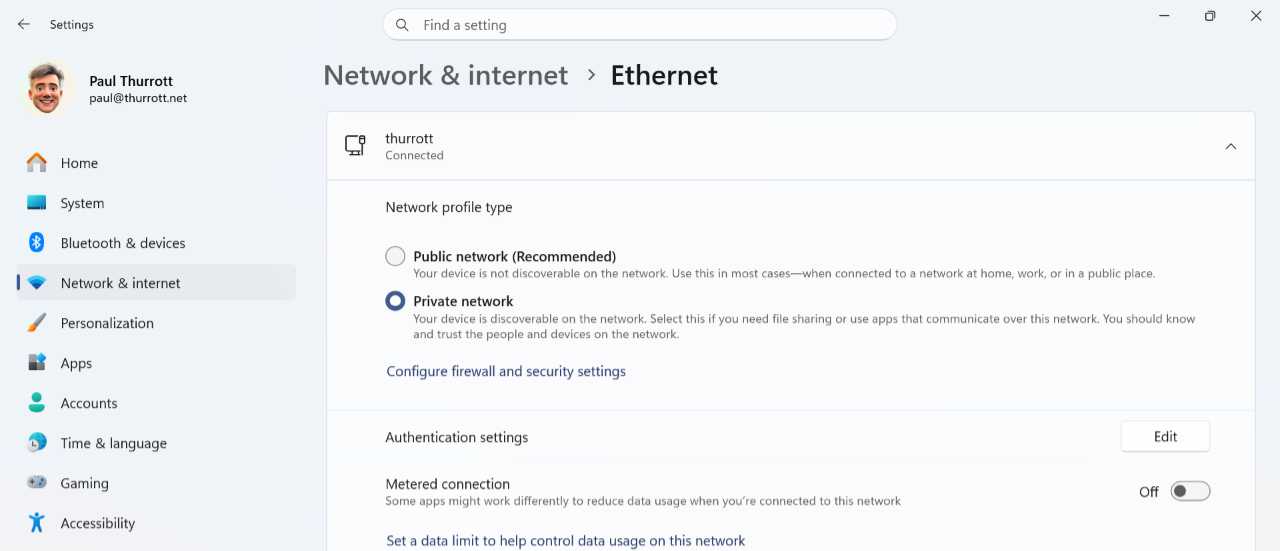
There are only a few options here worth considering.
- Network profile type. Here, you can choose between configuring this connection as a public or private network for discoverability and sharing purposes.
- Metered connection. Most Ethernet networks are not metered–meaning they do not have a data cap–so this option is usually set to “Off” by default.
Cellular data
If your PC supports cellular data services provided by a mobile operator, you can use this connection to access the Internet. This is similar to how you connect to the Internet with your smartphone, but it’s for mobile data only, without the voice calling and texting capabilities.
Tip: Most Windows PCs do not have a cellular data radio. But you can always take advantage of the cellular data plan on your smartphone, most of which offer hotspot capabilities that let you share their data connection with other devices. A connection shared from your phone will appear as a normal Wi-Fi network to your Windows PC.
As an individual, you will face a few barriers getting your PC connected to cellular data:
- It’s often expensive and limited. While cellular networks are broadly available out in the world, the data-only plans you can choose from for your PC are typically expensive and have a data cap, or limit.
- You’re on your own. It’s up to you to find a mobile operator that provides cellular data access. This can be the company you use for your smartphone, in which case you may have a monthly subscription plan. Or it could be a standalone offering from a mobile operator or mobile virtual network operator (MVNO) that sells data-only cellular access with specific data and time limits. For example, you might pay for 2 GB of access that last for one day, 10 GB of data that lasts for one month, or whatever other combinations.
- It’s complicated. Setting up and configuring cellular data capabilities in Windows 11 is more complicated than setting up Wi-Fi or Ethernet. Each mobile operator is a bit different and may require you to make specific configuration changes. If you don’t configure this connectivity correctly, it won’t work or you may quickly exceed your data cap.
Windows 11 treats a cellular data connection differently from Wi-Fi and Ethernet. This type of connection is what Windows 11 calls a metered network because of the data limits, and it provides a well-hidden interface you can use to configure those limits so the system will warn you if you’re in danger of exceeding them. It also turns off certain services, like OneDrive sync, Windows Updates, and more by default to prevent unwanted data usage.
Tip: Tied to the above, cellular data connections are always private and cannot be configured with a public network profile.
Connect to a data plan
Depending on your PC, you may be able to connect to a cellular data plan using an old-school physical SIM (Subscriber Identity Module) card or a more modern eSIM (embedded SIM) that is configured electronically. Most PCs support both options, but eSIMs are much more convenient and versatile, and your PC can store multiple eSIM profiles, though only one can be active at a time. For this reason, I will focus on eSIM connectivity here, though using a SIM card is somewhat similar.
Before you can get started, you have to buy a data plan and then activate the eSIM profile the mobile operator provides on your PC. (If you’re using a physical SIM, you will get that from your mobile operator and insert it in the SIM tray slot in your PC.) The process varies by mobile operator, but it will at least provide a QR code, which is more easily used on a phone or other mobile device, and an activation code that’s more PC friendly. You will need one or the other–and perhaps more information from the mobile operator–to configure and activate the connection.
Unfortunately, I can’t help with getting the data plan. Again, this will vary by mobile operator and there are different offerings for use locally and if you’re traveling internationally. All I can do here is assume you have paid for some form of cellular data access that provides an eSIM and you want to use it with a Windows 11 PC that supports this usage.
To get started using the cellular data with your computer, open Settings, navigate to Network & internet > Cellular. If this is the first time you’ve done so and you don’t have an eSIM profile configured (or a physical SIM inserted), then you will see a “Learn how to stay connected with an eSIM data plan” link under “Cellular” in the “Connection settings” section.
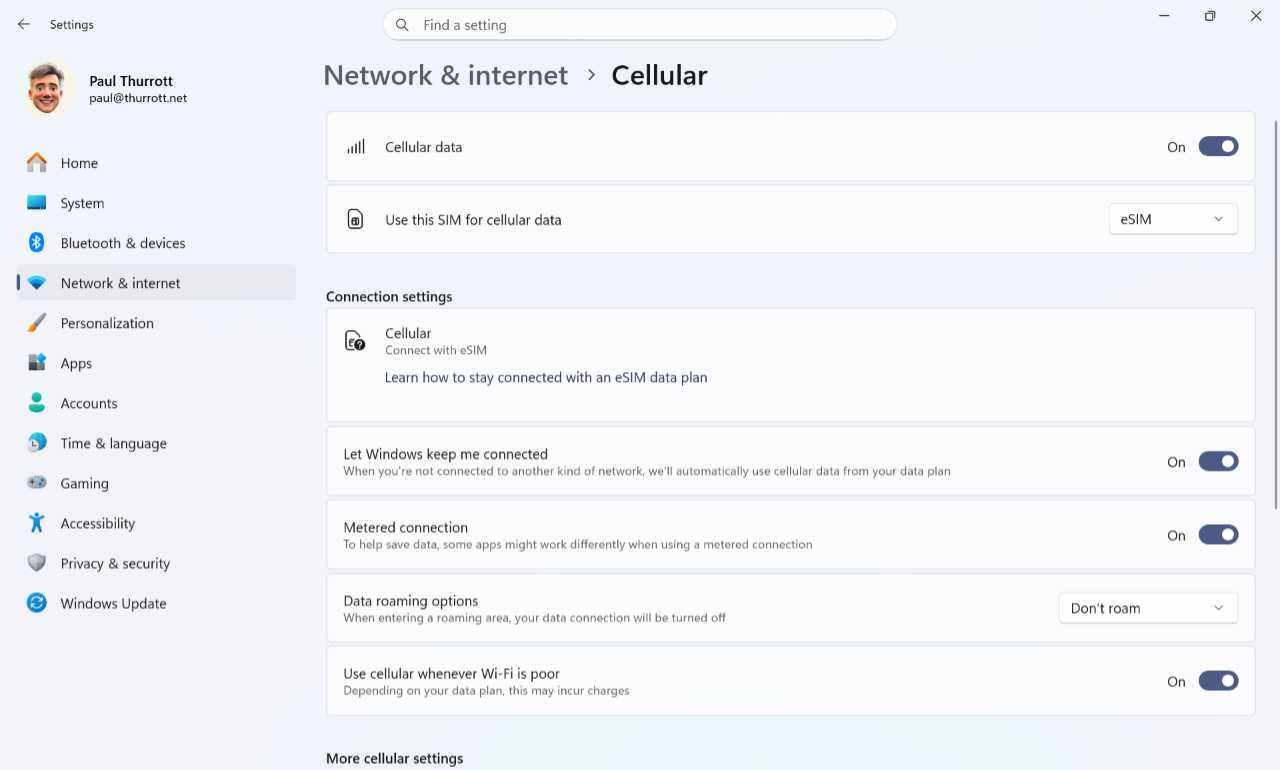
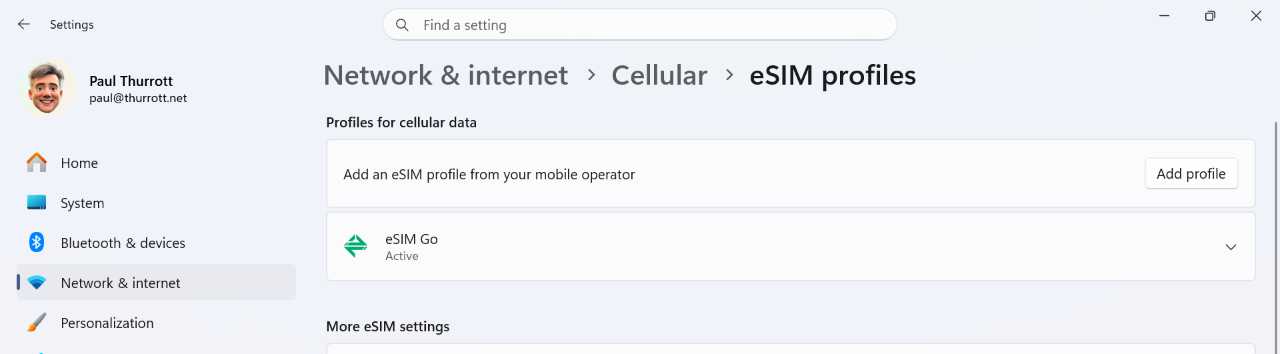
Make sure “Cellular data” is configured to “On” and, if you’re using an eSIM, that “Use this SIM for cellular data” is set to “eSIM.” Then, scroll down this page and click “eSIM profiles” under “More cellular settings.” The eSIM profiles settings page appears.

Click “Add profile” next to “Add an eSIM profile from your mobile operator.” A dialog will appear, asking how you’d like to add the profile. Click “Let me enter an activation code I have from my mobile operator” and click “Next.” The dialog that appears lets you scan the QR code, which can be awkward, or enter the activation code. Once that’s done, click “Next,” and Windows 11 will prompt you to download the profile. Click “Yes.” After the profile downloads and installs, click “Close” to close the dialog. You will see the new profile listed in the top section of this page, “Profiles for cellular data.”
Tip: You can expand the profile to access “Stop using,” “Edit name,” and “Delete” options.
You’re not done. Depending on the mobile operator, you will need to configure some or all of the following. (The information you need will be provided by the mobile operator.)
- SM-DP server address. On the eSIM profiles settings page, locate “Default SM-DP server address,” click “Edit,” and enter the SMDP/SMDP+ address provided by your mobile operator. SMDP stands for “Subscription Manager Data Preparation,” and this is required to activate the connection. Click “Save” after you enter this information.
- Data roaming. You will usually need to enable data roaming because you are or will be outside the geographic area where the mobile operator is. You do this on the eSIM profiles settings page: Under “Connection settings,” configure “Data roaming options” to “On.”
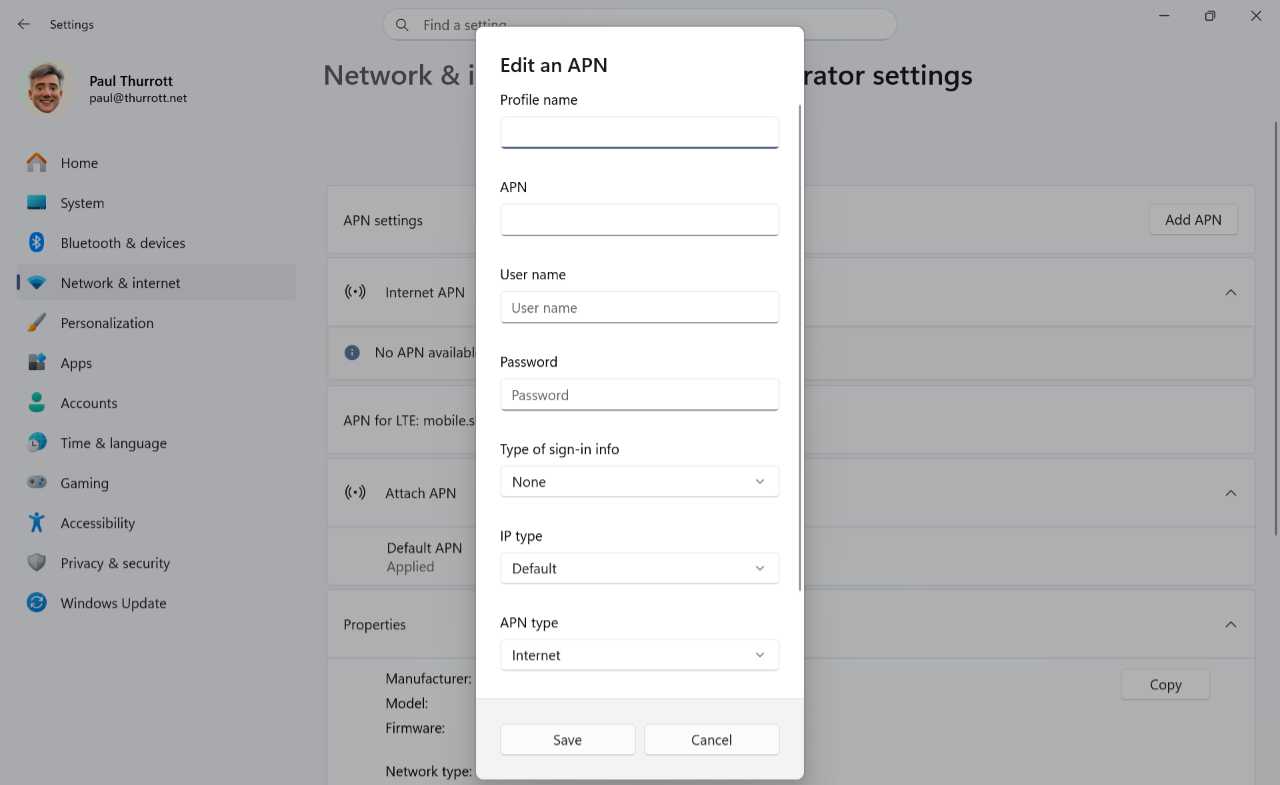
- APN. Each time you make a configuration change, like those noted above, Windows 11 reconfigures the cellular connection, so you may now see a “Can’t connect to this network” warning that mentions an “APN” with the connection under “Connection settings” on the eSIM profiles settings page. APN stands for “Access Point Name,” which acts like a network gateway. If you need to add this information, return to Cellular settings (Settings > Network & internet > Cellular) and click “Mobile operator settings” under “More cellular settings.” On the Operator settings page, click “Add APN” next to “APN settings” and enter the APN. You can leave the other fields here blank unless your mobile operator instructs otherwise. Click “Save” when you’re done.
If the stars align, an Operator message notification will appear telling you that you’re connected. You did it.

Tip: If you’re still not connected, you will have to consult your mobile operator’s documentation. Sorry.
Configure a cellular data plan
There are some other settings to consider when using a cellular data plan.
- Let Windows keep me connected. Windows 11 will use Wi-Fi (or Ethernet) when possible because it’s not metered, but it will switch to cellular data when needed so that you can stay online. That’s the right configuration for most. But if you prefer to manually connect to cellular as needed, you can configure “Let Windows keep me connected”–in Settings > Network & internet > Cellular–or Quick settings (via the Cellular quick setting button) to “Off”. Conversely, you can also optionally disable Wi-Fi to ensure that the cellular connection is always used.
- Use cellular whenever Wi-Fi is poor. Tied to the above, this option, located in Cellular settings, is disabled by default. When enabled, Windows 11 will automatically switch to cellular data if the Wi-Fi connection is weak. That is, instead of just enabling cellular data when there is no Wi-Fi, this will always choose the better connection. Which can impact your data cap more.
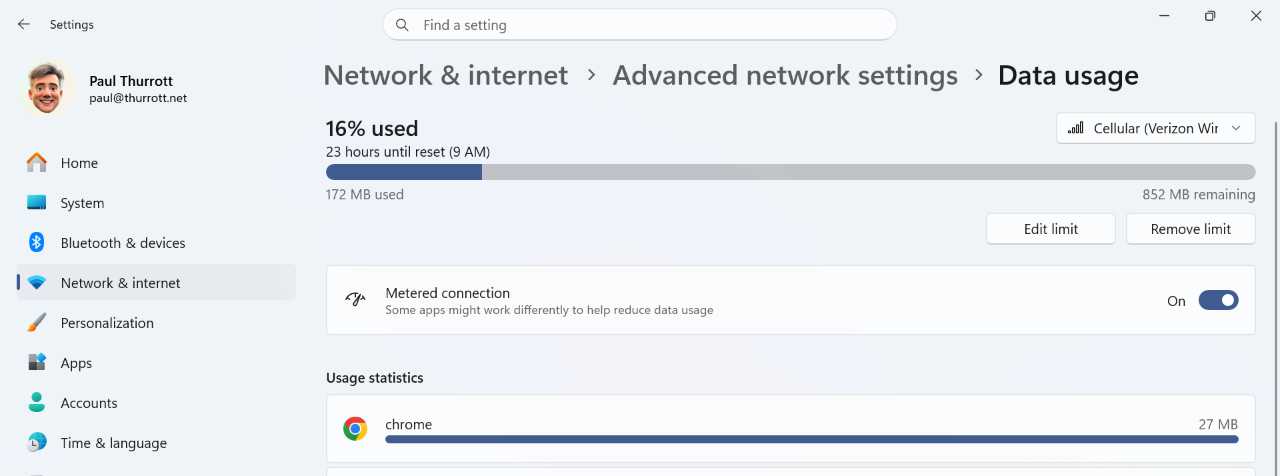
- Metered connection. Because cellular data connections are metered and can be expensive, you will likely want to configure this feature. Unfortunately, it’s not located in Cellular settings. Instead, navigate to Settings > Network & internet > Advanced network settings > Data usage. Select the cellular connection (not Wi-Fif) in the top right and click “Enter limit” to configure your data cap information, which will include the time frame. When you’re done, click “Save.”
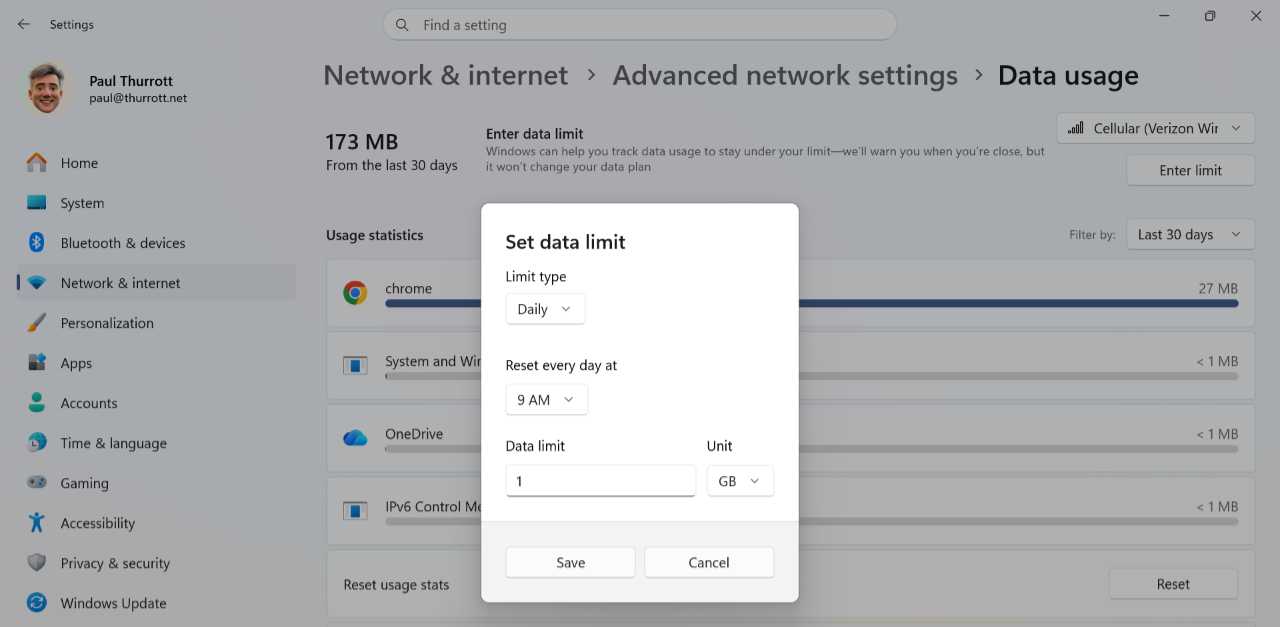
Now, you can check in on this page to see where your data use is at any time, and Windows 11 will notify you when you’re getting close to your limit.
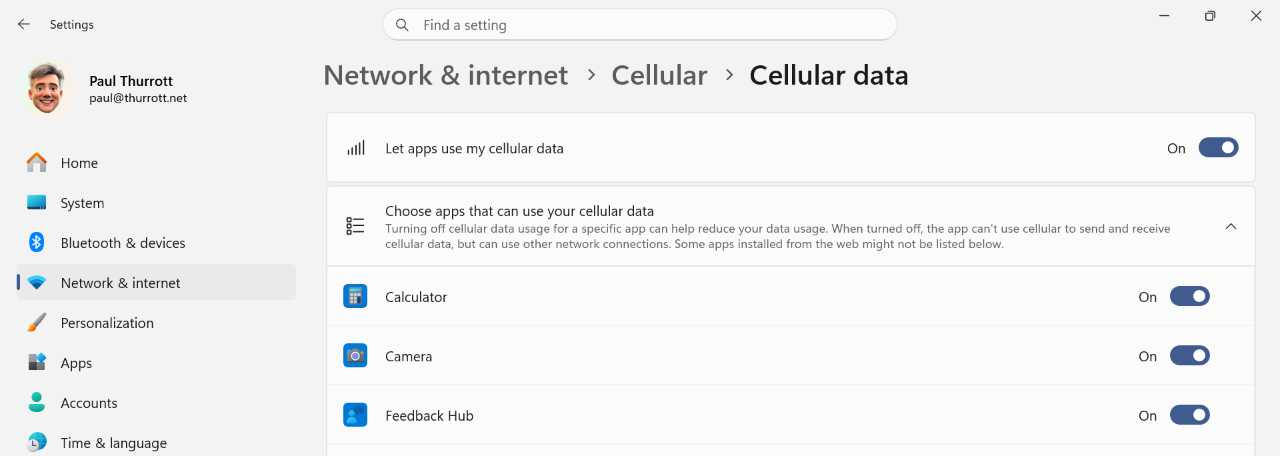
- Cellular data and apps. If you find that a certain app is using a lot of cellular data–or, if you’re just being proactive–you can configure how (or if) apps use cellular data in Network & internet > Cellular > Cellular data and apps. Here, You can globally toggle app access to cellular data on or off or, more commonly, determine which apps can or cannot use this data individually.
Enable and disable a cellular connection
Once you’ve configured an eSIM profile (or inserted a physical SIM card into your PC), Windows 11 can use it to get online and access the Internet. This will happen when the connection is enabled and according to the configuration you made, as above.
There are two places in Windows 11 where you can toggle your cellular data connection on and off:
- Cellular settings. In the Settings app, navigate to Network & internet > Cellular and toggle “Cellular data” to “On.”
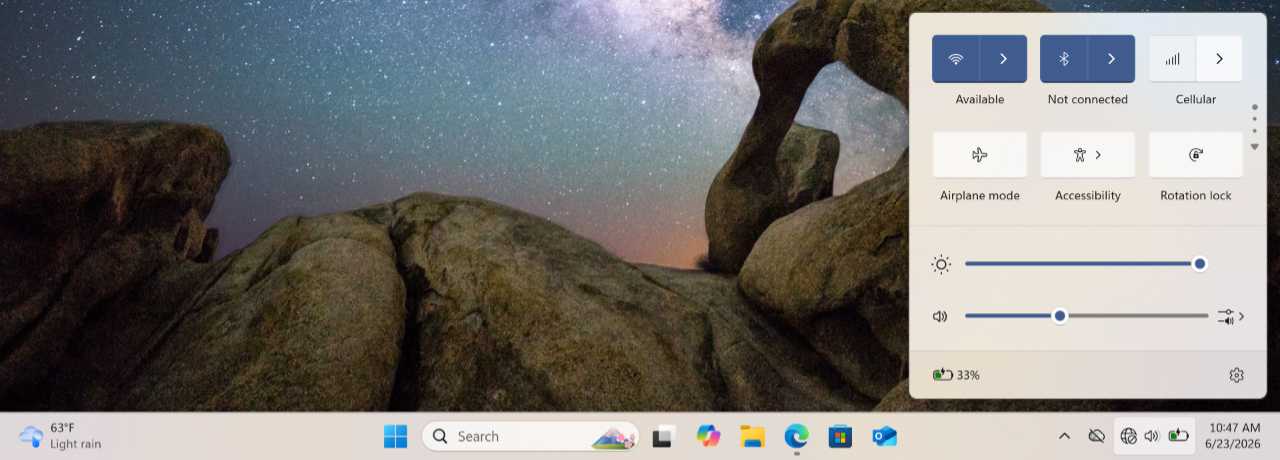
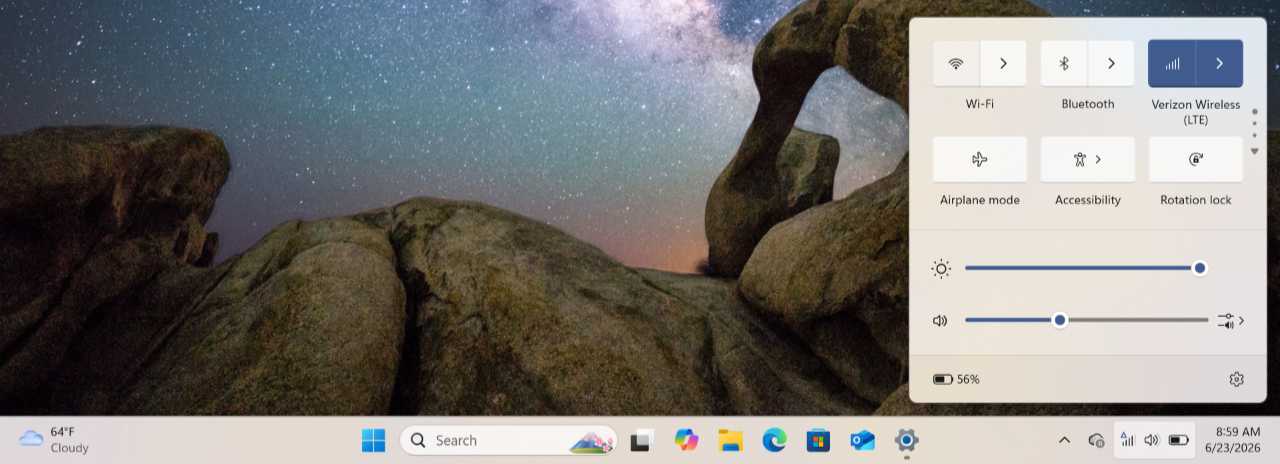
- Quick settings. In Quick settings, click the left half of the “Cellular” quick setting button. (You can also click the “Manage Cellular connections” side of the “Cellular” quick settings split button to switch between eSIM profiles if you have more than one and toggle “Let Windows keep me connected” for each.) When enabled, this button will display the mobile operator name and service level (typically LTE or 5G) of the cellular data network to which you are connected.
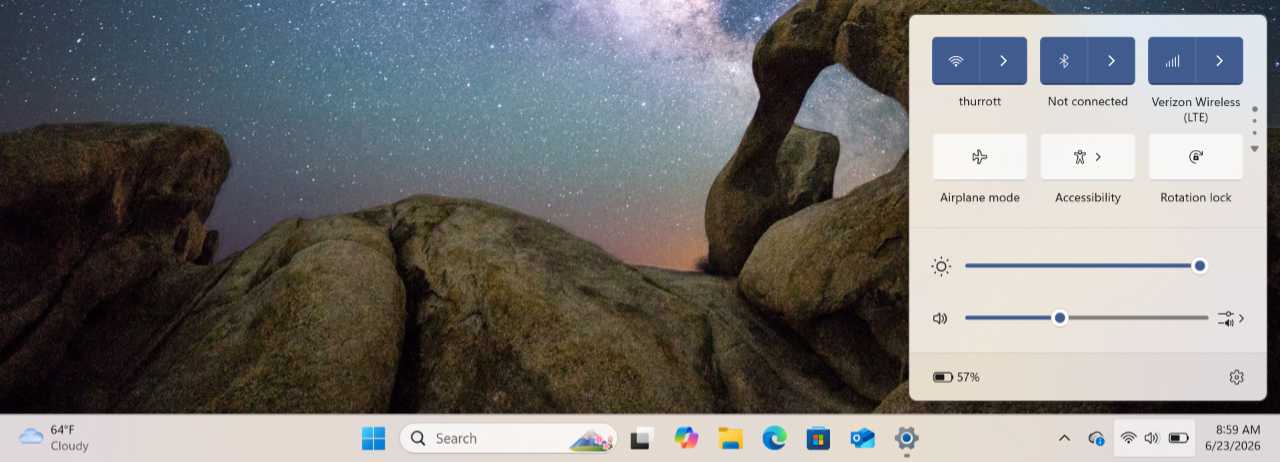
When you’re connected to cellular data but not Wi-Fi, the “Network” icon in the Taskbar system tray will change to a triangular “five bars” cellular connection icon similar to what you see on your smartphone.
Airplane Mode
Like your smartphone and other mobile devices, Windows 11 has an Airplane mode feature that instantly disables all the wireless radios in your PC. Depending on the PC, this can include Wi-Fi, Bluetooth, cellular data, and Near Field Communication (NFC).
Tip: Despite its name, Airplane mode isn’t only useful when you’re on an airplane. If you’re using a laptop on battery power and don’t need connectivity, you can enable Airplane mode to improve its battery life a bit.
Toggle Airplane mode
You can enable Airplane mode by opening the Settings app and navigating to Network & internet > Airplane mode. It’s a simple toggle. But there’s a faster way: Open Quick settings and click the Airplane mode button to toggle this feature on and off as needed.

When you do so, the “Wi-Fi” and “Bluetooth” quick settings buttons will be disabled and the “Network” icon in the system tray will change to an airplane-shaped icon. And if Nearby share is enabled, you’ll be notified that this feature is not available because Bluetooth and Wi-Fi are disabled.
To disable Airplane mode and re-enable any impacted wireless radios, simply toggle it as you did before, either in Settings or Quick settings.
Configure Airplane mode
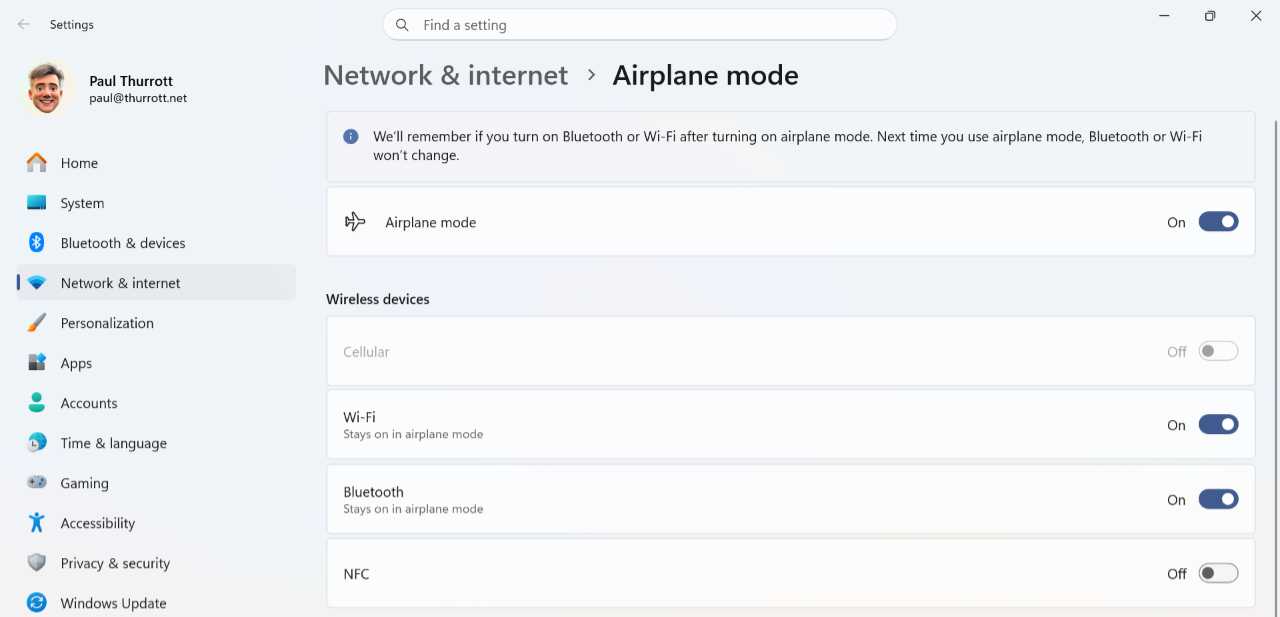
Airplane mode may seem simple enough, but it’s more than a basic on/off toggle. If you enable Wi-Fi and/or Bluetooth while Airplane mode is engaged, Windows 11 will remember that and leave those radios enabled the next time you toggle Airplane mode on.
Tip: There are many reasons why you might want to enable a wireless radio while in Airplane mode. The most obvious is to use a pair of Bluetooth-based earbuds.
The easiest way to do this is via Quick settings: With Airplane mode enabled, simply toggle on Wi-Fi or Bluetooth.

You can also use the Settings app to determine which wireless radios stay on while in Airplane mode. In Settings > Network & internet > Airplane mode, you can see which radios are enabled when Airplane mode is on and change the configuration as desired.
Mobile hotspot
A Windows 11 feature called Mobile hotspot lets you share your computer’s Internet connection with up to other PCs and other devices.
A mobile hotspot can share your PC’s Wi-Fi, Ethernet (wired), or cellular data connection. You can do so via:
- Wi-Fi. The shared connection works like any other Wi-Fi network, so it will be available to devices with Wi-Fi capabilities, including your smartphones, tablets, other PCs, and more. You can share your connection with up to 8 other devices via Wi-Fi.
- Bluetooth. This type of hotspot requires you to first pair your PC with any Bluetooth devices that will share your PC’s connection. It works with up to 7 other devices, but not with iPhones or other Apple devices.
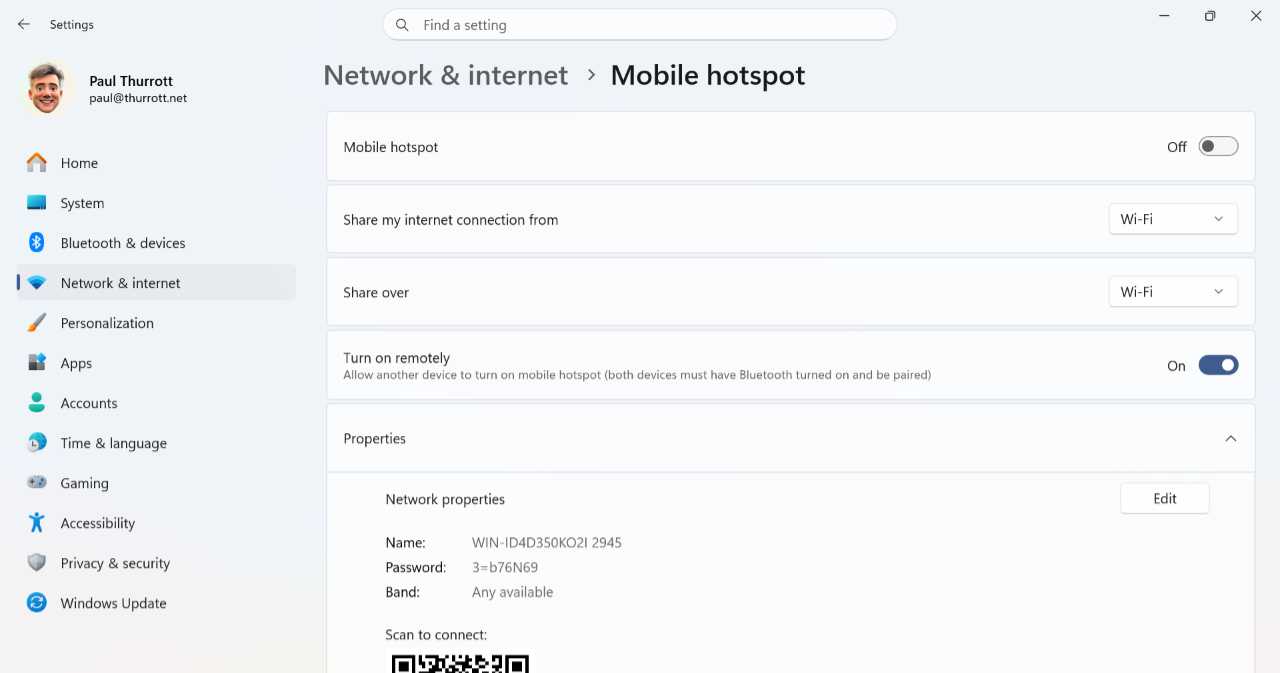
Mobile hotspot is configured in Settings > Networking & internet > Mobile hotspot.
Determine which connection to share
Before you get started, you may need to determine which of your connections to share. The option “Share my internet connection from” will let you choose from Ethernet, Wi-Fi, or cellular data, depending on which are available on your PC includes.
Tip: You should choose the fastest connection if possible. Ethernet will generally provide the best results, followed by Wi-Fi and then cellular data.
Configure Mobile hotspot
Though you can share your connection via Wi-Fi or Bluetooth, Wi-Fi is far more common, faster, and reliable, and it’s easier to set up and works with all devices, whereas Bluetooth-based connection sharing excludes iPhones and other Apple devices. So I will focus on sharing over Wi-Fi here.
To get started, examine the options displayed in the “Properties” section. By default, Windows provides terrible, automatically generated default Wi-Fi names and passwords. You will want to change both to something more memorable. To do so, click the “Edit” button to display the Edit network info window and enter your own network name, password, and, optionally, a network band (“Any available” is best, but you can choose 2.4 GHz or 5 GHz, the latter of which is typically faster) and security type (WPA2/WPA3 is the most compatible).
When you enable this connection as described below, a new option, “Power saving,” appears in Mobile hotspot and is enabled by default. This option determines whether Windows 11 automatically disables the hotspot after a short period of time if no devices are connected, which can save a bit of battery life.
Share your Internet connection with Mobile hotspot
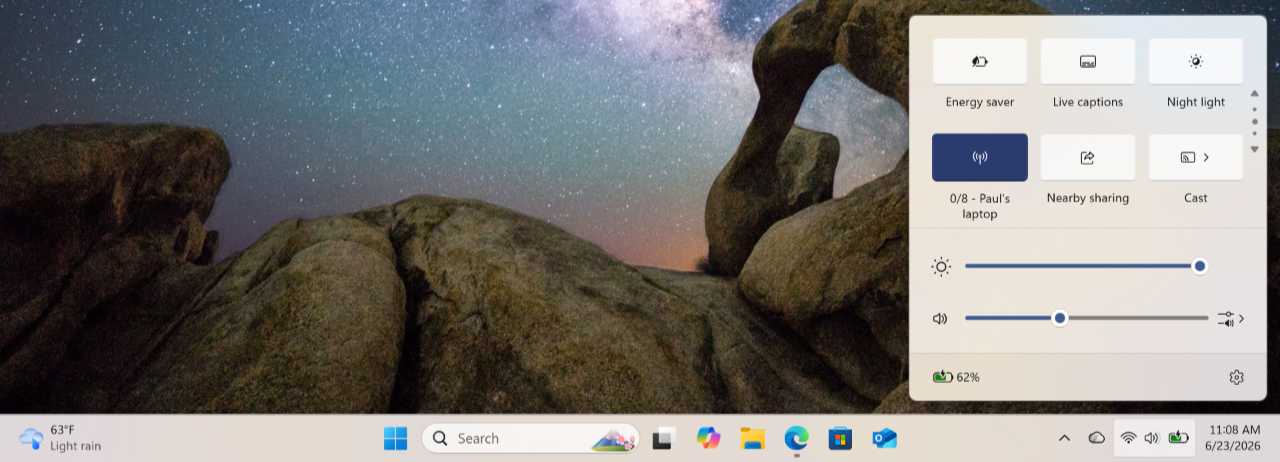
You can enable your mobile hotspot from Mobile hotspot settings, but it’s faster and easier to do so with Quick settings: Just locate the “Mobile hotspot” quick setting icon and toggle it on. When you do, the button’s label displays the number of connected devices (like 0/8, 1/8, and so on) and the name of the Wi-Fi network it created.
Your shared Internet connection will now appear as a Wi-Fi network alongside other nearby Wi-Fi networks on your other devices. You can connect to it using the password you configured.

Devices that are connected to your mobile hotspot will appear in the Properties section of Mobile hotspot settings, and the “Mobile hotspot” quick settings’ label will update to display the connection.

You can toggle this feature off the same ways you enable it.
Tip: If you don’t want your mobile hotspot to automatically turn off when there are no connected devices, configure “Power saving” to “Off.”

Gain unlimited access to Premium articles.
With technology shaping our everyday lives, how could we not dig deeper?
Thurrott Premium delivers an honest and thorough perspective about the technologies we use and rely on everyday. Discover deeper content as a Premium member.