Overcome Windows Setup Annoyances
- Paul Thurrott
- Oct 23, 2023
-
1
With each passing version of Windows 11, Microsoft has made it ever more difficult for users to configure things to their liking so that it can steer them toward using more of its products and services. We see this hostility throughout the system, but in this chapter, we focus on Windows Setup, as described in Step-by-Step: Windows Setup First-Boot Experience and Step-By-Step: Windows Setup Out-of-Box Experience (OOBE). And two key issues emerge:
- Crapware. PC makers have long installed crapware and other superfluous utilities in Windows, providing users with a compromised user experience that didn’t reflect what Microsoft intended. But with Windows 11, now Microsoft installs its own collection of crapware too, in the form of sponsored apps and shortcuts in the Start menu.
- Forced Microsoft account (MSA) usage. While we feel strongly that most users are best off signing into Windows 11 using a Microsoft account, we also acknowledge that experienced users should be able to use a local account (or what Microsoft sometimes calls an offline account) if they wish, and as they have in all previous Windows versions.
Fortunately, we can work around both of these issues. And while these issues may be of little concern to casual users, we think it’s important to have the choice.
Perform a super-clean install of Windows 11 without the crapware
If you are looking for the cleanest possible install of Windows 11, one without any crapware from Microsoft or your PC maker, a simple hack will do the trick. But it’s important to go into this knowing the downsides, none of which are particularly daunting:
- PC maker utilities that you may find to be useful will not be installed either. So check with your PC maker to see whether you can download the installers for the utilities you do want and keep them handy for manual installation afterward.
- Some drivers specific to your PC may not be installed when you first boot into the Desktop. To solve this problem, simply check for updates in Windows Update (Settings app > Windows Update). And if that doesn’t fully solve the problem, you can look for an app that your PC maker supplies for this purpose. (Key examples include Dell Update, HP Support Assistant, and Lenovo Vantage.)
- When you use this method to install Windows 11, the Start menu will be almost empty, with just a handful of app shortcuts. (Don’t worry: All the in-box apps included with Windows 11 are installed normally. They can be found in the All apps list.) If you use app shortcuts in the Start menu frequently, you’ll have to manually pin the ones you need. (The good news? You don’t have to unpin the ones you don’t.)
Ready to dive in? Great! Here are the steps for performing a super-clean install of Windows 11″:
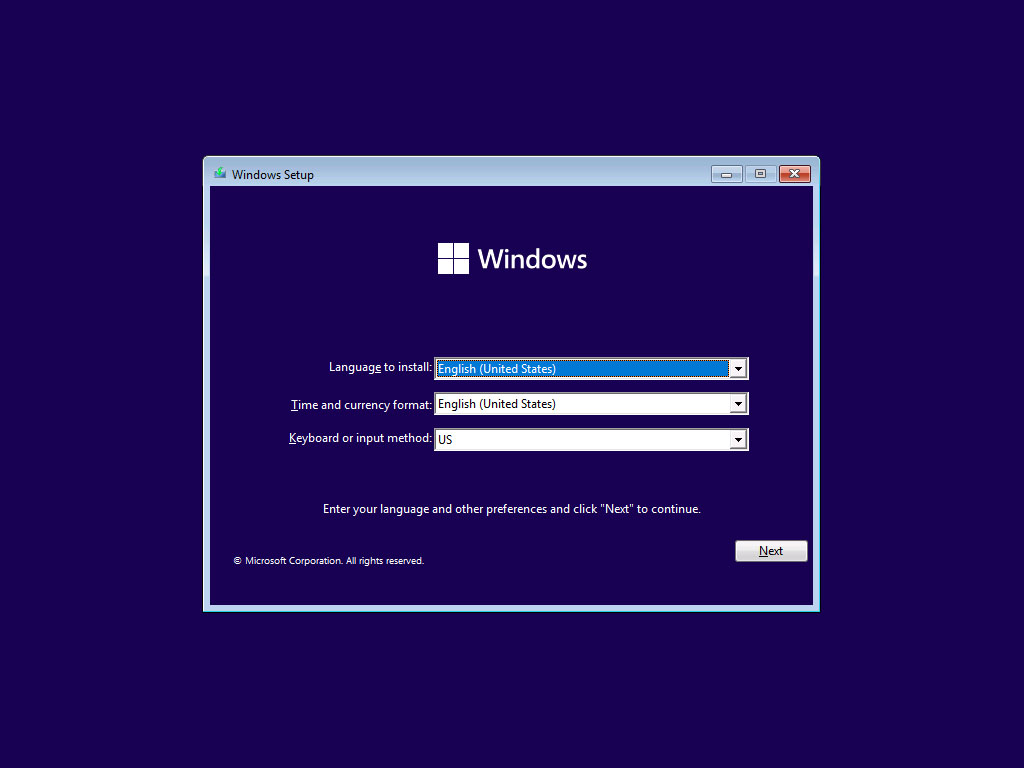
Boot your PC with your Windows 11 installation media. Start the clean install process as described in Windows Setup First-Run Experience. As you may recall, the very first step, titled Windows Setup, offers three options to customize: Language to install, Time and currency format, and Keyboard or input method.

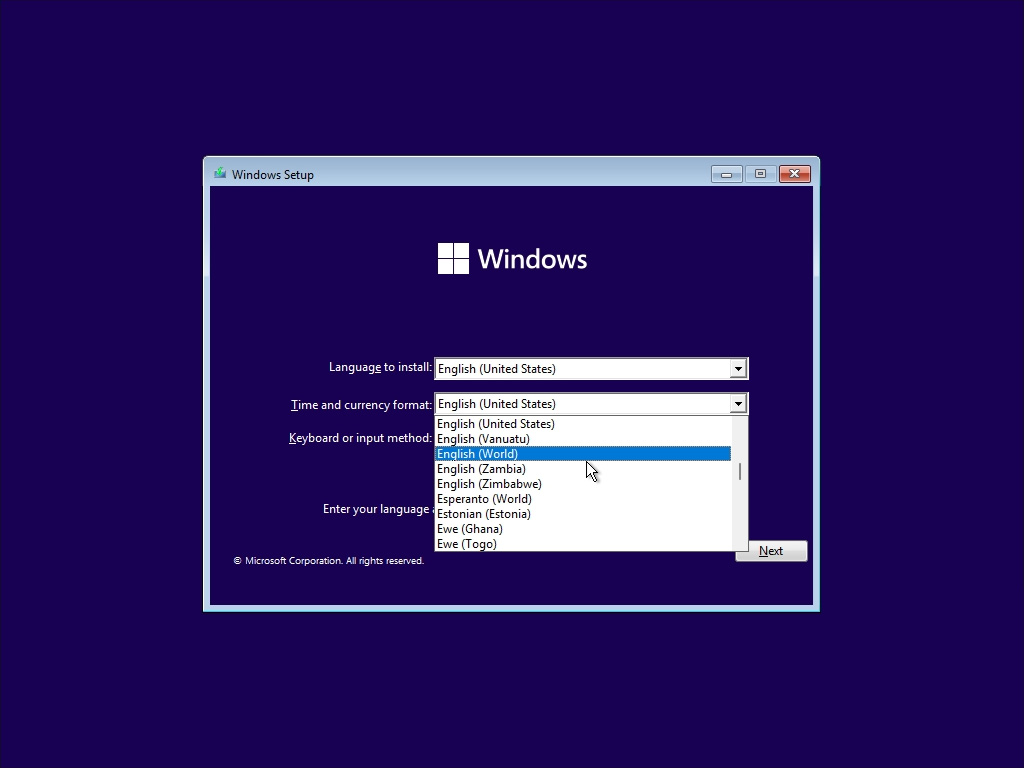
Change the Time and currency format. Normally, you don’t need to change any of these options. But this is when the hack comes into play: Change the Time and currency format to “English (World)” (or a similar option relevant to your location, like “Europe (World)”). This prevents Windows Setup from understanding your true location, and so Windows 11 will be installed without any crapware: The sponsored apps that Microsoft provides are region-specific.
Complete the first-boot experience. From here, the Windows Setup first-boot experience proceeds normally. Remember that you can refer to Windows Setup First-Run Experience, but it’s all pretty obvious.
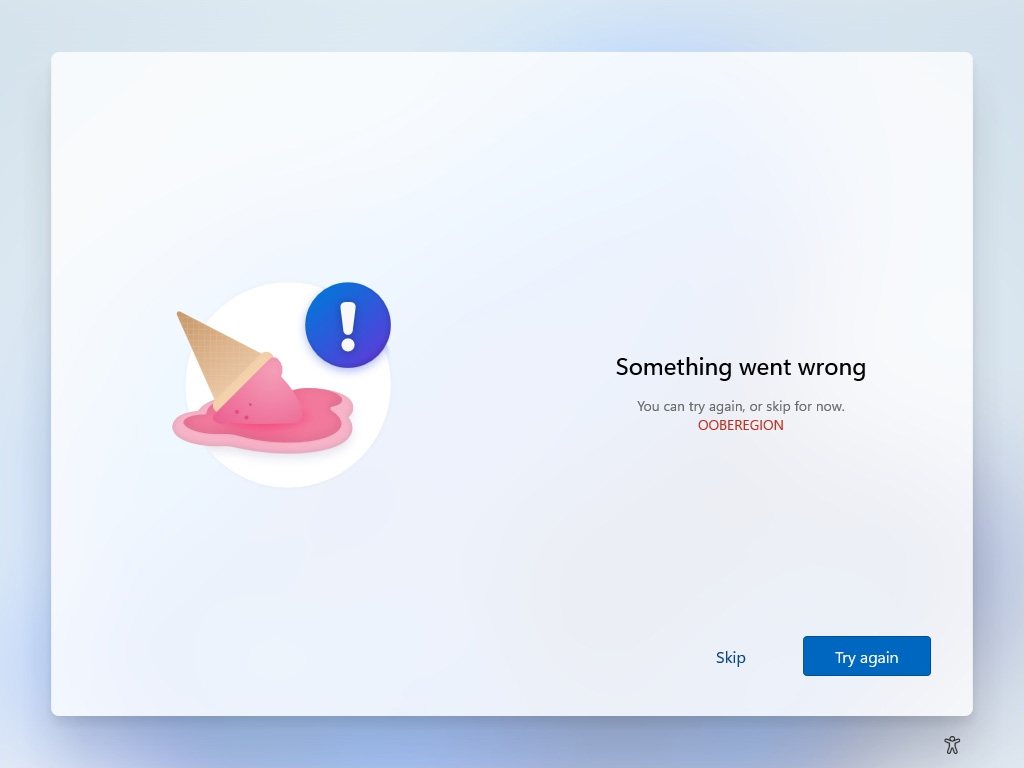
Start the Out-of-Box Experience (OOBE). Eventually, the PC reboots, and the friendly, more familiar second phase of Windows Setup, called the Out-of-Box Experience (OOBE), begins. But now it starts with a decidedly unfriendly “Something went wrong” screen triggered by the earlier change to the system’s time and currency format. No worries: Just click “Skip” to continue normally.

Continue with the OOBE. From here, the OOBE continues normally, for the most part. But because Windows Setup doesn’t understand your regional settings, it can’t present you with ads for Microsoft 365 and PC Game Pass. So it should take a bit less time than usual. Please refer to Step-By-Step: Windows Setup Out-of-Box Experience (OOBE) for our advice about how to configure Windows 11 during this process: All the same rules apply.
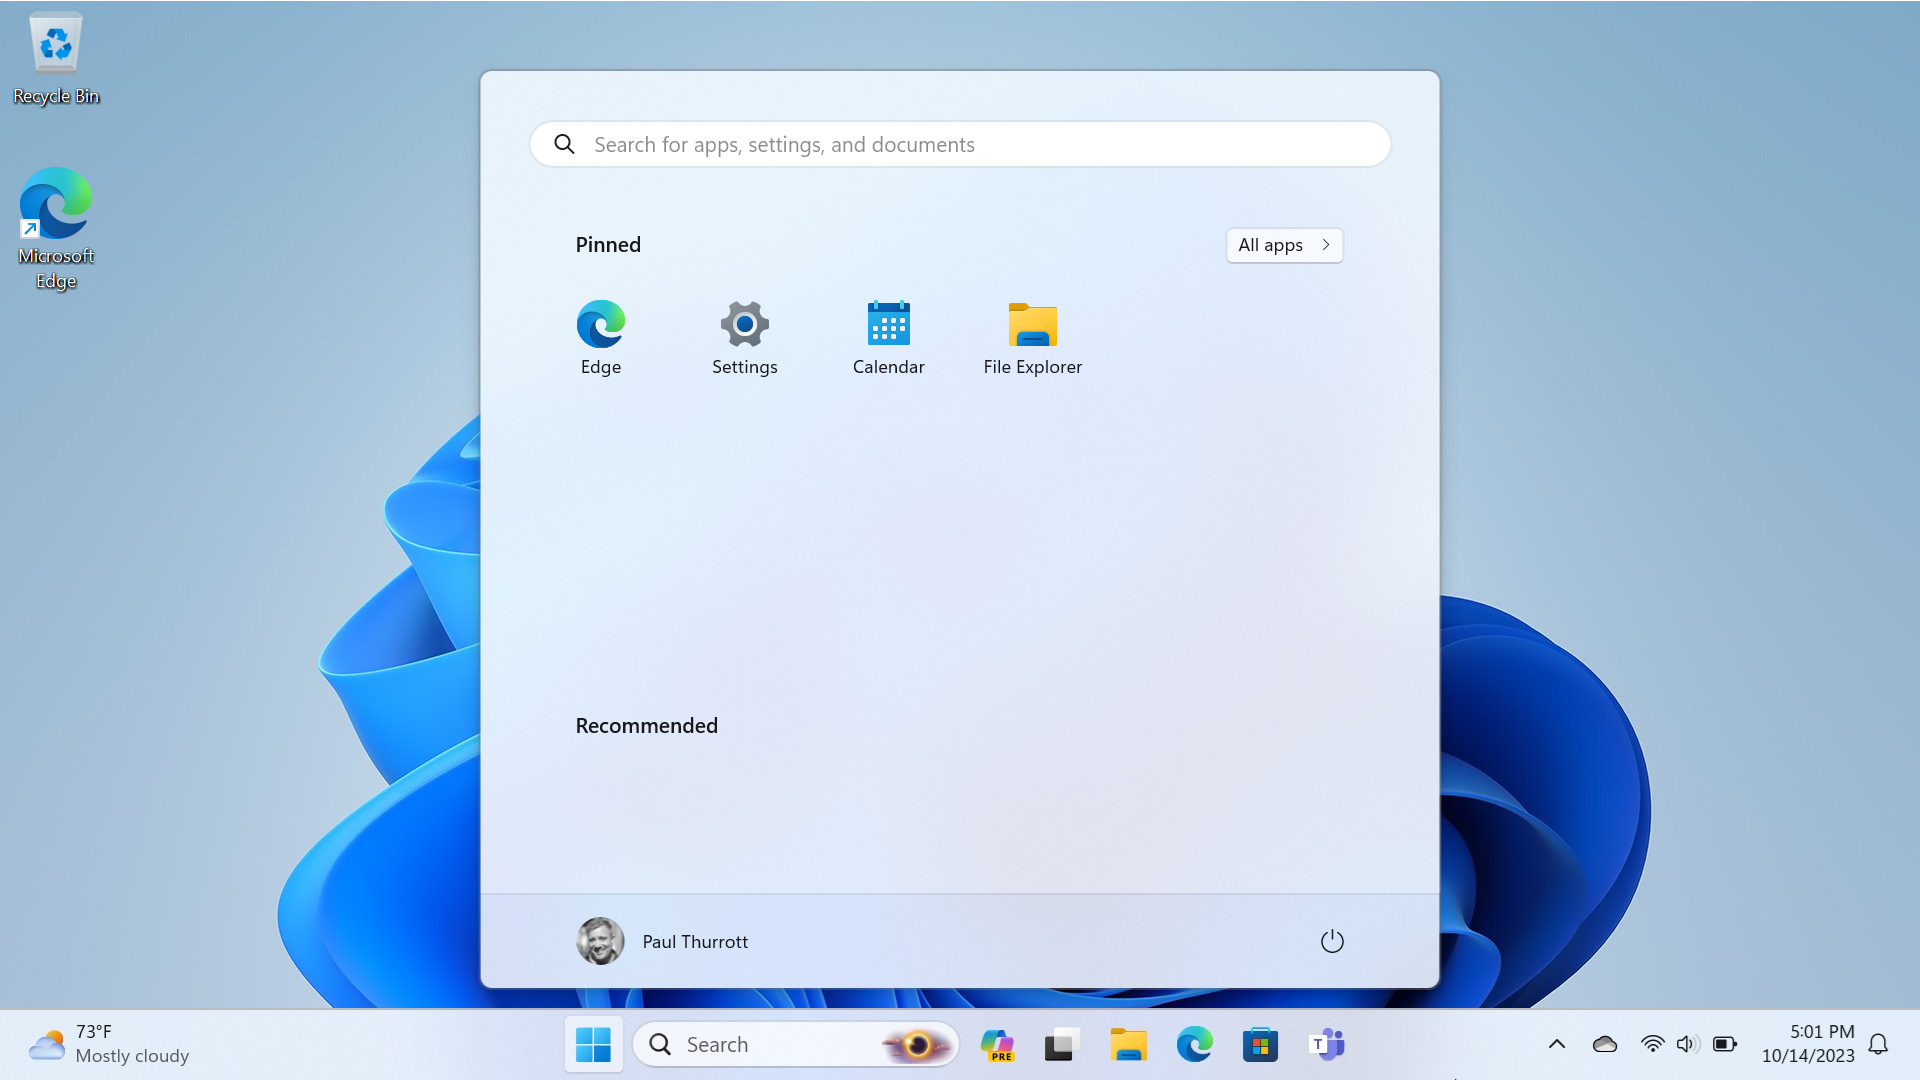
Boot into a surprisingly clean Windows 11 Desktop. If you’ve installed or used Windows 11 before, you are in for a treat if a minimalist installation is your goal. This is the Windows 11 of your dreams.
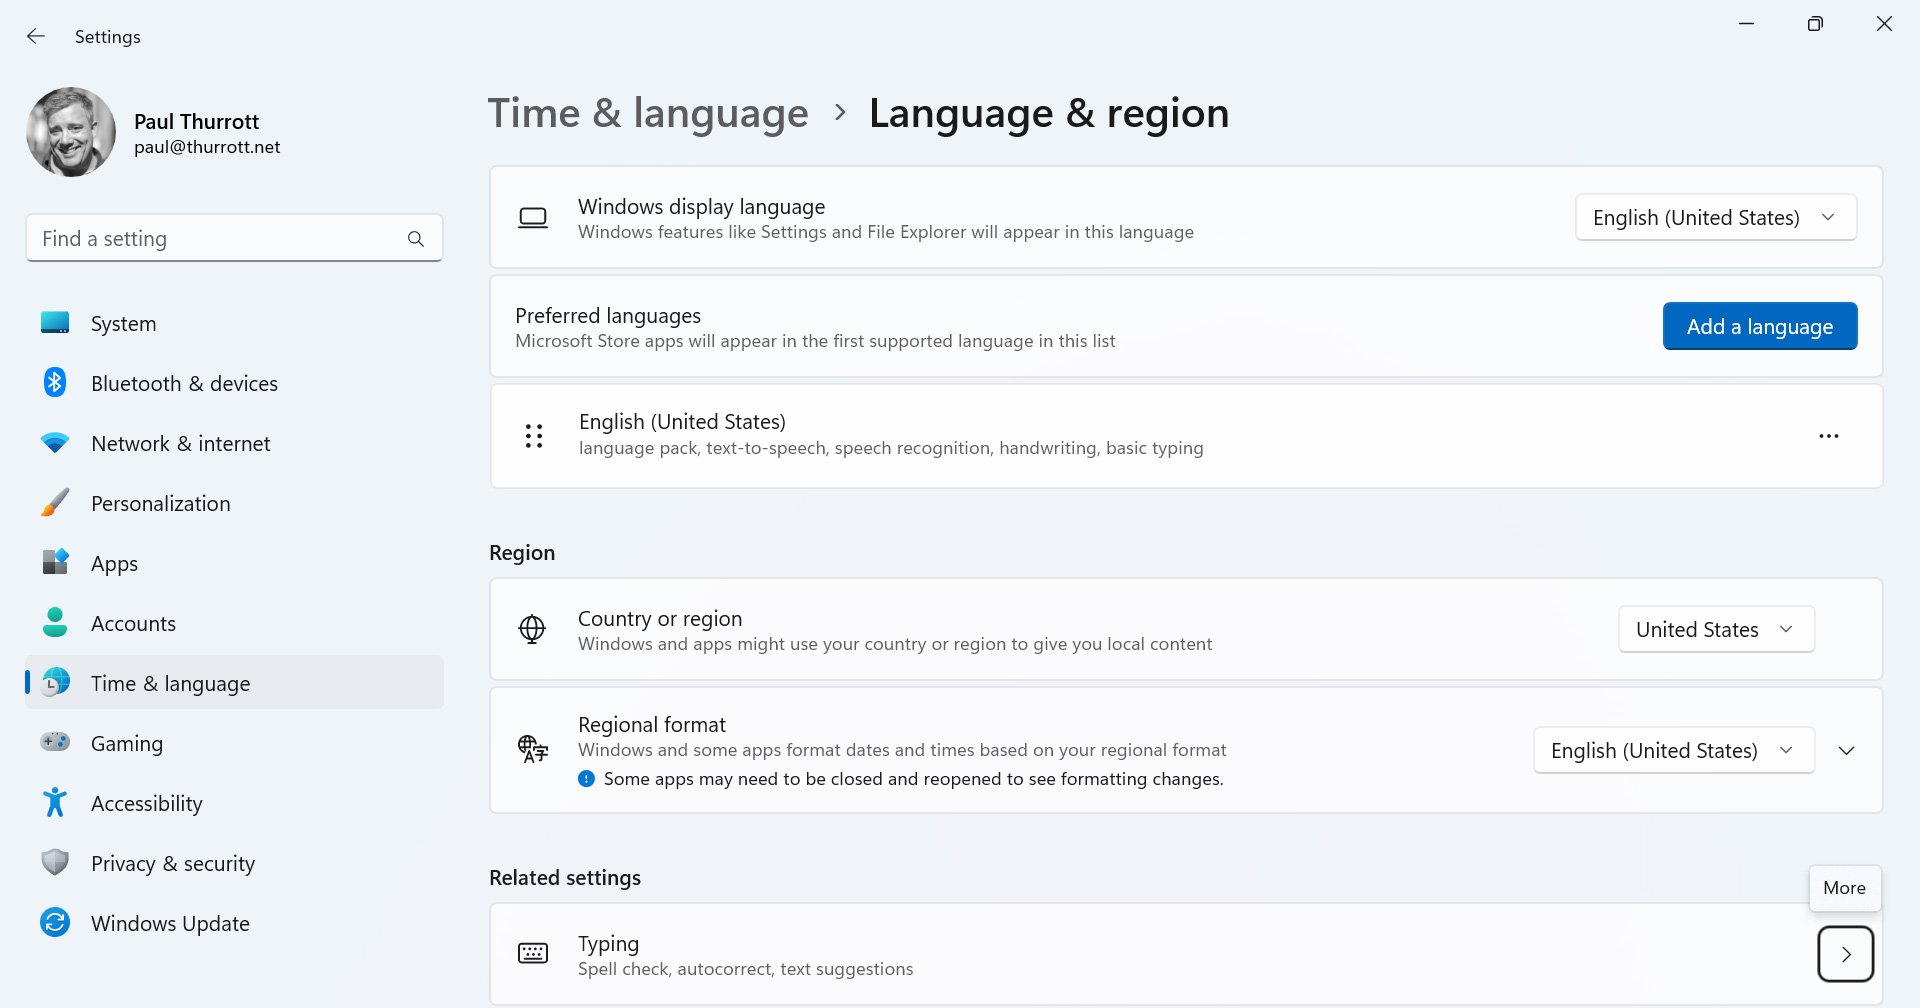
Configure your regional settings. Now that you’re using Windows 11, you need to correctly configure your regional settings. To do so, open the Settings app (WINKEY + I) and navigate to Time & language > Language & region. Here, you will make two setting changes. Configure “Country or region” to “United States” (or whatever country is correct for you), and then configure “Regional format to “English (United States)” (or whatever).
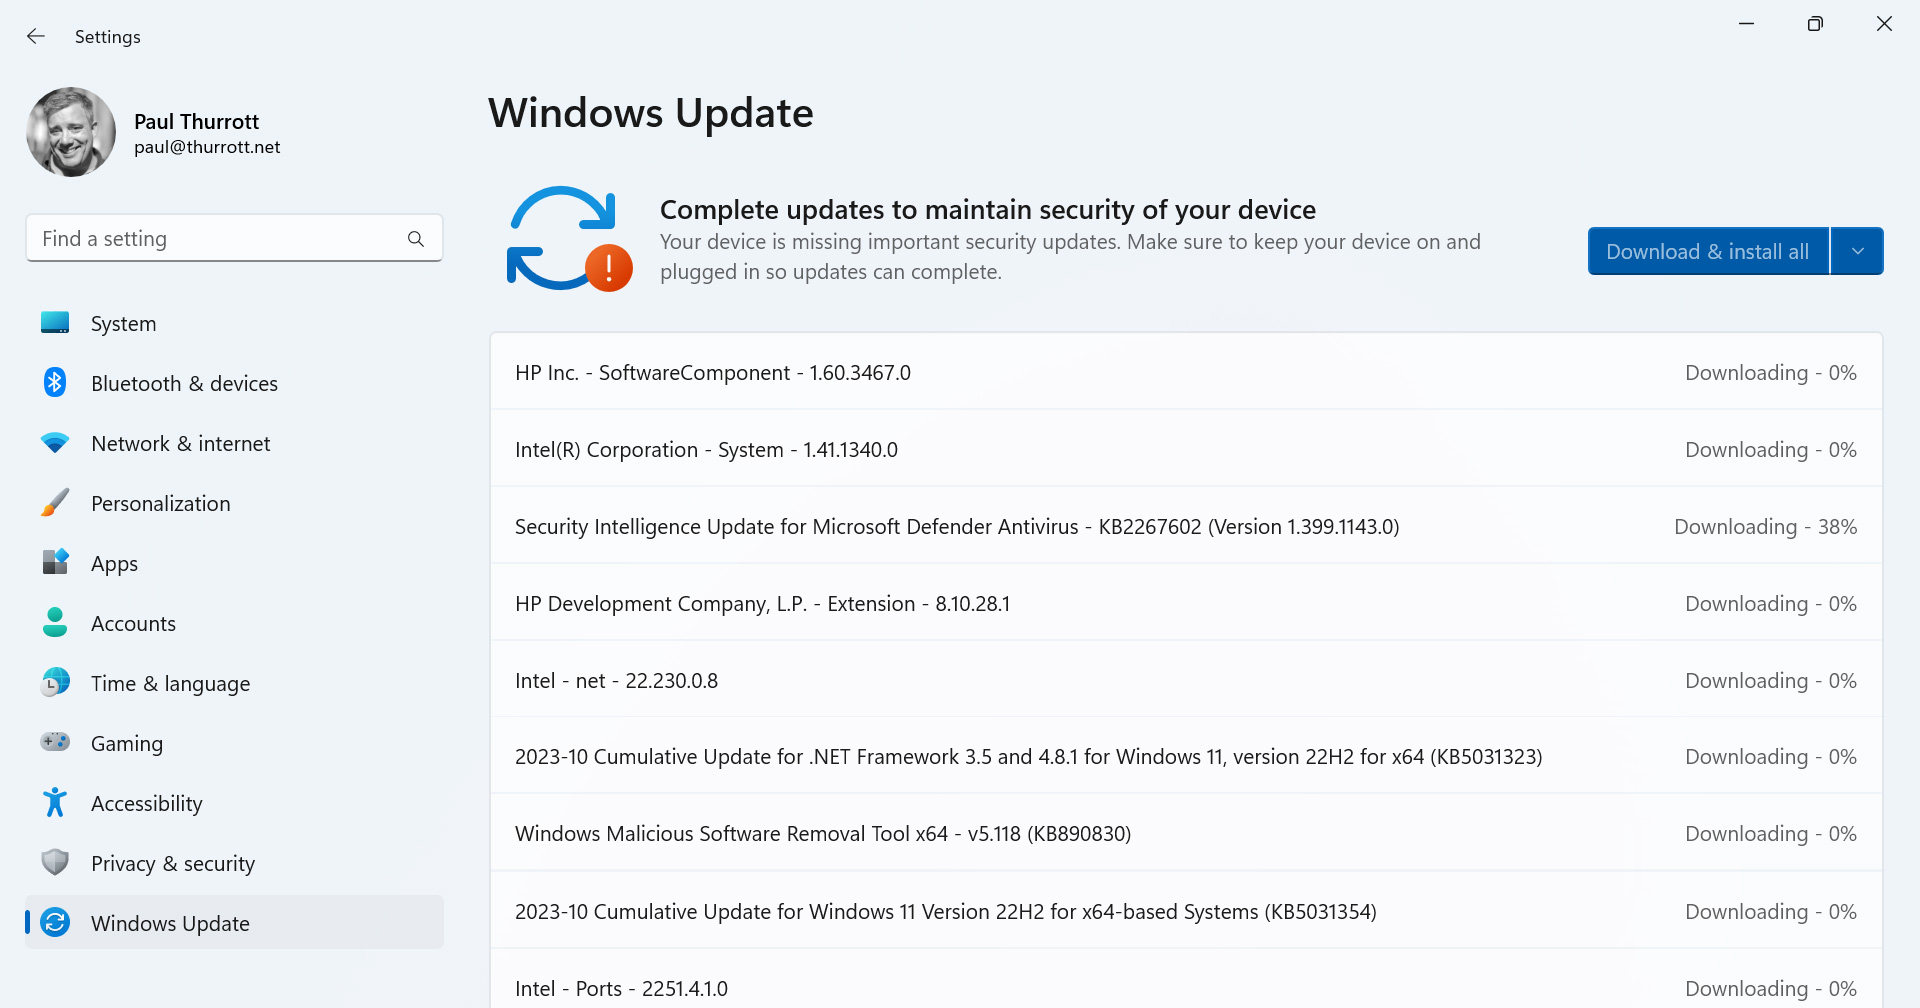
Check for updates. With that out of the way, it’s time to check for updates, which will likely include some much-needed driver updates. You do so in the Settings app: Navigate to Windows Update and, if necessary, click “Check for updates.” Install everything that is offered, reboot as necessary, and keep checking for updates until there are no more.
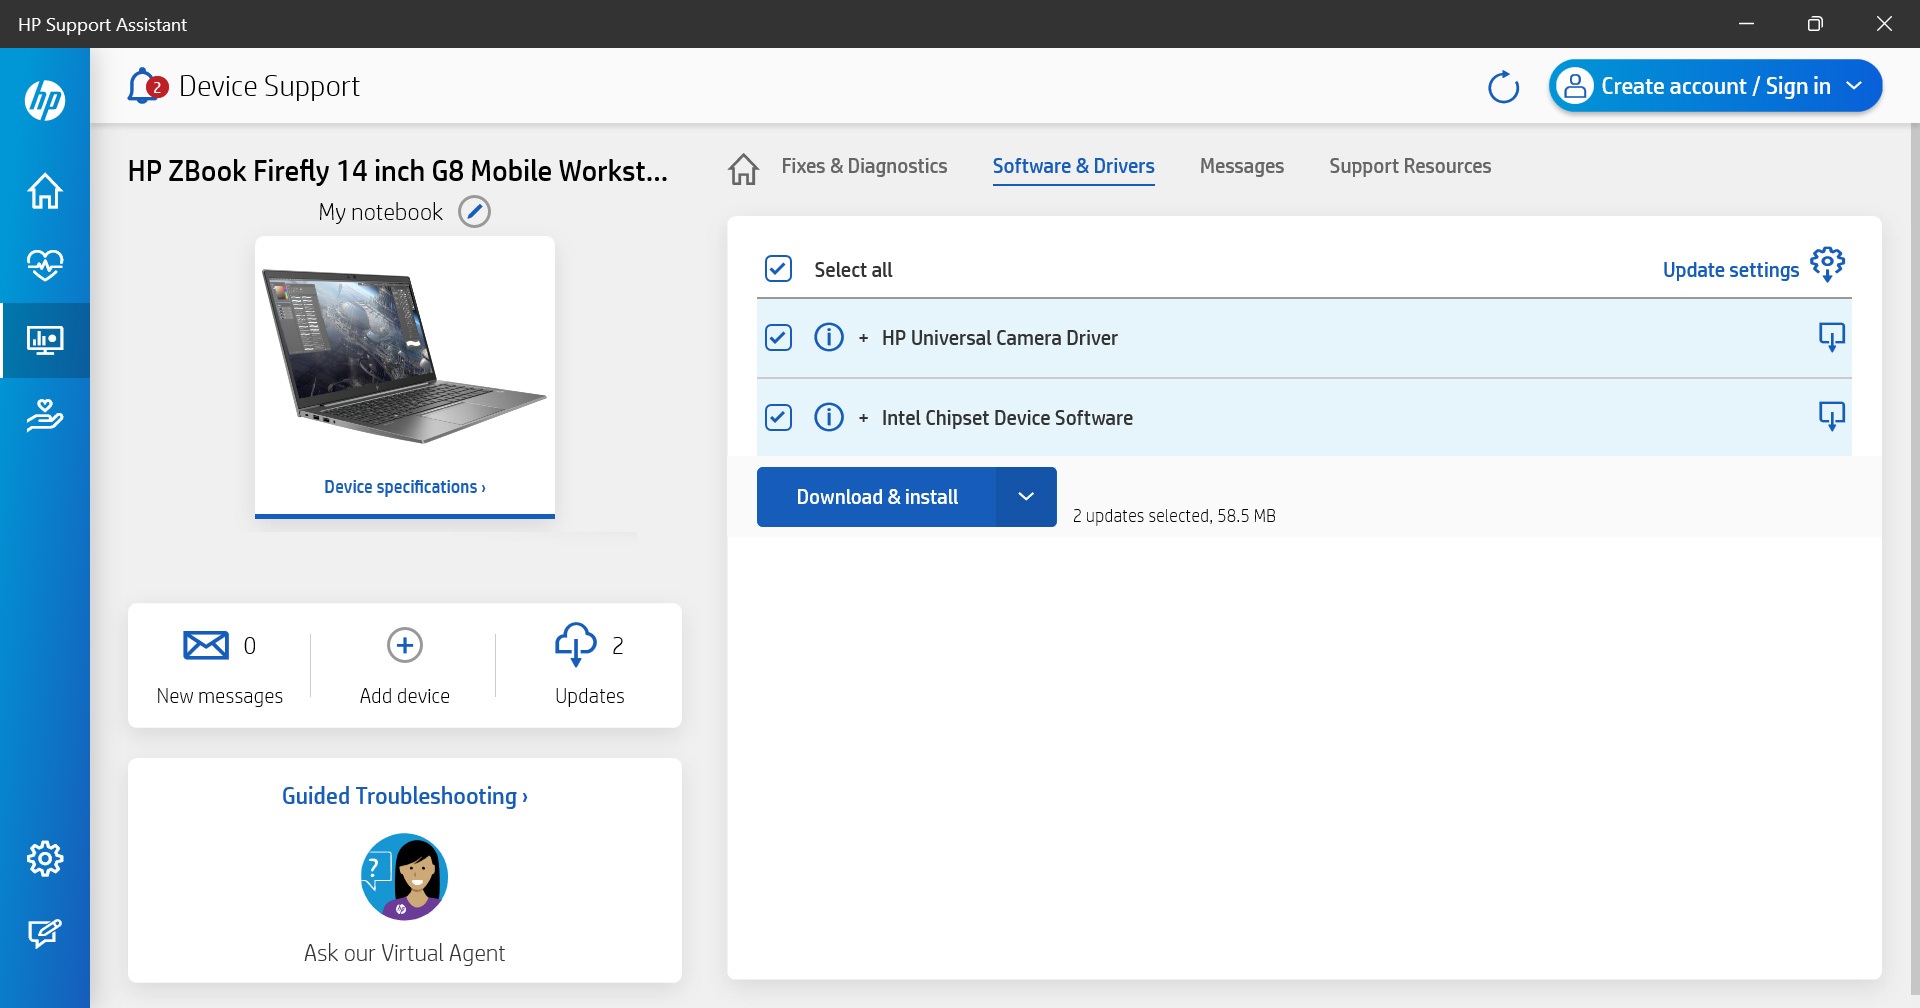
Optionally install your PC maker utilities. If you previously downloaded and saved utilities specific to your PC maker–including those designed to install driver updates, like the HP Support Assistant app shown below–now is the time. And do check for updates in that app as well.

And that’s it: From here, you can personalize the Start menu and the rest of Windows 11 normally.
Bypass the Microsoft account sign-in requirement in Windows Setup
Windows 11 requires individuals configuring a PC for personal use to connect to the Internet and sign in with a Microsoft account (MSA) during initial setup. To be clear, this is reasonable and even desirable for most users, and we recommend that most readers simply do so as required.
But power users who prefer to sign in with a local account–what Microsoft now calls an offline account to differentiate it from online accounts like Microsoft accounts and work or school accounts–will want to bypass these requirements.
Here are a few ways to accomplish this, most of which occur during the Windows Setup Out-of-Box Experience at install time.
Bypass the network connection and Microsoft account requirements during Windows Setup
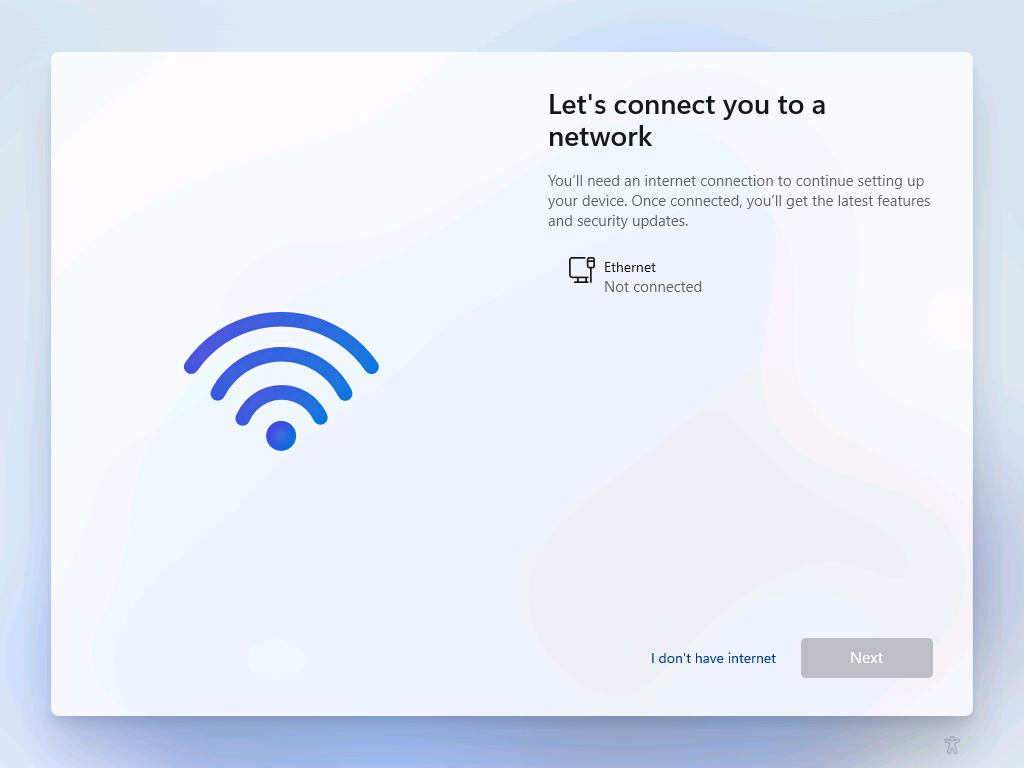
To bypass the network connection and Microsoft account requirements during Setup, navigate to “Let’s connect you to a network” and type SHIFT + F10. This will display a Command Prompt window, which lets you execute Windows applications from its command line interface. Make sure Command Prompt is selected and then type the following command:
> oobe\bypassnro
When you press ENTER, the PC will reboot and Windows Setup will run again. Step through Setup as before. When you get to the screen titled “Let’s connect you to a network,” you will see a new link near the bottom left titled “I don’t have internet.”
Click this link to display a screen titled “Connect now to quickly get started on your device.” Then, click the link “Continue with limited setup.” Setup will display a “Who’s going to use this device?” screen.
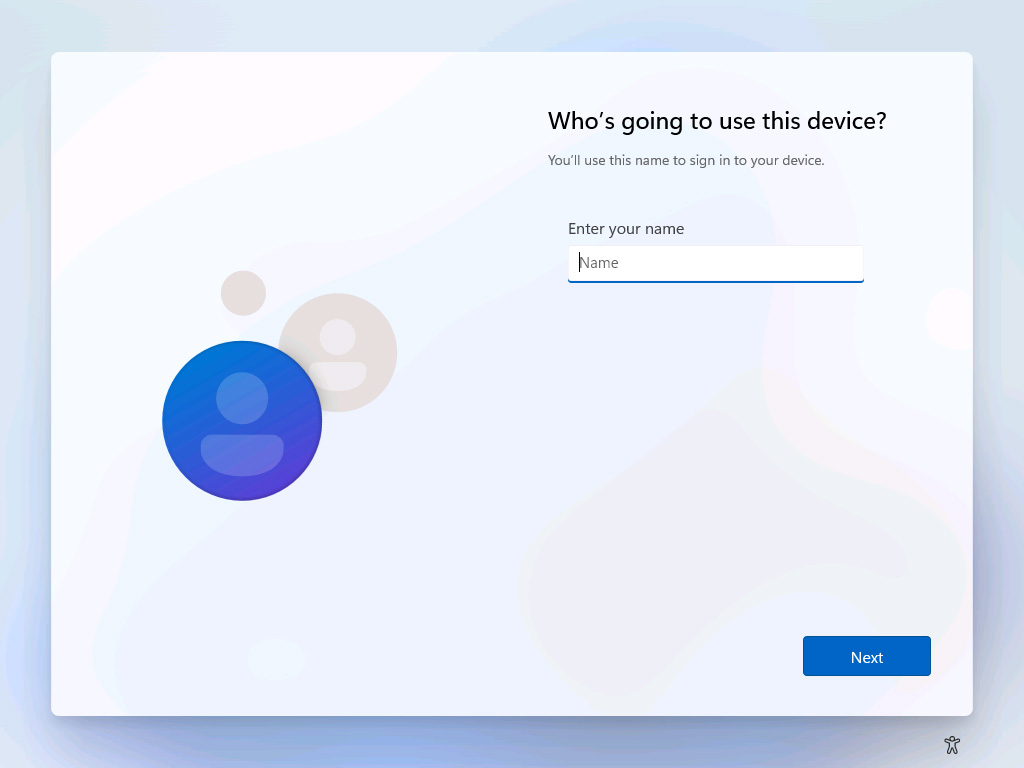
Now, just enter a local account name in the Enter your name field and click “Next.” The next screen will prompt you to enter a “super-memorable password,” which is optional. Do so (or not), click Next, and then Setup will proceed normally.
Bypass just the Microsoft account requirement during Windows Setup
If you’ve already connected to your local network during Setup, no worries: you can still bypass the Microsoft account requirement.
When you get to the “Let’s add your Microsoft account” phase in Setup, enter [email protected] in the Sign in field and then select the Next button. Then, in the Enter password field, enter any password and then select the Sign in button. The message “Oops, something went wrong” will appear.
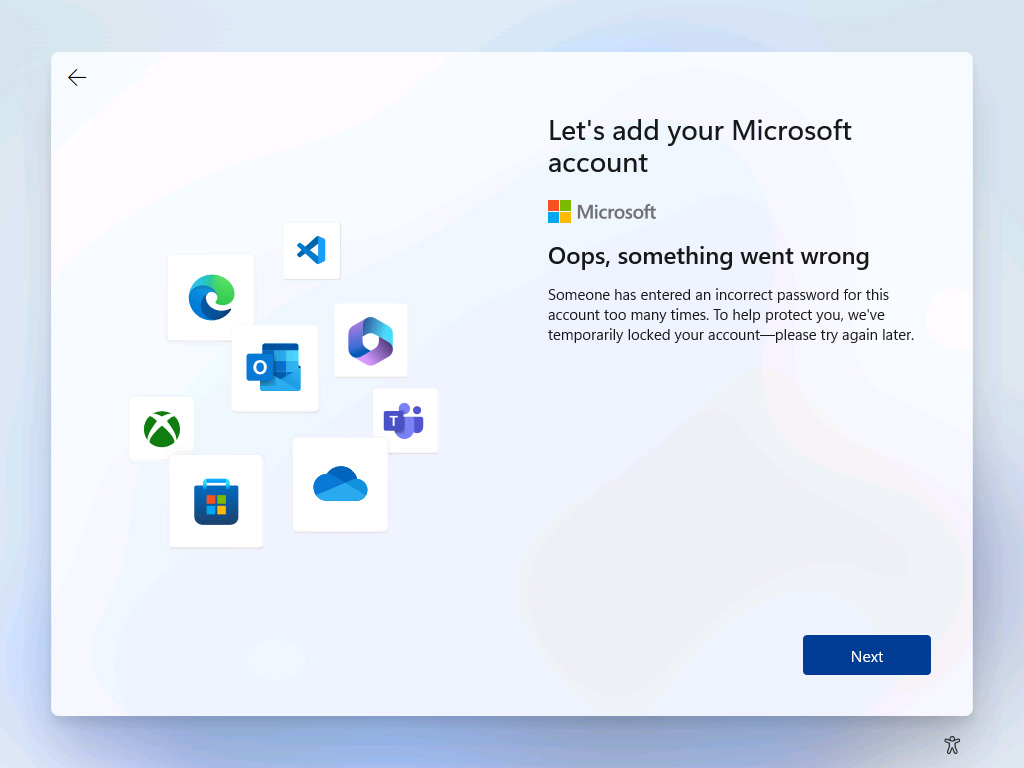
Select the Next button and the “Who’s going to use this device?” phase will appear. Now, just enter a local account name in the Enter your name field, enter a password (or not), and continue with Setup normally.

Create install media that removes Setup annoyances
A third-party utility called Rufus helps you create a version of the Windows 11 installation media on a USB memory stick that can optionally several Setup annoyances, most notably the Microsoft account requirement.
Rufus can also remove the Windows 11 Setup requirements for TPM, CPU, RAM, and disk space, and it can configure the install media to automatically skip over the privacy choices during Setup. If all you need is to remove the Microsoft account requirement, the methods noted above are much more efficient.
We discuss how to create Windows 11 install media using Microsoft’s tools in Create Windows 11 Version 23H2 Install Media.
To get started, connect a USB memory stick to your PC. Then, download Rufus and run the downloaded app (it’s a standalone app that does not need to be installed).
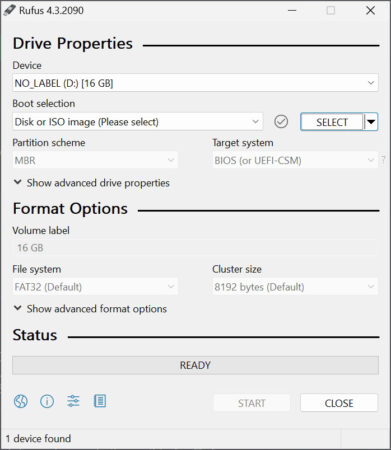
If you already have a Windows 11 installation media ISO file, click the “SELECT” button to find it in the file system. If you don’t have this ISO file, click the drop-down control next to “SELECT” and choose “DOWNLOAD” from the drop-down menu that appears. This changes the label of the “SELECT” button to “DOWNLOAD.”
Click “SELECT” or “DOWNLOAD.” If you need to download an ISO file, you will have to make several choices in the Download ISO Image dialog that appears.
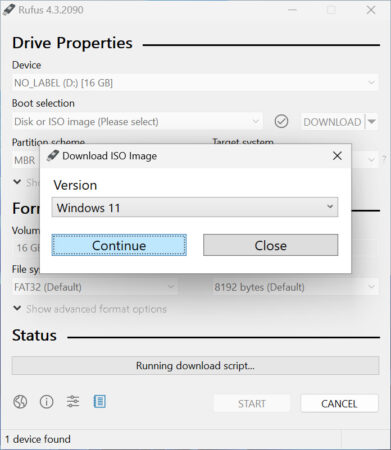
Those choices are Version (Windows 11, Windows 10, and some others), Release (the Windows 11 version), Edition (the Windows 11 product edition), Language, and Architecture (x64 is the only choice for Windows 11). For the most part, the default choices are correct, and once you get through all that, you will be prompted to download the ISO
Once that’s done–or immediately, if you already had your own ISO file–click the “Start” button. A Windows User Experience dialog will appear with several options to consider.
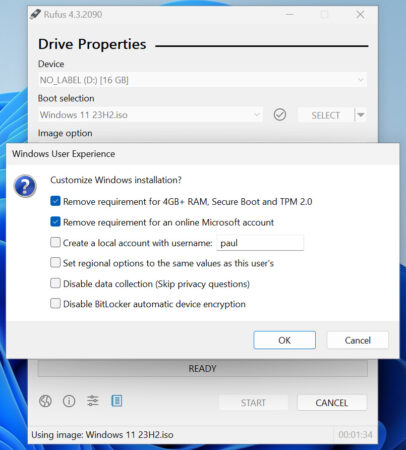
One of the default two selections, Remove requirement for an online Microsoft account, satisfies our needs. But you can examine the other options and determine whether you would like to include those workarounds as well. Press OK when you’re done, and then press OK in the warning dialog to start the install media creation process.
When this is done, you can set up Windows 11 using the new install media normally and as described in Step-by-Step: Windows Setup First-Boot Experience and Step-By-Step: Windows Setup Out-of-Box Experience (OOBE).
The PC must be offline during Setup
The Microsoft account workaround requires that the PC on which you’re installing Windows 11 is not connected to the Internet during Windows Setup.
Depending on which selections you made in the Windows User Experience dialog, some of the normal OOBE steps will be removed, resulting in a faster but potentially incomplete Setup experience.
When Windows Setup completes and you are taken to the Windows 11 Desktop for the first time, you will need to connect to the Internet, download all of the updates offered by Windows Update, and update all of Windows 11’s in-box apps using the Microsoft Store. You may be surprised to discover that the time you saved in Windows Setup is now squandered while you update your new Windows 11 installation.
Workarounds if you already installed Windows 11
If you have already installed Windows 11 and don’t want to go through that process again, you can still switch from a Microsoft account to a local account easily enough.
There are two ways to accomplish this:
- Convert your Microsoft account to a local account. Open the Settings app (WINKEY + I) and navigate to Accounts > Your info. Then, click the link “Sign in with a local account instead” next to “Microsoft account” in the “Account settings” section.
- Add a local account and remove the Microsoft account. Alternatively, you can create a new local account, give it Administrator privileges, sign out of Windows, sign in with the new local account, and then remove your original Microsoft account from the PC. To get started, open the Settings app (WINKEY + I), navigate to Accounts > Other users, and click “Add account.”
We discuss these methods in more detail in Local Accounts.

Gain unlimited access to Premium articles.
With technology shaping our everyday lives, how could we not dig deeper?
Thurrott Premium delivers an honest and thorough perspective about the technologies we use and rely on everyday. Discover deeper content as a Premium member.