Secure Your Microsoft Account
- Paul Thurrott
- Dec 28, 2023
-
2
Windows 11 includes deeply integrated security features that help protect your PC and the personal data that it contains from digital and physical attacks. But before we discuss any of that, it’s important to tackle a thorny, related issue, the security of the Microsoft account that most of us use when we sign in to Windows. If your Microsoft account isn’t properly secured, then the PCs you use it with can’t be fully secured either.
In an ideal world, your Microsoft account is already properly secured. But we’re all human, and whether it’s by error or ignorance, it’s possible or even likely that you’ve neglected your Microsoft account over the years. This chapter will help correct that problem. Or, if you’ve already done things correctly, it will simply confirm what you already know and have correctly configured.
But what does it mean to have a correctly configured Microsoft account? Three things. A correctly configured Microsoft account …
- Has has up-to-date and complete profile and account information
- Has multiple additional sign-in and verification methods
- Is configured to require two-step verification
If any of those terms are confusing or unfamiliar, no worries: We explain each of these things and how you can configure them in this chapter. And once you meet all three of the qualifications noted above, you can optionally remove the password from your Microsoft account as well. We explain how to do that in this chapter too.
Get started with Microsoft account configuration
The Windows 11 Settings app includes a top-level Accounts interface you use to configure the sign-in accounts and other accounts you use in Windows on a PC. What Windows 11 lacks, however, is a way to configure the underlying Microsoft account that most of us used to sign in to Windows. And that means we need to turn elsewhere, in this case to the Microsoft account website. So fire up your favorite web browser, sign in and authenticate as required, and take the time to examine how your account is configured and make the recommended changes if required.
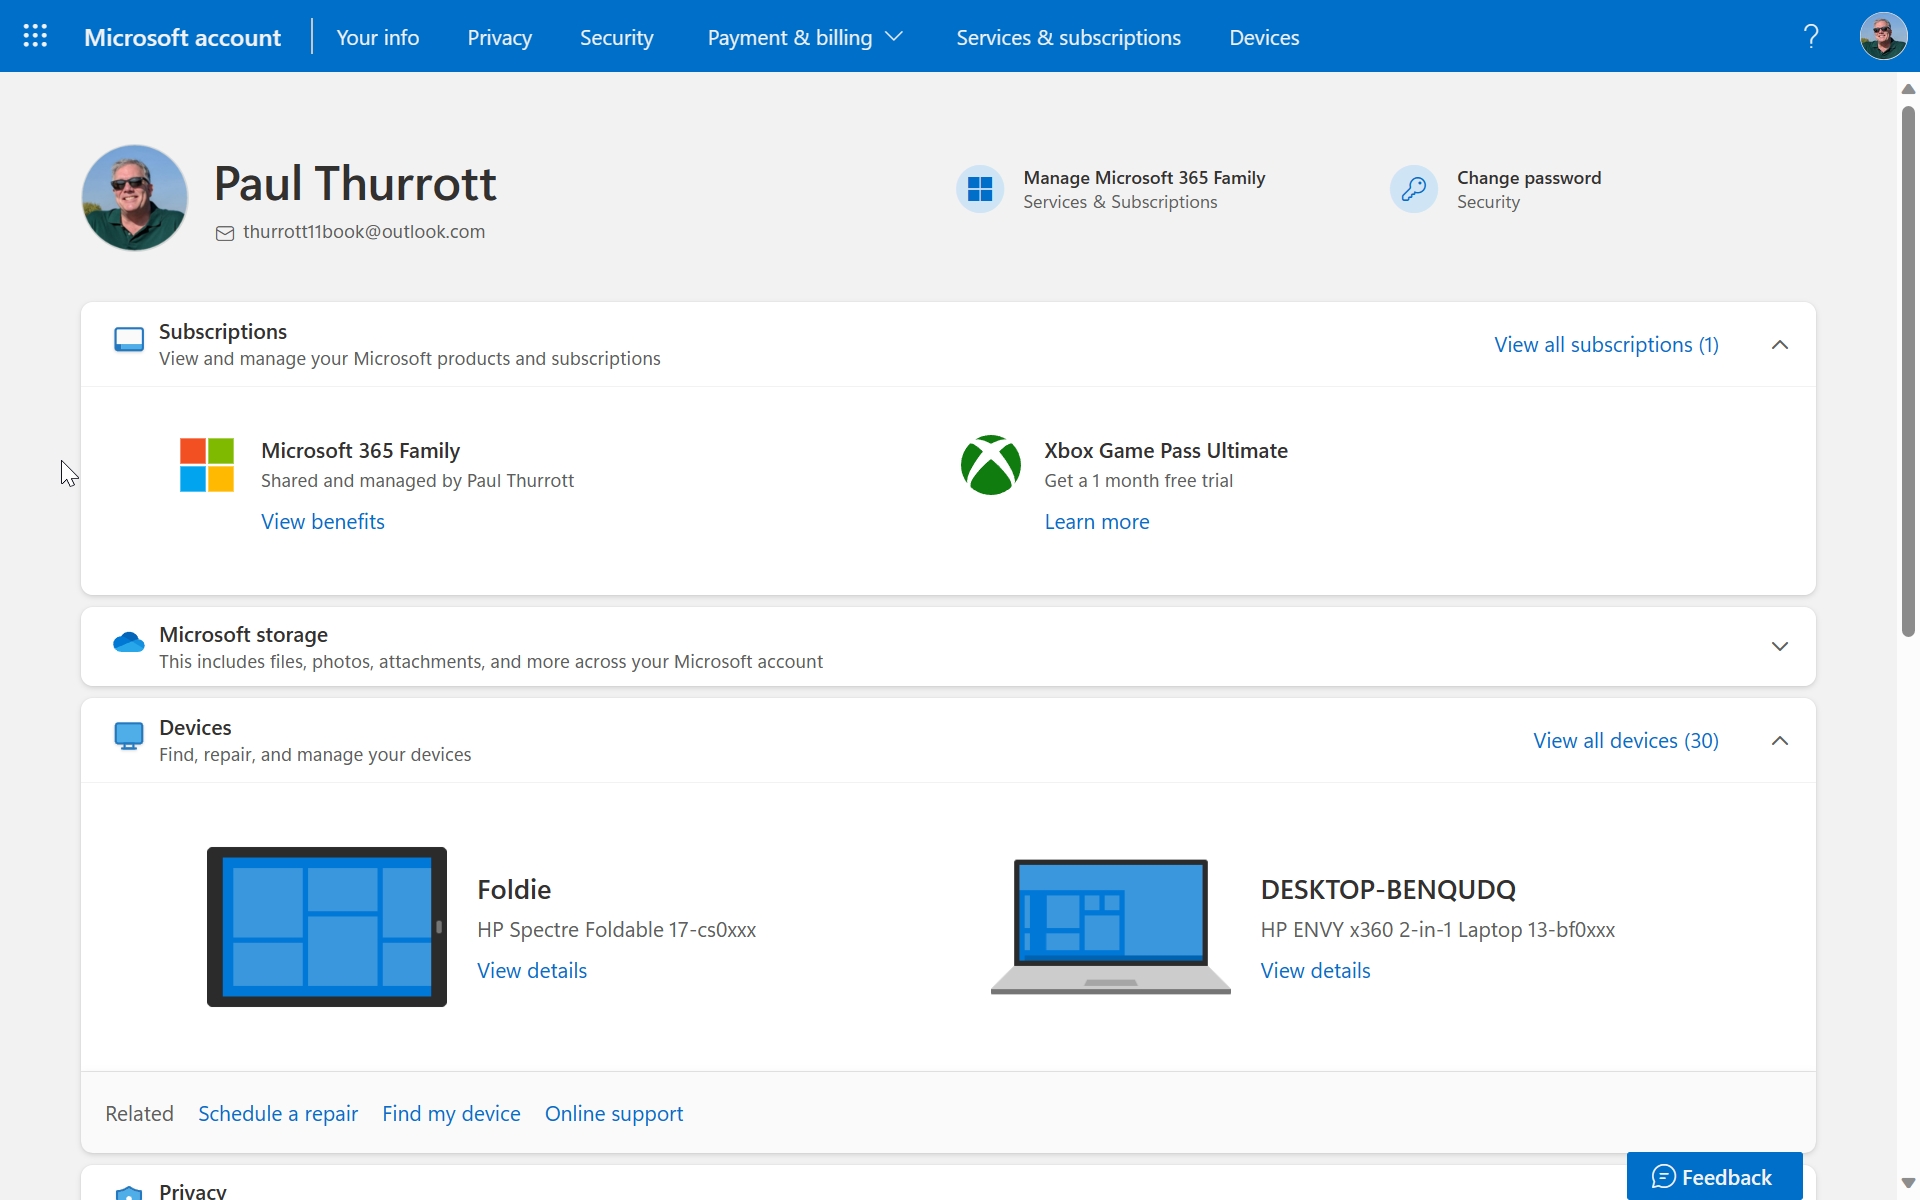
This website is organized into several top-level functional areas like Your info, Privacy, Security, Payment & billing, Services & subscriptions, and Devices. This chapter deals exclusively with the first three of those functional areas, and only with those settings that directly impact the security of your account. But it’s worth reviewing the settings exposed throughout this site from time to time, especially those related to billing, subscriptions and auto-renewals, and the PCs and other devices that are connected to your account.
Configure your profile information
When you first created your Microsoft account, you were asked to specify a new outlook.com email address and an associated password.
If you’ve been around as long as we have, you may have been prompted to create a hotmail.com or live.com email address instead. They all work identically, and you can actually still create a Microsoft account with a hotmail.com email address today if you’d like.
We don’t recommend this, but you can also use an existing email address from any source–Gmail, Yahoo, your workplace, whatever–as a Microsoft account. For the most part, these Microsoft accounts work identically to those with outlook.com, hotmail.com, and live.com email addresses, but there are two notable differences: The email service associated with that email address will be managed elsewhere and if anything happens to the original account, you could lose access to your Microsoft account and all of the data it contains, including the purchases you made and any subscriptions. You’re better off not using an existing email address as your Microsoft account.
Microsoft also requires new Microsoft account holders to specify a date of birth for security reasons, and your country/locale for privacy reasons. These items and your other profile information should be configured fully and accurately.
You do this from the Your profile page on the Microsoft account website, which you can access directly by clicking the “Your info” link in the site’s top navigation.
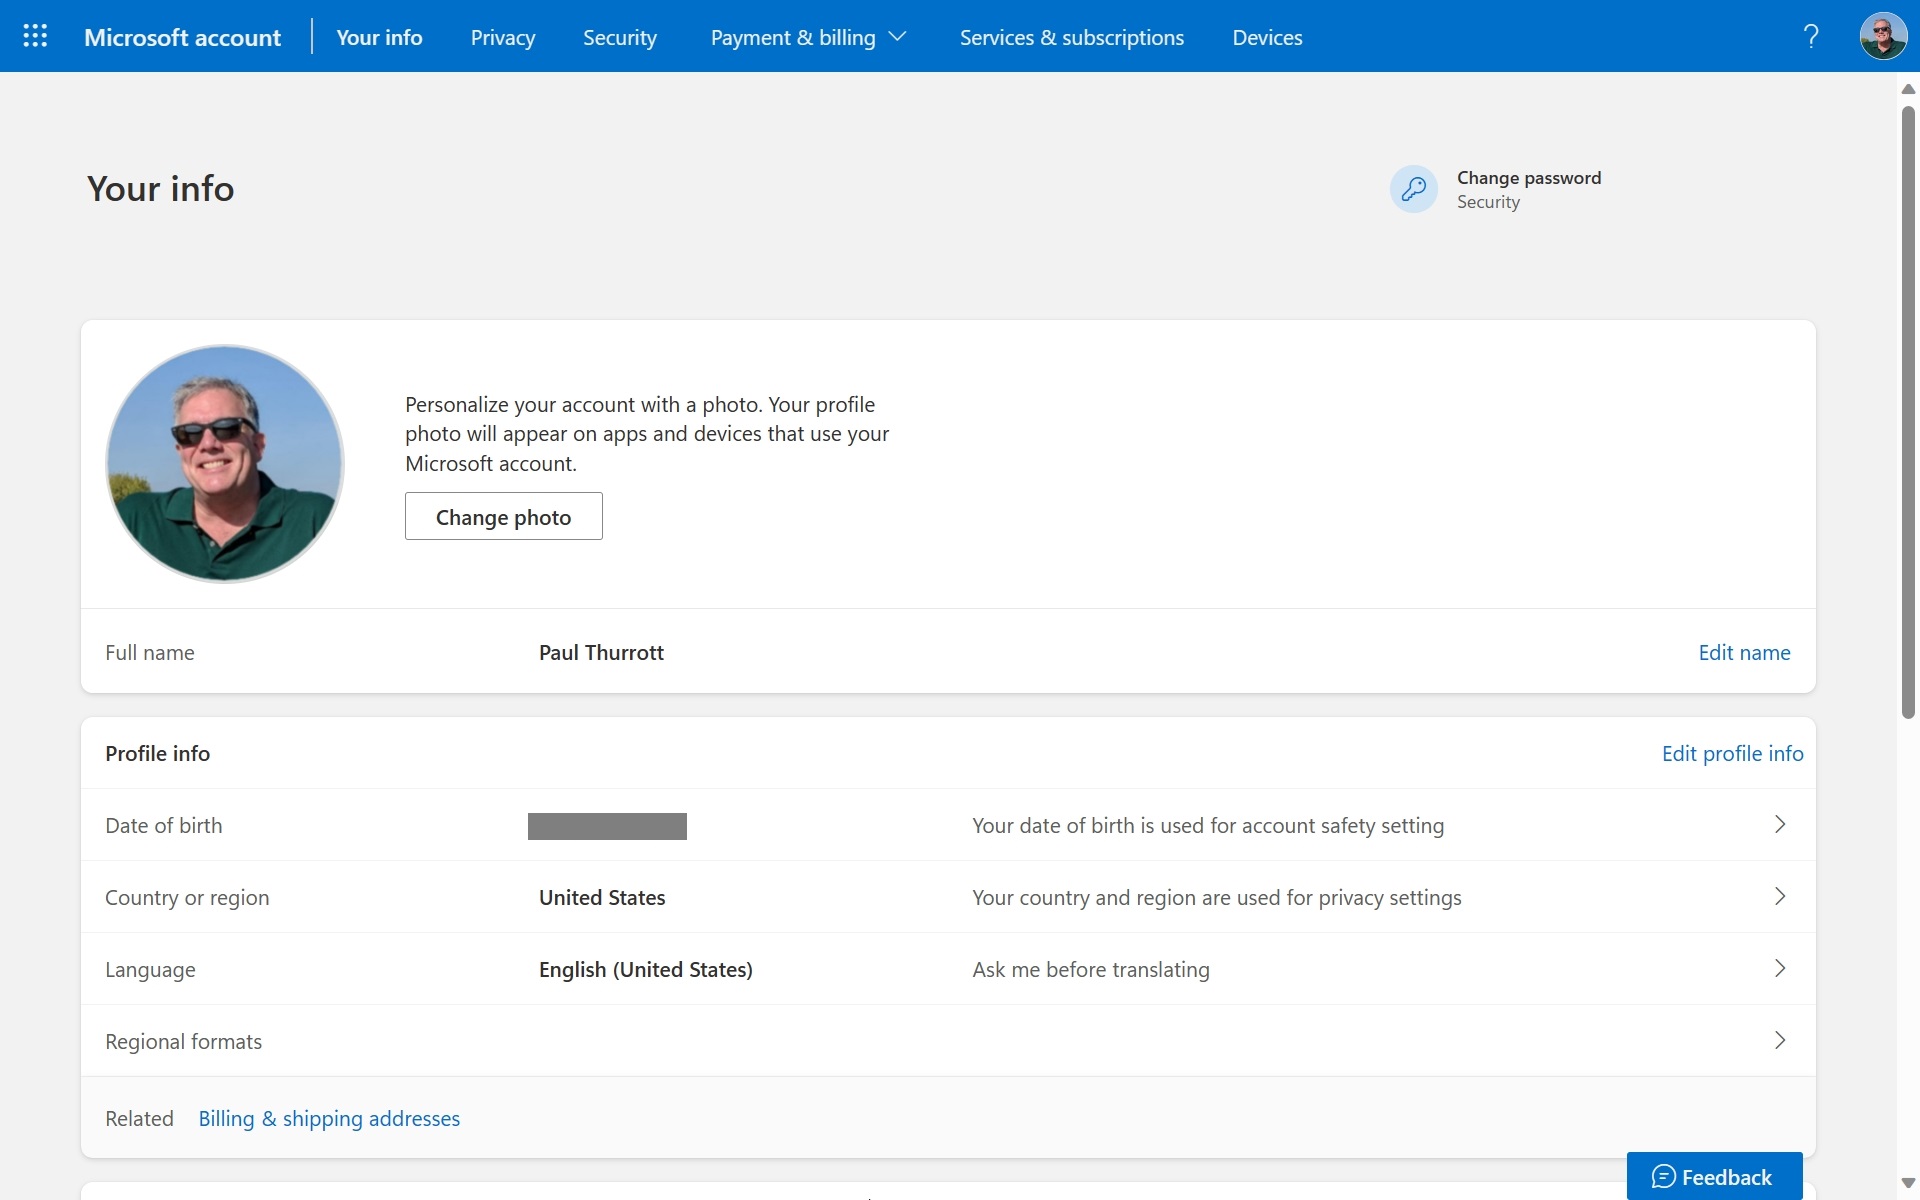
Here, ensure that all of the personal information associated with your account is correct, especially those items–Date of birth, Country or region, Language, Billing & shipping addresses, Email address(es), and Phone number(s)–that are tied to your account security and privacy. Don’t move on until you’ve verified all of the information here.
Related to this, Microsoft lets you add one or more optional aliases to your Microsoft account so that you can sign into this account using a different email address or phone number. Aliases are managed on the Manage how you sign in to Microsoft page on the Microsoft account website. It’s better not to have too many aliases and to limit which of them can be used to sign-in to your Microsoft account. You configure that from the Sign-in preferences page on the Microsoft account website. Here, fewer is better: Each email address and phone number is an avenue of attack. We recommend having a single email address, a single phone number, and optionally a single alias with a custom domain if you prefer that to an outlook.com or other standard Microsoft account email address.
Configure additional sign-in and verification methods
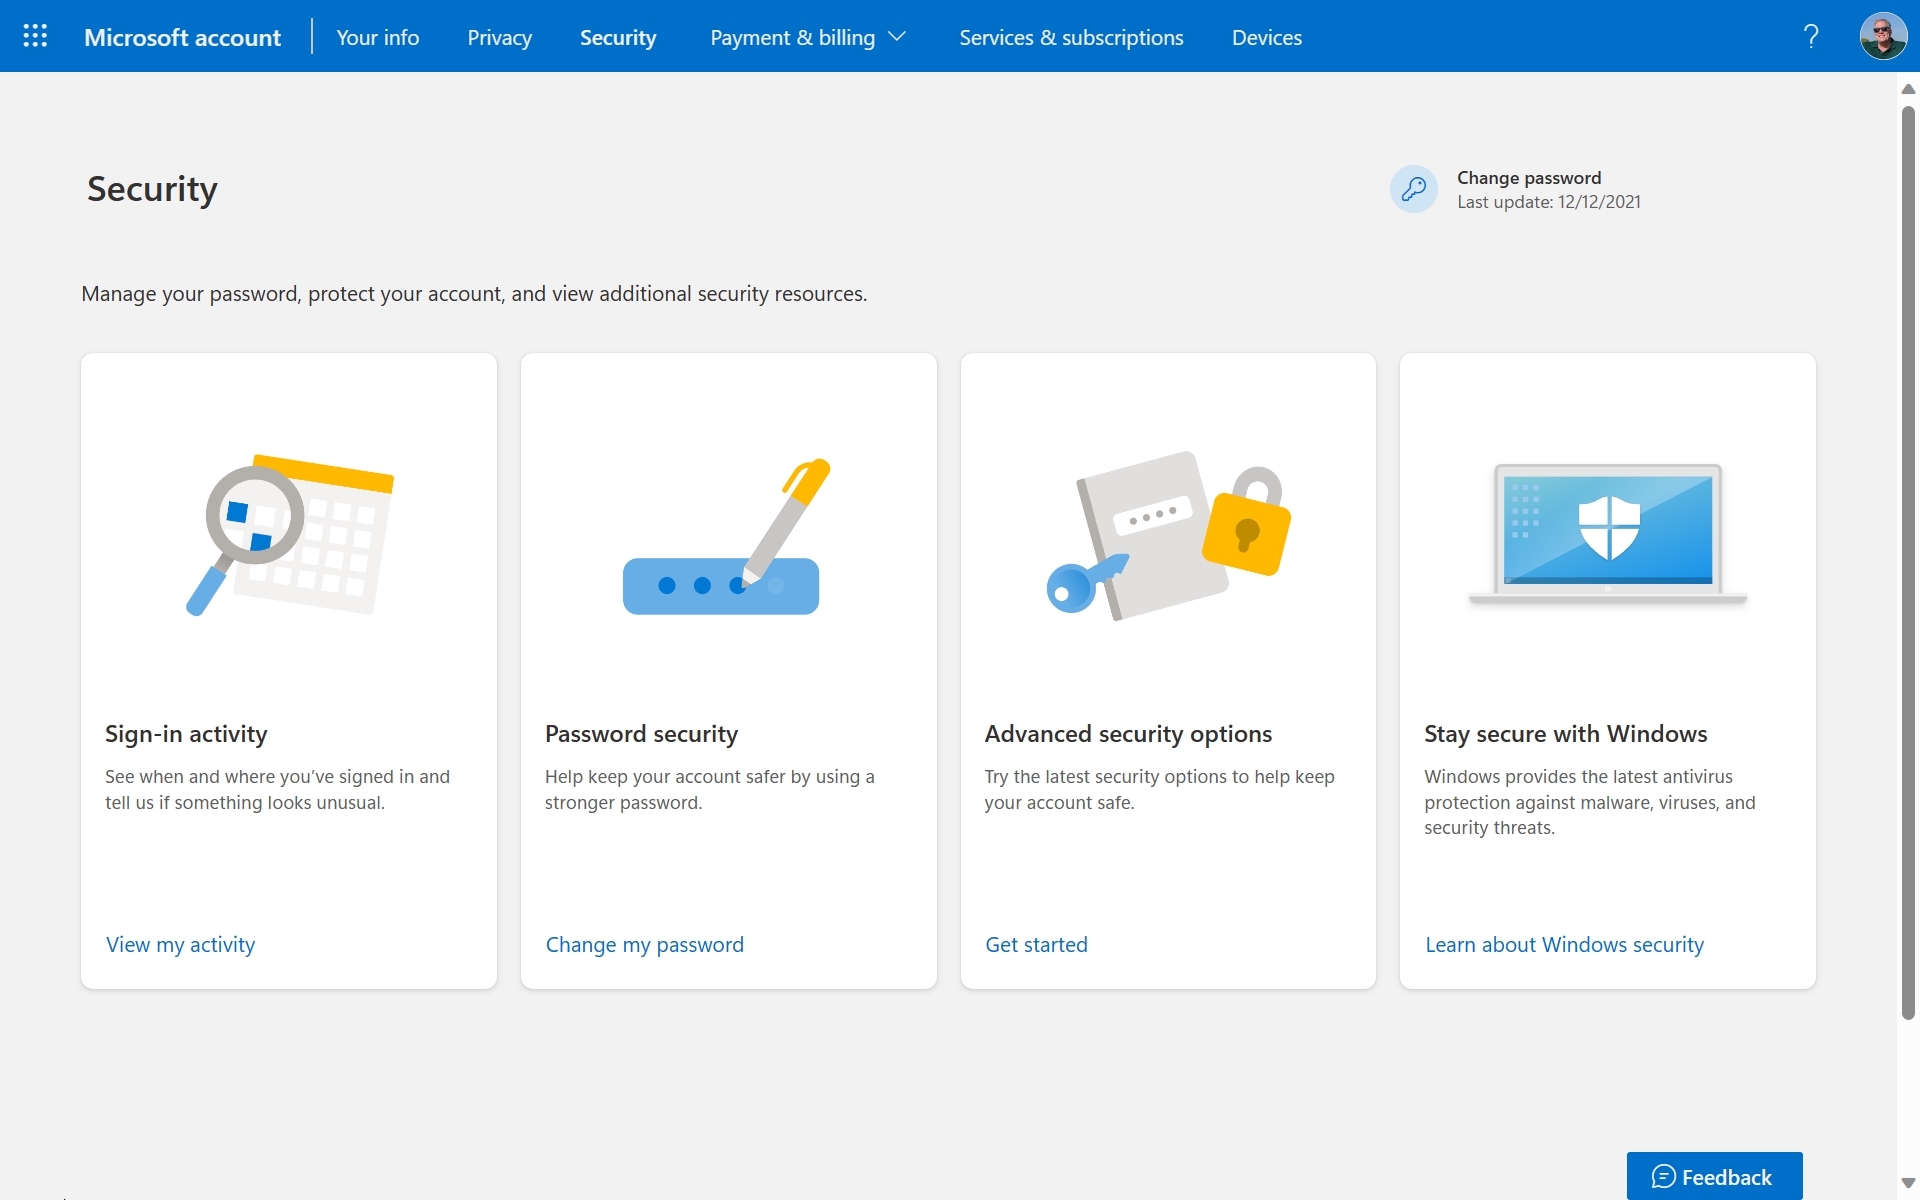
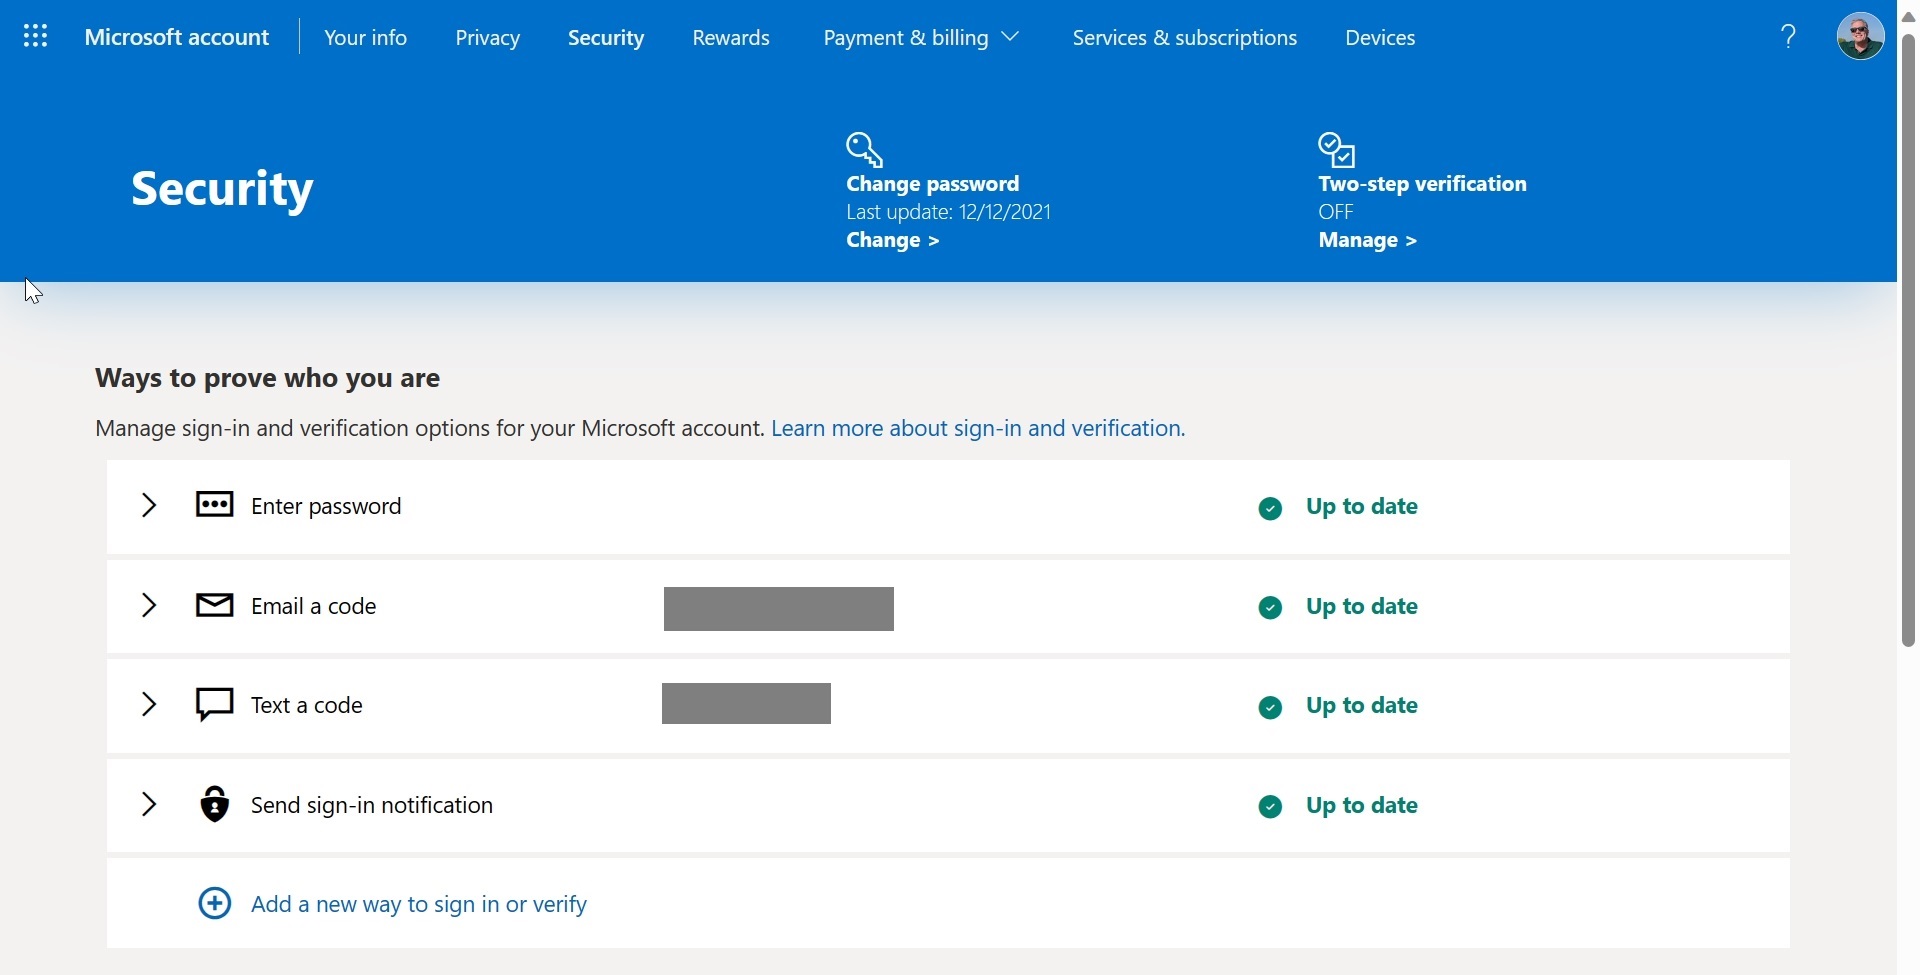
The security features associated with your Microsoft account can be accessed on the Security page on the Microsoft account website, which is sometimes referred to as the Security dashboard. Here, you will see links for reviewing your sign-activity (described later in the chapter), changing your password, and the area we’re concerned with here, Advanced security options. Plus, a link to a page on the Microsoft Support website that explains how Windows 11 helps keep you and your data secure on your PC.
The next step to securing your Microsoft account involves correctly configuring additional sign-in and verification methods that are associated with this account.
But what does that mean?
Your Microsoft account’s email address and password are its original sign-in and verification methods, the things you know that verify who you are when you need to use the account in any way. But your Microsoft account also supports a variety of additional sign-in and verification methods, each of which is to some degree more secure than using your password. So you can use any of these methods to authenticate yourself when you sign in, instead of using the account’s password.
A> Some readers will immediately realize that just adding additional sign-in and verification methods to your Microsoft account doesn’t eliminate the security issues with a password. But that’s the problem that two-step verification solves, as described in the next section. You have to configure additional sign-in and verification methods before you can enable two-step verification. First things first.
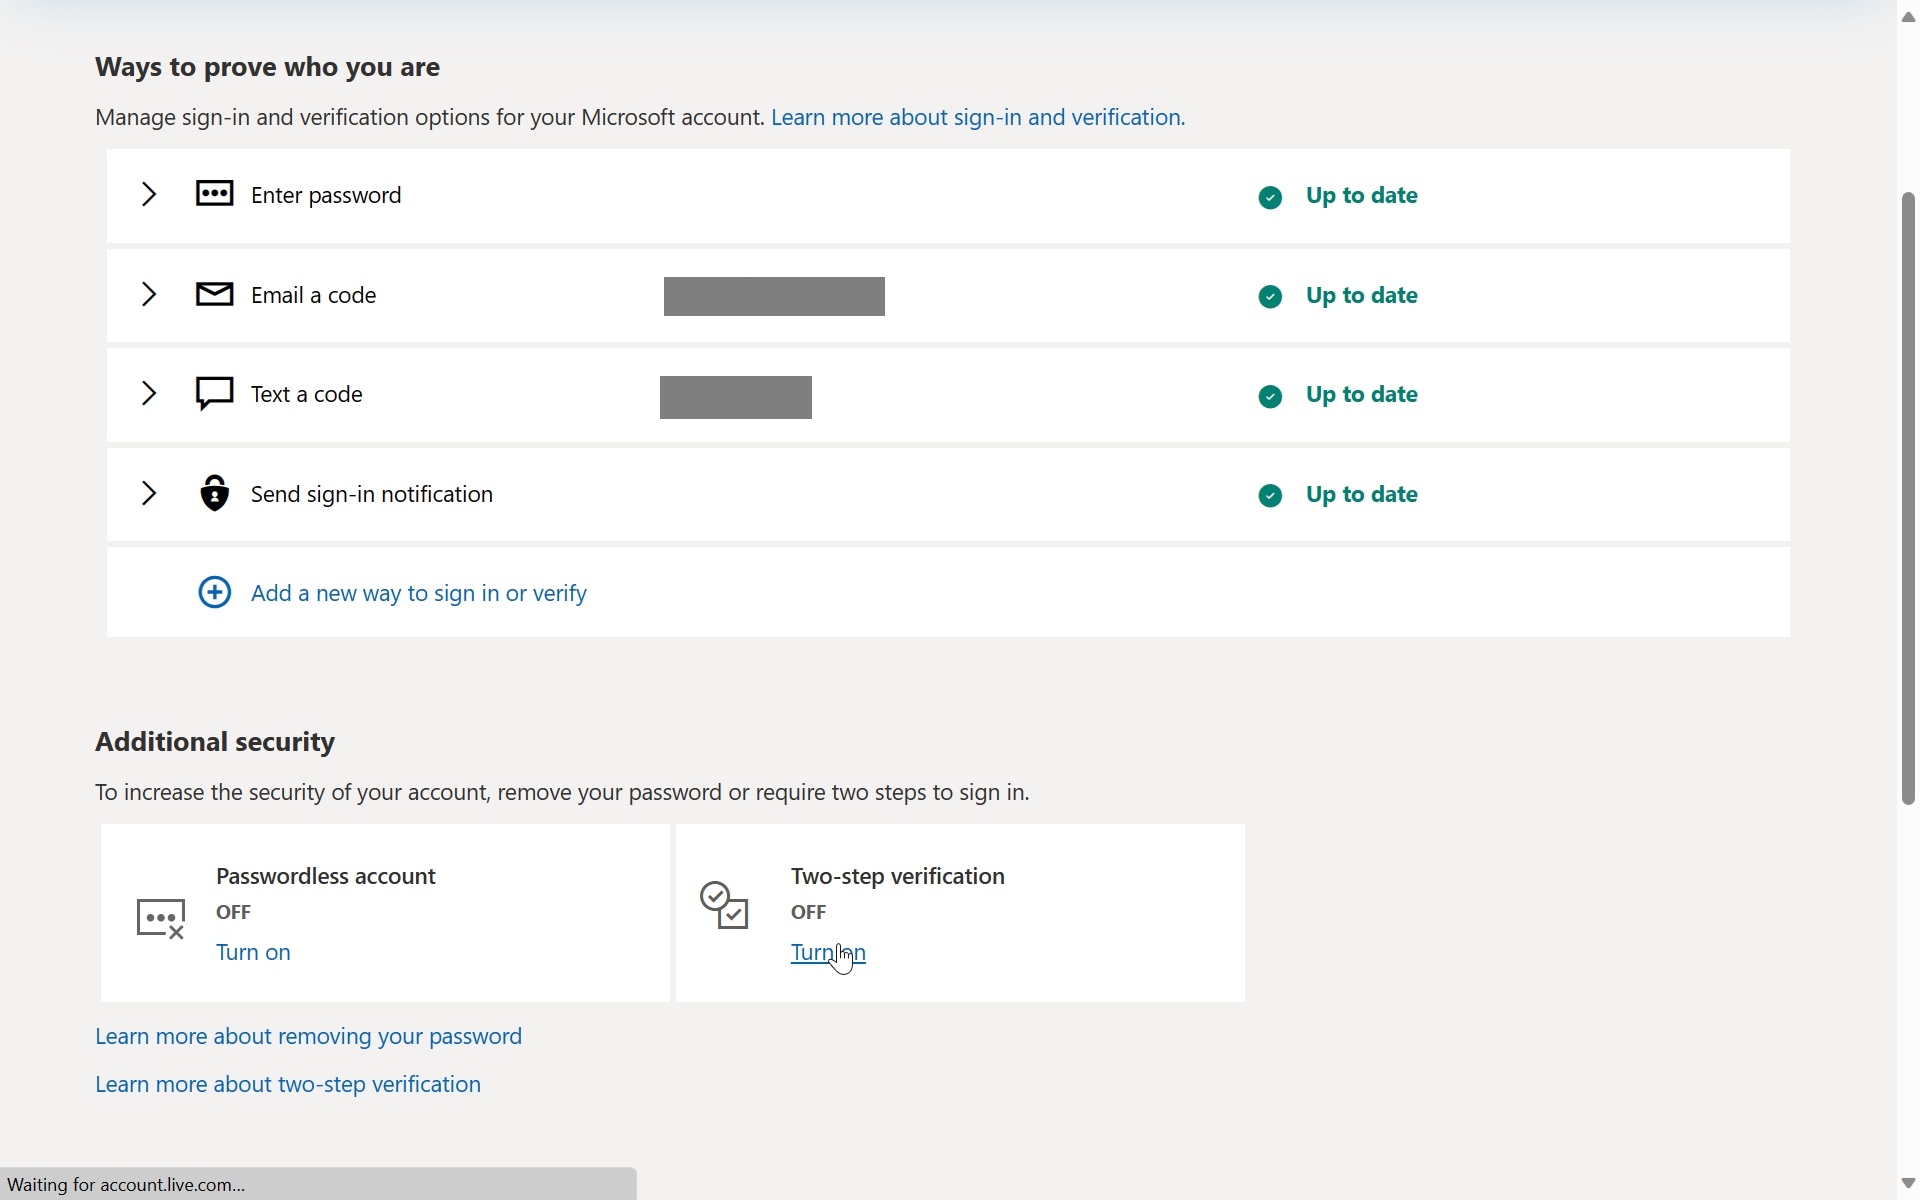
You create and manage additional sign-in and verification methods on the Additional security options page on the Microsoft account website. (You can access this by clicking “Get started” under “Advanced security options” on the Security dashboard page.) If you’ve had your Microsoft account for a while, it’s likely that you have at least one or two additional methods list here.
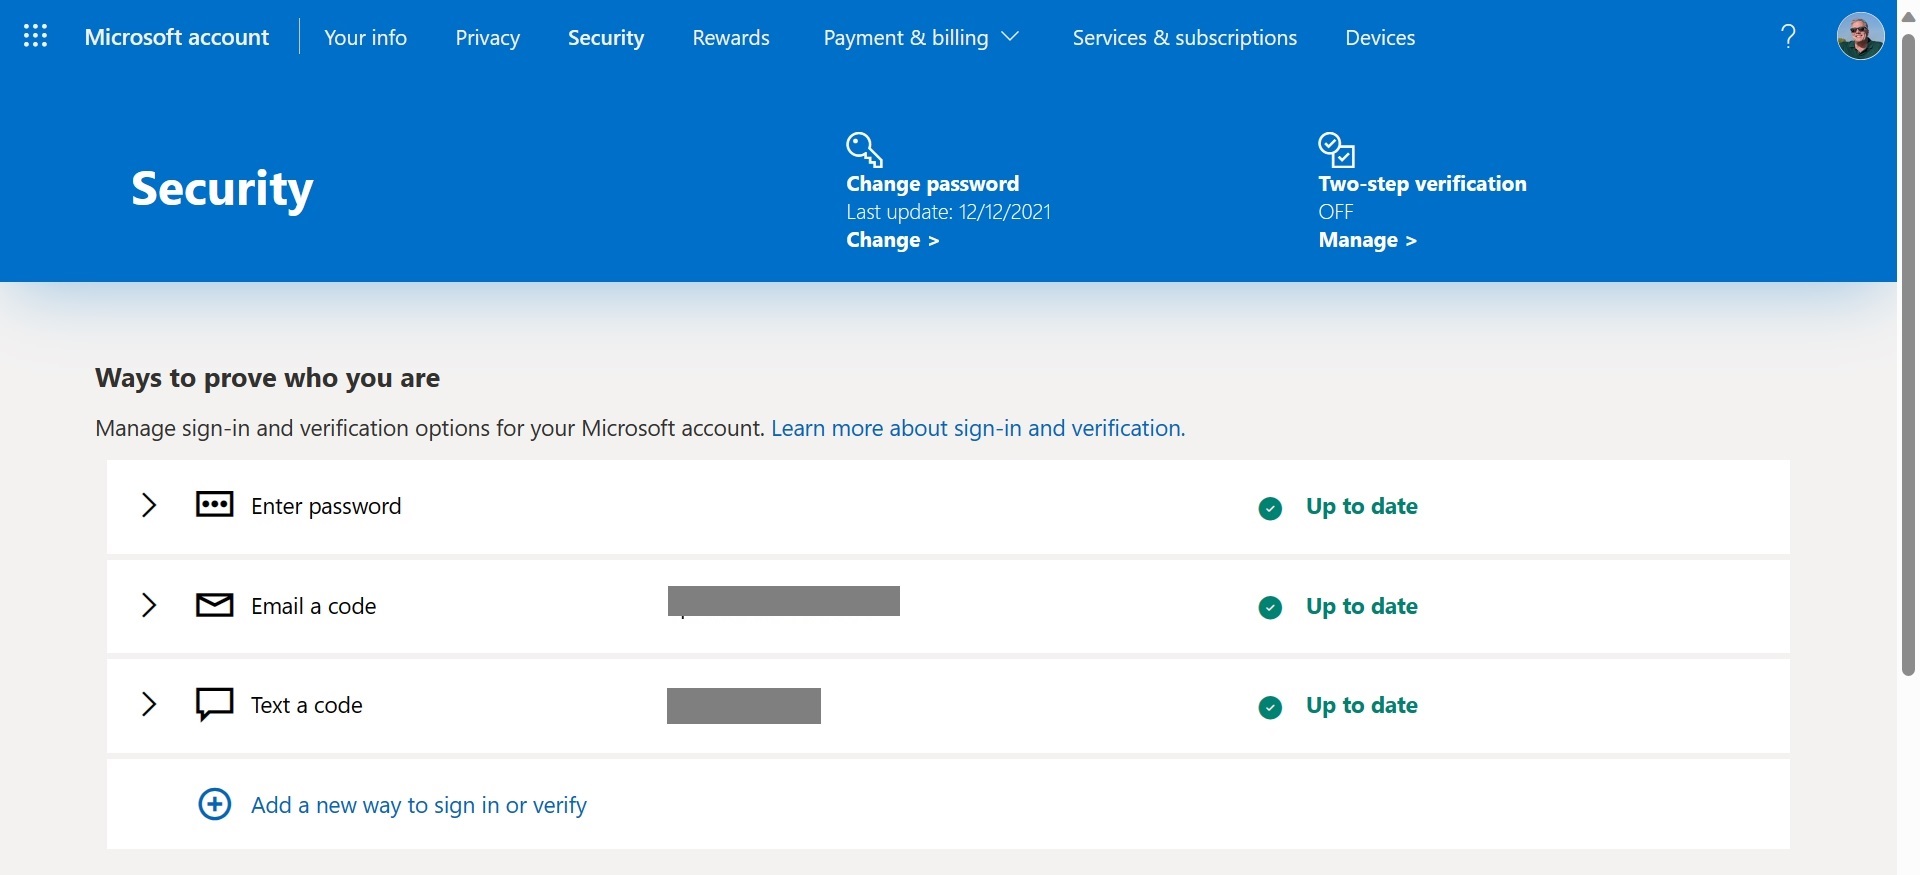
Aside from your password, the following additional sign-in and verification methods are available:
Text a code. With this method, you configure a phone number associated with a smartphone so Microsoft can send you a code via text message each time you need to sign-in to your Microsoft account: You will enter that code as prompted on your PC or elsewhere.
We recommend NOT configuring this additional sign-in and verification method because it is insecure. Among other issues, text messages are sent in plain text and not encrypted, and hackers who compromise your smartphone or phone number–or, in more extreme cases, even entire phone networks–can intercept the the codes and use them to gain access to your account. Note, however, that to remove this option, you will need at least two other methods that can be used for account recovery. So adding a second email address (“Email a code”) is perhaps the obvious solution.
Email a code. With this method, you register a valid email address so Microsoft can send you a code via email message each time you need to sign-in to your Microsoft account: You will enter that code as prompted on your PC or elsewhere.
Emailed verification codes are only as secure as the email account to which they are sent. So make sure that the account associated with this email address is controlled by you and as configured as securely as possible, as are the devices on which you access it.
Use an (authenticator) app. Microsoft and other reputable companies make so-called authenticator apps for Android and iPhone that prompt you to authenticate yourself in one of a variety of secure methods whenever you need to sign-in to your Microsoft account. This is one of the most secure additional sign-in and verification methods in part because these apps integrate with the PIN and/or biometric security features on your phone, adding an additional layer of security.
Use a security key. Workplaces with enhanced security needs often require their employees to protect their online accounts with a physical security key, a small hardware fob or dongle that connects to your PC and other devices via USB-C, USB-A, or Near Field Communication (NFC) wireless technology. These devices utilize an open authentication standard called FIDO2, can securely store thousands of online account credentials, are unlocked with an integrated fingerprint reader or PIN, and are resistant to phishing and account takeover attacks. And, yes, they can be used with your Microsoft account, though a newer and simpler technology called passkeys is far more common and user-friendly.
These technologies are discussed further in the Passkeys and Security Keys chapter.
Use your Windows PC. Windows 11 requires that anyone who signs in to a PC with a Microsoft account creates a Windows Hello PIN (personal identification number) in part because signing in with a PIN is much easier than remembering and correctly typing a potentially complex password. (You can also optionally enable even more secure Windows Hello sign-in methods, like facial or fingerprint recognition.) But there’s another reason: When you created this sign-in account on your PC, Windows 11 also created an associated passkey that allows it to pass your credentials through to services like OneDrive and Outlook, and to websites attached to that account. And that’s what this option does, it creates a passkey on the current PC so that you can use Windows Hello to securely authenticate yourself, albeit only when using the current PC. If you signed in to Windows 11 with your Microsoft account, there’s no reason to configure this option now: The passkey it would create is already there.
We discuss Windows Hello further in the Windows Hello, Presence Sensing, and Dynamic Lock chapter. And you can learn more about passkeys and how they integrate with Windows Hello in the Passkeys and Security Keys chapter.
So what should you do?
An authenticator app is the single best choice for most people, so we recommend protecting your Microsoft account–and your other online accounts–with the Microsoft Authenticator app. But adding a single additional sign-in and verification method is not enough: You need at least one more verification method for those times when your phone is not available for some reason. And for that, we recommend configuring at least one alternative email address too.
This alternative email address is not an alias for your Microsoft account, meaning that you cannot use that address to sign in to this Microsoft account. Instead, Microsoft will only send verification codes to the alternative email address when you choose this method during a Microsoft account sign-in.
Adding an alternative email address is straightforward. But it’s possible you’re not familiar with Microsoft Authenticator, so let’s walk through the process of setting up that mobile app and using it with your Microsoft account.
Installing Microsoft Authenticator is easy enough: The app is available for Android in the Google Play Store and for iPhone in the Apple App Store. Then, you just need to add your Microsoft account to the app.
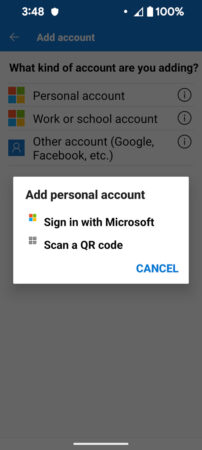
To do so, open Microsoft Authenticator on your phone, tap “Add account” (“+”) followed by “Personal account” and “Scan a QR code,” after which you’ll be prompted to allow the app to use your phone’s camera. Accept this request.
On your PC, navigate to the Additional security options page on the Microsoft account website and click “Add a new way to sign in or verify.”
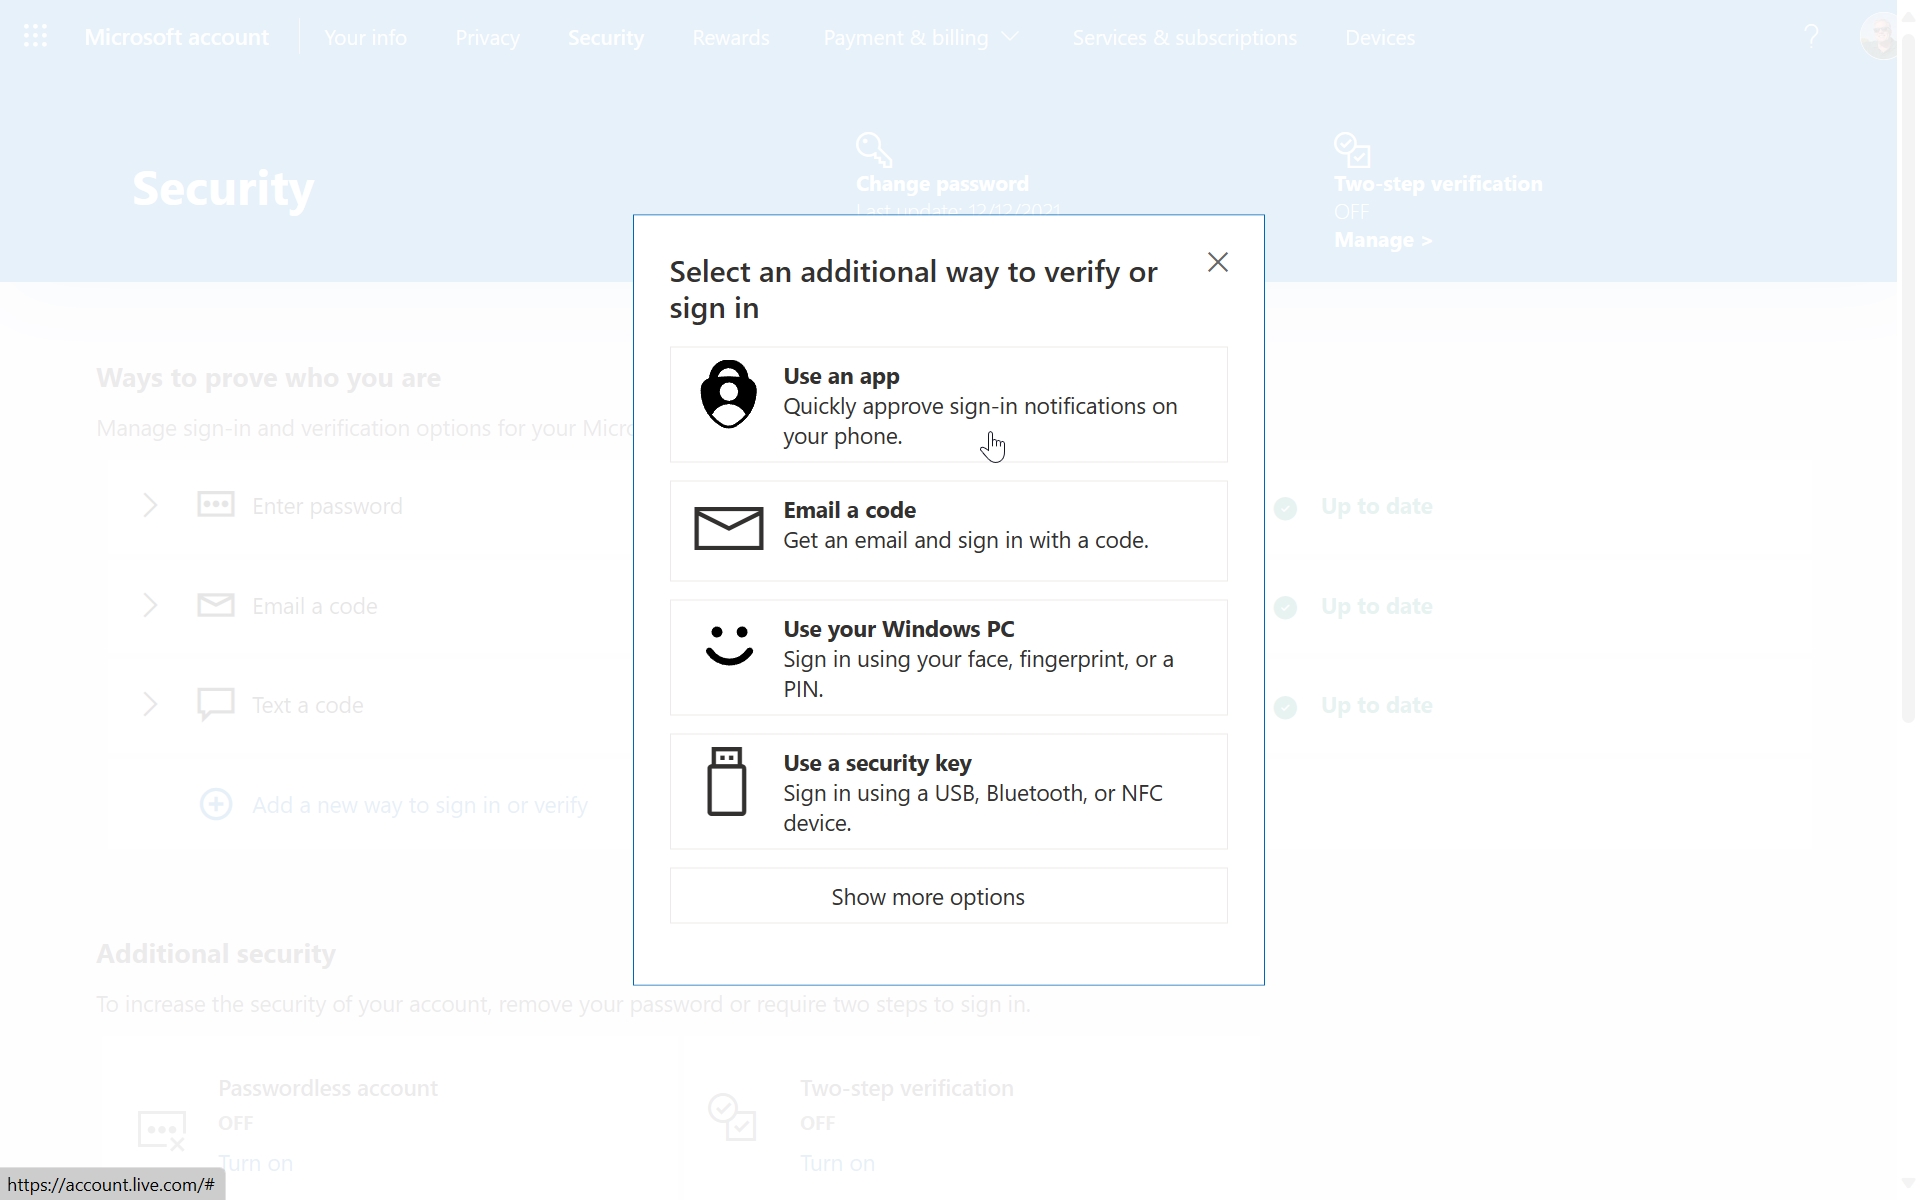
In the dialog that appears, click “Use an app.” Step through the prompts that ask you to download the Microsoft Authenticator app until a screen with a QR code appears.
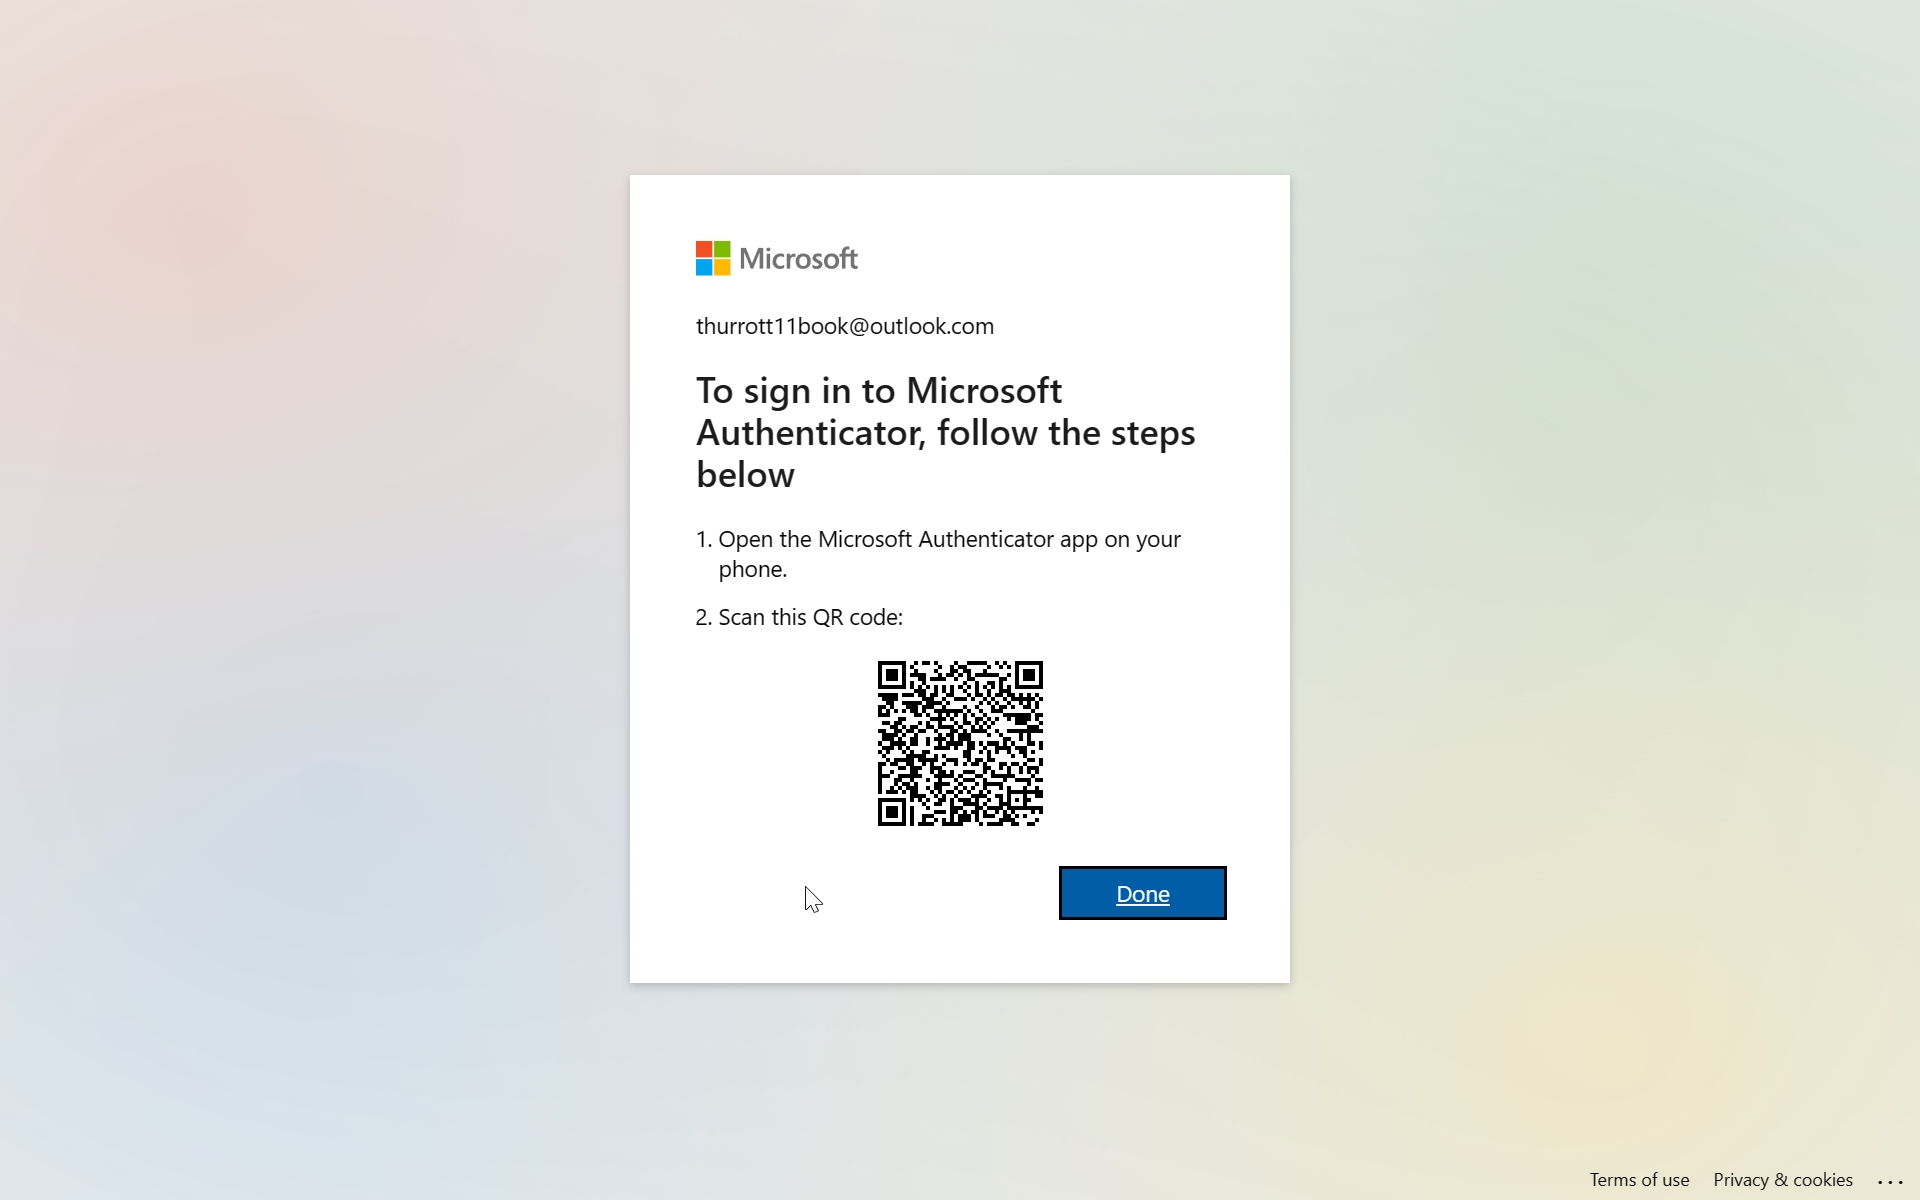
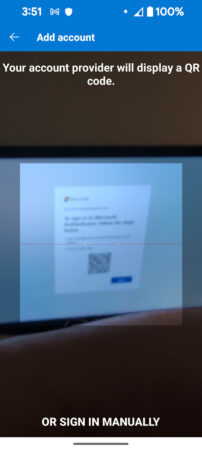
Then, point your smartphone camera at the QR code on your PC’s display. It will scan the code, prompt you, and then add your Microsoft account to its list of accounts.
Microsoft Authenticator may also ask you whether you’d like to use it a password autofill provider for your phone. That’s a distraction at the moment, so just tap “Skip” if asked.
On your PC, click the “Done” button under the on-screen QR code. A new additional sign-in and verification option, “Send sign-in notification,” now appears in your list of “ways to prove who you are.”
You can now use this method to sign in to your Microsoft account. For example, if you navigate to Bing.com on a PC or mobile device and begin a sign-in, the site will prompt you to enter your email address as usual. But when you click “Next,” it will prompt you to “Check your Microsoft app” and will optionally display a number.
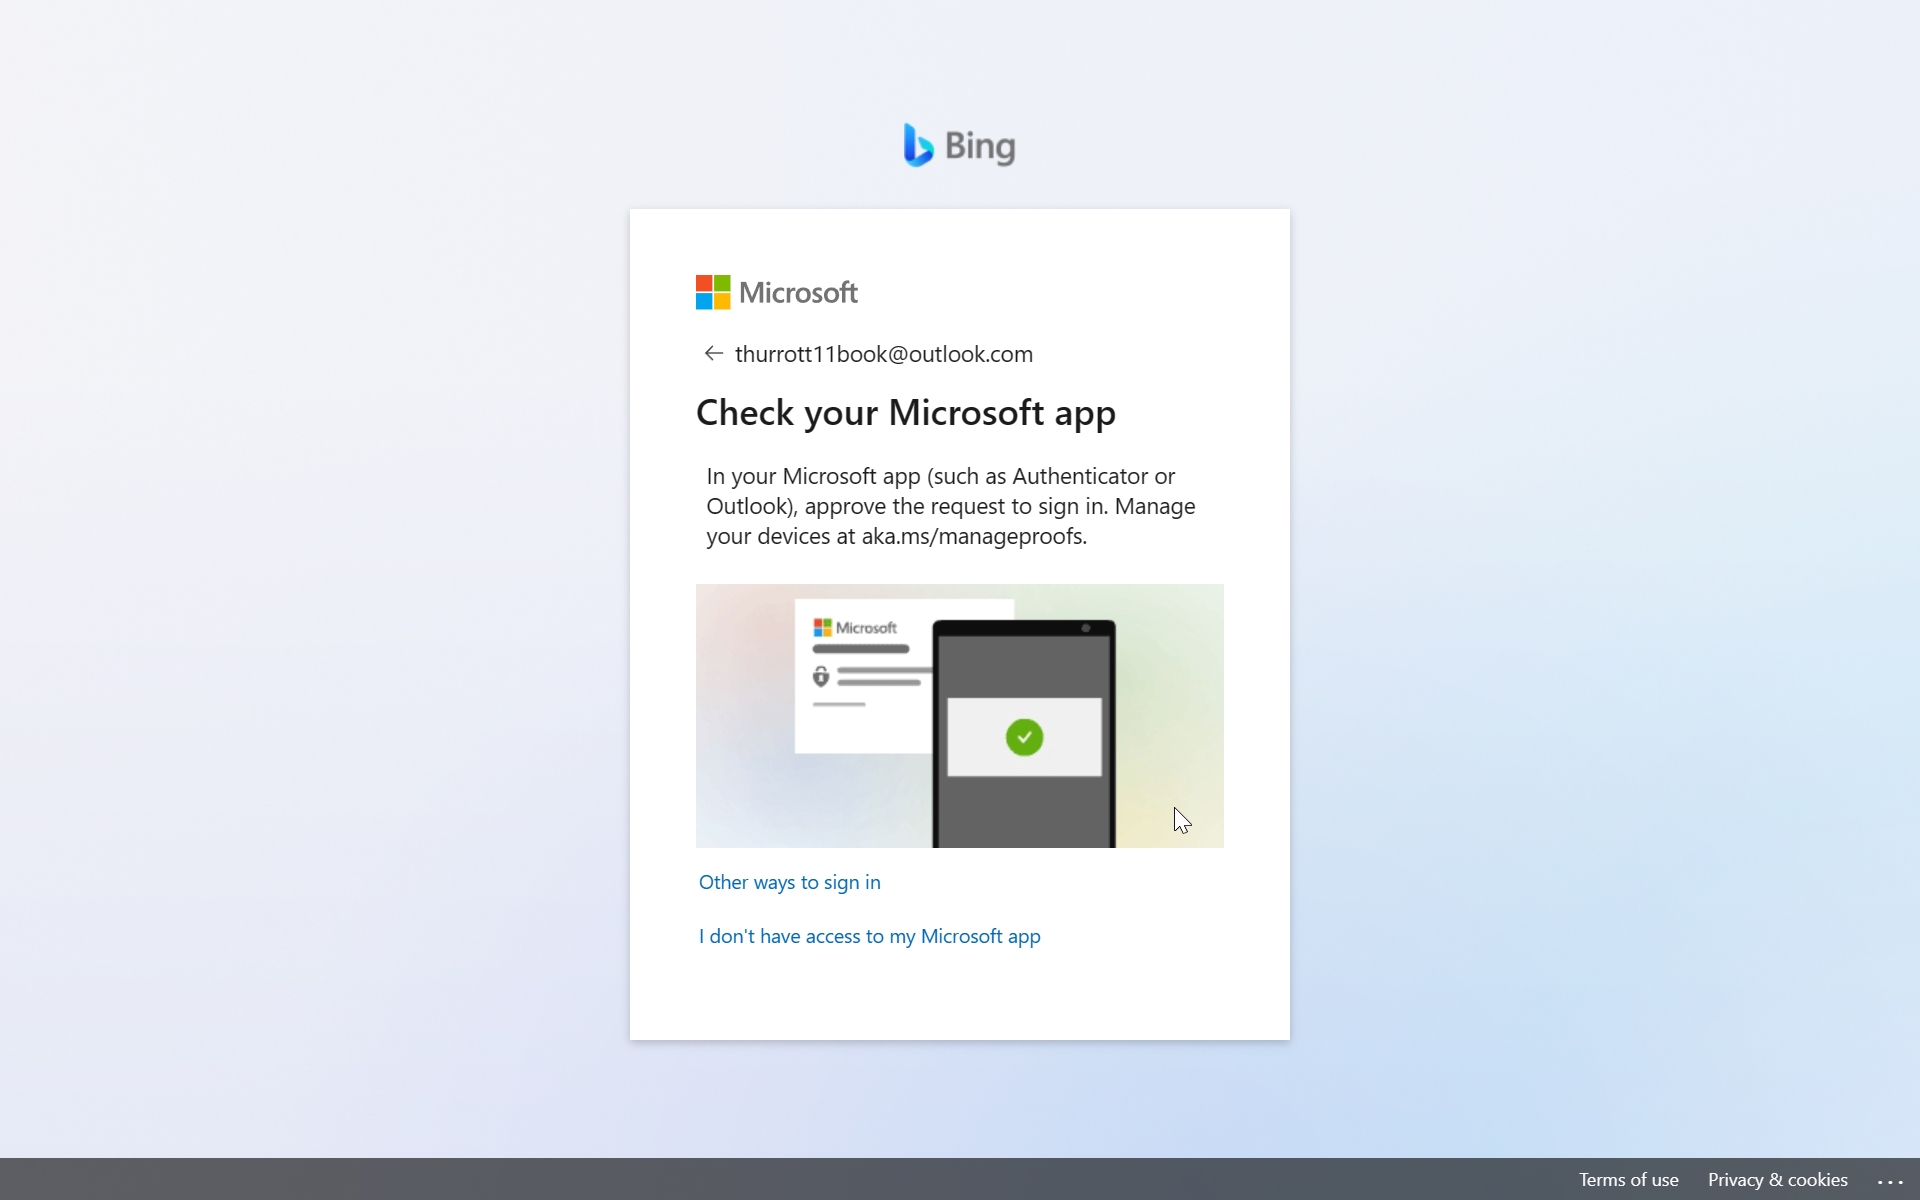
If you don’t see this or a similar display, click “Other ways to sign in” and then “Approve a request using my Microsoft app.”
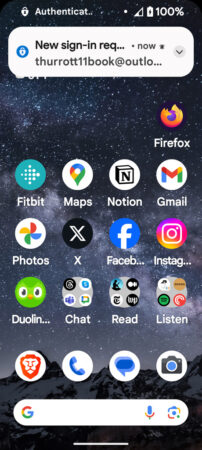
Meanwhile, your phone will display a Microsoft Authenticator app notification and, if configured that to do so, it will play a notification sound.
When you select this notification, the app will prompt you to securely authenticate using a PIN or biometric method and then note that there is a new sign-in request. If the PC-based notification displayed a number, this phone-based notification will display three numbers, one of which is the same number, so you can prove that the request came from you.
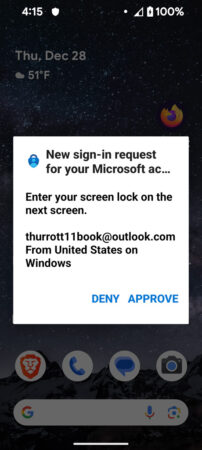
On the phone, tap the correct number if necessary. And either way, tap “Approve” to authenticate yourself and sign in to Bing.com on your PC, with no password required.
This process will become second nature as you use it more often. But for your Microsoft account to be truly secure, you must enable at least one more feature: Two-step verification. That’s next.
Enable two-step verification
It’s not enough to configure additional sign-in and verification methods for your Microsoft account because your insecure password is still available as one method: A hacker could still steal or guess that password and gain access to your account.
But that’s where two-step verification comes in: This additional layer of security works its magic by requiring you to take a secure additional step each time your need to sign-in or verify your Microsoft account credentials.
That sounds like it could be time consuming and complex, but it’s not: Two-step verification uses a device you already have with you at all times–which can be the PC you’re using or your smartphone and the authenticator app you just configured–to streamline this process dramatically. And because you never actually have to type the password associated with your account either way, it’s easy, quick, and secure.
To enable two-step verification, you have to first navigate to the Additional security options page on the Microsoft account website and scroll down to the section “Additional security.”

Then, click “Turn on” under “Two-step verification.” You will be prompted to send a verification request to your authenticator app because “you’re accessing sensitive info.” But there is also a “Sign in with Windows Hello or security key” link, so you have a choice: You can authenticate with your phone by clicking “Send notification.” Or you can authenticate using Windows Hello by using that link. Either way will work fine, and once you’ve authenticated yourself, the Microsoft account website on your PC will explain what it means to enable this feature for your account.
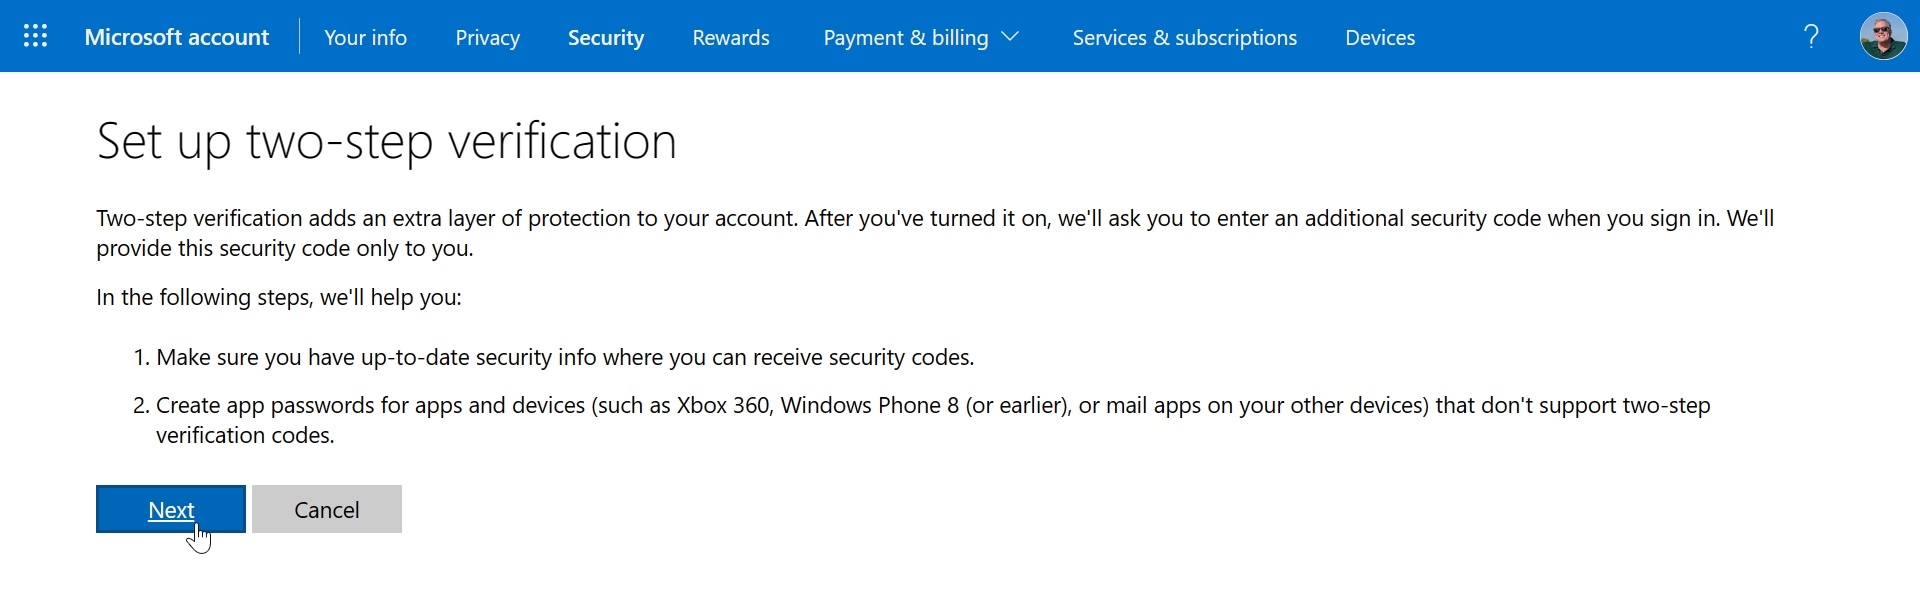
Click “Next.”
You’ve done it! Your Microsoft account is now secure, and signing in and verifying your identity is easier than ever too. This is true no matter how or where you sign-in to this account: When you sign-in for the first time on a Windows 11 PC, when you access Microsoft apps or online services, or when you add the account to a mobile device. When you’re using a Windows 11 PC, all you need is Windows Hello. And when you’re elsewhere, all you need is your email address and your smartphone with the Microsoft Authenticator app.
Review your account safety options
Before moving on, let’s make sure that you configured your Microsoft account to be as secure as possible. The quickest way to do that is to use a simple wizard on the Microsoft account website called Safety review.
To access this wizard, open the Microsoft account website and navigate to Privacy. Then, click “Get started” under “Make sure your safe and secure.”
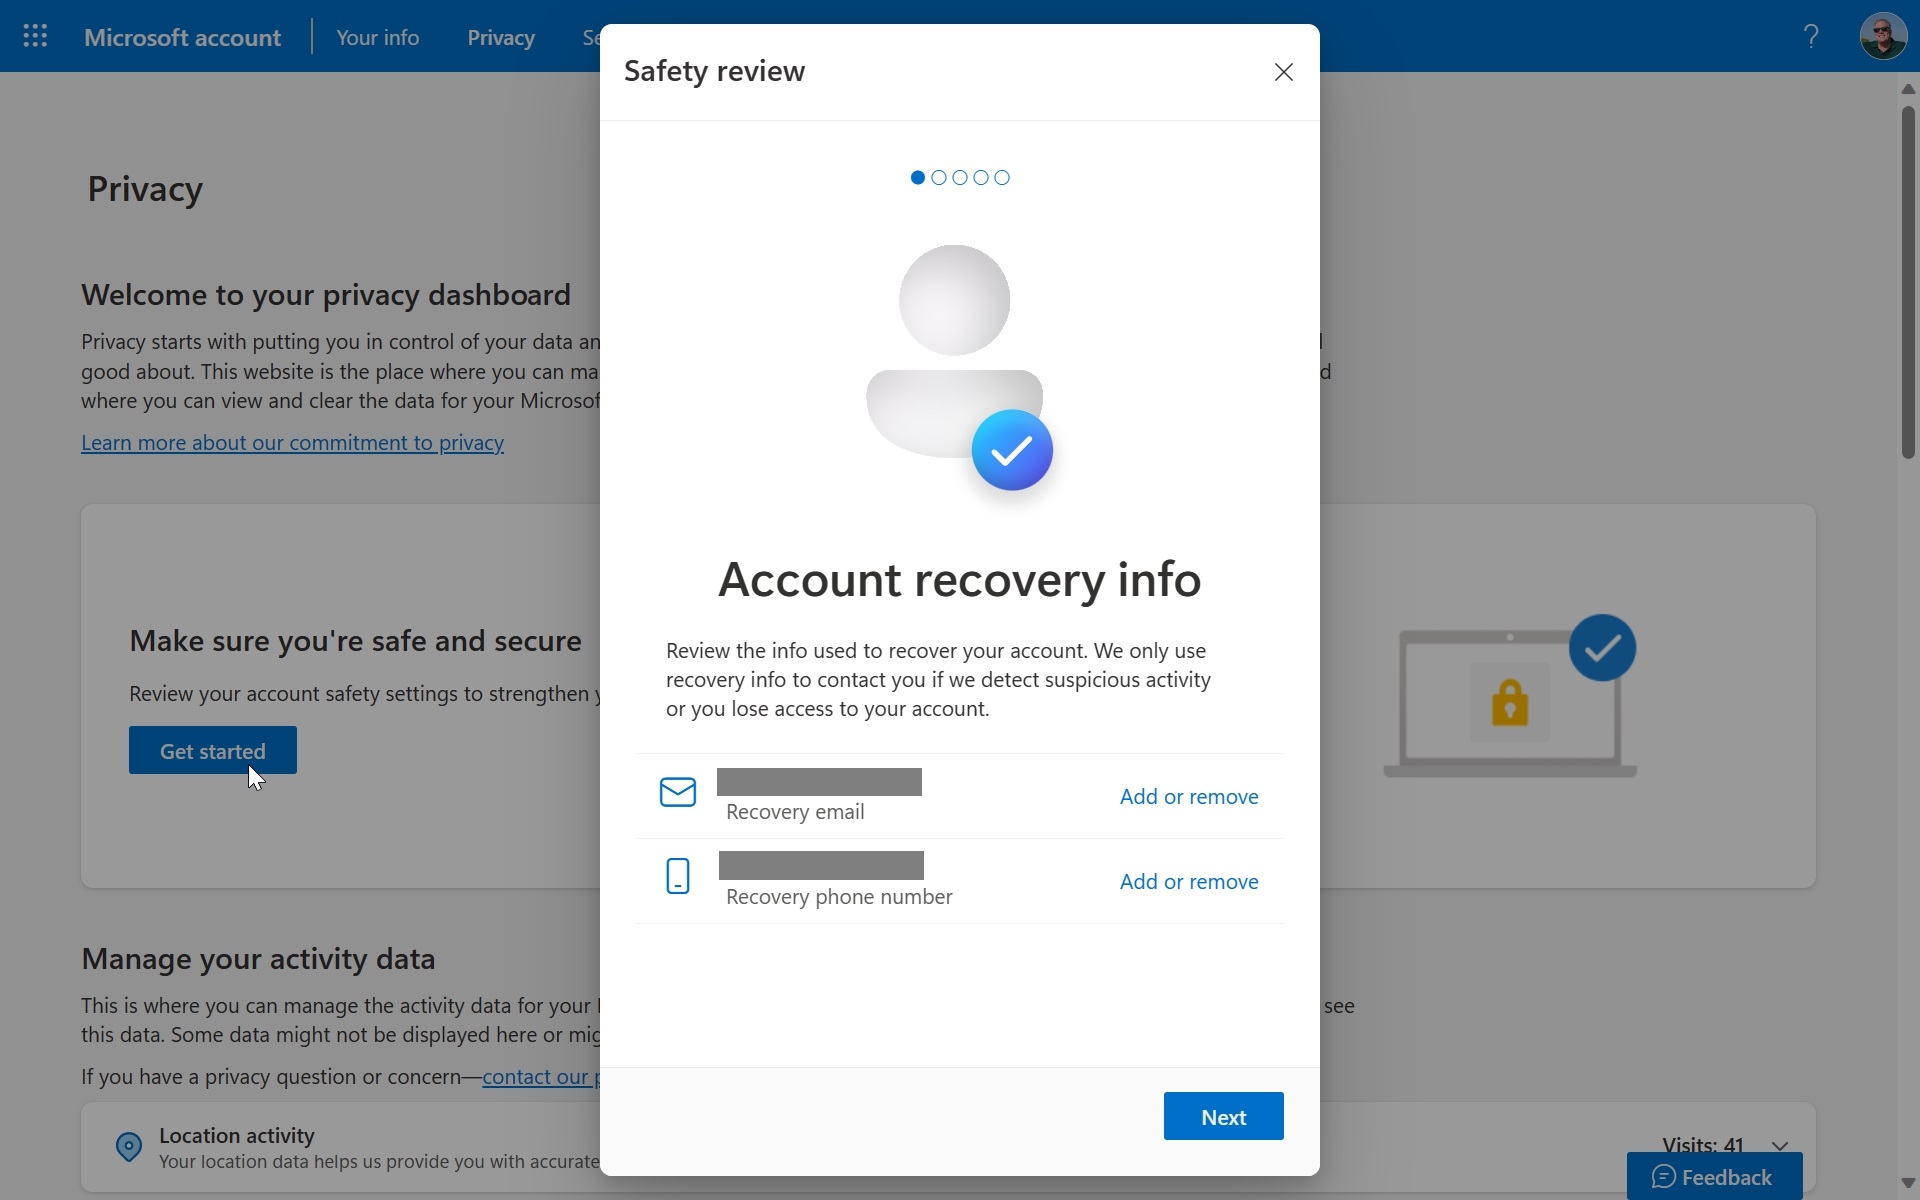
In this first step, review your account recovery information: You should have at least one email address and phone number configured for recovery purposes. (Or, two email addresses.) Click “Next” to continue if both are correctly configured.
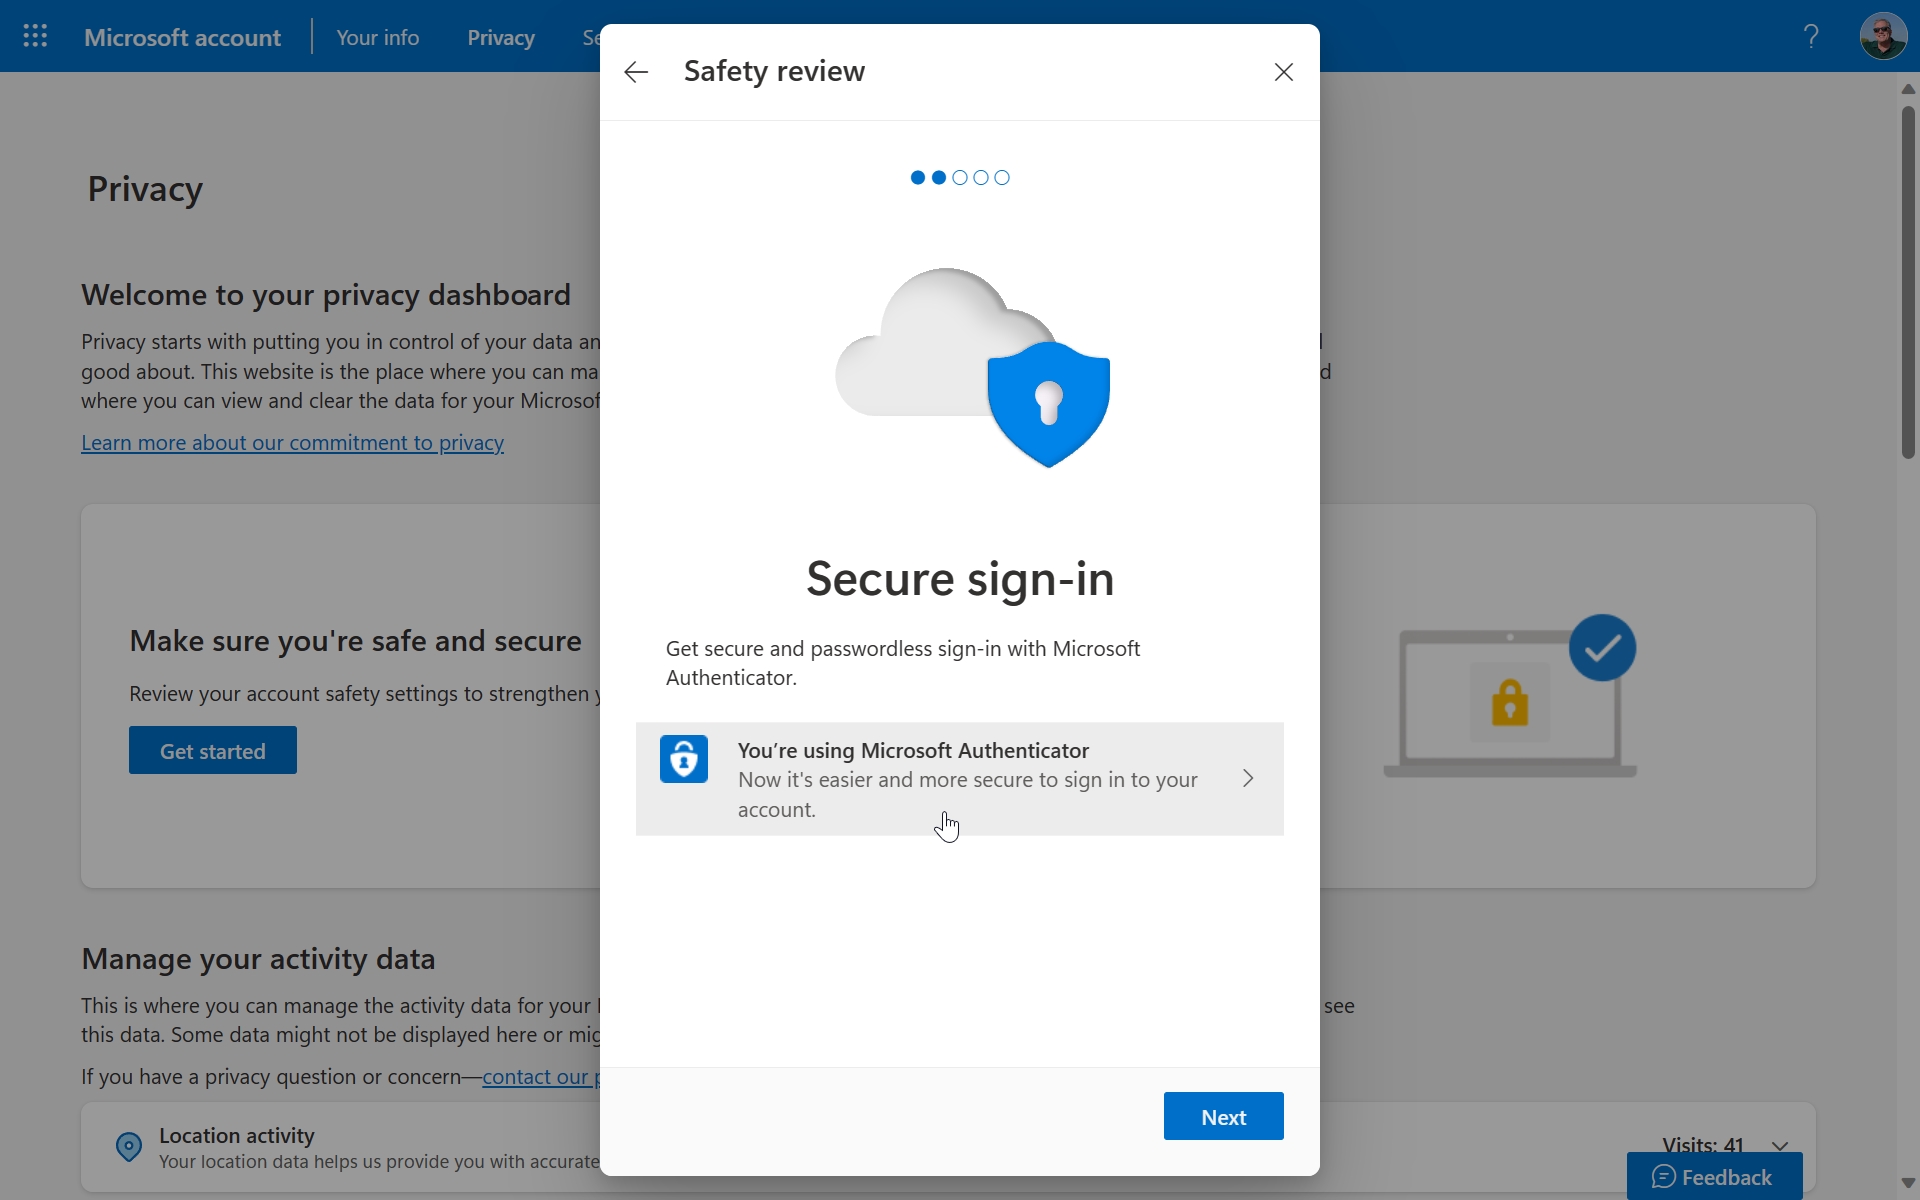
In the second step, you confirm that you can securely sign-in to your Microsoft account from anywhere using the Microsoft Authenticator mobile app and without needing to use a password. Click “Next” to continue.
The next three steps–Safe web browsing, More safety resources, and Microsoft 365 privacy settings–are unrelated to account security, so you can ignore or dive in as the mood strikes.
Understand the other security features offered by the Microsoft account website
While you’re securing your Microsoft account, you should take the time to familiarize yourself with the other security features you can access from this website. Most of these other features are reactive rather than proactive, as you typically need them only when something goes horribly wrong. But that’s a great reason to see what’s available there now: It’s important to know where to turn if you see suspicious activity and suspect that your account is compromised.
Review your sign-in activity. The See when and where you’ve used your account page lists recent sign-in attempts, successful or not, and other account activity in reverse chronological order, and you can expand each event to see more information, including the time and date, the location (with a small map), and more. Ideally, you will recognize all of these events. But if you see suspicious activities here, including unsuccessful sign-in attempts, especially from other locations including places far from your home, then you’re probably still fine because your account is secure. Plus, there’s nothing you can do about it anyway: Microsoft doesn’t even provide a way to report this activity.
If you just secured your account using the information in this chapter and notice some recent successful sign-in activities that you’re nervous about, you can use the “Immediately sign out from your Microsoft account everywhere” and “Reset Windows Hello on all of your PCs” options noted below to solve that problem.
Create, remove, and use app passwords. If you use an older device like an Xbox 360 or a third-party service that doesn’t support two-step verification for some reason, you don’t need to disable this important security feature from your account. Instead, you can create an app password for that one time use. To do so, navigate to the Additional security options page and locate the “App passwords” section.
Immediately sign out from your Microsoft account everywhere. In the unlikely event that someone else accessed your Microsoft account before you secured it as described in this chapter, you can remotely sign out of the account almost everywhere from the Microsoft account website. To do so, visit the Additional security options page and find the “Sign out everywhere” section. (Be sure to use the next option as well.)
Reset Windows Hello on all of your PCs. Tied to the previous option, you can also remotely reset all of the Windows Hello sign-ins that you’ve configured across all of your PCs. You will still be able to sign-in on your own PCs, of course, as you’ll simply be prompted to authenticate using Microsoft Authenticator or another method. And then you can re-enable Windows Hello as needed. This option is also located on the Additional security options page in the “Sign out everywhere” section.
Generate and use a recovery code. Like other online accounts, your Microsoft account provides a single complex recovery code that you can use if you somehow managed to lose all access to all of your sign-in and verification methods. If you didn’t save this code in a secure location or can’t find it, you can generate a new one on the Additional security options page. You’ll find it under “Recovery code.”
Optionally remove the password from your Microsoft account
Enabling two-step verification ensures that no one can access your account using just its email address and password: This feature bypasses the password at sign-in but requires you to have configured an additional sign-in or verification method, ideally the Microsoft Authenticator app on your phone because it will work from anywhere. So now you can sign in with something you know–your email address–and something you have, the smartphone with Microsoft Authenticator, which is protected with its own PIN or biometric protections.
This will be enough for most people. But you can also fully realize the passwordless dream and secure your Microsoft account even further by removing its password. You won’t notice any difference in day-to-day use since you’re already bypassing its password and using two-step verification. But going passwordless comes with two prerequisites.
First, you must have configured two account recovery methods–typically an alternate email address and a phone number, but perhaps two alternative email addresses that you control–in case you lose your phone or otherwise can’t access the Microsoft Authenticator app. If you followed along with the discussion earlier in this chapter and successfully completed the Microsoft account Safety review, you meet this requirement.
Second, you can no longer use older, out-of-date, and unsupported Microsoft products and services that predate two-step authentication and still require a password like it’s still the 20th century. This won’t be an issue for most people, but if you’re unsure, you can find a list of these offerings, which include the Xbox 360 video game console, Office 2010 and earlier versions, Windows 8.1 and earlier versions, and more on the Microsoft Support website.
This isn’t a one-way, dead-end street. If you later discover that removing your password was a mistake for some reason, you can simply add a password to the account again later without issue.
When and if you’re ready to take this step, open the Microsoft account website and navigate to the Additional security options page. Then, scroll down to the “Additional security” section, where you will find a “Passwordless account” option. Click “Turn on” to display a short informational dialog.
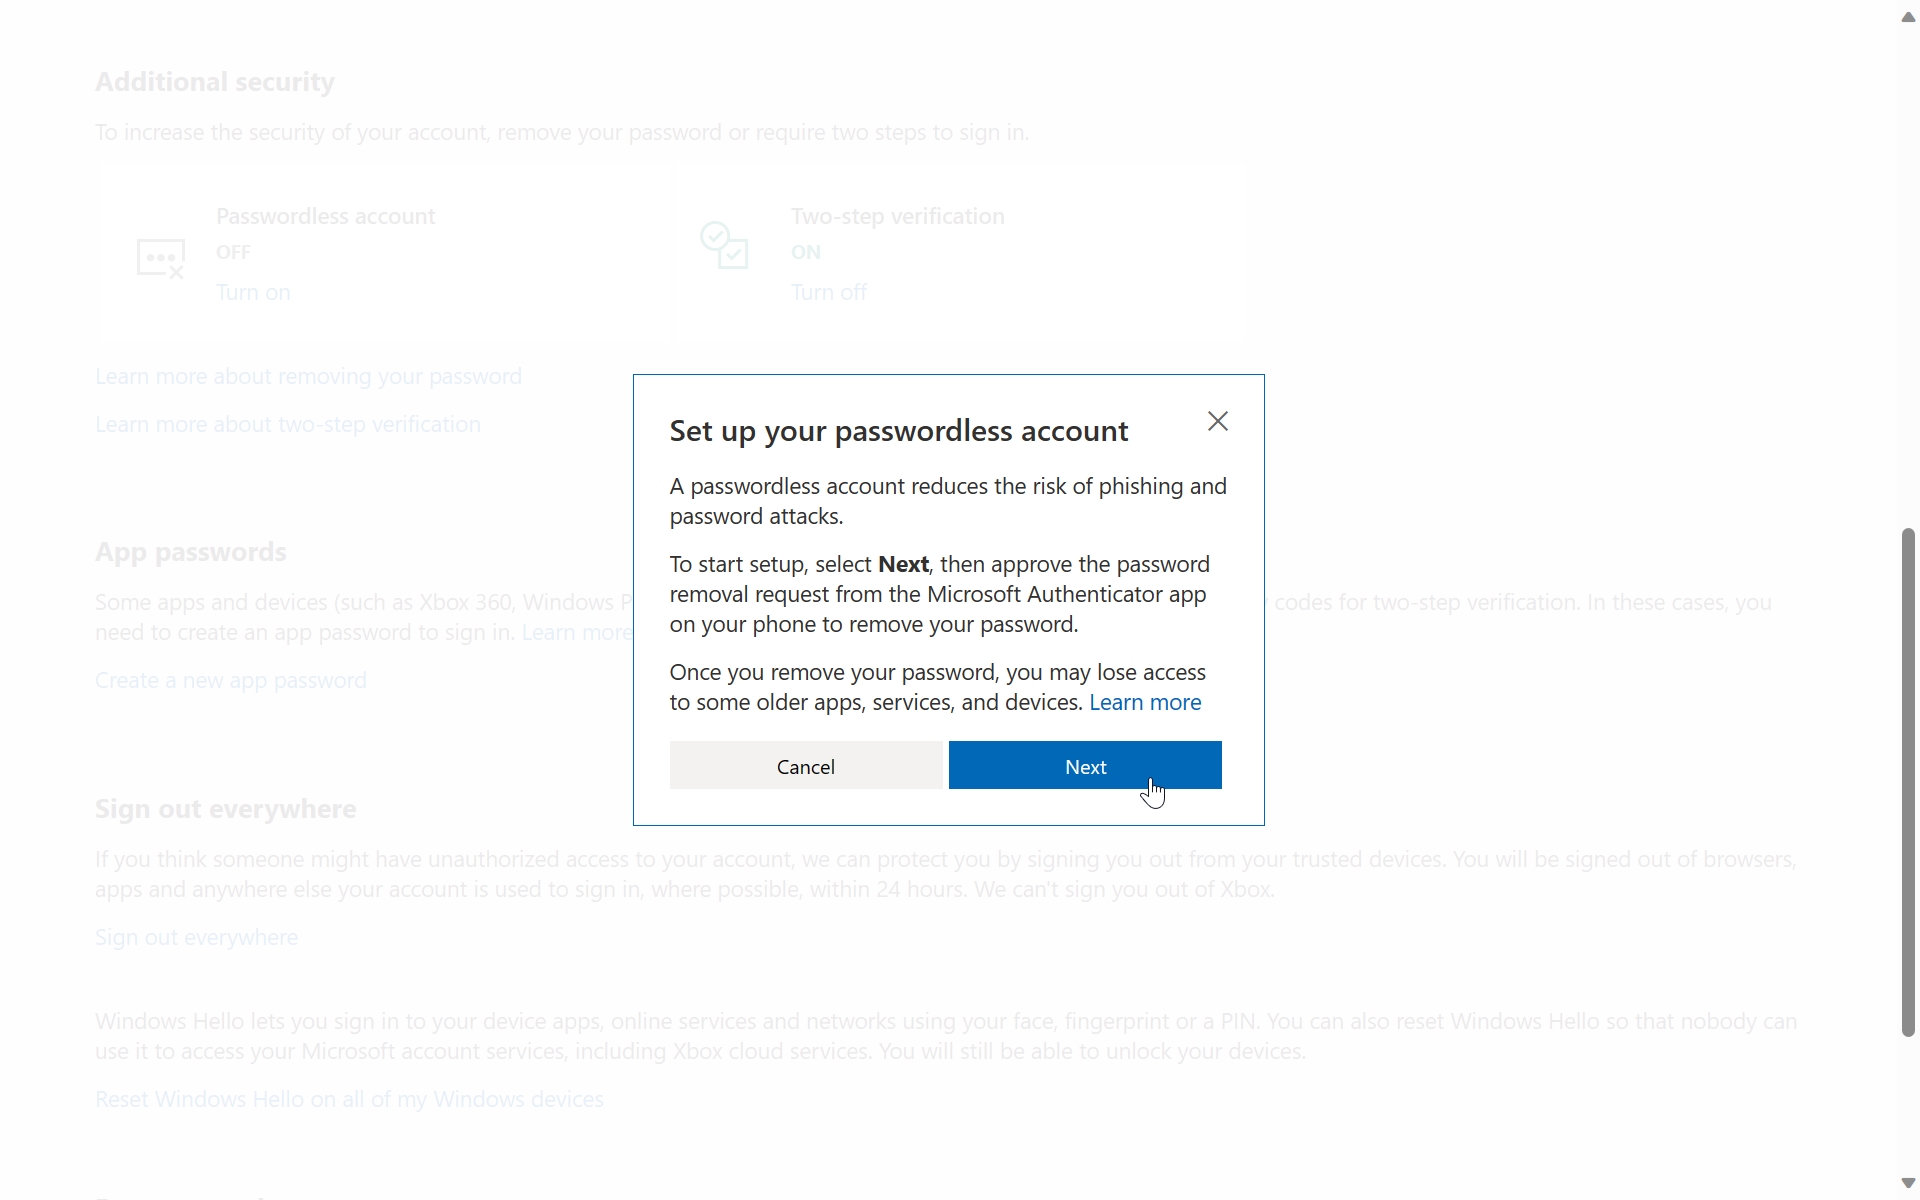
Click “Next.” You will be prompted to approve the password removal request using the Microsoft Authenticator app on your phone as always. When you do so, your Microsoft account password is removed.

Gain unlimited access to Premium articles.
With technology shaping our everyday lives, how could we not dig deeper?
Thurrott Premium delivers an honest and thorough perspective about the technologies we use and rely on everyday. Discover deeper content as a Premium member.