Search
- Paul Thurrott
- Oct 03, 2022
-
2
As with its predecessors, Windows 11 offers an integrated Search feature that’s accessible from the Taskbar or the Start menu. Search helps you find apps and documents on your PC, as you might expect, but it also searches the web and can find other types of files on your PC. There is also a search feature built into File Explorer so that you can easily find documents and other files.
Get to know Search
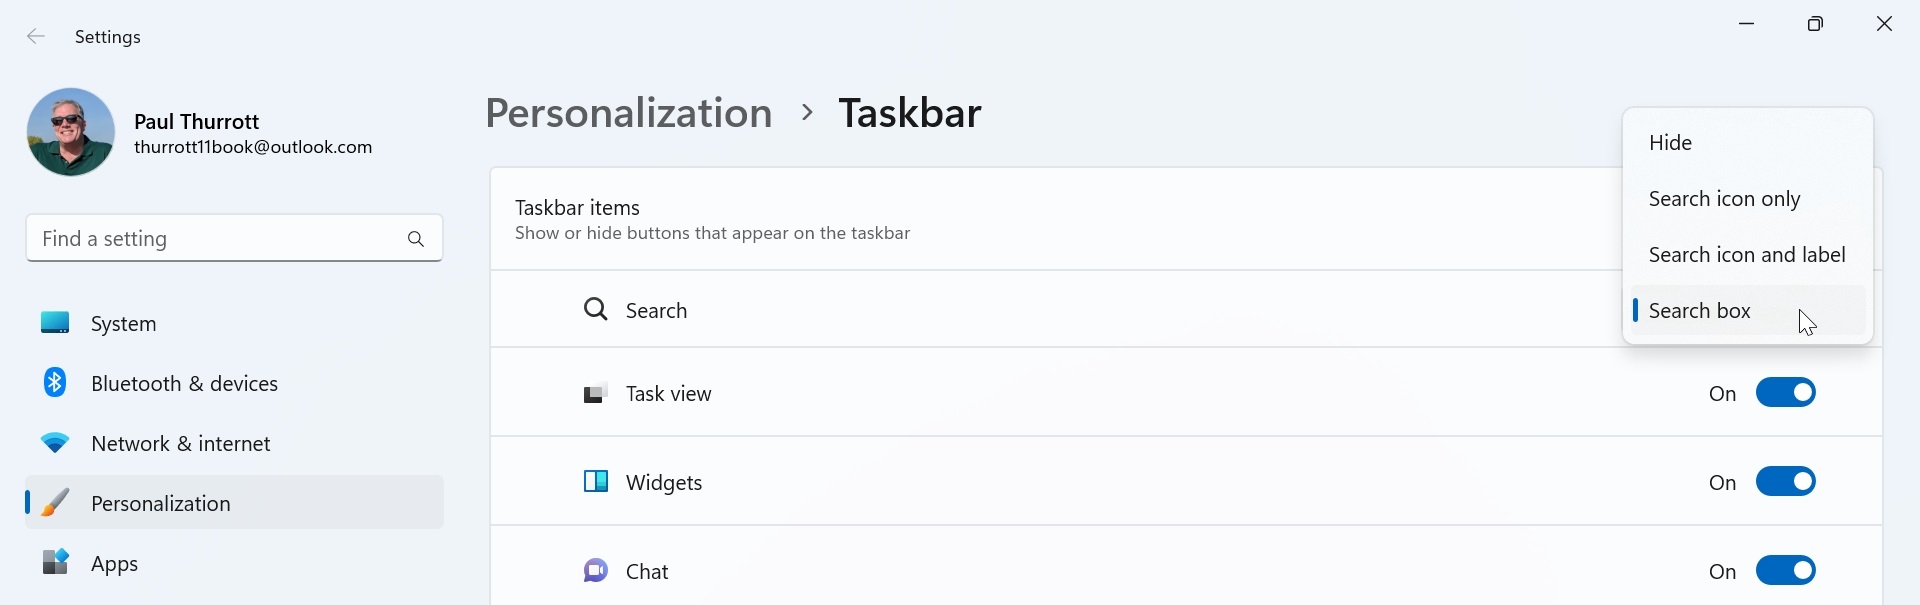
By default, Windows 11 displays a prominent Search box on the Taskbar.

But this can be configured to display as a more normally sized Search icon or a Search icon with a label. You can also hide the Search icon/box altogether if you’d like.

To configure how Search appears in the Taskbar, right-click an empty area of the Taskbar and choose “Taskbar settings” from the context menu that appears. In the Settings window that appears, select the option you prefer.
In this book, we typically display Search in the Taskbar as an icon because it takes up the least space and looks the most natural.
To initiate Search, select the Search box/icon in the Taskbar.
Microsoft really wants you to use Search because its built-in web integration requires you to use Microsoft Edge (no matter which web browser you chose as the default), Bing, and MSN, and you thus be exposed to Microsoft’s web advertising services.
Here are a few other ways to access Search:
-
Open Start and select the Search field at the top of the window
-
Tap WINKEY and just start typing your search query.
-
Type WINKEY + S (or, oddly, WINKEY + Q).

Search provides the following interfaces:
Search bar. This control is auto-selected when Search opens so that you can simply start typing to initiate a new search query.
Recent. On the left, you will see a columnar list of your most recently-accessed apps.
You can remove any item from the Recent list. Just mouse-over it and select the small “Remove” (“x”) button that appears to its right.
Search highlights. The largest area of Search is taken up by a new feature called Search highlights that exists solely to distract the user into clicking on one of its links so you can—wait for it—launch Microsoft Edge (even if you chose a different default web browser) and access Microsoft websites like Bing or MSN that are monetized using Microsoft’s advertising services.
Search highlights is a problem, but you can at least disable it. We explain how later in this chapter.
As you begin typing—remember, you came here to find something specific—Search switches to a query results view, which provides a column on the left with search results segregated by types—like apps, settings, the web, and more–and a right column that displays details about whatever item is selected on the left.
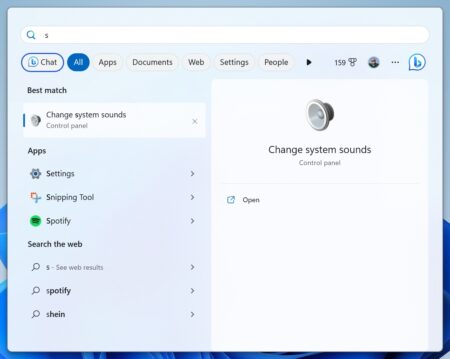
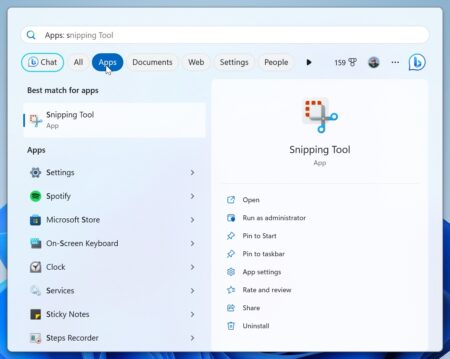
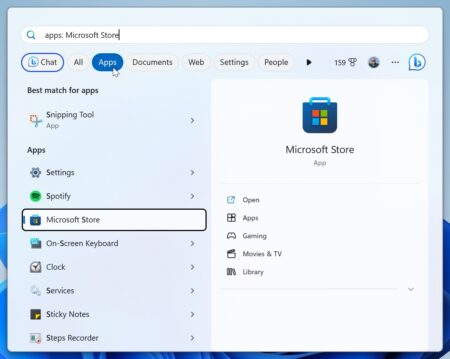
There is also a Bing chatbot icon and a set of filters on the top so that you can apply the search phrase you’re typing to a conversation with the Bing chatbot on the web or, more likely, display results in the Search pane for only a certain type. By default, the view is filtered to “All,” but you can select Apps, Documents, Web, Email, Folders, Music, People, Photos, Settings, or Video to search for a specific type of item. For example, if you are searching for an app and don’t see it immediately, choose the Apps filter.
You can use the arrow keys on your PC’s keyboard to navigate through the results list. As you do, the right column will change to show you more information about whichever item is selected.
To open a selected item, type ENTER or just click it with the mouse.
Search is a great way to find apps you don’t use all that often and settings of any kind. (Though you can also launch the Settings app and search from there.) It’s also a great way to find files stored on the PC or in your OneDrive.
But we don’t recommend using Search to search the web, because doing so forces you to use Microsoft’s web browser and its lackluster Bing search service. Instead, use the web browser and Internet search service you prefer and search the web using that browser.
Search for files with File Explorer
In addition to Search, Windows 11 lets you search for files using File Explorer. We usually start with Search, but File Explorer-based search might be the more obvious choice for those who often find themselves spelunking around in the file system or prefer working in File Explorer.
To search for files this way, open File Explorer (WINKEY + E) and, optionally, navigate to a specific location in the file system where you believe what you’re searching for might be.
This isn’t strictly necessary, however, as you can search all of your storage from the File Explorer home page.
Then, select the Search box in the upper right of the File Explorer window.
You can get there more quickly by typing CTRL + F.
As you type, File Explorer will begin searching through your storage. It will display its progress inline in its Address bar, and results will be displayed in the main view area.
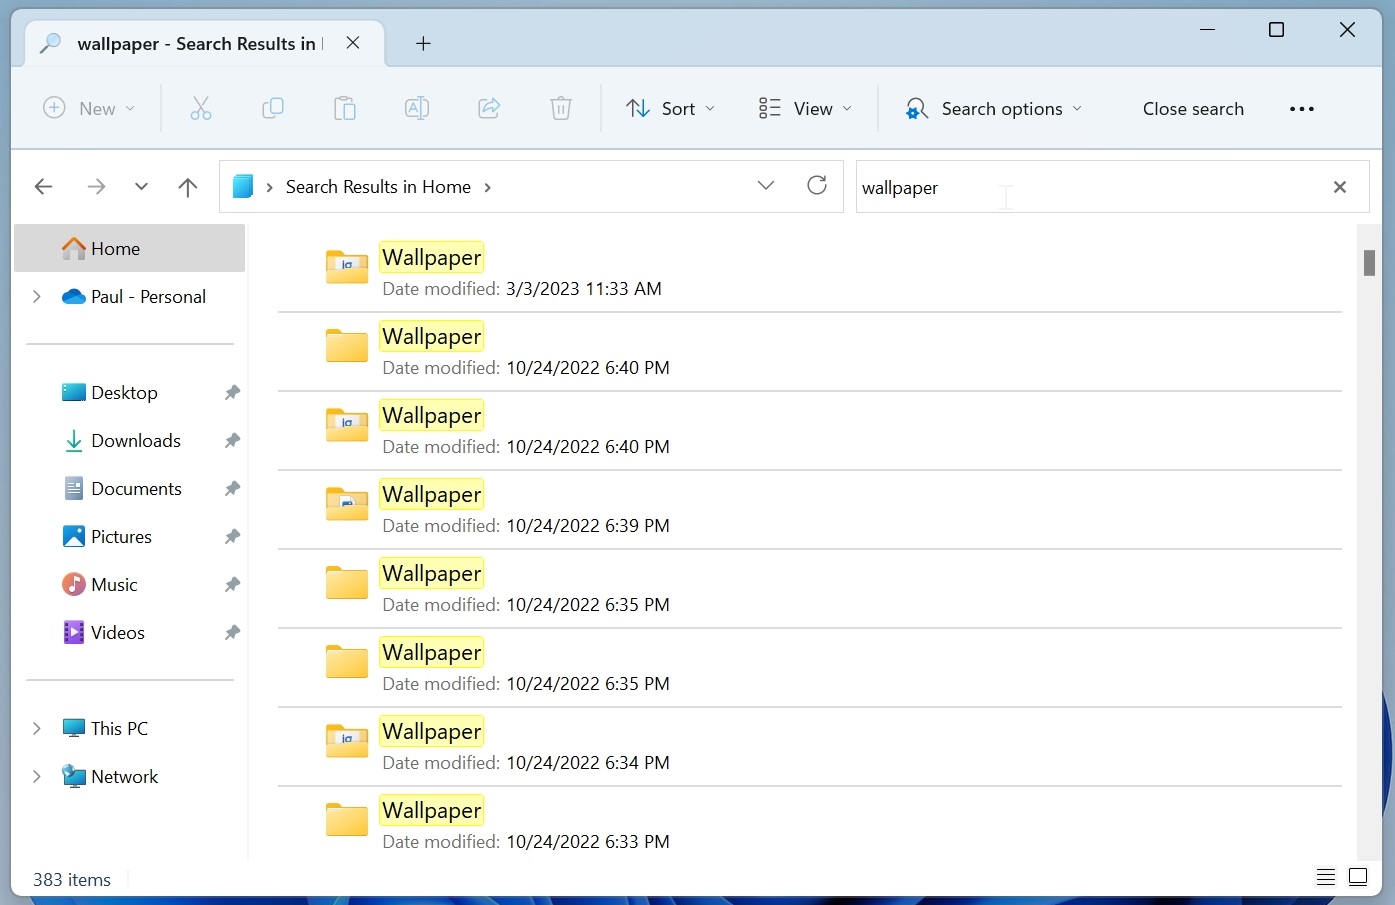
If you select a folder in either results view, File Explorer will navigate to that folder and display it normally. You can return to the search results view by navigating Back. (Or, type ALT + LEFT ARROW.)
If you select a file in either results view, it will open. For example, a text file will open in Notepad by default.
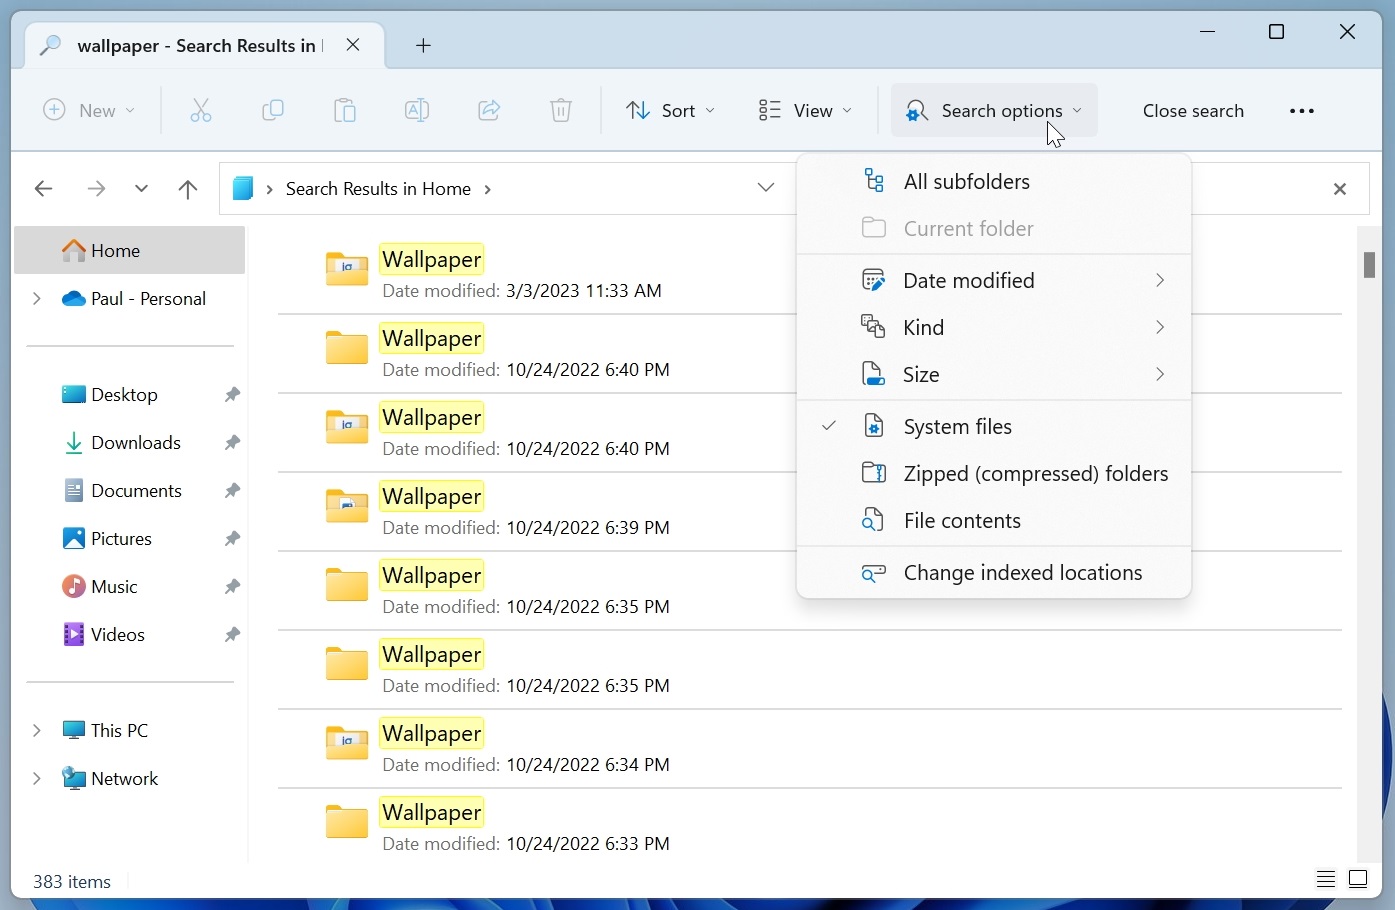
Be sure to check out the advanced features provided by the Search options command bar button: here, you can filter the search results using a wide range of options.
Configure Search
Search is configured via two different pages in the Settings app. Fortunately, you can find a link to each in Search: just open Search, choose “Options” (“…”), and then “Search settings” or “Indexing options.”
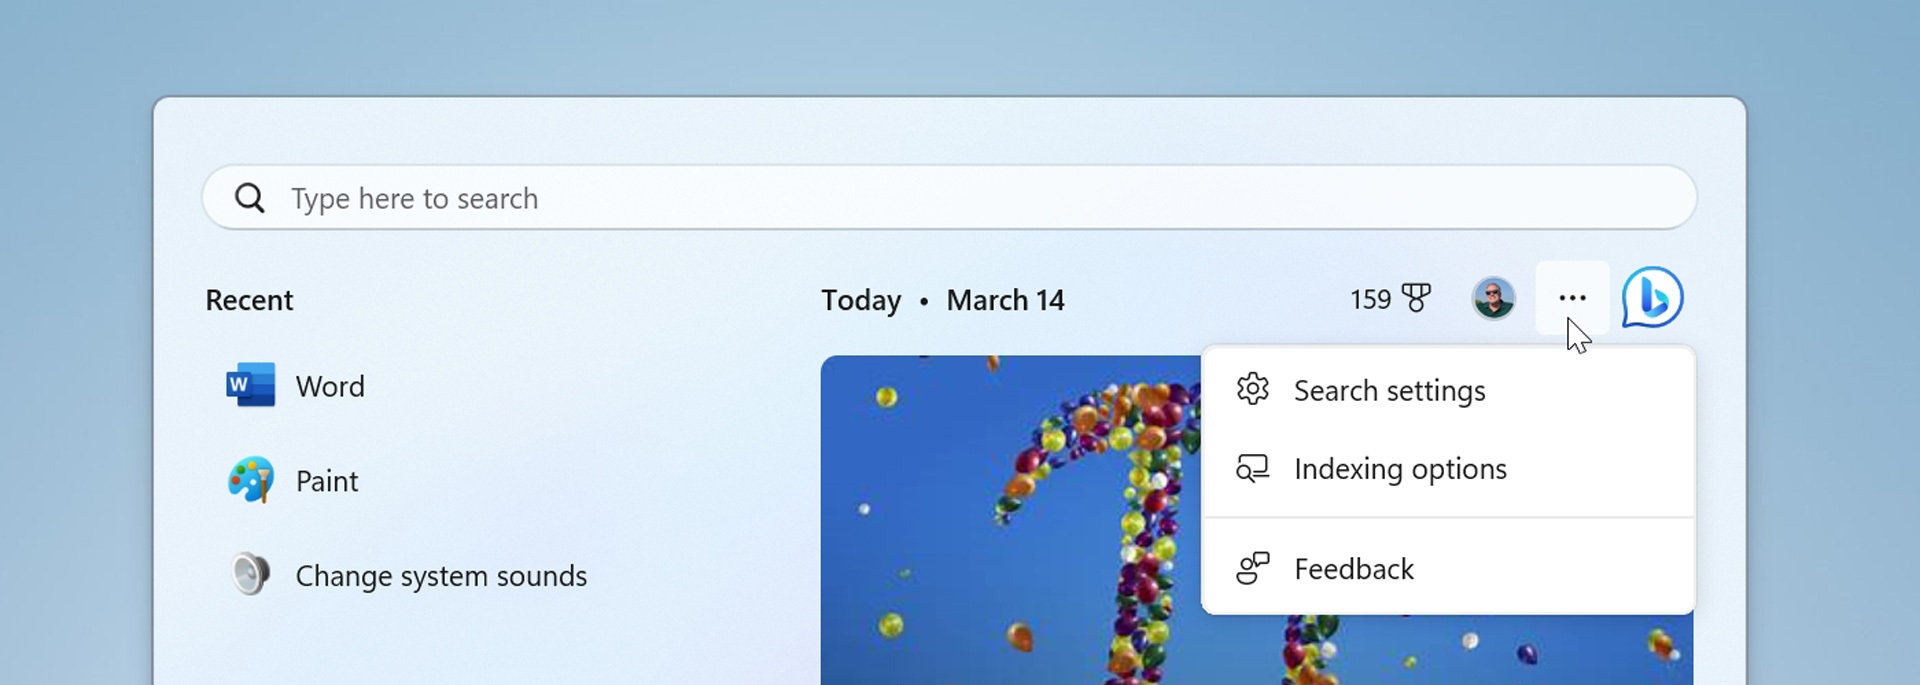
If you choose “Search settings,” Settings will open and navigate to Privacy & security > Search permissions. This page has settings related to Search’s web search functionality, history, and Search highlights.
If you choose “Indexing options,” Settings will open and navigate to Privacy & security > Searching Windows. This page has settings related to local file search and how the indexing functionality in Windows works.
For the most part, we don’t recommend changing the default settings. But there is one major exception…
Disable Search highlights
As noted previously, Search highlights is designed solely to force you to use Microsoft products and services. Worse, it’s a distraction: you open Search to find something specific, not to be distracted by information that is irrelevant to that search. So you should disable this feature.
To do so, open Search settings (or open Settings and navigate to Privacy & security > Search permissions). Then, scroll down until you see the More settings section. Change the setting “See content suggestions in the search box and in search home” under “Search highlights” to off.
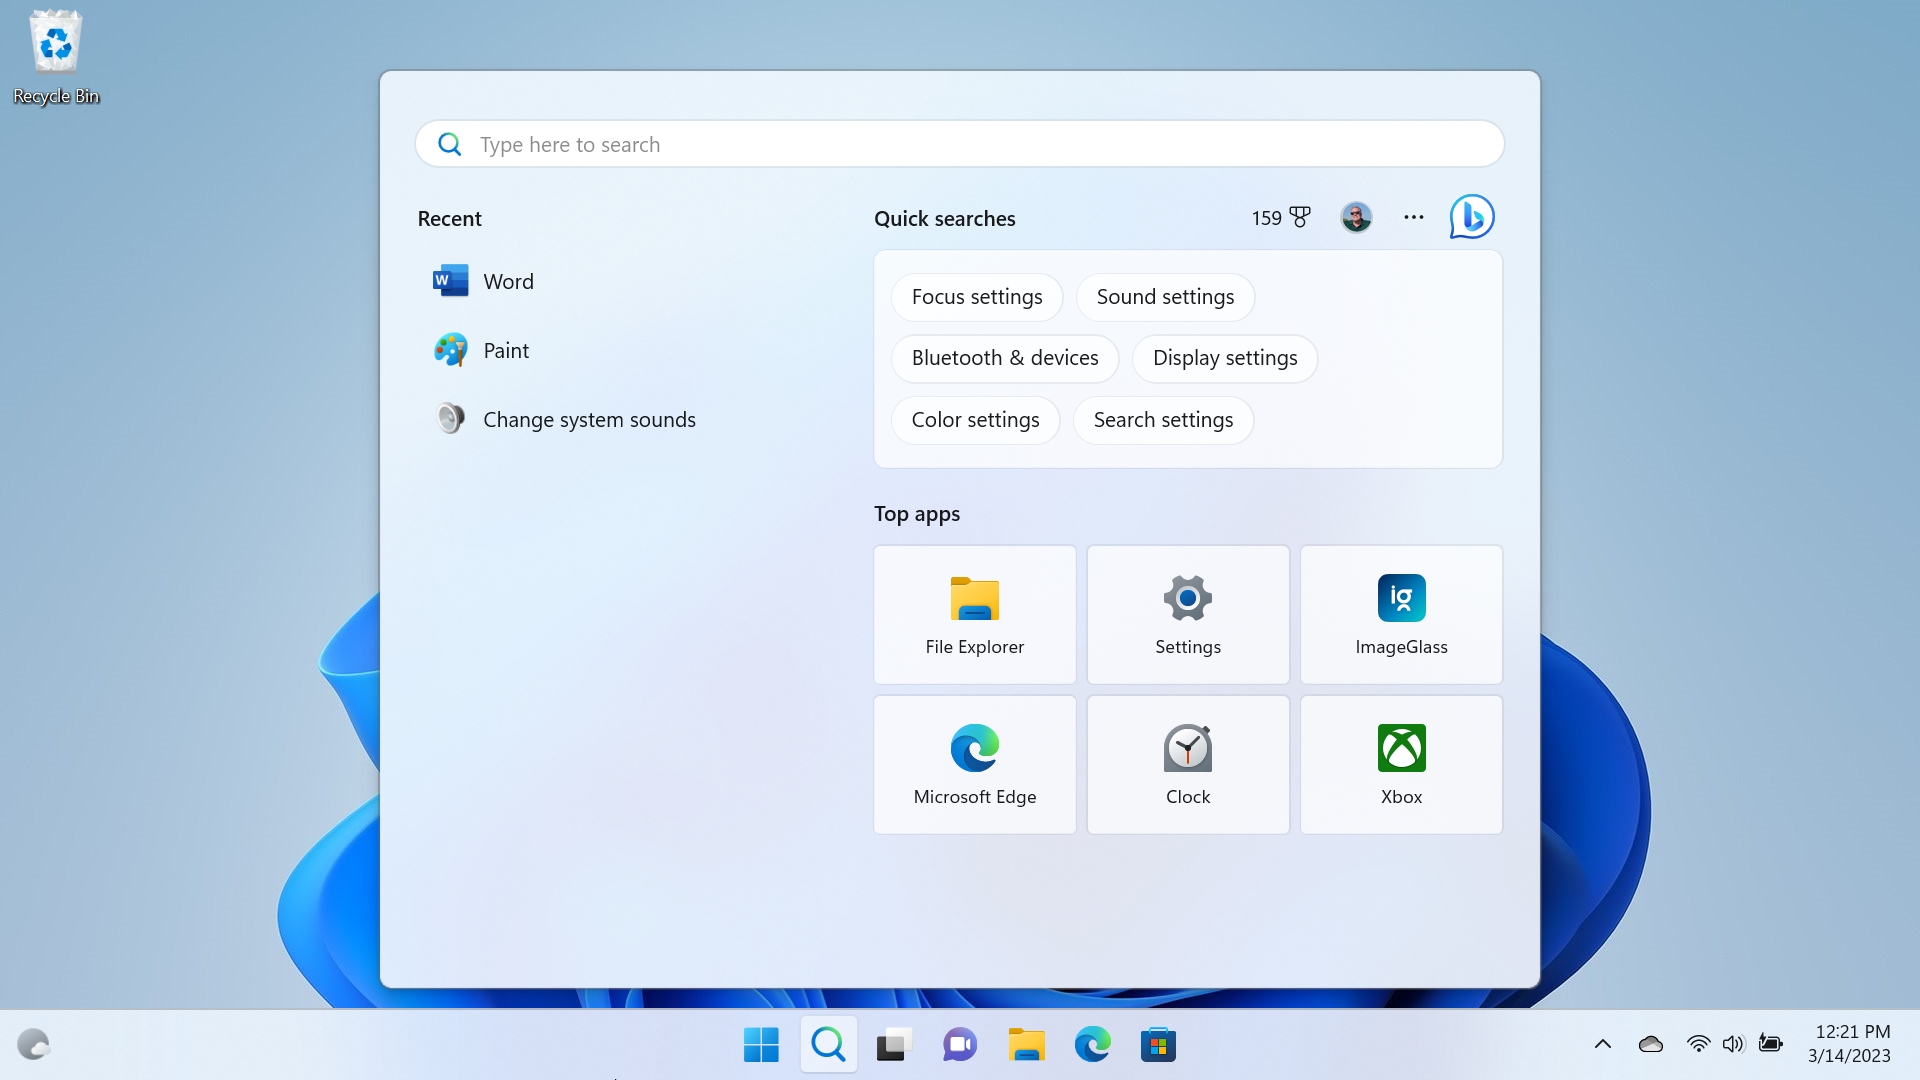
Now, when you open Search, you won’t be distracted by Search highlights. Instead, Search will display useful lists of quick searches and top apps.

Gain unlimited access to Premium articles.
With technology shaping our everyday lives, how could we not dig deeper?
Thurrott Premium delivers an honest and thorough perspective about the technologies we use and rely on everyday. Discover deeper content as a Premium member.