Windows Hello, Presence Sensing, and Dynamic Lock (23H2)
- Paul Thurrott
- Nov 26, 2023
-
1
Windows 11 version 23H2 includes three features, Windows Hello, Presence Sensing, and Dynamic lock, that work together to make it easier to sign into Windows 11 and then automatically lock the PC when you’re done using it. But because each requires unique hardware components, your PC may only offer some of these features.
You will typically only find all three features on premium and business-class PCs.
Windows Hello
Windows Hello is a set of technologies in Windows 11 that seemingly achieves the impossible by making it both easier and more secure to sign into your user account. It does so using a combination of two-step authentication and a biometric authentication type–facial or fingerprint recognition–or PIN.
Windows Hello works with online accounts–Microsoft accounts and work or school accounts–and local accounts, which are sometimes called offline accounts.
A> That said, Windows Hello is more of a convenience than an added measure of security for local accounts because that account type can not take advantage of the two-step authentication protections provided by online accounts.
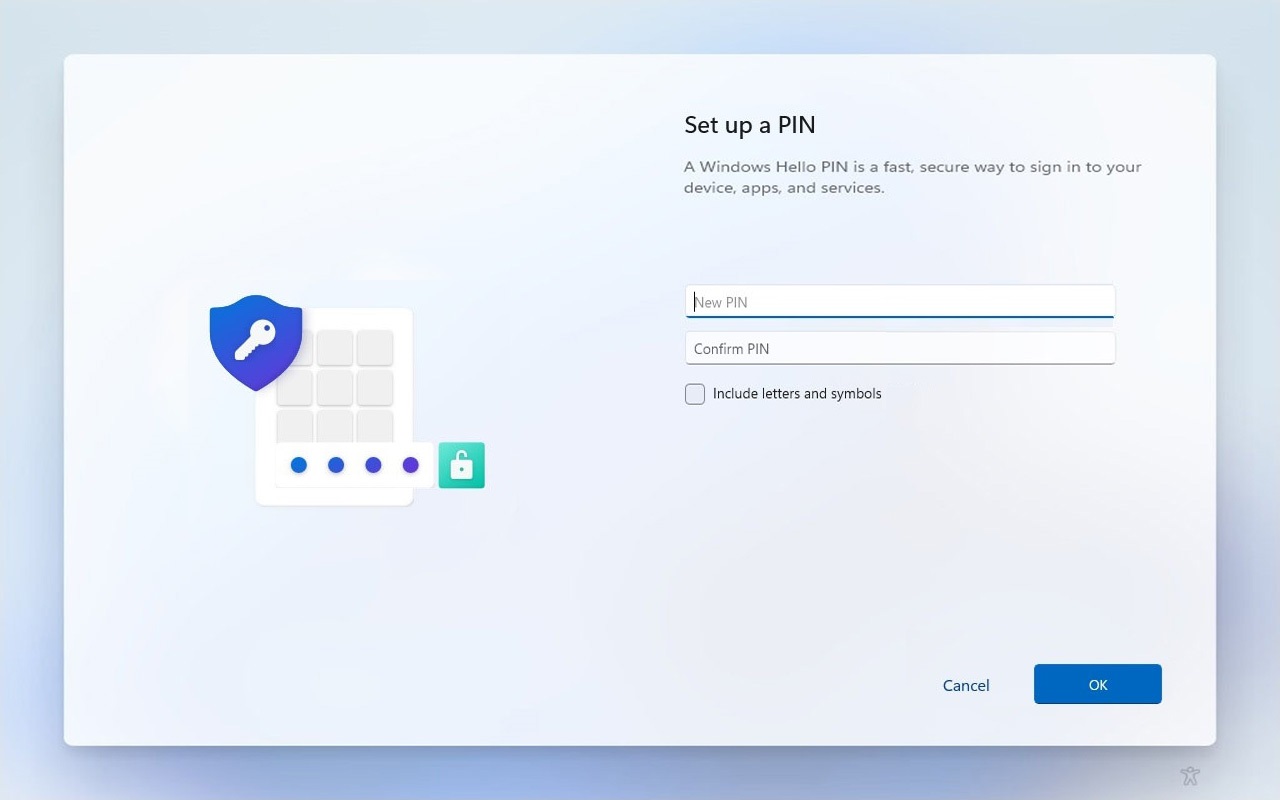
When you set up Windows 11 on a new or recently reset PC and sign in with a Microsoft account, work or school account, or local account with a password, Windows Setup will prompt you to create a PIN, which is the most basic form of Windows Hello and is supported on all PCs regardless of hardware configuration. This is a requirement: Windows Setup will not continue until you do so.
If your PC supports Windows Hello facial fingerprint recognition, you will likewise be given the option of configuring that during Windows Setup as well. But you can skip by that step if you’d like and configure it later.
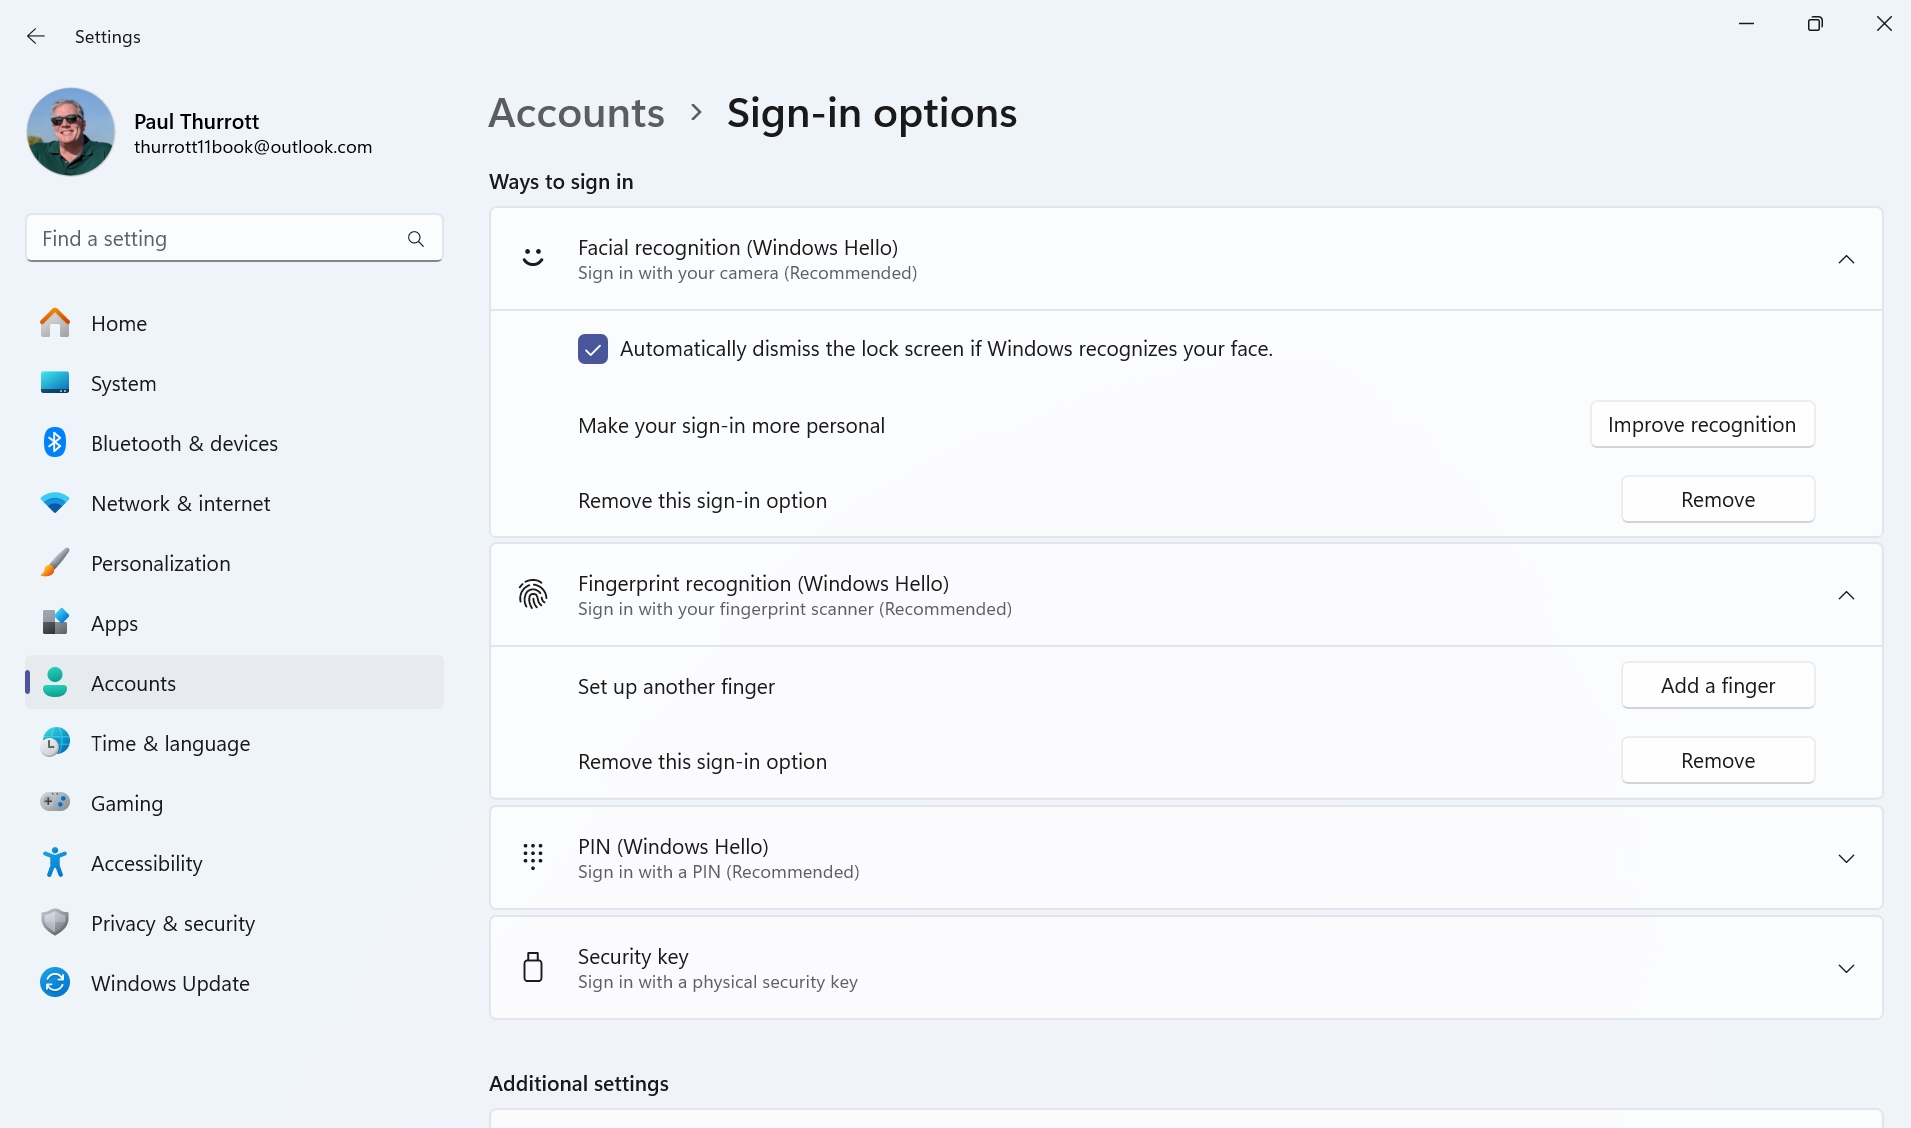
Once you’re using Windows 11, you can set up and configure Windows Hello in the Settings app. Navigate to Accounts > Sign-in options to see which Windows Hello features are available on your PC.
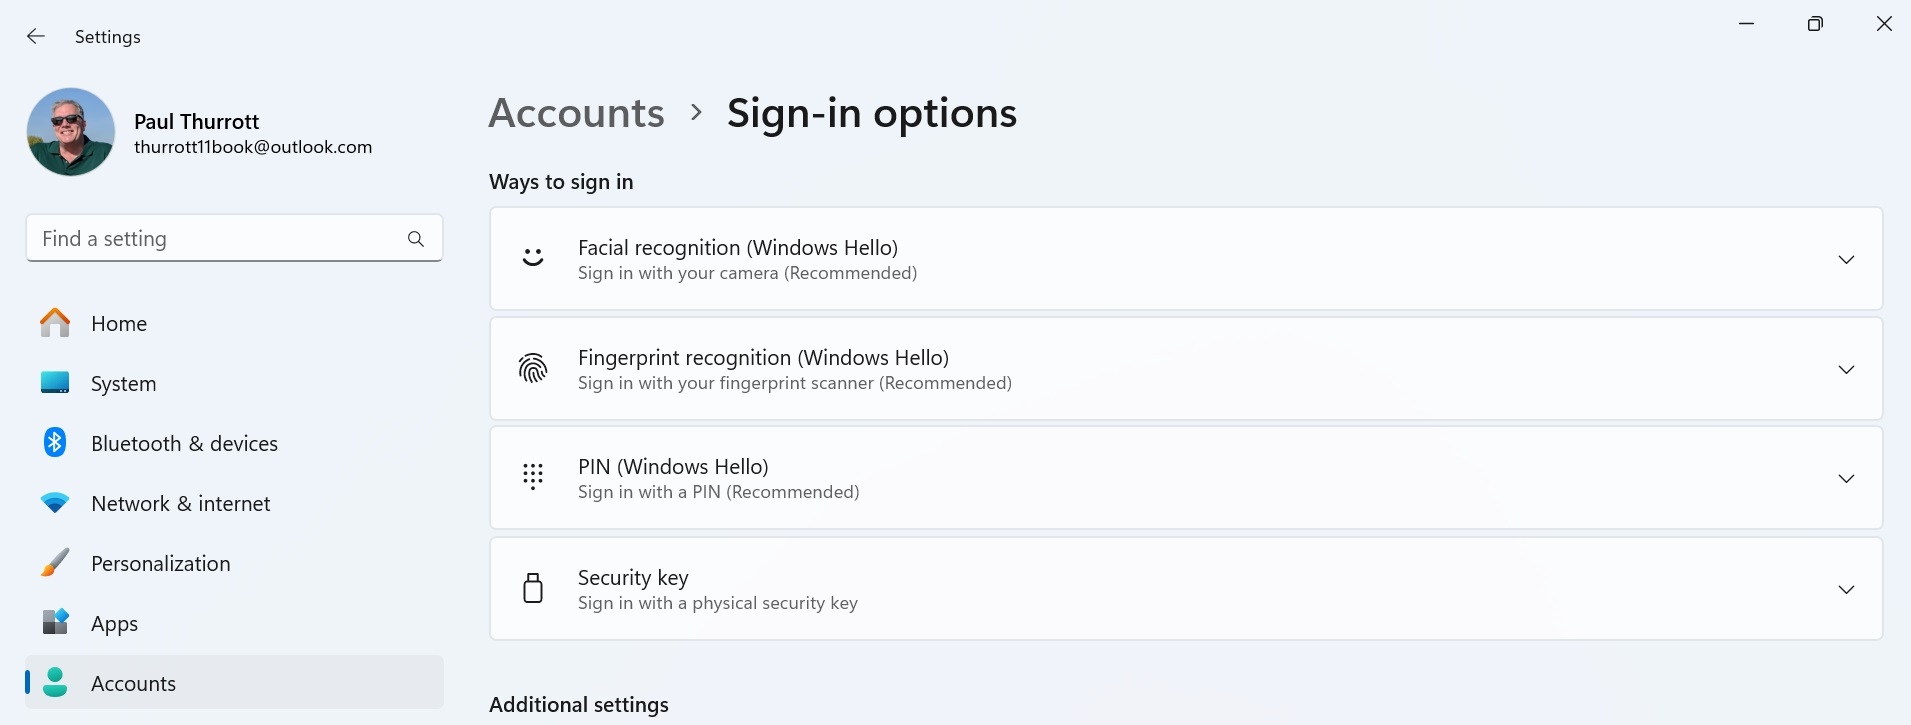
You will see four options under “Ways to sign in,” though it’s possible that only some of them will be available on your PC since three of the four require specific hardware components. They are:
Facial recognition (Windows Hello). If your PC includes a webcam with near-infrared (IR) capabilities, you can enroll an IR representation of your face with Windows Hello and automatically sign into Windows when you sit in front of your PC and wake it up. This is the fastest and most convenient form of Windows Hello, but some may prefer the more explicit sign-in provided by Windows Hello fingerprint recognition or PIN.
Fingerprint recognition (Windows Hello). If your PC is equipped with a compatible fingerprint reader, you can use that to sign in to Windows 11 as well. This method provides the same level of biometric security as Windows Hello facial recognition, but it works a little less automatically since you need to find and touch the sensor.
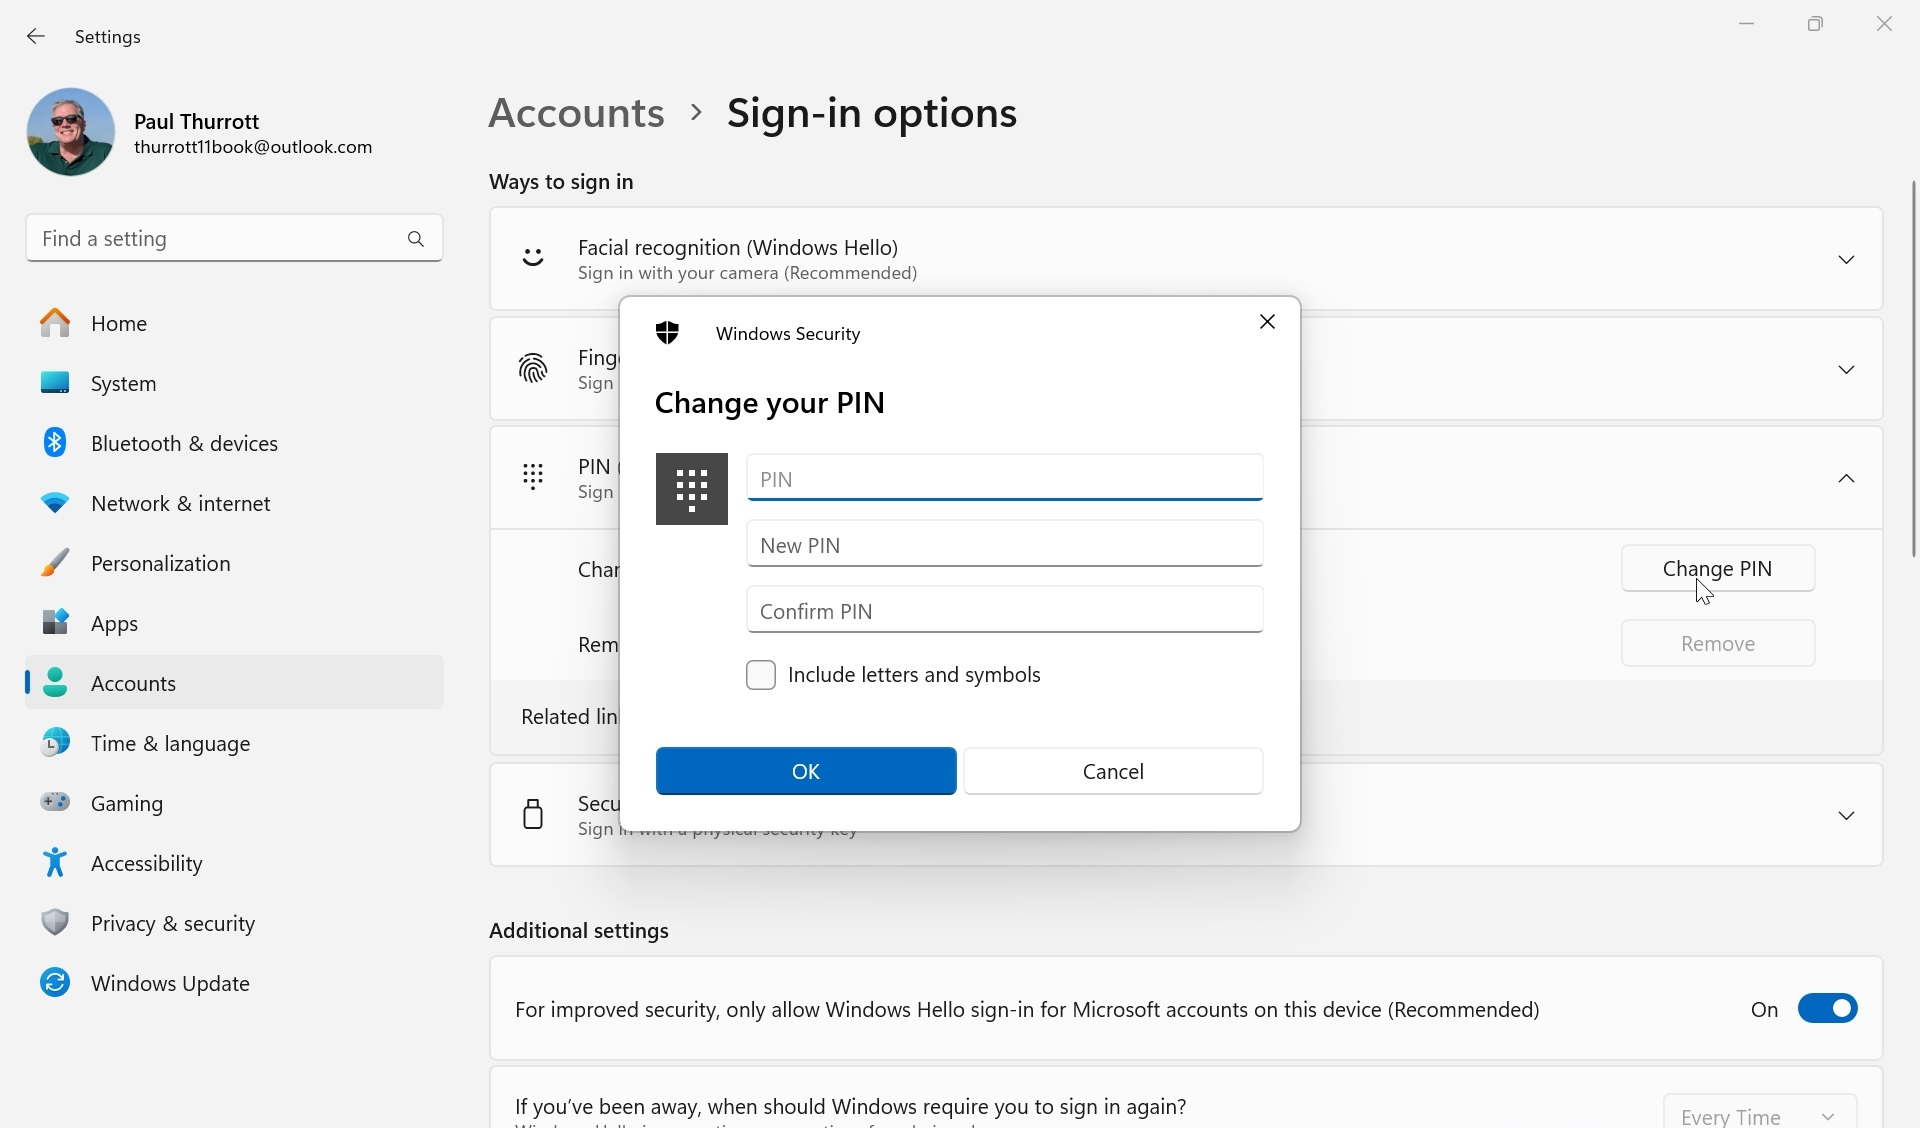
PIN (Windows Hello). You configured this sign-in type when you first set up Windows 11, but you can change your PIN here if desired.
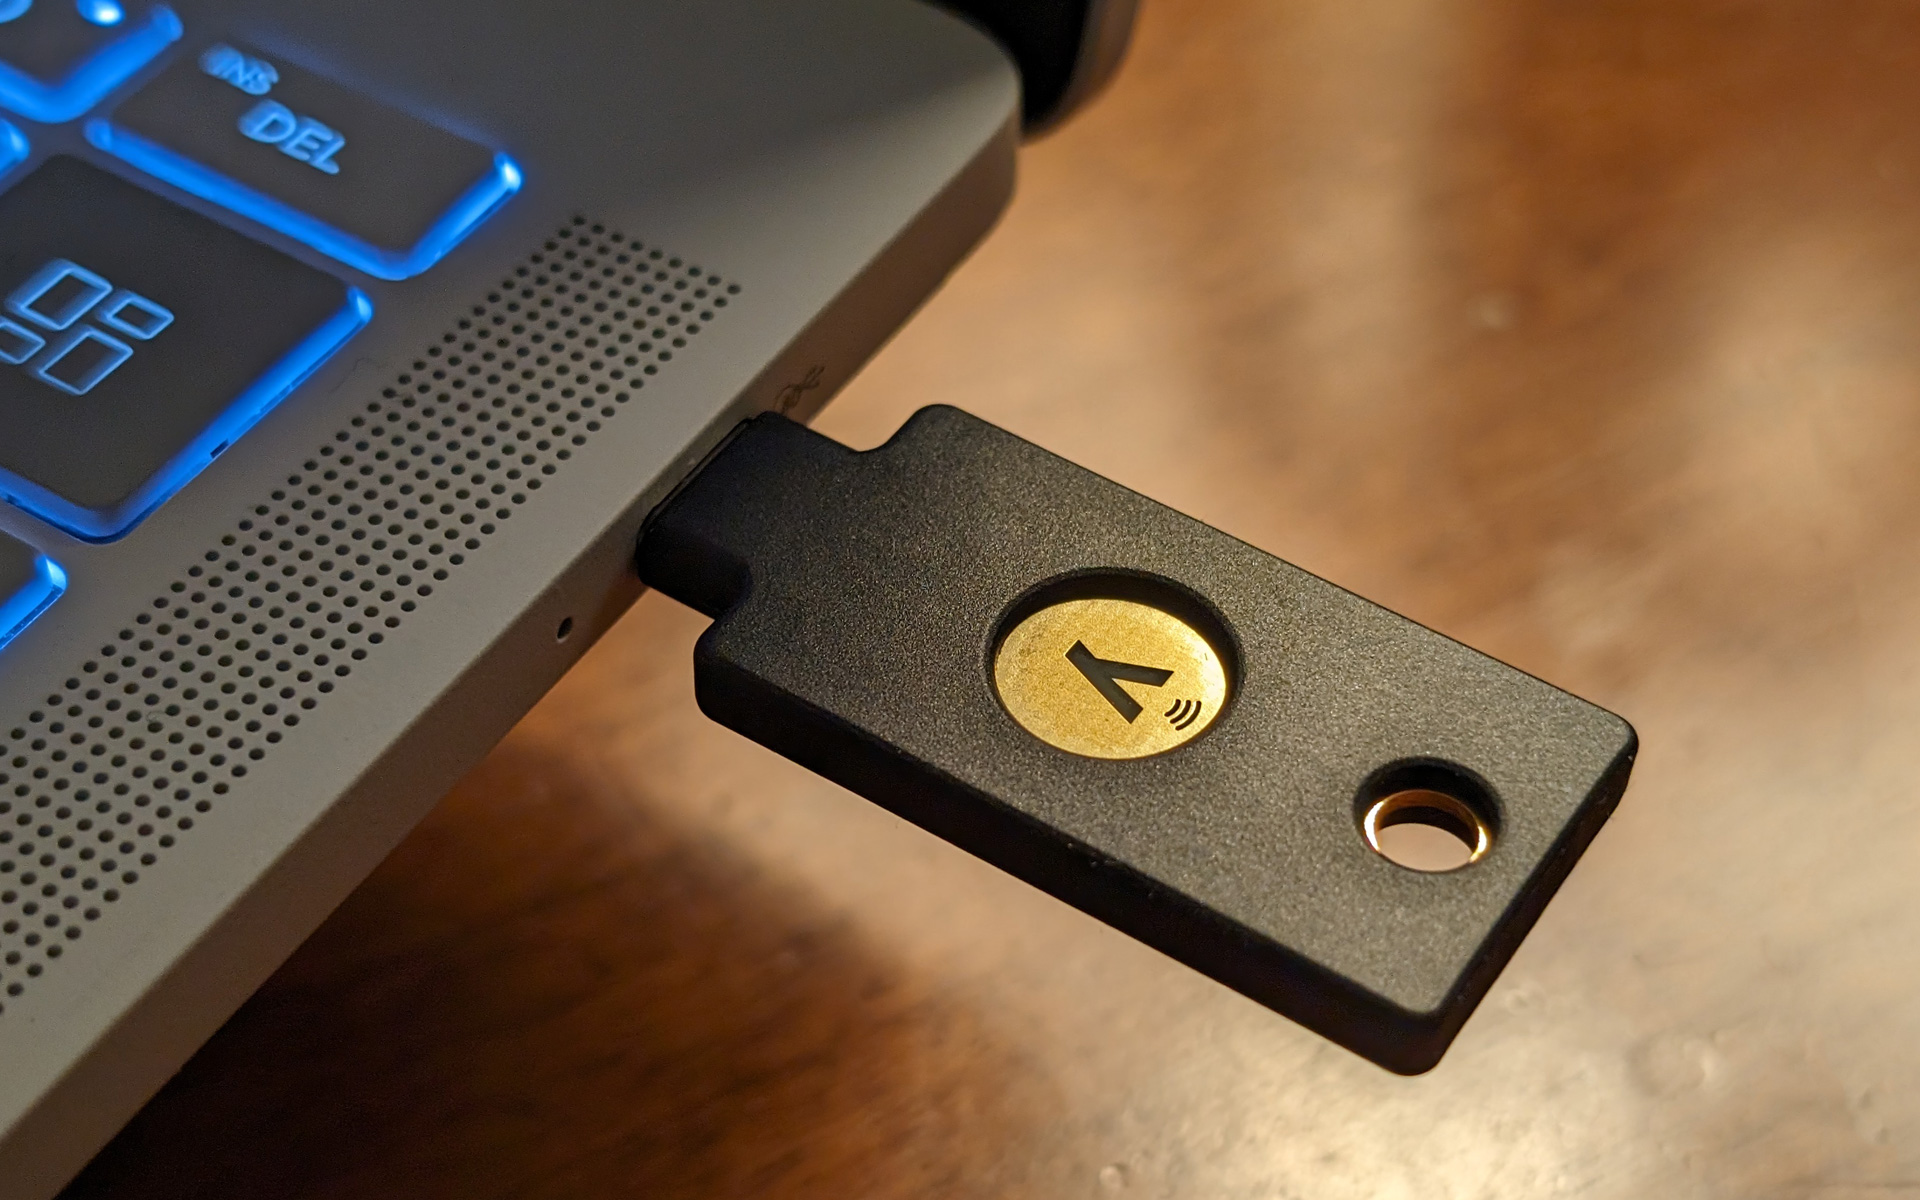
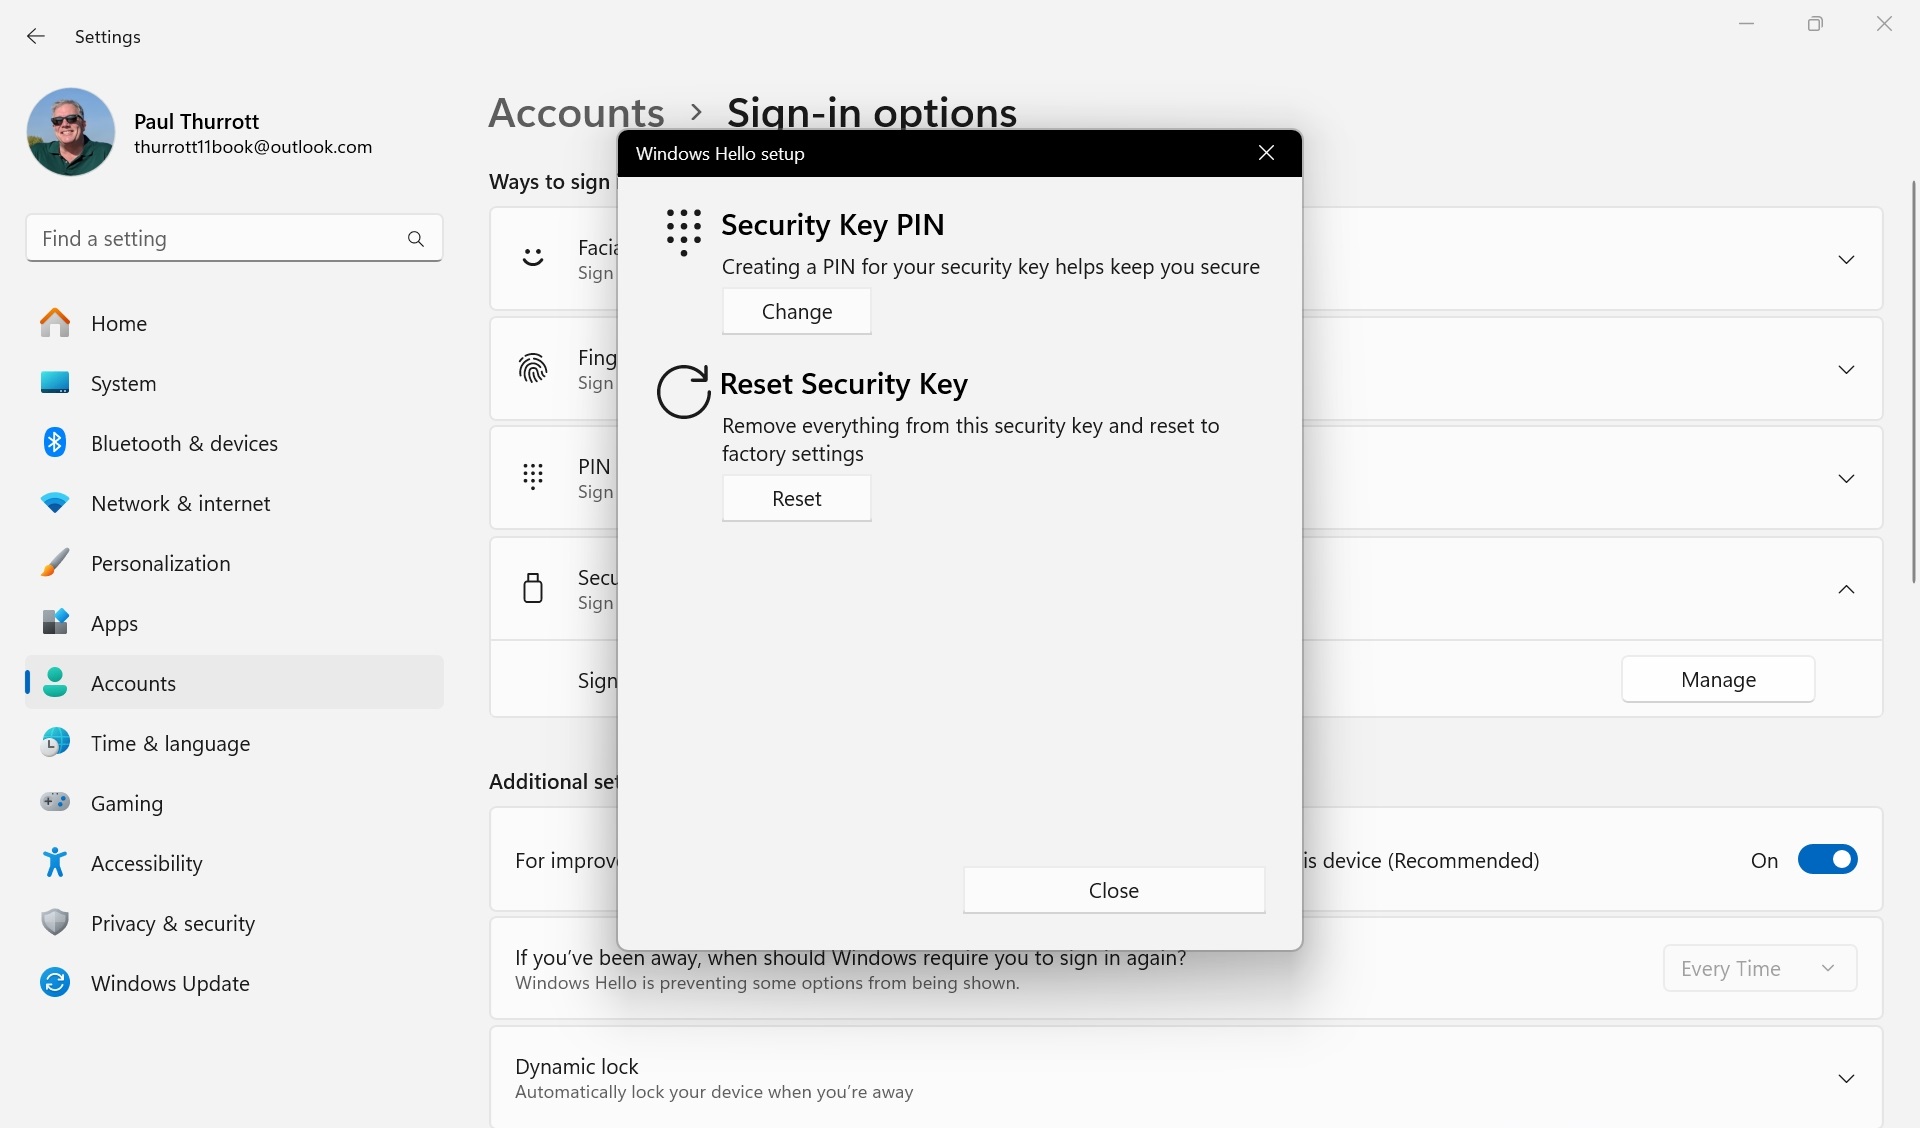
Security key. Windows 11 supports physical security keys–small hardware fobs or dongles that connect to your PC via USB-C, USB-A, or Near Field Communication (NFC)–like those made by Yubico. They can be used alongside a Windows Hello sign-in to securely sign into online accounts–not just Microsoft accounts but many others too–on the web or in apps. Note that Windows 11 does not support signing in to the system with a Microsoft account or Microsoft school or work account using a security key, though you can use this device to authenticate yourself the first time you configure the account on a PC.
Security keys are closely tied to passkeys, a modern method for securely signing into an online account without needing to type a password. We discuss this technology in more detail in the Passkeys chapter.
Assuming your PC supports it, you can enable any combination of Windows Hello capabilities. For example, you can have Windows Hello facial recognition, fingerprint recognition, and PIN all enabled simultaneously.
Enable and configure Windows Hello biometric authentication
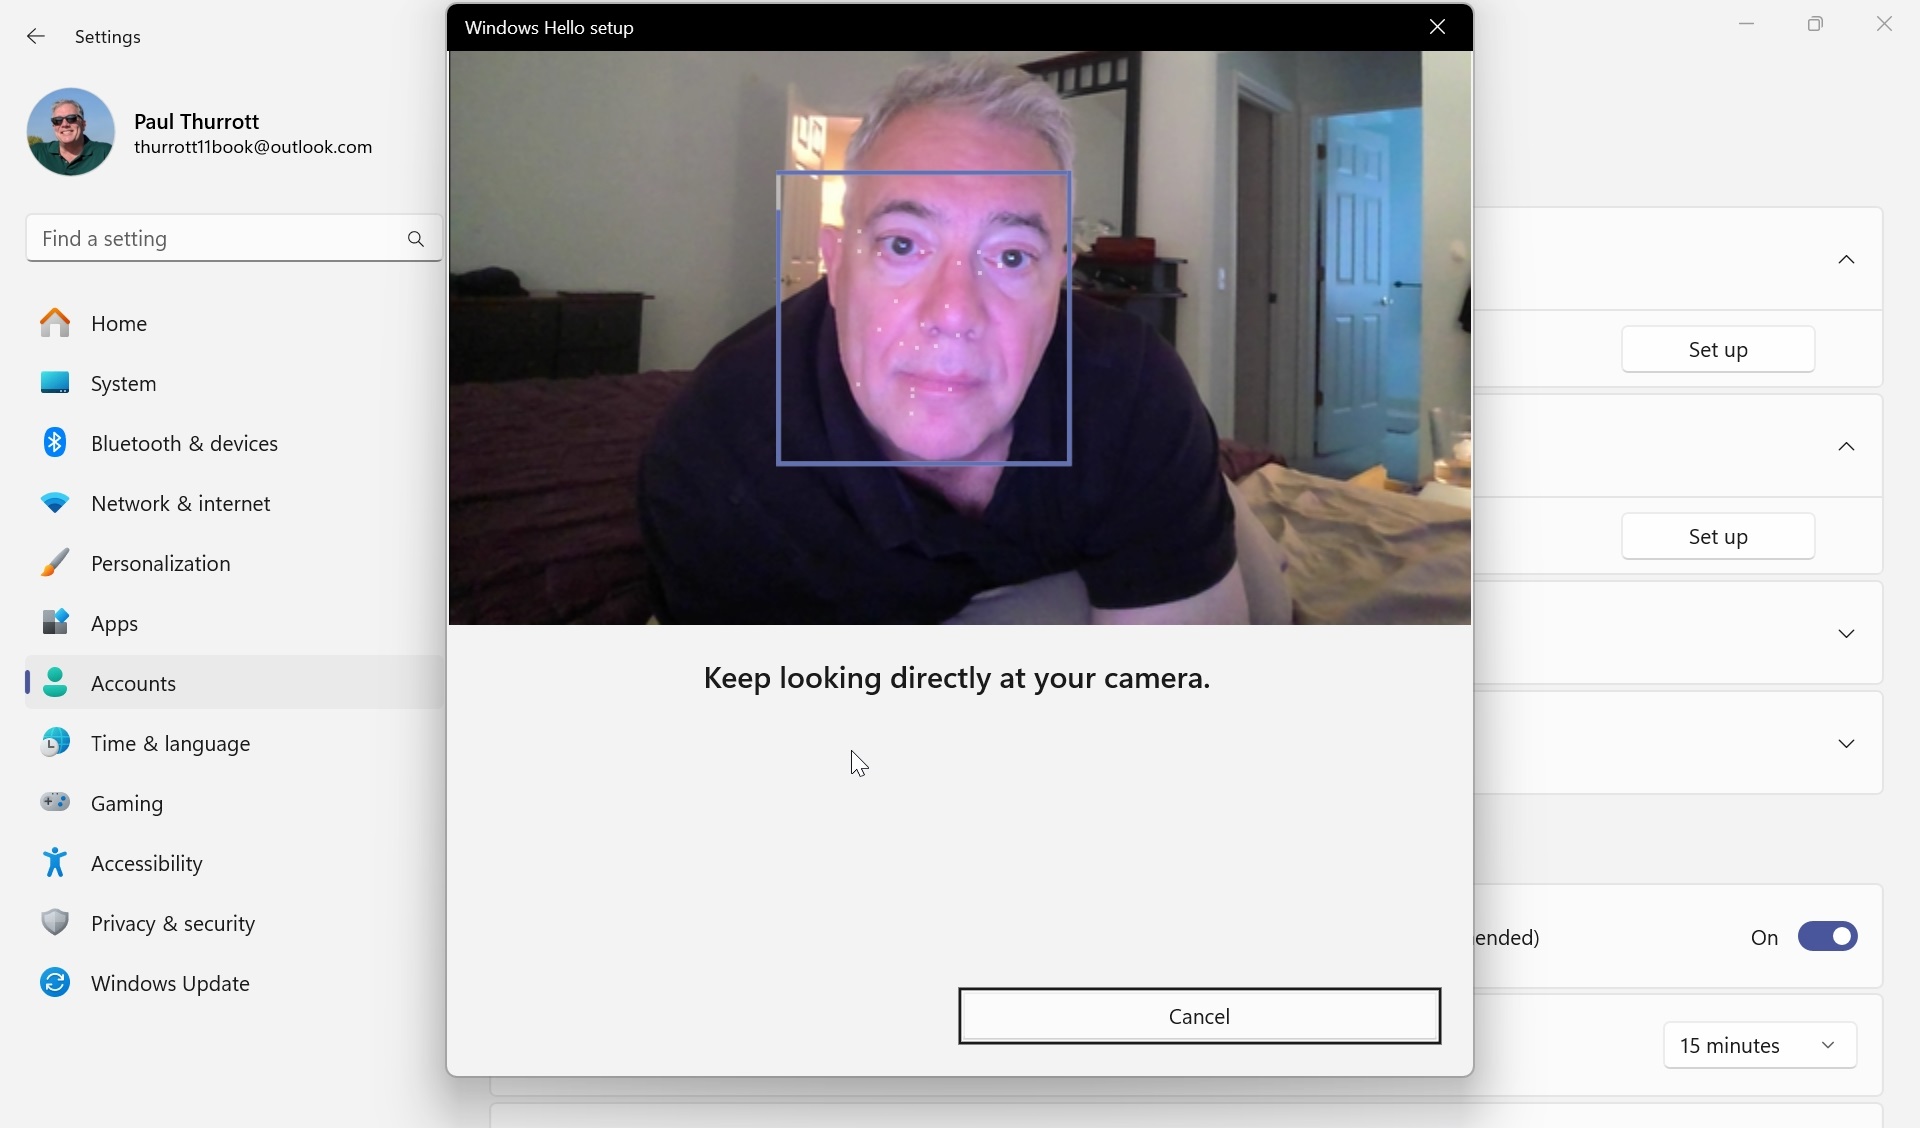
To get started with Windows Hello facial recognition and/or fingerprint recognition, open the Settings app and navigate to Accounts > Sign-in options. Then, review the top two items under “Ways to sign in”: “Facial recognition (Windows Hello)” and “Fingerprint recognition (Windows Hello).” Unless either has the note “This option is currently unavailable,” you can enable and configure one or both features.
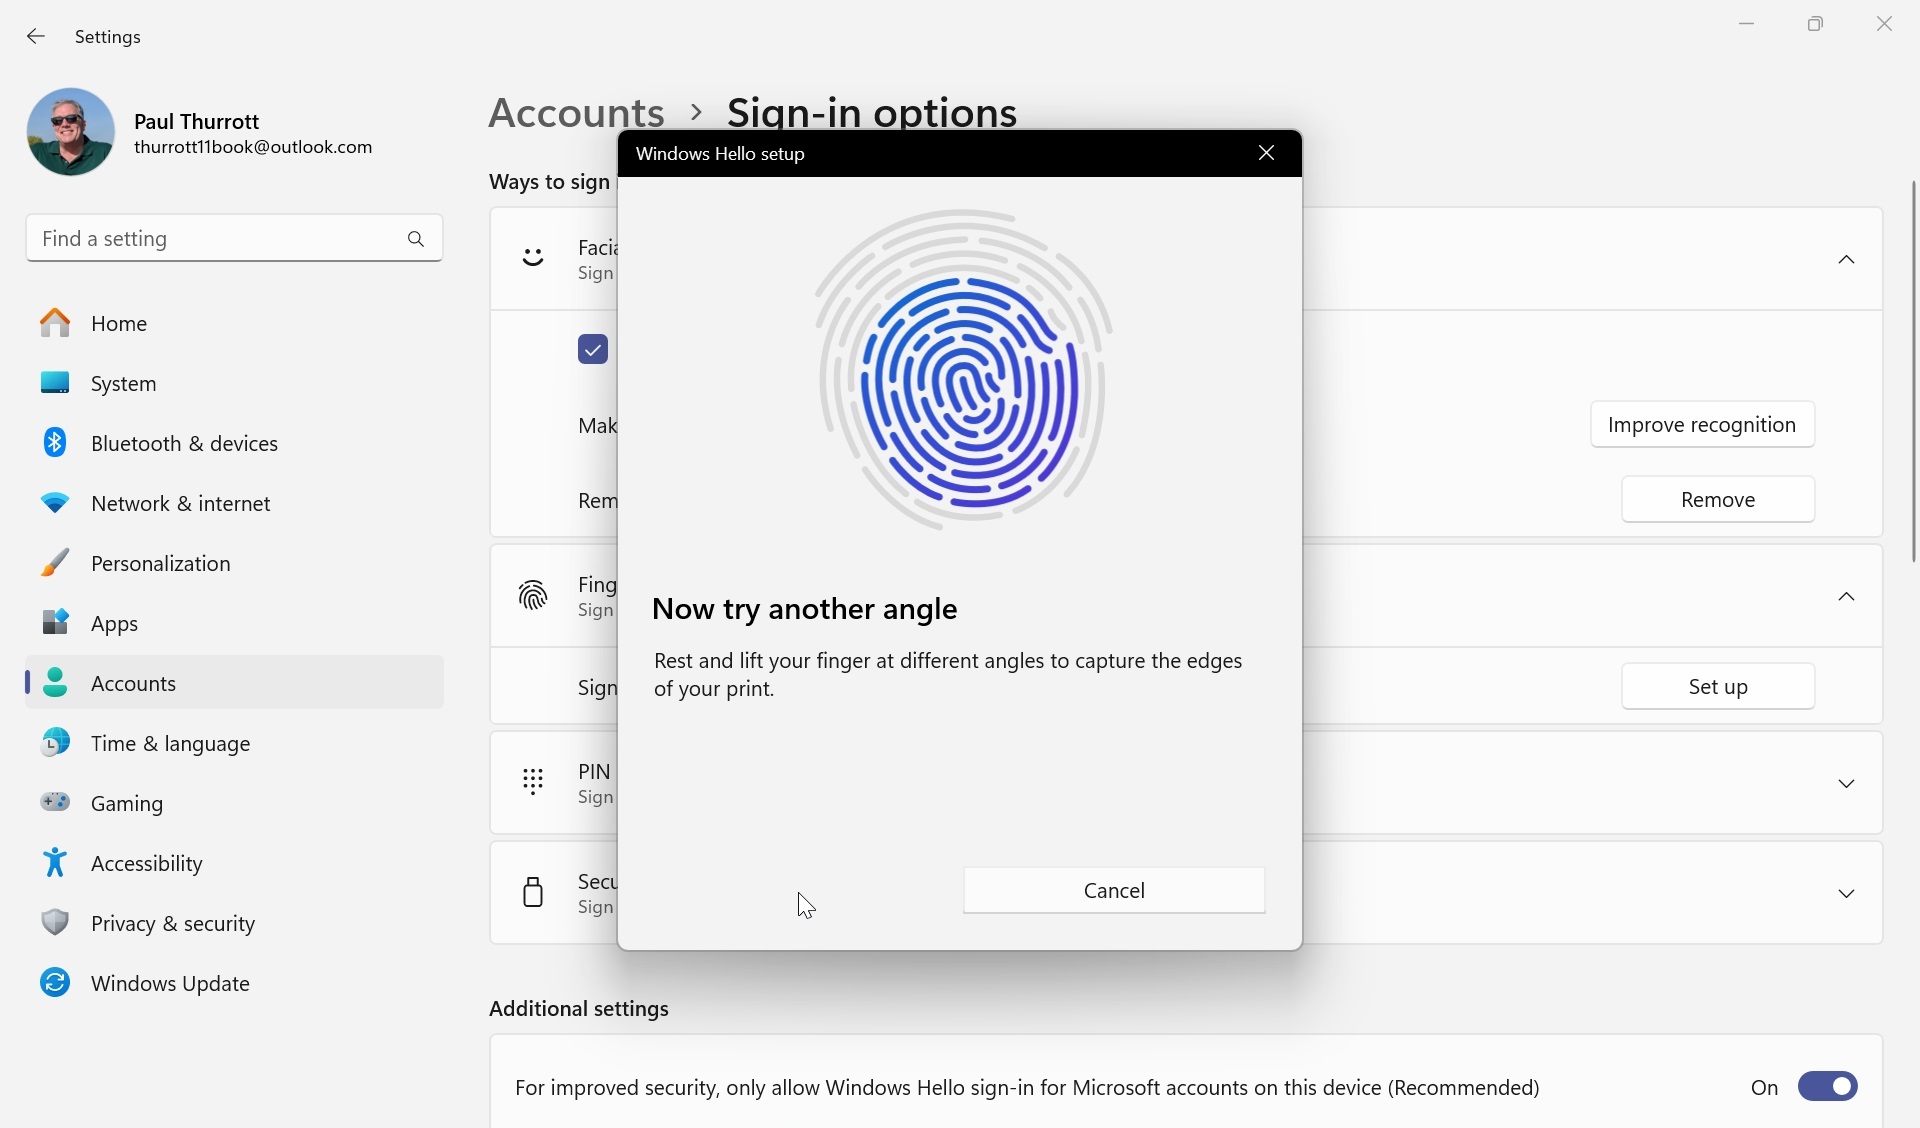
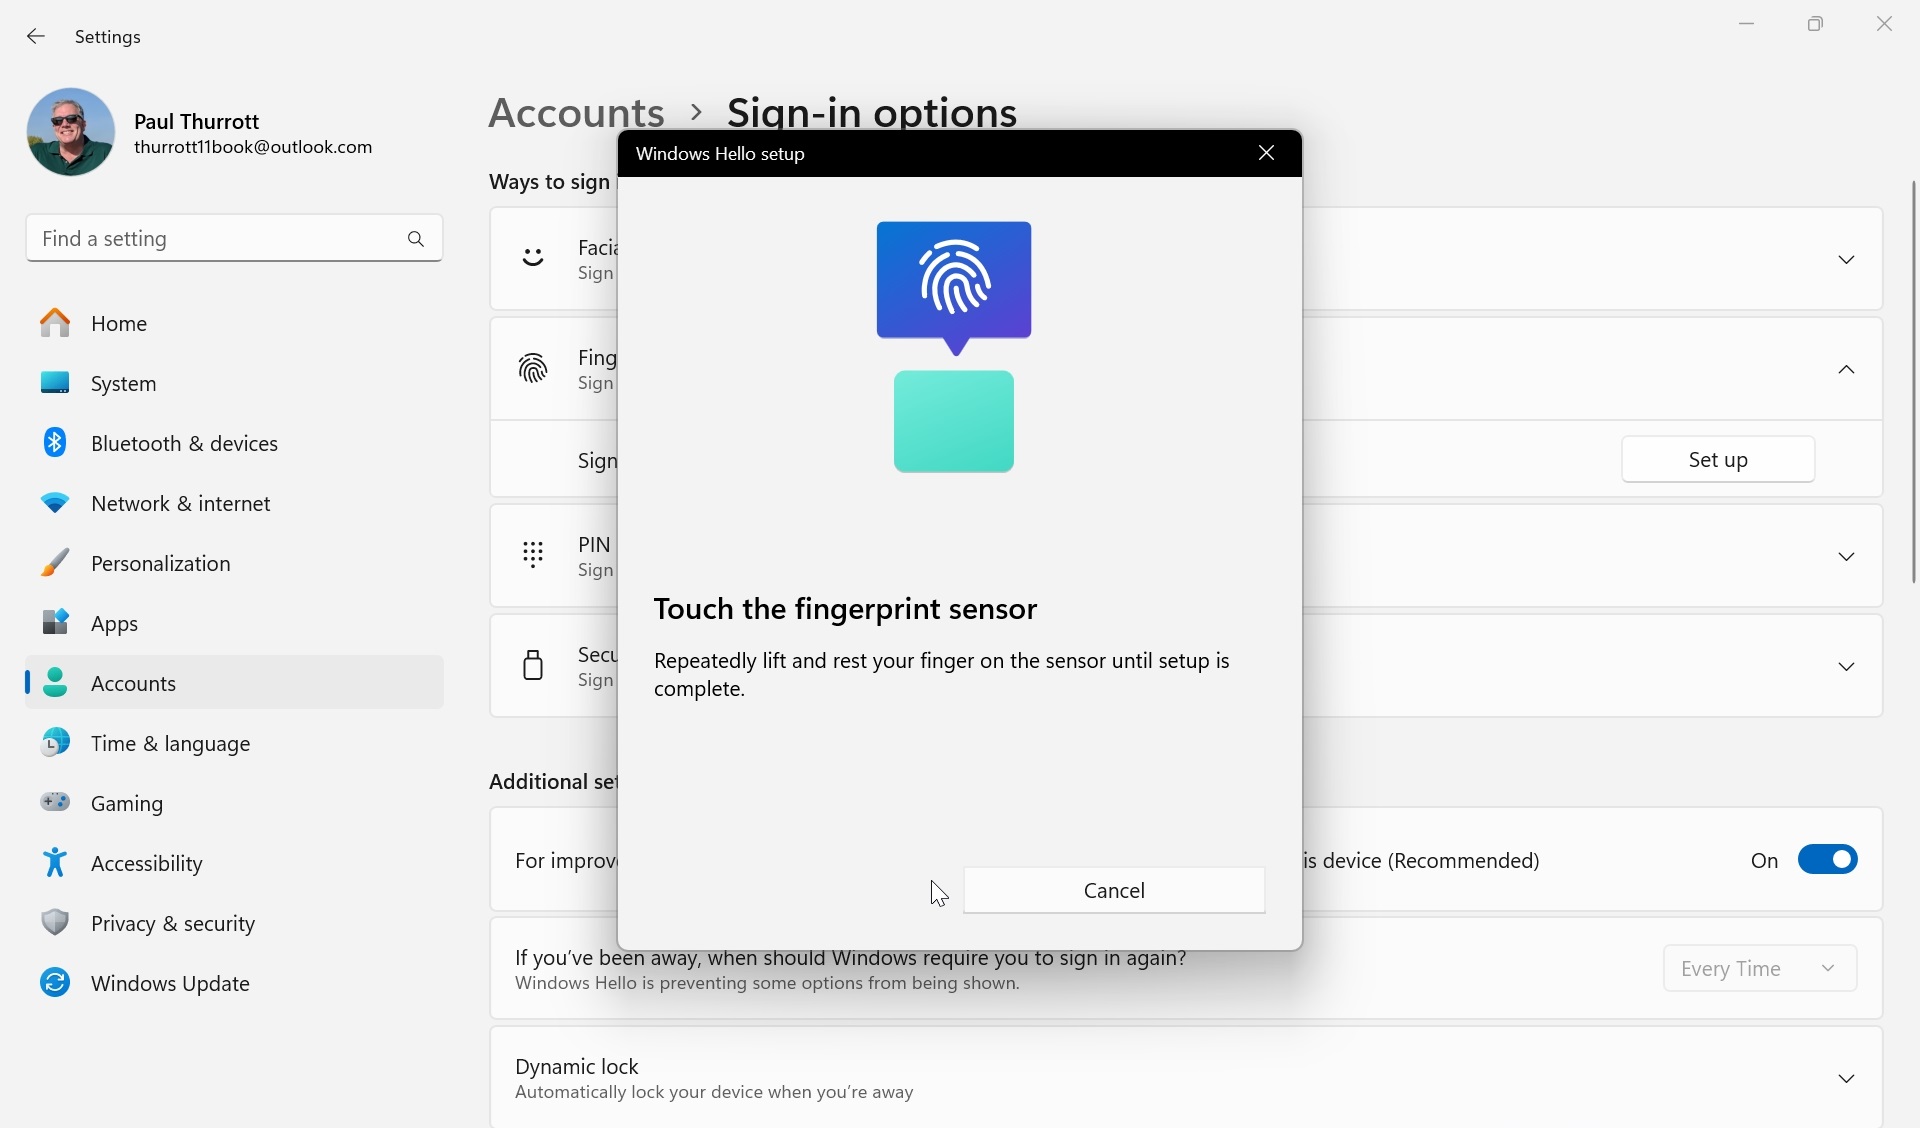
Doing so is straightforward in both cases: Just select the sign-in option you wish to enable, click the “Set up” button that appears, and step through the resulting onboarding process after Windows Security prompts you to enter your PIN to verify your identity.

You can also improve recognition in both cases. For facial recognition, this may include wearing or not wearing glasses for the second pass. And for fingerprint recognition, you should consider enrolling at least one more finger.
After you’re done, you will see that each sign-in type now has associated options related to the lock screen, improving recognition, and/or removing the sign-in option.
Sign into Windows 11 with Windows Hello
Signing into Windows 11 with Windows Hello is so easy and seamless, especially with facial recognition, that you may wonder how you ever used a computer without it. Just wake up your PC–or configure Presence Sensing (described below) to do that automatically, if available–and sit down in front of it: Windows Hello will recognize you, sign you in, and display the Windows Desktop.
If you are using fingerprint recognition, you may have one additional step: You need to rest your finger on the fingerprint reader first. (Some PCs integrate the fingerprint reader into the power button you use to turn on or wake up the PC, and they can recognize your fingerprint then and pass it through to Windows Hello for a quicker sign-in.)
Sign in to an app or online account with Windows Hello
Windows Hello makes it easy to sign into Windows 11, but the system also uses a security feature called passthrough authentication to sign you into in-box apps like Microsoft Store, OneDrive, Photos, and many others. That way you don’t need to sign into your Microsoft account (or work and school account) the first time you run these apps: They will automatically use the account you used to sign into Windows and will be configured accordingly.
That said, you will occasionally need to sign into your Microsoft account (or work and school account) when accessing other apps or websites. In these cases, Windows 11 will display a set of notifications so you can authenticate yourself.
For example, if you visit the Security page on the Microsoft Accounts website in any web browser, the site will display a prompt asking for additional security information.
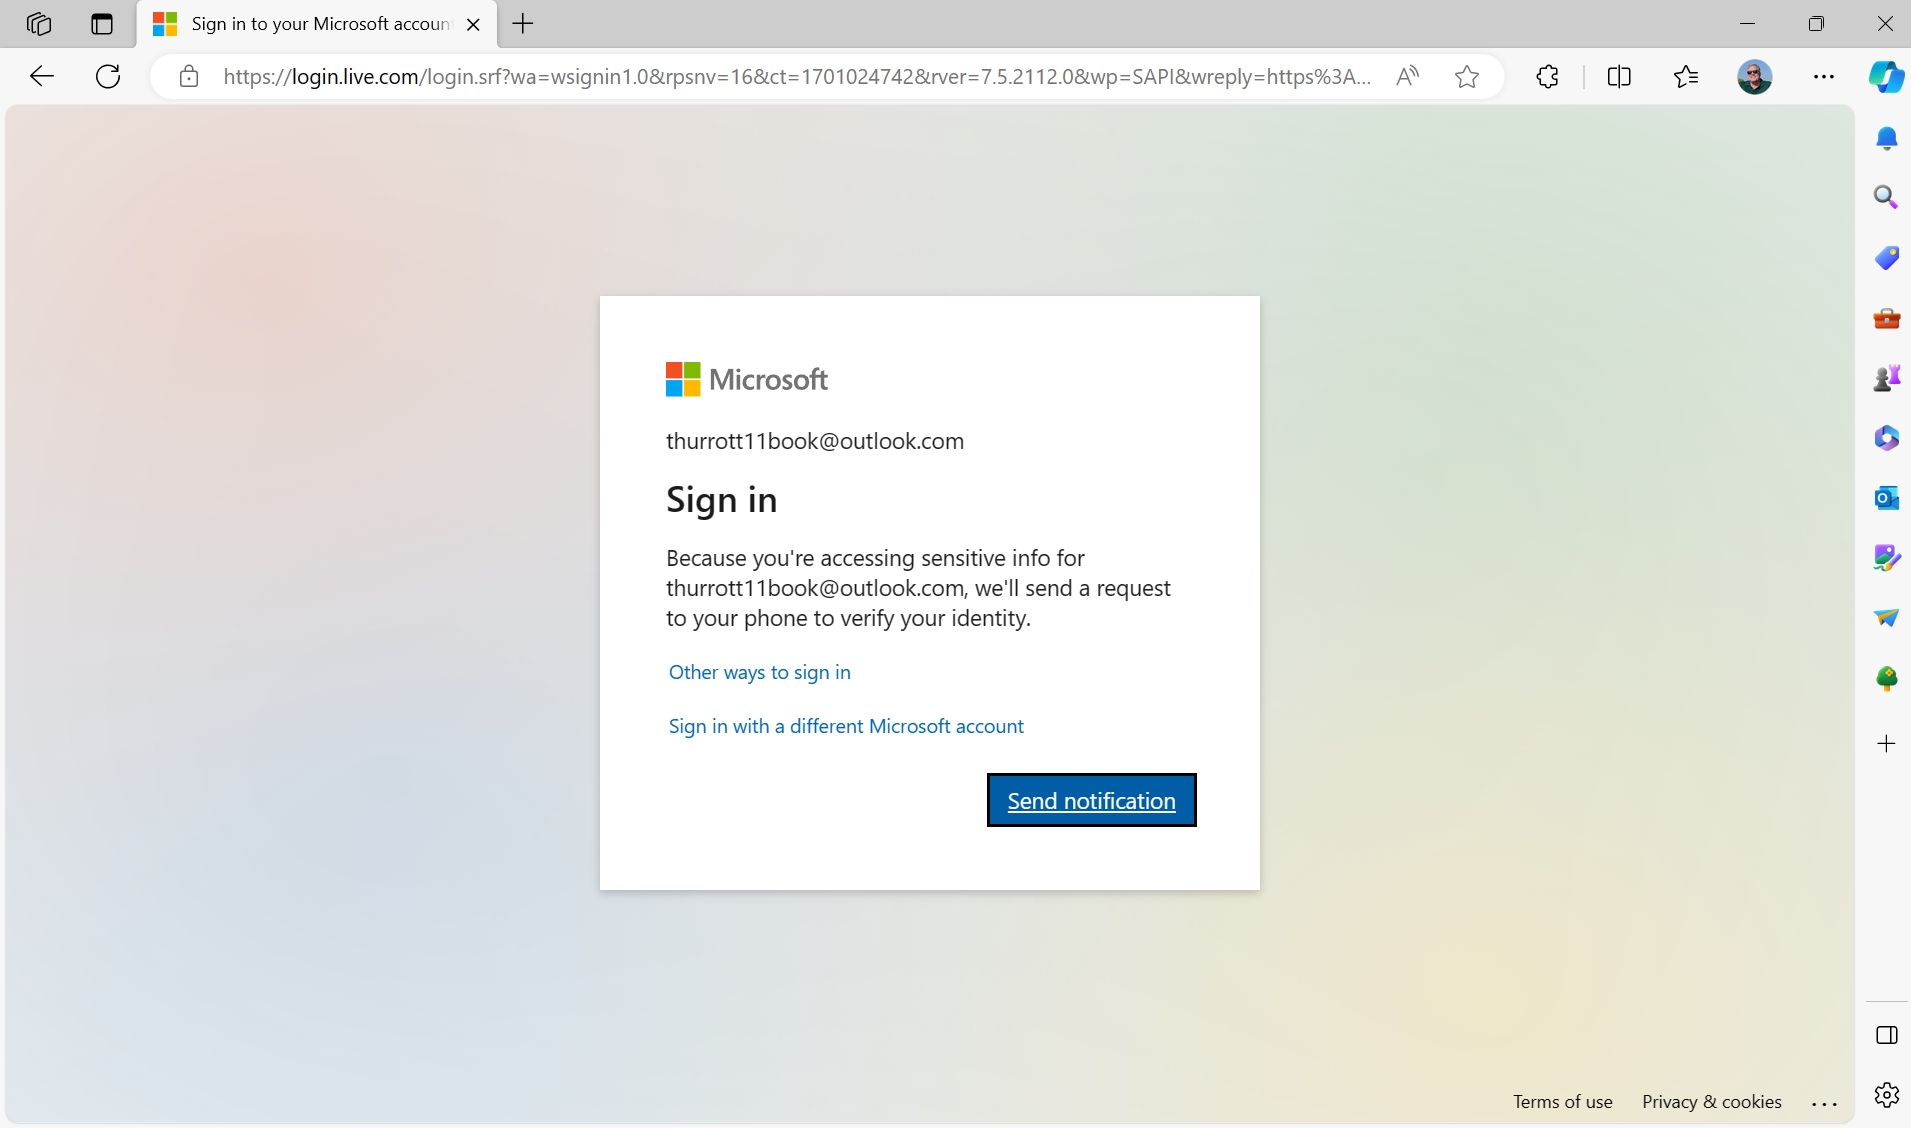
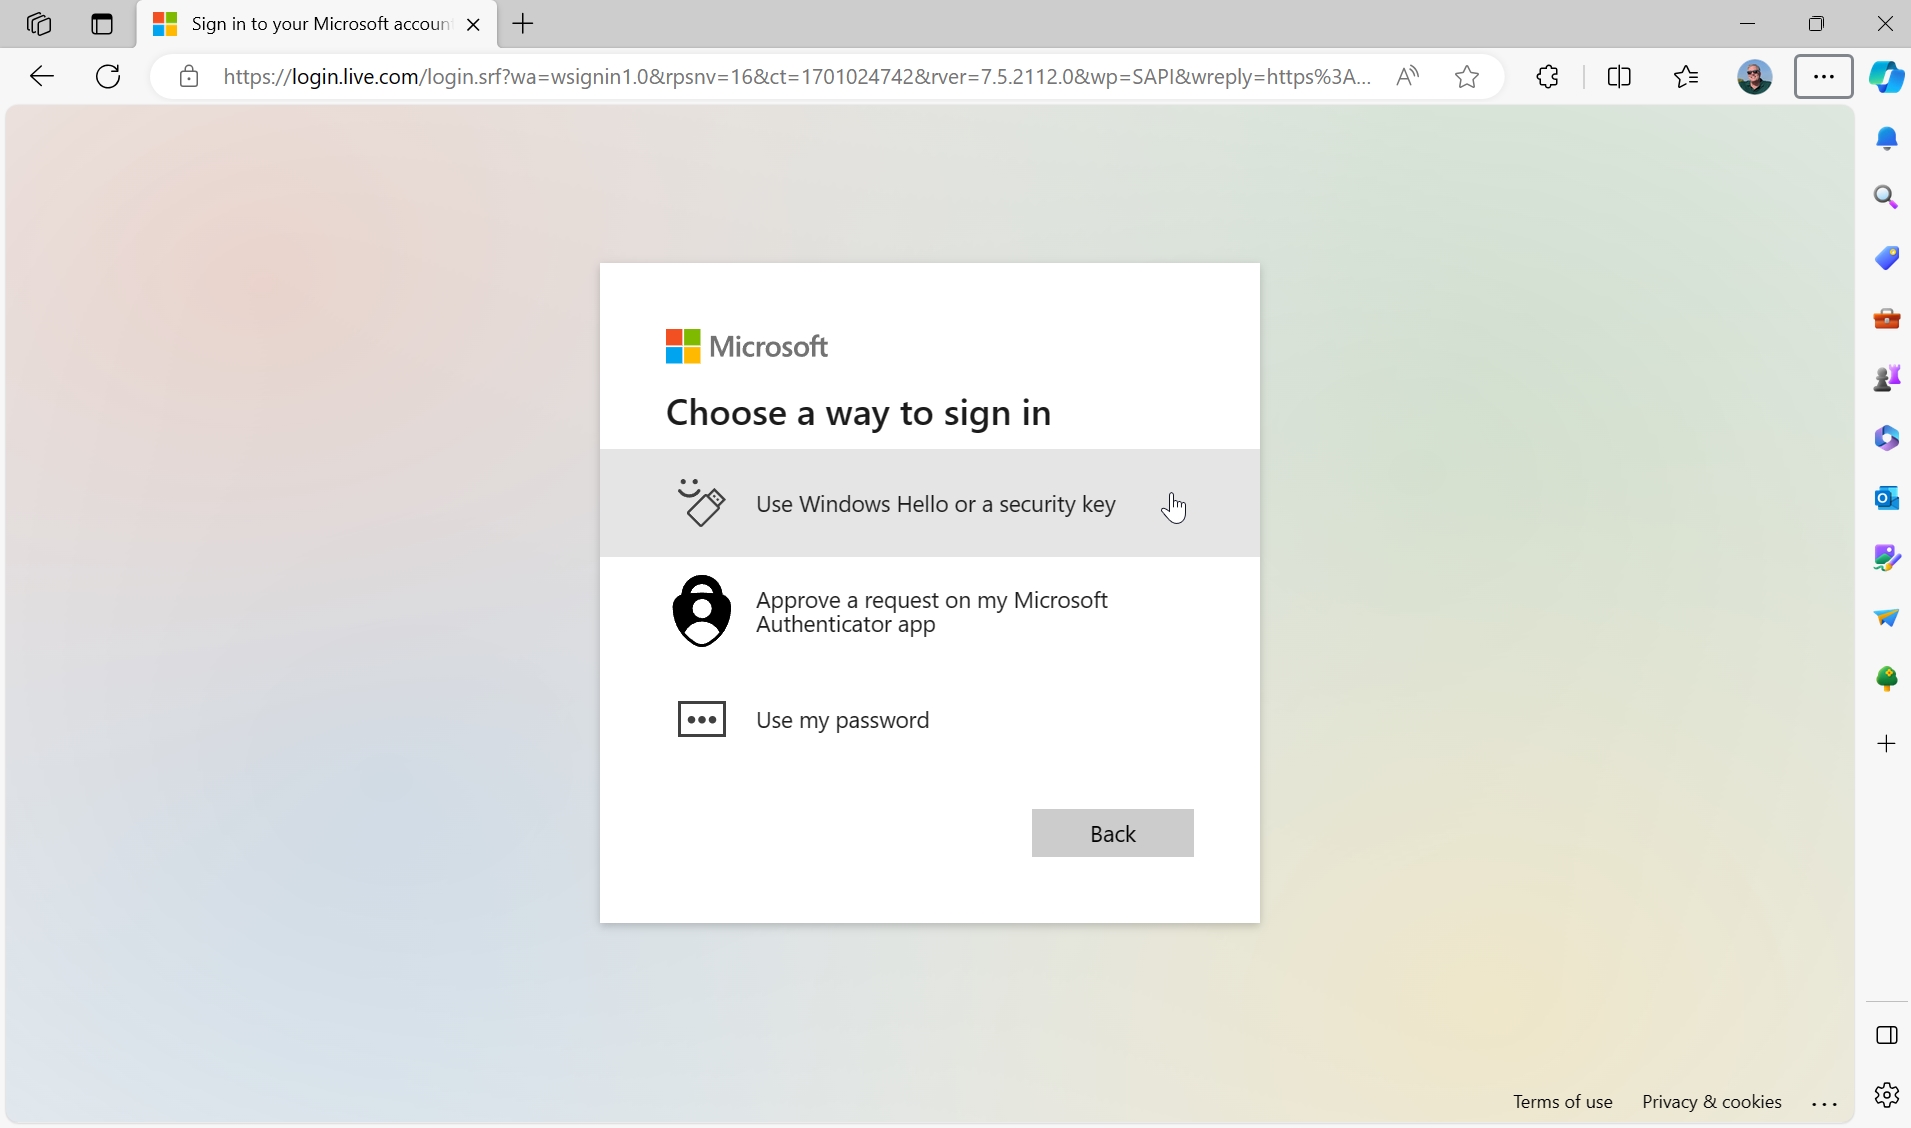
What you see here will vary according to how you’ve configured the security features associated with your Microsoft account, but if Windows Hello isn’t the default option, you can click “Other ways to sign in” to choose Windows Hello and then authenticate that way, using your face, fingerprint, or PIN.
Presence Sensing
Windows 11 version 23H2 is the first to natively support Presence Sensing, a set of features that uses a hardware proximity sensor to detect you and automatically wake up the PC when you approach and then turn off the display when you leave.
For now at least, you can only get native Presence Sensing capabilities on new PCs, typically portable PCs, that ship with a compatible proximity sensor. Our expectation is that future webcams and external displays will let users add Presence Sensing capabilities to more PCs.
Before you can get started with Presence Sensing, you need to see whether your PC supports this feature. There are a few ways to do so in the Settings app, but they are well hidden. So the easiest way is to search for presence sensing in Search: If you see results like “Turn off presence sensing systemwide” and “Turn off my screen when I leave” under a “Settings” heading, you’re good to go.
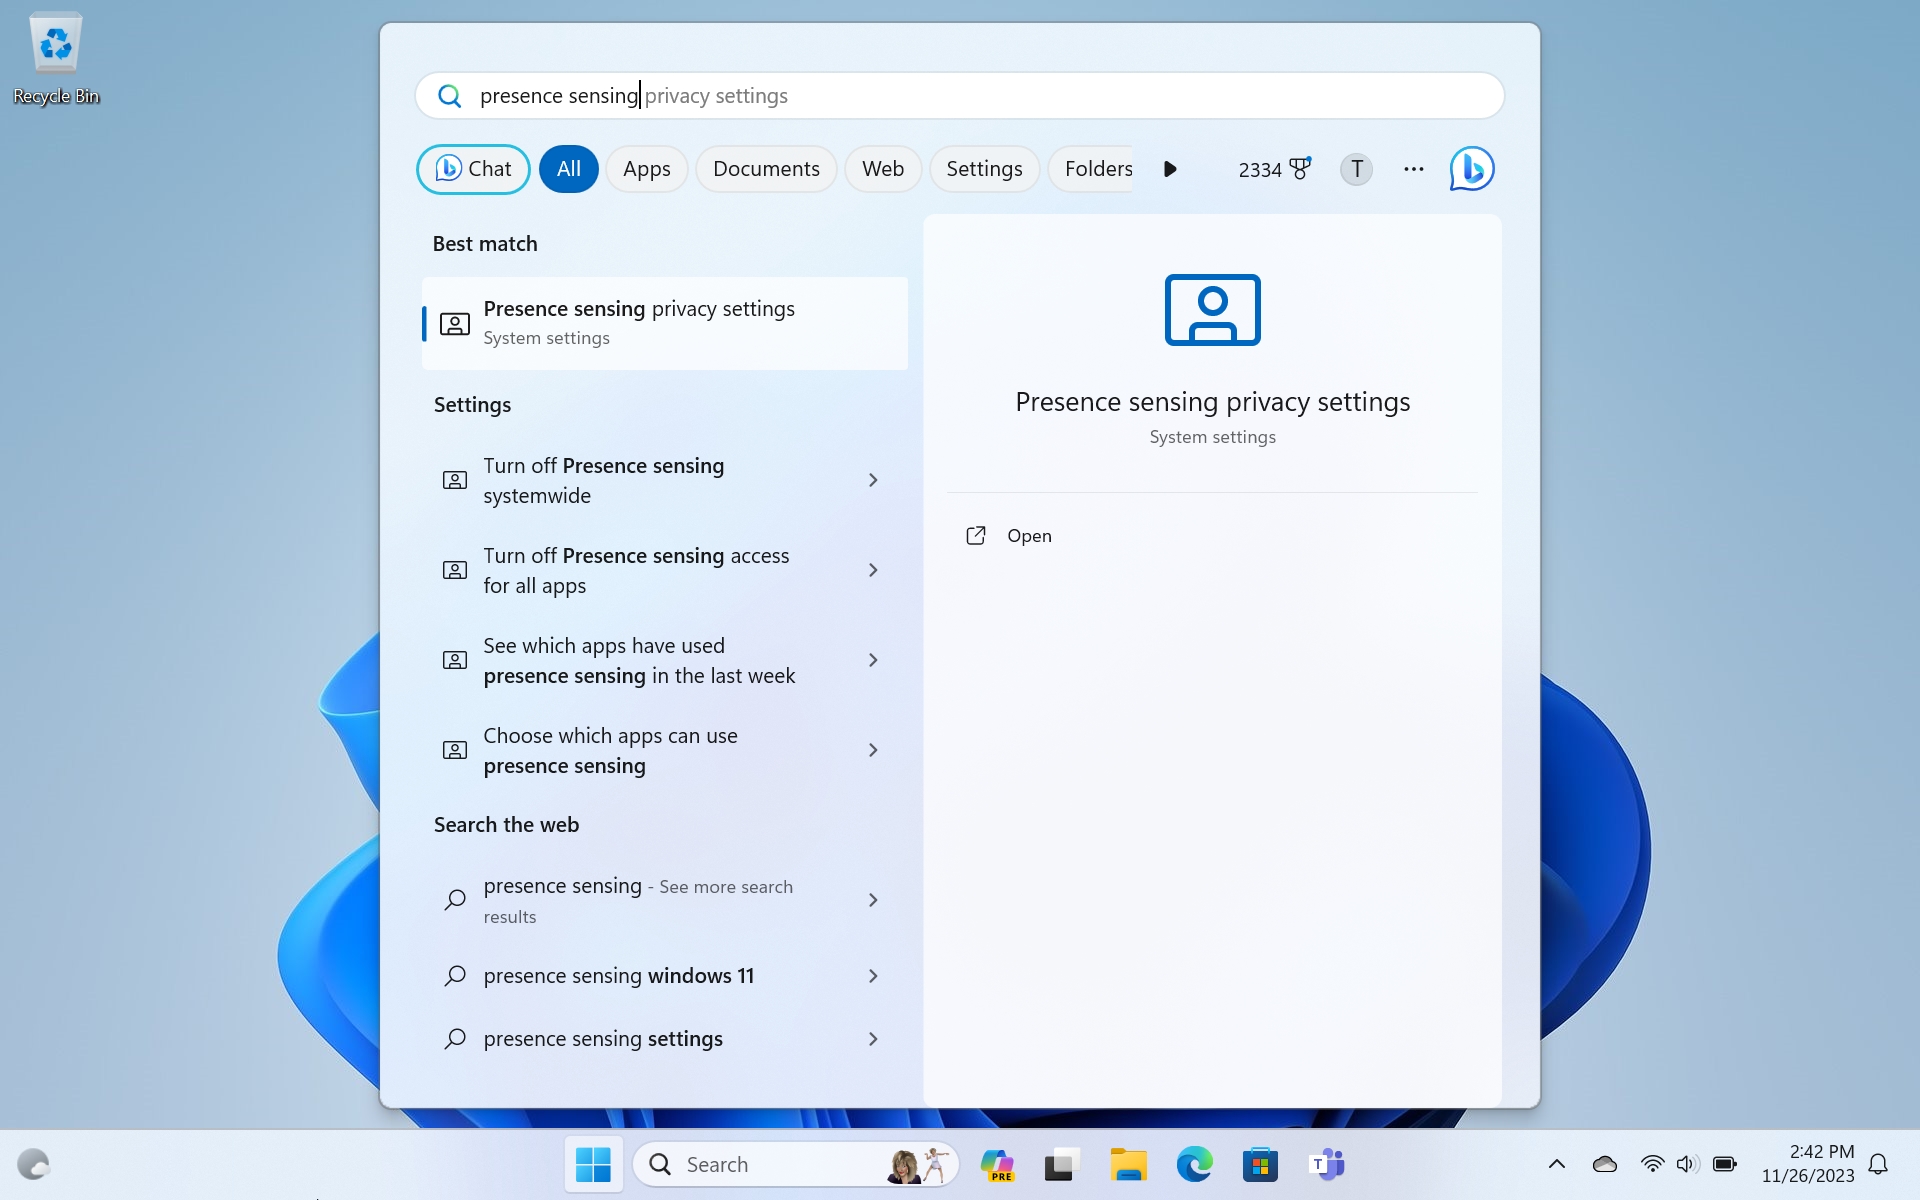
(Alternatively, if all you see are “Search the web” results, your PC is not compatible, sorry.)
There are also two ways you can navigate directly to the Presence Sensing settings in the Windows 11 Settings app:
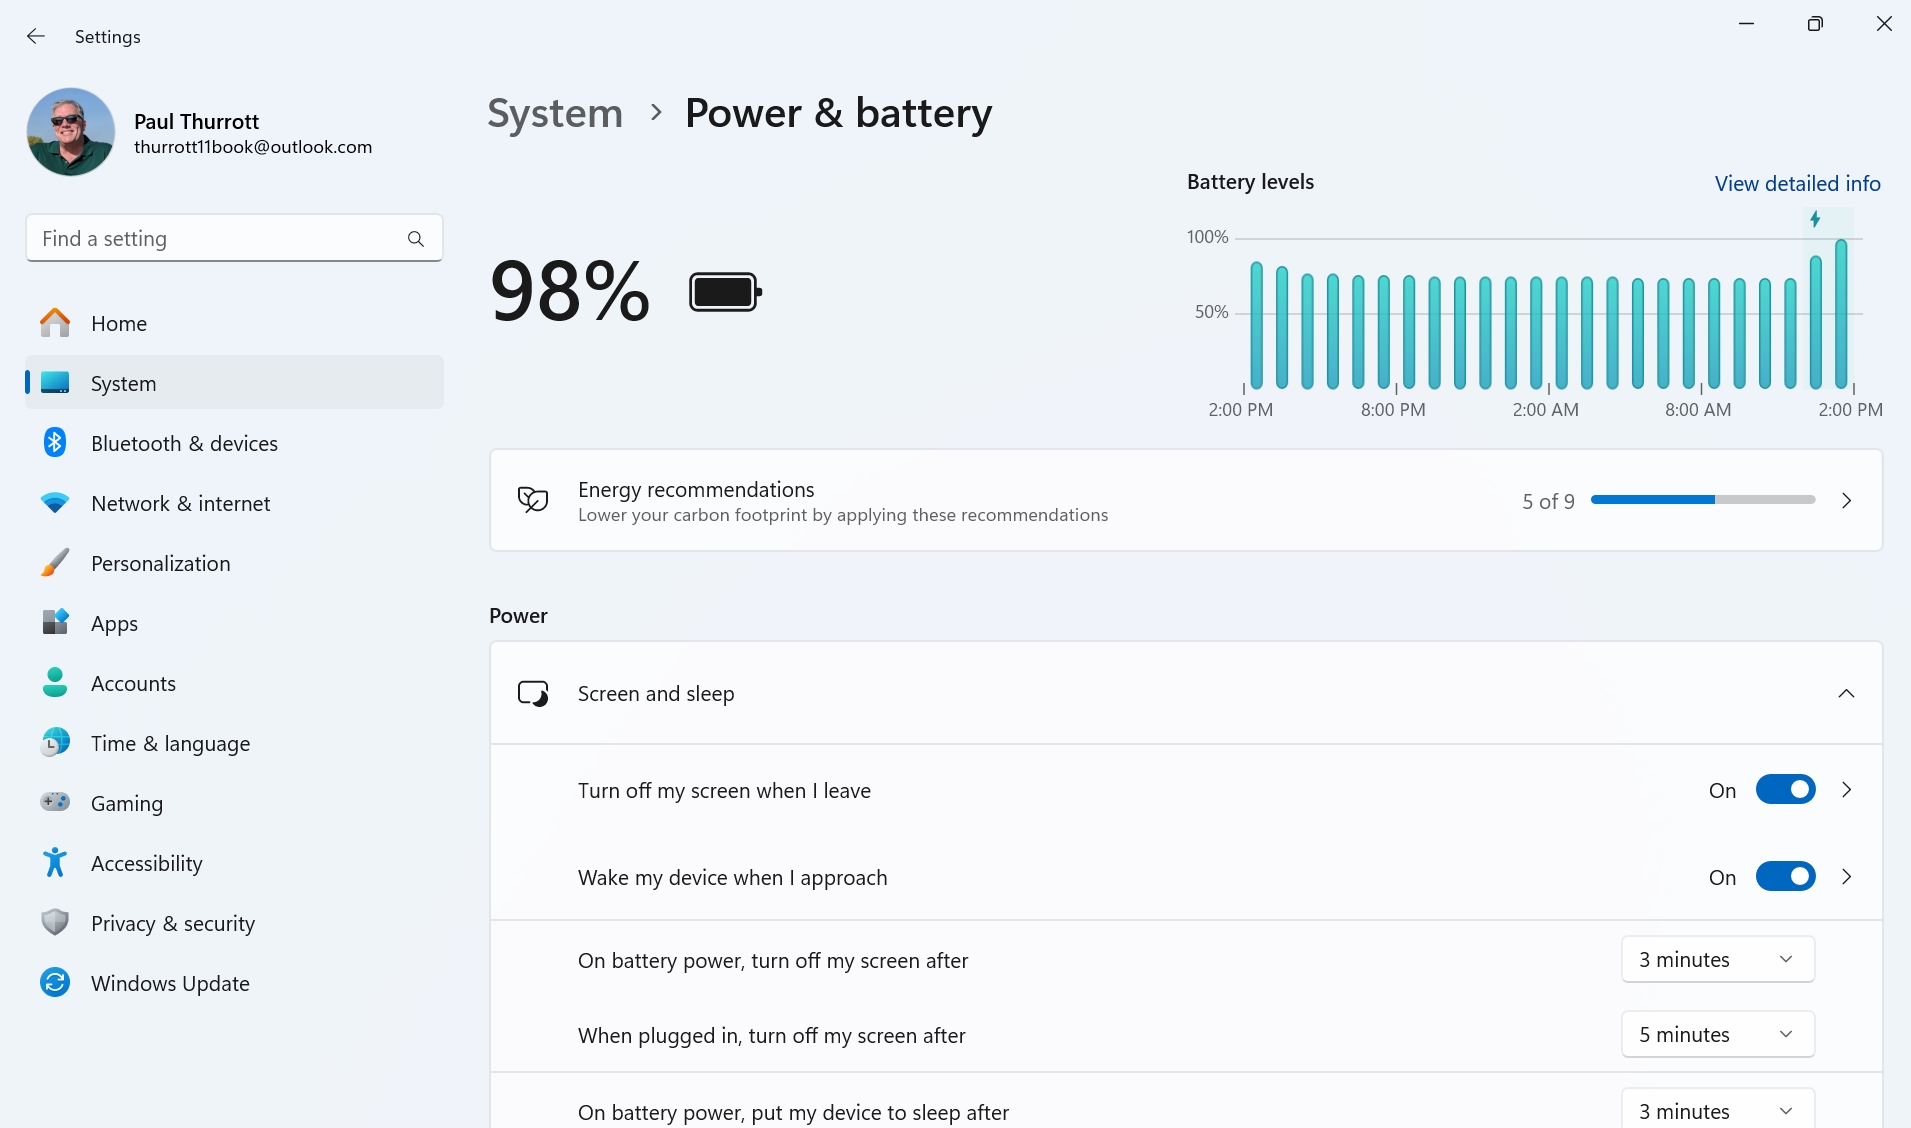
- Navigate to System > Power & battery and expand the “Screen and sleep” item under “Power.” Here, you will see two Presence Sensing options, “Turn off my screen when I leave” and “Wake my device when I approach.” You can click either (as opposed to toggling either “On” or “Off”).
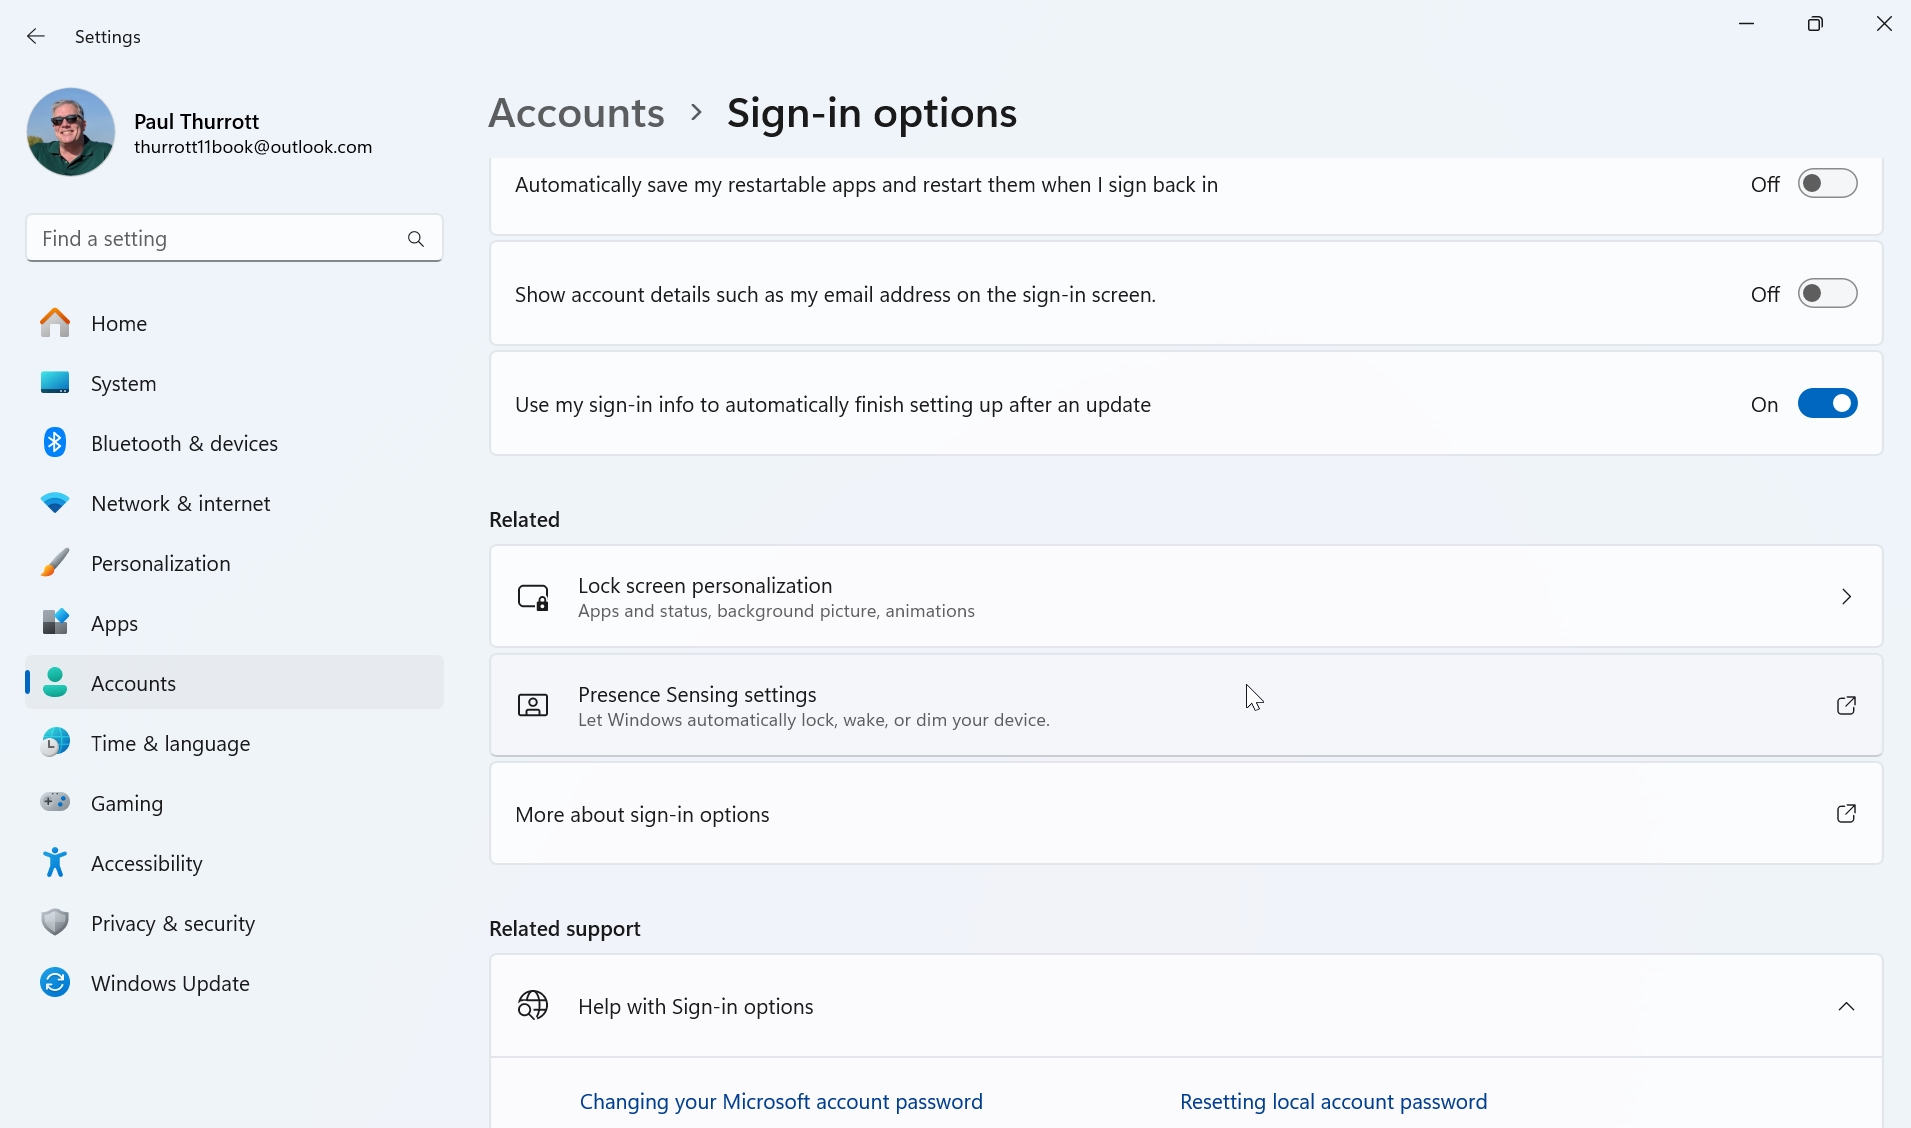
- Navigate to Accounts > Sign-in options and click the “Presence Sensing settings” option under “Related.”
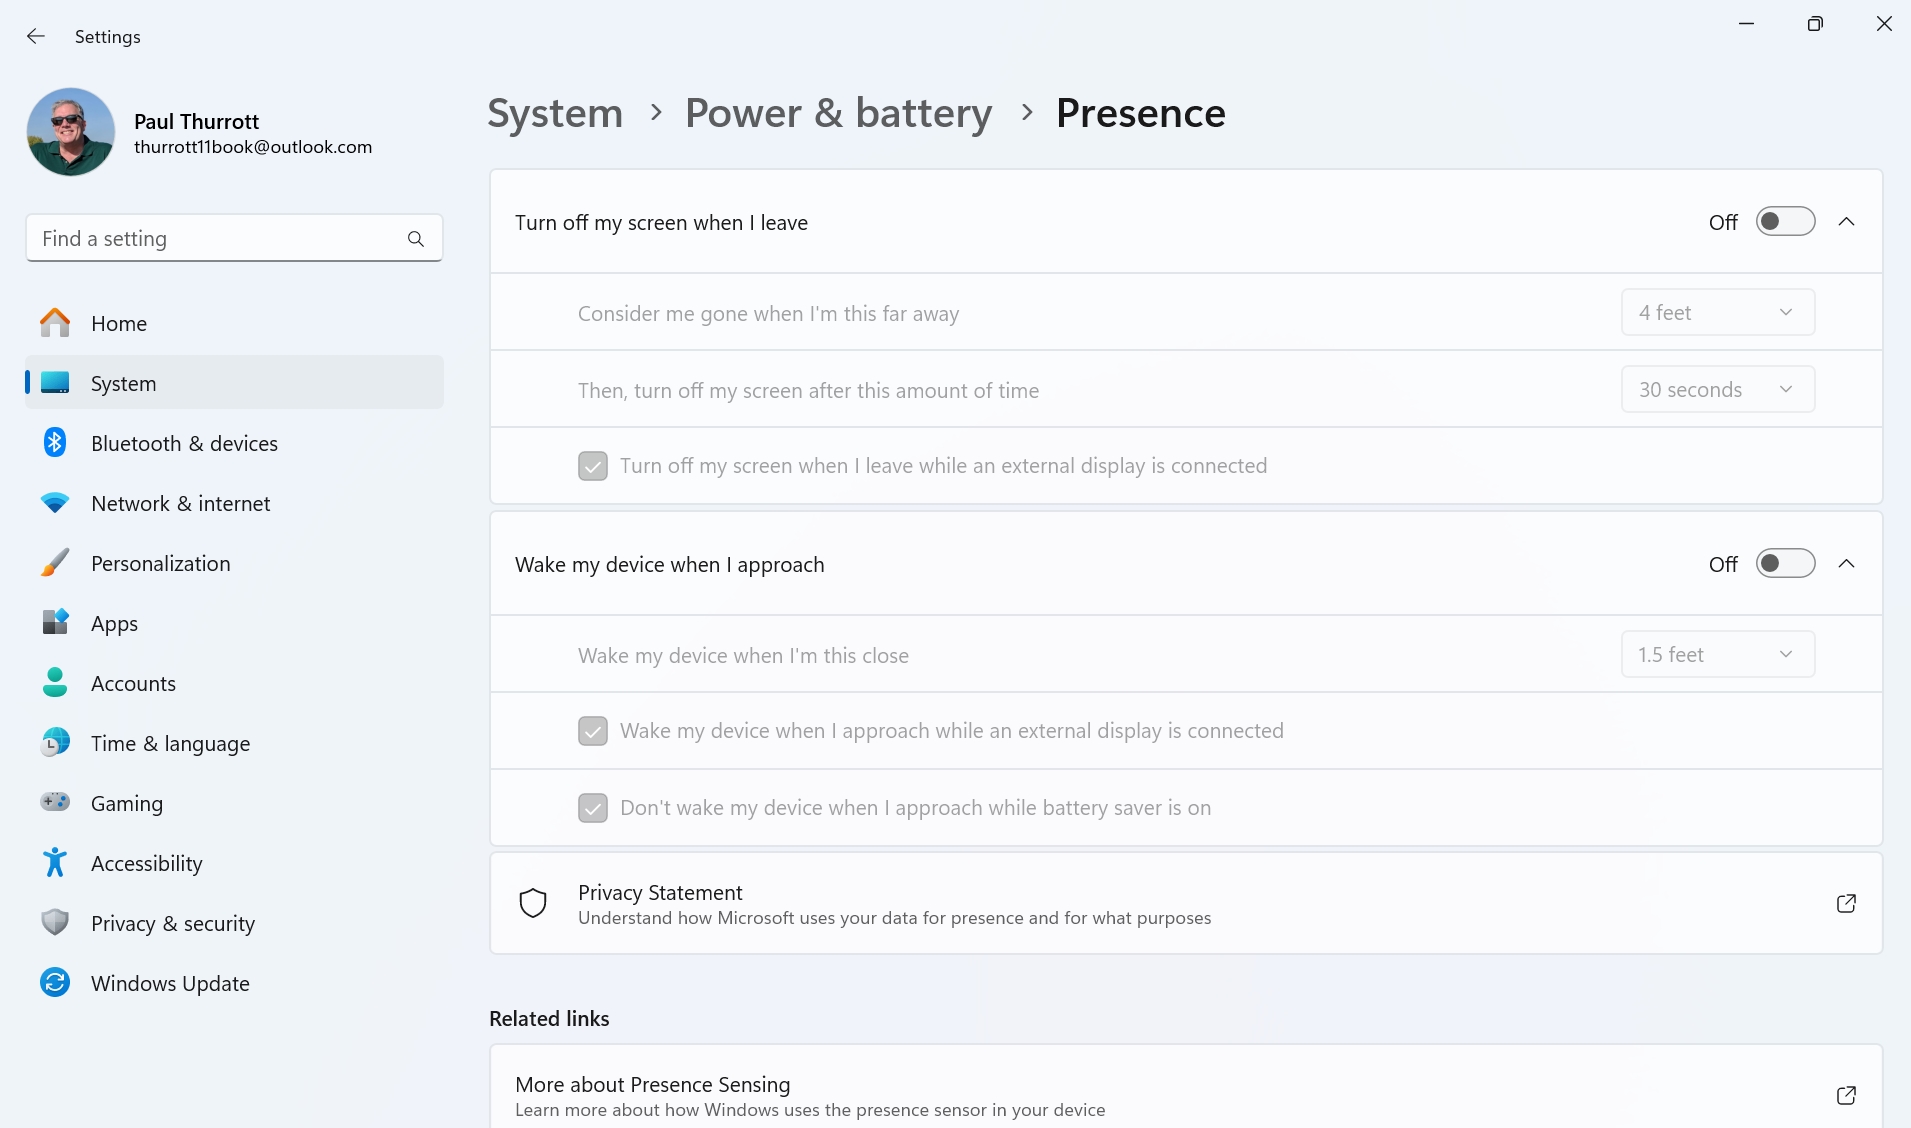
However you get there, Presence Sensing settings has two major options, “Turn off my screen when I leave” and “Wake my device when I approach,” each of which is disabled by default and has a few optional configuration choices when enabled.
To fully enable Presence Sensing, set “Turn off my screen when I leave” and “Wake my device when I approach” to “On.”
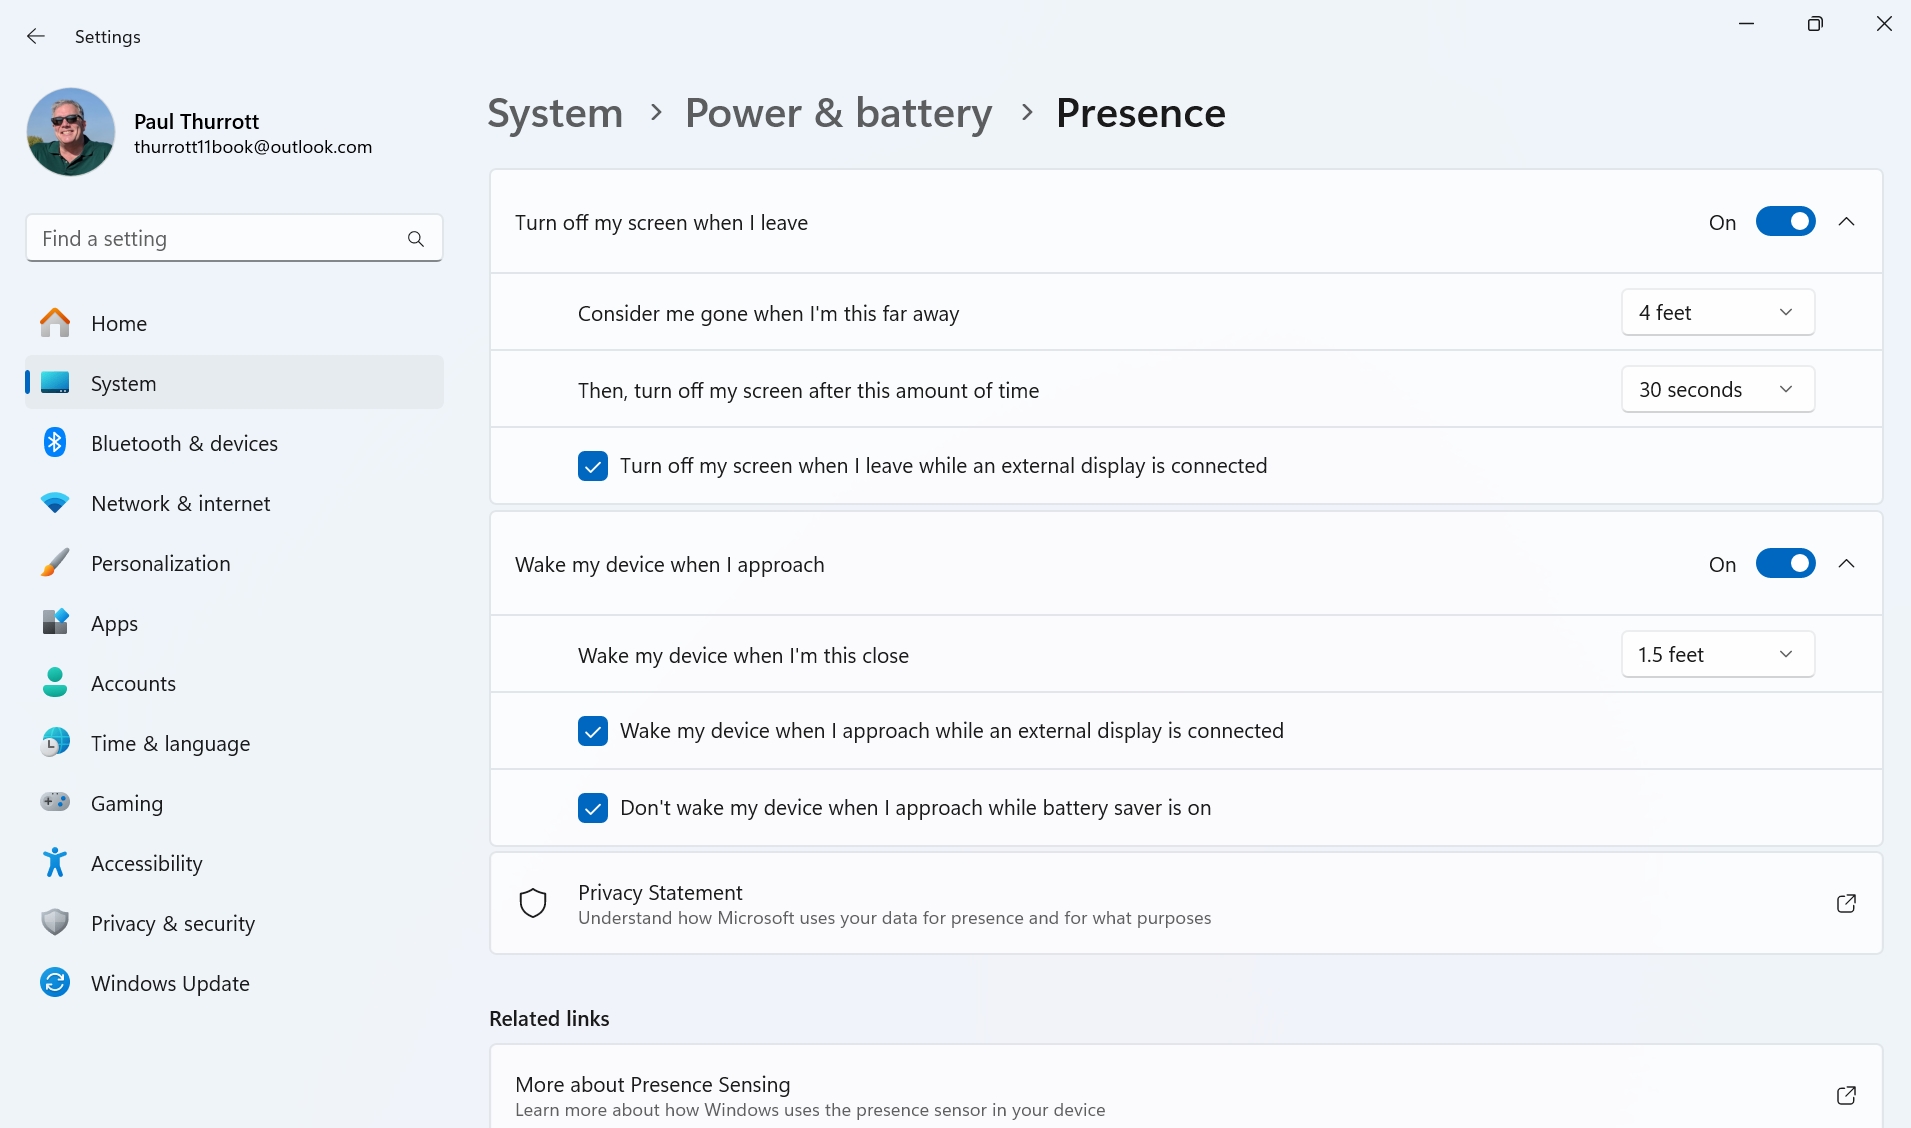
Then, consider each option’s optional configuration choices. Both have choices related to distance–4 feet when you leave the PC, 1.5 feet when you approach–and usage with an external display. And “Wake my device when I approach” has a choice related to battery saver, since this proximity sensor will drain the battery a bit when enabled. But for most people, the default settings are likely correct.
You could, of course, individually enable either of the Presence Sensing features but not the other if desired.
Presence Sensing is best used in tandem with Windows Hello facial recognition as it will speed the process of signing into your PC: The IR sensor will start scanning for your face as soon as the PC wakes up.
Dynamic lock
Dynamic lock uses a Bluetooth-paired smartphone to automatically lock your PC when you walk away from it.
Because Dynamic lock is somewhat unreliable, we don’t recommend using this feature. This is especially true if your PC supports Presence Sensing, as that feature is far more reliable and secure.
If your PC doesn’t offer Presence Sensing capabilities and you’re unconcerned with Dynamic lock’s reliability issues, setting it up is easy enough. That is, assuming that you’ve already paired the smartphone you intend to use via Bluetooth.
You can learn how to pair your smartphone with your PC in the Bluetooth chapter.
To do so, open the Settings app, navigate to Accounts > Sign-in options, locate the “Dynamic lock” entry, and click it to expand it in place.
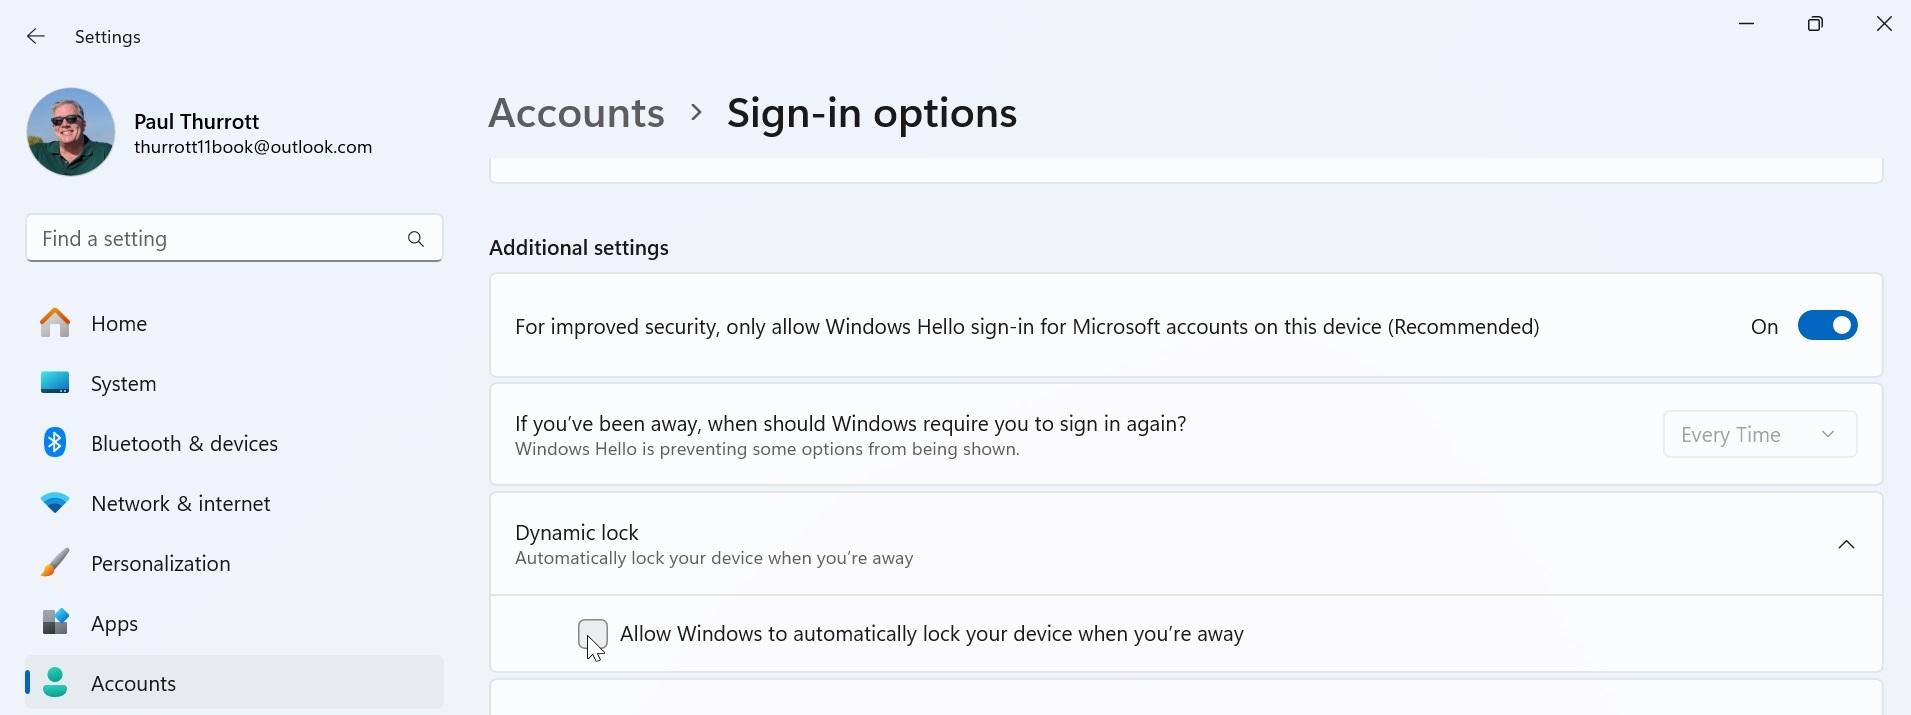
Now, check “Allow Windows to automatically lock your device when you’re away” to enable this feature. If you’ve already paired your smartphone, you can select it now. Otherwise, Dynamic lock configuration will fail and tell you to pair a phone first.

Bluetooth has reliability issues of its own, so there is no way to further configure this feature. Instead, Dynamic lock simply senses when your smartphone is no longer in range of the PC and locks it then.
For this reason, you’re better off manually locking your PC–typing WINKEY + L is the fastest way–when you step away. Assuming you can remember to do so.

Gain unlimited access to Premium articles.
With technology shaping our everyday lives, how could we not dig deeper?
Thurrott Premium delivers an honest and thorough perspective about the technologies we use and rely on everyday. Discover deeper content as a Premium member.