Accounts Used by Other Apps (23H2)
- Paul Thurrott
- Feb 10, 2024
-
0
In addition to letting you sign in to your PC with Microsoft accounts, work or school accounts, and local accounts, Windows 11 also lets you configure other online accounts within a sign-in account that can be used by other apps. These can be apps that ship with Windows 11 or third-party apps you install from the Microsoft Store.
Previously, Windows 11 supported two types of online accounts that could be used by apps: Those that provided email, calendar, and contacts data, and those that were used by other apps. But thanks to a single change in Windows 11 version 23H2–the addition of a new Outlook (new) app that replaces the Mail, Calendar, and People apps–you only need to worry about the second of those online account types because you configure email, calendar, and contacts accounts in Outlook (new), not in Windows 11.
Despite this, Windows 11 confusingly still includes an interface for adding and configure email, calendar, and contacts accounts alongside the interface for adding and configure app accounts. You can see this by opening the Settings app and navigating to Accounts > Email & accounts.
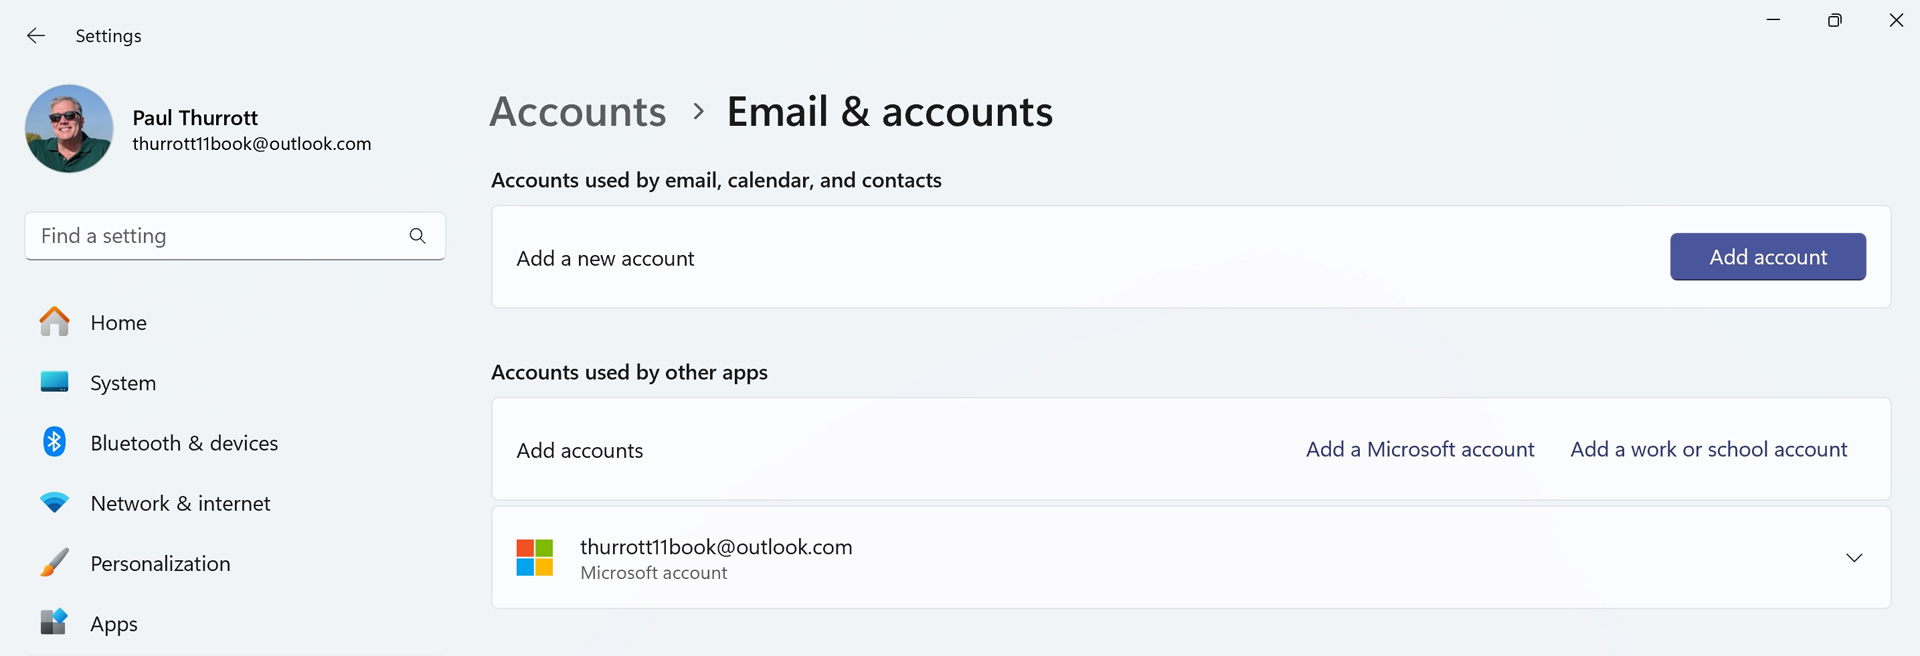
As you can see, there are two main sections to this Settings page, “Accounts used by email, calendar, and contacts,” and “Accounts used by other apps.”
You can safely ignore “Accounts used by email, calendar, and contacts.” While it is still possible to add online accounts in that interface, Outlook (new) will not automatically use any of them, nor will it respect the configuration changes you might make there. Instead, you should add and configure email, calendar, and contacts accounts directly in the Outlook (new) app.
Where did it go?
In older versions of Windows 11, you used the “Accounts used by email, calendar, and contacts” interface in Settings to add and configure online accounts for use in the Mail, Calendar, and People apps. But with Windows 11 version 23H2, Microsoft has deprecated those apps and replaced them with the all-in-one Outlook (new) app. And not only will it will soon remove Mail, Calendar, and People from Windows 11 soon, but Microsoft will also prevent users from downloading these apps from the Microsoft Store or using them in Windows 11.
Oddly, you can still add online accounts using “Accounts used by email, calendar, and contacts,” and you can configure each to your heart’s content. But unlike Mail, Calendar, and People, the Outlook (new) app ignores the accounts you add and any configuration changes you make there.
Because of this change, we will soon remove the Mail and Calendar chapters from this book so that we can focus on Outlook (new) instead. If you still use Mail, Calendar, and People, we recommend that you evaluate Outlook (new) and switch to that app or another email solution as soon as possible.
You can learn more about the Outlook (new) app in the Outlook (New) chapter.
Add and configure an account that can be used by Microsoft Store apps
When you sign in to Windows 11 using a Microsoft account or work or school account, that account is also configured for use with the Microsoft Store, Windows 11’s app store. Indeed, your sign-in account is the default account for apps, meaning that many Microsoft Store apps, including many that are included with Windows 11, will also automatically use that account.
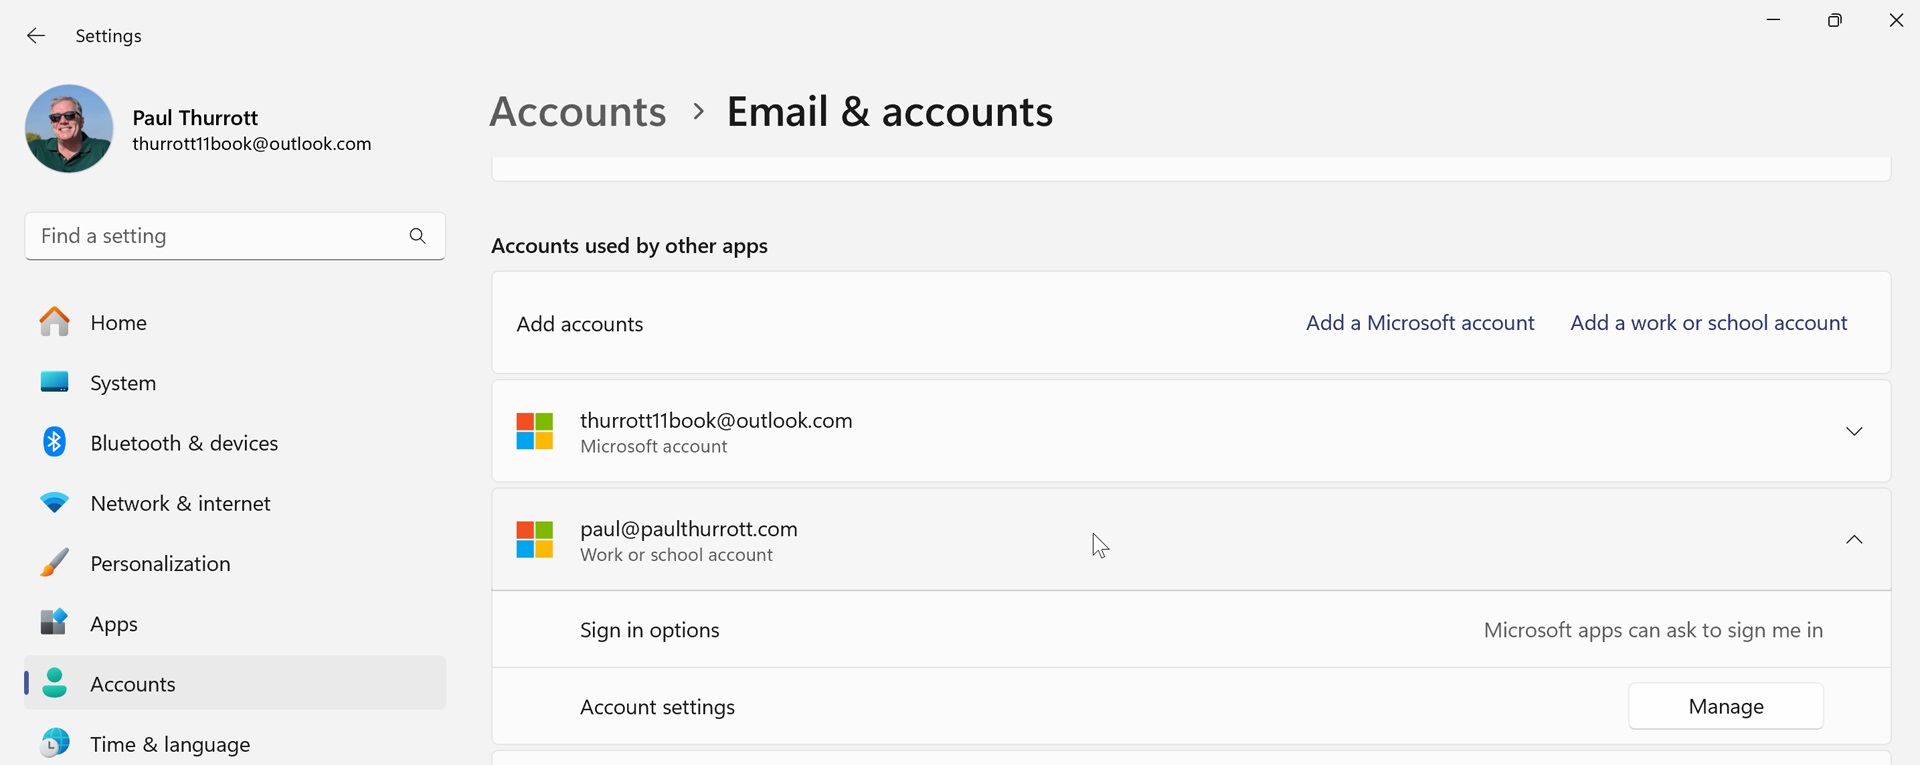
This can be seen by opening the Settings app and navigating to Accounts > Email & accounts: You’ll see your sign-in account listed under “Accounts used by other apps.”
But you can also configure other Microsoft accounts and work or school accounts for use with Microsoft Store apps. Windows 11 will still default to your sign-in account in most cases, but when you want to use a different account with a specific app, you can sign out of the app and choose the account you want.
Add and configure a Microsoft account that can be used by Microsoft Store apps
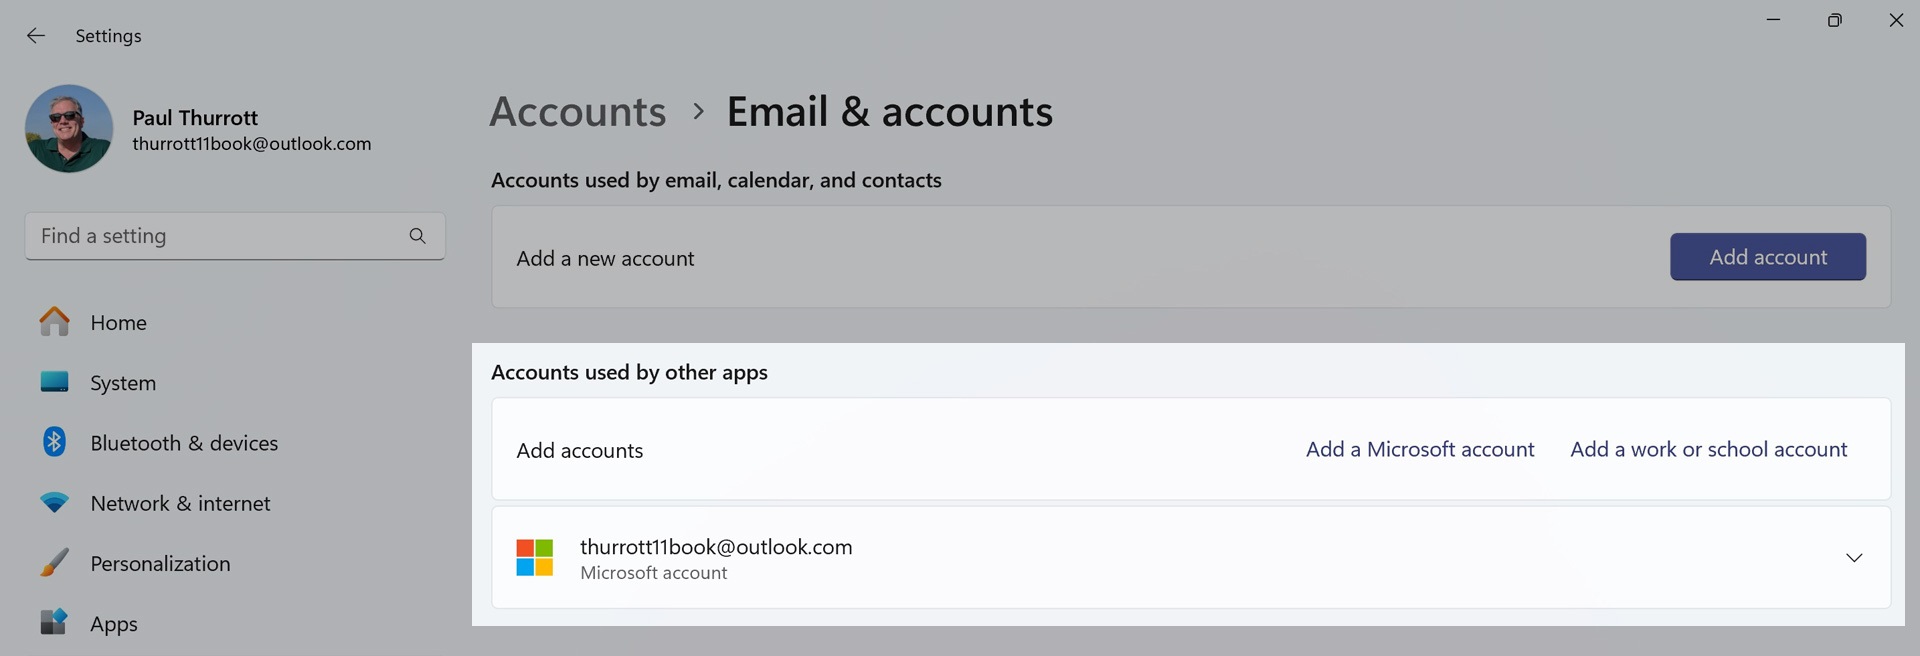
To configure another Microsoft account for use with Microsoft Store apps, click the “Add a Microsoft account” link next to “Add accounts” under “Accounts used by other apps” in Email & accounts settings. The “Sign in” window appears.
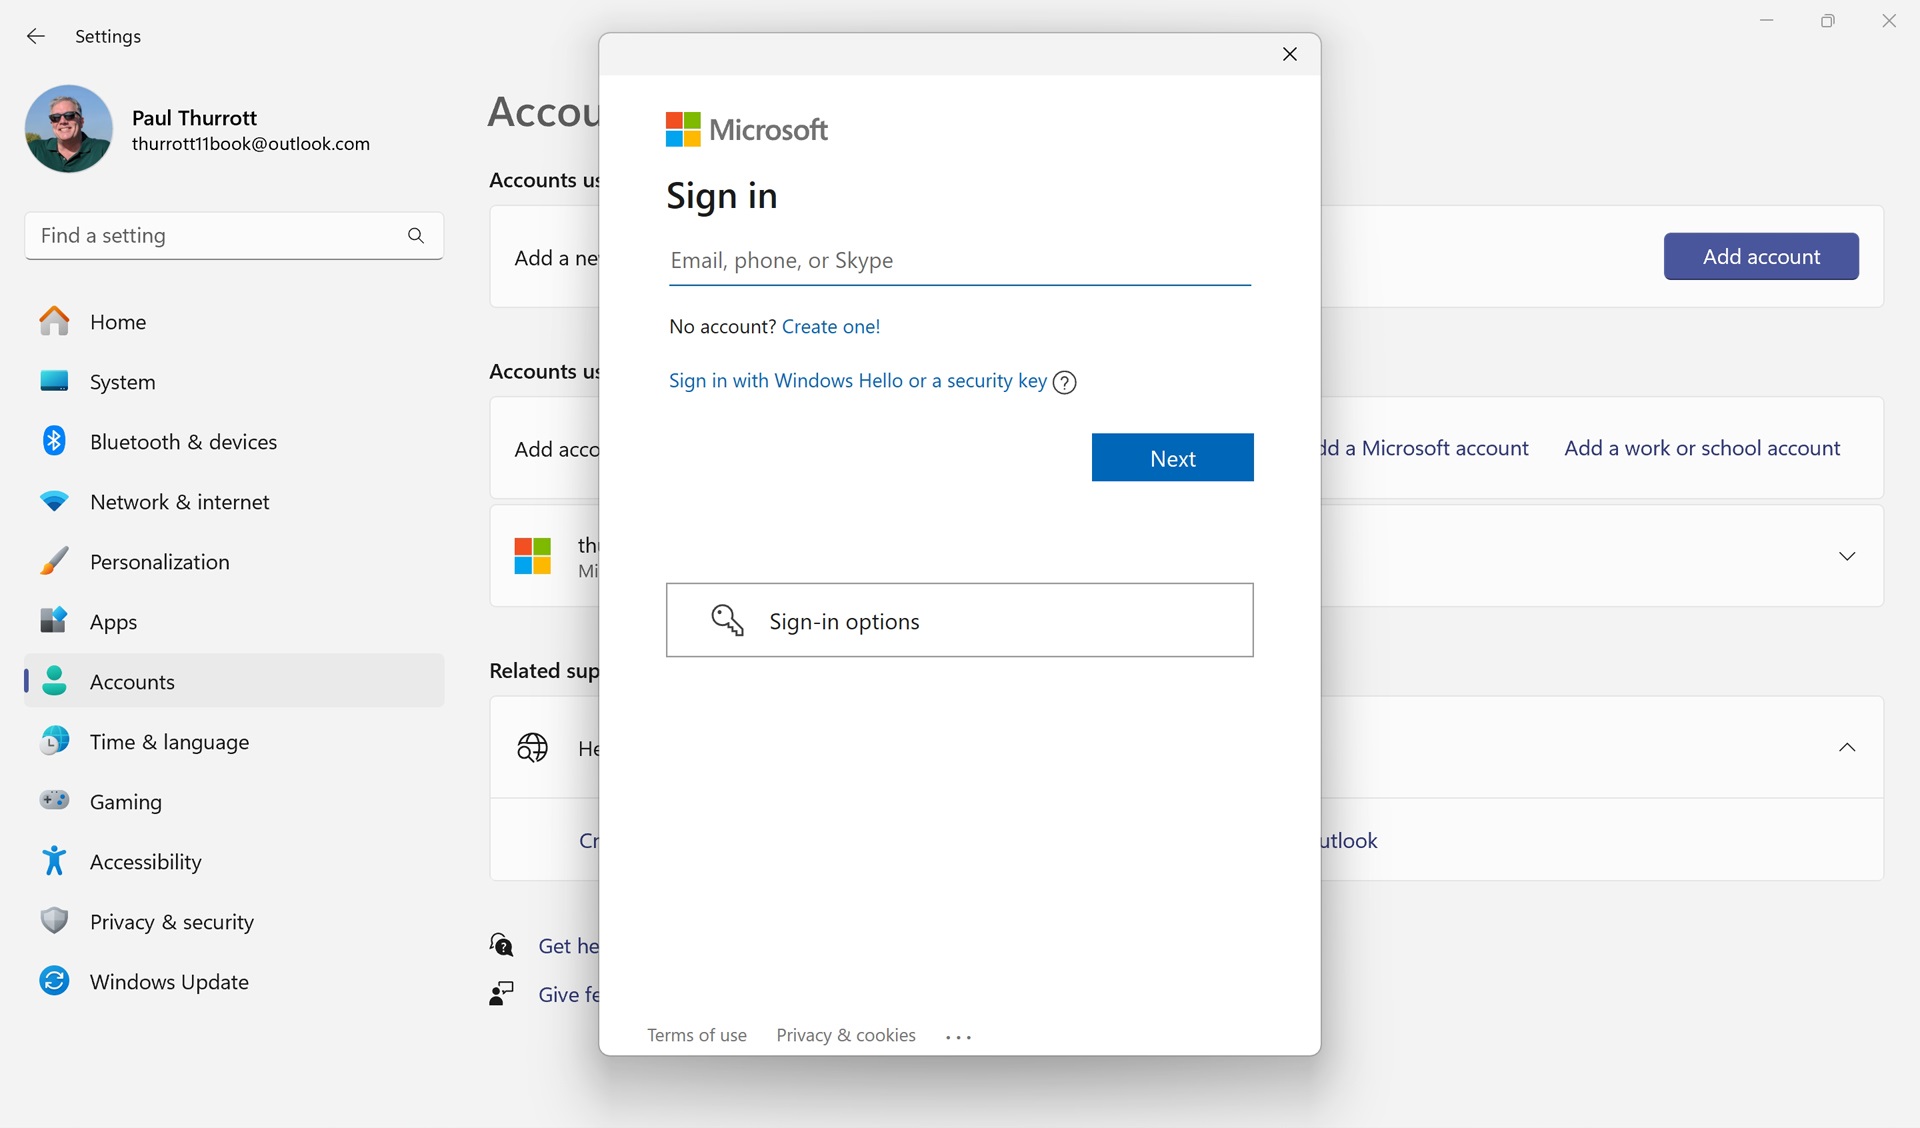
Sign in to the Microsoft account you wish to use and authenticate as required. Then, when prompted, verify your identity with Windows Hello (using a PIN or facial or fingerprint recognition) to add the account. When you’re done, the account will be listed alongside your sign-in account under “Accounts used by other apps.”
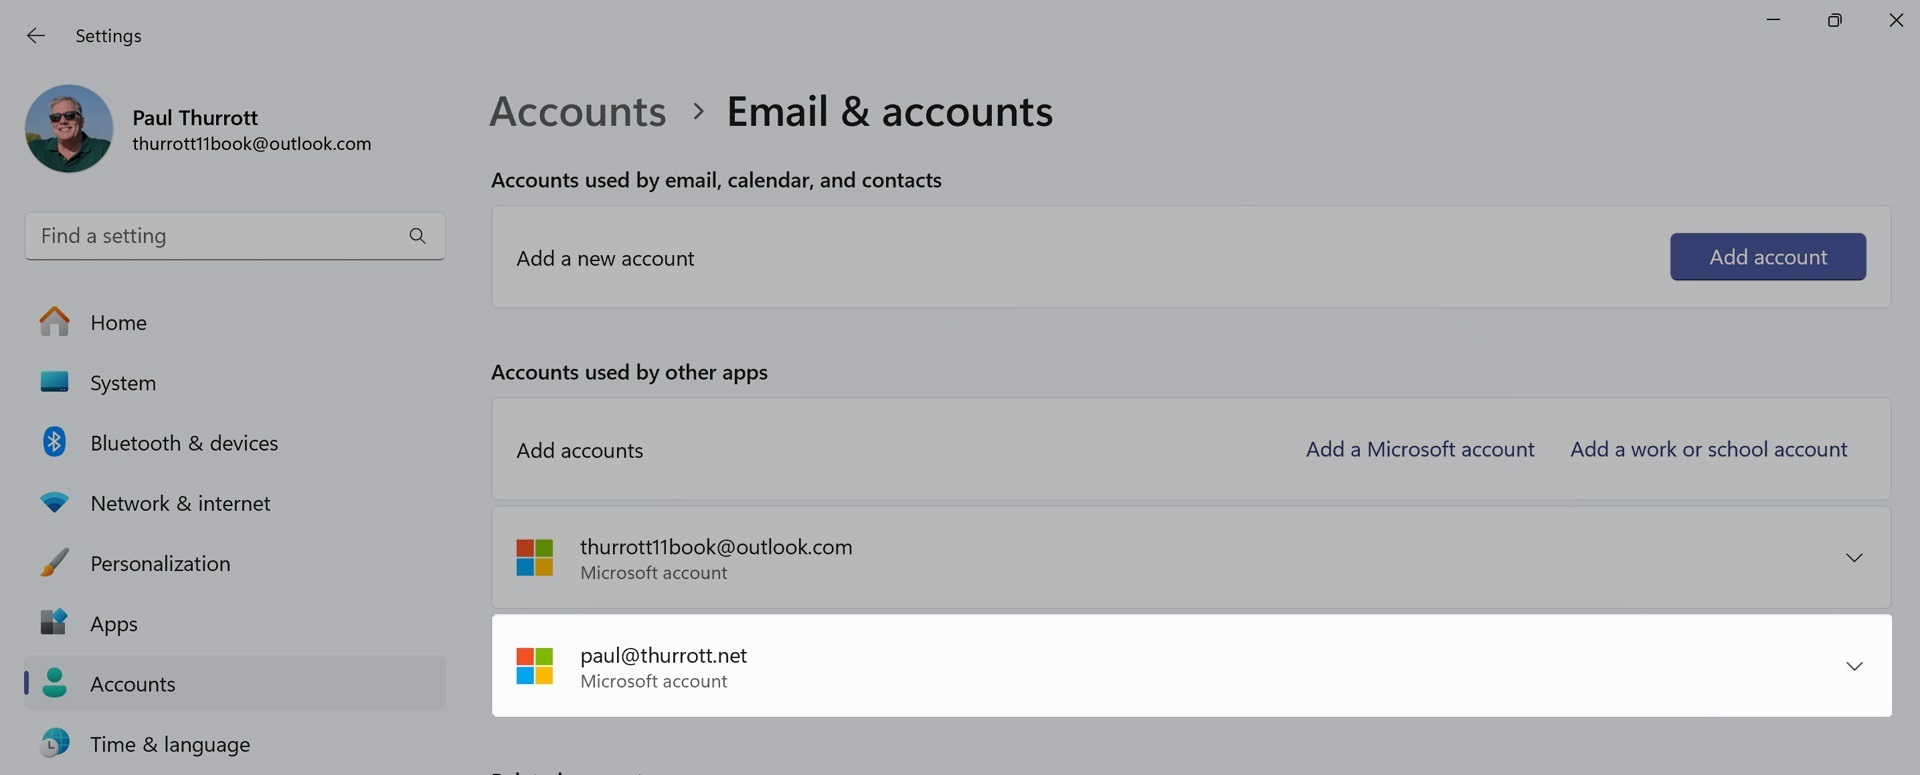

Click the new account to expand the view. Then, examine the choices for “Sign in options.”
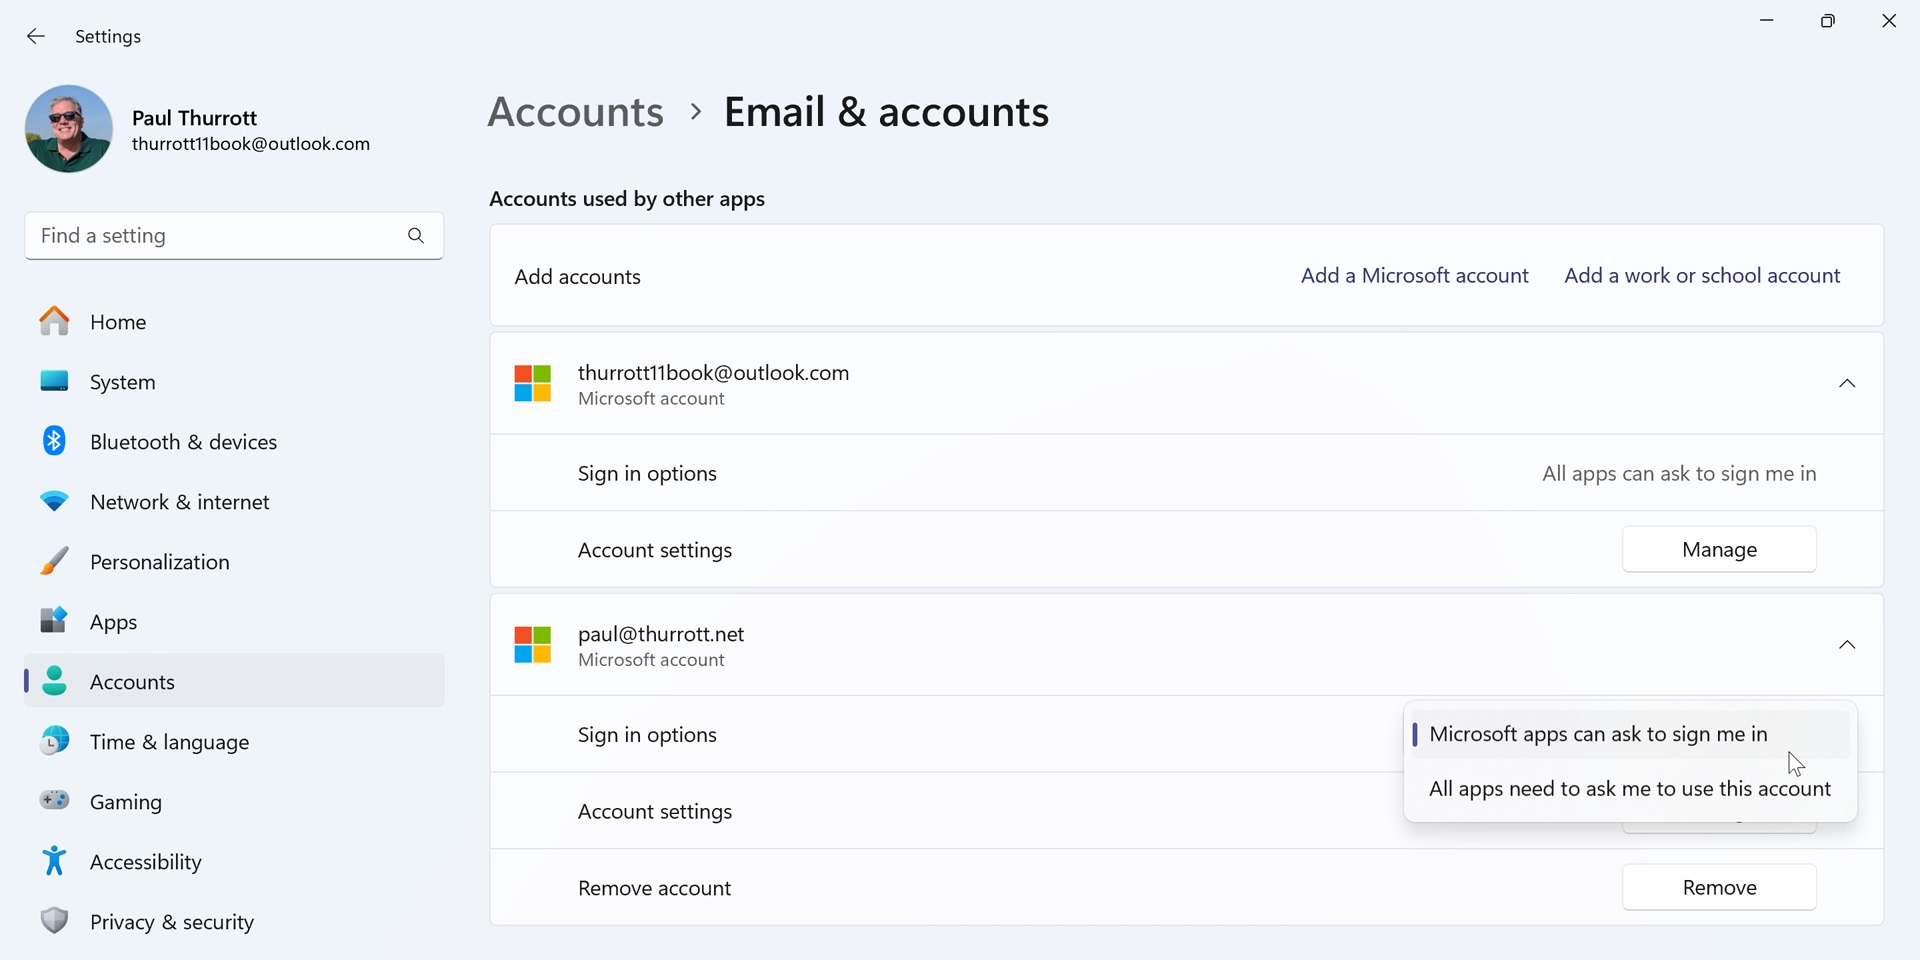
Where your default Microsoft account is set to “All apps can sign me in” because of Windows 11 pass-through authentication–and cannot be configured otherwise–the newly added account is set to “Microsoft apps can ask me to sign me” by default. This means that any compatible apps can automatically use this account. Or, you can change it to “All apps need to ask me to use this account” to make that choice more explicit.
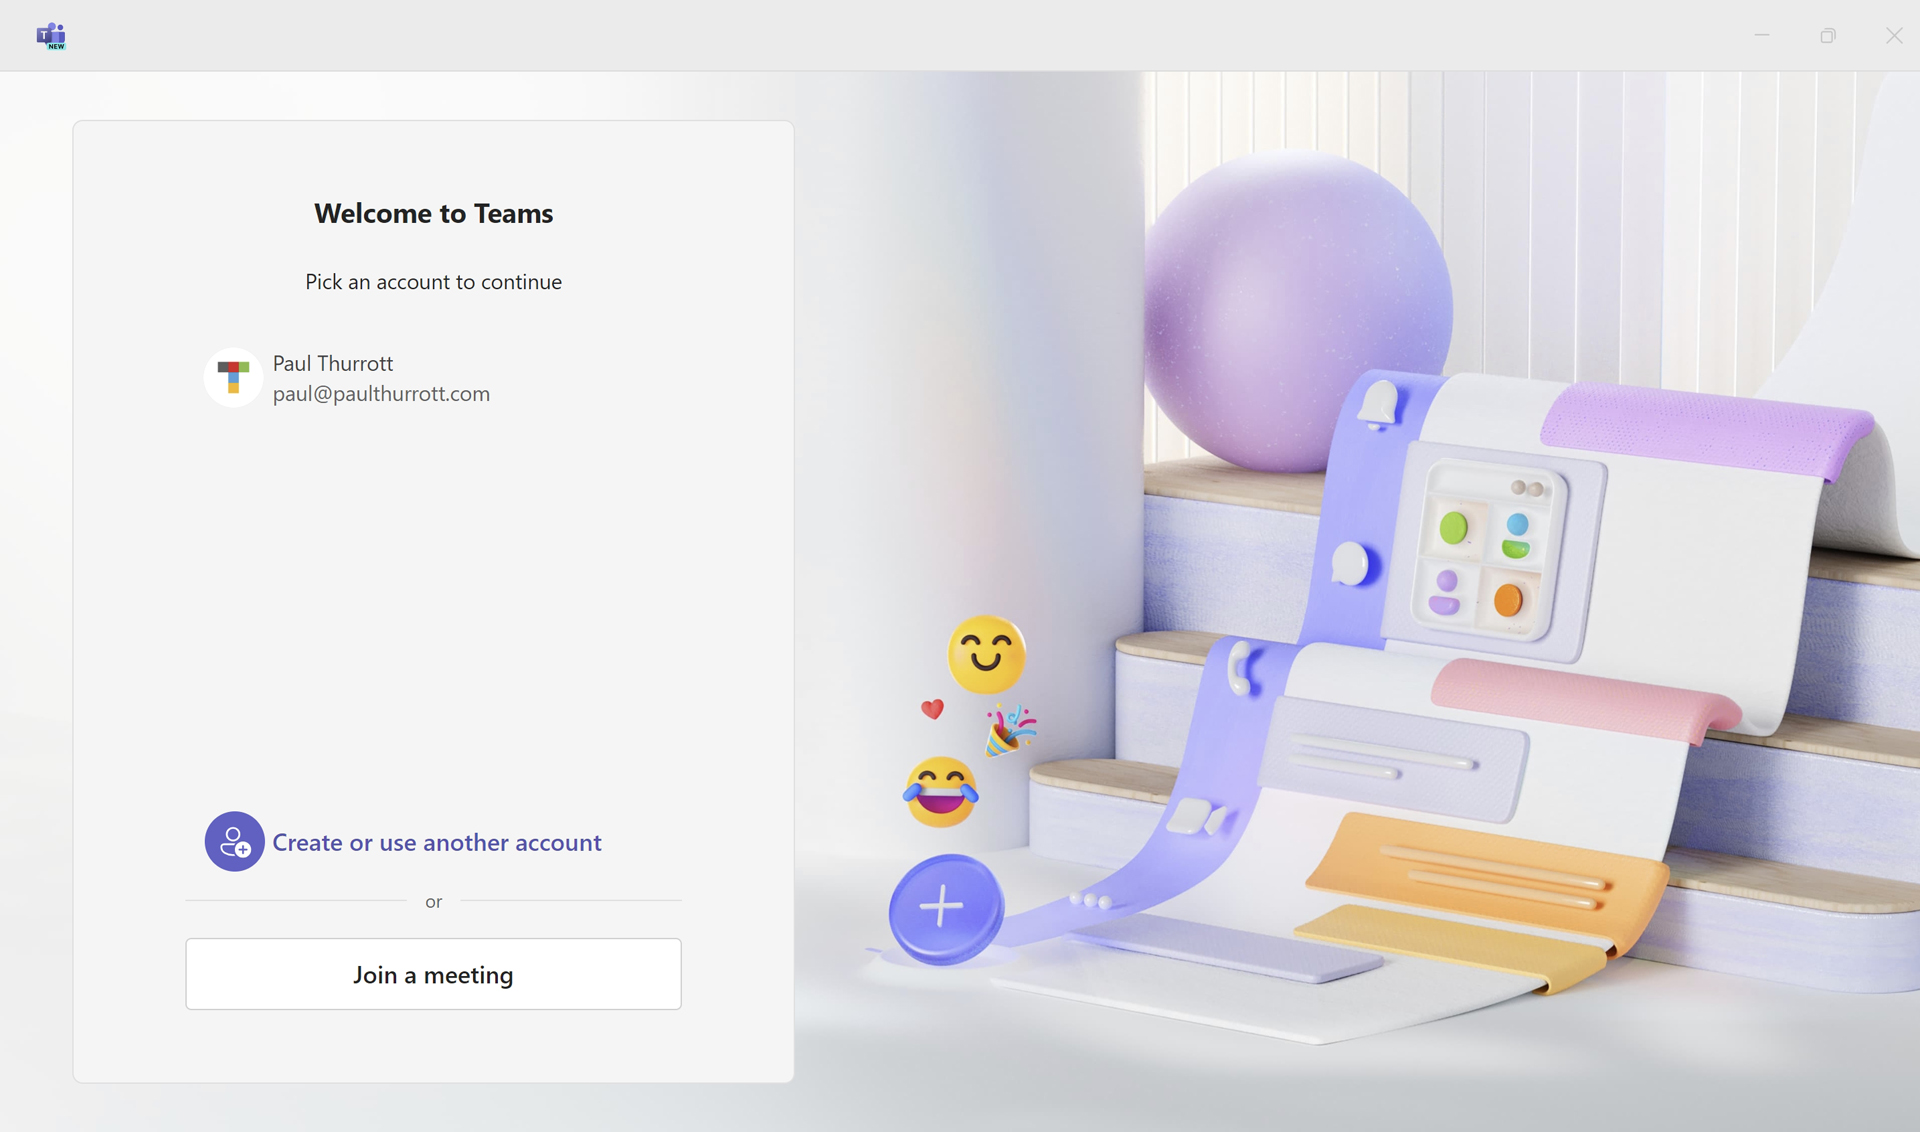
To use this new account with a compatible app, open the app, sign out of your Microsoft account, and then sign in again. You will be prompted to choose which account to use. For example, here we are changing the sign-in to the Microsoft Store app to a different account so that we can access the content in that account’s library.
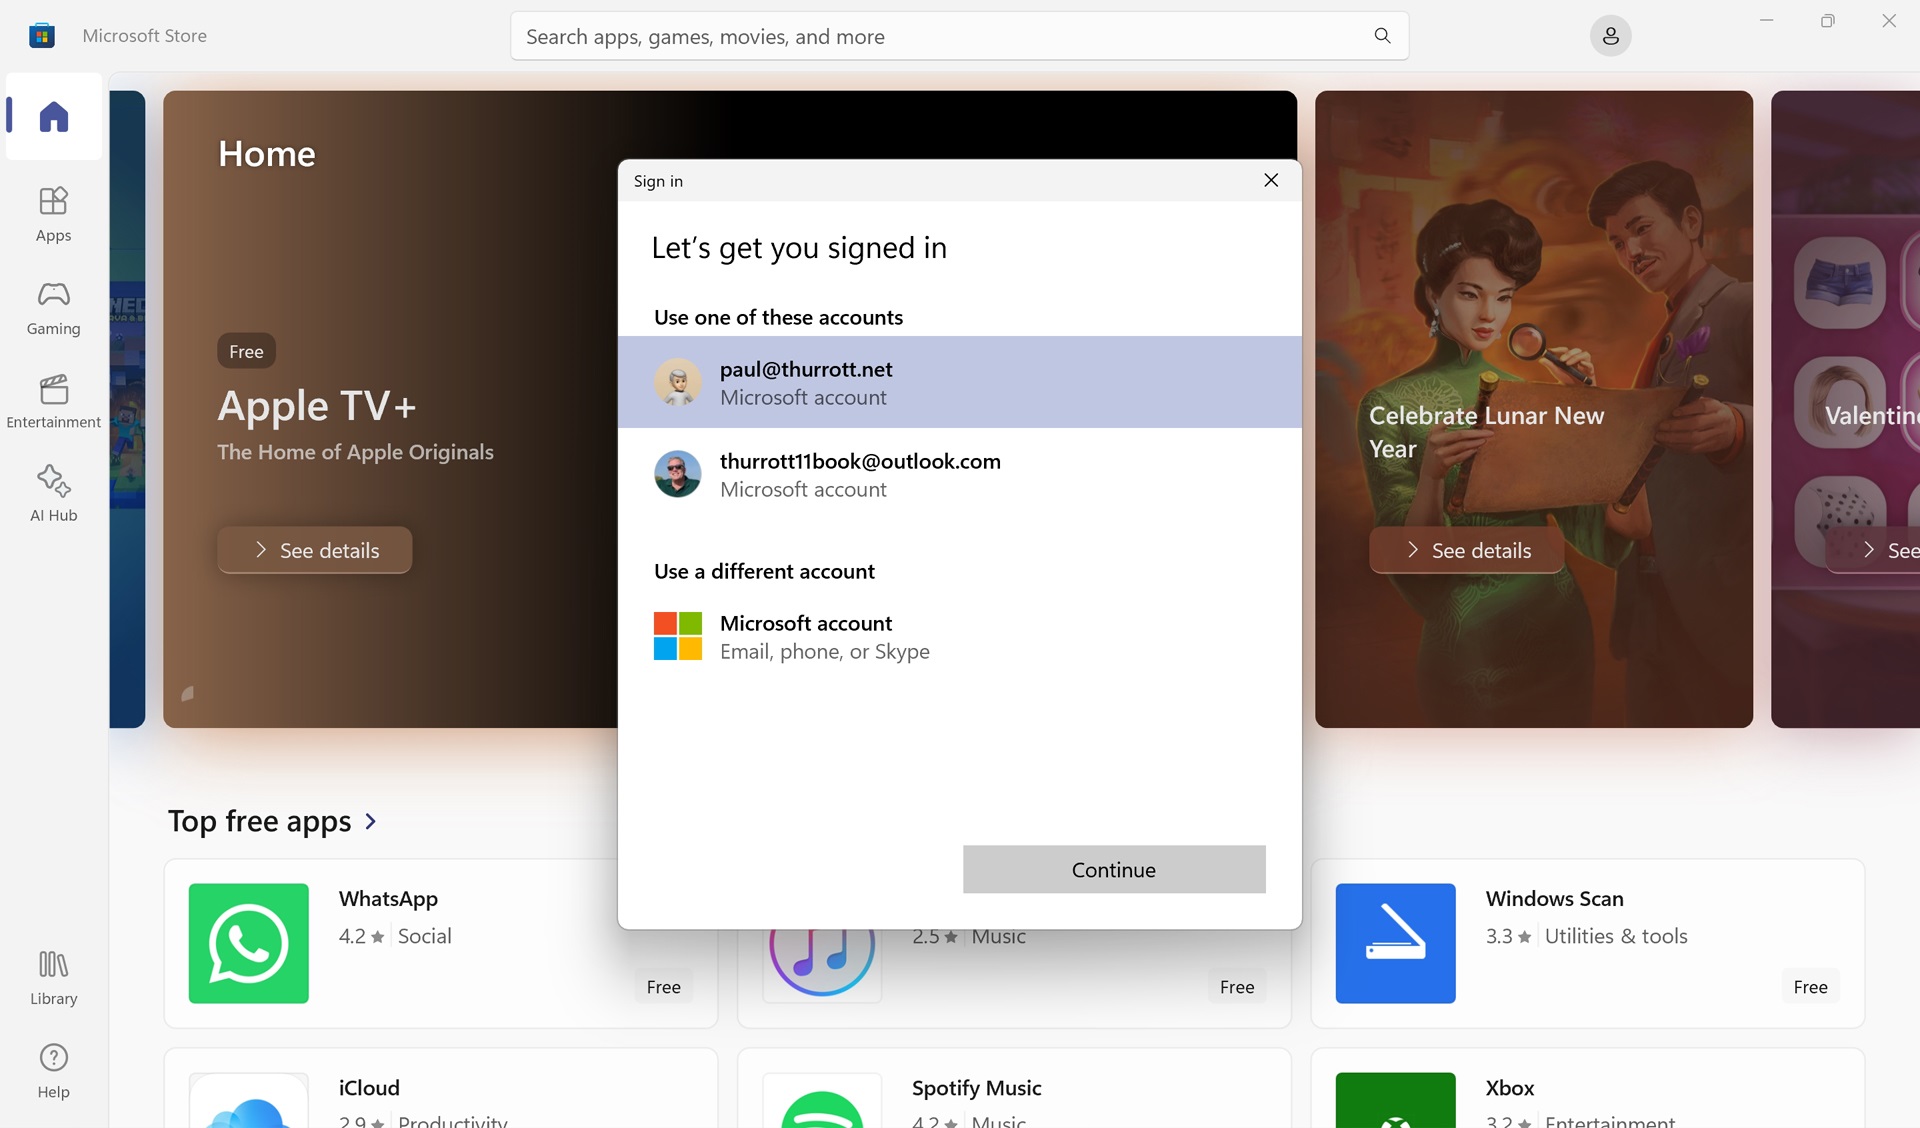
As you can see in the screenshot above, you can also configure a Microsoft account for use with compatible Microsoft Store apps directly from the “Sign in” window. Just choose “Use a different account” and follow the prompts to add a new account. When you do so, that account will be added to “Accounts used by other apps” in Email & accounts settings as well.
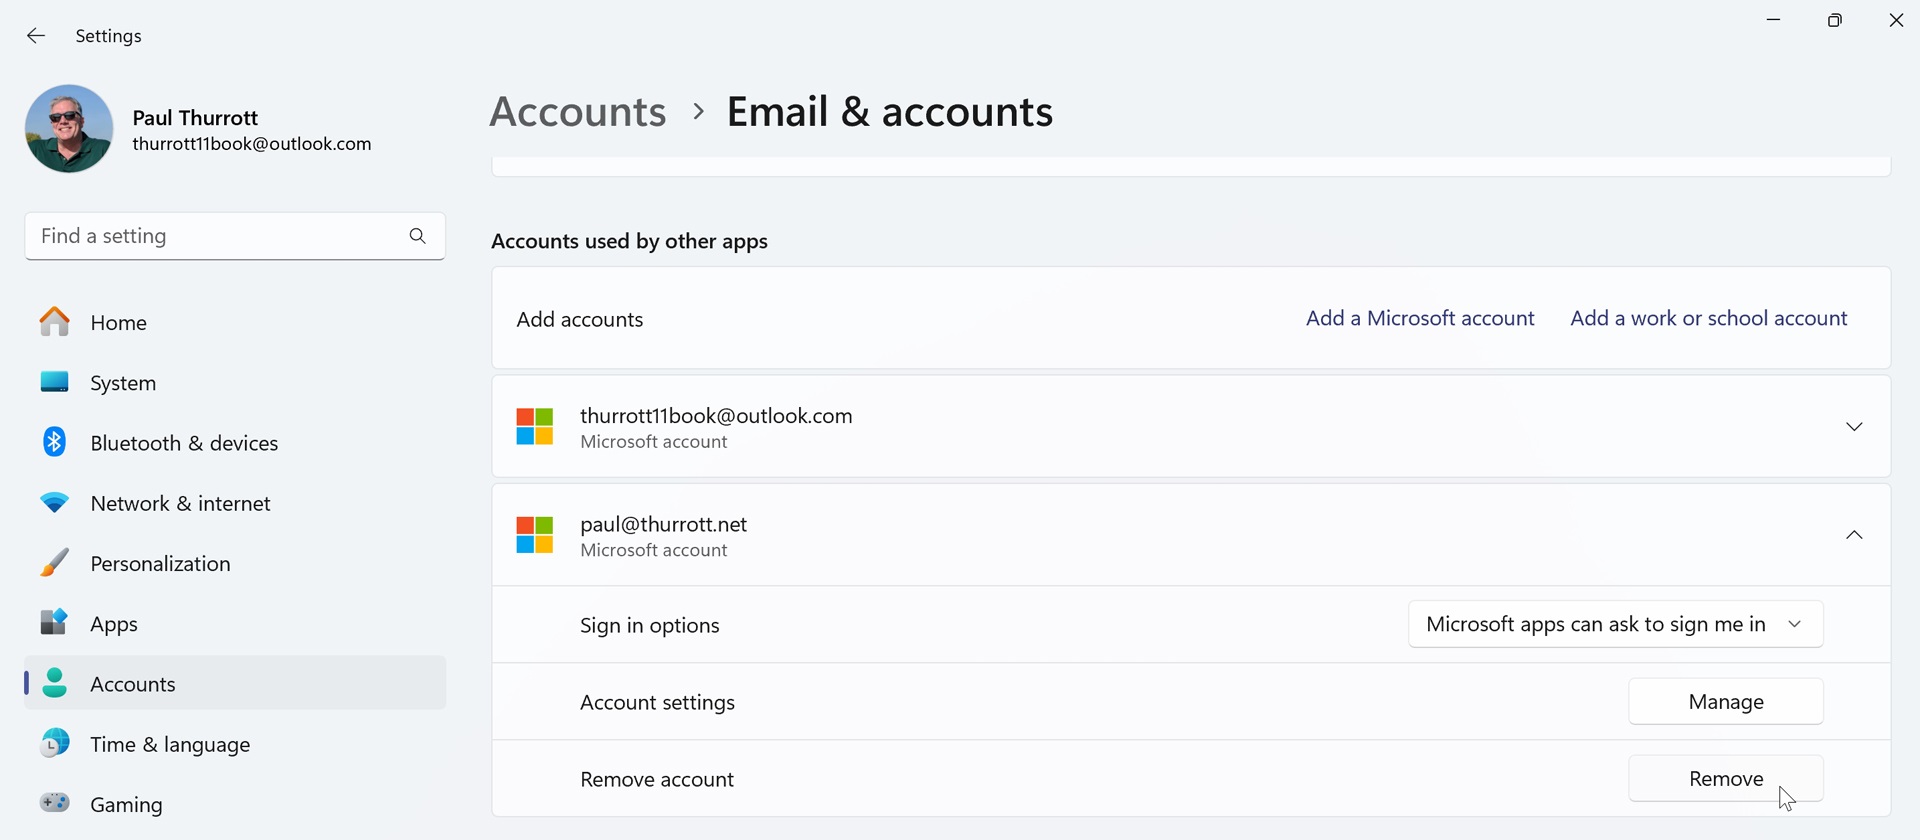
To remove a Microsoft account from “Accounts used by other apps,” select it to expand the view and then click “Remove.” When prompted to make sure, click “Yes.”
Add and configure a Microsoft work or school account that can be used by Microsoft Store apps
You can also add a Microsoft work or school account to “Accounts used by other apps.” Doing so is similar to adding a Microsoft account, as described previously, but because of the managed nature of this account, there are no options to configure and the number of apps you can sign in to is smaller.
Oddly, adding a work or school account here is no different from connecting a work or school account to your Microsoft account sign-in, as described in the Work and School Accounts chapter. And because you can’t later remove a work or school account from the PC using “Accounts used by other apps,” it’s perhaps better to use that other interface instead.
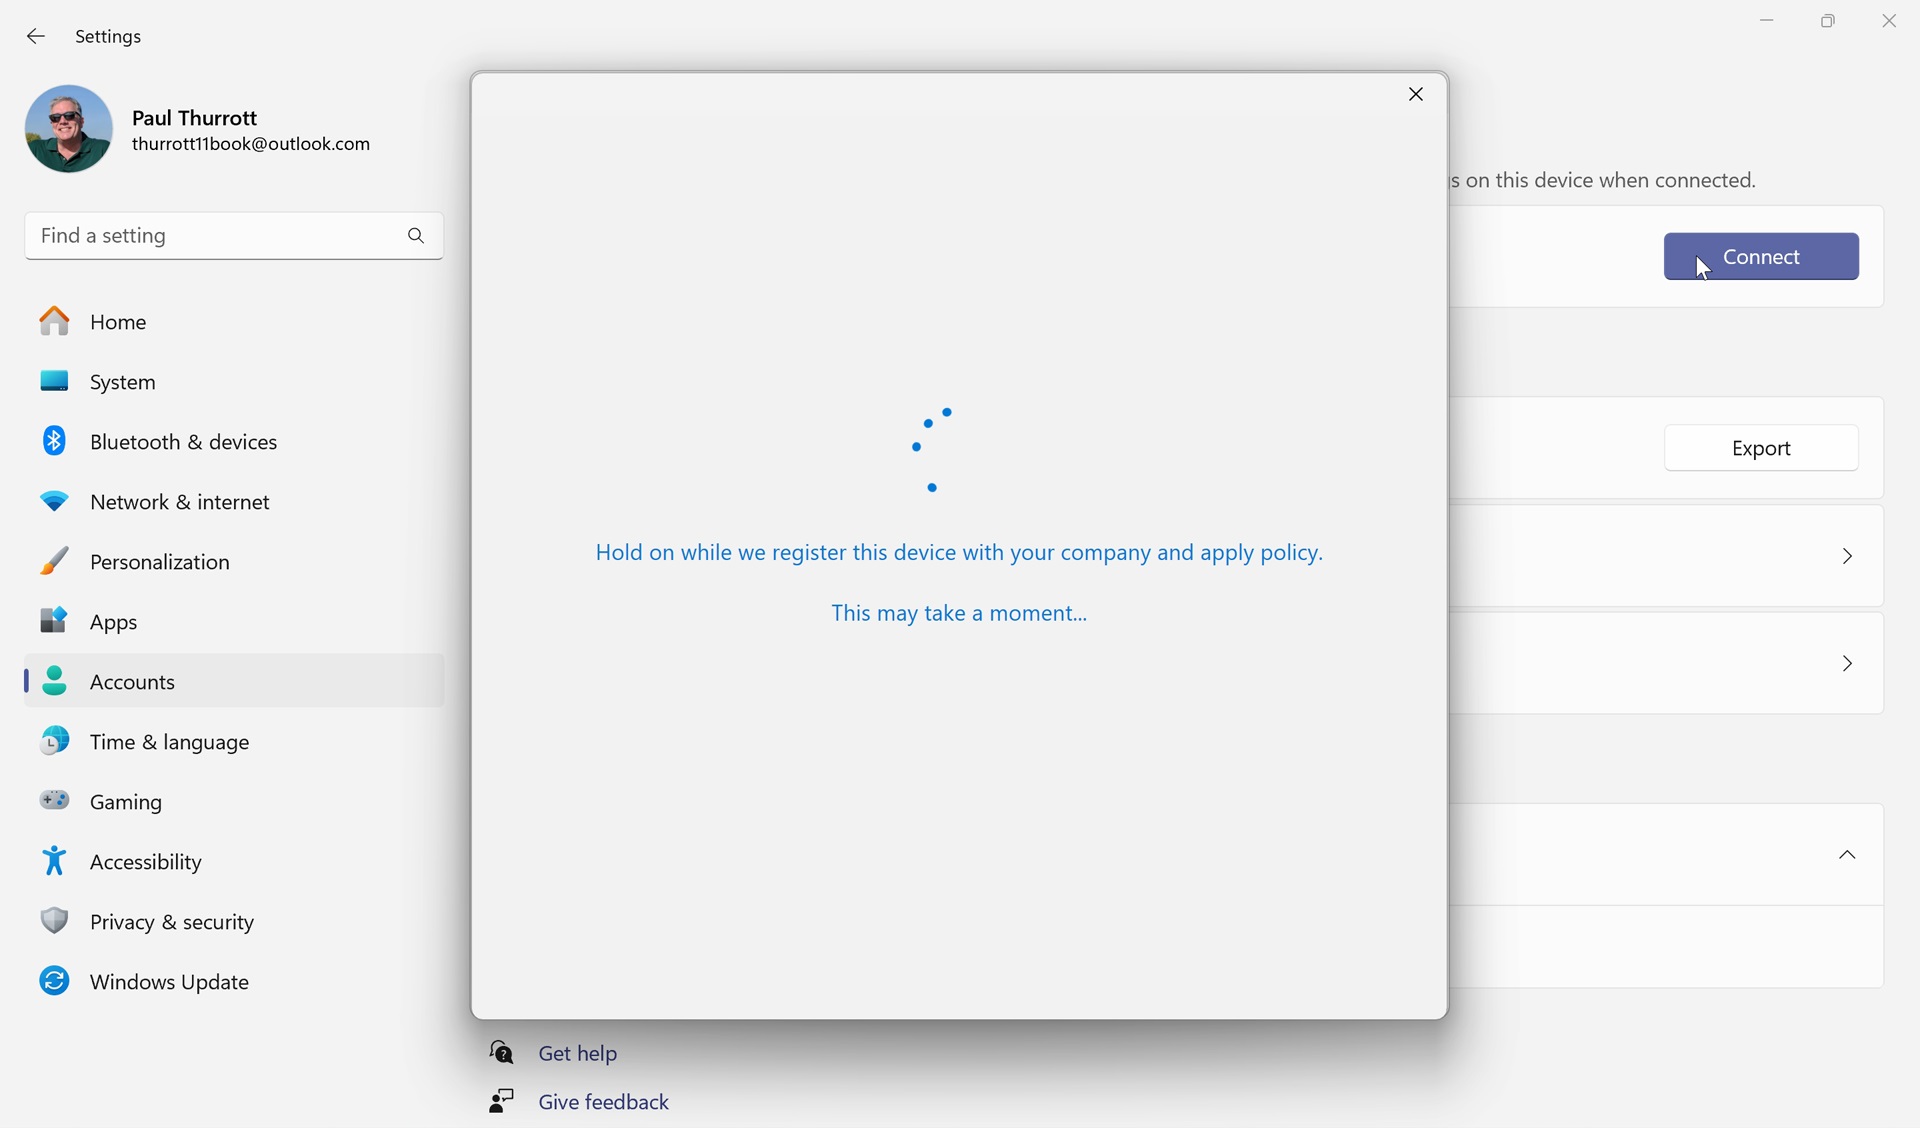
To connect a work or school account to your Microsoft account sign-in, allowing you to, among other things, sign in to apps using that account, open Settings and navigate to Accounts > Access work or school. Then, click the “Connect” button next to “Add a work or school account” and sign-in and authenticate as required. Windows 11 will then register the PC and apply polices as required by your organization.
When that’s done, you’re told you’re all set. Click “Done” to close the window.
Two things have changed.
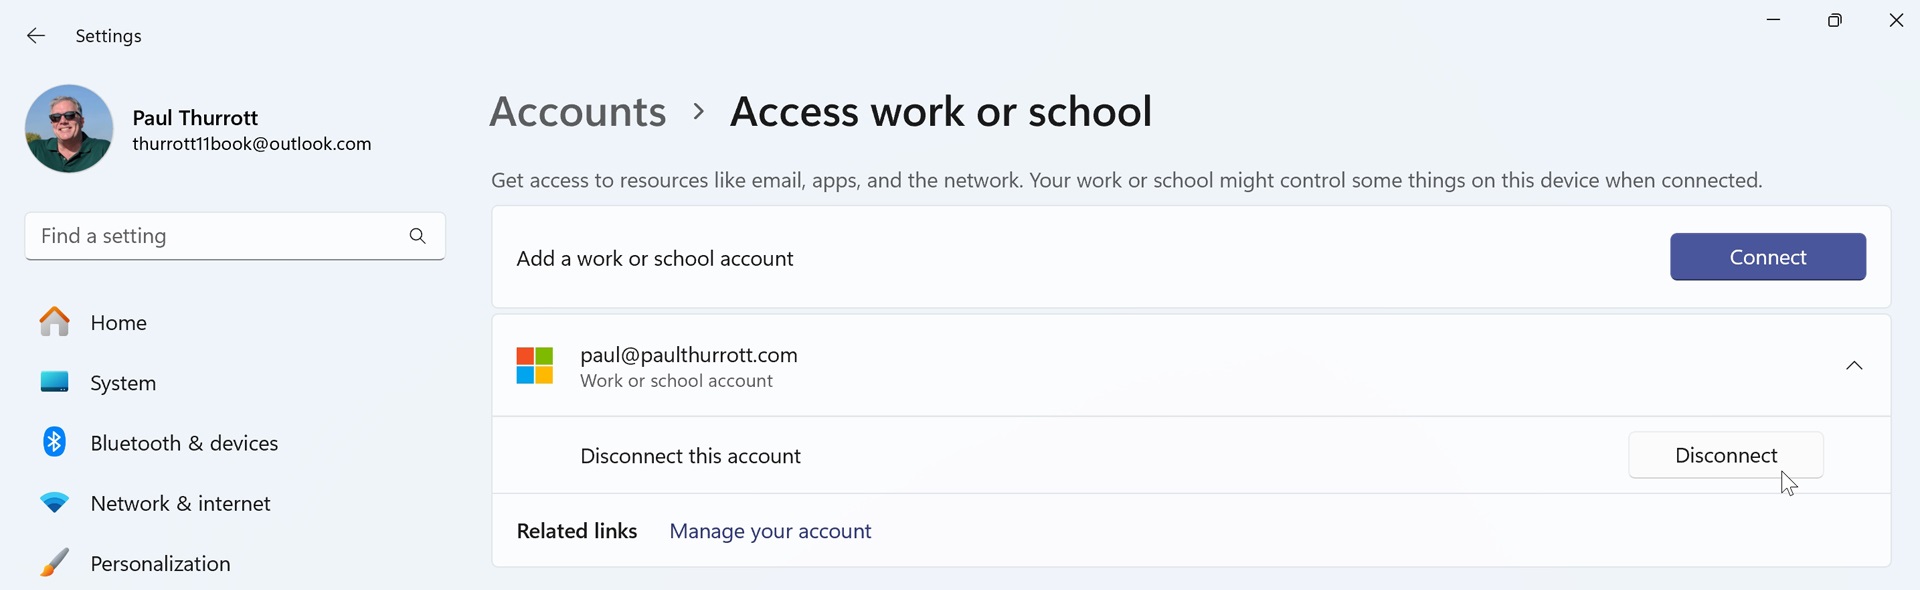
First, your work or school account is listed in Accounts > Access work or school and in Accounts > Email & accounts > Accounts used by other apps.

Note that if you view Accounts > Email & accounts and click the new account to expand the view, you’ll find that you can’t configure this account in any way. Instead, the “Sign in options” setting is hard-coded to “Microsoft apps can ask me to sign in.”
Second, as hinted at when you connected the work or school account, your organization may control certain settings and configurations you could otherwise modify. But you can also now access your organization’s email, apps, and other resources.
To use your work or school account with a compatible app, like Microsoft Teams (work or school), install the app from the Store if necessary, open it, sign out of your Microsoft account if necessary, and then sign in again. You will be prompted to choose which account to use, and your work or school account will be among the choices, if not the only choice.
To remove a connected work or school account, open Settings, navigate to Accounts > Access work or school, select the account there to expand the view, and click “Disconnect.”
Then, just follow the prompts. When you’re done, the work or school account will no longer be listed here or in “Accounts used by other apps” in Accounts > Emails & accounts.

Gain unlimited access to Premium articles.
With technology shaping our everyday lives, how could we not dig deeper?
Thurrott Premium delivers an honest and thorough perspective about the technologies we use and rely on everyday. Discover deeper content as a Premium member.