Cellular Data
- Paul Thurrott
- Oct 24, 2022
-
0
If your PC supports cellular data services provided by a mobile operator, you can use this connection to access the Internet, just as you do with your smartphone.
Most Windows PCs do not provide this capability today, but that doesn’t mean you can’t take advantage of the cellular data plan you’re already paying for: smartphones can typically be used as a hotspot that lets them share their data connection with other devices. Those shared connections will appear as normal Wi-Fi networks to your Windows PC.
While cellular networks are more broadly available than Wi-Fi, they are also typically more expensive. And most cellular data plans are limited by a monthly data cap (and perhaps an even smaller hotspot data cap), so customers are charged even more if that amount is exceeded. For this reason, Windows 11 treats cellular data networks differently from Wi-Fi or Ethernet networks. Most notably, it will not sync with OneDrive or download Windows Updates over such a network by default. Even critical security updates are deferred for as long as possible.
Windows also helps you keep track of your data usage on this type of network—which it calls a metered network—so it can proactively warn you if you’re in danger of exceeding your monthly data cap.
Cellular data connections are always private and cannot be configured with a public network profile.
Connect to a data plan
Depending on your PC, you may have one or two different ways to connect it to a data plan:
eSIM. Those with an internal (embedded) SIM—called an eSIM—can purchase plans online via Windows 11.
Physical SIM. Those with only a SIM card tray will need to buy a physical SIM card first, either directly from a mobile operator or from a retailer that offers such a thing.
A> Most PCs that support cellular data offer both eSIM and (physical) SIM options. The latter is less convenient and less versatile since you can only connect to that one mobile operator: you can configure an eSIM with multiple plans, though you can only use one at a time, of course.
Connect an eSIM to a data plan
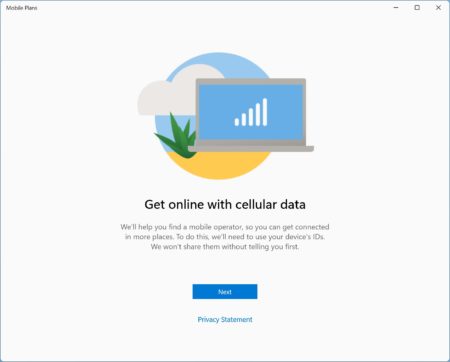
If your PC offers cellular data via an eSIM, you can purchase cellular Internet access from third-parties through Windows for temporary or even long-term usage. This is an interesting option for those who don’t have a permanent cellular data connection through work or personally.
To get started, launch the Mobile Plans app that comes with Windows 11. (The easiest way to find this, as always, is with Search.)
Ironically, you need to be connected to the Internet to use this app, so be sure to set this up before you’re on a trip and offline.
Mobile Plans provides you with a list of mobile operators, specific to your locale, that you can sign up with to purchase a cellular data plan. Whichever mobile operator you choose, Mobile Plans will display that company’s website, where you can create an account if needed, peruse the various options, and make the purchase that makes the most sense for you.
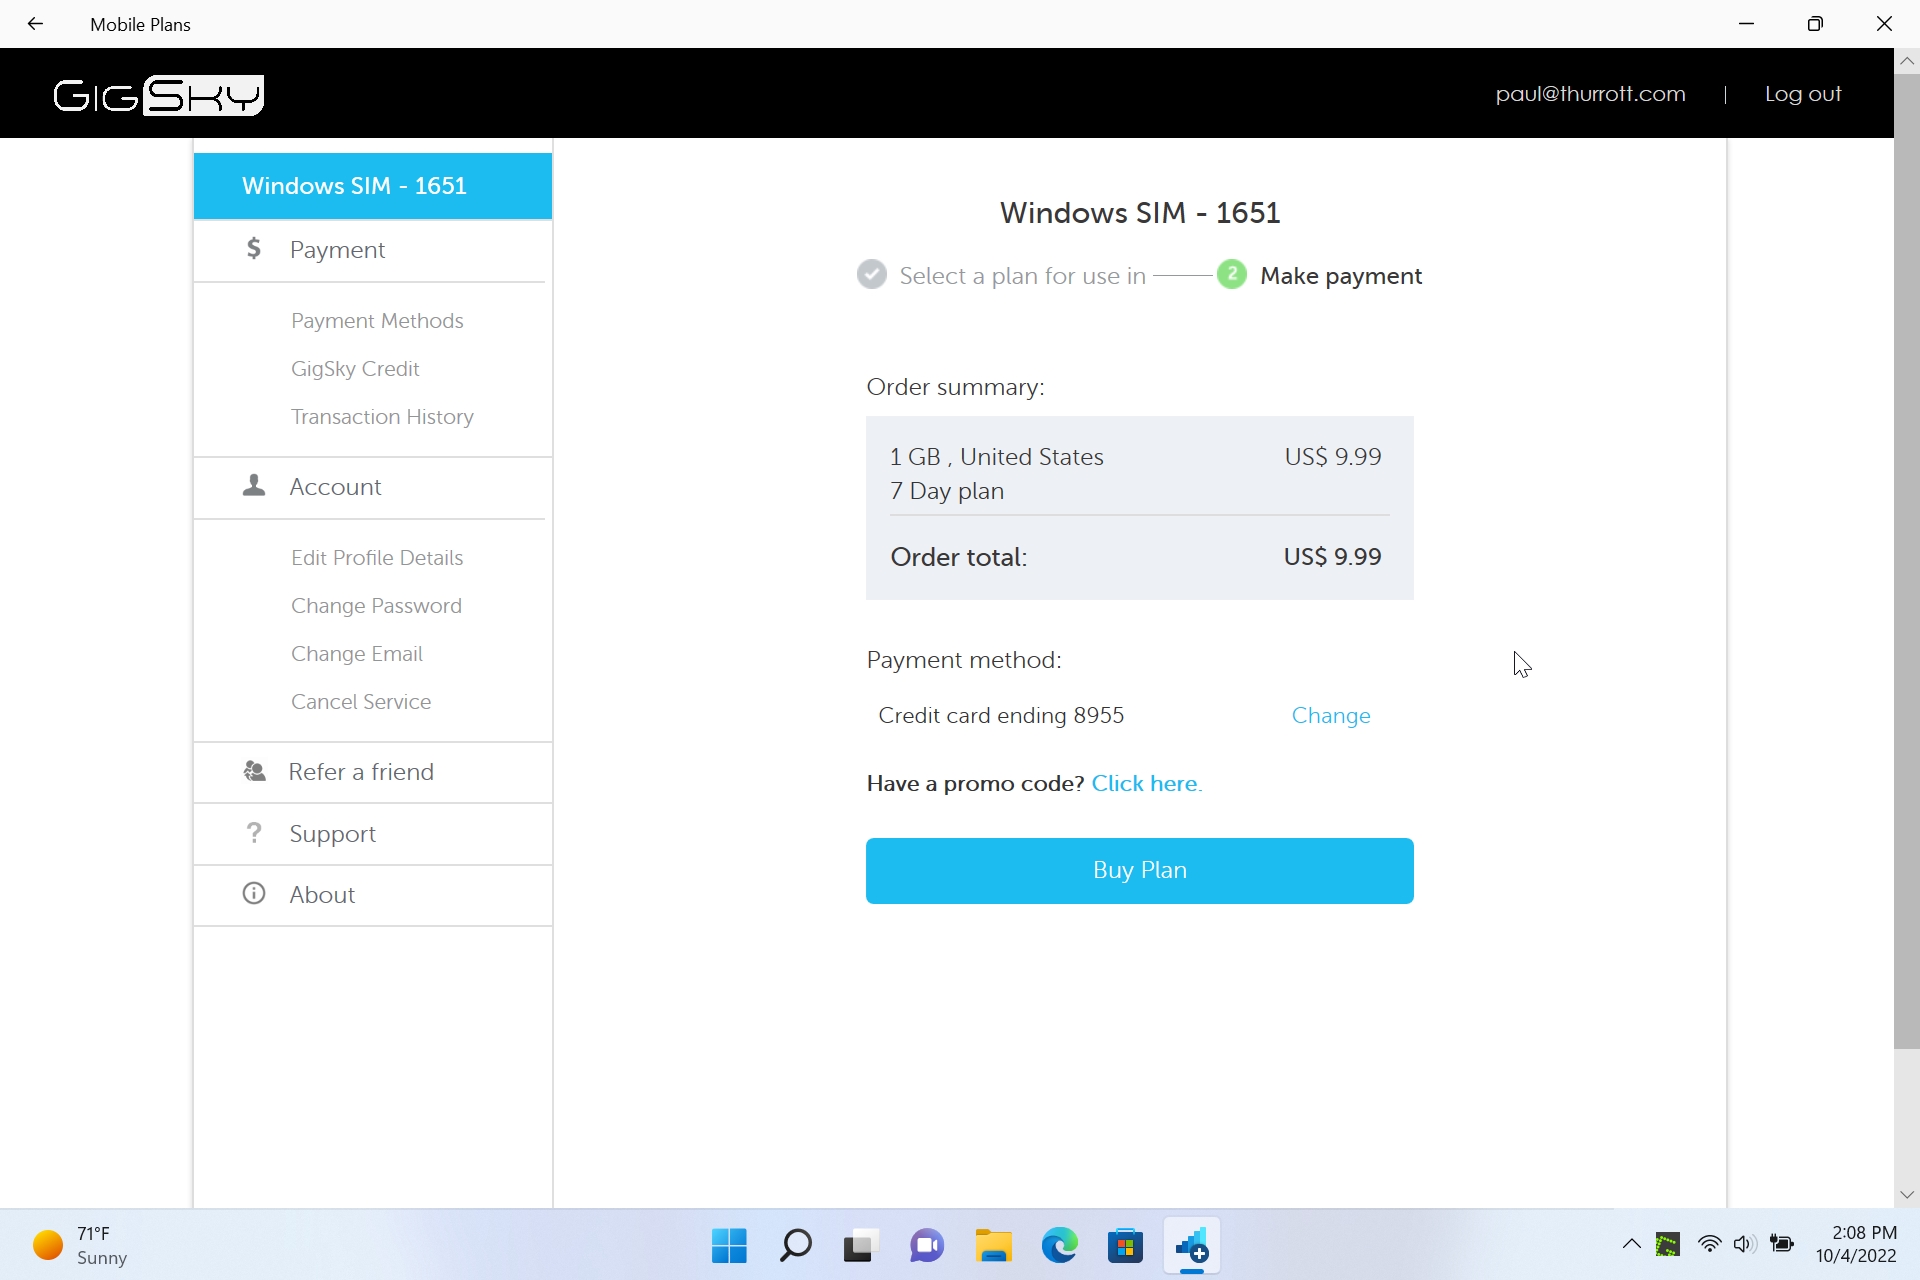
Once that process is complete, the mobile operator will download a profile to your eSIM. This profile is then installed in the eSIM, providing it with the account and network configuration settings it needs to connect to that network.
Use a physical SIM card.
It’s much quicker getting up and running with a physical SIM: just eject the SIM tray, insert the card, and then re-insert the SIM tray. Windows will ask you if you’d like to switch to that SIM.
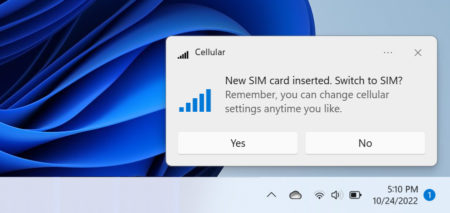
Click “Yes.”
Enable and disable a cellular connection
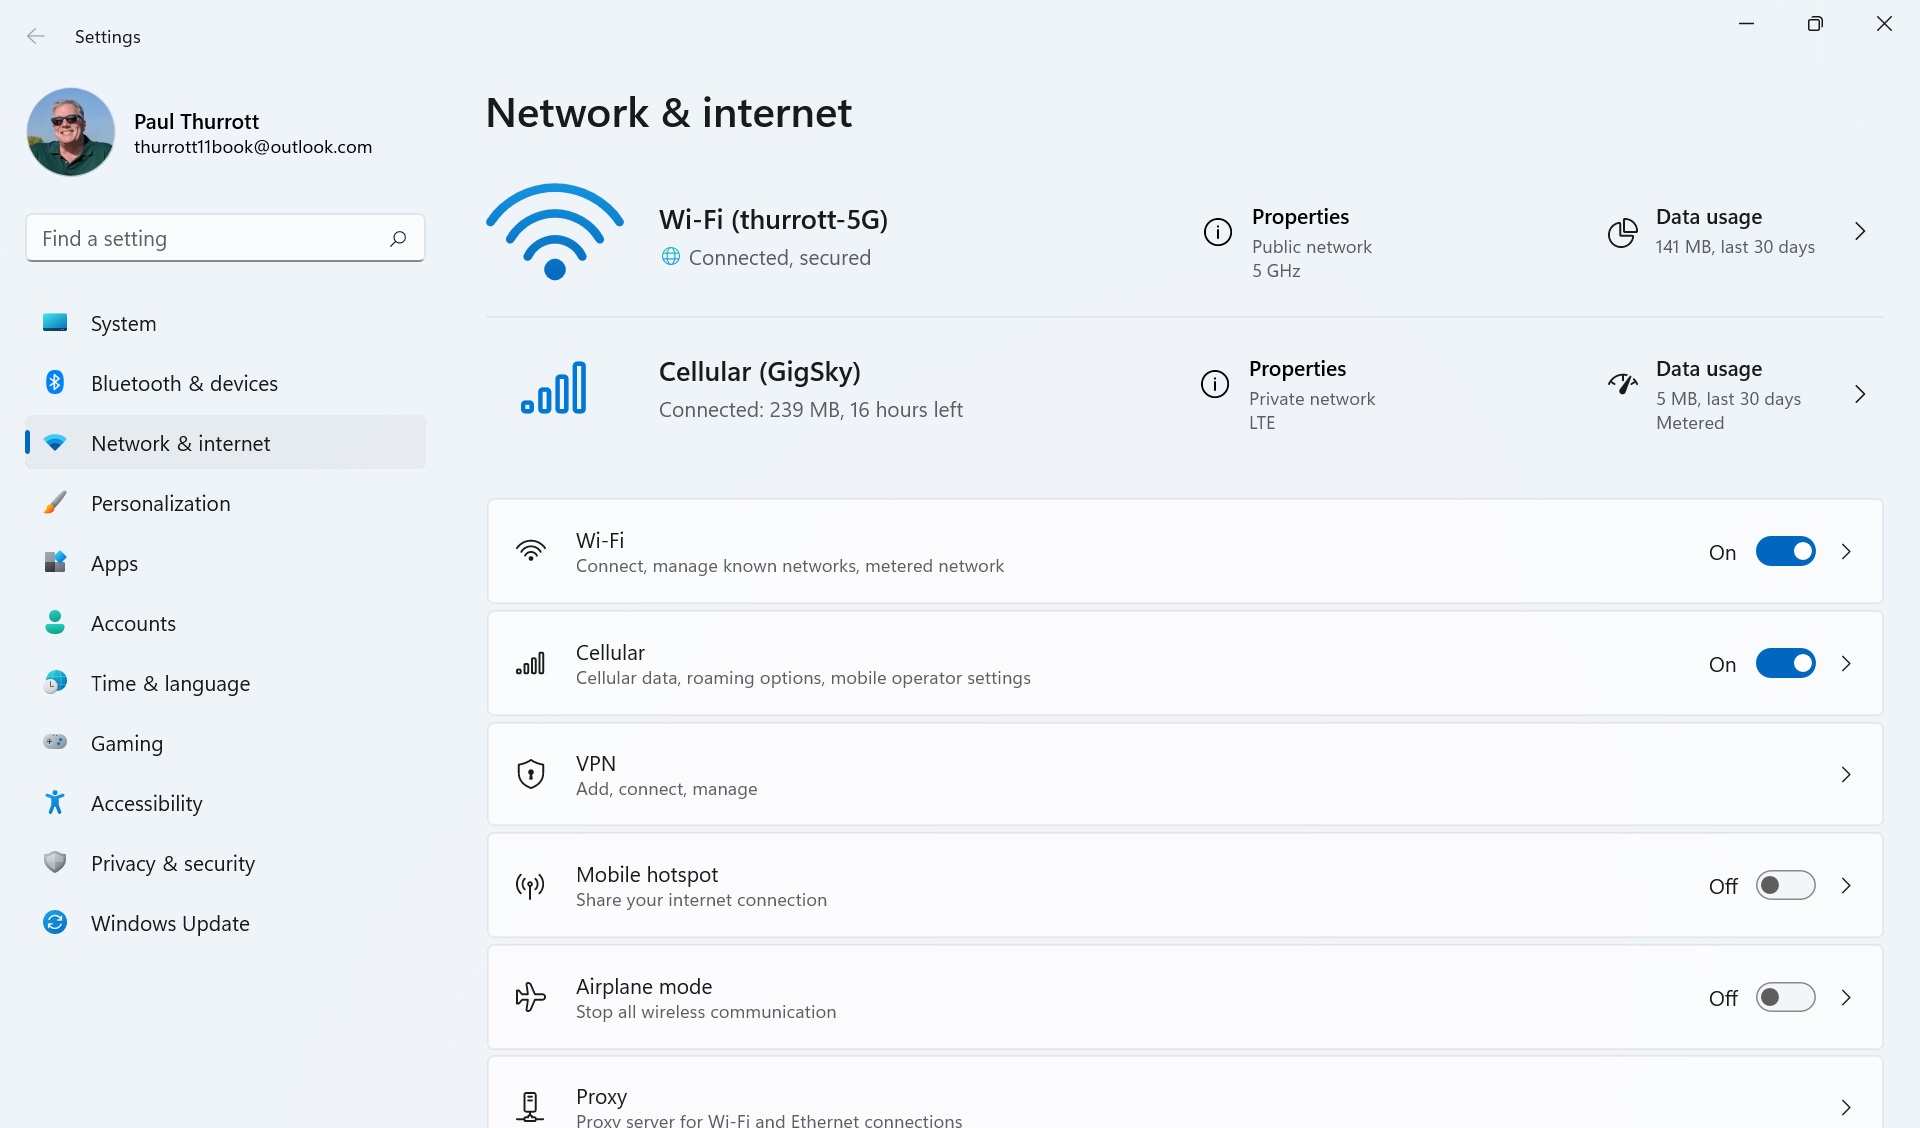
Once you’ve connected your eSIM to a data plan or inserted a physical SIM card into your PC, Windows 11 can use it to get online and access the Internet. But you will first need to enable your cellular data connection. There are two places to do so: in the Settings app (Network & internet > Cellular) and using the Cellular quick settings button in Quick settings (WINKEY + A).
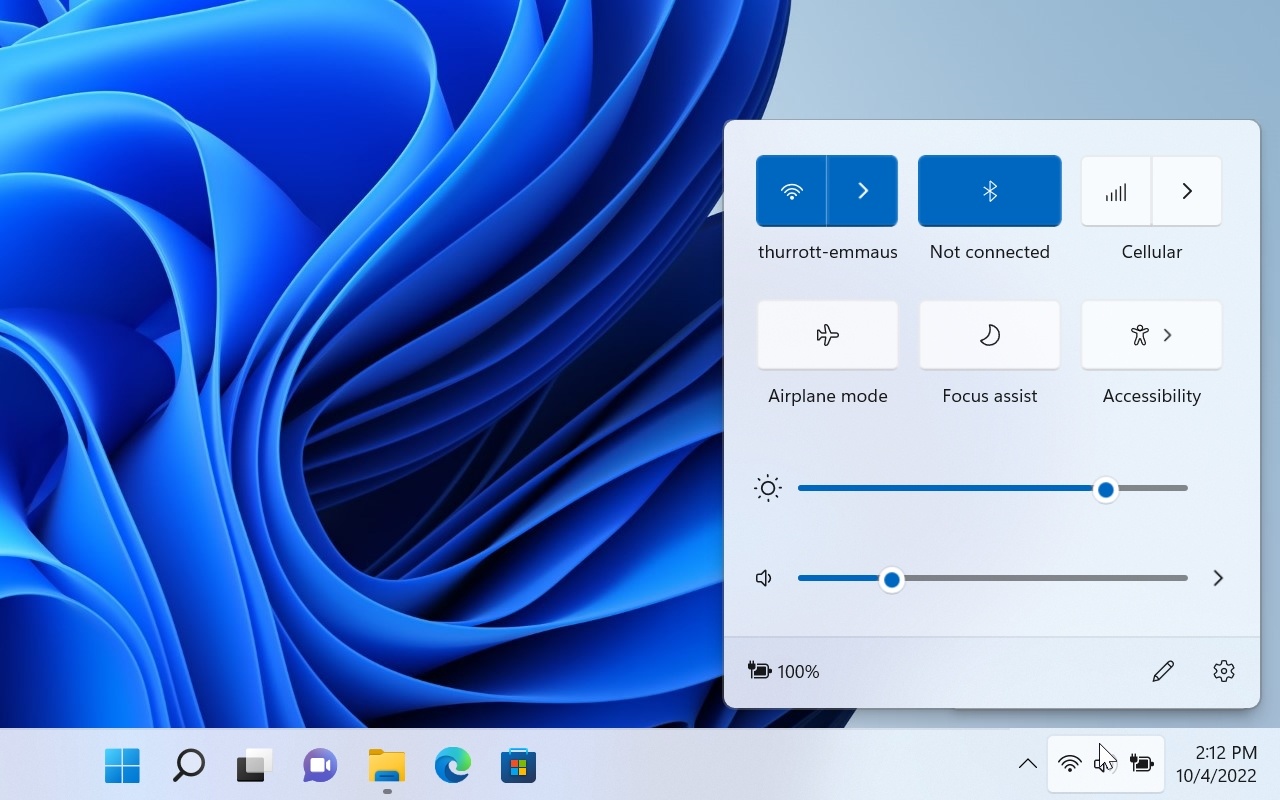
If you are not also connected to Wi-Fi, the Network icon in the notification area of the Taskbar will resemble the triangular “five bars” cellular connection icon you see on your smartphone. And either way, the Cellular quick settings button in Quick settings will display the mobile operator name and service level (typically LTE or 5G) of the cellular data network to which you are connected.
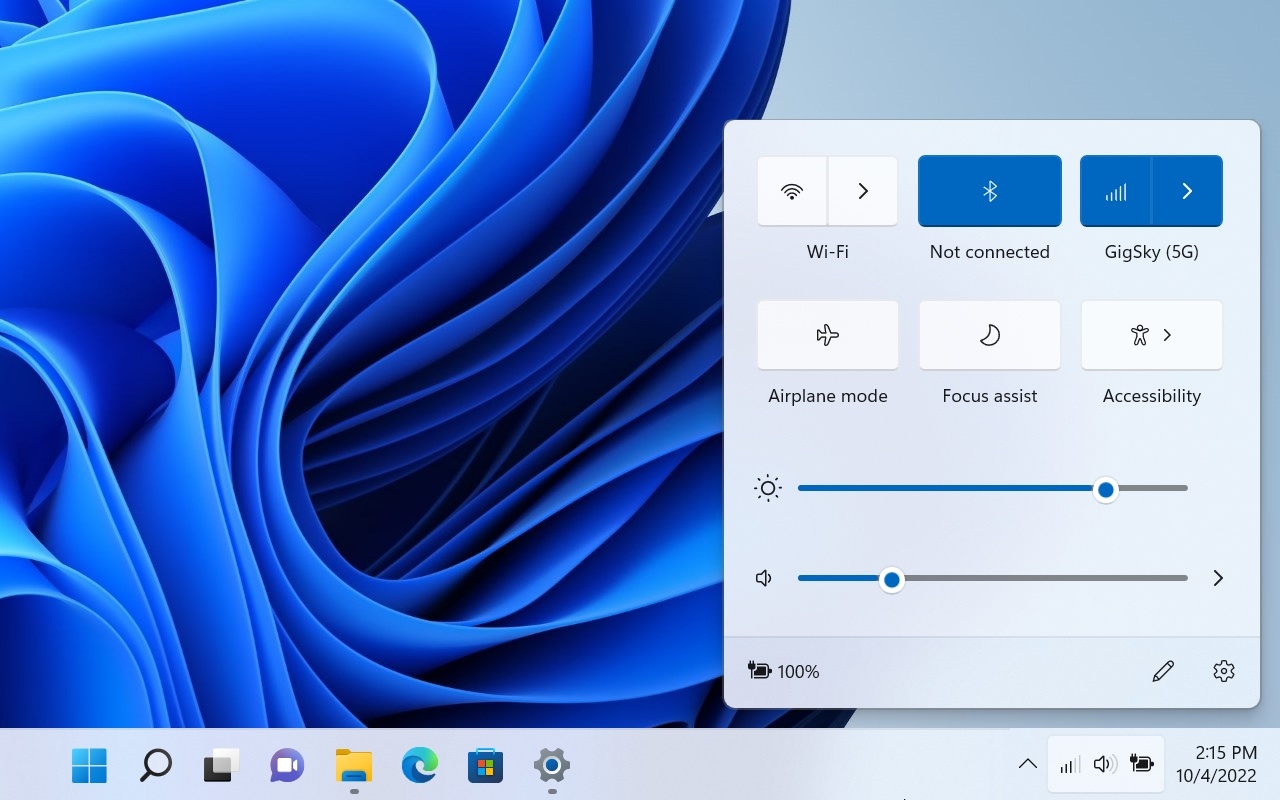
By default, Windows 11 configures a cellular data connection to keep your PC connected to the Internet. In this configuration, Windows will use Wi-Fi when possible, but will switch to cellular data only when needed so that you can stay online. You can see how the connection is configured by opening Quick settings and selecting the “Manage cellular connections” button (“>”) attached to the Cellular quick settings button.
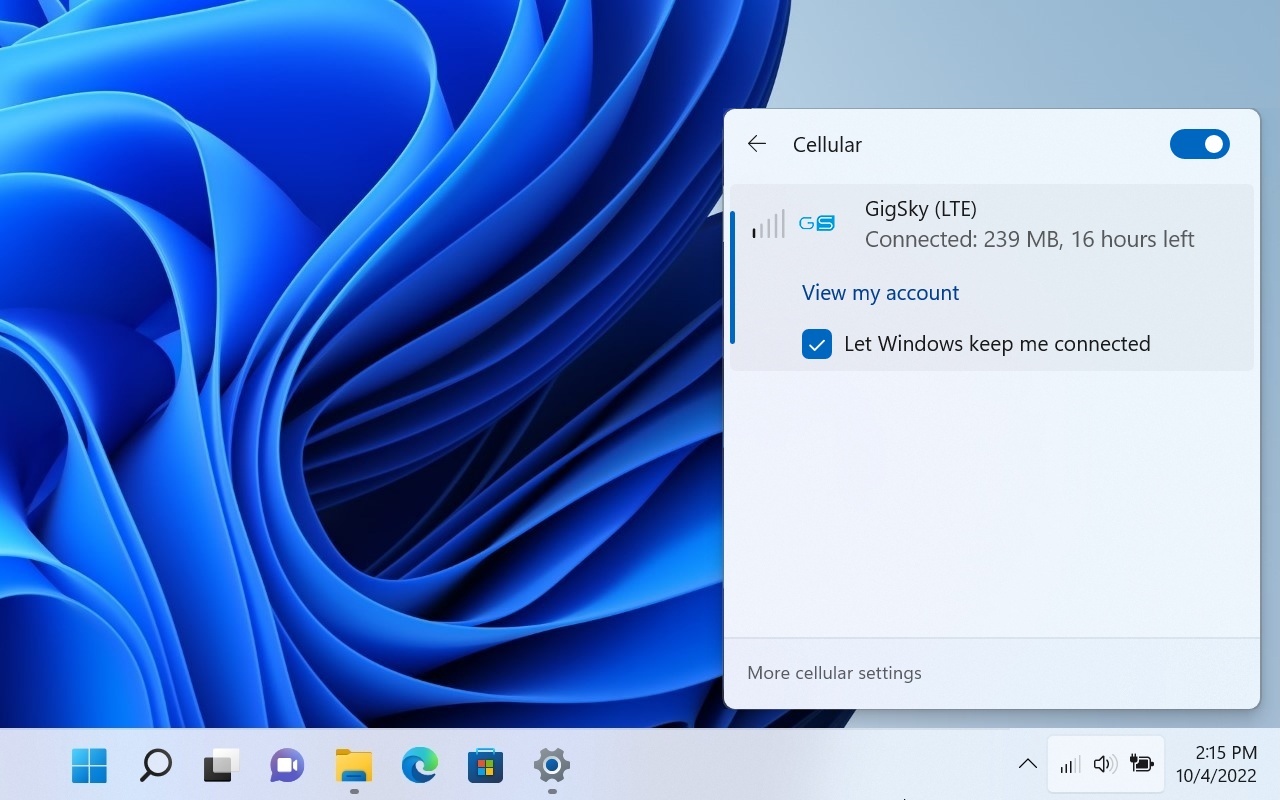
As you can see, this interface also lets you configure this setting, called “Let Windows keep me connected.” If you uncheck it, a “Connect” button appears so that you can manually connect to the cellular data connection. But there are many more options to configure. So we will examine those next.
To disable your cellular data connection, open Quick settings and click the Cellular quick settings button. (Or, open Settings, navigate to Network & internet, and set “Cellular data” to “Off.”
Configure a cellular data connection
Because cellular data connections are metered and can be expensive, we strongly recommend examining how yours is configured before you do anything else.
Oddly, there are two places to configure settings related to your cellular data connection.
Configure most cellular data connection options
To do so, enable your cellular data connection, open the Settings app, and navigate to Network & internet > Cellular.
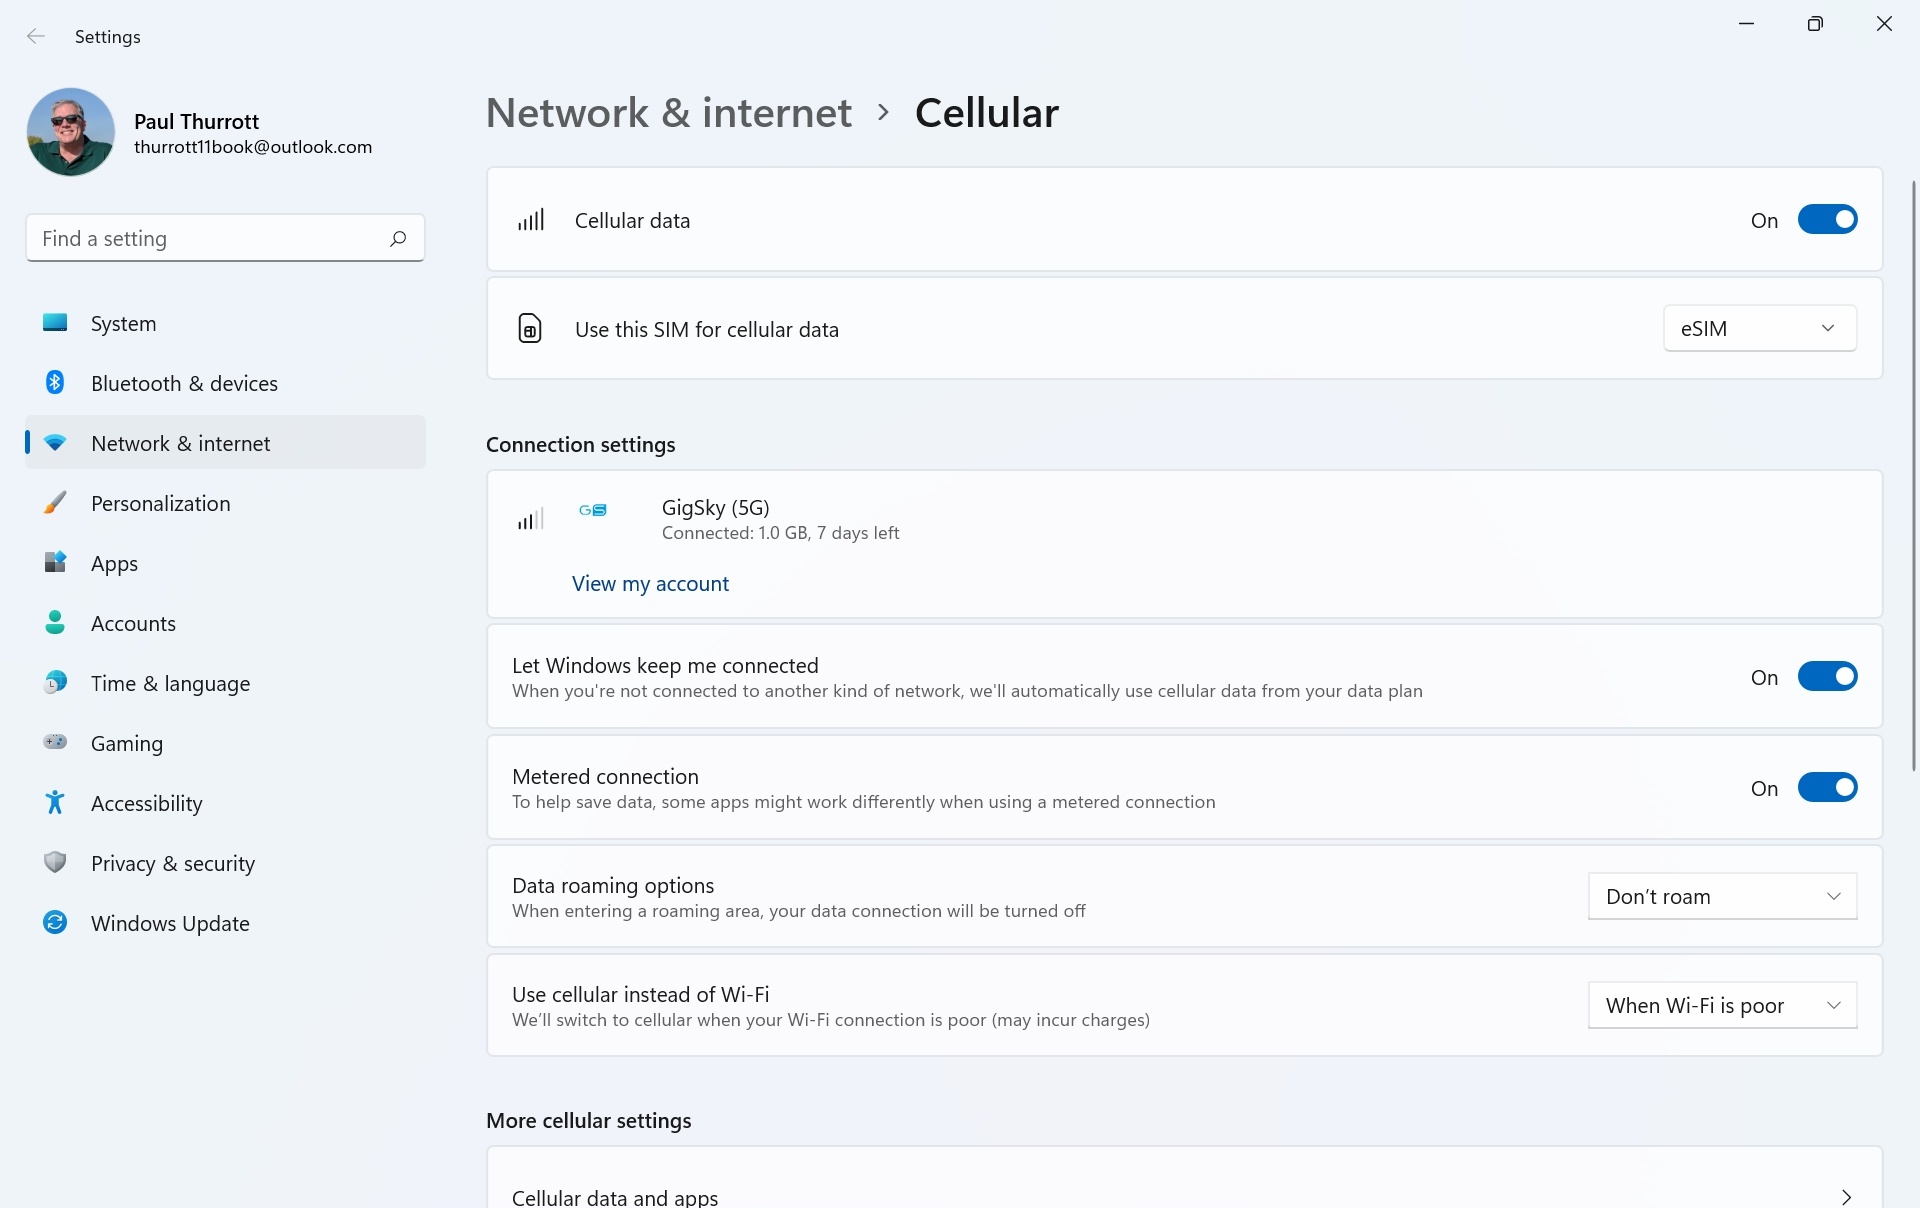
Here, you can configure the following options:
Cellular data. This is a master switch for enabling or disabling your PC’s cellular data capabilities. It works identically to the Cellular quick settings button in Quick settings.
Use this SIM for cellular data. If your PC supports dual SIMs—typically via one eSIM and one physical SIM—this drop-down box will let you switch between them.
View my account. This link opens Mobile Plans and navigates to the website for your cellular data provider.
Let Windows keep me connected. When enabled, as it is by default, Windows will manage this connection for you automatically and use cellular data if Wi-Fi is unavailable or has a weak signal.
Metered connection. By default, all cellular data connections are configured as metered connections, and this option will be set to On as a result. If you’re not concerned with your data costs, you can set this option to Off and the connection will work similarly to Wi-Fi.
Most will want to leave this option enabled.
Data roaming options. This determines whether the PC can use roaming (out-of-network) data. Because roaming data can be much more expensive than in-coverage data, you’ll want to check with your carrier to see whether you should change this option from its “Don’t roam” default.
Use cellular instead of Wi-Fi. By default, your cellular connection is configured to come on “When Wi-Fi is poor” (or non-existent), but you can change this to “Never” or “Always.”
Cellular data and apps. By default, most apps will work normally when you’re using your cellular data connection. But you can use the Cellular data page that appears when you select this link to prevent individual apps from using the connection, which could save money. You can also toggle this option off globally, meaning that only Windows, but not any installed apps, can use the cellular data connection.

OneDrive pauses syncing when you’re using a cellular data connection. To resume syncing OneDrive, right-click the OneDrive icon in the Taskbar and choose “Resume syncing” from the context menu that appears.
Mobile operator settings. This link displays the Operator settings page for your cellular data connection. Typically, you will not need to use this page, but if your wireless carrier requires you to manually edit specific connection features—for things like Access Point Names (APNs), a PIN access code, and so on—you can do so here.
eSIM profiles. If your PC has an eSIM, it can support multiple profiles and thus accounts. That is, you might have accounts with multiple mobile operators and use the interface that appears when you select this link to manage those profiles and switch between them.
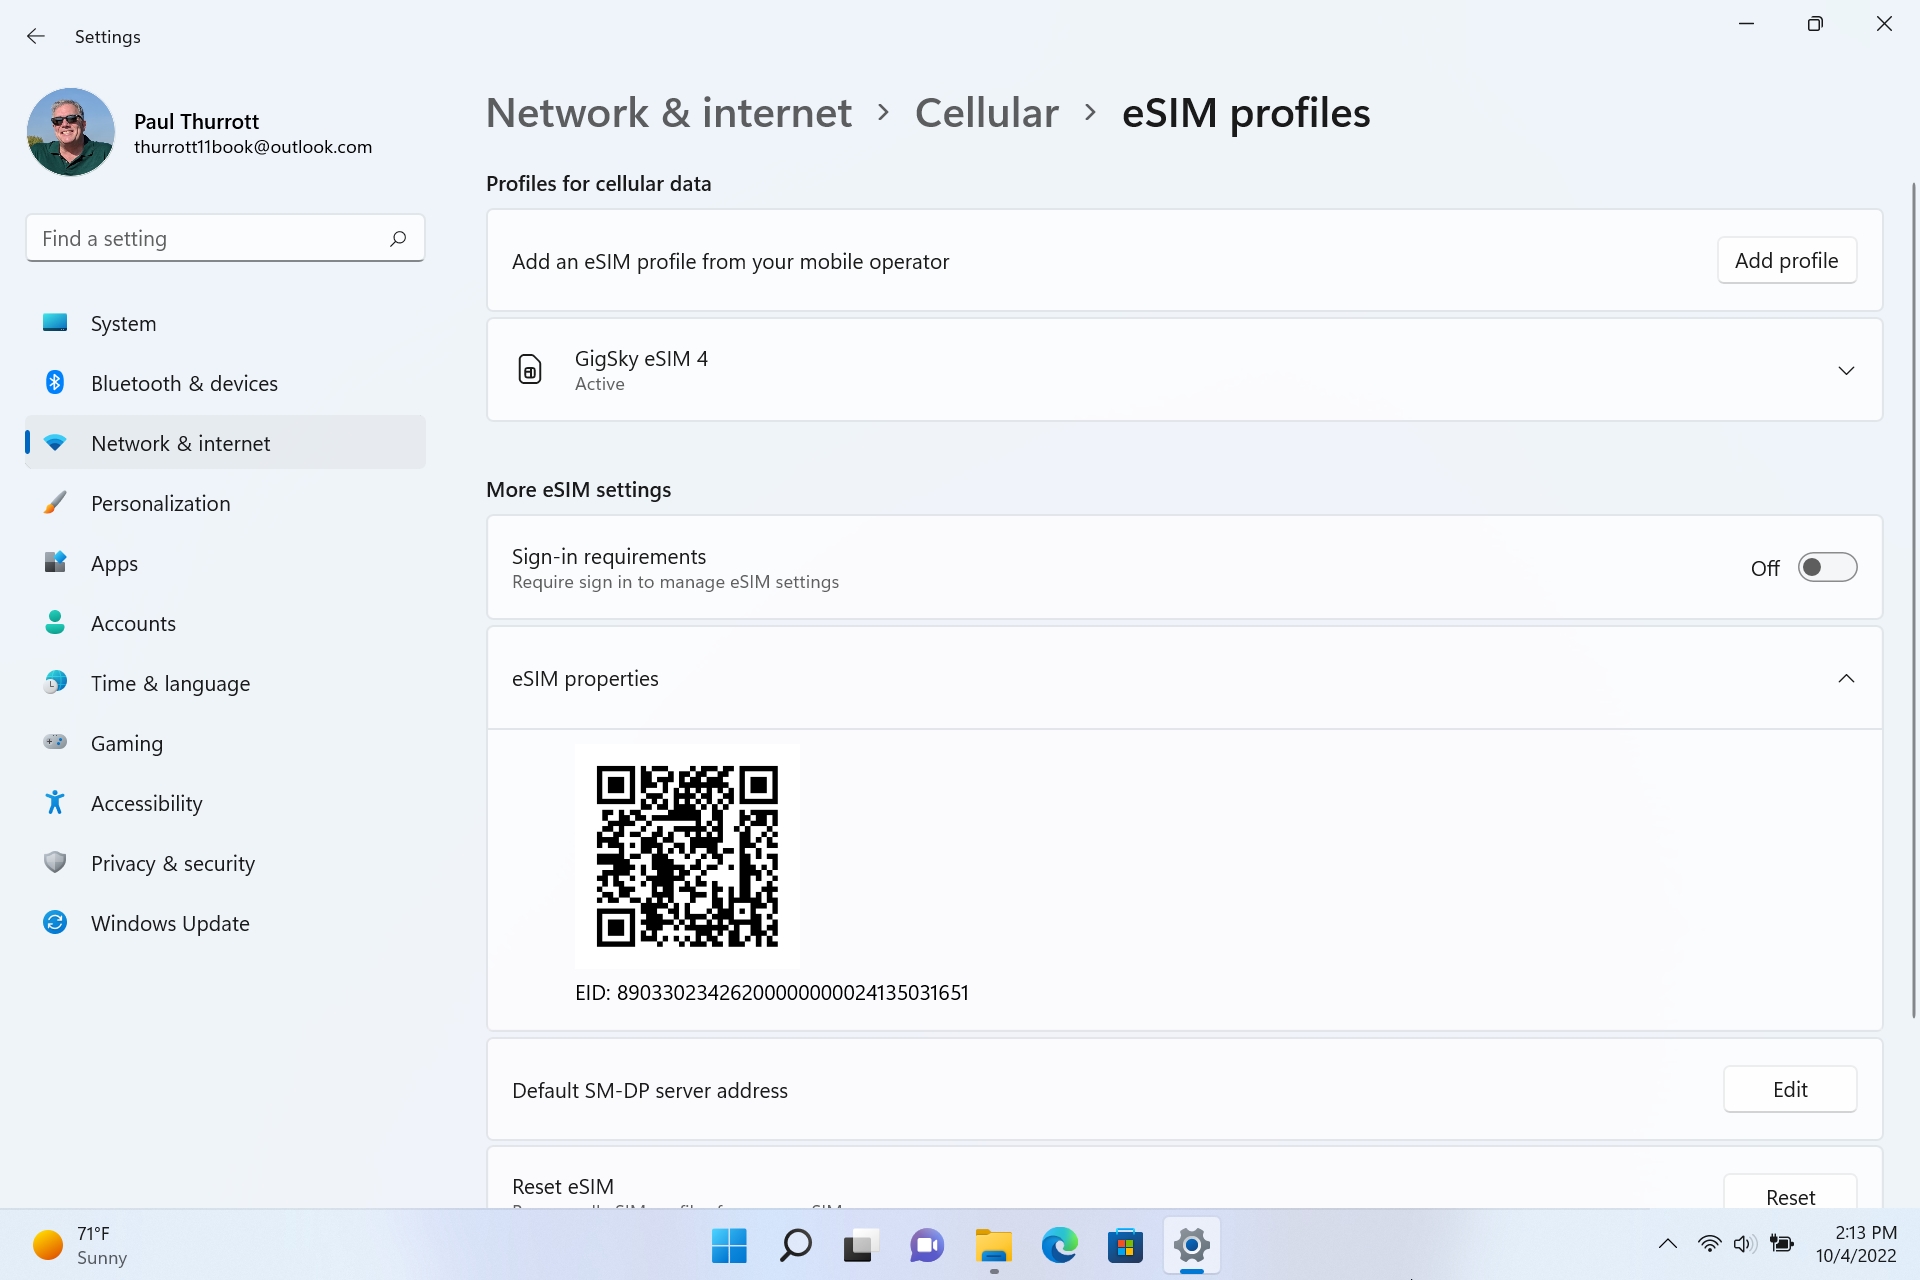
To switch to a new profile, select it in the list to expand it and then select the “Use” button.
Configure your data limit
Many cellular data connections have a data limit, typically per week or per month, and so it makes sense to let Windows 11 track how much data that connection is using.
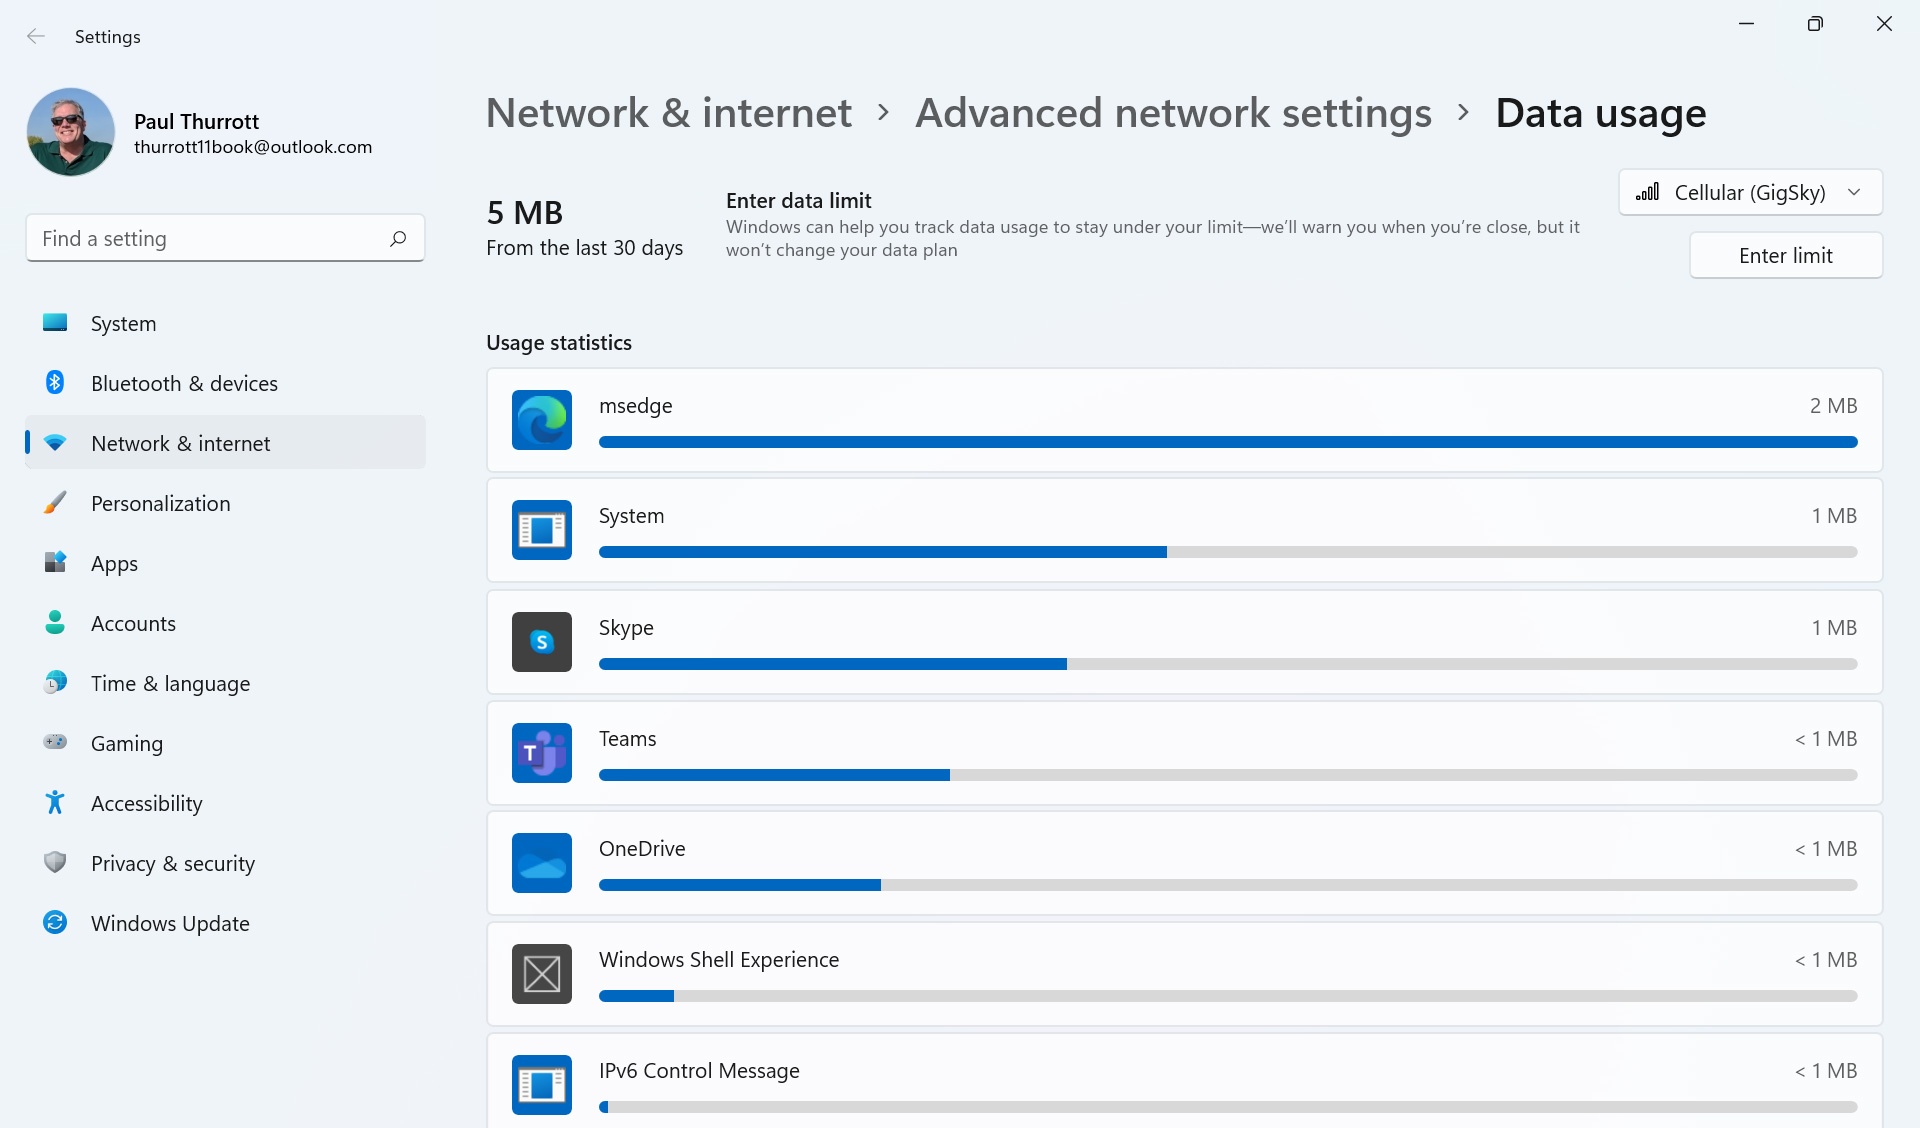
To get started, open the Settings app and navigate to Network & internet. At the top of this page, you will see a section displaying information about your cellular data connection near the top and below similar sections for your Ethernet (if present) and Wi-Fi connections.
Select the Data usage item on the right of the cellular data connection section. Its Data usage page appears. This page displays how much data you’ve used over the default time period (30 days) and which apps have used the most cellular data.
Click the “Enter limit” button. In the Set data limit window that appears, you can configure the limit type (daily, weekly, or monthly), the day of the month that the data limit expires or resets, and the data limit amount in MB or GB.
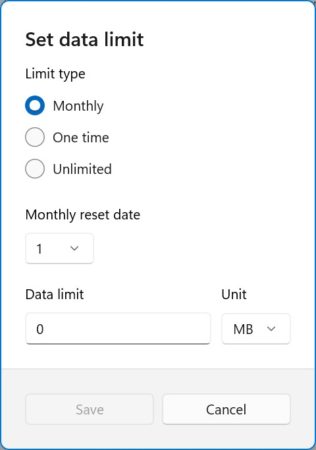
Click the “Save” button when you’re done.

Gain unlimited access to Premium articles.
With technology shaping our everyday lives, how could we not dig deeper?
Thurrott Premium delivers an honest and thorough perspective about the technologies we use and rely on everyday. Discover deeper content as a Premium member.