Clipchamp
- Paul Thurrott
- Jul 24, 2023
-
4
Windows 11 includes a free and surprisingly full-featured video editor called Clipchamp that should meet the needs of just about anyone.
Get to know Clipchamp
When you first launch Clipchamp, the app displays a Getting started view that lets you create a new video project from scratch or using AI, browse the available project templates, and access existing video projects.
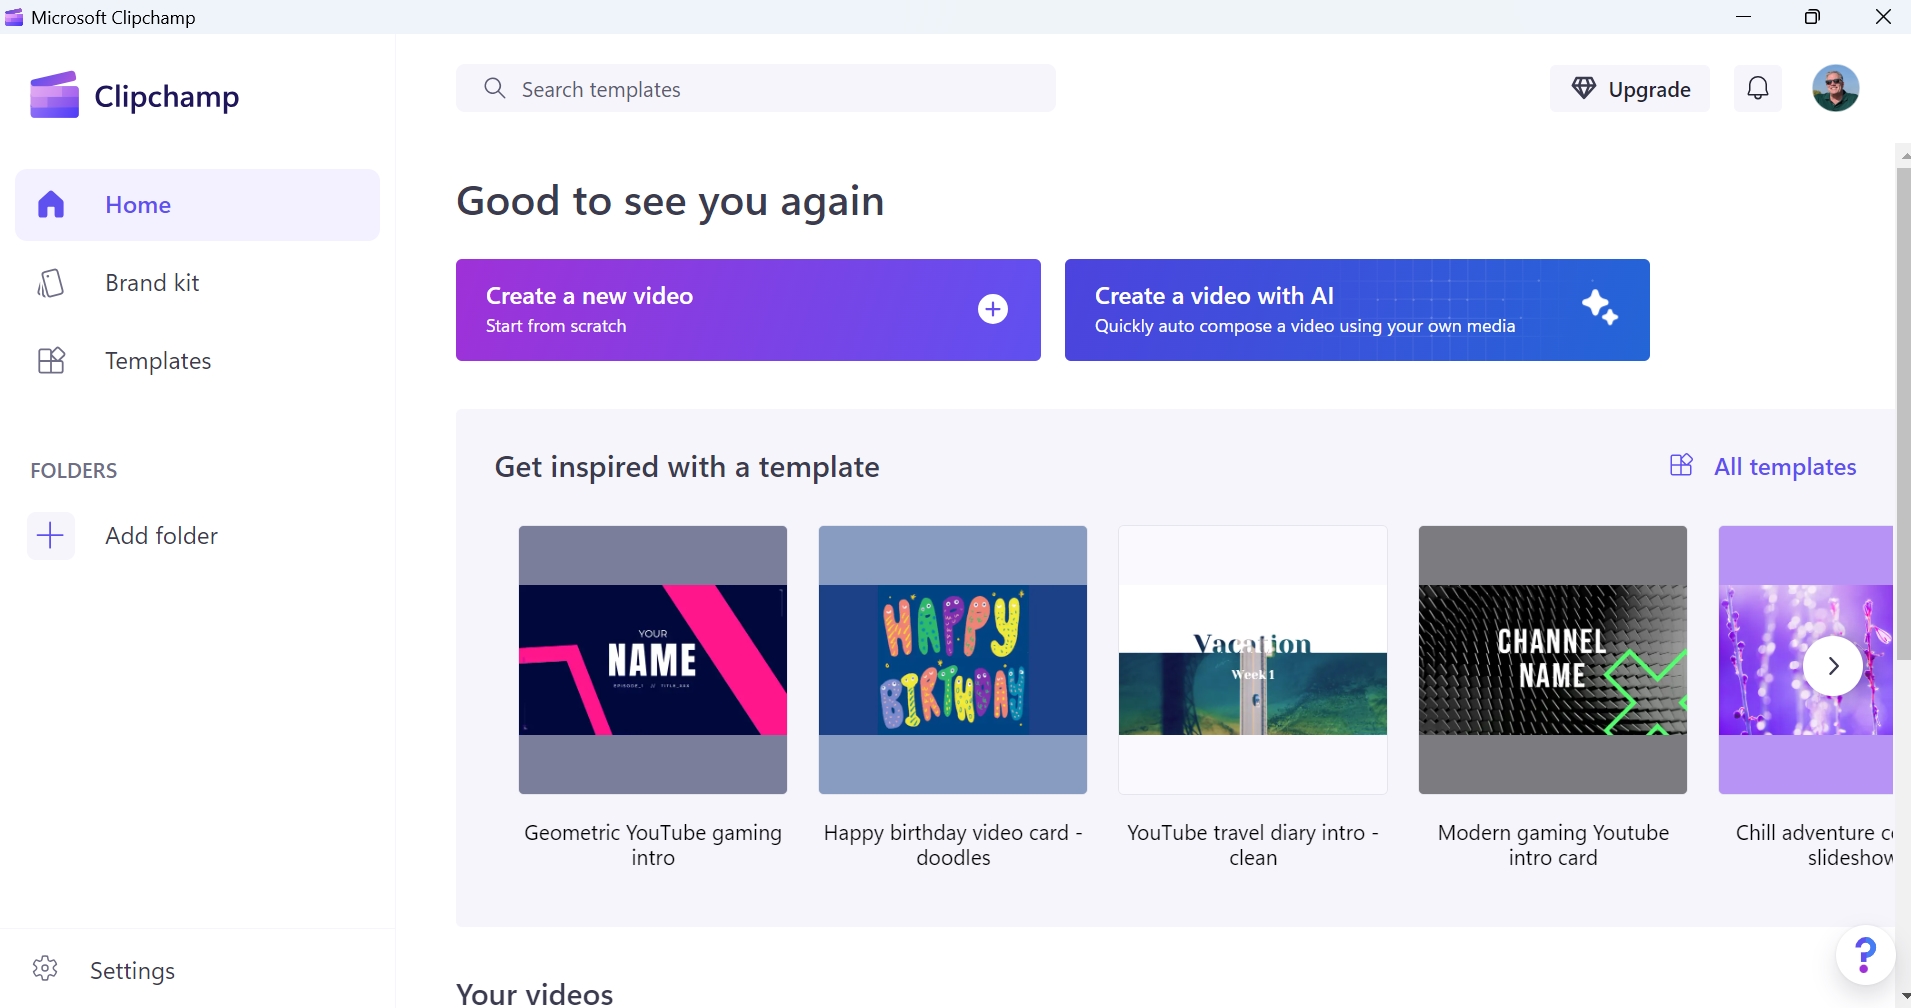
The templates and AI-created video options can be useful, but this chapter focuses on the more traditional use case, where you use Clipchamp’s excellent video editor to import media, place it on a timeline, edit it, and then export it as a finished video.
To navigate to this editor and create a new video project, click “Create a new video.”
The video editor is described in the next section.
Understand the Clipchamp video editor
Those familiar with video editing will find the Clipchamp video editor immediately familiar, as it offers all of the expected controls and capabilities. But those unfamiliar with this process may find Clipchamp to be a bit intimidating.
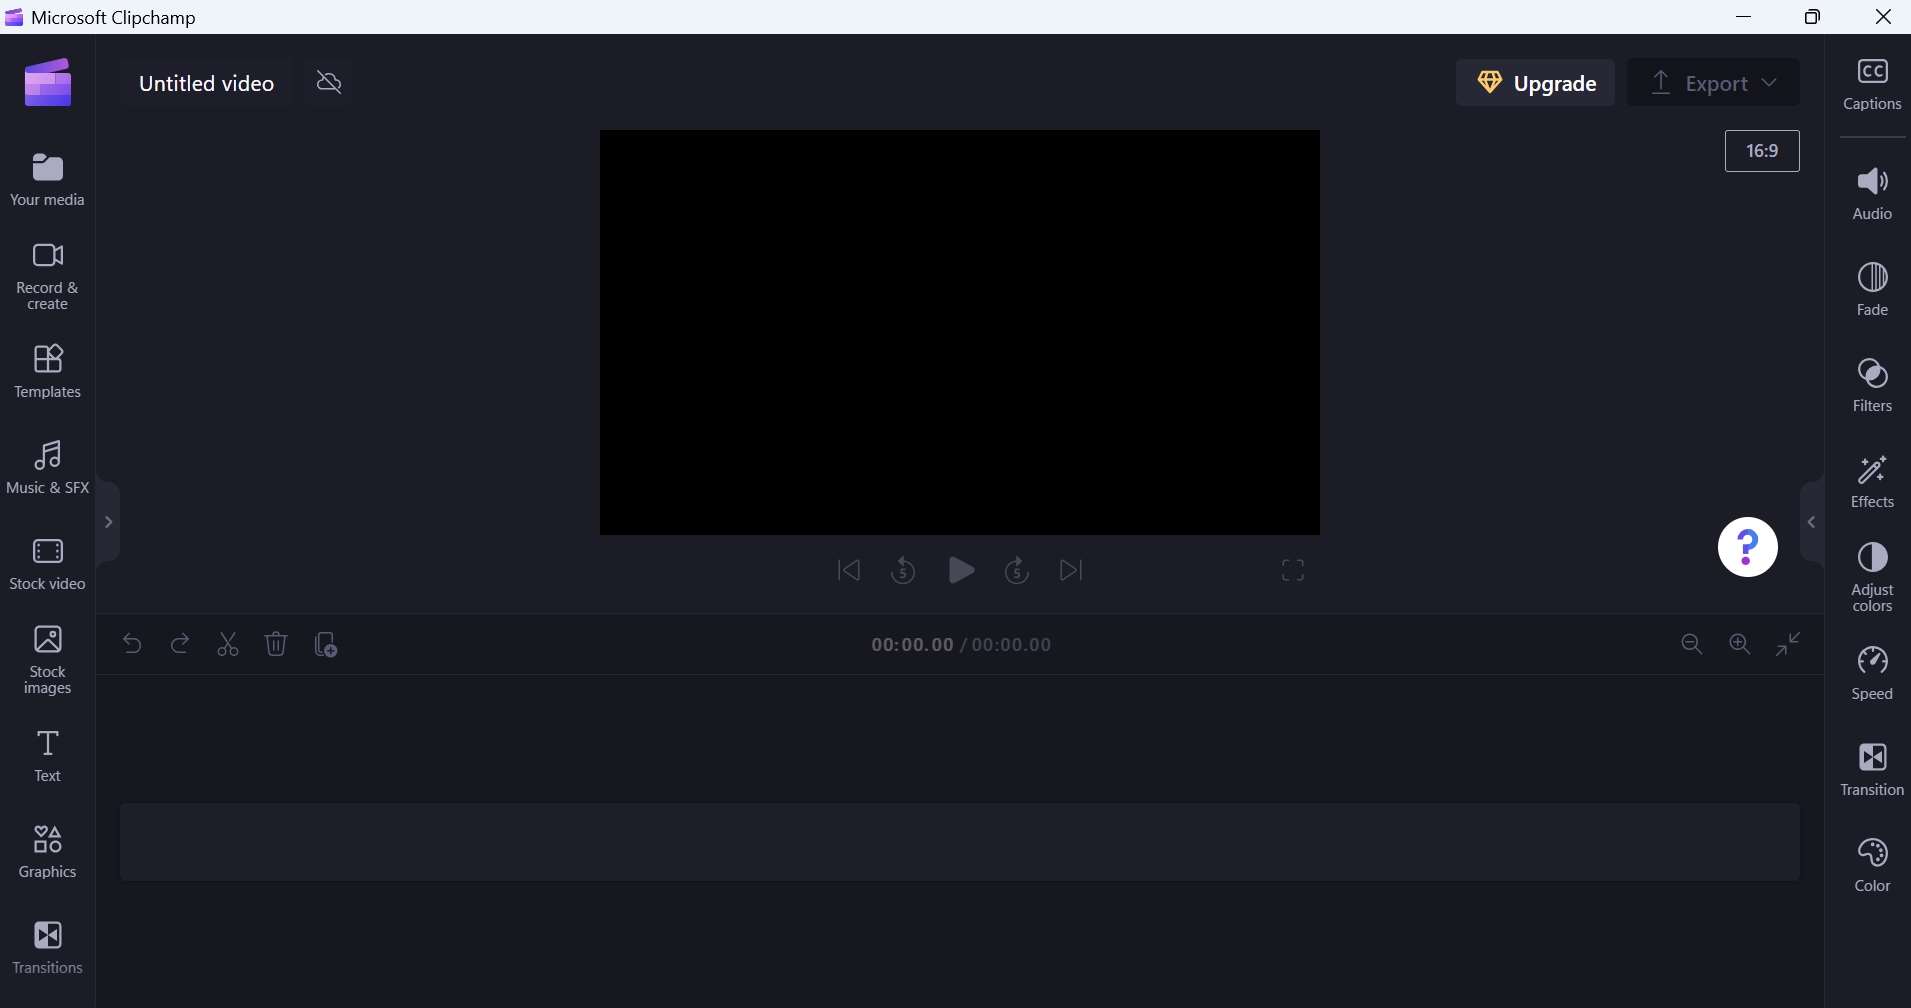
Don’t be put off by this somewhat busy app: Clipchamp offers a lot of functionality, but it’s pretty straightforward and has a reasonably easy learning curve. So let’s get started with a quick tour of the various user interfaces you see here.
Toolbar. On the left, you will see the Clipchamp toolbar, a vertical stack of icons that expands into a wider panel when you select an icon. This is where you can access the media (video, image, and audio files) associated with the project, plus the titles and other text, graphics, and transitions you may wish to add to your video.


The Clipchamp toolbar, like the Timeline and Property panel interfaces described below toggles between collapsed and expanded views. You can toggle these views by clicking any icon in the toolbar or its little grab handle. You can also resize the expanded panel view to make it bigger or smaller.

Video preview. The editor’s video preview is prominently displayed in the center top of the app, letting you preview your video as you edit it. This preview has obvious playback controls, a full-screen toggle, and, less obviously, a set of additional controls that appear in a floating toolbar when you select the video preview.


Timeline. Located at the bottom of the video editor, the timeline is where the magic happens. This is where you will drag, arrange, and edit clips into a finished video that can include music and sound effects, titles and other text, transitions, filters, effects, and more.

Property panel. Located on the right, the Clipchamp property panel is a vertical stack of icons that expands into a wider panel when you select an icon, just like the toolbar. But these are things you typically apply to one or more clips in the timeline, like audio levels, audio and video fades, filters, effects, and so on.

Project name. By default, your first project is given the inelegant and unhelpful name Untitled video. But you can change it at any time by clicking the Project name in the upper left of the video preview area.


Export. This prominent button in the upper right of the video preview area is used to export an edited video to a finished video file that you can view and share with others.


What you get for free, what you can pay for
Clipchamp is free, but Microsoft offers additional features for a monthly fee. Basically, there are three usage tiers. They are:
Free. Anyone can use the Clipchamp video editor with their own media files, and the free stock music, videos, and images that Microsoft supplies with the app. You can use a selection of free filters and effects. And you can export edited videos at up to Full HD (1080p) quality with no watermarks. You can share use and share these videos however you like.
Microsoft 365 subscription. Those with a Microsoft account and paid Microsoft 365 Personal or Family subscription get everything in the free tier plus access to the app’s premium filters and effects.
Clipchamp Essentials. Those who pay $11.99 per month or $99 per year for Clipchamp Essentials get everything in the other two tiers plus access to all of the app’s premium stock media, a brand kit with logo, color, and font customization, content backup to the cloud, and the ability to export edited videos at up to 4K/UHD (2160p) quality with no watermarks.
Unless you’re a professional videographer, it’s unlikely you will need to pay for Clipchamp Essentials (and such people will likely use more professional tools anyway). Regardless, this chapter will focus exclusively on the Clipchamp features that are available to everyone. It’s a rich feature-set, and not at all limiting.
Create a simple video from start to finish
Now that you understand the many interfaces that make up the Clipchamp video editor, you can put it all together by starting a new video project, importing media, editing it into a finished video, and exporting it so that you can share it with others.
Not all video projects will need all of the features described below. As you gain expertise with this project, you’ll come to understand which features you need or prefer for your own videos.
Start a new project
To create a new video project, open Clipchamp and click “Create a new video.” The video editor appears.
Before moving on, you should consider configuring one or two options:
Project name. Change the default project name, Untitled video, to something more meaningful by clicking the project name in the upper-left of the video preview area.
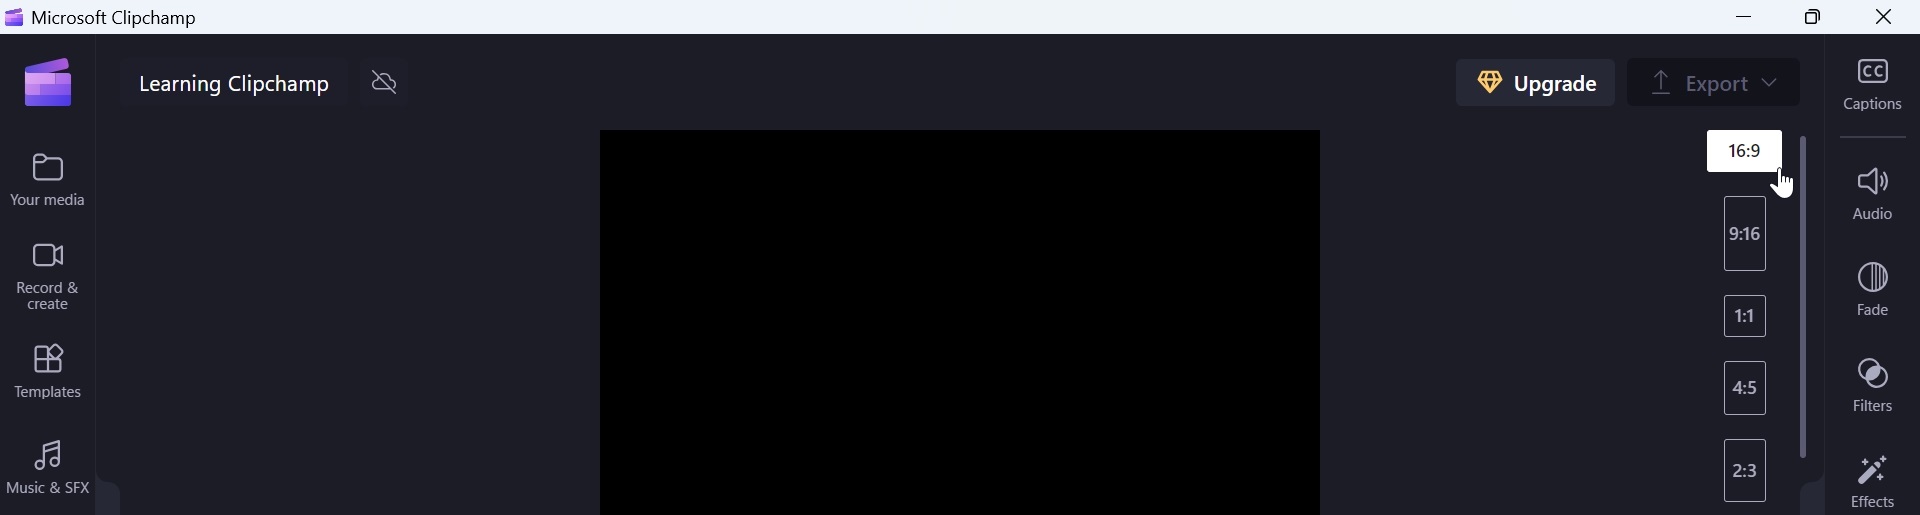
Aspect ratio. By default, Clipchamp creates videos in a 16:9 aspect ratio, which is a description of the rectangular shape of the final video you will export. 16:9 is the most common aspect ratio for content displayed on a modern TV set, and is what we will stick with in this chapter. But if you wish to create a portrait-mode video for social media, or use an even wider, movie-like aspect ratio, just click the Aspect ratio button in the upper-right of the video preview area and make your choice.

Add media to your project
Once your new video project is ready, the next step is to import media into the project so that you can place it in the timeline and edit it. How you do so is determined by your needs.
Here are the choices.
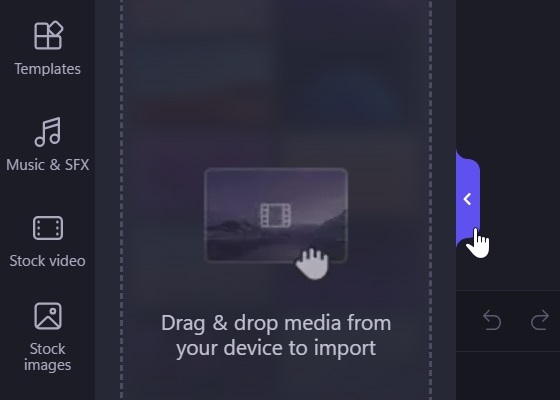
Use your own media. If you have your own video, audio, and/or image files on your PC that you would like to use in the project, click “Your media” in the Clipchamp toolbar and then import it by clicking the “Import media” button or by dragging and dropping it into this pane from File Explorer.
You can also click the ride side of the “Import media” to import media from your phone, OneDrive, Google Drive, or Dropbox.
Create a camera and/or screen recording. You can use Clipchamp to create a camera recording of you using your PC’s webcam, a screen recording, in which you use the computer (or just a single app or browser tab) and record it for demonstration purposes, or a combination of both, with Picture-in-Picture functionality. To do so, click “Record & create” in the Clipchamp toolbar and then select which type of recording you need.
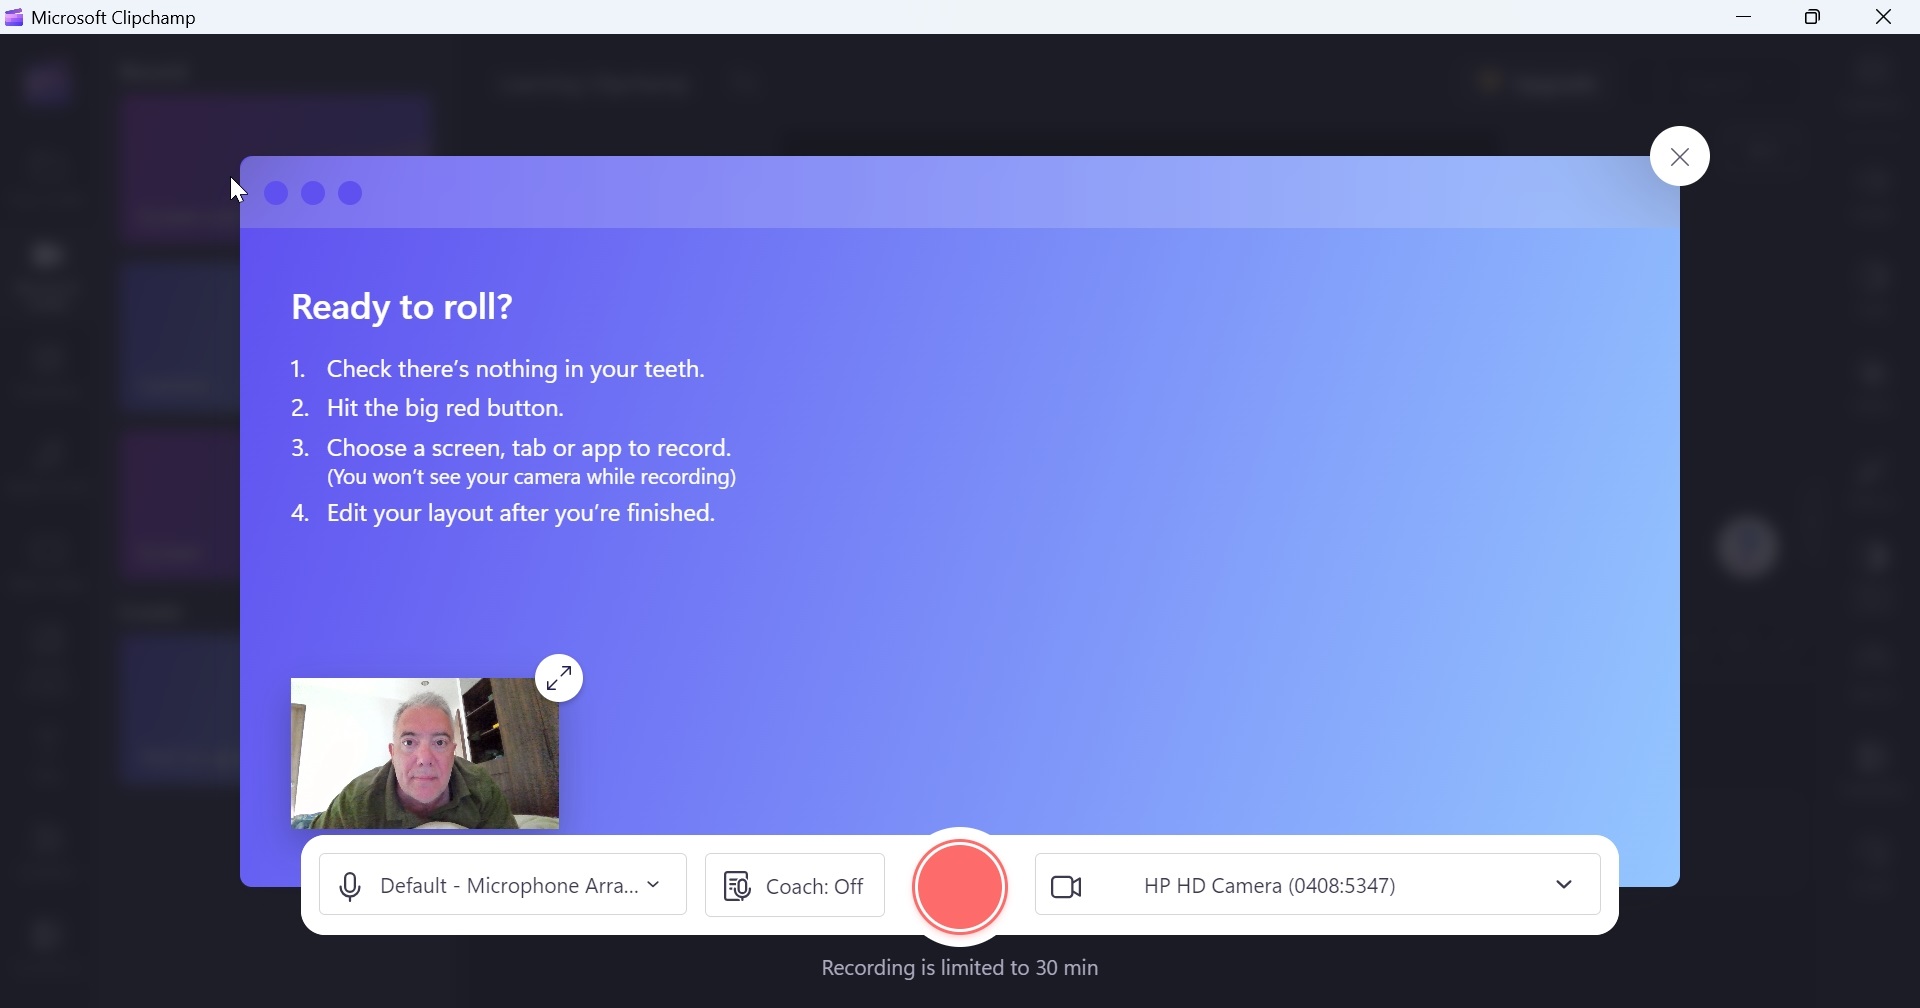
Screen recordings are limited to 30 minutes.
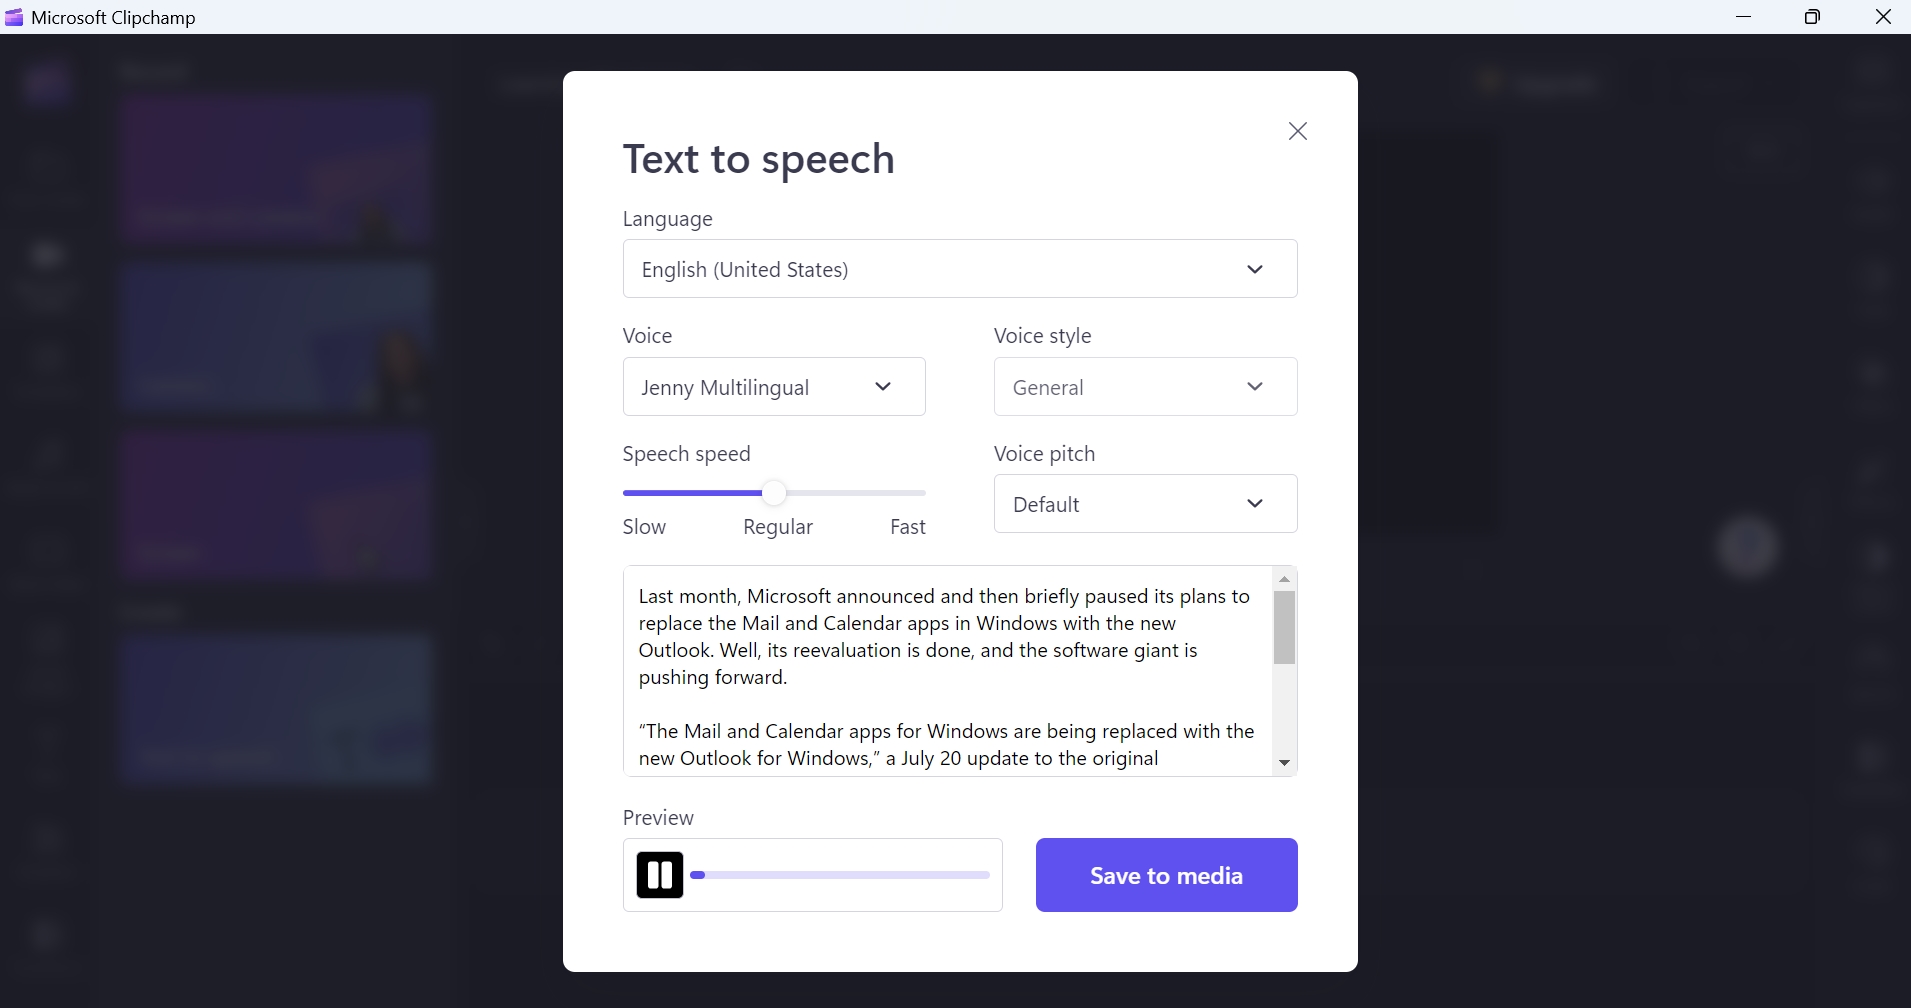
Create narration from text. Among Clipchamp’s many incredible features is the ability to generate realistic speech narration from text. This can be useful if you wish to have a voice-over or other narration in your video but don’t wish to use your own voice. To do so, click “Record & create” in the Clipchamp toolbar and then select “Text to speech” in the Record & create pane. Then, in the Text to speech window that appears, you can choose from a variety of languages, voices, voice styles, speed speeds, and voice pitches. Prepare to be amazed.
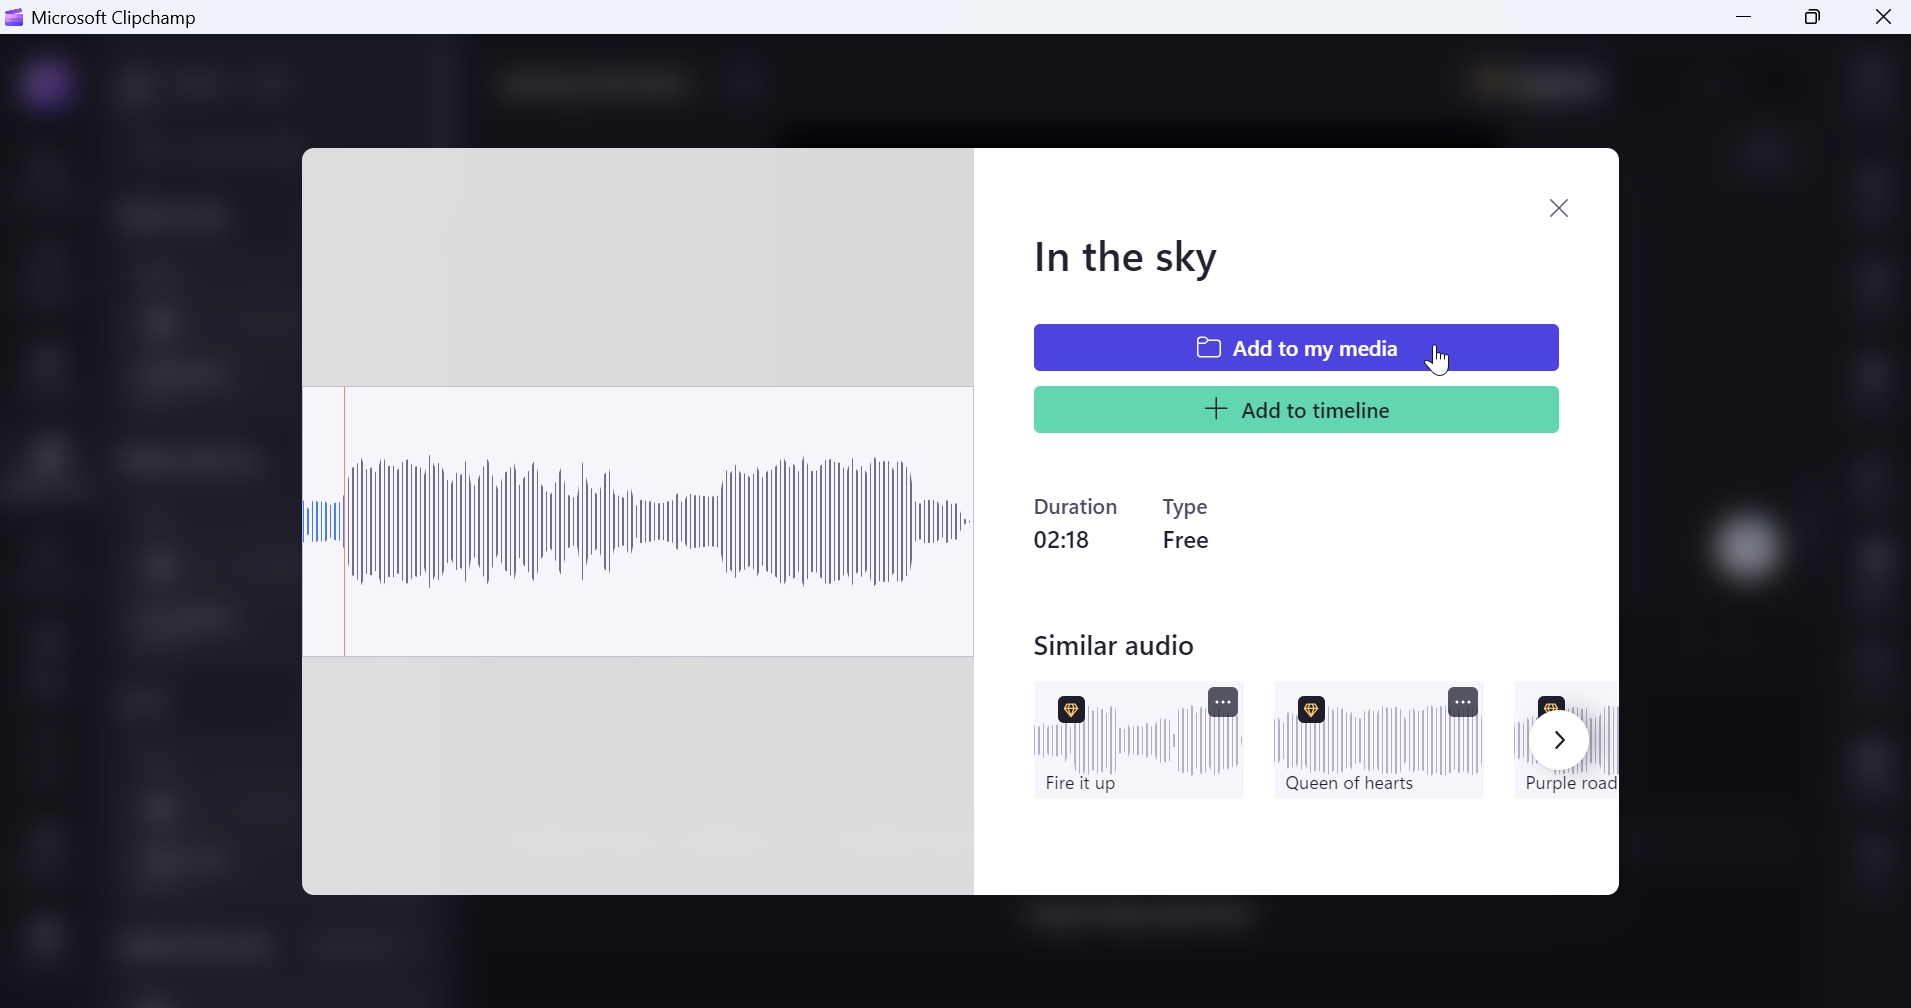
Music and sound effects. Clipchamp comes with a nice collection of music and sound effects choices that you can use license-free in your video projects. To see what’s available, click “Music & SFX” in the Clipchamp toolbar. In the pane that appears, you can switch between music and sound effects (SFX) views, search, and play previews before adding anything to the project. To add a music or sound effect item to your project, select it (and not the “Add to timeline” button that appears when you mouse-over it) and then choose “Add to my media.”
Stock video. Clipchamp includes a wide variety of stock videos, and video types–like backgrounds, social media subscribe panels, overlays, and more–that you can use, license-free, in your video projects. To see what’s available, click “Stock video” in the Clipchamp toolbar. To add a stock video to your project, select it (and not the “Add to timeline” button that appears when you mouse-over it) and then choose “Add to my media.”

You can mouse-over each video to see a small inline preview.
Stock images. As with stock videos, Clipchamp includes a collection of license-free stock images you can use in your video projects. You know the drill: Click “Stock images” in the Clipchamp toolbar to see the available images. To add a stock image to your project, select it (and not the “Add to timeline” button that appears when you mouse-over it) and then choose “Add to my media.”
Whichever media types you choose, each item will appear in the Your media pane as a thumbnail.
As you become more proficient with Clipchamp, you will discover that there are alternative methods for adding media into a project. For example, the music, sound effect, stock video, and stock image choices feature a green “Add to timeline” button that appears when you mouse-over them. If you click this button, the item will be added to Your media and to the timeline, which is described in the next section.
Add media to the timeline
Once you have imported all of the media you wish to include in your video, you can start placing, arranging, and editing them in the timeline. This is where you will spend most of your time in Clipchamp, so it’s important that you understand what the timeline is, and how it works.
The Clipchamp timeline visually represents the final video you wish to create. You drag media items onto the timeline, at which point they become clips that can be edited independently of the source media.
That is, any changes you make to clips in the timeline are not written to the original media. This lets you work in a non-destructive way–you can harm the originals–and it lets you reuse the same media repeatedly throughout a project if you’d like.
The simplest video project will contain just one clip, and this clip can be visual (a video or image clip, for example) or audible (a voice recording, music clip, or similar).
Of course, the resulting video would not be very interesting, and so Clipchamp of course supports adding multiple clips. In the most basic usage, you can add two or more clips next to each other on the same track, so that they will play sequentially, from left to right.
But clips can also be added and arranged in two dimensions, too. That’s because you will usually want visual and/or audible clips to appear at the same time as other clips. For example, you may want to place text titles on top of a video clip, play music over a video or image clip, or even play a second video clip over a video clip. And so you can also arrange clips vertically, or on top of each other, in the timeline, each in its own track.

Visually, the clips at the top of the timeline will appear (or be heard) over clips lower in the timeline. So when you want to see text titles or other items over a video, you will place them above the impacted video clip, in their own track.
Put more succinctly, to build out a video, you will arrange your media into clips in the timeline so that they are located sequentially (horizontally) or simultaneously (vertically) there as needed. You can have any number of sequential clips in a track, and any number of tracks, though most videos will have a limited number of tracks.
And while this may seem complex at first, the method by which you arrange clips couldn’t be any easier: you simply drag and drop your media files from the Your media pane into the timeline. And then you drag (move) them around inside the timeline to position them accordingly, either within a single track sequentially or in other tracks above or below the first track.
So let’s put this information to practice. Let’s add some media to our project and place it in the timeline.
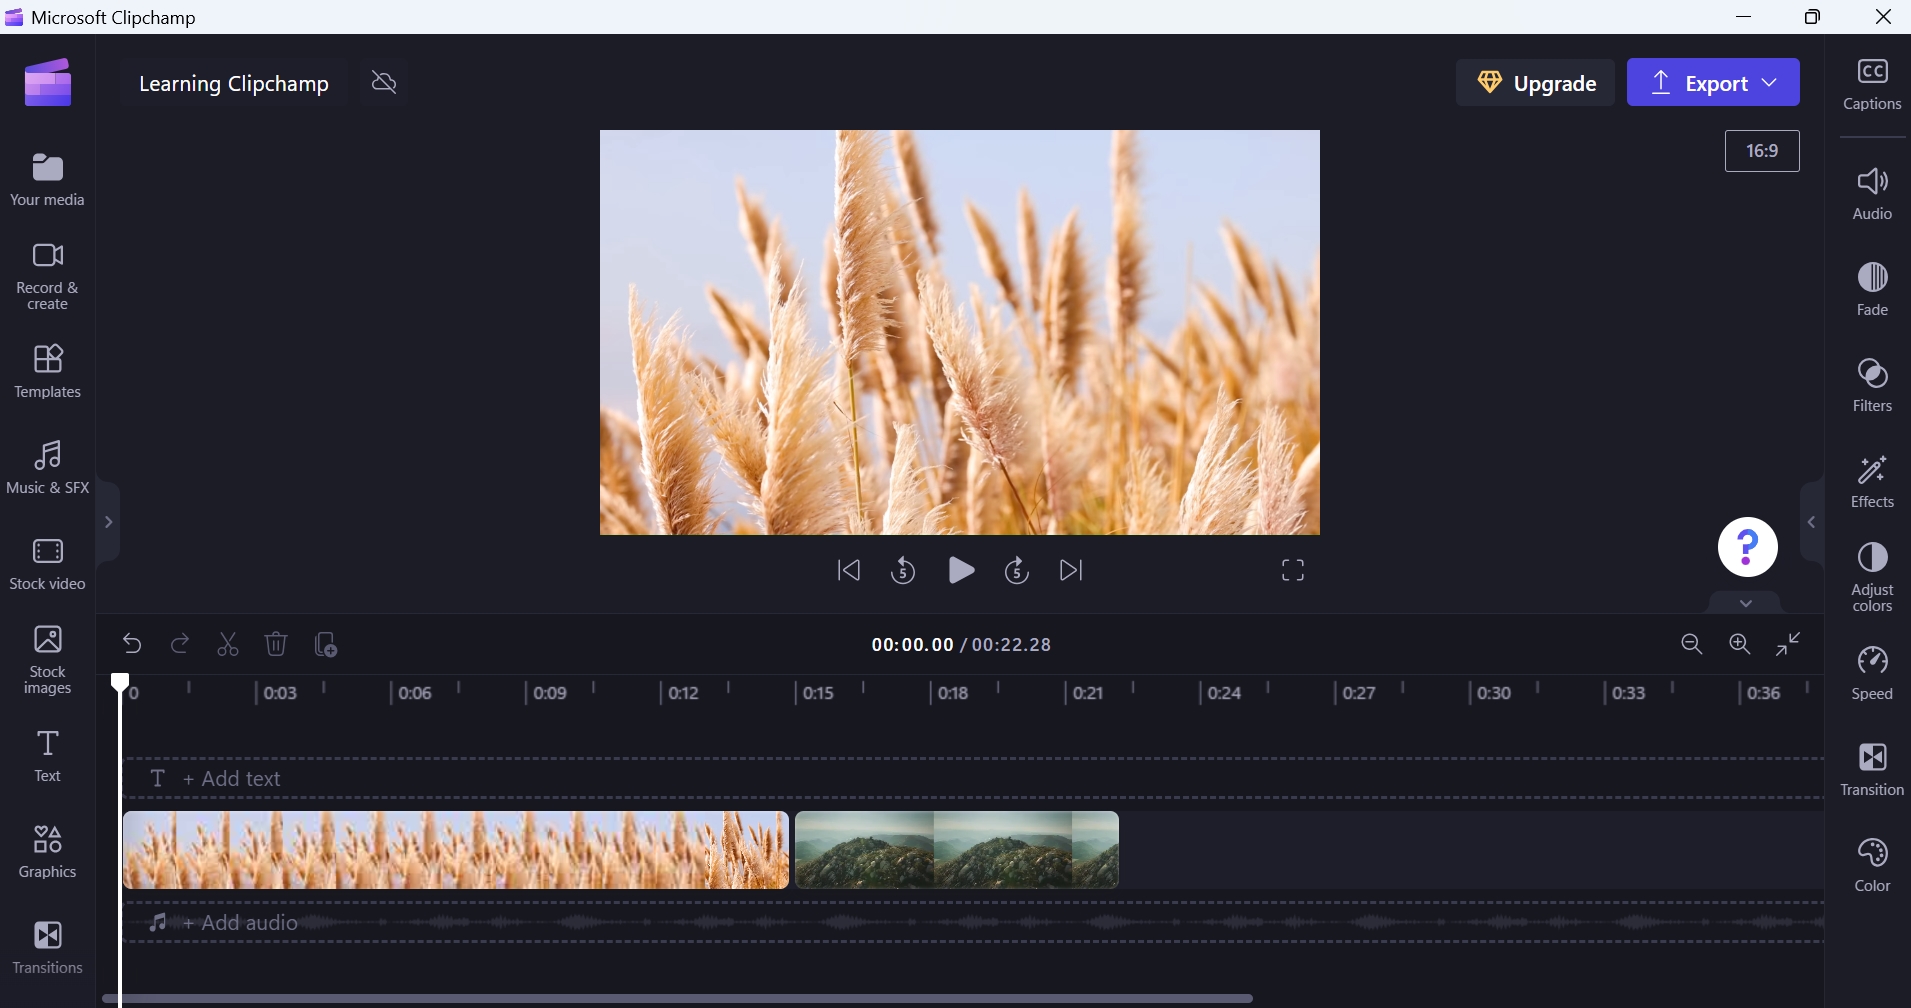
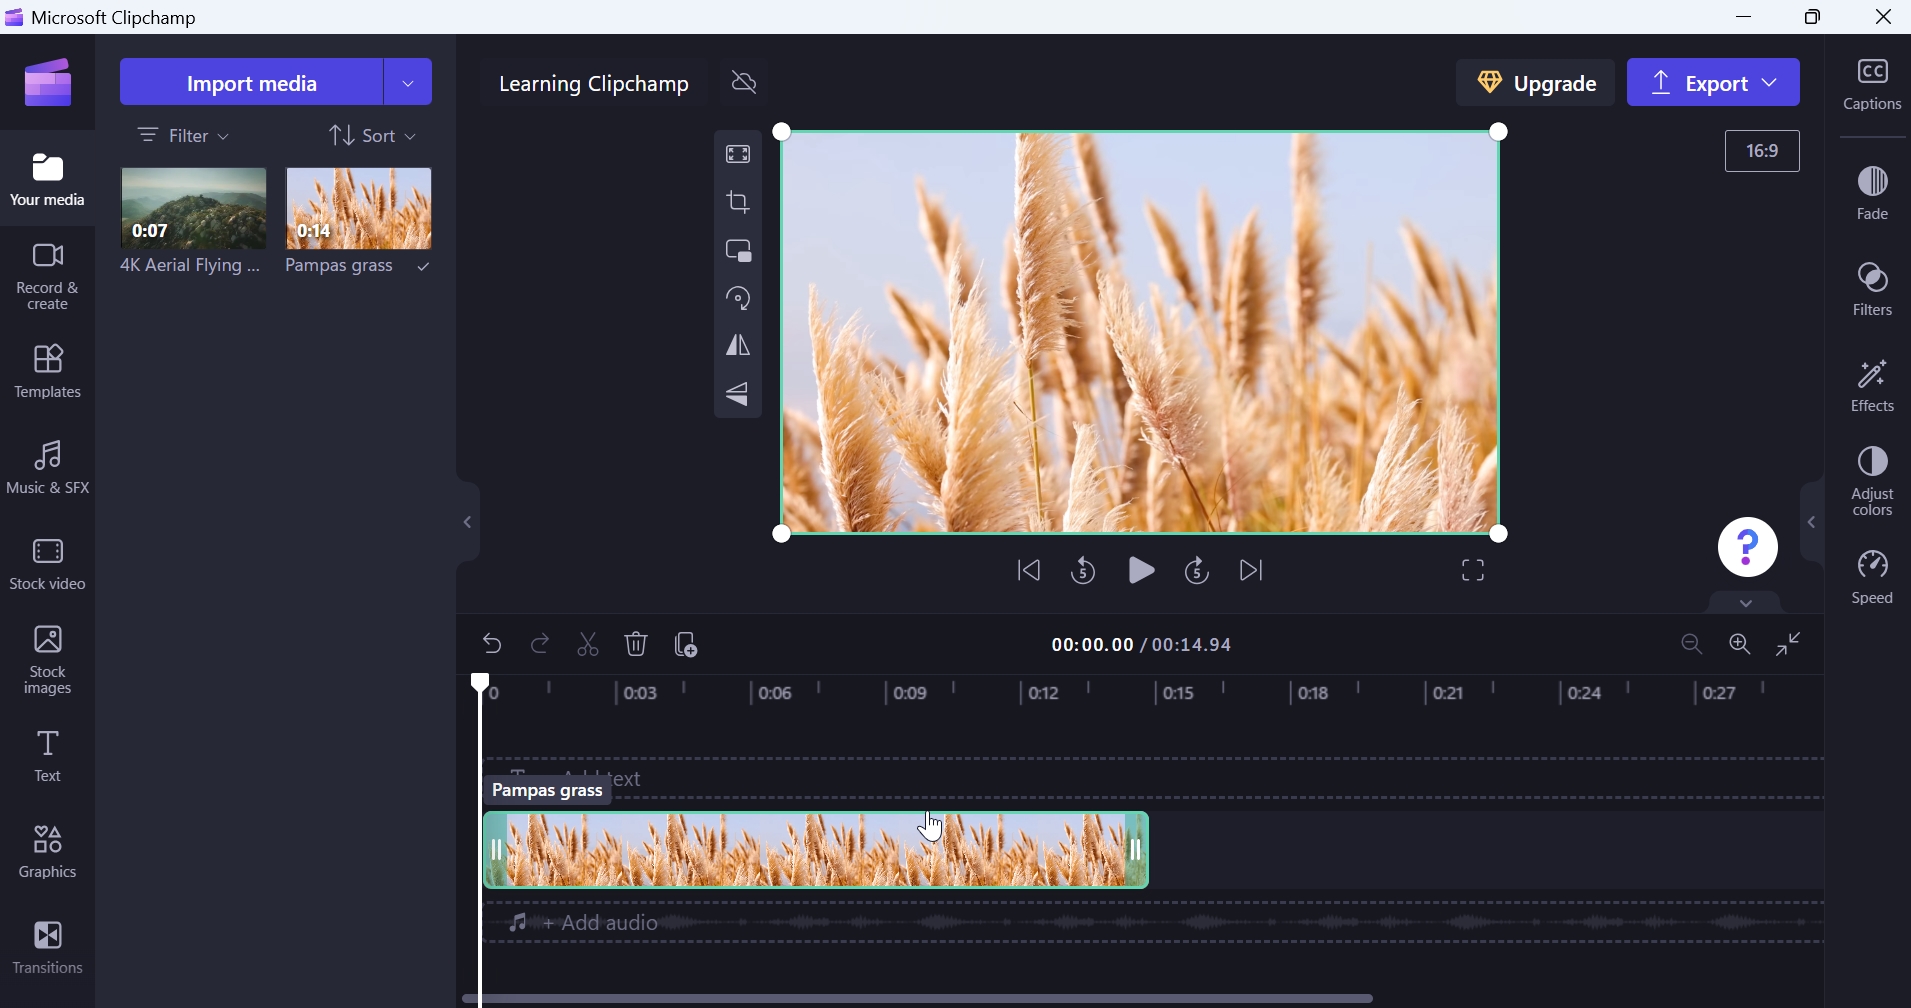
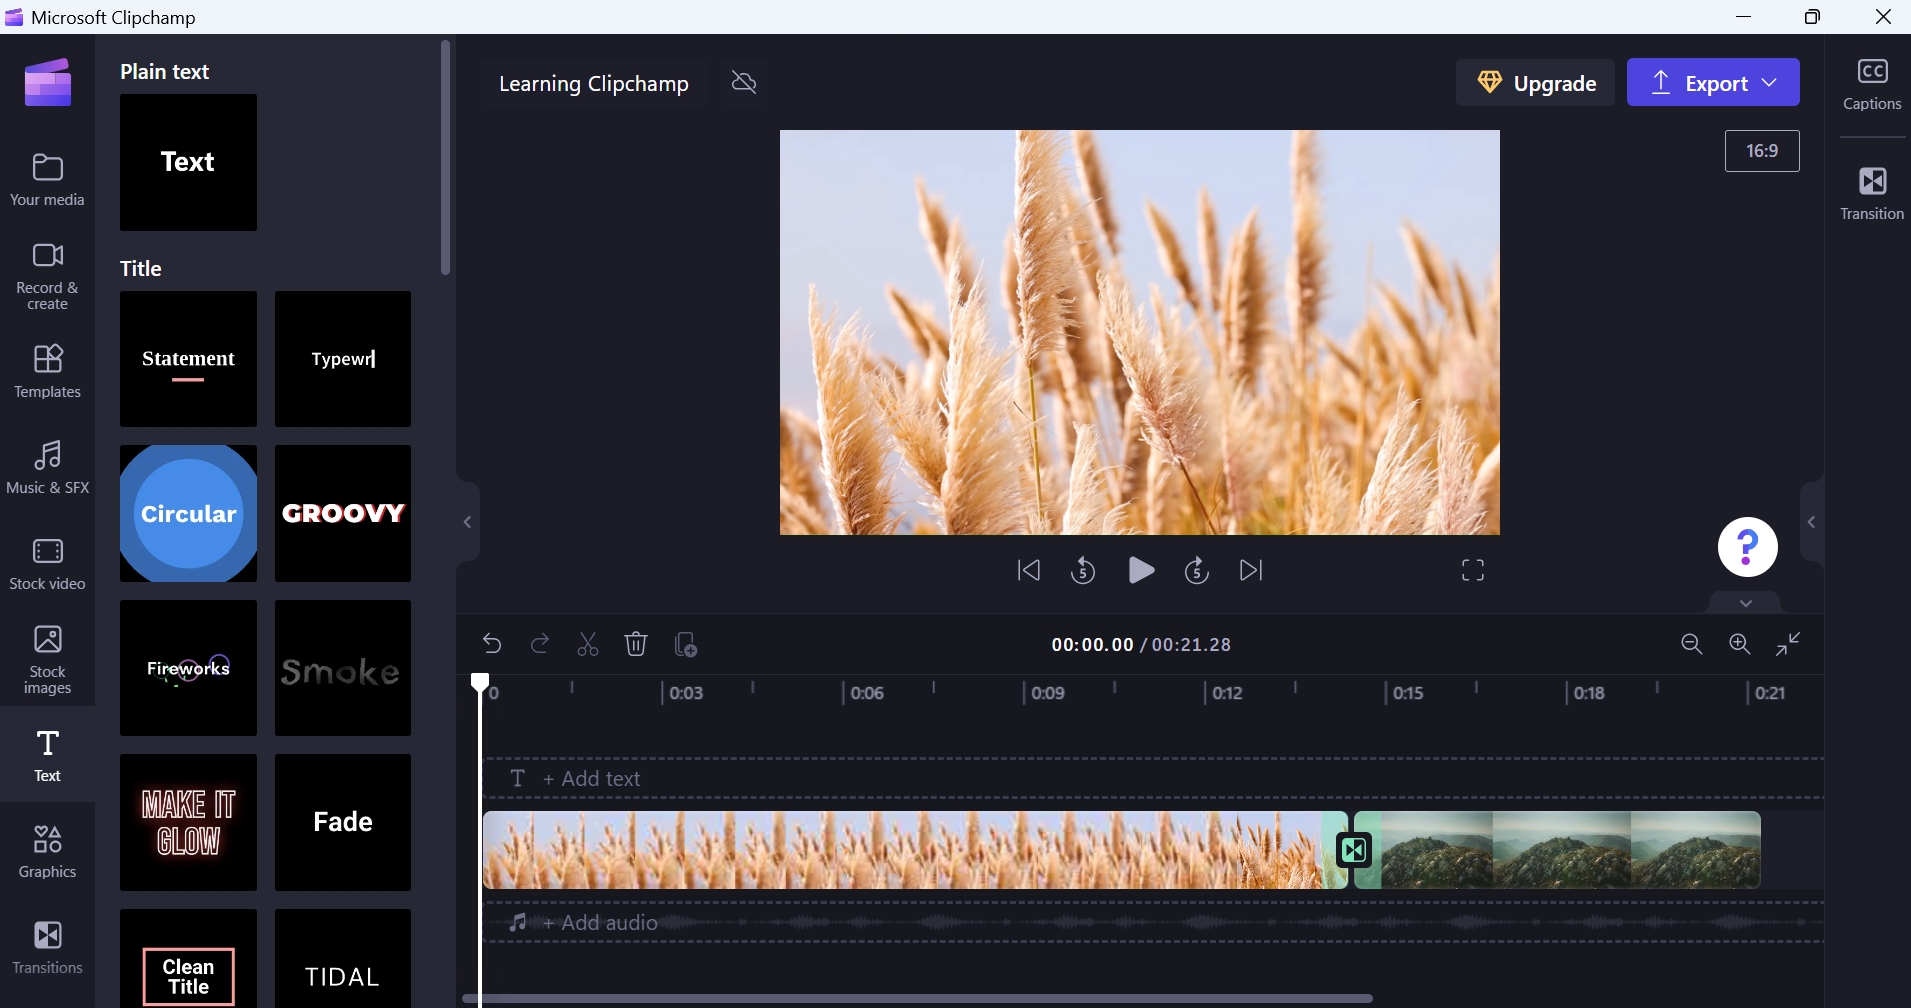
First, click “Stock video” in the toolbar to open that pane and scroll down until you see the section “Nature documentary.” Then, add the first clip, called “Pampas grass,” to Your media. (To do so, select it and choose “Add to my media” from the window that appears.)
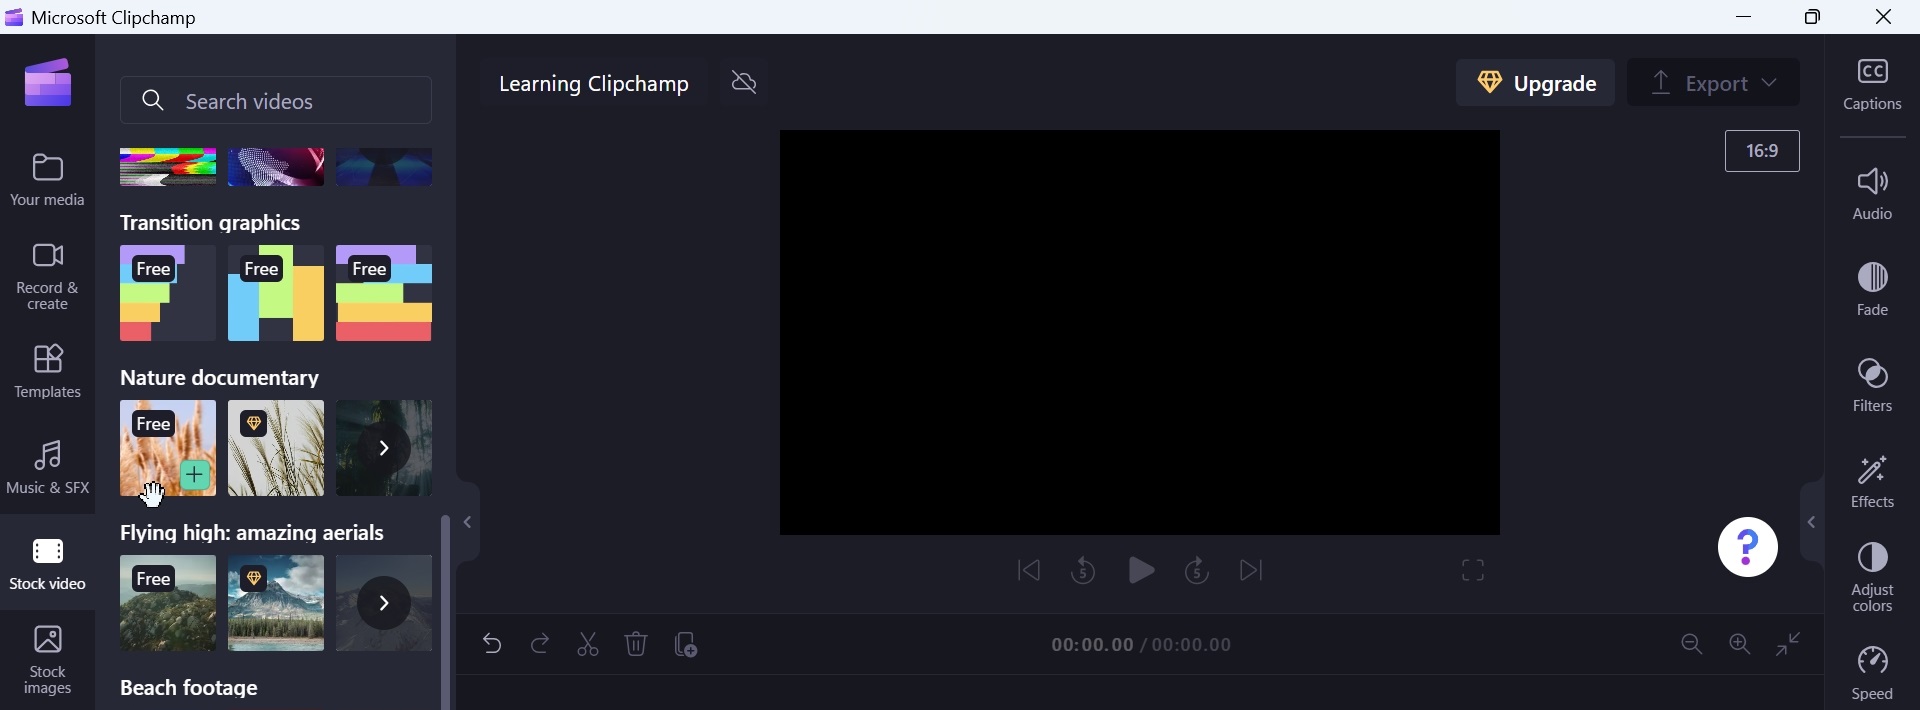
Below “Nature documentary,” you will find another section, named “Flying high: amazing aerials.” Select the first clip there, called “4K Aerial Flying Around Rocky Desert Hills,” and add that to Your media as well.
You now have two media items in Your media. To see this, close/toggle the Stock video pane and click “Your media.” There you will see each item displaying as a thumbnail to help you identify which is which.

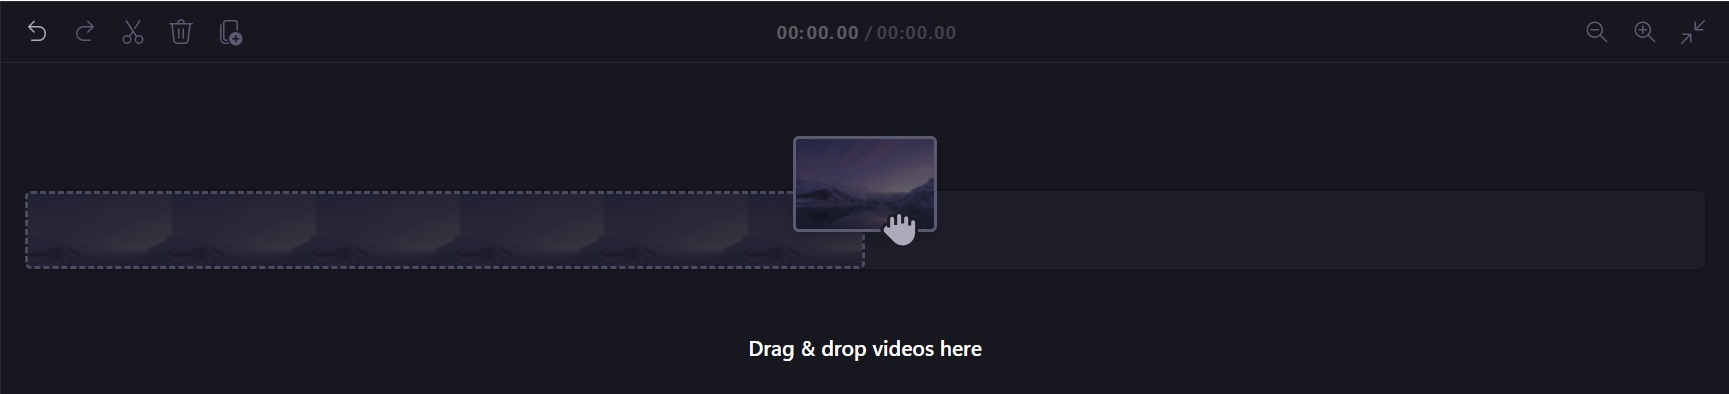
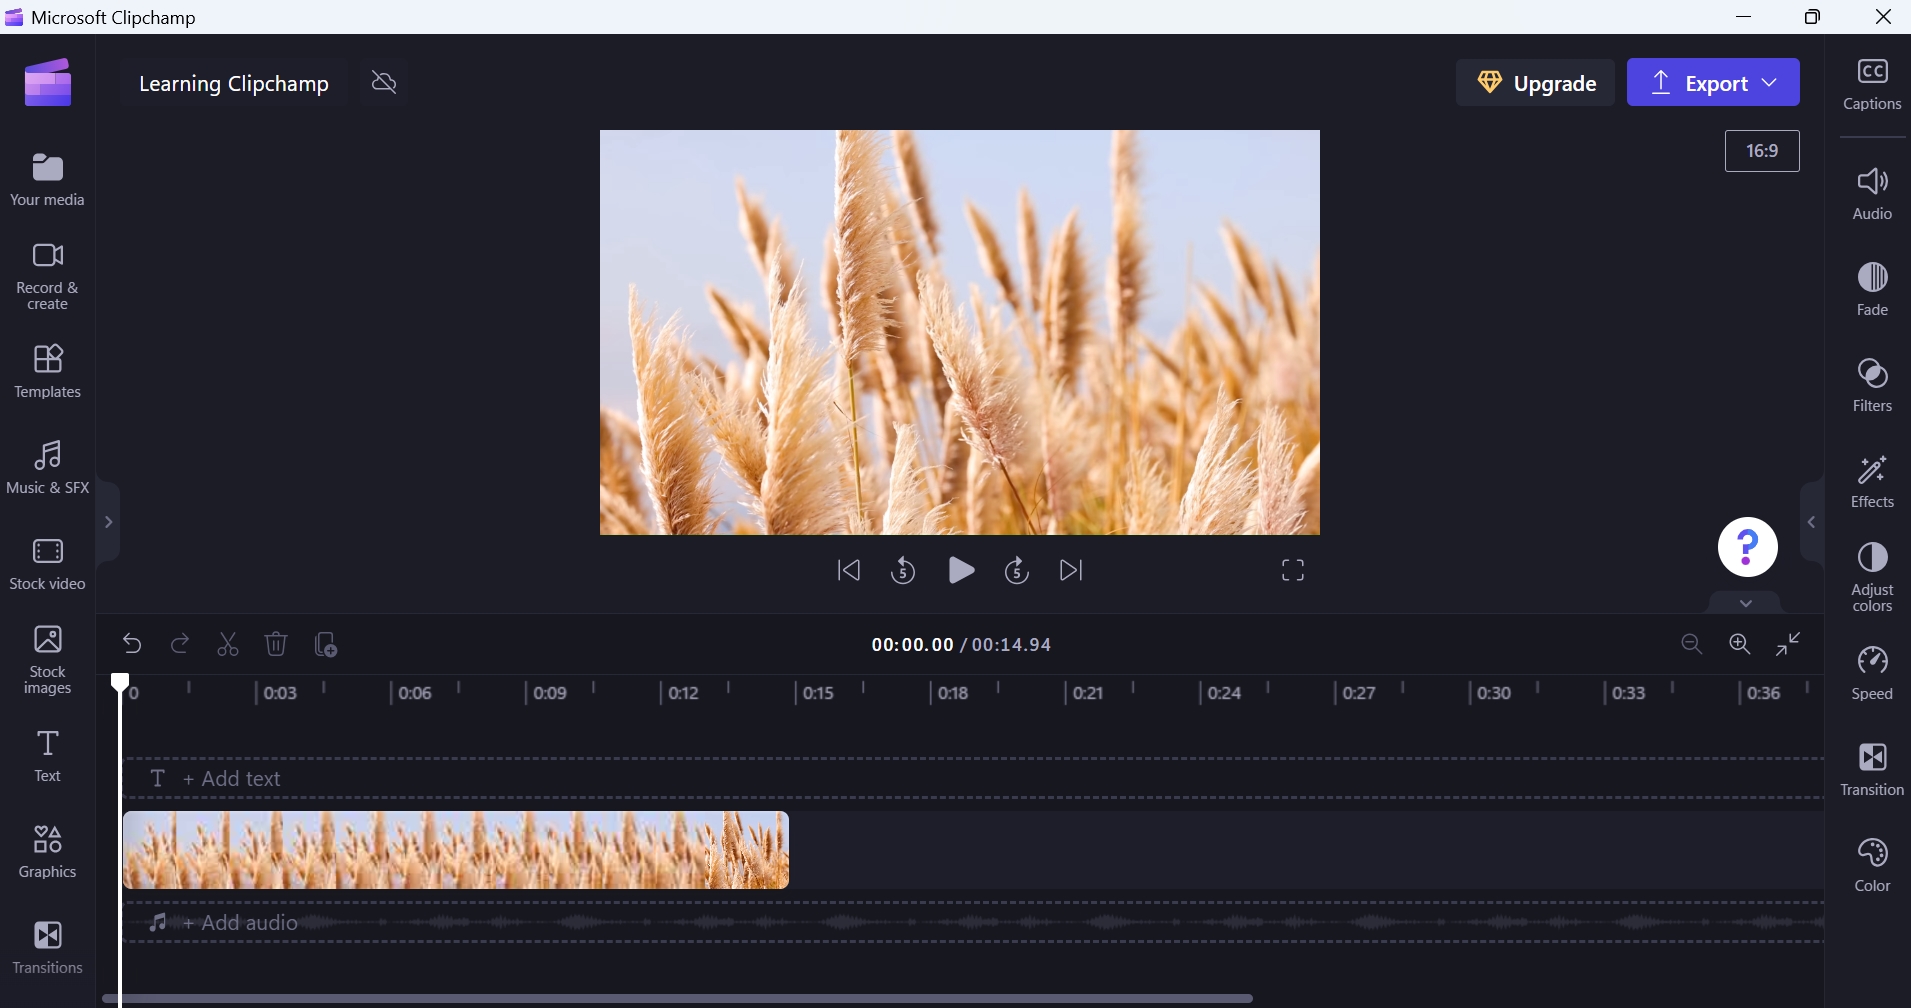
Now, drag “Pampas grass” from Your media to the timeline. As you do, the timeline visually changes to indicate that there is a drag target in its first and default track. This target turns green as you drag the item over it.
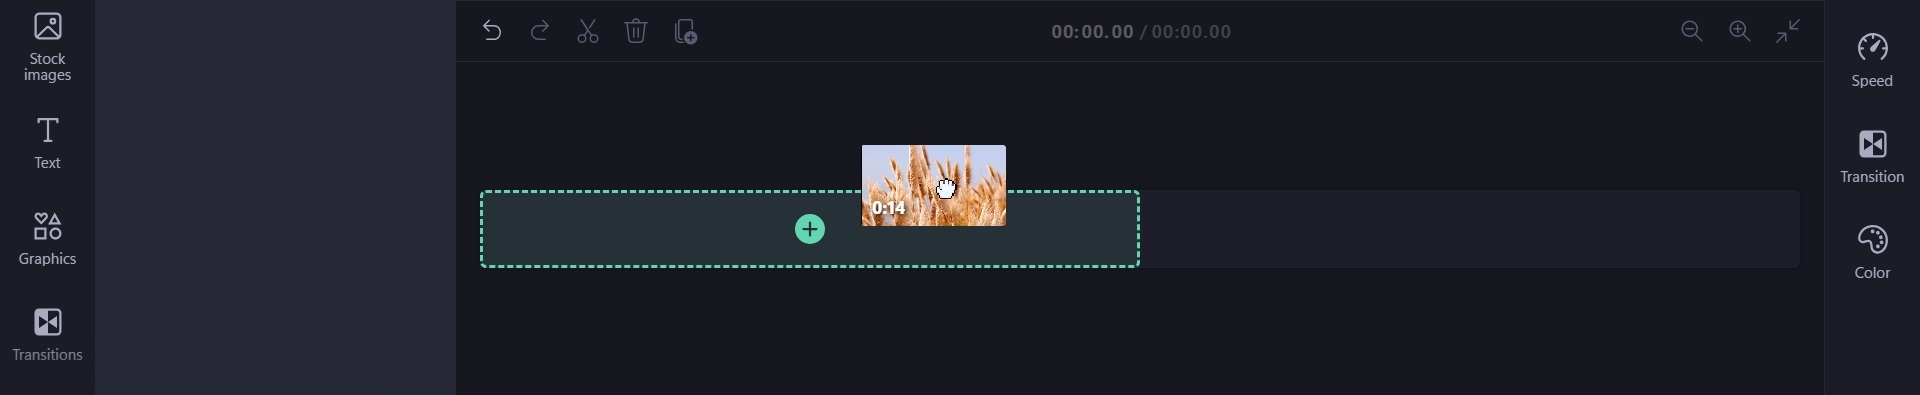
Drop the item onto the timeline and let go.

Many things change when you do this.
First, a clip representing the media item appears in the timeline at the very beginning of a new track. Prompts to add text and audio appear above and below this first track (and clip), respectively. A playhead indicator–a vertical white line–appears at the far left (beginning) of the timeline. The video preview displays the first frame of the new video you’re making, which is of course the beginning of the new clip you just created. And all of the video preview’s features–its playback controls, its floating toolbar, and full-screen toggle–are now enabled.
This one-clip video project, simple as it is, can be previewed and exported into a final video right now. Neither makes much sense, of course. But since this is your first video, previewing it makes some sense.
To preview the video, click the triangular “Play” button under the video preview.
You can also type SPACE to toggle Play (and Pause).


When you do so, the “Play” button changes to a “Pause” button, the clip plays in the video preview, and the playhead indicator moves from left to right across the timeline.
You can click “Pause” (or type SPACE) to pause playback at any time. You can also grab the playhead indicator with the mouse and move it left or right–or scrub–to move to any point in the clip.
Now, we can add a second clip to the timeline. Because we have two stock videos in Your media, the most obvious way to position the second one is to place it in the same track as the first. That way, the two clips will play one after the other.
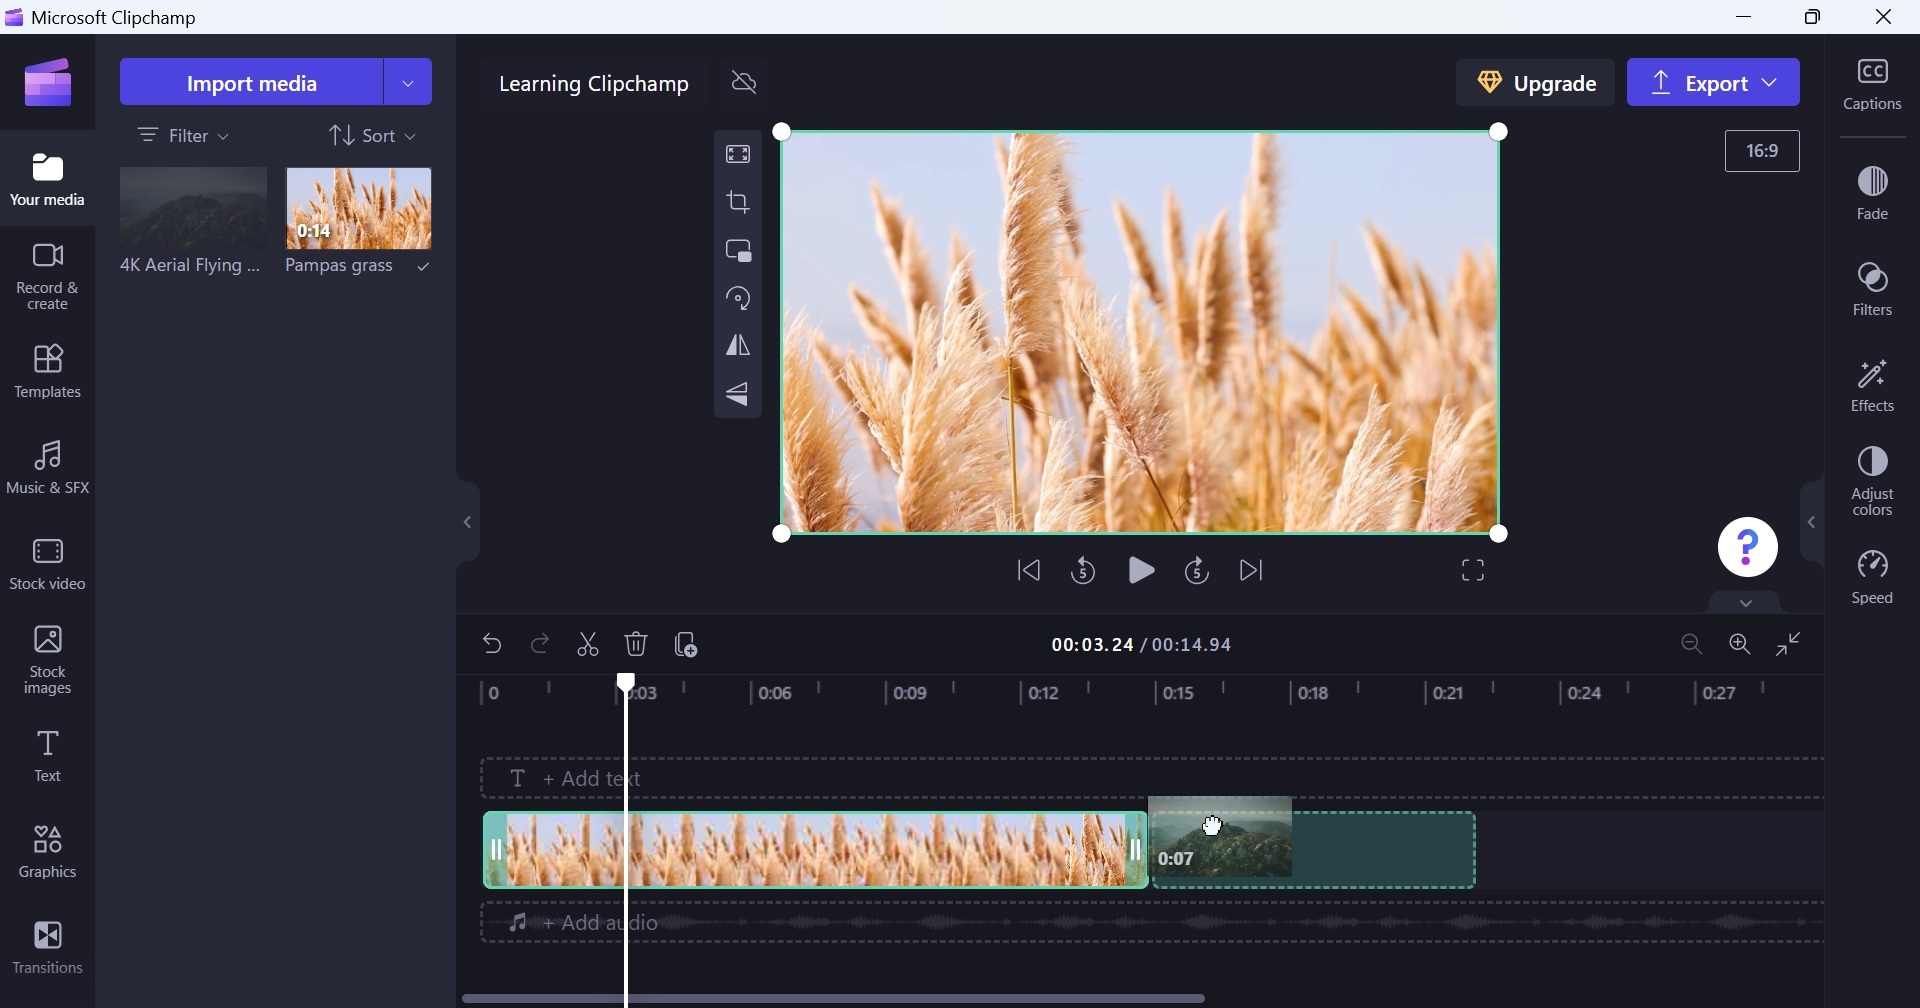
To add “4K Aerial Flying Around Rocky Desert Hills” to the timeline, select it in Your media, drag it to the timeline, and drop it to the right of “Pampas grass” in the same track.
You could just as easily drag it to the left of the first clip so that the second clip is now located at the start of the video.
Now, when you preview the video, it will play each clip in succession. The shift between the two is a bit visually jarring, of course, but we can add a transition to fix that. We’ll do that in the next section.
Remember that you can close/toggle the Your media pane (or any other pane in Clipchamp) at any time. Doing so frees up on-screen real estate, giving more room to your timeline and video preview. This is especially useful as a video project grows more complex.
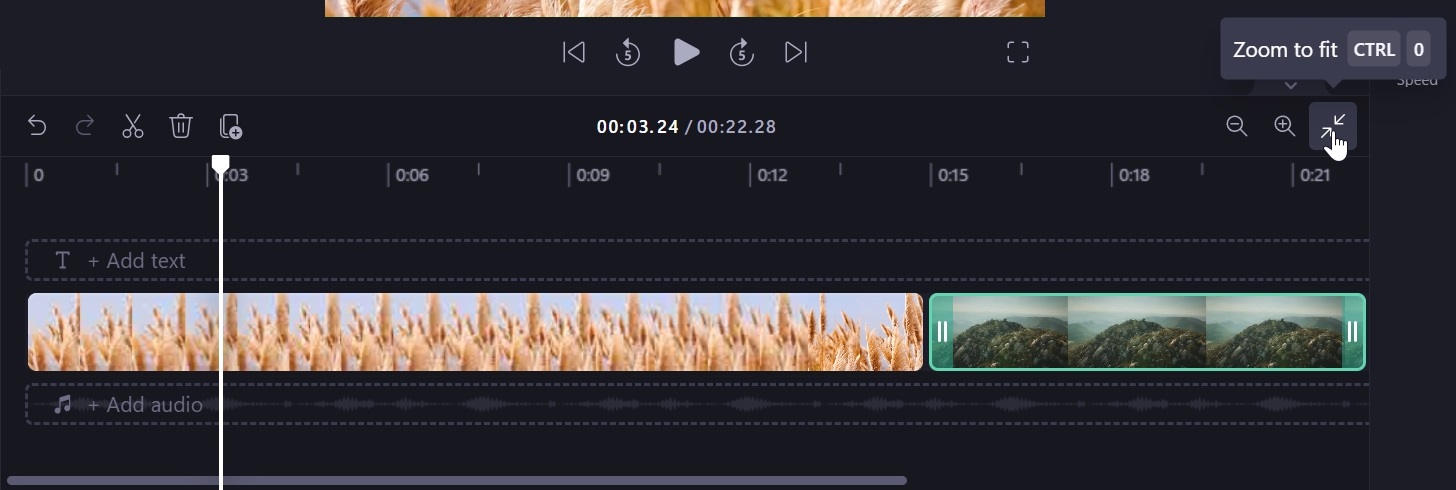
Before moving on, take a look at the “Zoom out,” “Zoom in,” and “Zoom to fit” buttons in the top right of the timeline area. (The first two resemble magnifying glasses.) These controls are used to control how much you can see on the timeline, and they get useful when you add a lot of clips to the timeline. For now, click “Zoom to fit” to ensure that our two clips fill the full visible area of the timeline.
Each of these zoom controls also has a handy keyboard shortcut.
Zoom out: CTRL + Minus
Zoom in: CTRL + Plus
Zoom to fit: CTRL + 0
Place a transition between two clips in the timeline
To visually smooth the transition between two clips in the timeline, you can add a—wait for it—transition. Clipchamp provides numerous popular transitions, including various fades, wipes, and pushes, but this is an area where you can perhaps too easily make something that’s more distracting than pleasing. We urge you to exercise caution here.
Fortunately, Clipchamp makes it easy to use the most basic and less distracting transition, called Cross fade. And to see it in action, we will now add a cross fade to this first project.
To do so, mouse over the gap between the two clips you added to the timeline. When you do, a green “Add transition” button appears.
![]()
Click to add the (Cross fade) transition. The transition now appears visually between the two clips.
![]()
![]()
You can preview the video now to see how the two clips cross-fade, creating a smooth visual transition. But you can also customize or change the transition if you’d like. The following options are available:
Change the transition’s duration. By default, the Cross fade transition lasts for one second. If you would like it to be quicker or shorter, select the transition in the timeline, which removes most of the choices from the Property panel on the right and adds a new “Transition” icon. Click “Transition” to display the Transition panel (not be confused with the Transitions panel on the toolbar). Then, use the “Duration” slider to change the duration in 1/10th of a second increments.
![]()
Most will find the default duration to be ideal, but be sure to preview your changes with the video preview before closing the Transition panel.
Change to a different transition. You can also use the Transition panel to switch from Cross fade to a different transition. Just select a transition thumbnail and then use the playhead indicator and video preview to see the results.
If you know you don’t want a Cross fade transition, you can also add a different transition by opening the Transitions pane from the toolbar on the left, selecting the transition you want, and dragging it to the gap between two clips. The transitions in this pane offer video previews too.
Delete the transition. To delete a transition, right-click it in the timeline and choose “Delete” from the pop-up menu that appears.
Add a title or other text to your project
Now that our simple first video project has a few sequential clips and a transition, we can add a clip that appears above an existing clip in the timeline. And the most common example of that is a title, which is a form of text overlay.
To see what’s available, open the Text pane by selecting “Text” in the toolbar. This panel provides a basic plain text choice at the top plus various one- and two-line titles, captions, intro and outro text choices, and more.
As always, we’ll keep it simple, though you will want to experiment with the available options as your Clipchamp experience grows.
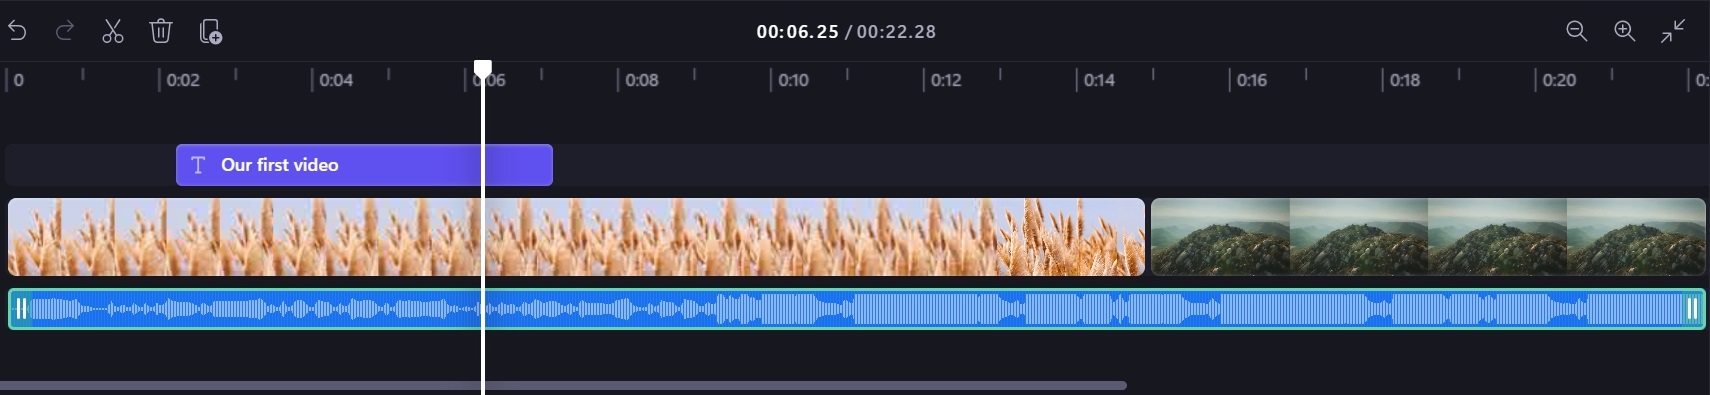
To add a title, select the Plain text item and drag it down onto the timeline, above the first and default track. Or, mouse over this item and click “Add to timeline” to place the title above the first and default track at the position of the playhead indicator. Either way, you can use drag and drop to position it where you want.
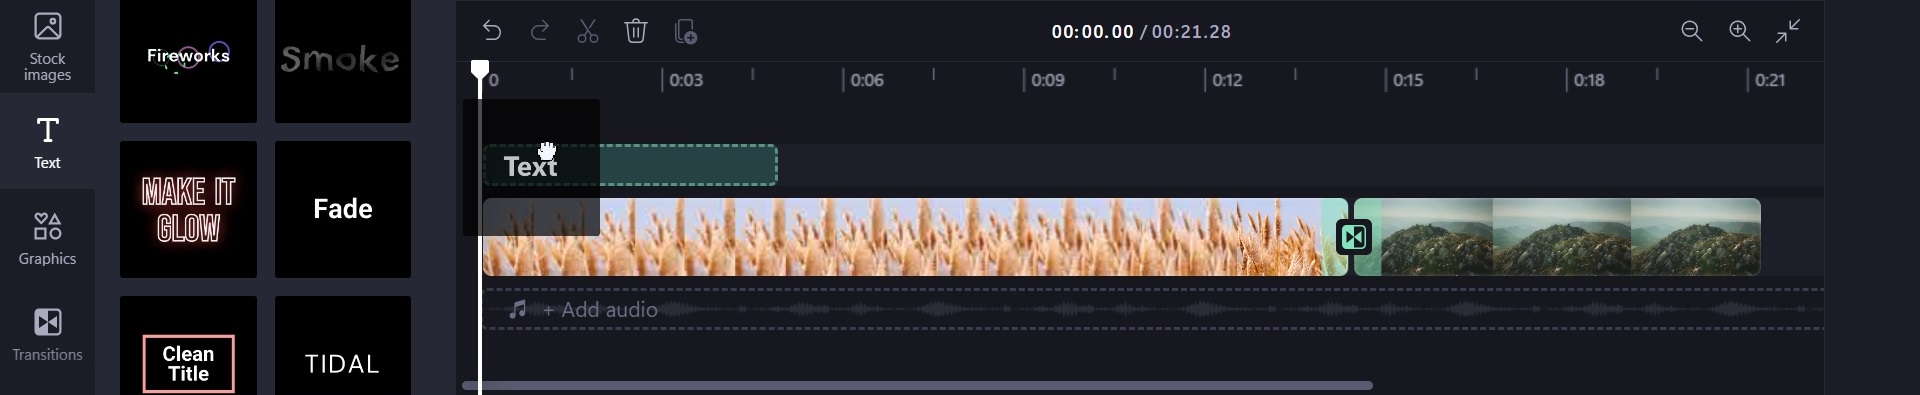
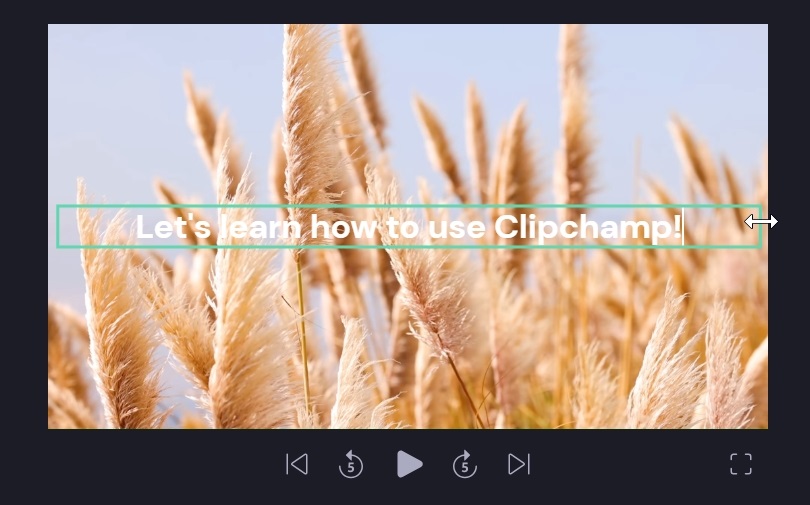
When you’re done, the text clip is placed in its own track above the default (first) track. And if you preview the video, you will see the text–with its default “Add your text here” message–overlayed on top of whatever video clip you placed it above.

To change the text, click it inside of its box in the video preview. The Property panel on the right changes to display options related to text–“Text,” “Fade,” and “Effects”–and you can type whatever you want right in the text in the preview.

You can also move or change the size of the text box by dragging its sides or corners. This might be necessary if the text you wish to display is too big for the default box.

The following options are available in the Property panel when a text clip is selected.
Configure the text’s font, alignment, style, color, and position. Clipchamp provides a lot of options for customizing the font, alignment, style, color, and position of a text clip. To see what’s available, click the “Text” icon in the Property panel.

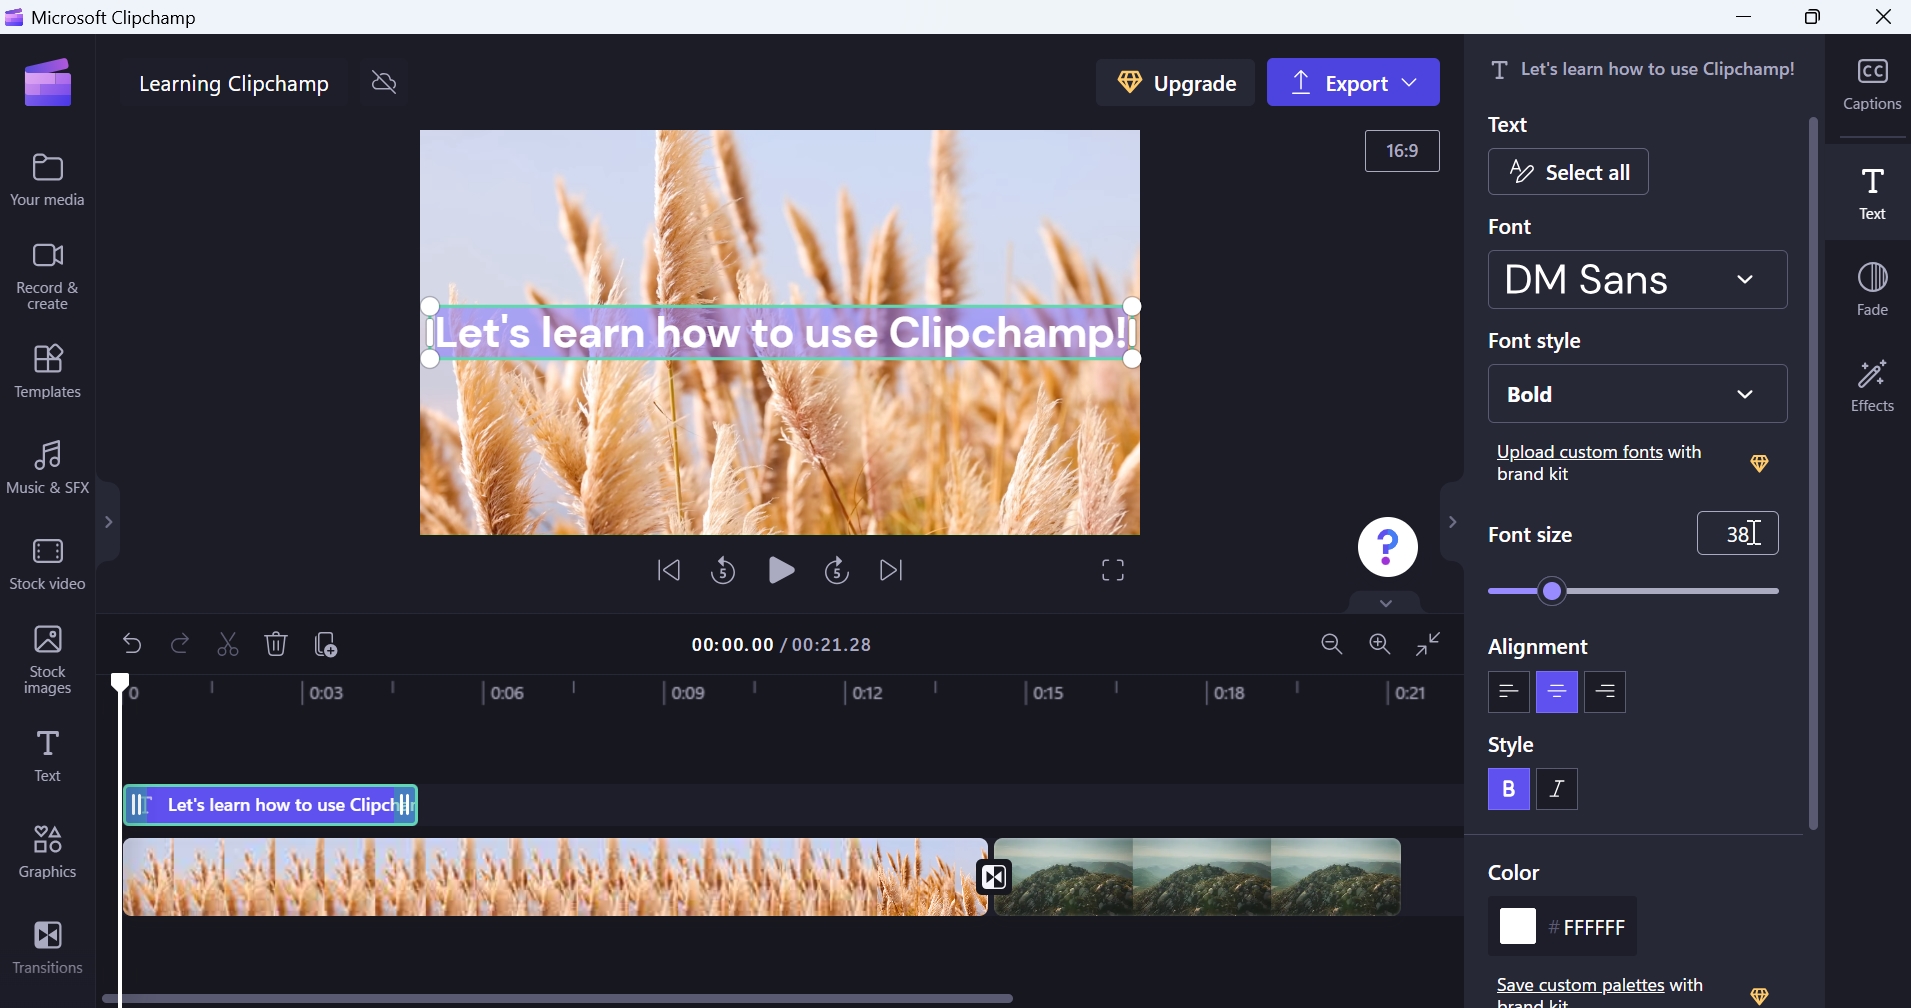
Because resizing the text box can often reposition the text on-screen, it’s important to remember that the Position control in this panel can always be used to re-center or otherwise cleanly reposition the text.
Fade the text in and out. By default, text will suddenly appear, be visible for 5 seconds, and then disappear. If you think this looks abrupt, you can click “Fade” in the Property panel and then add fade-in and/or fade-out effects of up to 2 seconds in 0.1-second intervals.

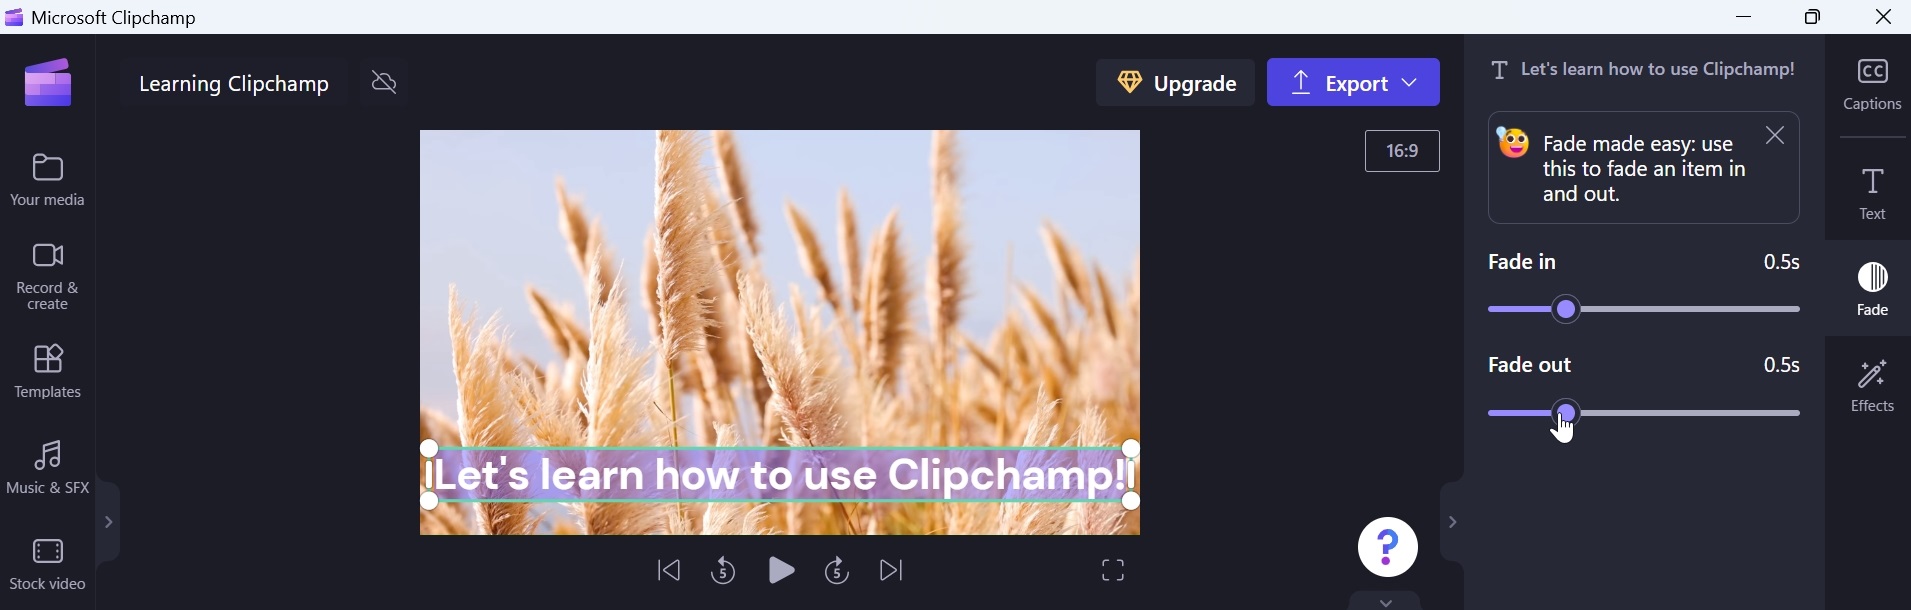
You can also change the duration that the text appears. This is discussed in the section Edit clips in the timeline later in this chapter.
Fade works with other types of clips too. There’s not much more to say about it, but we do discuss Fade more generally in the section Apply fades, filters, effects, and more to a clip in the timeline later in this chapter.
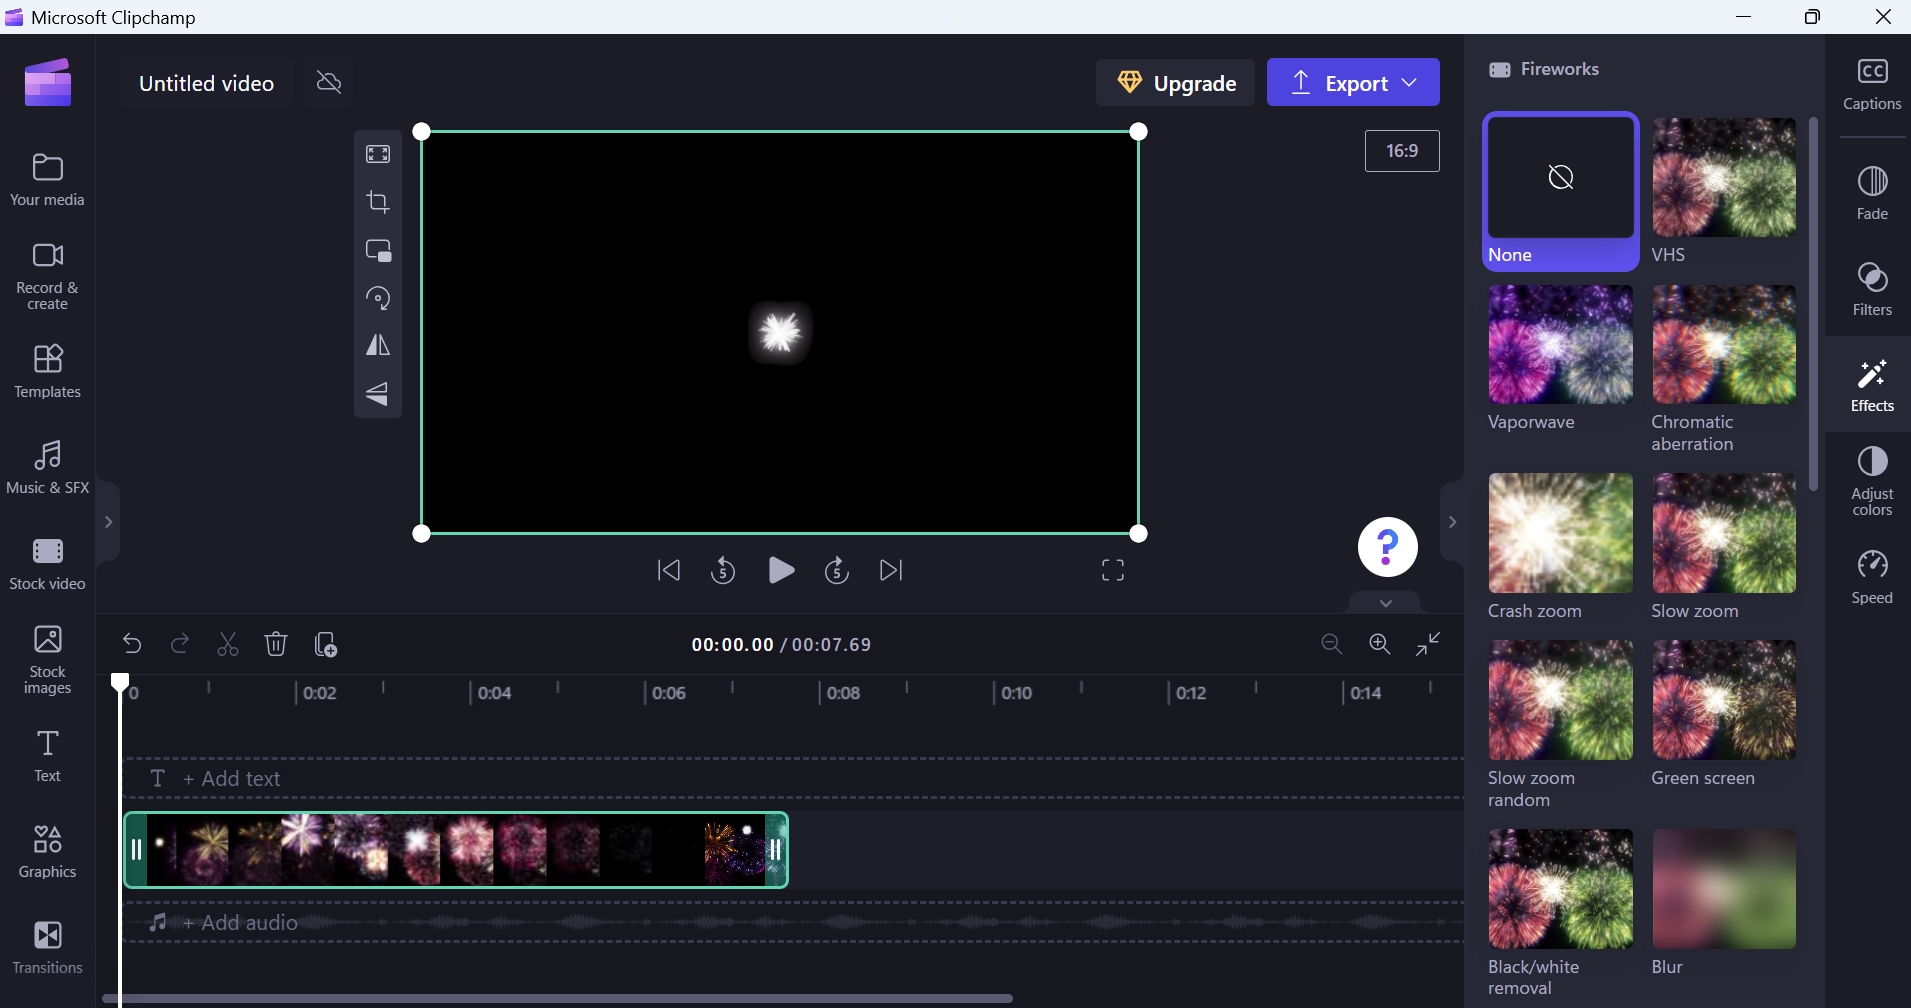
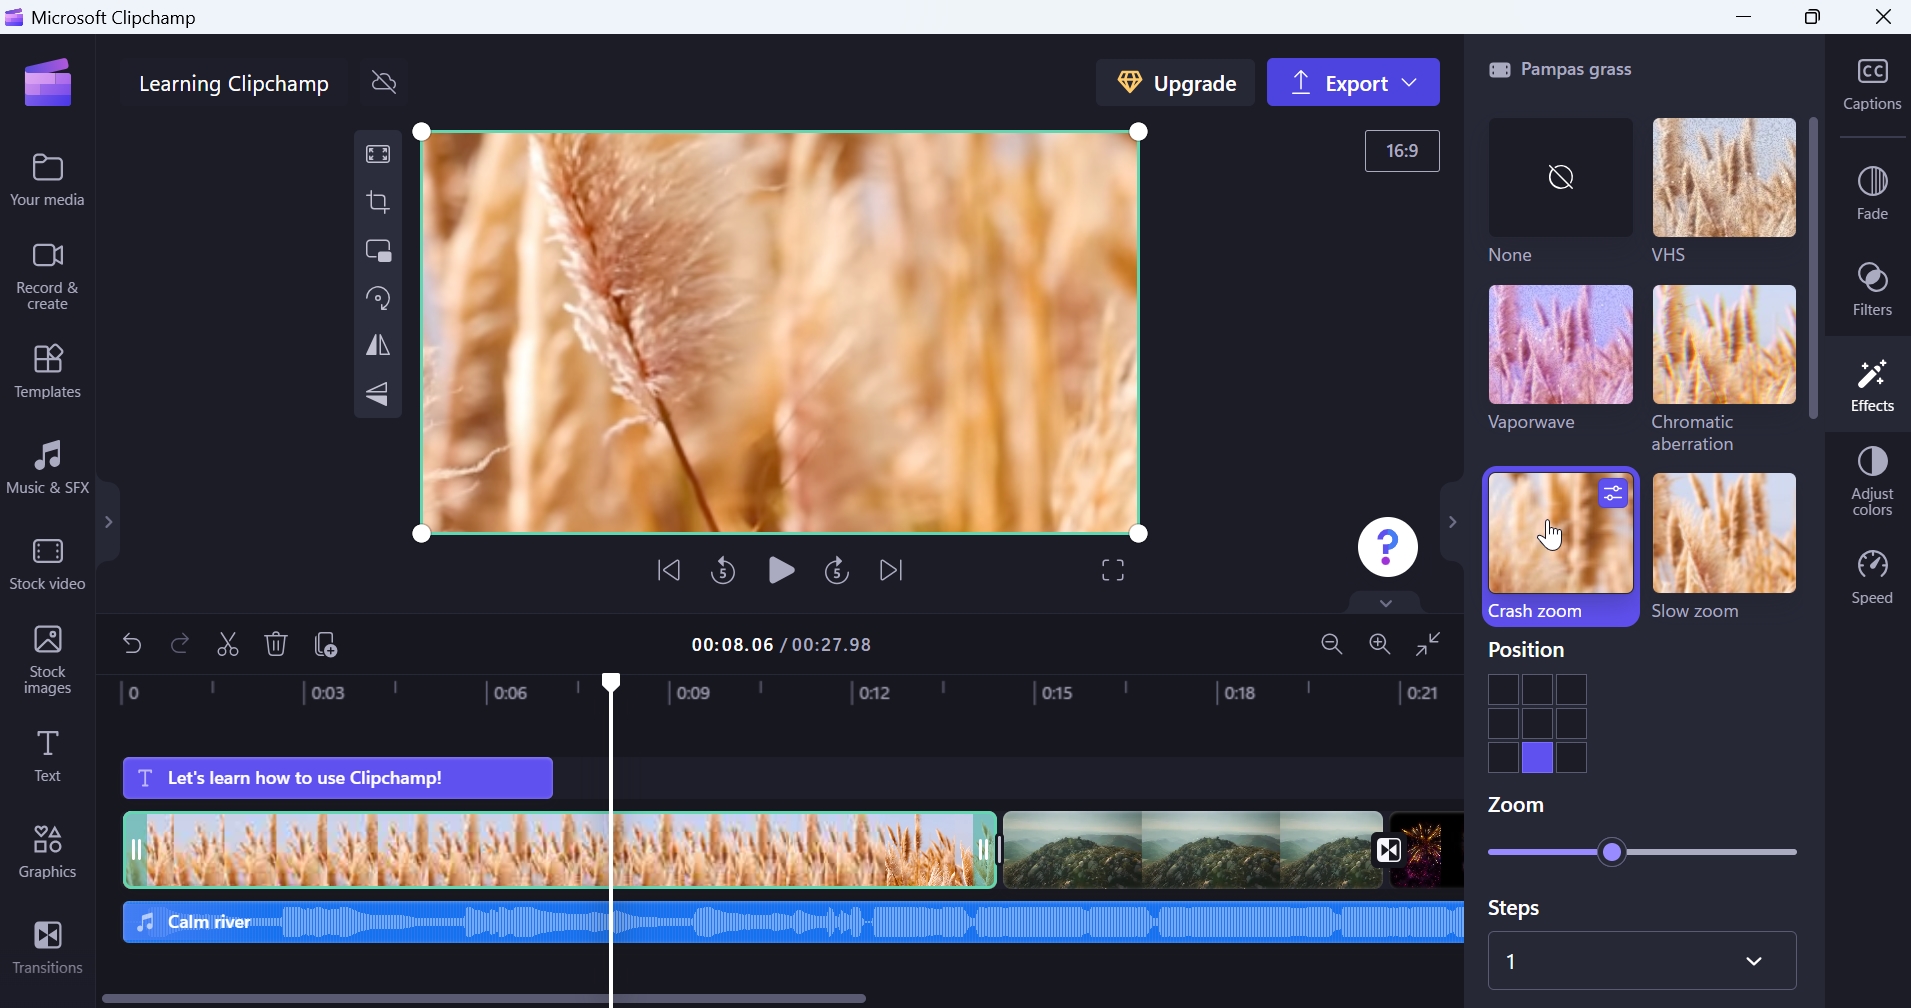
Apply an effect to the text. Clipchamp also lets you apply various effects to a text clip. These range from fairly simple effects like “VHS” and “Chromatic aberration” to animated effects with many configurable properties like “Crash zoom” and “Slow zoom.” To see the available effects, click “Effects” in the Property panel. Note that when you select an effect in the grid, you may see various configurable properties appear underneath it.

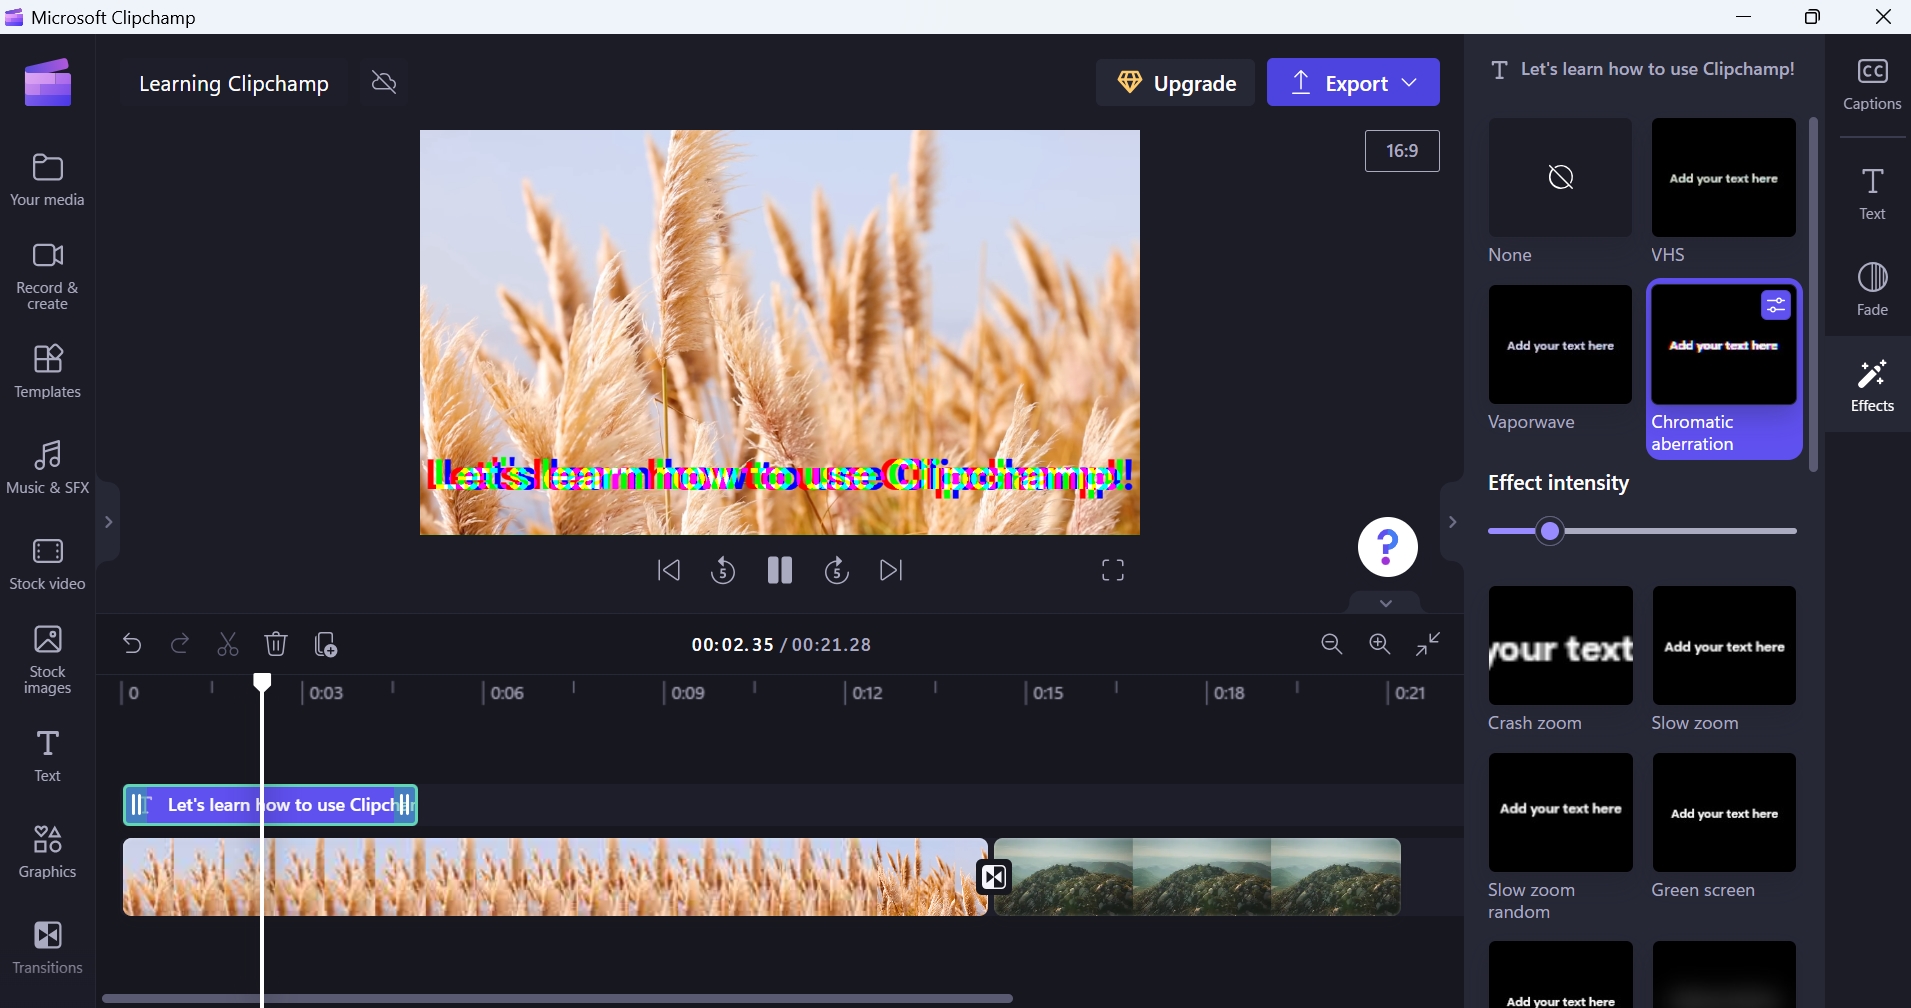
Effects are somewhat unique in that you can apply multiple effects to a single click. If you only want to use a single effect, make sure that no other effects are selected. (You can just click a selected effect to deselect it.)
Effects works with other types of clips too. We discuss Fade more generally in the section Apply fades, filters, effects, and more to a clip in the timeline later in this chapter.
Edit a clip in the timeline
While the stock video and images that Clipchamp provides are clean and well-made, many if not most of your own videos that you import into the app–such as those taken with your phone–will need to be edited in some way, perhaps to remove superfluous content at their beginning, end, or elsewhere. Likewise, you will often want to change the duration of clips. Whatever your editing needs, Clipchamp will likely meet the challenge.
Remember, when you edit a clip, it does not change the source media that’s displayed in Your media and is found in your PC’s storage. The clip is just a copy, and you can edit it as much as you want in the app without changing the original underlying media.
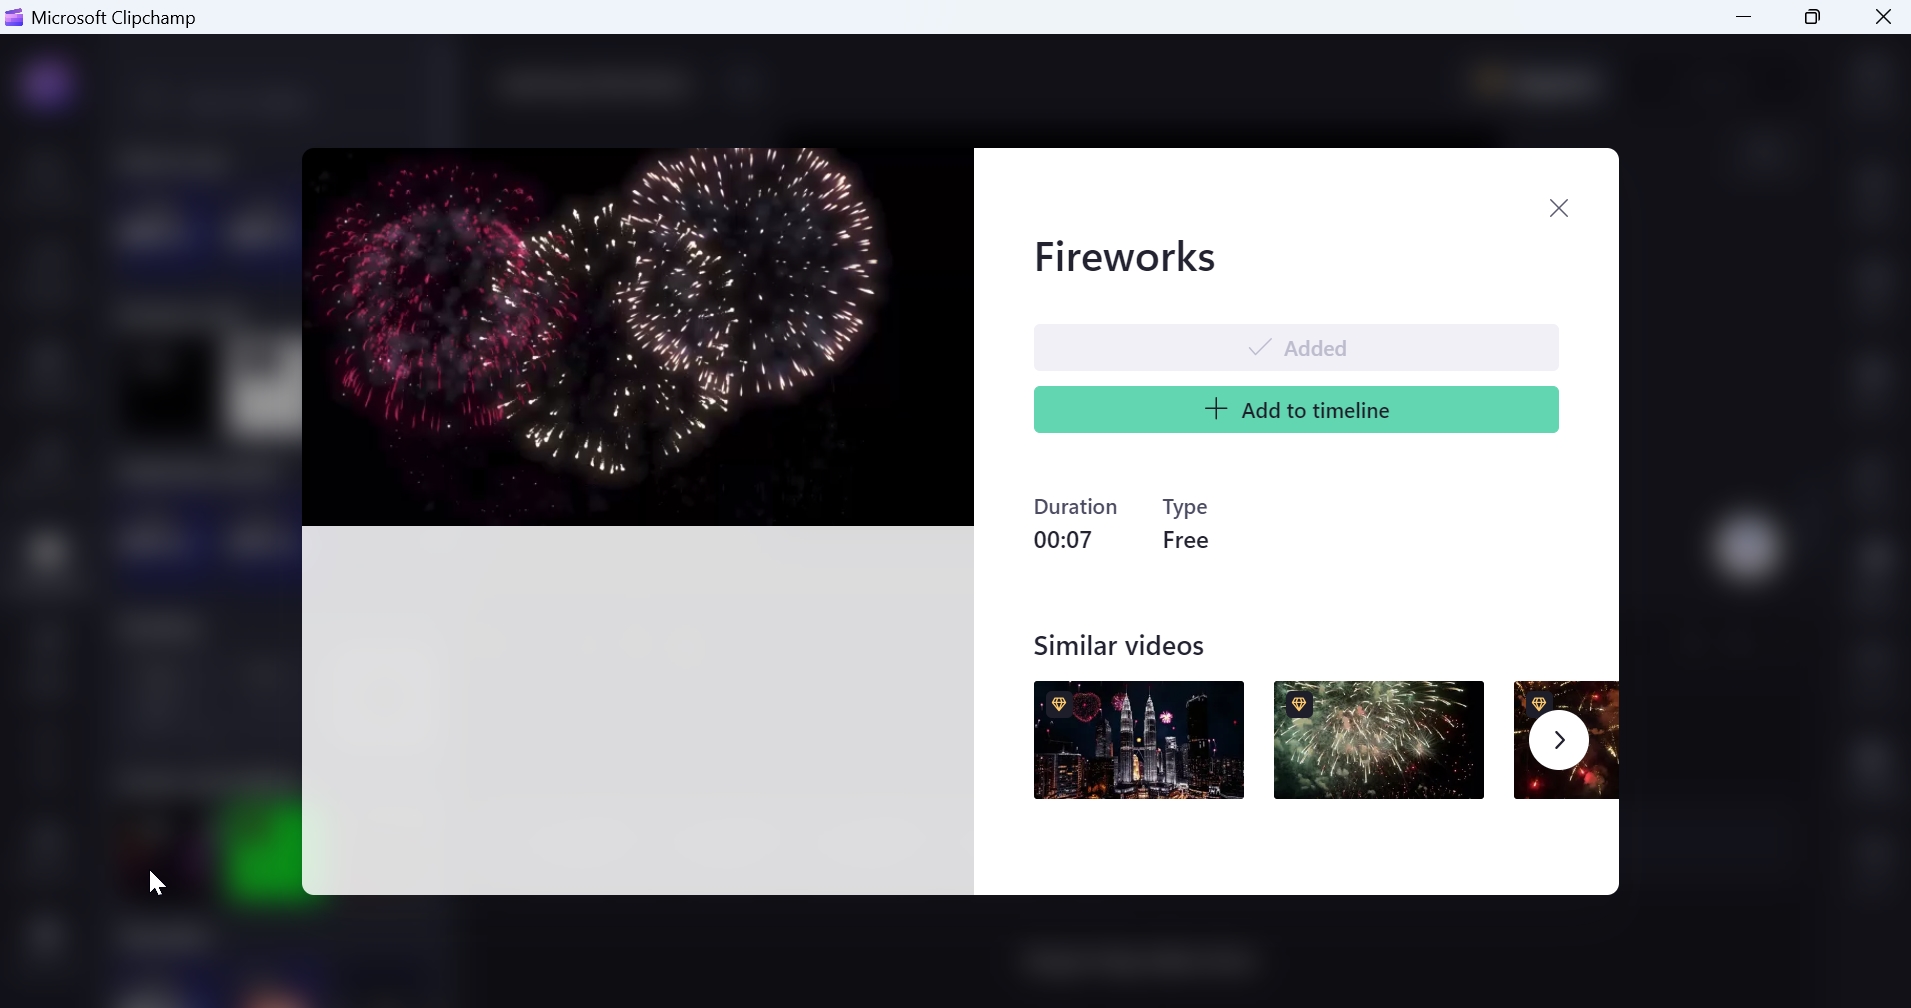
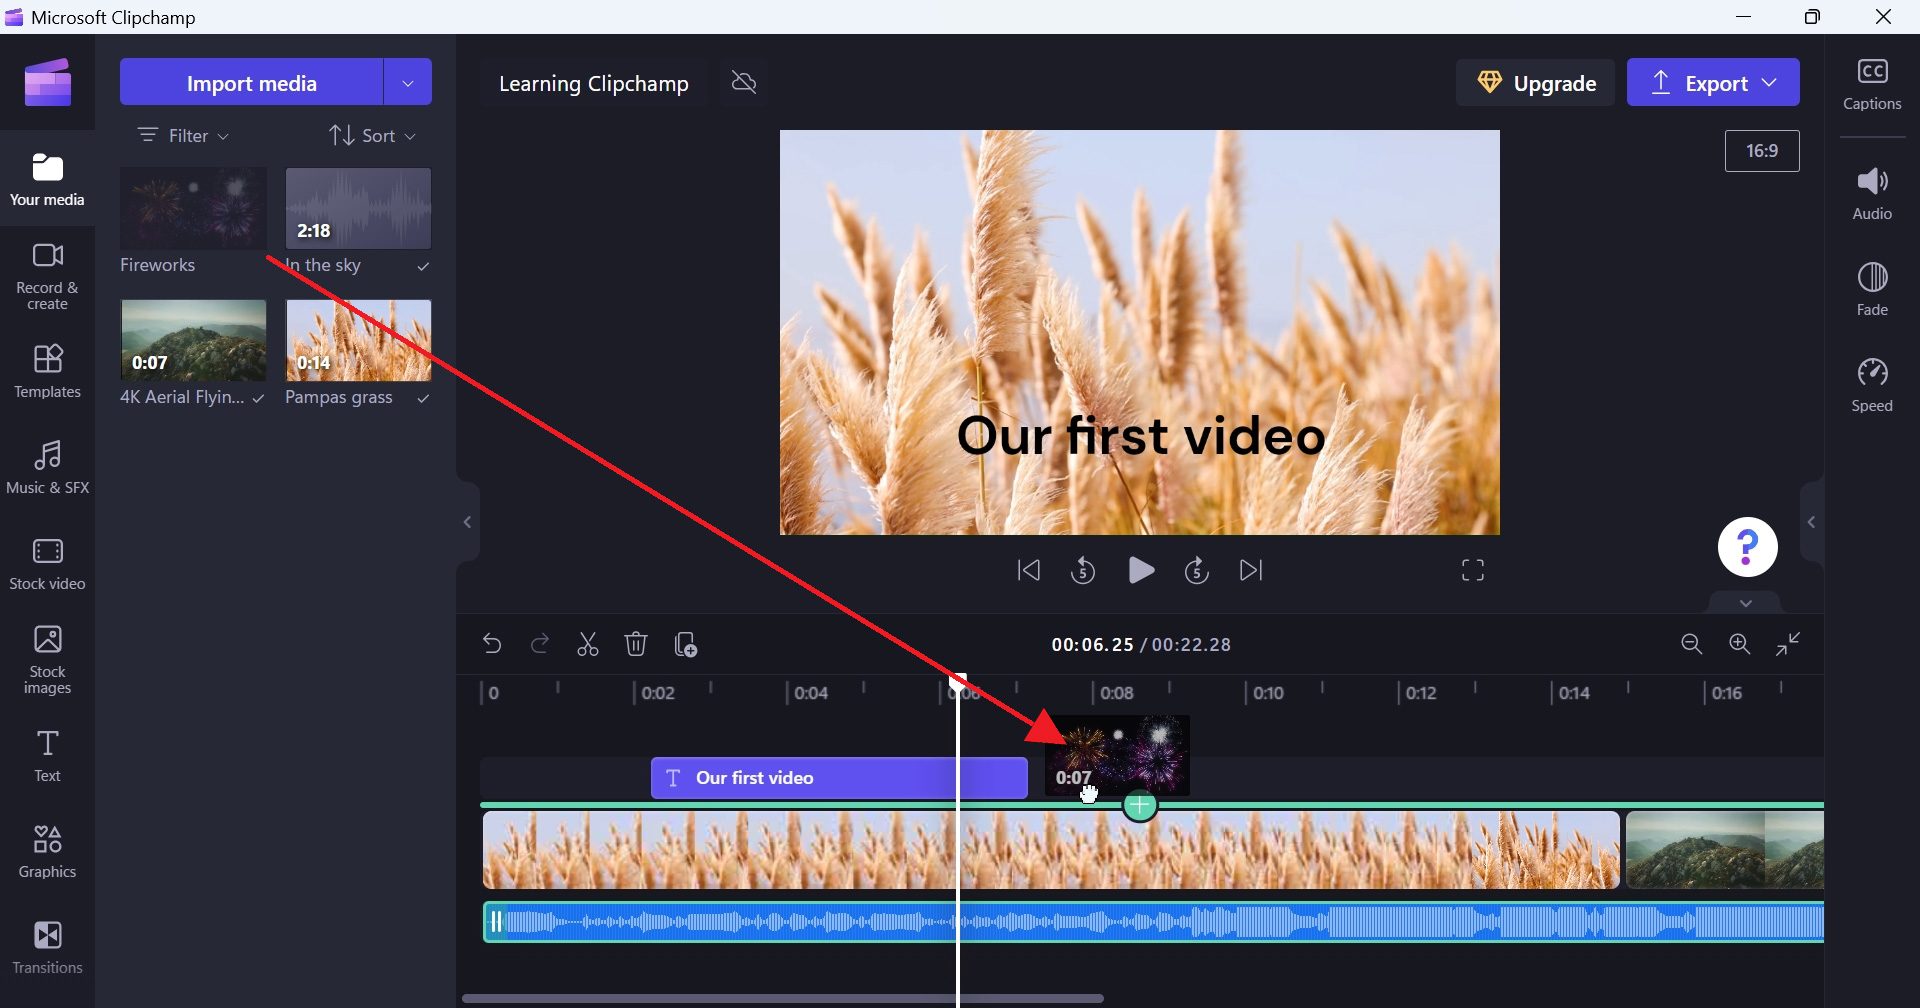
Before getting into editing, let’s pull in a new clip. Open the Stock video pane from the toolbar, scroll down to “Events and holidays,” and add the “Fireworks” item to the timeline (which also adds it to Your media). Position it in the same track as the two previous video clips, at the end. But leave some empty space between this new clip and the previous clip.

To edit a clip, you must first select it in the timeline. When you do, the clip is highlighted with a green outline.


When you select a clip, the items available in the Property panel can also change because different types of clips support different options. We examine these options in the section Apply fades, filters, effects, and more to a clip in the timeline later in this chapter.
How you can edit a clip will depend on the type of the clip, as each clip type has different characteristics and capabilities. For example, all clips have a beginning and an end, and a duration, which is the amount of time they appear in the video, plus starting and ending positions in the timeline. But video, music, and sound effect clips are of set durations, so they can only be cut, or trimmed, to be of shorter durations. In contrast, image and text clips can also be made to appear in the video for longer durations than the default amount of time.
It’s not as confusing as it sounds. The following types of edits are possible.
Trim. You can easily trim the beginning or end of a video clip–thereby making its duration shorter overall—by grabbing either end and dragging it left or right in the timeline. This isn’t very precise, but the video preview will move through the clip in concert with your edits so you can see where you are.


You can always undo any change you make. Remember, these changes are non-destructive and apply only to the clip you’re editing. Undo is your friend.
Make an image or text clip longer. Image and text clips appear for about 5 seconds by default. But you can lengthen or shorten the duration of one of these clips by grabbing its right end and dragging it left or right in the timeline. For example, we can make our title text stay visible a bit longer.

This, too, can be imprecise. If you want an exact length, you will need to first examine the clip’s starting time by mousing over its leftmost edge and clicking when the mouse cursor turns into a resize cursor: the starting appears at the tope of Clipchamp’s timeline. You can do the same for the end of the clip and then do a bit of math. Then, you can drag the end of the clip right or left until it’s the length you want.
Split Sometimes, you will need to remove a segment inside of a video clip. To do so, you can split the clip at the beginning of the section you want to remove and then again at the end. Then, you can select the part you wish to remove and delete it. (See below.) To do so, you will position the playhead indicator precisely at the places you wish to cut and then click the “Split” button in the toolbar above the timeline. Then, do so again at the end of the section you wish to remove, select the clip to remove, and press the Delete button to remove it. You will want to reconnect the clips before and after this split, and use your new transition skills to add a cross fade or other transition.

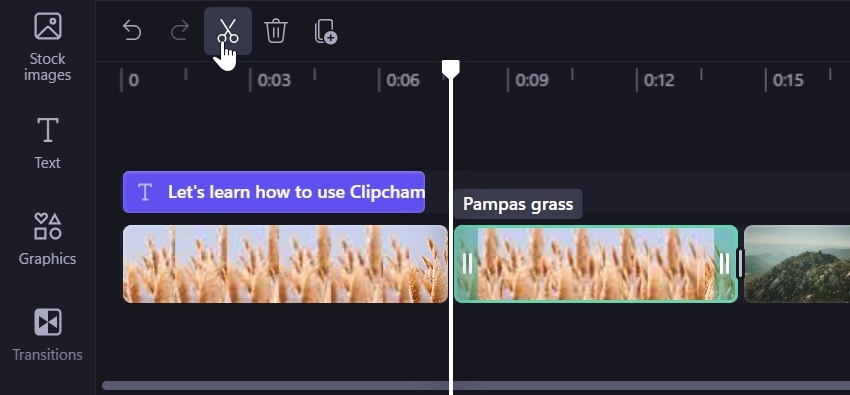
You can also split a video by typing S.
Delete Removing a clip from the timeline is simple enough: just select it and click the Delete button above the timeline.
Or, just type DEL.
Deleting a clip from the timeline does not delete it from your project or your PC’s storage.
Apply fades, filters, effects, and more to a clip in the timeline
As your Clipchamp skills grow, you may wish to modify individual clips using audio, video, and other effects. What’s possible varies by clip type. For example, text clips support such things as “Text,” “Fade,” and “Effects,” while video clips support “Fade” “Filters,” “Effects,” “Adjust colors,” and “Speed.”
You can see what’s possible for a given clip by selecting it in the timeline and then observing the Property panel on the right: this will change to display only those options that are available for the selected item.
The following properties are available.
Captions. Clipchamp supports an interesting auto-captions feature, currently in preview, that will examine the audio in an entire project and apply captioning to the video similar to how Google’s YouTube service works. You will be prompted to select the language used in the clip(s) and can optionally filter out profanity and offensive language. Once it generates the captions, you can edit them for accuracy, which is a nice touch. Here, for example, you can see the captions created for a video with a lot of talking.

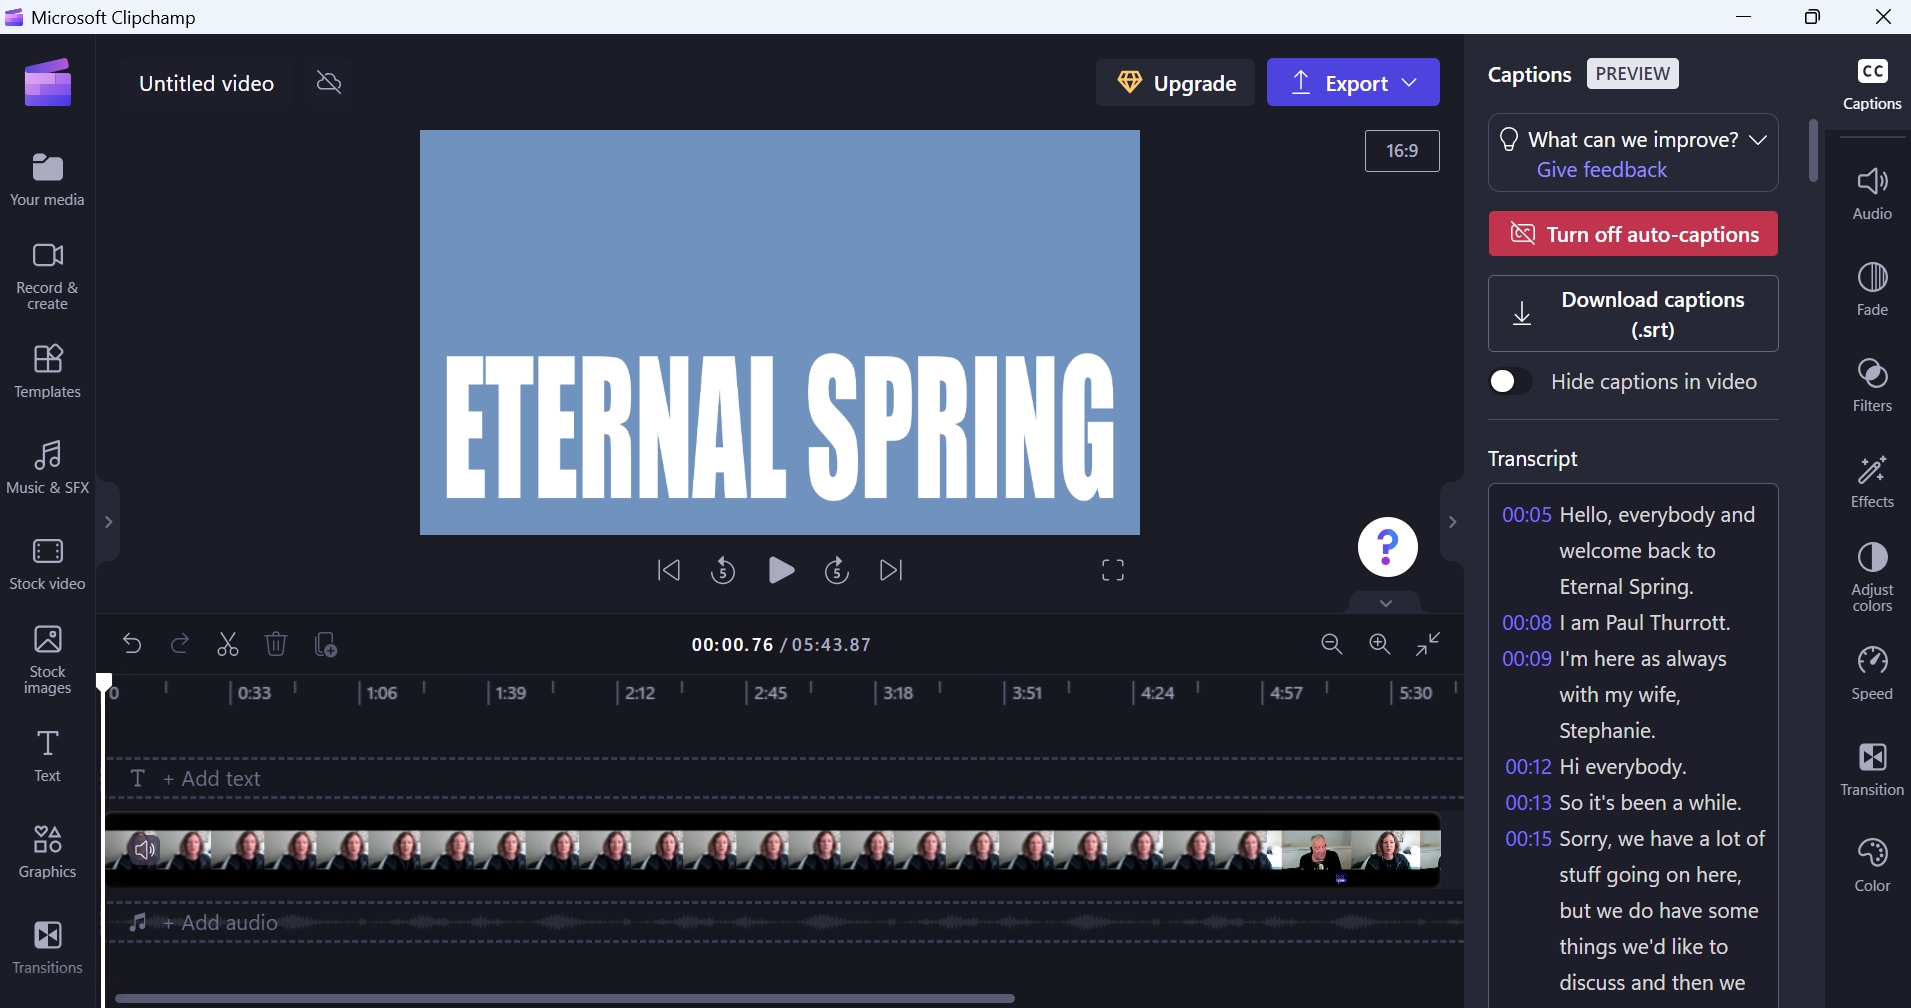
It even lets you download the captions separately as a SubRip Subtitle (SRT) file, which can be useful if you want to upload your completed video to YouTube and offer accurate captions (really subtitles).
If you are going to use this feature, we recommend enabling it after your video is fully edited. That way, you only need to generate–and check and edit–the captions once.
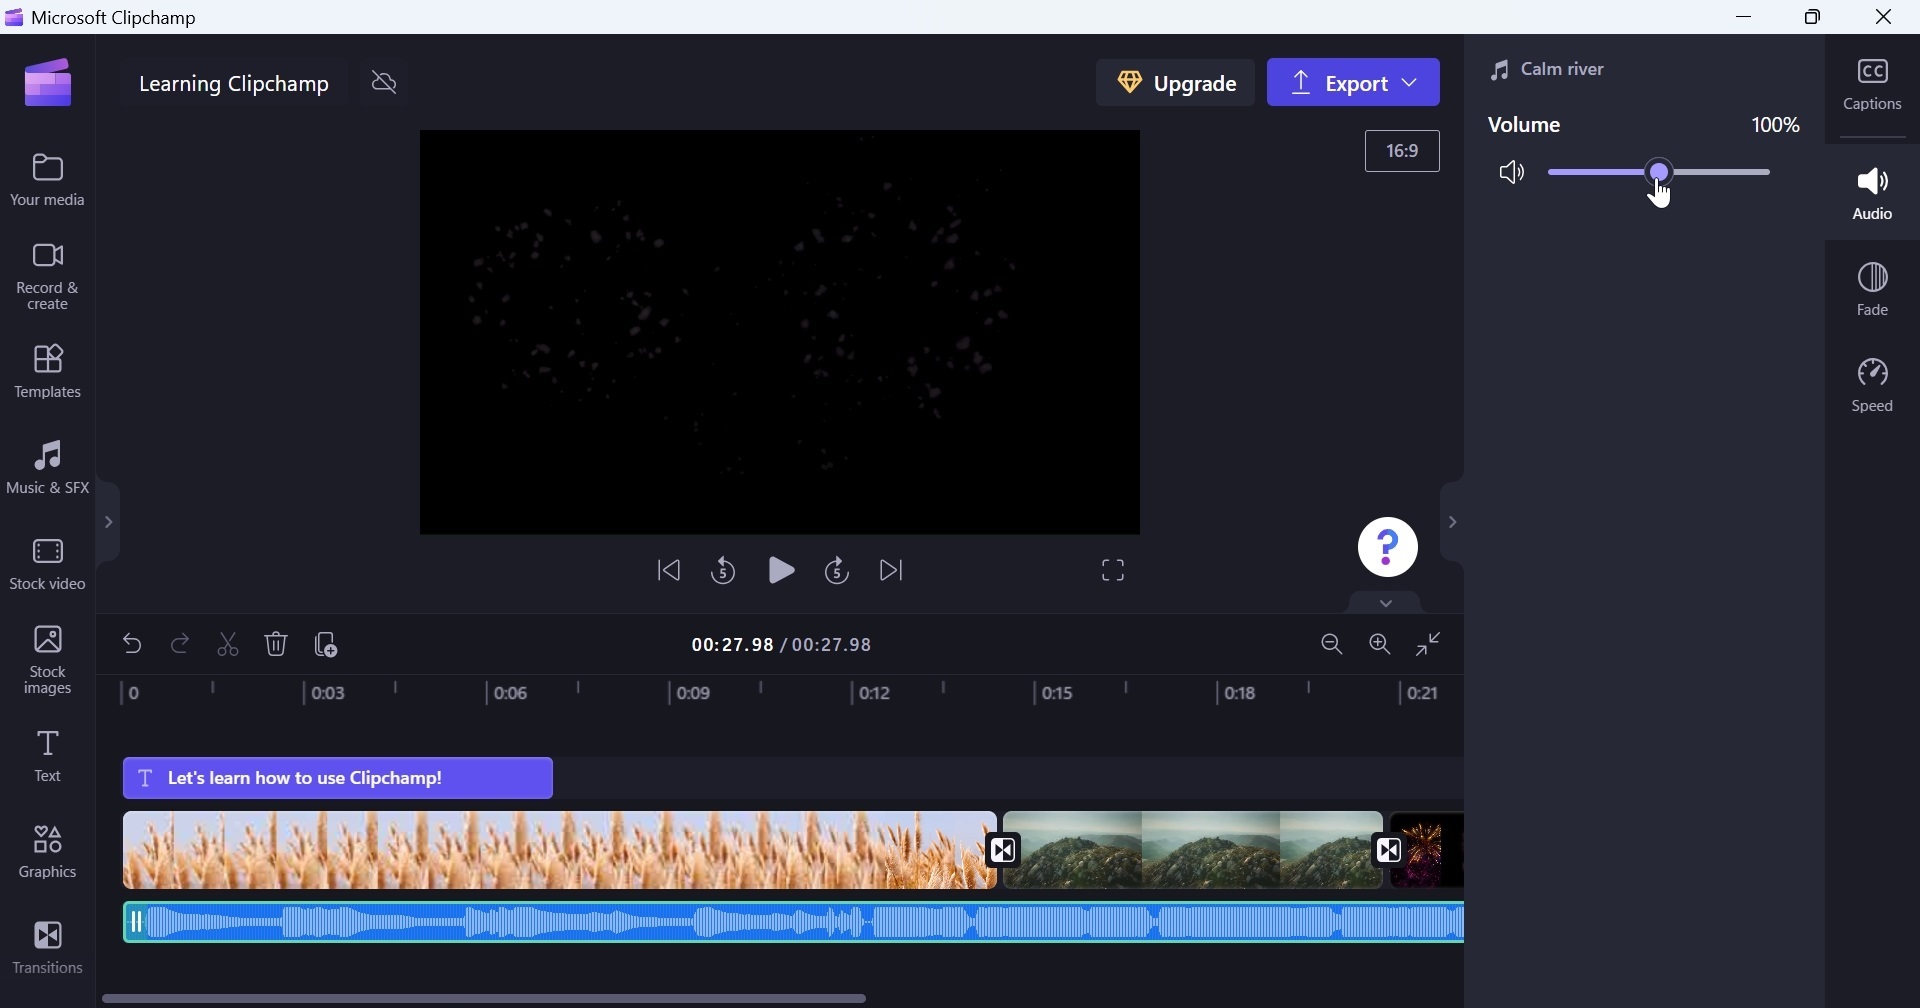
Audio. Music, sound effects, and many video clips support the Audio property, which can be used to raise or lower the volume of the entire clip. You can also use this interface to detach the audio from a video clip so that each can be edited individually. When you do so, the video and audio will appear as separate items in the timeline.

Fade. Graphics, images, text, and video clips support fade-in and fade-out properties so that their appearance and disappearance can be made less jarring. This is worth experimenting with, as you may find that short fades work well for some items while others require longer fades for a smooth transition.
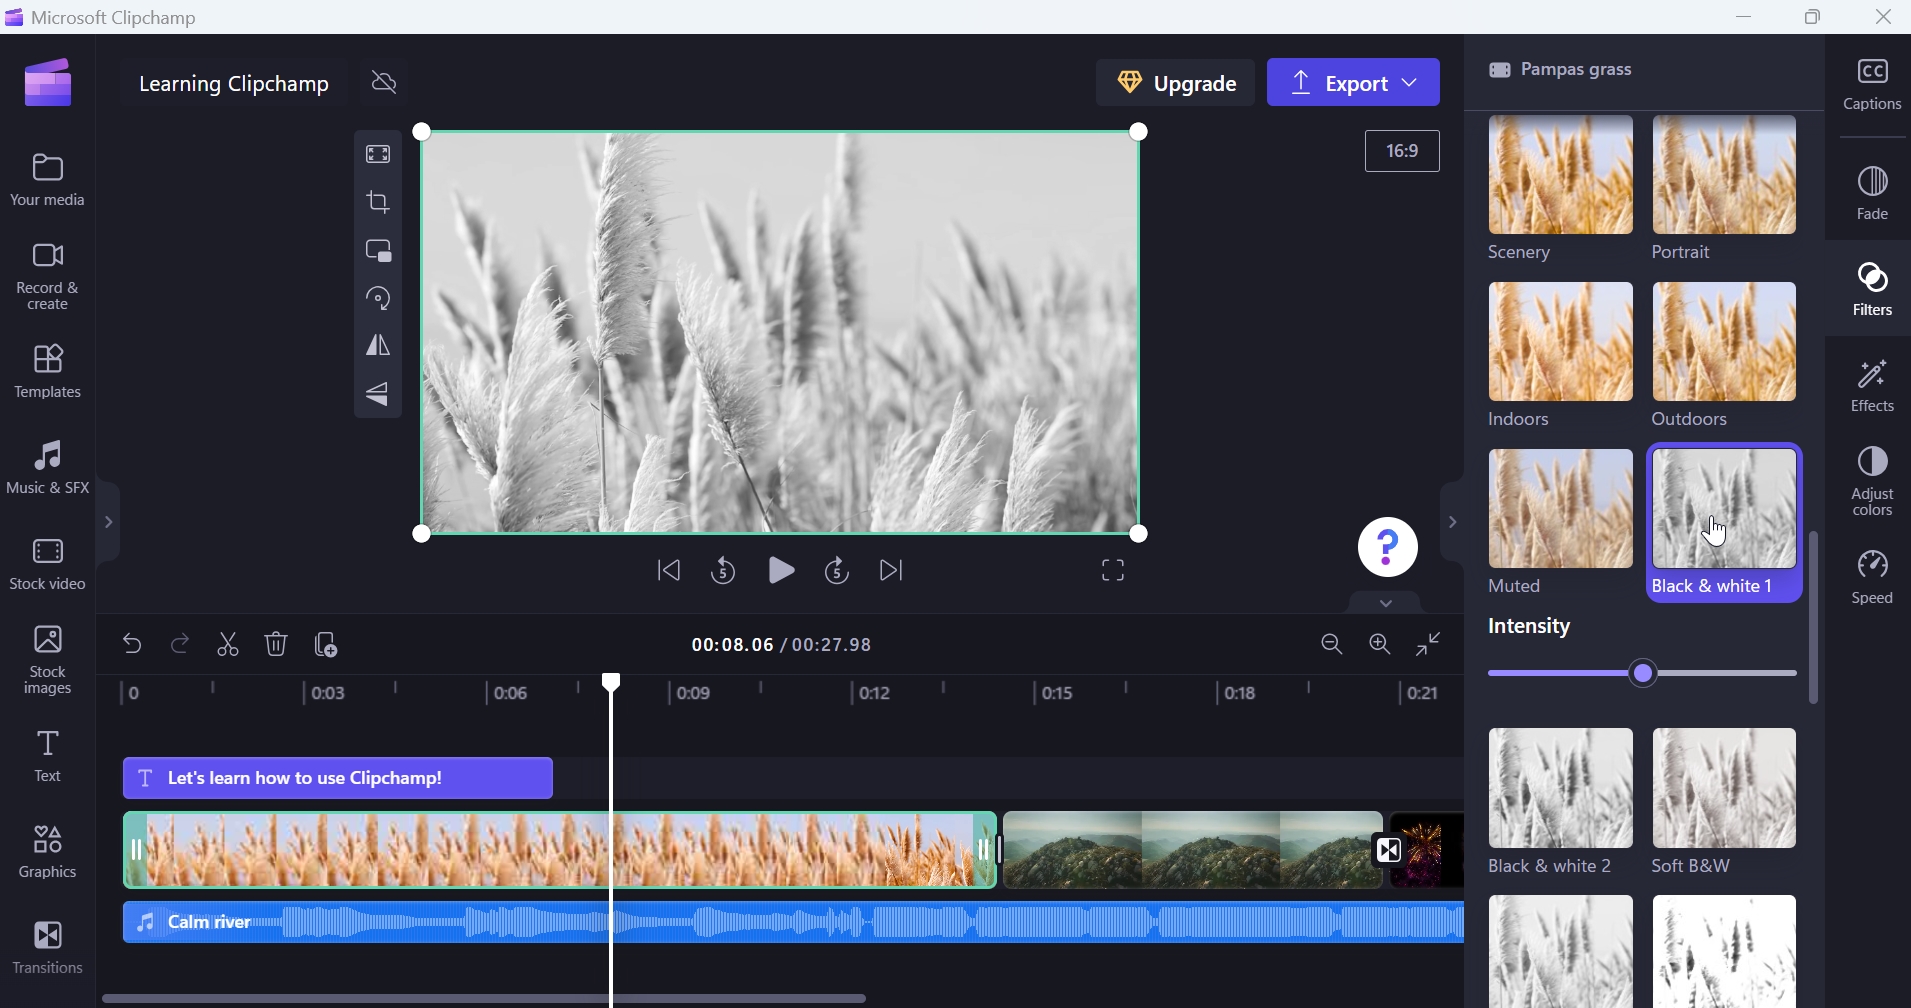
Filters. Video clips and images support a wide range of filters that can dramatically alter their look. Here, you should be judicious, as many of the filters are a bit extreme. But depending on your needs, the right filter can make a big visual difference.
Effects. Video clips, text, and images likewise support a wide range of effects, which differ from filters in that they are more complex, can involve animations, and often have many properties to configure. For example, the Crash zoom effect, which zooms into a specific area of a selected clip, has Position, Zoom level, Steps, and Steps delay properties that can be configured for a truly personalized effect.

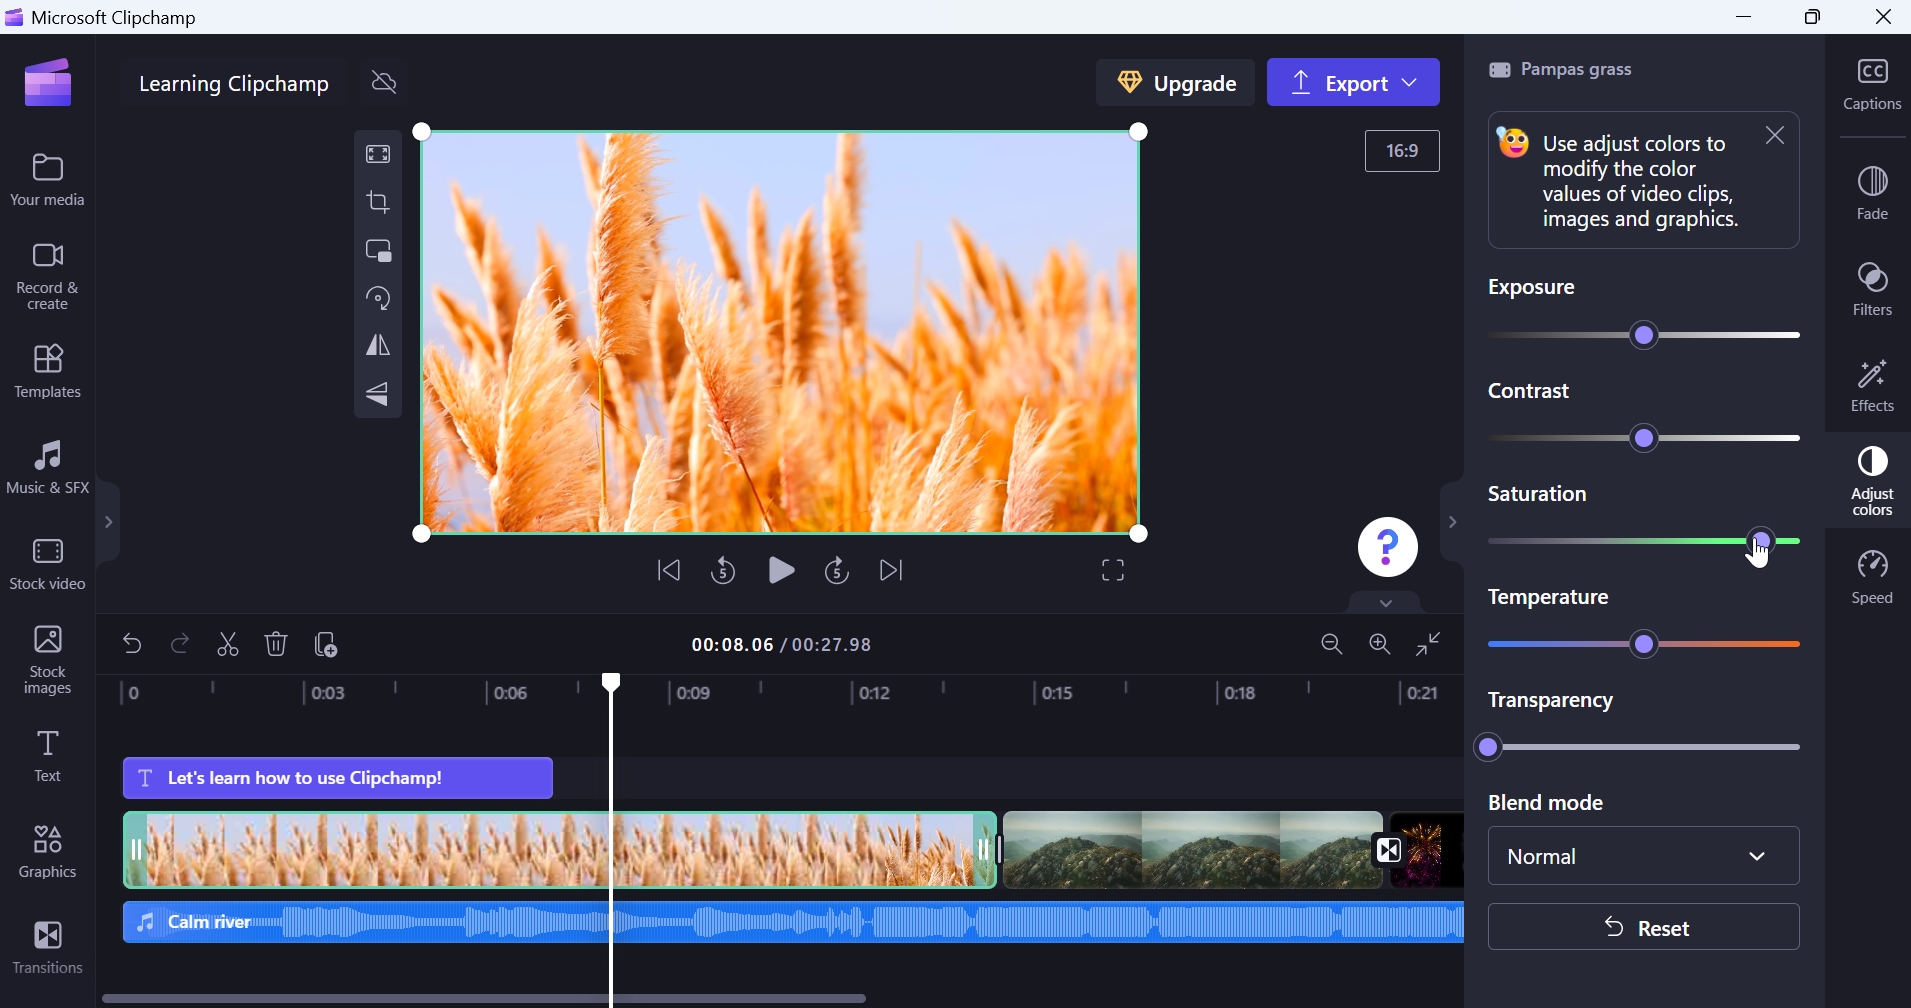
Adjust colors. Video clips, images, and some other items support a wide range of color adjustments that can include individual controls for exposure, contrast, saturation, (color) temperature, transparency, and blend mode. Here, as always, be judicious, as small changes to any of these values can dramatically impact the look of the selected item.

Speed. Video, audio, and music clips normally run at their normal, native speed (1x), but you can sue this property to slow down or speed up playback as needed.


Note that altering the speed of a clip, in particular a video clip, will distort its audio as well.
Export your finished video
Clipchamp is an interesting application on many levels, but one of its more unique qualities is that there’s no need to manually save individual projects as that is done for you automatically. All you can really do is name each project as noted earlier in the chapter, add and edit content, and then export it as a finished and widely compatible MPEG-4 Part 14 (MP4) video file.
To export a Clipchamp video, click the “Export” button in the upper right of the application window. A flyout shade will appear, giving you various video quality options.

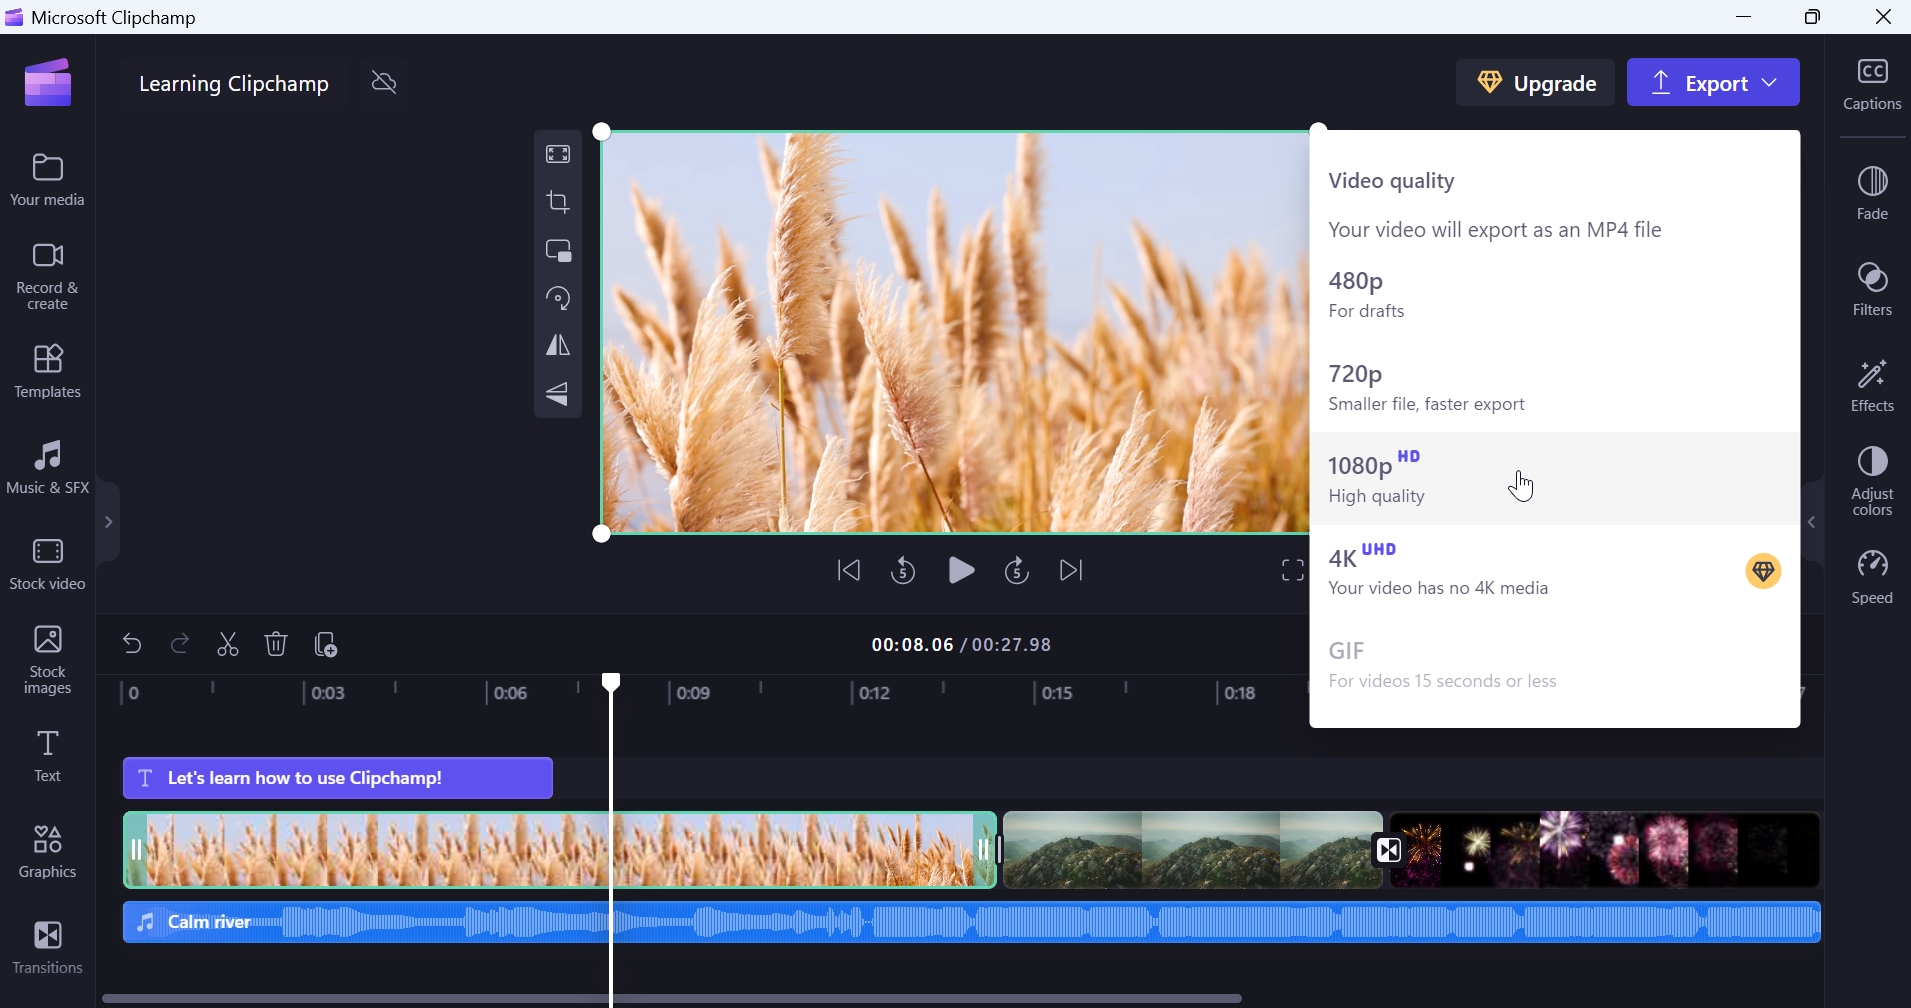
Generally speaking, you should always use the highest-quality setting offered. Unless you are paying for Clipchamp Essentials, that will be 1080p (which is Full HD, with a resulting resolution of 1920 x 1080).
Clipchamp will then render the video. As it does so, it provides a progress indicator, and you can optionally choose to track the export progress in a new window so you can do other work.

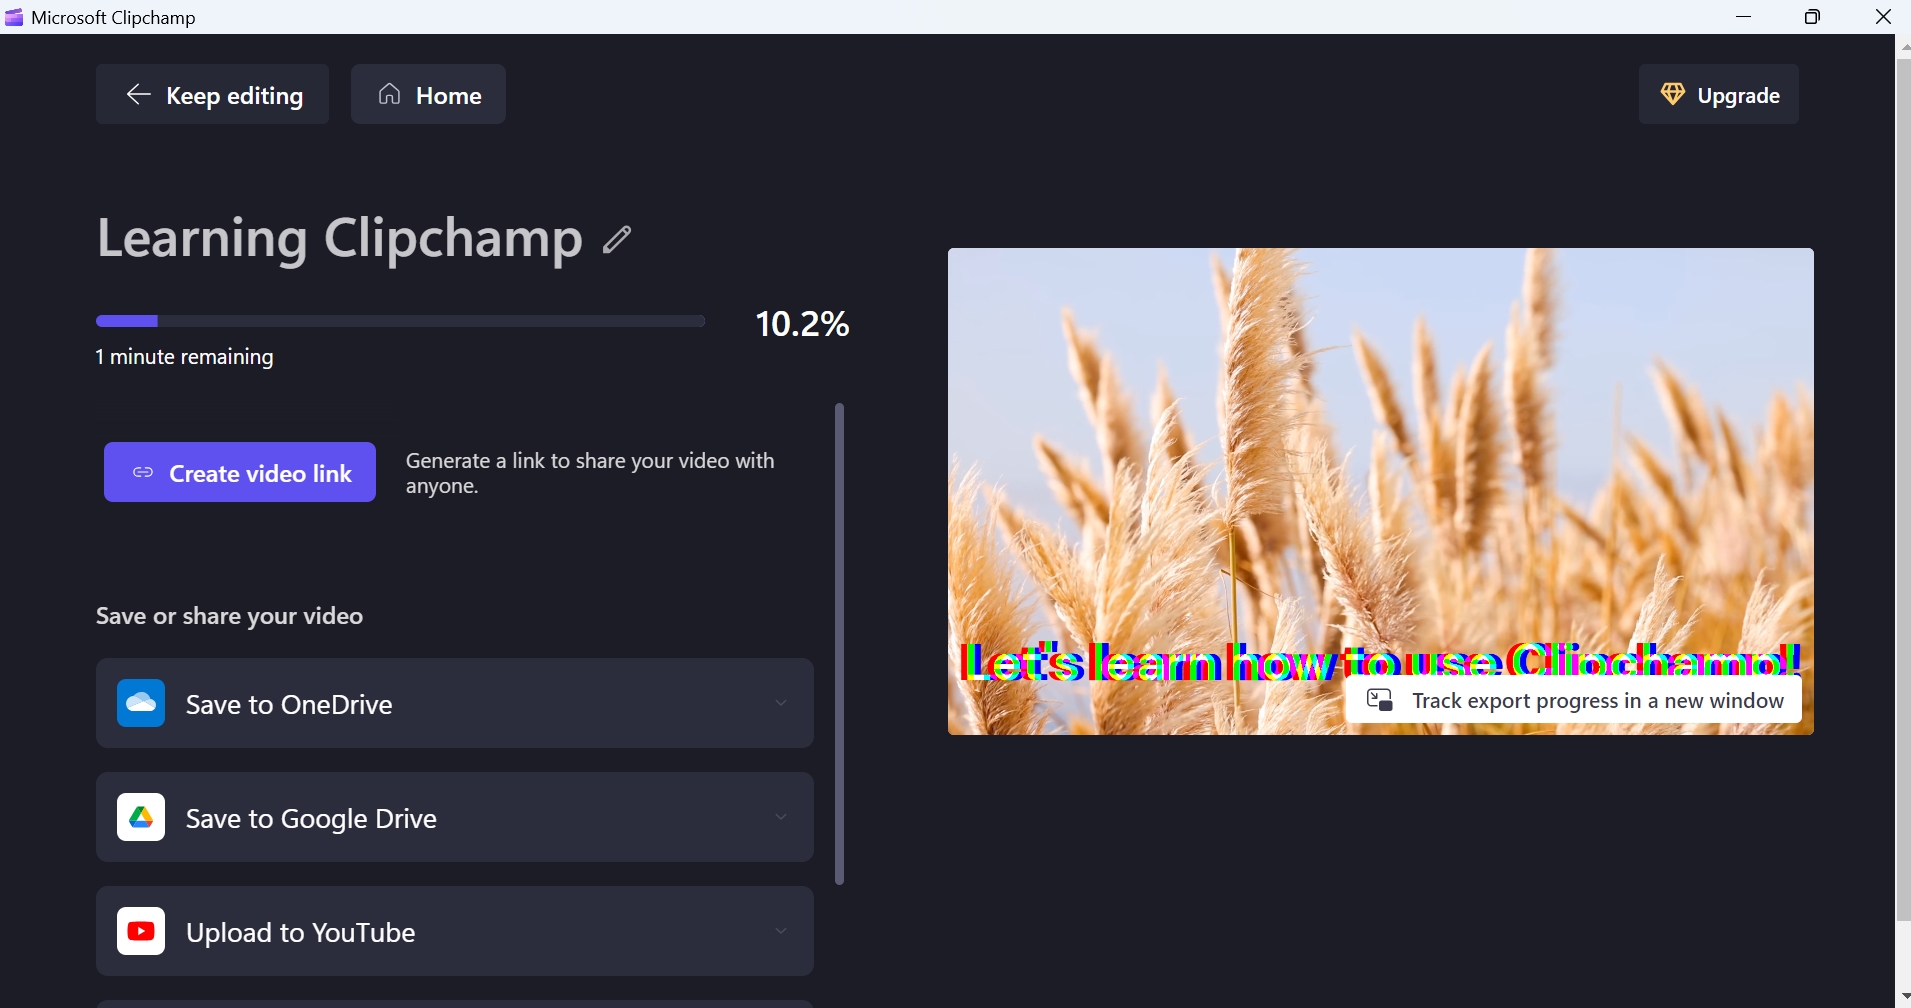
When it’s down, a web browser-like Downloads pane appears so you can click on the outputted video to play it in your default media player (Media Player, unless you configured a different app) or open the output file’s containing folder.


OK, it’s not just “web browser-like.” Remember, Clipchamp is a web app, so it’s really an instance of Microsoft Edge, and this Downloads pane is the same as what the full Edge app displays when you download files from the Internet. Indeed, the created final video is downloaded to your Downloads folder, which is the default for all Edge downloads (unless you reconfigured this).
The output page also lets you share the resulting video with others or to a variety of services that includes OneDrive, Google Drive, YouTube, and more. Generally speaking, you’re better off sharing the video manually using whatever service(s), you prefer, but if you do go this route, you will need to connect to the service(s) you use first.
But wait, there’s more
Clipchamp is an incredibly full-featured application, and that’s especially impressive given how much it does for free. And while we have tried to provide a run-down of its most important and useful features here, there is so much more to explore.
In addition to its Essentials paid upgrade, which includes access to a Brand Kit, additional stock content, and other features, Clipchamp can create videos with AI, which can spare you some time editing. And it supports a variety of templates, including some specific to Instagram, YouTube, and other social networks, and more, that you may find useful.
There are also numerous other video editor features to explore, including stock images, graphics, music, and sound effects. The more you use it, the more proficient you will become, and the more functionality you will discover.

Gain unlimited access to Premium articles.
With technology shaping our everyday lives, how could we not dig deeper?
Thurrott Premium delivers an honest and thorough perspective about the technologies we use and rely on everyday. Discover deeper content as a Premium member.