Linux
- Paul Thurrott
- Apr 02, 2023
-
1
Windows Subsystem for Linux (WSL) is an optional Windows 11 feature that provides a complete GNU/Linux environment in Windows, with support for command-line and graphical Linux applications. WSL is aimed at developers who need both Windows and Linux and would like to avoid the inconveniences of virtual machines (VMs) or a dual-boot configuration. But it’s also an excellent and free way for any Windows 11 user to learn the Linux command-line environment.
Install Linux in Windows 11
WSL has evolved a lot since its initial implementation and there are now several different ways to arrive at a working installation. However you do it, installing WSL is still a multi-step process. But we’re confident that this is the most reliable way to do so.
Install the Virtual Machine Platform
First, you should install an optional Windows 11 feature called Virtual Machine Platform. This feature, also used by the Windows Subsystem for Android (WSA), lets your PC emulate different operating systems, like Android and Linux.
Virtual Machine Platform is based on, but separate from, the hypervisor-based technologies that power Hyper-V, the Windows 11-based virtualization platform that lets you virtually run other operating systems–usually Windows or Linux–in VMs in Windows 11. One might think of Virtual Machine Platform as the subset of Hyper-V required for WSA and WSL.
To install Virtual Machine Platform, open Search and search for features. Then, select “Turn Windows features on or off” to open the Windows Features control panel.
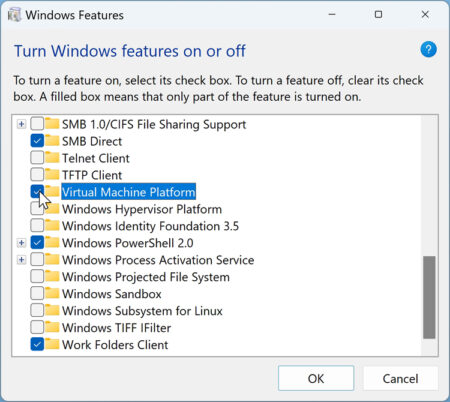
Scroll down, find “Virtual Machine Platform,” select it, and click “OK.” Windows 11 will need to reboot to fully install this feature. Do so.
If you are running Windows 11 on a supported PC–that is, you have not installed it on unsupported hardware–Virtual Machine Platform will be supported too. That said, it’s possible that your PC is not configured properly to enable virtualization features like Virtual Machine Platform, and in this case you won’t be able to install this feature. A Microsoft support document explains what you need to do to enable it in this case.
Install the Windows Subsystem for Linux
To install the Windows Subsystem for Linux, open the Microsoft Store app and search for linux. Find Windows Subsystem for Linux in the search results–it should be the first item–and install it.
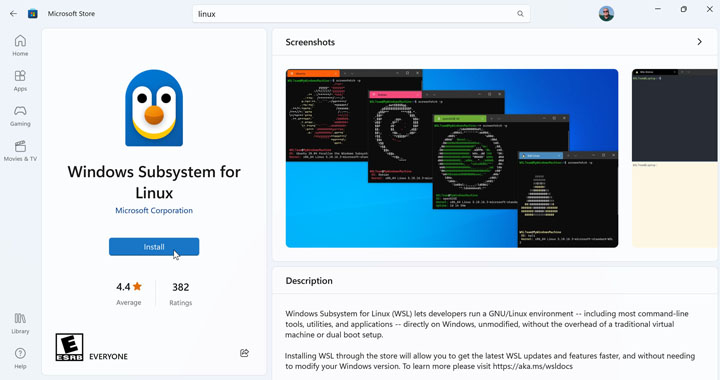
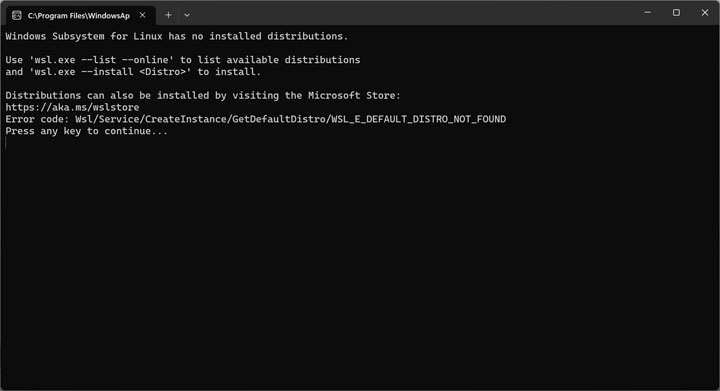
You can’t use WSL yet–you need to install a Linux distribution first, as described below–but click the “Open” button on WSL’s Store listing page just to see that it works and needs a Linux distribution.
Install your first Linux distribution
Finding a Linux distribution should be easy since you obtain one using the Microsoft Store. Sadly, this is not the case: the official Microsoft shortcut for displaying available Linux distributions, aka.ms/wslstore, only displays some of the distributions.
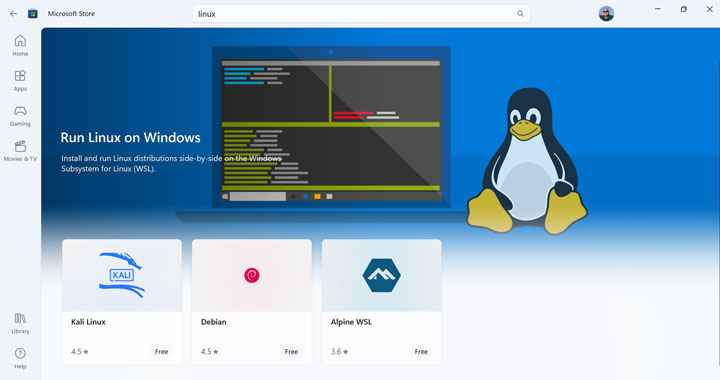

Another tactic is to use Store search. If you know the name of the distribution you want–Ubuntu and Debian are among the more popular choices–searching is easy enough. But related search terms like Linux, WSL, and similar will display results that include distributions and other things. So here are direct links to some of the more popular distributions:
Debian GNU/Linux
Kali Linux for WSL
openSUSE Leap
Oracle Linux 9
SUSE Linux Enterprise Server
Ubuntu
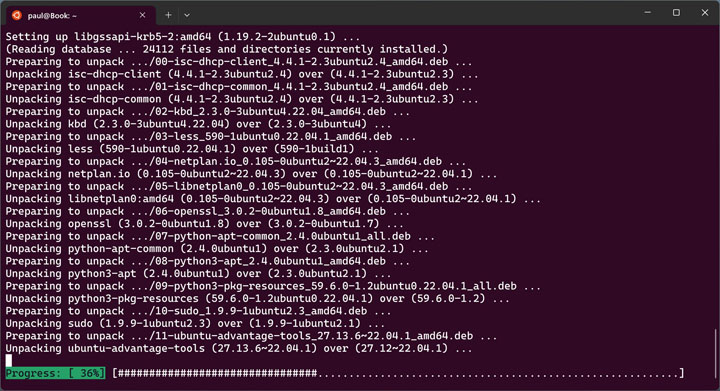
We use Ubuntu for the examples in this chapter, though the experience using other distributions will be similar. After opening the Ubuntu listing page in the Store, click “Install” to install it. Then, when that’s done, click “Open.” A Terminal command line window opens and explains that it is installing the distribution. Eventually, you will be prompted to create a new user for use with Linux.
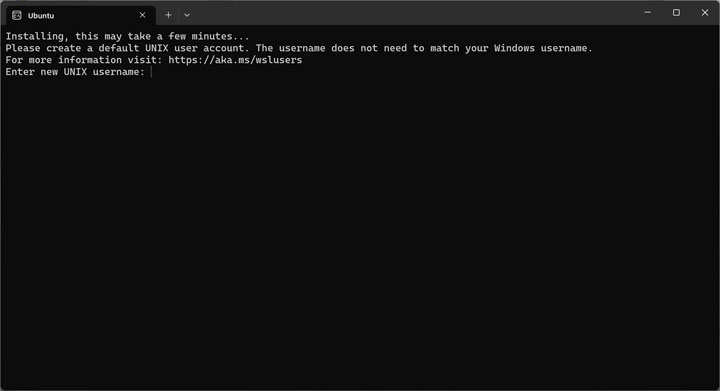
Here, you will enter a username and password for this new user account. Each time you open a WSL command-line window or graphical app, you will be automatically signed in to this account.
When that’s done, the installation concludes.

Close the command line window and open Terminal. As you can see, you can now open a new tab for the Linux distribution you just installed.
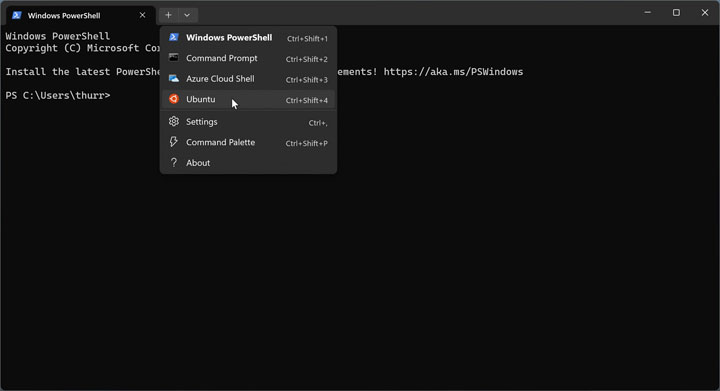
Select “Ubuntu” to open an Ubuntu command-line experience.
You can also run Ubuntu using a shortcut icon that’s been added to Start. But the version you get inside Terminal is a bit more attractive looking.
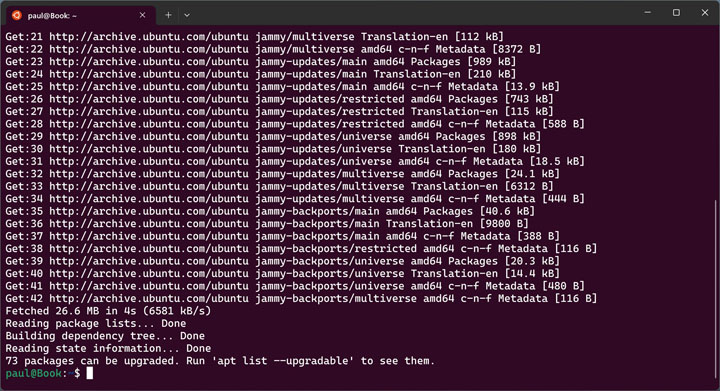
Before moving on, you should ensure that Ubuntu is up-to-date. To do so, type the following command:
>sudo apt update
You will need to supply your password because the sudo command runs apt with elevated privileges. And as you can see, some number of packages will need to be updated.
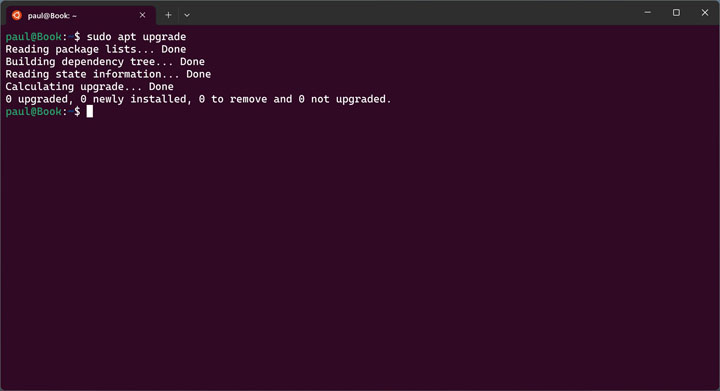
To update all of the packages at once, type the following:
>sudo apt upgrade
This process could take some time and it could be interactive, meaning that you might occasionally need to answer prompts (with a “Y” for yes or an “N” for no), depending on which packages need to be upgraded.
To ensure that it’s completely up-to-date, run the following command again.
>sudo apt upgrade
Configure WSL
You configure the Windows Subsystem for Linux using the wsl command line application, which is accessible from Windows PowerShell, Command Prompt, and Linux. This works nearly identically in each environment, though you will need to use wsl.exe in place of wsl if you use this app in Linux.
To see which Linux distributions are installed, you can use one of the following commands:
>wsl --list
>wsl -l

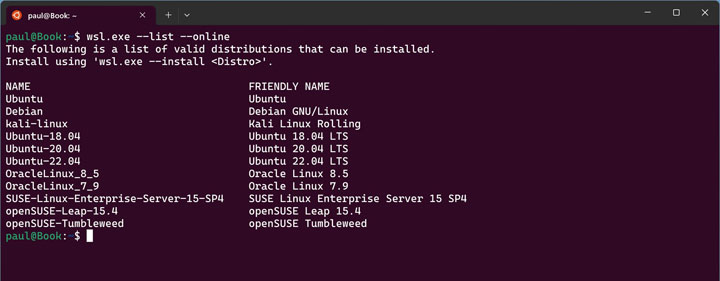
As you can see, we installed the Ubuntu distribution, and we explained how to do that earlier in this chapter using the Microsoft Store. But you can also install Ubuntu or other Linux distributions using wsl. For example, either of these commands will list the available distributions.
>wsl --list --online
>wsl -l -o
To install one of them, just use the following (replacing Debian, if needed, with the name of the distribution you want):
>wsl --install Debian
Now, when you check to see which distributions are available, you will see two, Ubuntu and Debian.
>wsl --list

The new distribution will appear as a choice in Terminal’s “Open a new tab” menu, though you will need to open a new Terminal window before it appears. But you may also want to configure which distribution is the default WSL environment. By default, the first distribution installed is the default. But you can verify this with either of the following commands:
>wsl --list --verbose
>wsl -l -v

As you can see, the default distribution is listed first and has an asterisk (“*”) before its name.
You can change the default using either of the following commands:
>wsl --set-default Debian
>wsl -s Debian
And now, when we list them again, you can see the change has been made.

Finally, to uninstall a Linux distribution from WSL, you can use the following command:
>wsl --unregister Debian
There is a lot more to wsl. You can learn more on the Microsoft Learn website.
Use the Linux command-line interface
While it’s not really possible to provide a complete overview of the Linux command-line shell, called Bash, we can at least list a few commands to help you get started. For a more complete overview of this environment, we recommend the official Ubuntu tutorial, The Linux command line for beginners.
Get the full path of the current directory
You can use the pwd (path working directory) command to view the full path of the current directory. This is useful because Bash, unlike Command Prompt and Windows PowerShell, does not display that information in the default prompt.
>pwd

Basic navigation
As with other command line environments, you can quickly navigate around in Bash using specific commands. For example, the ls (list) command will list all of the files and directories in the current directory.
>ls
The familiar dir command works fine too.
The cd (change directory) command helps you navigate to a new location. For example, the following command will always navigate you directly to your user account’s home directory:
>cd ~
And the following command will move you to the root of the file system:
>cd /
As with Command Prompt and Windows PowerShell, this command will move you up one level in the directory hierarchy.
>cd ..
Learn more about commands
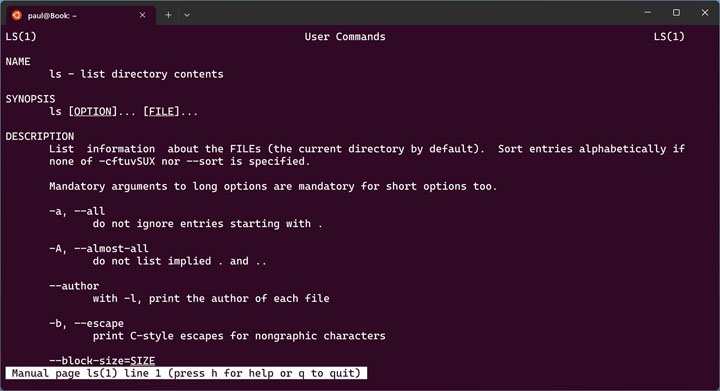
Linux provides a command called man (for manual) that displays pages of information about any available command. For example, to learn more about the ls command, you could use the following:
>man ls
Run a command with administrative privileges
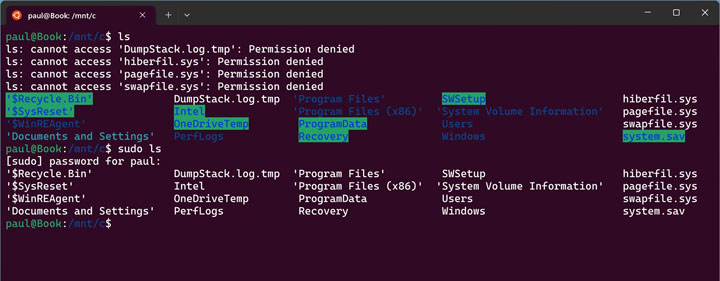
We used this above, but it’s useful to remember that the sudo (super user do) command is used as a prefix to run a command with administrative (super user) privileges. For example, when we navigate to /mnt/c to view the Windows file system and use the ls command to get a list of the contained files and directories, we can see that ls cannot access some system files because of a permission issue.

But if we run that same command under sudo, there are no permission complaints.
Install and use Linux graphical apps
In addition to supporting Linux command-line apps, WSL also lets you install and use Linux graphical apps.
Before you get started, you should download the correct graphics driver for your PC, as this will let Linux apps use hardware-accelerated OpenGL rendering for better performance:
Not sure which type of graphics your PC supports? The fastest way is to use the legacy Device Manager utility, which you can find with Search. (Or, right-click Start and choose “Device Manager” from the menu that appears.) Your PC’s graphics supplier is listed under “Display adapters.”
Next, run PowerShell as an administrator. Then, run the following command to upgrade WSL to the latest version if needed:
>wsl --update
When that completes, restart WSL with this command:
>wsl --shutdown
Close PowerShell, run Terminal, and open a new Ubuntu (or other Linux) command-line tab. Then, make sure the distribution is completely up-to-date with the following command:
>sudo apt update
Now you’re ready to install some Linux graphical apps. You do so using the same apt command-line tool you used above. Some apps you can consider installing this way include:
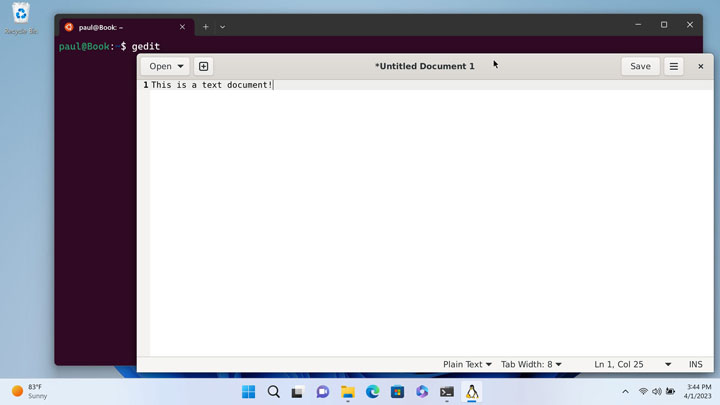
Gedit. A text editor.
>sudo apt install gedit -y
>gedit
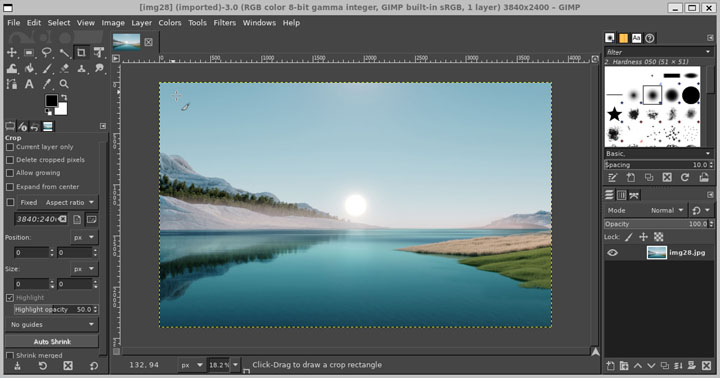
GIMP. A free and open-source image editor.
>sudo apt install gimp -y
>gimp
Google Chrome. The world’s most popular web browser.
>cd /tmp
>sudo wget https://dl.google.com/linux/direct/google-chrome-stable_current_amd64.deb
>sudo dpkg -i google-chrome-stable_current_amd64.deb
>sudo apt install --fix-broken -y
>sudo dpkg -i google-chrome-stable_current_amd64.deb
>google-chrome
Microsoft Edge. The Linux version of Microsoft’s web browser.
>curl https://packages.microsoft.com/keys/microsoft.asc | gpg --dearmor > microsoft.gpg
>sudo install -o root -g root -m 644 microsoft.gpg /usr/share/keyrings/
>sudo sh -c 'echo "deb [arch=amd64 signed-by=/usr/share/keyrings/microsoft.gpg] https://packages.microsoft.com/repos/edge stable main" > /etc/apt/sources.list.d/microsoft-edge-beta.list'
>sudo rm microsoft.gpg
>sudo apt update
>sudo apt install microsoft-edge-beta
>microsoft-edge

The Microsoft Edge instructions are specific to Ubuntu and Debian. If you are using a different Linux distribution, please refer to the instructions on the Microsoft Edge Insider Channels website under “Command line installation.”
Nautilus. A Linux file manager application.
>sudo apt install nautilus -y
>nautilus
VLC. A free and open-source video player.
>sudo apt install vlc -y
>vlc

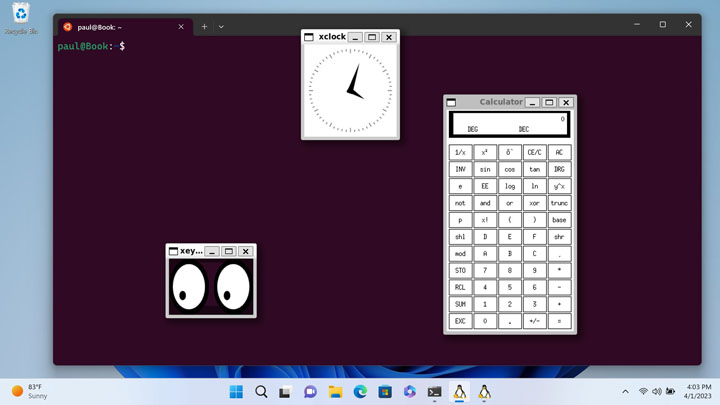
X11 apps. A collection of apps and tools that ships with the X11 windowing system for Linux. This includes xclock (clock), xcalc (calculator), xclipboard (system clipboard), xeyes, and more.
>sudo apt install x11-apps -y
>xclock
>xcalc
>xclipboard
>xeyes
You can learn more about running Linux GUI apps on the Microsoft Learn website.
File system interoperability
Though Microsoft recommends keeping your Windows- and Linux-based files separate, you will obviously want to move files between the two environments, and WSL does offer various ways to interoperate between them. We cover some of the more useful methods here.
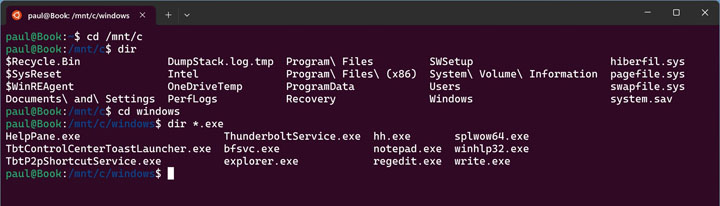
Access the Windows file system from the Linux command line
You can easily browse your Windows PC’s file system from the Linux command line environment because each drive in Windows is mounted as a drive in Linux too. The C:\ drive, for example, is mounted in /mnt/c. So you can use commands like the following to access the Windows file system.
>cd /mnt/c
>dir
>cd windows
>dir *.exe
Open the current directory in File Explorer
If you are browsing through the Linux file system in WSL and would like to open the current directory in the Windows 11 File Explorer, you can do so with the following command.
>explorer.exe .
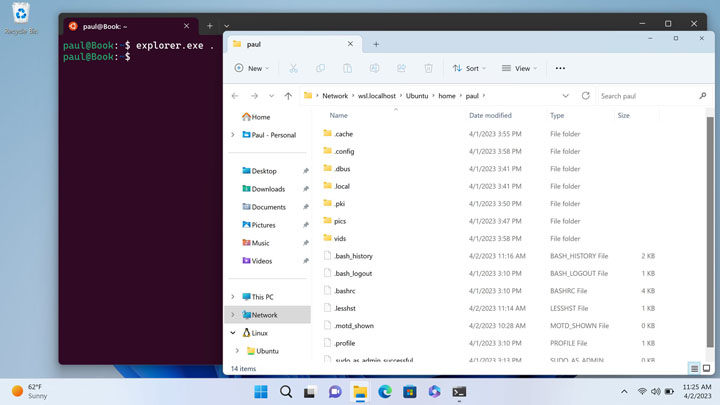
Access the Linux file system with File Explorer
When you install WSL, Windows 11 adds a Linux entry to the bottom of the File Explorer navigation bar, below This PC and Network, so that you can easily access the file system for each installed distribution. Here, for example, you can see that a single distribution, Ubuntu, has been installed.
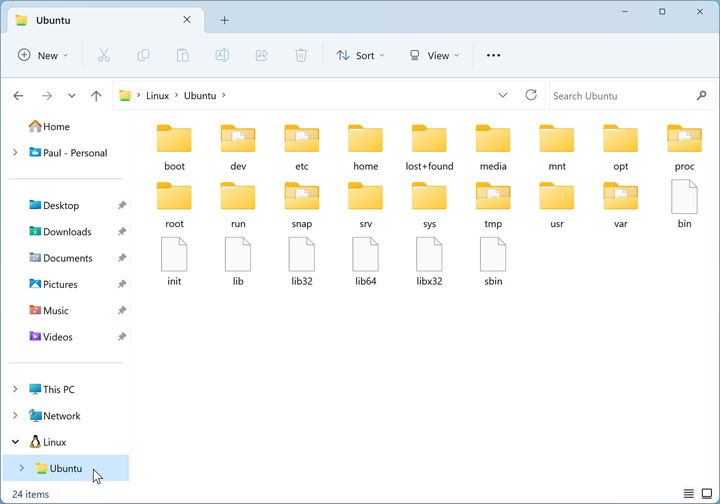
This capability lets you seamlessly copy files into the Linux file system so that they can be used in that environment, and vice versa.

Gain unlimited access to Premium articles.
With technology shaping our everyday lives, how could we not dig deeper?
Thurrott Premium delivers an honest and thorough perspective about the technologies we use and rely on everyday. Discover deeper content as a Premium member.