Snap (23H2 + Moment 5) (Archived)
- Paul Thurrott
- Mar 05, 2024
-
0
Snap is a set of Windows 11 features that helps you organize how your open apps, Microsoft Edge tabs, and other windows appear on-screen. In its simplest configuration, you can snap two windows side-by-side, with each window occupying 50 percent of the screen.

But Snap also lets you position three, four, or more windows on-screen in interesting layouts.
The possibilities are only limited by your display properties–its resolution, scaling, physical size, and orientation–and your needs. If you have a higher resolution display, you may be offered additional layout options.
There are four main Snap features:
Snap. This is used to snap an open window to a screen edge or corner.
Snap layouts. This feature is used to determine how multiple windows will be snapped–arranged–onscreen, and it now offers layout suggestions based on which apps are currently open.
Snap assist. After you’ve snapped a window directly or with Snap layouts, Snap assist helps you position the other window(s) you will snap.
Snap groups. This feature helps you return to previously created Snap layouts.
We will explore all of this functionality in this chapter.
Snap windows manually
If you only need to snap two or four windows, you can do so manually using drag-and-drop via your mouse, touchpad, or multitouch.
You can also snap windows using keyboard shortcuts.
Snap two windows side-by-side
To snap a window to either side of the screen, drag it towards one of those screen edges. When you get close, a guide will appear showing where the window will be snapped if you let go of it.
You can also snap windows to the left and right screen edges by typing WINKEY + LEFT ARROW or WINKEY + RIGHT ARROW.
Let go of the window to snap it. When you do, Snap assist jumps in and shows you the other available windows that can be snapped in the remaining space.
Select the window you want and it will snap into place as well. Now you have two windows side-by-side.
Snap four windows
You can also manually snap four windows so that each occupies 25 percent of the Desktop.
To get started, drag a window into one of the screen corners. As with the previous example, a guide appears, in this case showing you that the window can occupy 25 percent of the screen.

You can also snap windows into the screen corners with the keyboard. For example, to snap a window into the upper-left corner, type WINKEY + LEFT ARROW and then, while holding down WINKEY, type UP ARROW. Indeed, you can keep using the arrow keys to position a window arbitrarily this way: just keep using combinations of WINKEY and the arrow keys.
When you let go of the window, Snap assist once again appears, but this time it’s in one of the three remaining areas.
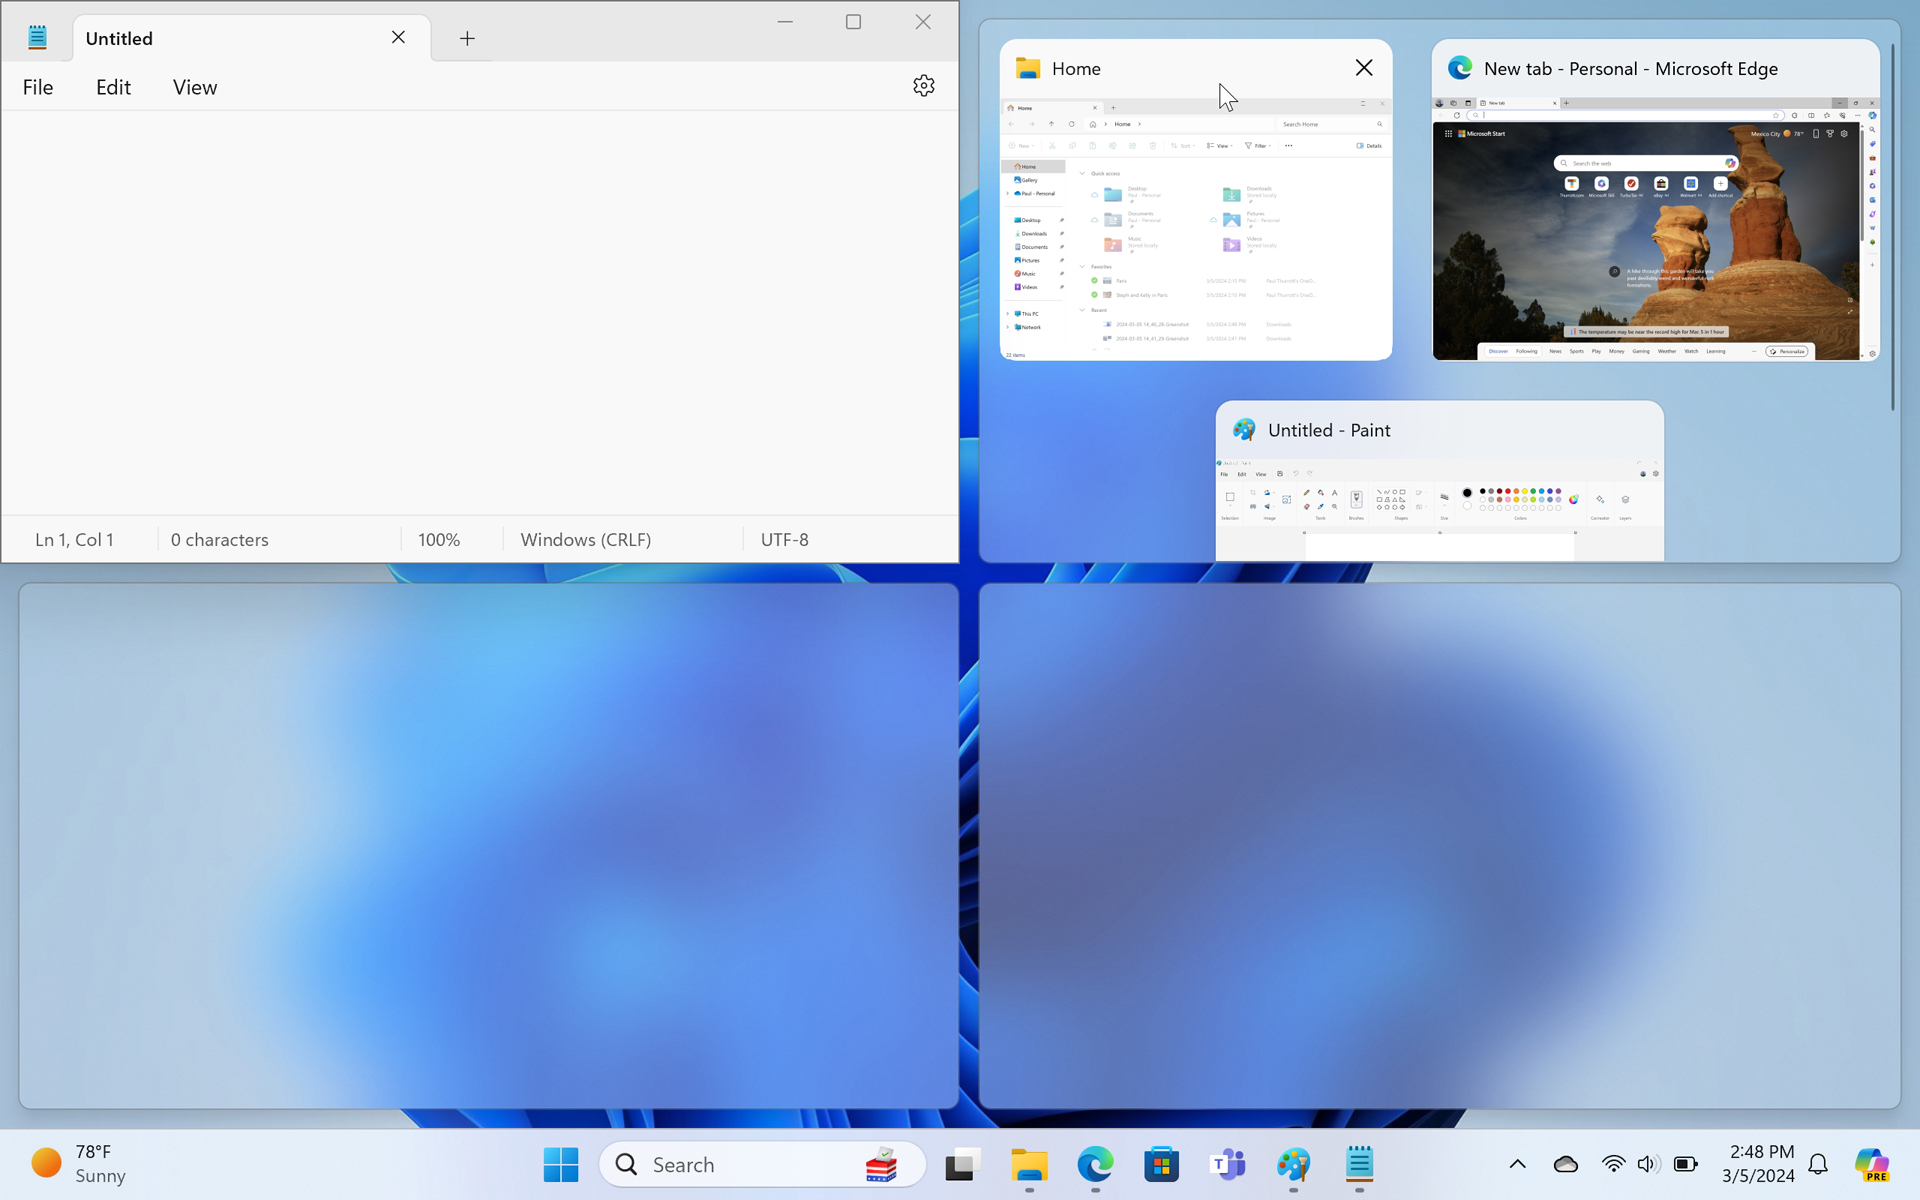
As before, you can simply select the window you wish to occupy that space. The difference is that Snap assist will appear three times, once for each available space in turn.
Use Snap to maximize a window
You can also use Snap to maximize a window. To do so, drag it to the top edge of the screen and let go when the guide appears, indicating that doing so will result in a maximized window.

To maximize a window using Snap with the keyboard, type WINKEY + UP ARROW.
You can also use the keyboard to restore a maximized window or to minimize a floating window. To do so, type WINKEY + DOWN ARROW.
Use Snap layouts to arrange windows
Snapping windows manually works well enough, but it’s not easily discovered and, worse, it’s a little limited in that it only supports some layouts. For this reason, Microsoft created a feature called Snap layouts that offers the same layouts we just examined plus some others, including a two-window layout in which one window is wider than the other and one or more three-window layouts, depending on your screen properties and configuration.
Snap layouts also offers suggestions that will recommend which apps, Edge tabs, and other windows you may wish to use in some layouts.
There are three ways to access Snap layouts: By dragging a window, by mousing-over the window controls on a window, or by using keyboard shortcuts.
Use Snap layouts by dragging a window
To get started with Snap layouts, grab the first window you wish to snap with the mouse cursor or via touch and move it a bit. When you do, the bottom edge of the Snap layouts pane will appear at the top of the screen.


To view the available layouts, drag the window toward the pane. When you get close, Snap layouts will appear. As you can see, there are additional layouts available here.

If you drag the window over one of the available layouts. As you do, a snap area will be highlighted and a snap guide will appear on-screen to indicate where that window will move when you let go of it.

When the window is in the position you want, let go of it. Then, Snap assist will prompt you to position a window in each of the remaining snap areas provided by the selected layout as before.
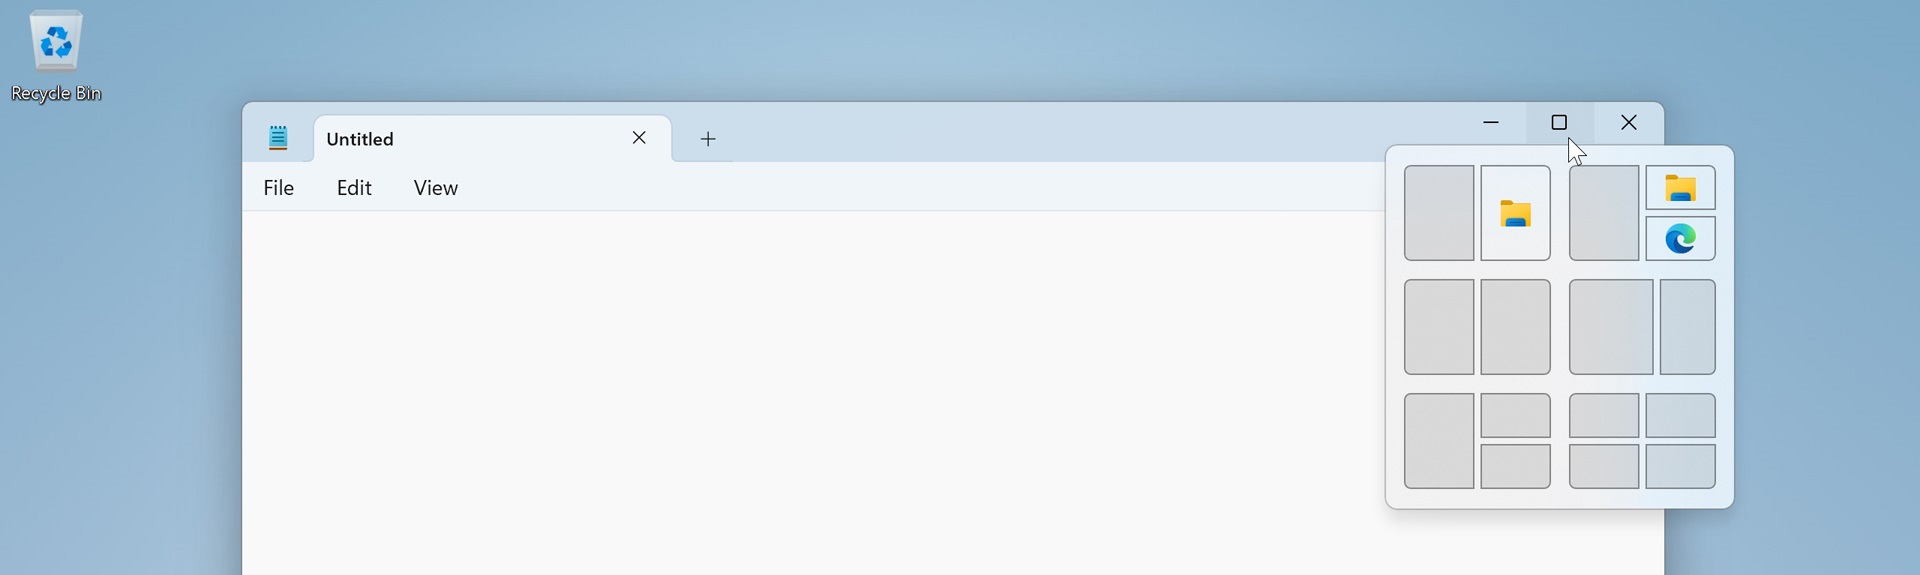
Note that some of these layouts have app suggestions that appear as small icons representing the suggested apps.

These work differently than the layouts without suggestions: When you select a suggested layout, all the relevant apps and windows will snap into their respective places in one step.
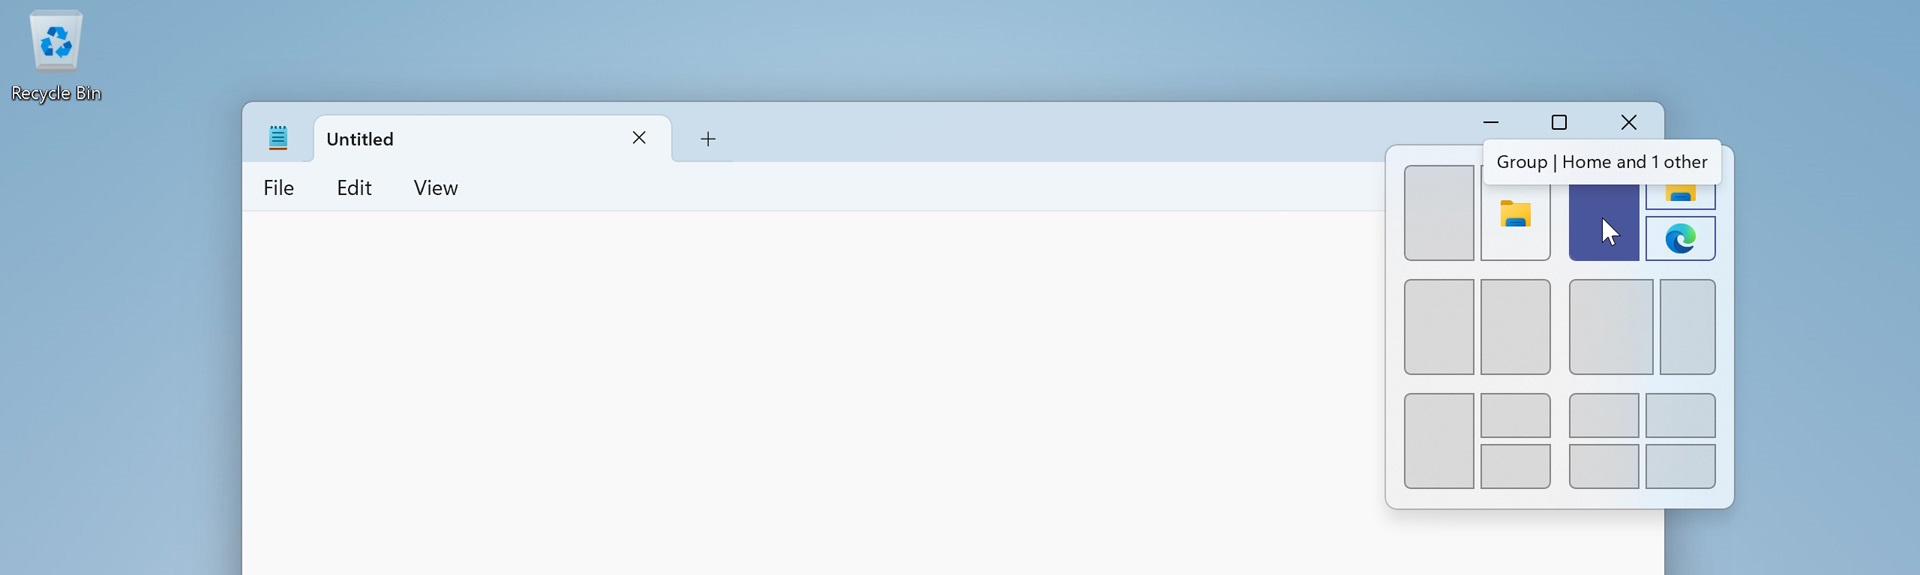
Use Snap layouts by mousing-over the window controls of a window
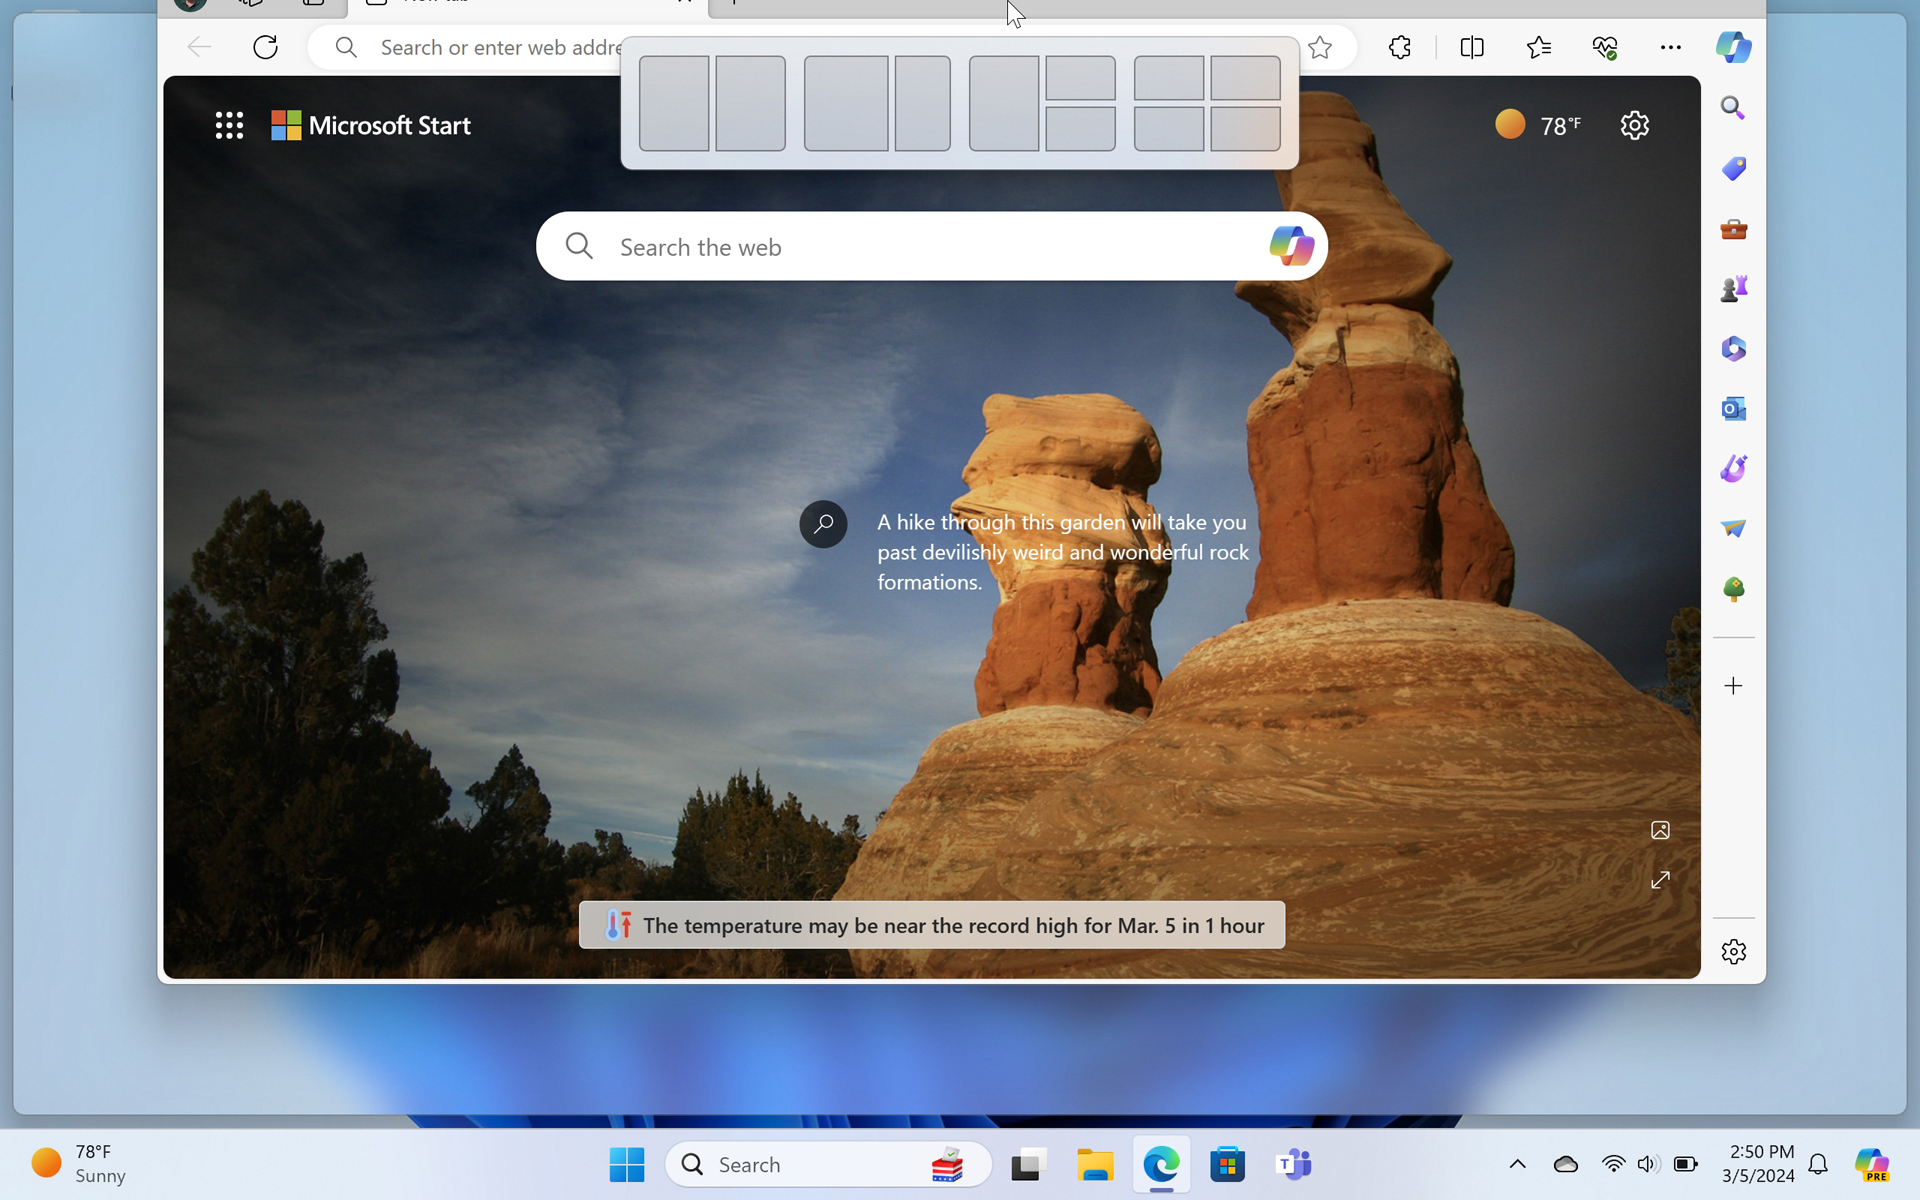
You can also access Snap layouts by hovering the mouse cursor over the Maximize/Restore window button of the currently focused window. When you do so, a Snap layouts pane appears right there.
As oddly, the suggestions you receive when invoking Snap layouts this way often vary from those the system recommends when you drag the window. But other than that, everything else works as described above.
Use Snap layouts with the keyboard
You can also invoke Snap layouts with a keyboard shortcut, and then select snap areas for the current window and subsequent windows using just the keyboard.
To get started, make sure that a window you wish to snap has the focus. Then, type WINKEY + Z. A Snap layout pane will appear below the Maximize/Restore window of the focused windows as described in the previous section, but this time, each layout has a number associated with it. This includes layouts with suggestions.
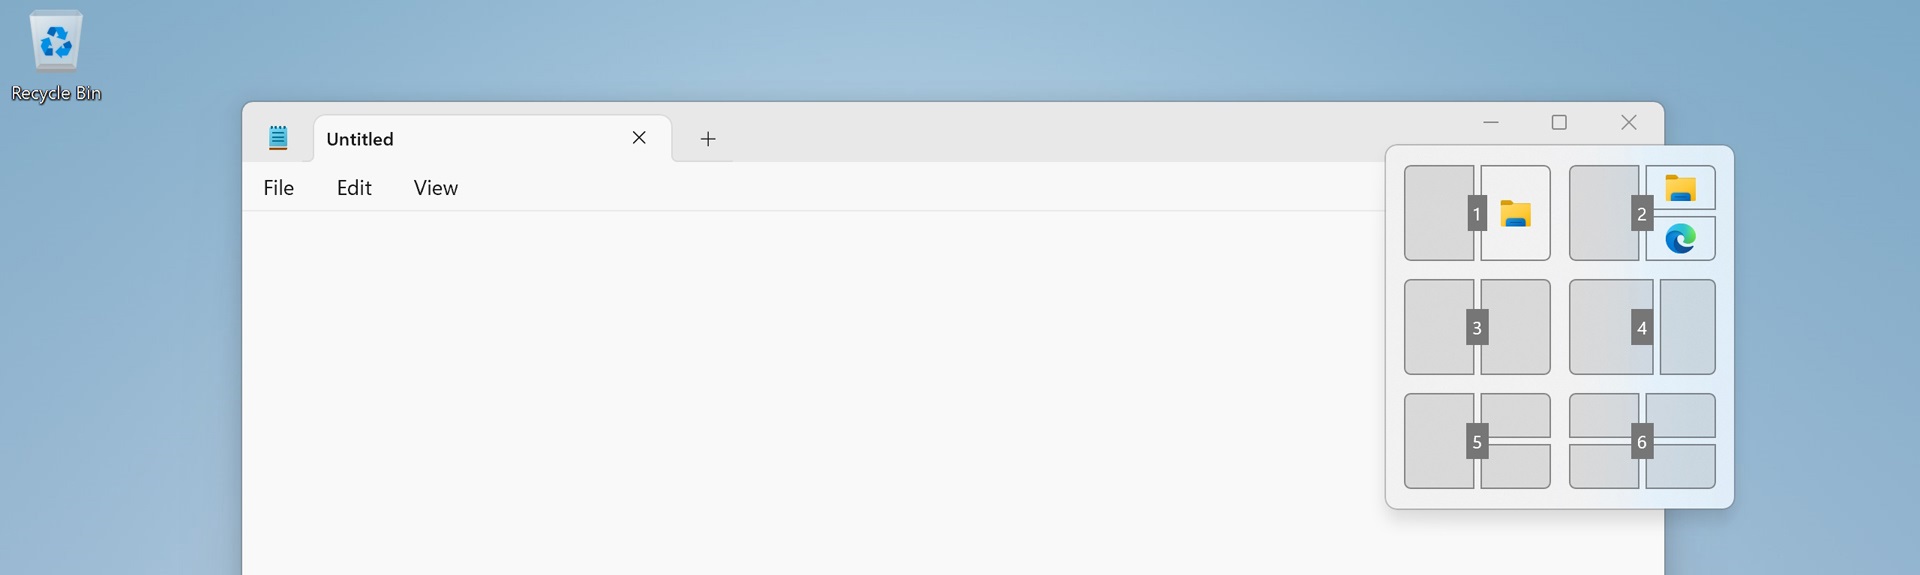
To select a particular layout, just type the appropriate number. If you chose a suggested layout, each window will snap into place all at once.
Otherwise, the layout you chose becomes visually selected and displays a number on each of its available snap areas.
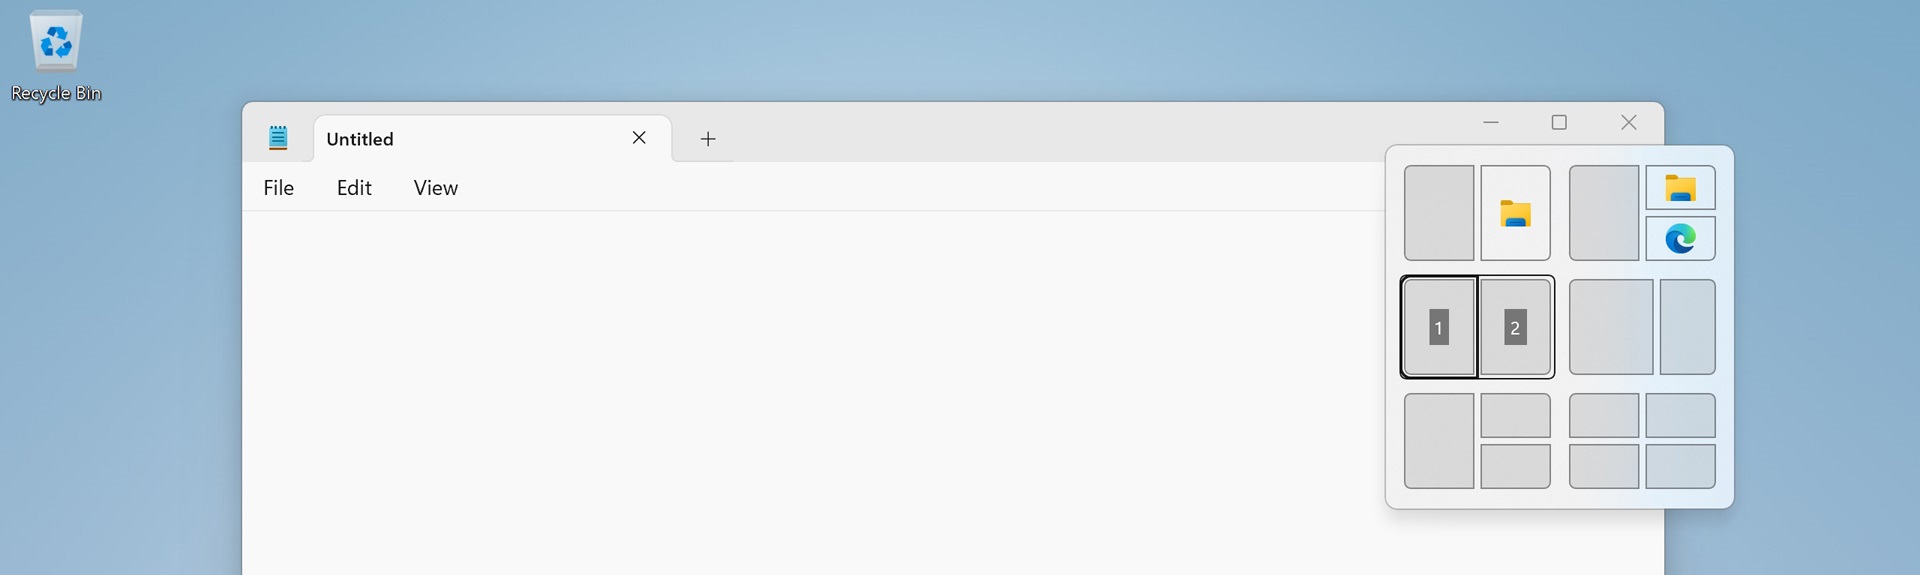
Now, just select the number corresponding to the screen area in which you would like that window to be snapped. Then, Snap assist will help you get the rest of the way: Use the arrow keys to select the window you want in the next snap area. Then, type ENTER or SPACE to position the selected window in the current area. Repeat as needed for the remaining snap areas, if necessary.
Use Snap groups to restore a previous layout
After using Snap layouts to arrange two or more windows in a particular layout, you may find that you need to use other apps or windows. And that when you’re done doing so, you want to return to the previous layout you were using. You could manually find and restore each window, of course. Or you can use a feature called Snap groups to restore them all with a single click.
To do so, you must first create a layout with two or more windows. Then, you can minimize one or more of those windows, minimize all windows, open and use one or more other windows, or whatever. Then, you can return to the original layout using Alt-Tab or Task view, as current layouts will appear in the grid of thumbnails in each alongside each available app or window.
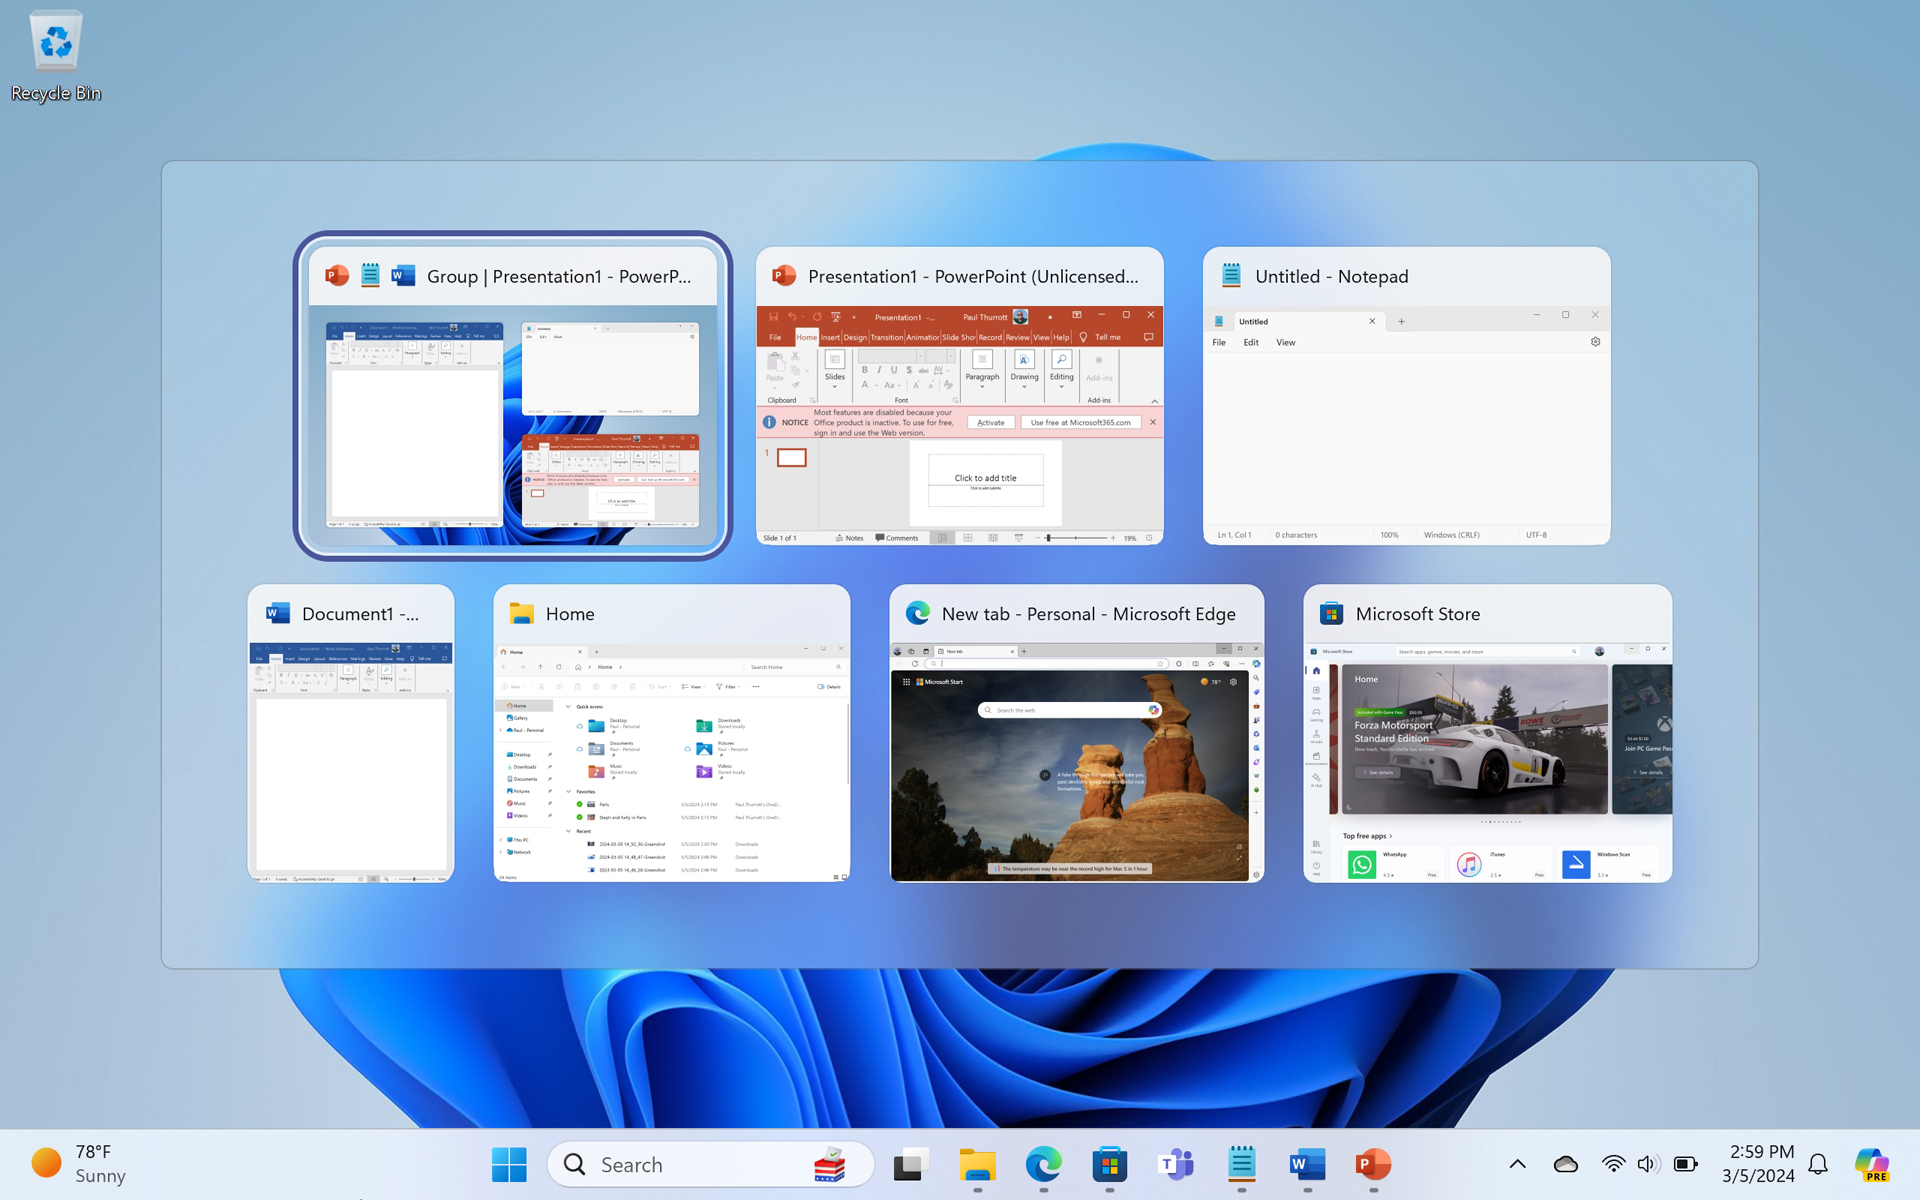
Alternatively, you can mouse-over the Taskbar shortcut for one of the apps or windows that were part of that layout. When you do, you will see two thumbnails, one for the Snap group and one for just that window.
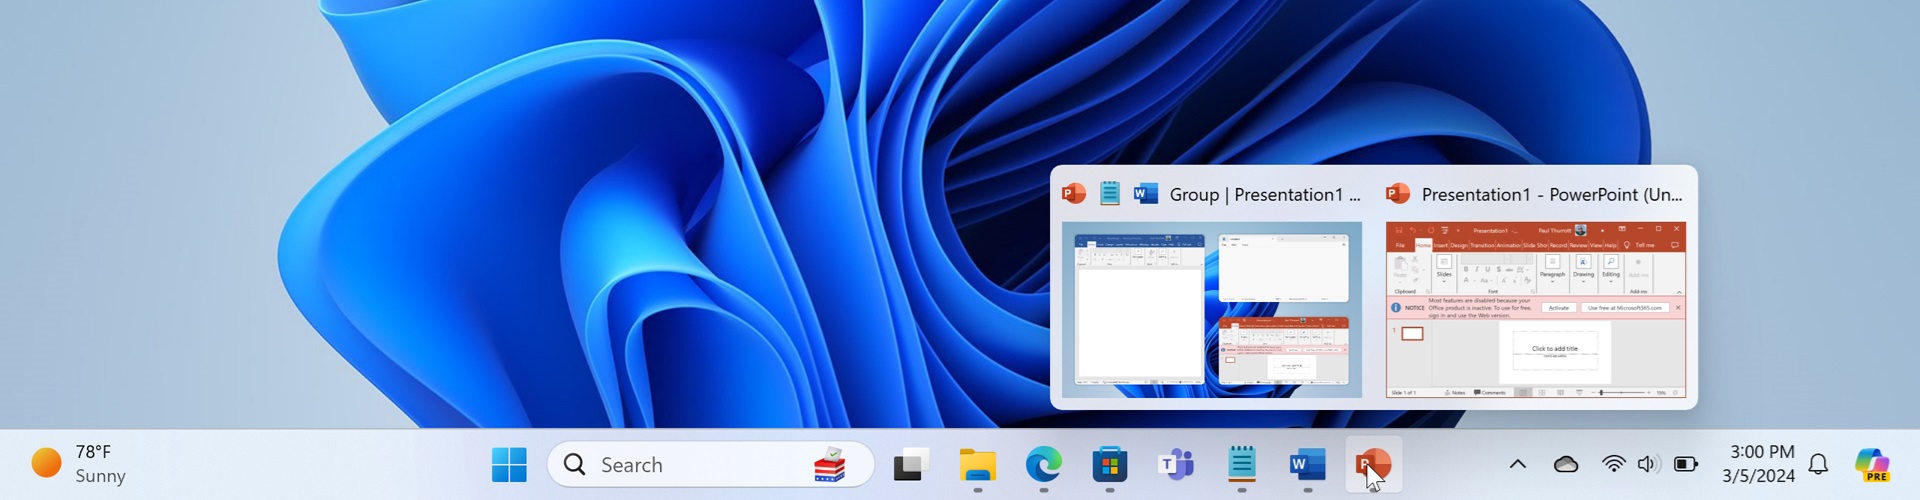
Select the group thumbnail to restore the entire layout (that is, to restore all the windows in that layout into their previous positions).
You can restore a previous layout with the keyboard, too. First, type WINKEY + T to display The thumbnail for the first shortcut on the Taskbar. Then, use the RIGHT ARROW key to select the correct shortcut, if necessary. Then, type UP ARROW to select the group. Finally, type ENTER to restore it.
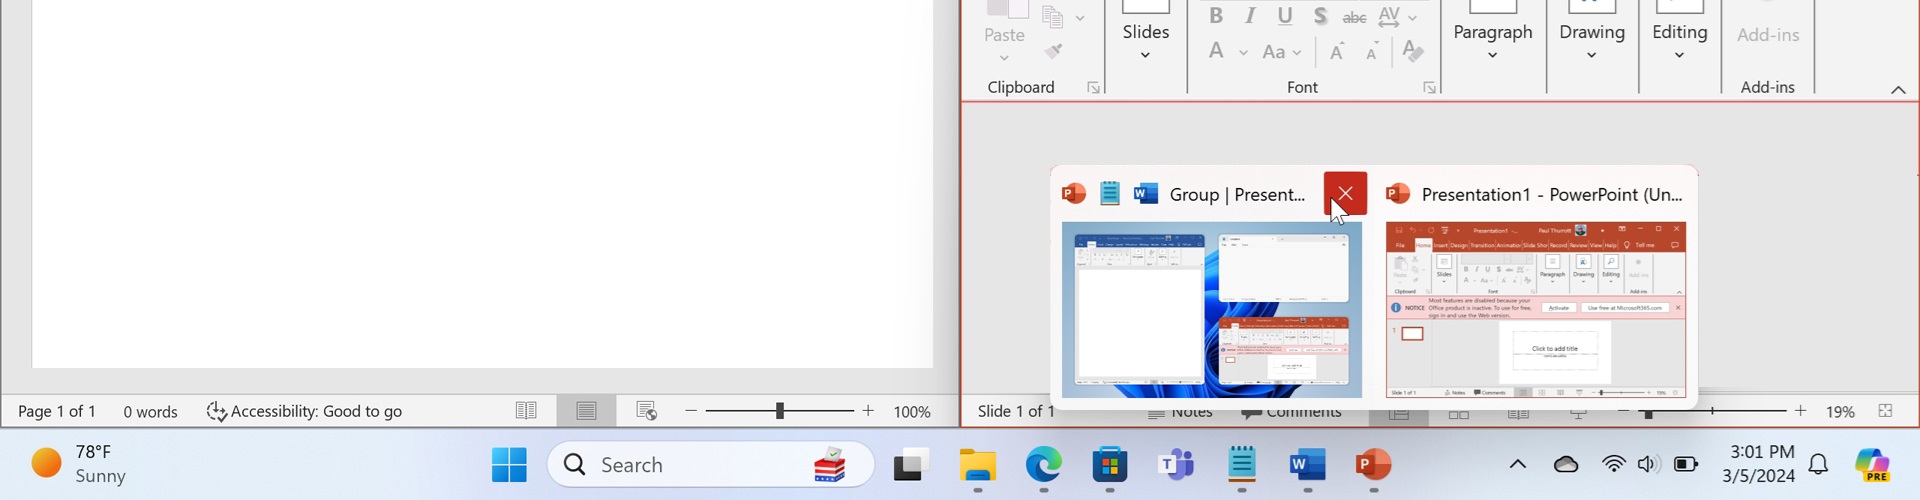
To quickly close a Snap layout and close all of its windows, mouse over the Taskbar shortcut for one of its windows and select the Close button in the group thumbnail.
Configure Snap
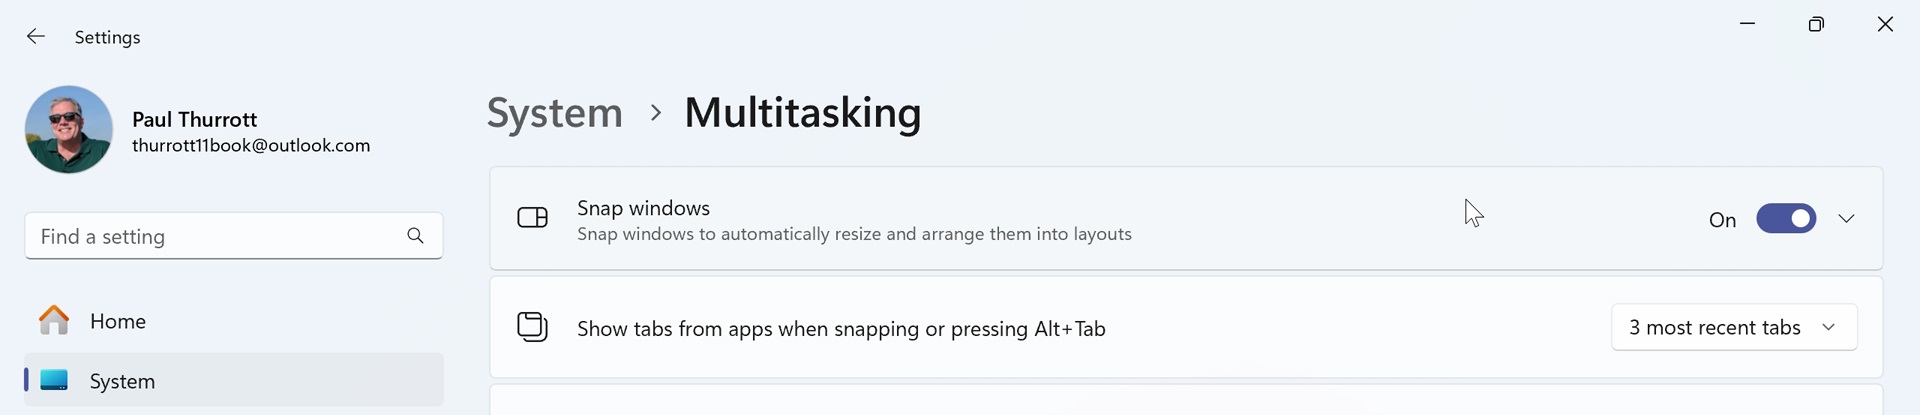
Snap is configured–and can even be completely disabled–using the Settings app. To get started, open Settings and navigate to System > Multitasking.
Disable Snap
To disable Snap, just configure the “Snap windows” setting to Off.
Configure individual Snap features
If you expand the “Snap windows” item in Multitasking settings, you can configure individual Snap features.
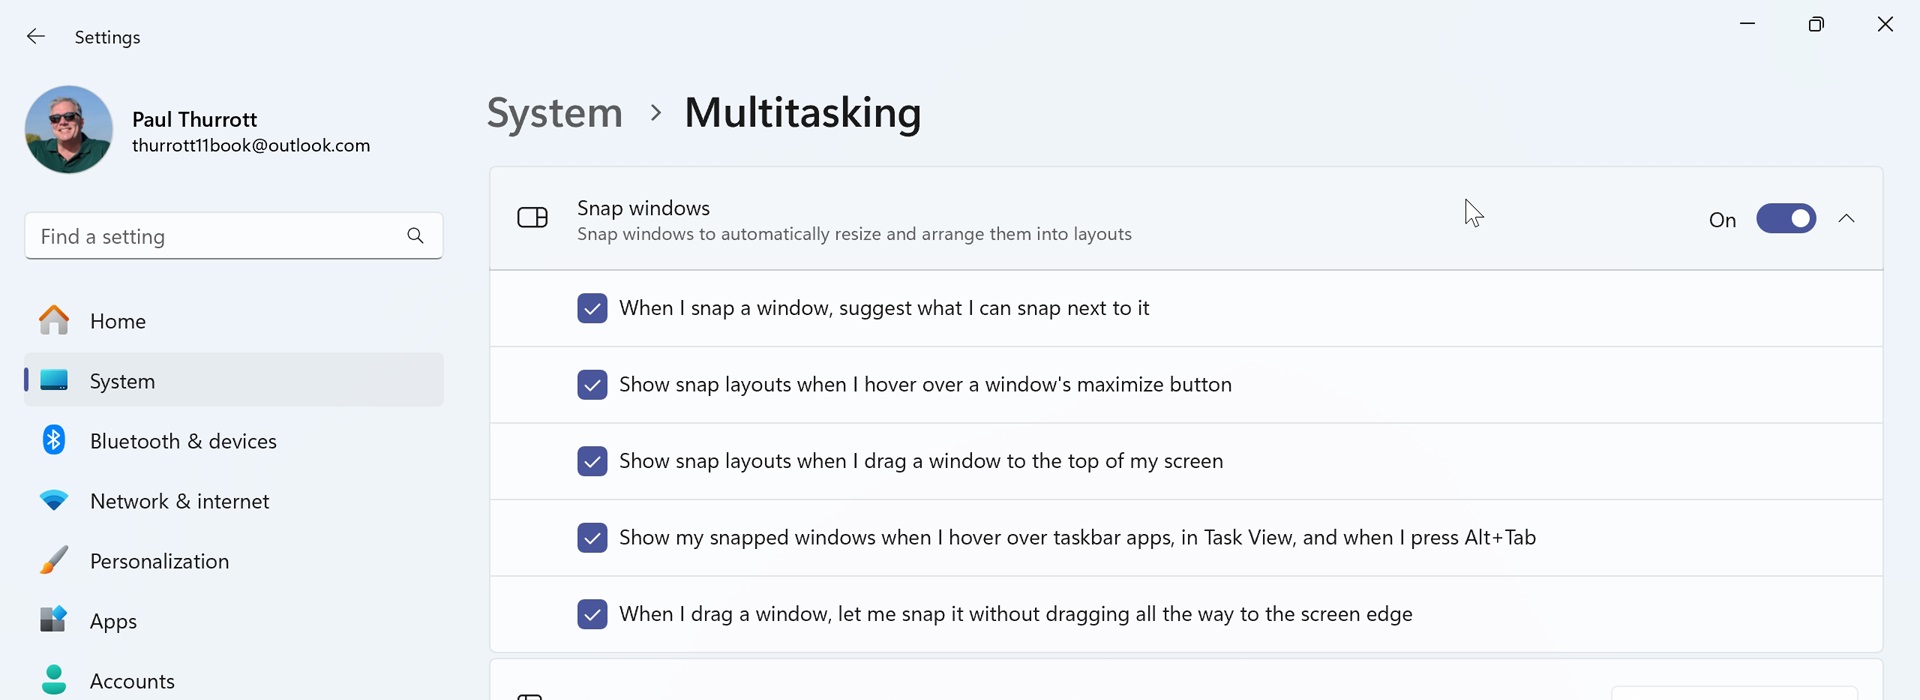
Each of the options you see here is related to a specific Snap feature. To completely disable Snap layouts, for example, uncheck “Show snap layouts when I hover over a window’s maximize button” and “Show snap layouts when I drag a window to the top of my screen.”
Configure whether Snap can access Microsoft Edge tabs
By default, Snap works with apps, windows, and the three most recent tabs you’ve accessed in Microsoft Edge. But you can configure how many tabs Snap can access or disable this feature entirely.
To do so, locate the option “Show tabs from apps when snapping or pressing Alt+Tab.” By default, it is set to “3 most recent tabs.” But you can change this to “All tabs,” “5 most recent tabs,” or “Don’t show tabs.”
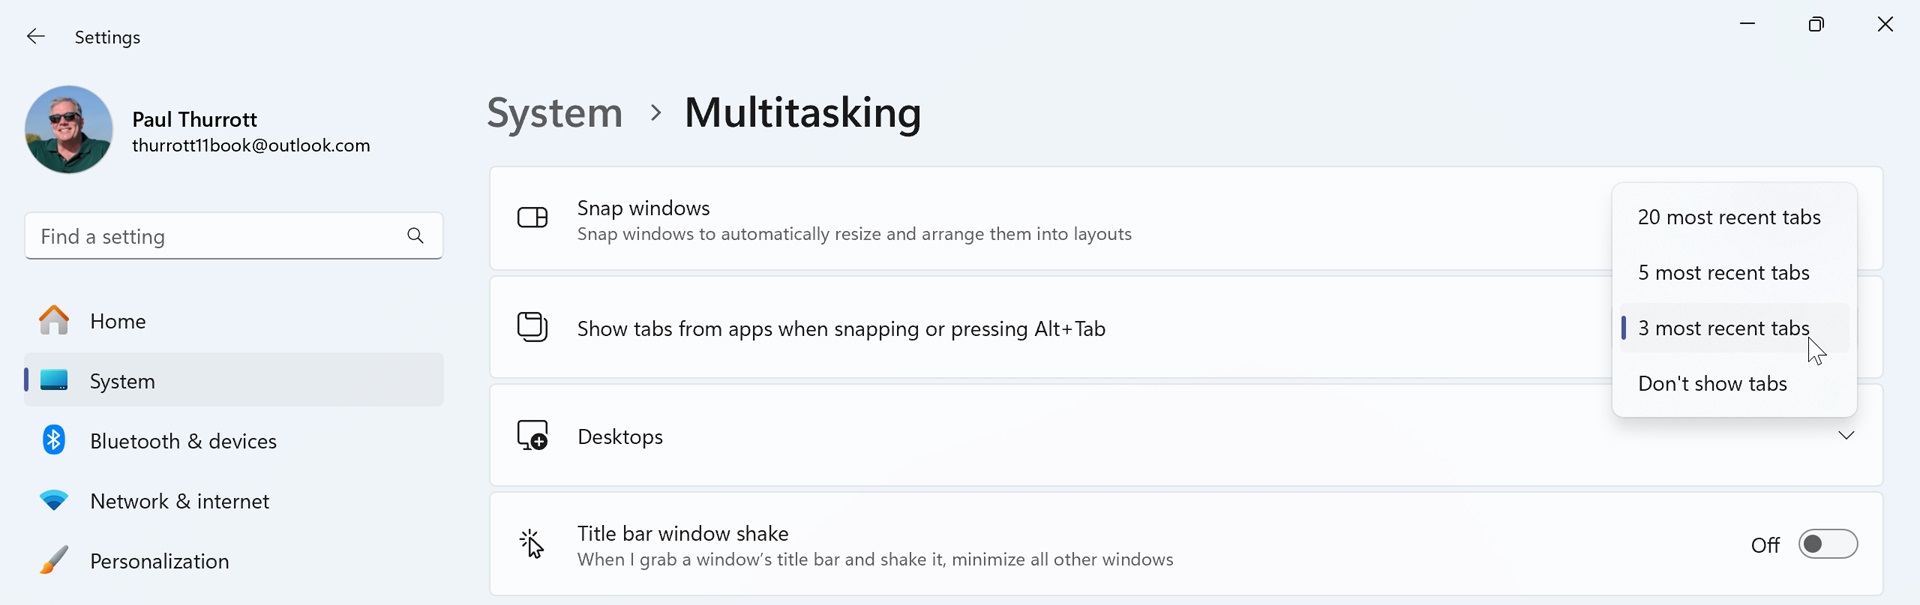
As noted in the option’s name, this feature impacts Alt + Tab as well as snap. There’s no way to configure how tabs work separately for each.

Gain unlimited access to Premium articles.
With technology shaping our everyday lives, how could we not dig deeper?
Thurrott Premium delivers an honest and thorough perspective about the technologies we use and rely on everyday. Discover deeper content as a Premium member.