Printers and Scanners
- Paul Thurrott
- Dec 29, 2022
-
1
As you would expect, Windows 11 connects to printers and scanners locally using a USB cable or over your home network.
Printers
Windows supports the same traditional printing capabilities that it has for years, and printers work much as they always have. But there is one interesting wrinkle: you can print to easily-shared PDF files in addition to hardware printers.
Configure printers
Printers & scanners settings—available by navigating to Settings > Devices > Printers & scanners—provides only basic printer controls: You can add new printers here, but there’s little in the way of printer configuration.

There is one important option here: “Let Windows manage my default printer.” If you leave this option set to its default setting of On, Windows 11 will always configure the default printer to be the most recently-used printer. If you don’t like this behavior, just configure this option to “Off.”
By default, this interface displays only a single virtual printers, Microsoft Print to PDF. But if Microsoft Office is installed, you will see a second entry for OneNote (Desktop) as well.
Microsoft Print to PDF is described later in this chapter.
However, if Windows 11 detects a printer—either on the local network or attached directly to the PC—that will appear here as well. If you have a printer that is not displayed here, you will need to add it.
Add a printer
To add a printer, click “Add device” next to “Add a printer or scanner.” Windows 11 will look for a printer and add any that it finds to the list of available devices.

Click “Add device” next to a found printer you wish to add. Windows will download and install the necessary drivers, and then that printer will appear in the list, ready for action.
You may also be prompted to download an app for the printer: many printers have custom software that exceeds the capabilities of the basic driver and printing interface provided by Microsoft. If so, you will see a second entry for the printer with a “Get app” button so that you can download the app from the Microsoft Store.

If you are offered an app from the device maker, you’ll probably want to use that app when you print. Otherwise, you can configure the printer using Windows, as noted in the next section.
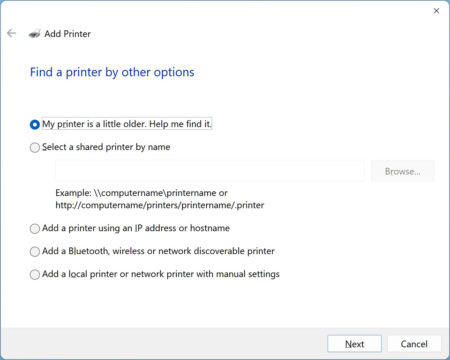
If Windows didn’t find your printer, you can click the “Add manually” link next to “The printer that I want isn’t listed.” This option is best used for older printers, but you will see options for network-attached, Bluetooth, and other types of printers.
Configure a printer
If you are going to use the Windows driver to print, you can configure the printer so that it’s optimized for your needs. To do so, select the printer in the list.
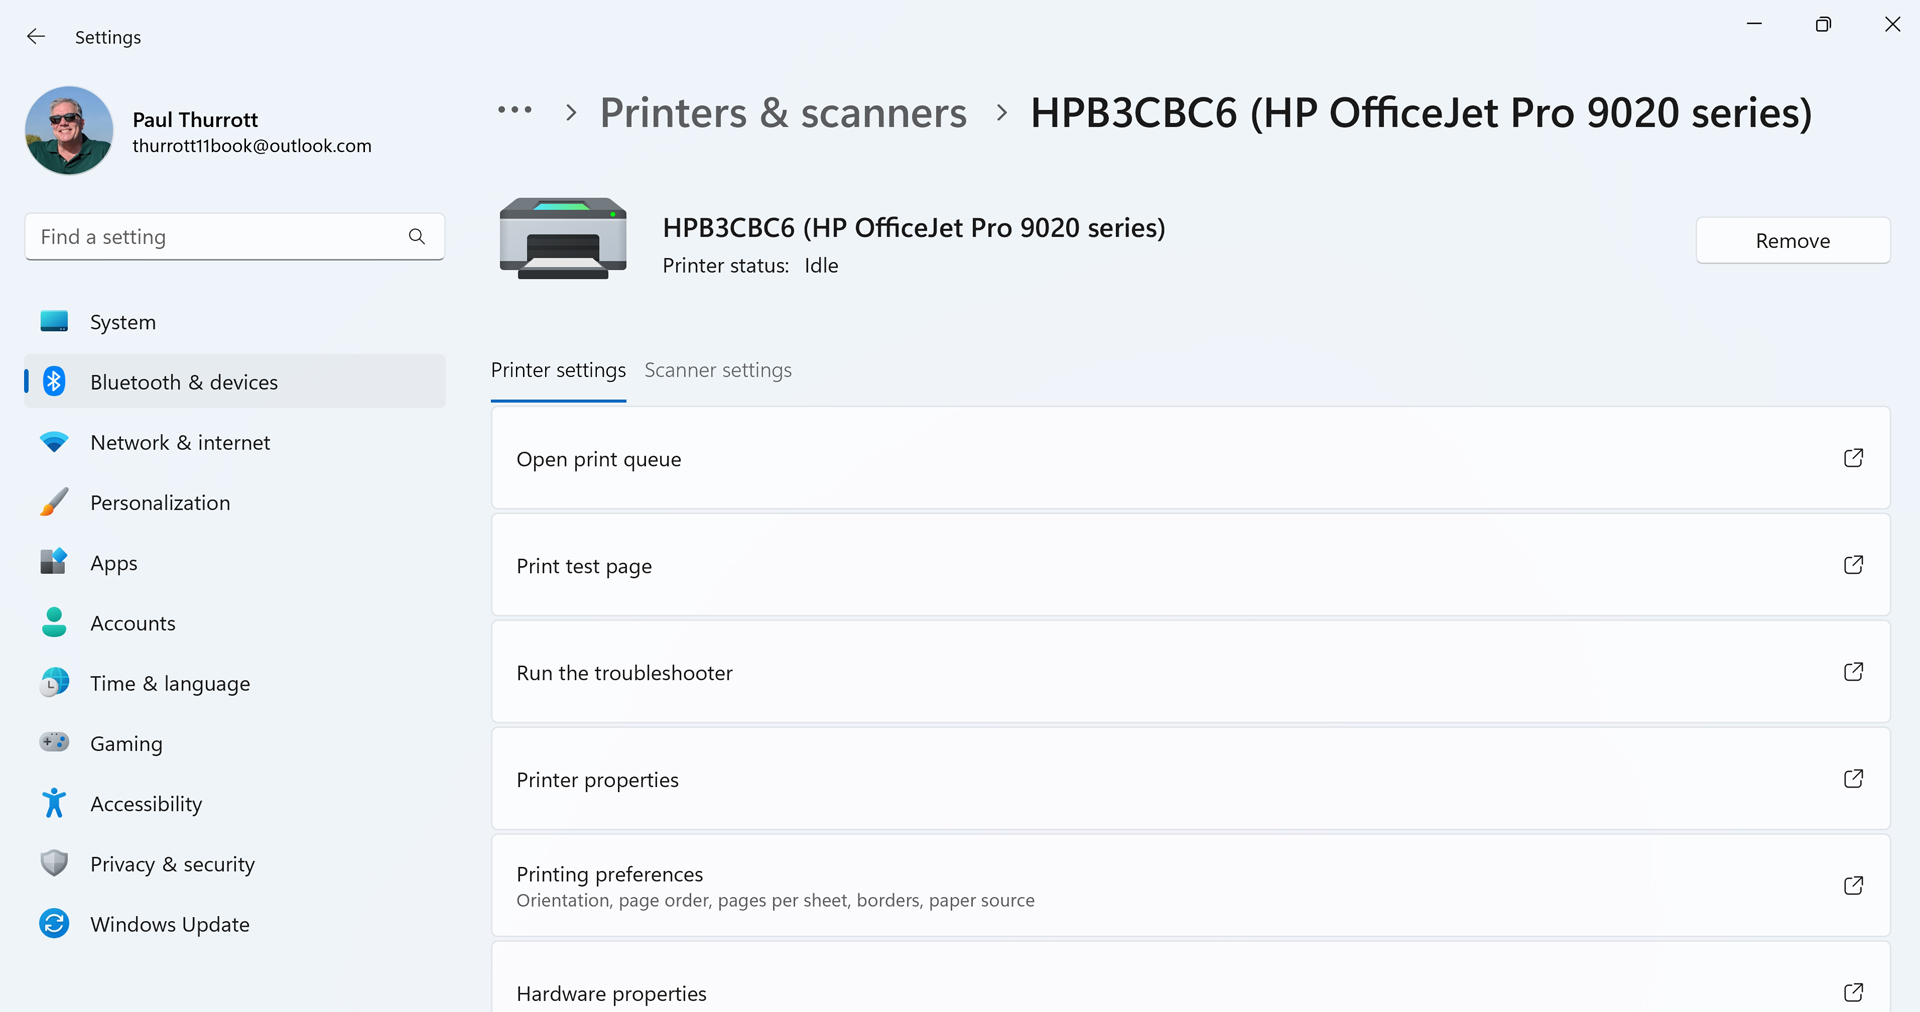
If you declined to let Windows manage your default printer, you will see a “Set as default” button at the top of this page. Click that to make this printer your default printer.
Then, select Printing preferences. The Printing preferences window for this printer appears.

Here, you can configure the printer’s various special features. This will vary wildly by device, and this window is often customized by the printer maker.
Print a document or other file
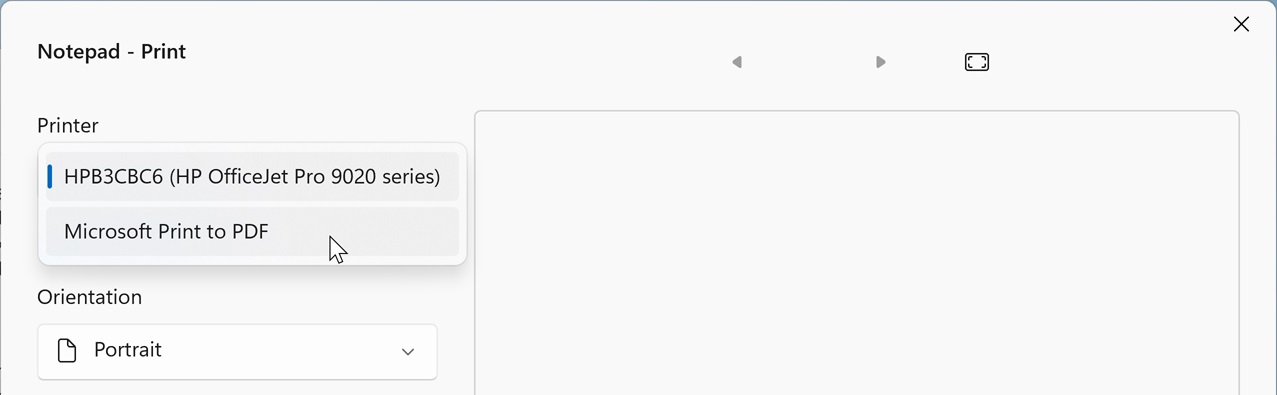
Many Windows applications support printing, and you will typing do so from within those apps. Recent apps, including most of those included with Windows 11, will use the modern Print dialog that is included with this system.

Here, you can choose which printer to use, configure the orientation, the number of copies to print, and other options, depending on the capabilities of your printer. You can also access the Printing preferences window by selecting “More settings.”
Older applications may display an old, legacy Print dialog. This is less full-featured, but it offers many of the same options.
Print to a PDF file
In addition to supporting traditional hardware printers, Windows 11 also lets you print to a virtual printer called Microsoft Print to PDF that creates a PDF file instead of hard copy. This is useful because PDF is a de facto standard and is broadly compatible and accessible to others.
Microsoft Edge and other web browsers all support viewing and, in most cases, annotating PDF files.
You can print to PDF from any desktop application or Microsoft Store app that supports printing. To do so, simply select “Microsoft Print to PDF” from the list of available printers.
When you select the Print button, you’ll be prompted to specify a file name and save location. From there, you can use the PDF file normally.
Yes, you can set Microsoft Print to PDF as the default printer if you’d like.
Scanners
Windows 11 also supports a wide variety of scanners, including all-in-one devices that provide both printing and scanning capabilities. Unlike with printers, however, Windows no longer includes built-in scanning capabilities. Instead, you will need to download an app, which can be Microsoft’s Windows Scan app, which is available in the Microsoft Store, or an app provided by the scanner maker, which might be found in the Store or on the web.
Actually, Windows 11 still includes a legacy app called Windows Fax and Scan that was last updated for Windows Vista (!) in 2006, so we won’t be covering it here. But Windows Scan isn’t much newer: it dates back to Windows 8. It works well enough, but we recommend getting an app from the device maker whenever possible.
Add a scanner
Before you can use a scanner with Windows 11, you need to make sure that it’s recognized by the system. To do so, open the Settings app and navigate to Bluetooth & devices > Printers & scanners. If Windows 11 detects a scanner (or an all-in-one printer with scanning capabilities), either on the local network or attached directly to the PC, it will appear. If you have a scanner that is not displayed here, you will need to add it.
To do so, click “Add device” next to “Add a printer or scanner.” Windows 11 will look for a compatible scanner and add any that it finds to the list of available devices.
Click “Add device” next to a found scanner you wish to add. Windows will download and install the necessary drivers, and then that printer will appear in the list, ready to be used. Or, somewhat ready to use: it is highly likely you will need—or want—to download a scanning app before you can use the scanner.
To find out, select the scanner (or all-in-one printer) in the list. Then, select the “Scanner settings” header if it’s an all-or-one and look for a “Get scanner app” link. If you select this link, the Microsoft Store app will launch and navigate to the listing for the Windows Scan app.

This app provides basic scanning capabilities, but you should check with your device maker and download their scanning utility instead: in most cases, this will offer a more sophisticated scanning experience that can best take advantage of the device’s unique features.
Configure a scanner
Scanner configuration occurs via the device’s maker’s software or, if you wish to use Windows Scan, that app. Windows Scan couldn’t be simpler: it has options for just selecting the correct scanner, the source (flatbed or feeder, depending on the hardware), the file type, color mode, resolution (dependent on the hardware), and the save location.
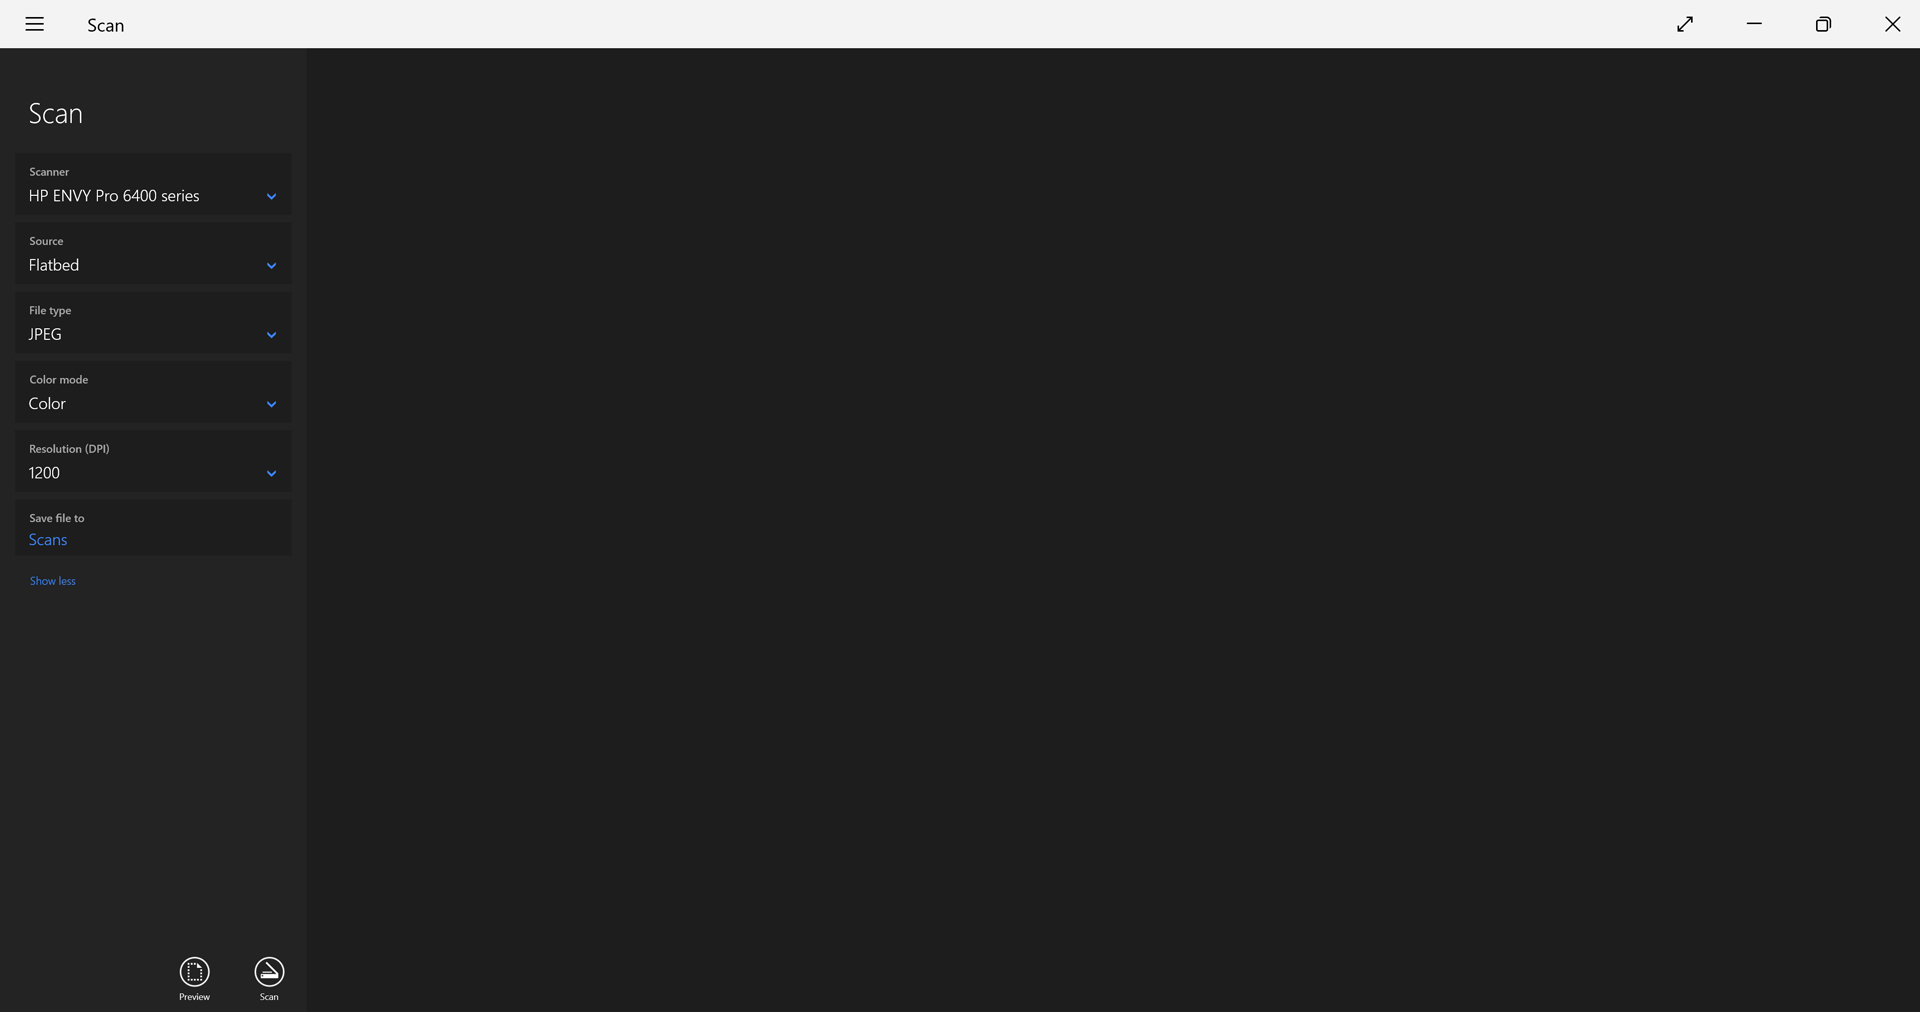
By default, Windows Scan will save scans to a Scan folder that it will create in your Pictures folder if not already present.
Scan a photo or document
If you are using Windows Scan for scanning, launch that application and make sure it’s configured properly for the work at hand.
The software that came with your scanner likely has different settings for photos and documents, but Windows Scan isn’t that sophisticated. Instead, you can choose “Grayscale” or “Black and white” under “Color mode” if scanning a document.
If you’re using a flatbed scanner, we recommend selecting “Preview” first: Windows Scan will quickly scan the photo(s) or document(s) you wish to scan, giving you the opportunity to fine-tune the area that will be scanned using on-screen guides.
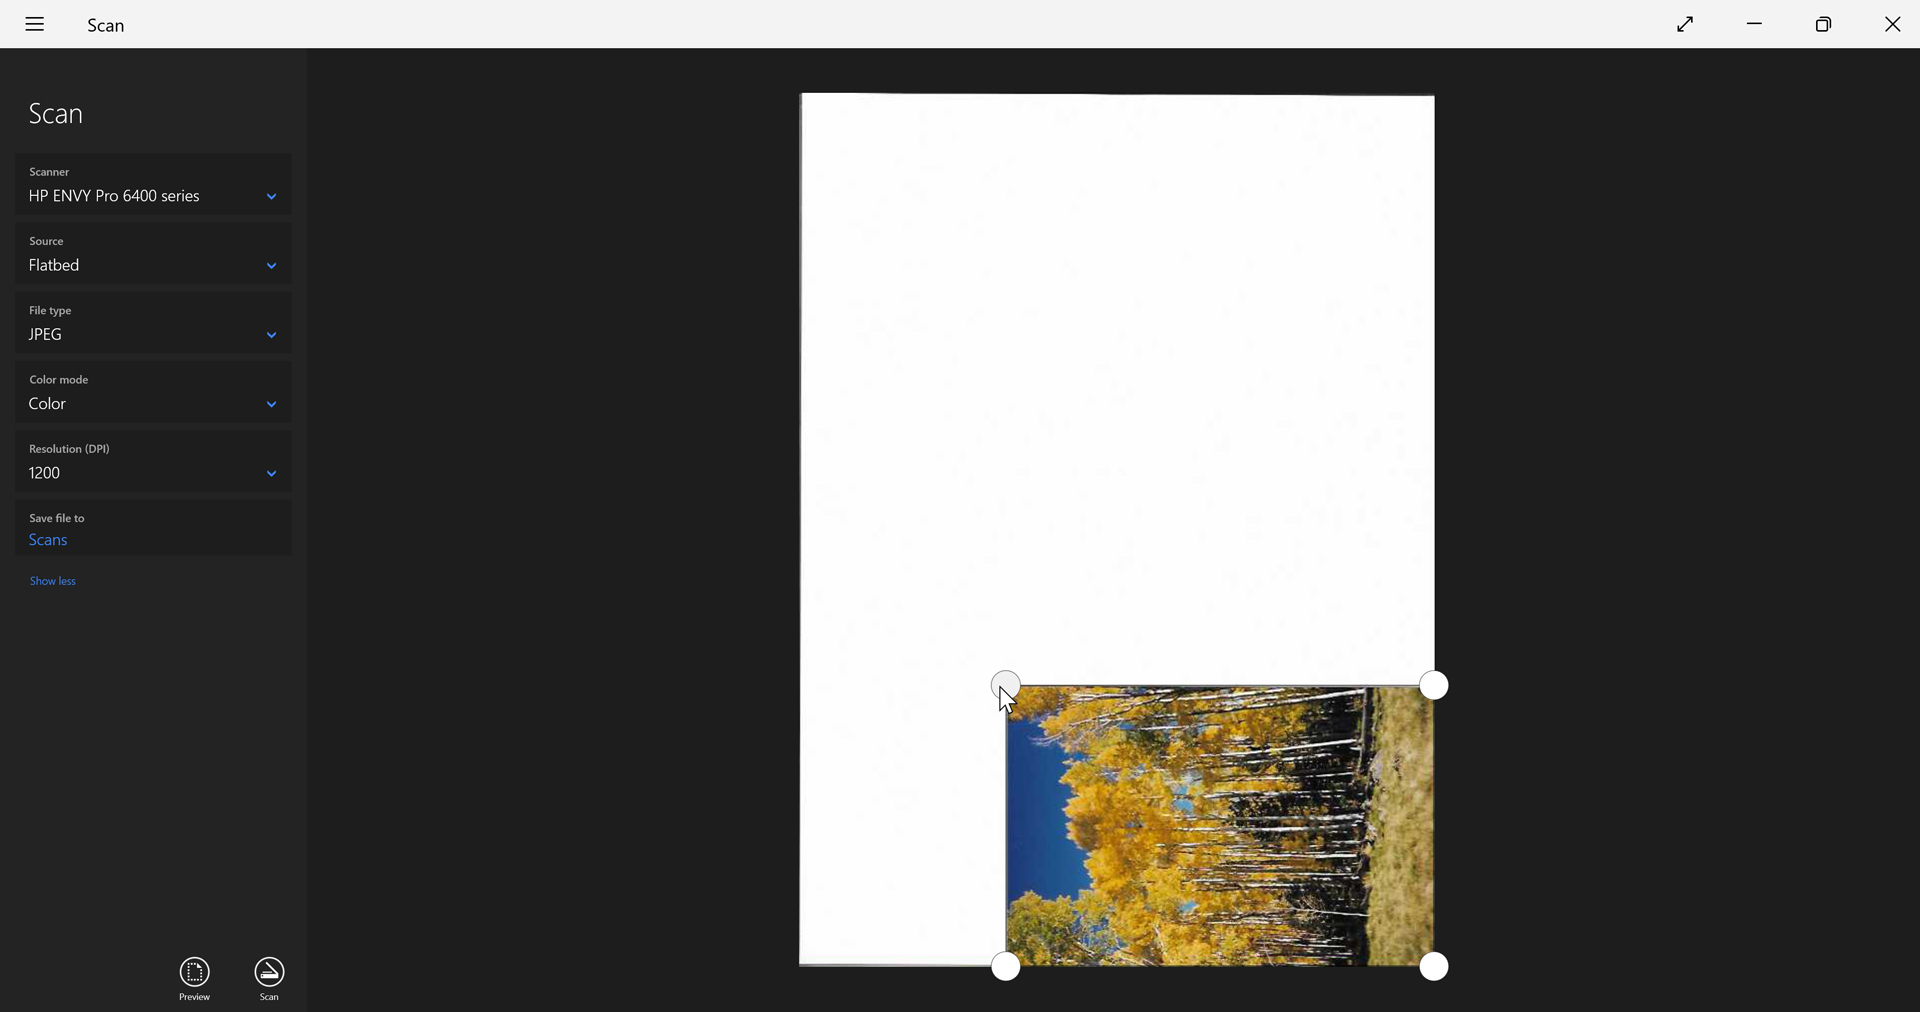
When you’re ready, just click “Scan” to scan the image and save it to your PC.
Photos scanned with the Scan or third-party scanner apps can be edited using the Photos app.

Gain unlimited access to Premium articles.
With technology shaping our everyday lives, how could we not dig deeper?
Thurrott Premium delivers an honest and thorough perspective about the technologies we use and rely on everyday. Discover deeper content as a Premium member.