Troubleshooting
- Paul Thurrott
- Dec 29, 2022
-
0
Windows 11 will try to automatically fix problems that occur on your PC. But when it cannot do so, it will often present a troubleshooter, a built-in utility that will try to help you fix the issue. You can also manually access any of the available troubleshooters at any time.
Configure troubleshooting
By default, Windows 11 will ask if whether you’d like to run a troubleshooter to when an issue occurs. But you can configure this behavior.
To do so, open the Settings app and navigate to System > Troubleshoot.
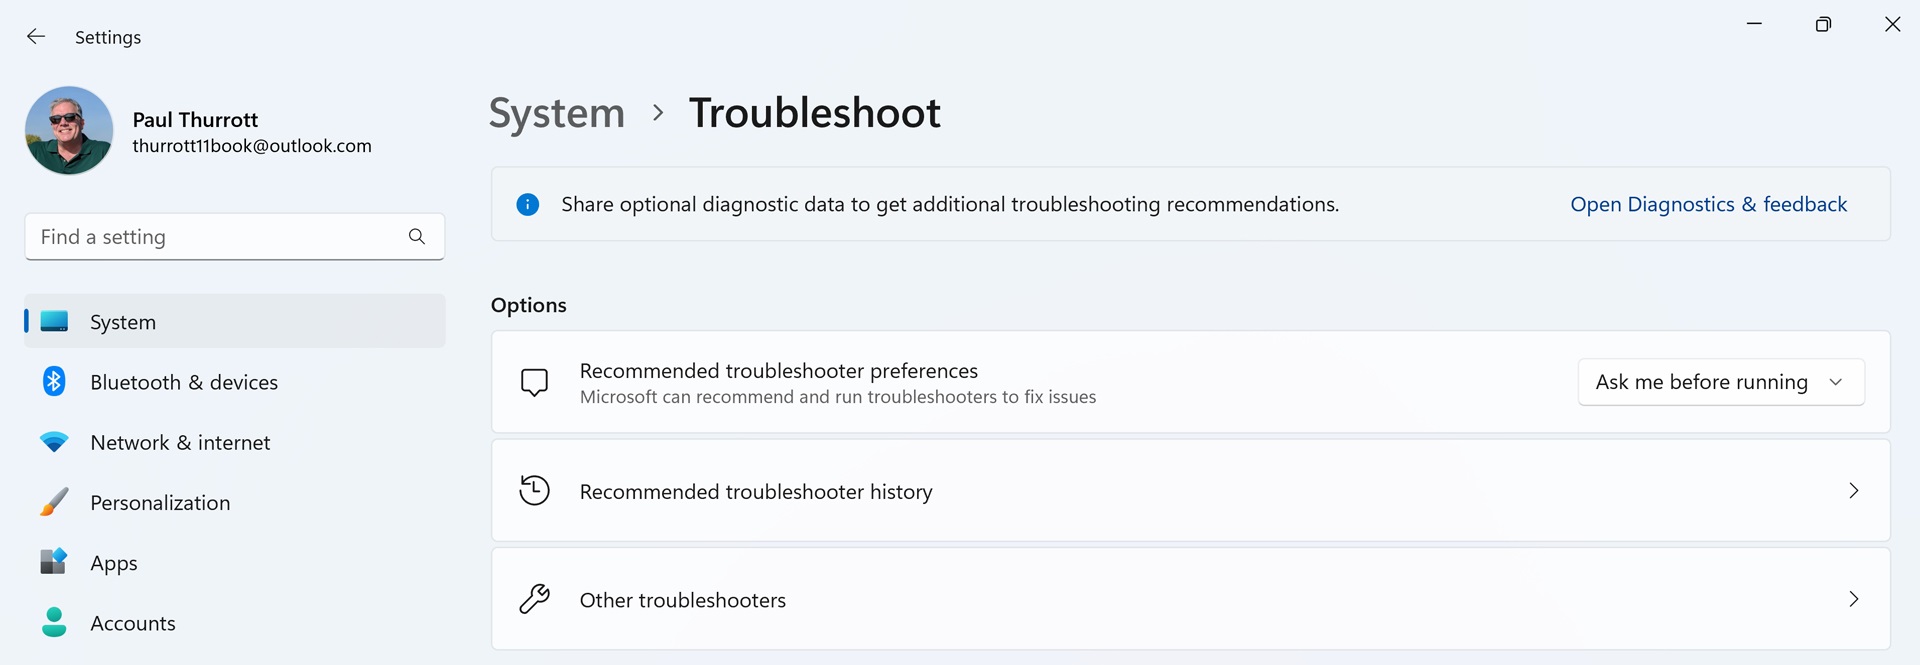
There, you find a single option related to troubleshooting: “Recommend troubleshooter preferences,” which is set to “Ask before running.” However, you can also set this to “Run automatically, don’t notify me,” “Run automatically, then notify me,” or “Don’t run any,” depending on your preferences.
Find and run a troubleshooter
If Windows 11 hasn’t asked you to run a troubleshooter when something goes wrong, you can find and run it manually.
To do so, open the Settings app and navigate to System > Troubleshoot > Other troubleshooters.
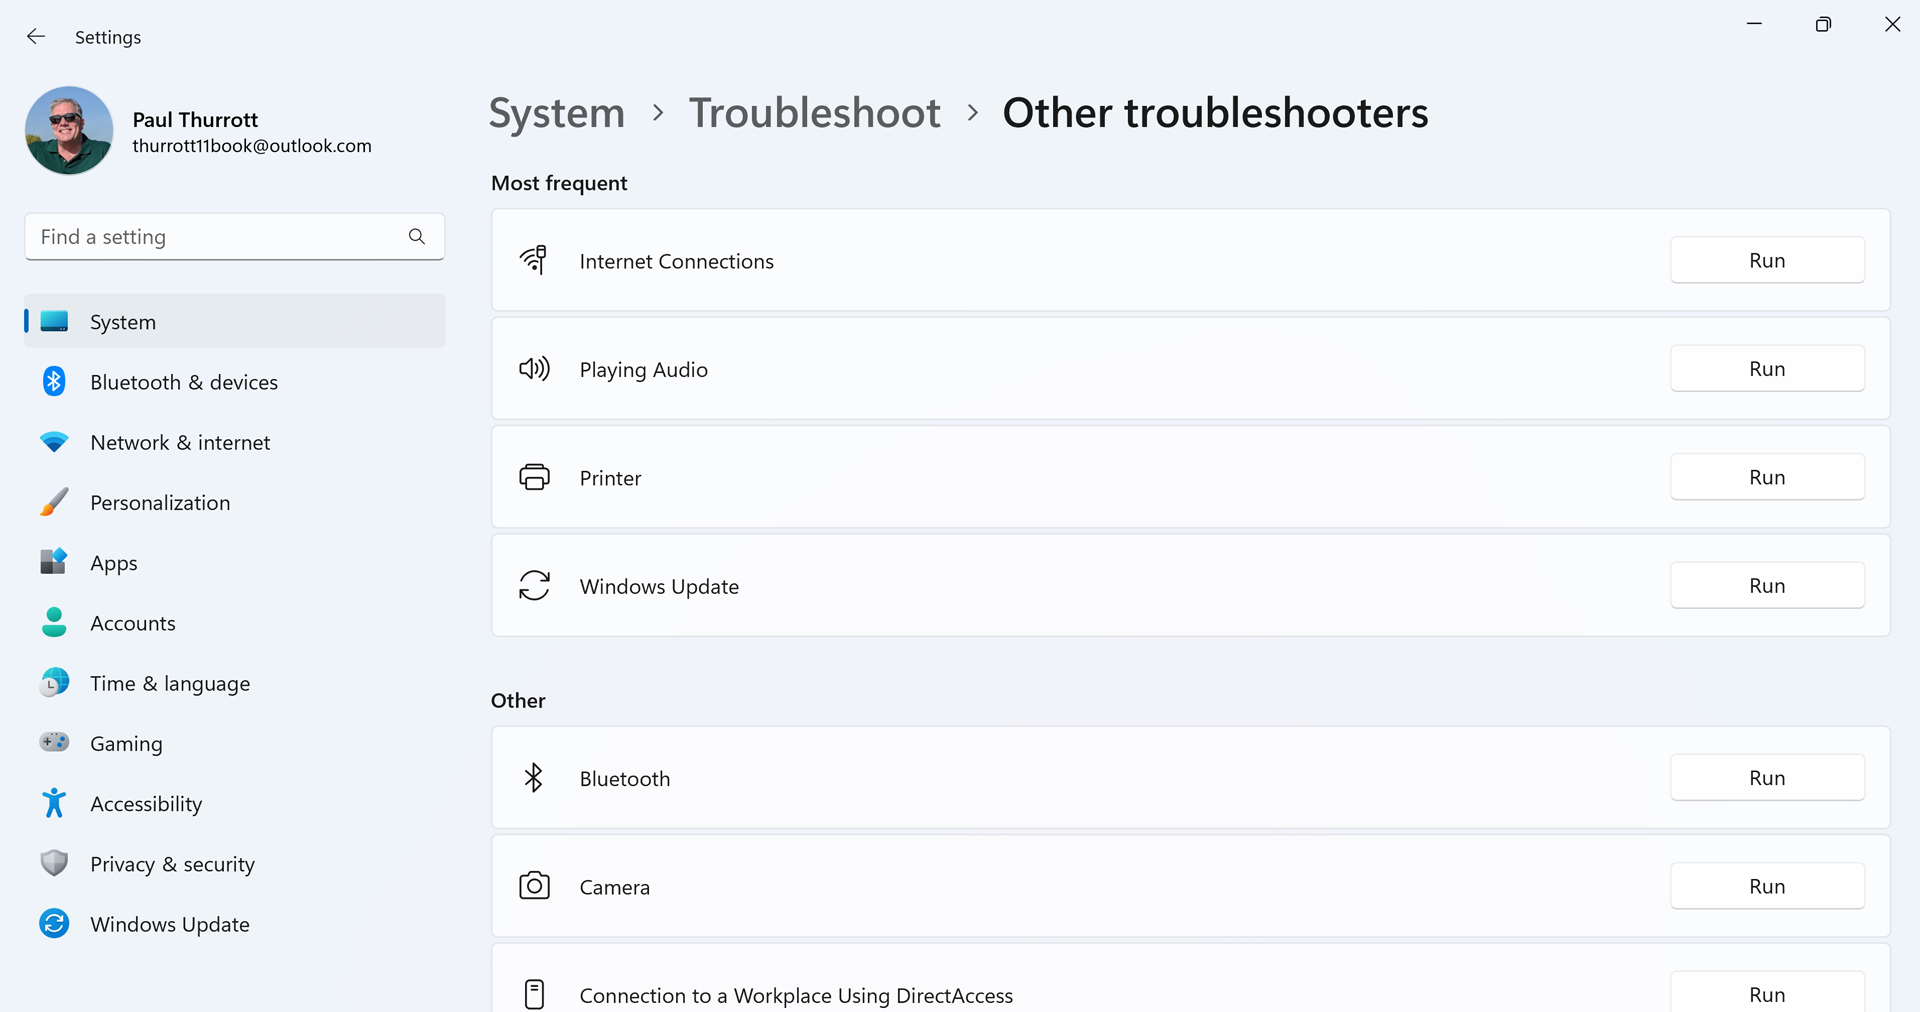
Here, you will find two lists of troubleshooters, “Most frequent” and “Other,” which is obvious enough: Internet Connections, Playing Audio, Printer, and Windows Update are the most commonly needed troubleshooters, but there are many others found under “Other.”
Troubleshooters work the same no matter how they’re triggered: each has a set of conditions and diagnostics it can run, and it will step through each in turn, prompting you when possible to try different things. What differs is the details: because of the specific nature of each troubleshooter, each has a different series of steps to perform.
We’ll examine two obvious examples.
Troubleshoot your Internet connect
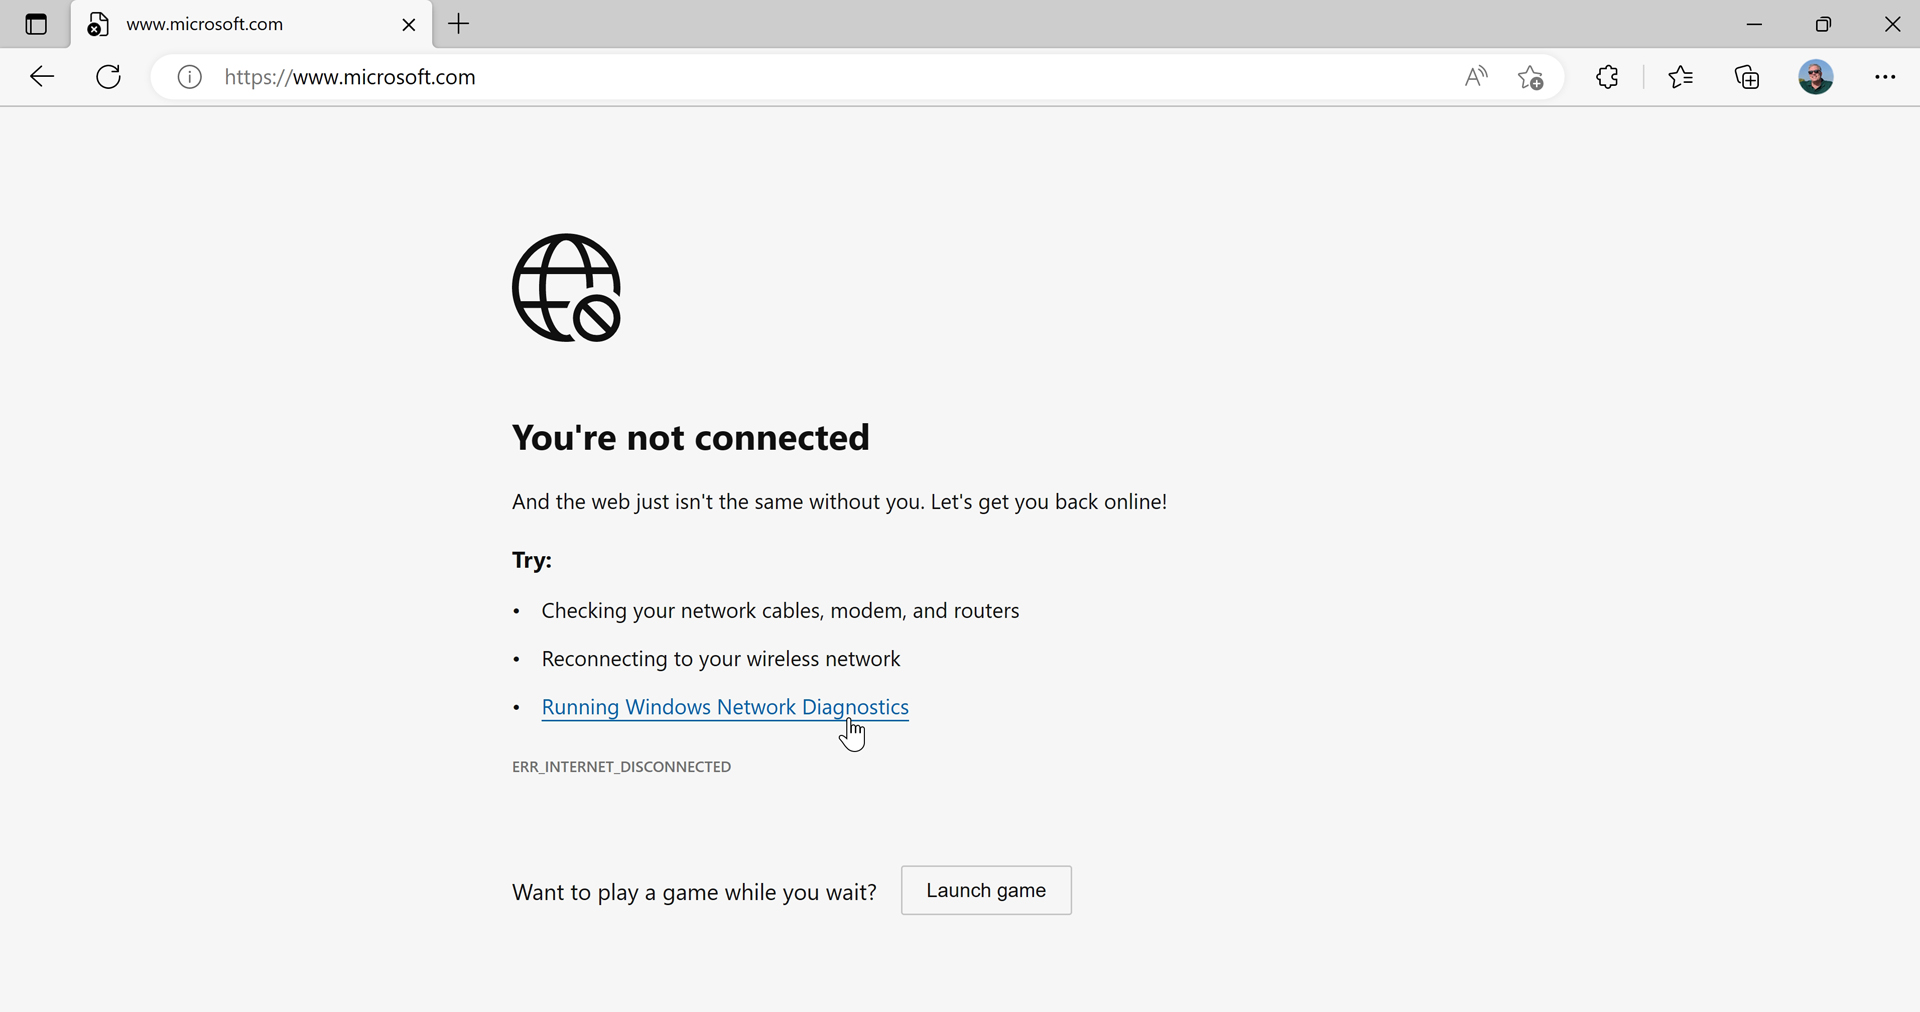
This is perhaps the most common issue: you try to visit a website, check your email, or perform a similar task that requires connectivity and it fails. What gives?
If this happens with Microsoft Edge, the browser will provide some recommended troubleshooting steps and provide a link for running “Windows Network Diagnostics,” which is just a restyled version of the Internet Connections troubleshooter.
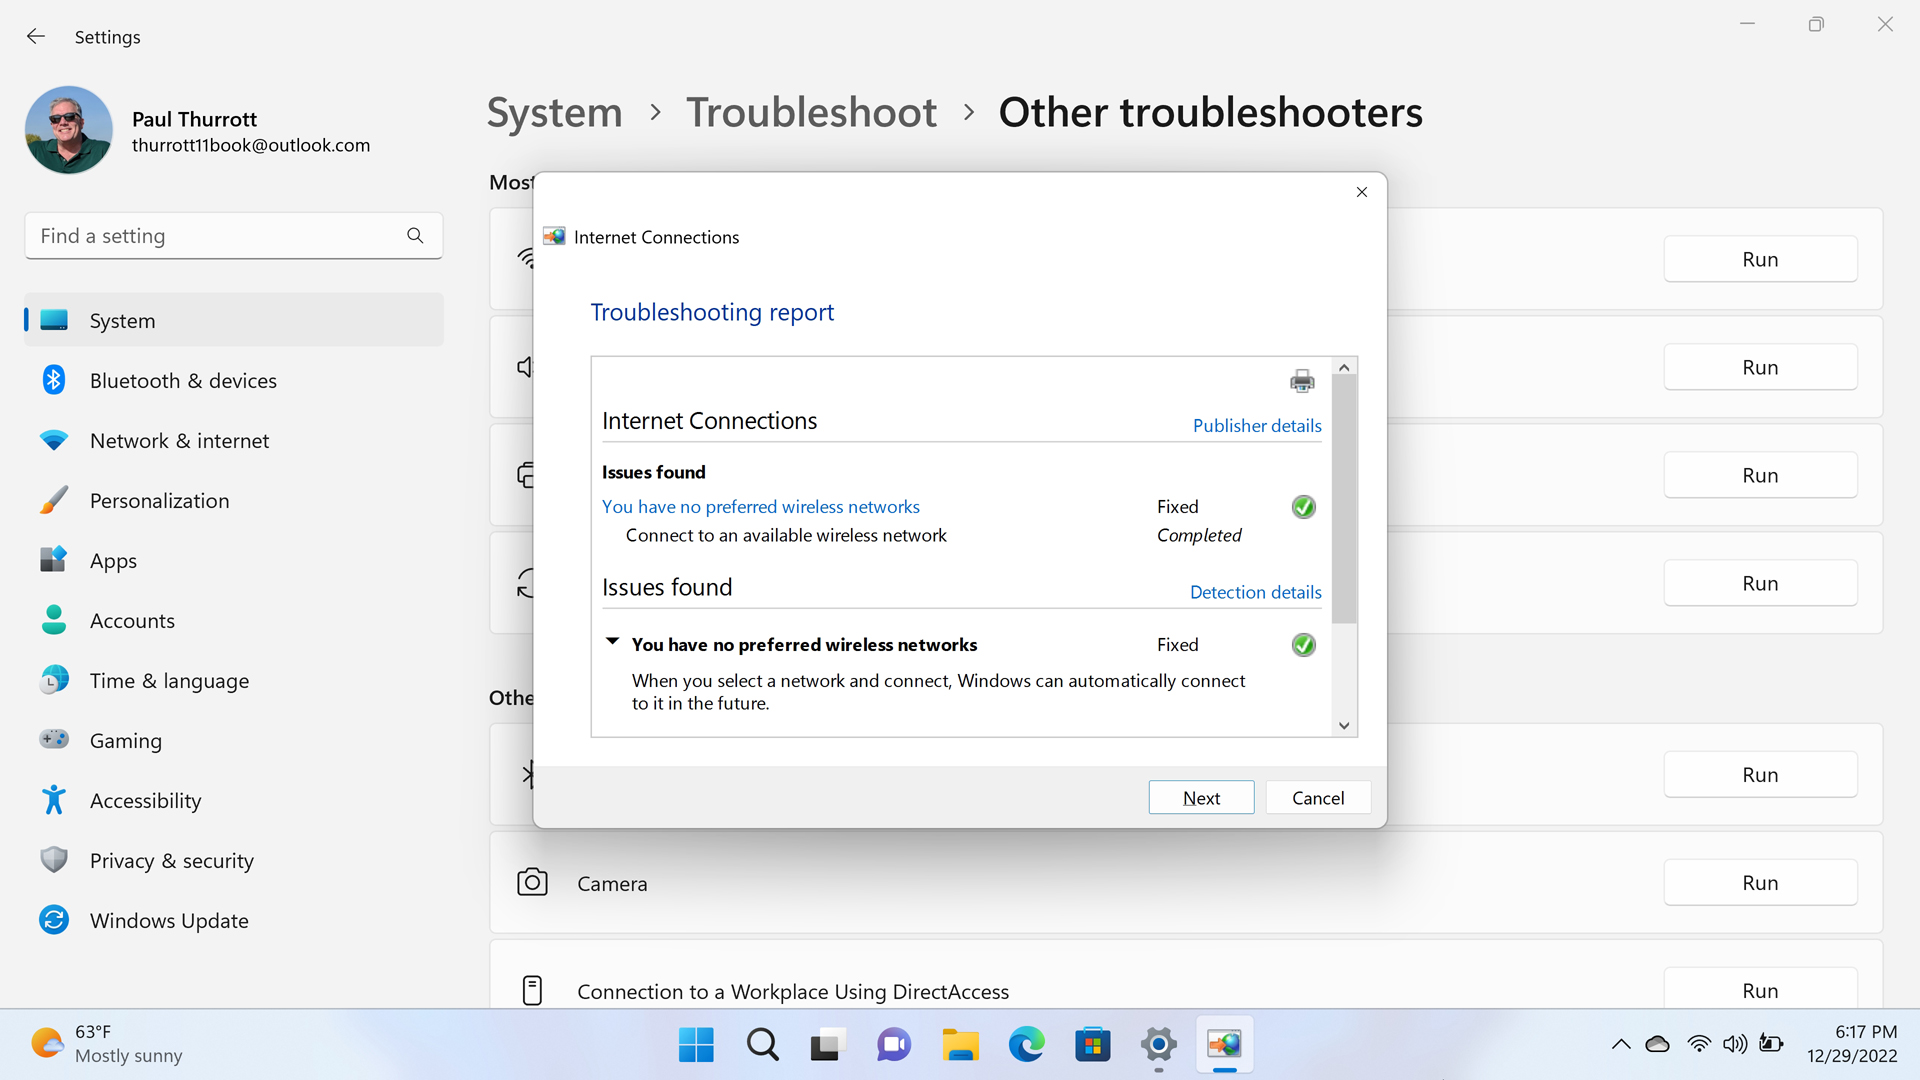
Otherwise, you can run the troubleshooter manually in Other troubleshooters: just select the “Run” button next to Internet connections.
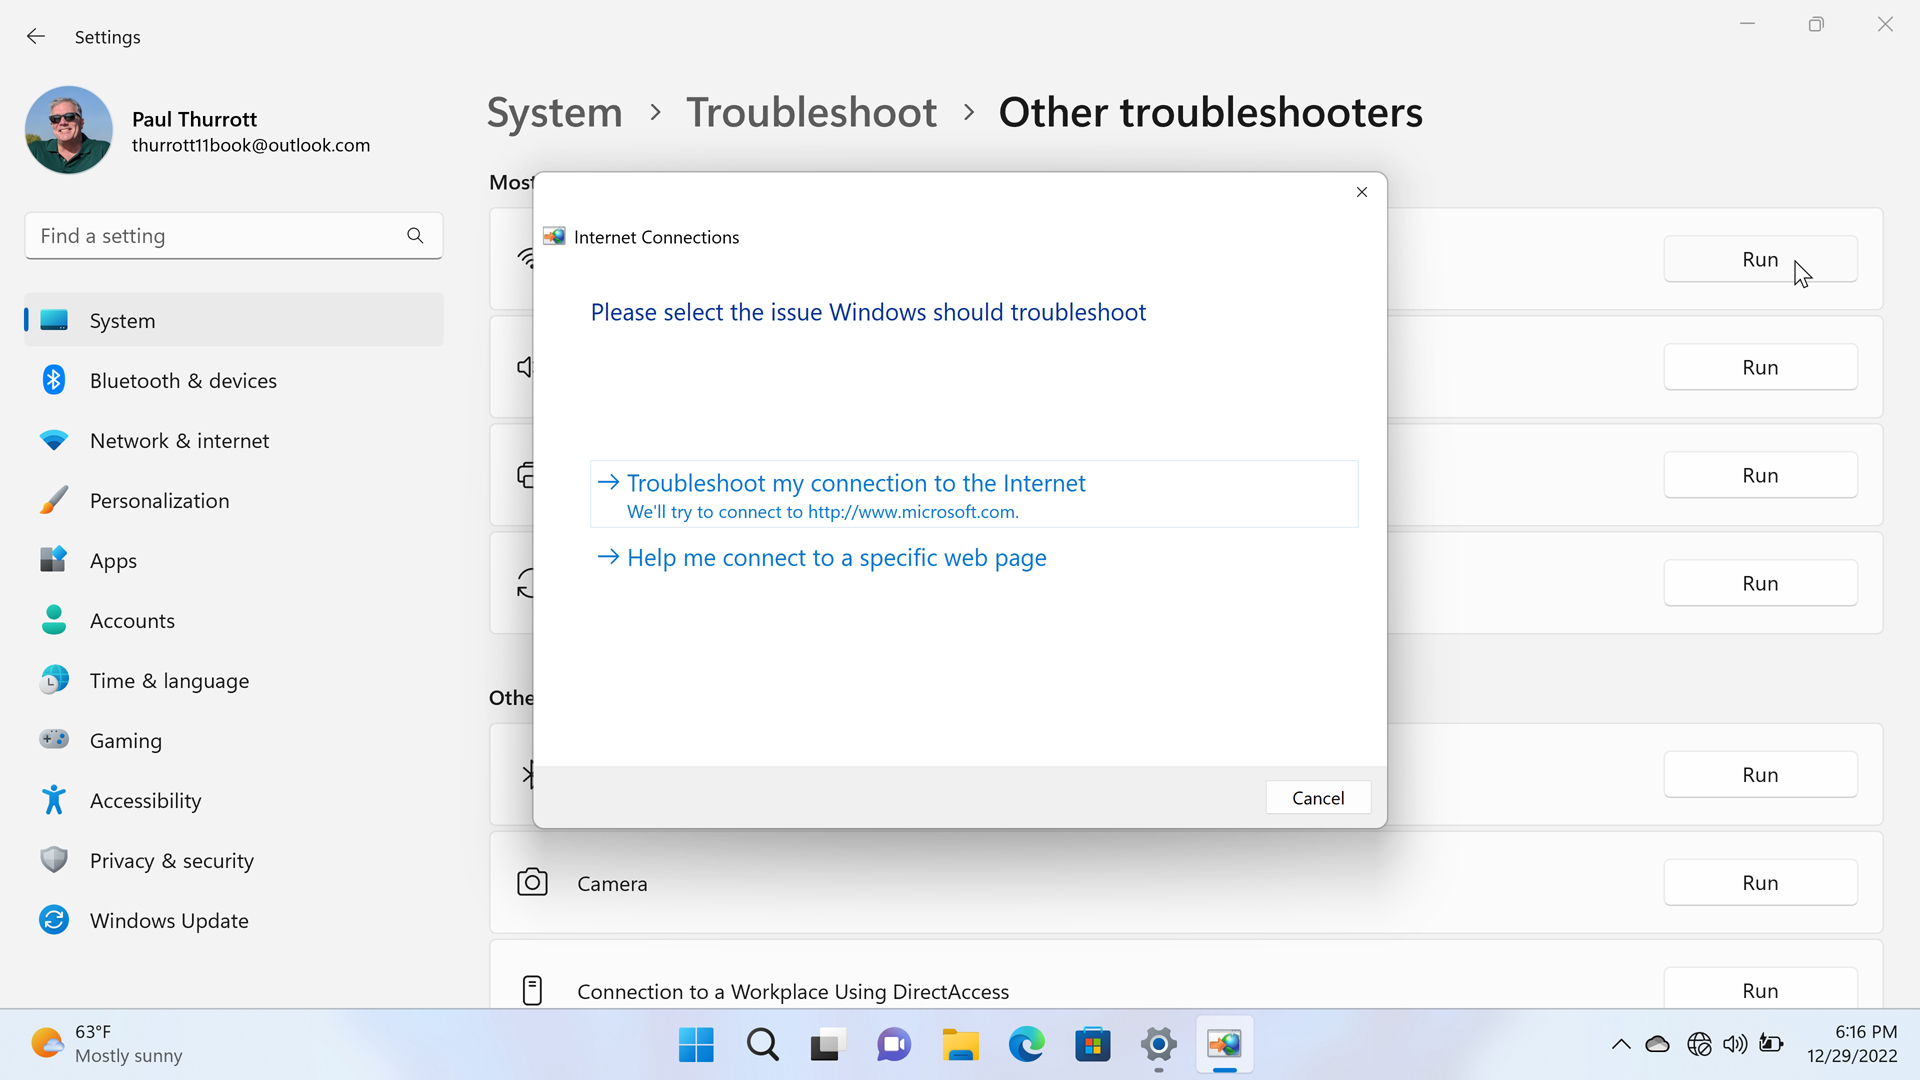
This troubleshooter will examine your connectivity, determine whether there’s an issue with the network adapter—and reset it if so—and prompt you to connect to a different network if on Wi-Fi. At its conclusion, you will be connected to the Internet or the troubleshooter will report that it was unable to fix the problem and detail the steps it took. A “View detailed information” link does as promised, providing a much more detailed view of the troubleshooting steps, which can be printed (to PDF or paper) for later consultation.
Troubleshoot Windows Update
Microsoft designed Windows 11 to be updated frequently in the background, and Windows Update is the primary interface for this functionality. Many users will let Windows Update do its thing and then prompt them when it needs to reboot the PC. But more experienced users will often check Windows Updates for updates manually. And, in doing so, they will sometimes experience issues in which an update seems to get “stuck” and never complete successfully.
These and other similar updating issues can be fixed with the Windows Update troubleshooter, which is found in Other troubleshooters: just select the “Run” button next to Windows Update.

As with the Internet Connections troubleshooter, this troubleshooter runs a series of diagnostic tests to determine what’s wrong, but it will also check whether a pending restart is blocking updates, examine Registry keys associated with Windows Update, and restart the Background Intelligent Transfer Service (Bits) service that underlies Windows Update.

Gain unlimited access to Premium articles.
With technology shaping our everyday lives, how could we not dig deeper?
Thurrott Premium delivers an honest and thorough perspective about the technologies we use and rely on everyday. Discover deeper content as a Premium member.