Quick Settings
- Paul Thurrott
- Jun 21, 2026
-
0
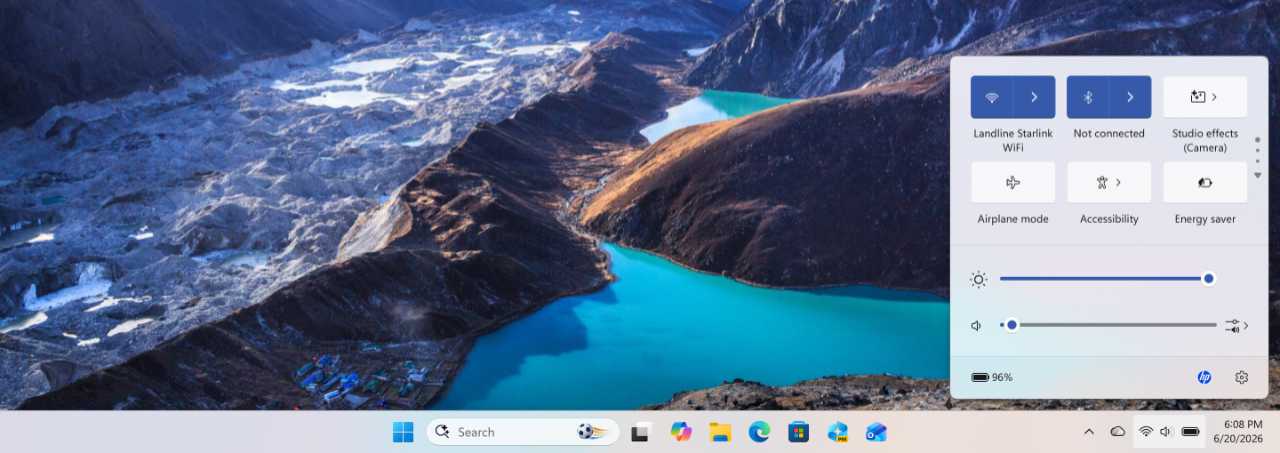
Quick settings appears when you click the “Network,” “Volume,” or “Power” icons in the Taskbar’s system tray. As its name suggests, Quick settings provides quick access to commonly needed system settings like Wi-Fi, Bluetooth, Airplane mode, Battery saver, and more.
Keyboard shortcut: You can also open Quick settings by typing Windows key + A.
That the
The “Network,” “Volume,” and “Power” icons working as one is unique. But they behave more typically when you right-click them. Each displays a different context menu that is relevant only to the icon you right-clicked.

Defaults
Quick settings is non-resizable interface with few settings you can customize. It displays a scrollable grid of quick settings buttons, six of which are visible at a time, Brightness and Volume sliders, a “Sound output” button, a Battery life icon that opens the Settings app to System > Power & battery, and an “All settings” (gear) button that launches the Settings app to its Home page when clicked.
Tip: Quick settings is sometimes customized by your PC maker to include a custom icon that launches its support app when clicked. This icon will appear to the left of “All settings” if present.
To close Quick settings, click anywhere else on-screen.
Keyboard shortcut: You can also close Quick settings by tapping Esc.
Customize
Quick settings supports just a single customization capability: You can reposition any quick setting button by dragging and dropping it with your mouse.
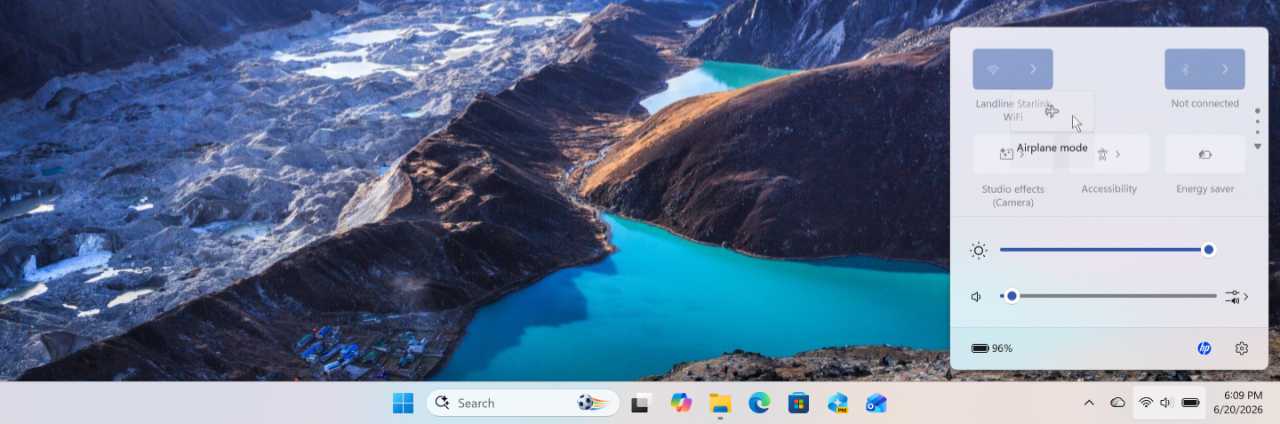
There is no way to remove quick settings buttons you don’t want. The best you can do is reposition them at the bottom of the last page of quick settings buttons.
Also, it’s likely that your PC won’t have every possible quick setting button because some are tied to specific hardware configurations. Cellular quick settings requires a cellular data connection, for example, which is unusual in PCs.
Understand Quick settings
Quick settings is a simple, useful, and mostly obvious interface for accessing key system settings without needing to open the Settings app and search or click around to find what you need. But there’s a lot of functionality in there.
Quick settings buttons
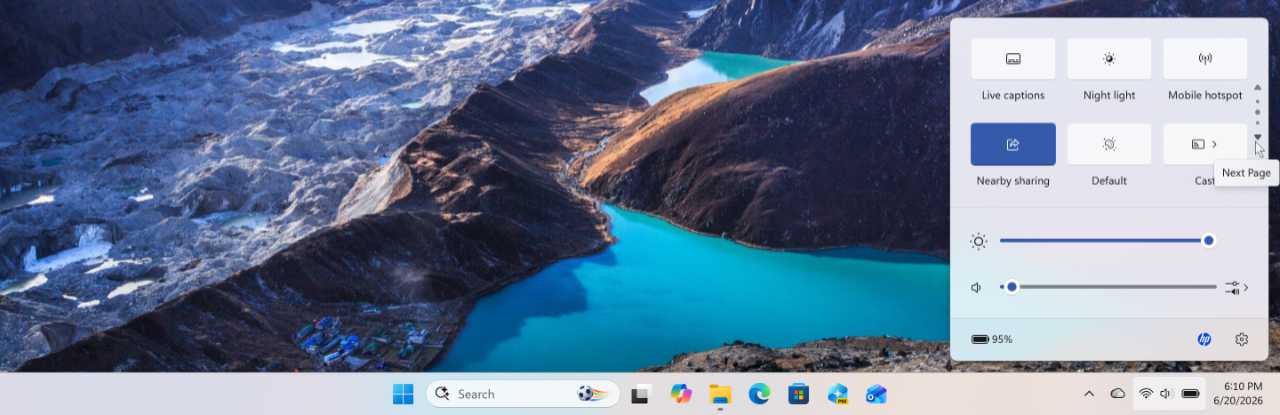
Quick settings displays six quick settings buttons in a grid at its top, but there are more pages of buttons you can’t see unless you scroll down. So it provides a pips pager control on its right for navigating between the available pages of buttons. To do so, click a specific pip (circular dot) on the control, click the “Next Page” pip to scroll down one page, or, if you have a touchpad or mouse with a scroll wheel, you can use that to scroll while the mouse cursor is over the grid. When you scroll down, a “Previous Page” pip appears at the top of the control for navigating in the opposite direction
Most active quick setting buttons display using the accent color you configure (in Settings > Personalization > Colors), while most inactive buttons use the background color. Either way, it indicates whether the underlying feature is enable or not.
Each quick setting button also displays an icon and, below the button, a label to help you identify its use. But there are three types of quick settings buttons:
- Split button. This type of button has two halves, a left half with the quick setting icon you can click to toggle the underlying function on or off and a right half you can click to navigate to a management page that takes over the Quick setting window. The “Wi-Fi” quick setting button is perhaps the most commonly used example.

- Toggle button. This type of button acts as a toggle between multiple states. Most have two states, enabled/active and disabled/inactive, with Airplane mode being a typical example. But one quick setting button, Color profile, can support many states (in this case, dependent on how many color profiles you have on your PC). And this one doesn’t use your accent color at all.
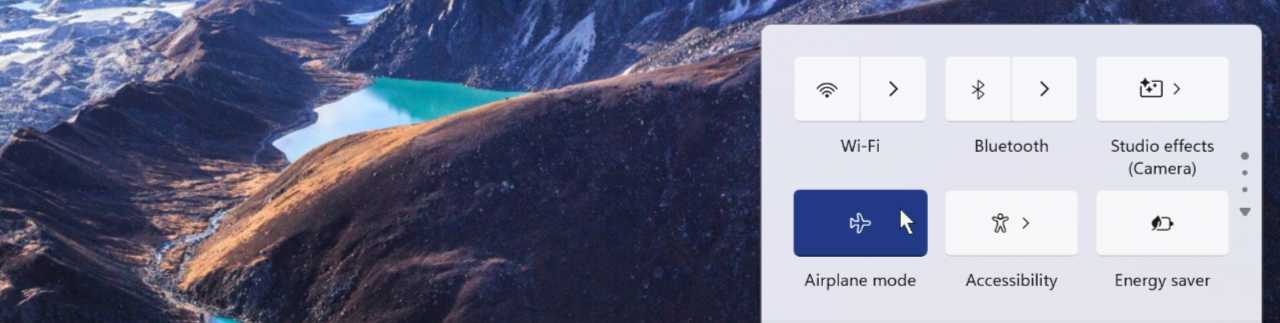
- Page navigation button. This button type looks like a toggle button but when you click it, the normal Quick settings page is replaced with a new interface displaying options for the underlying feature. The Accessibility quick setting button works this way.

You can access the underlying features of any quick setting button by right-clicking it and choosing “Go to Settings.”
Wi-Fi
This quick setting is used to toggle Wi-Fi on or off and to manage available Wi-Fi networks. If Wi-Fi is enabled but you are not connected to a network, the button’s label with read “Available.” And when you are connected to a Wi-Fi network, the name of that network will appear as the button’s label.
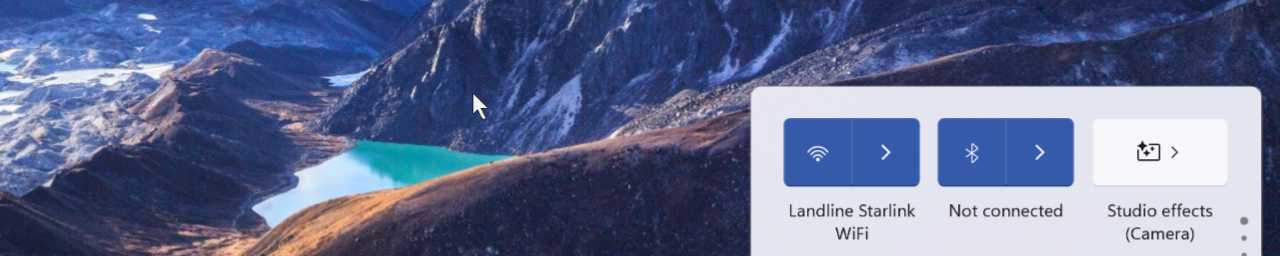
Tip: If Wi-Fi is disabled, the button will be titled “Wi-Fi.” And if Wi-Fi is enabled but you are not connected to a network, it will be titled “Available.”
To see available Wi-Fi networks and access other Wi-Fi settings, click the right half of the button.
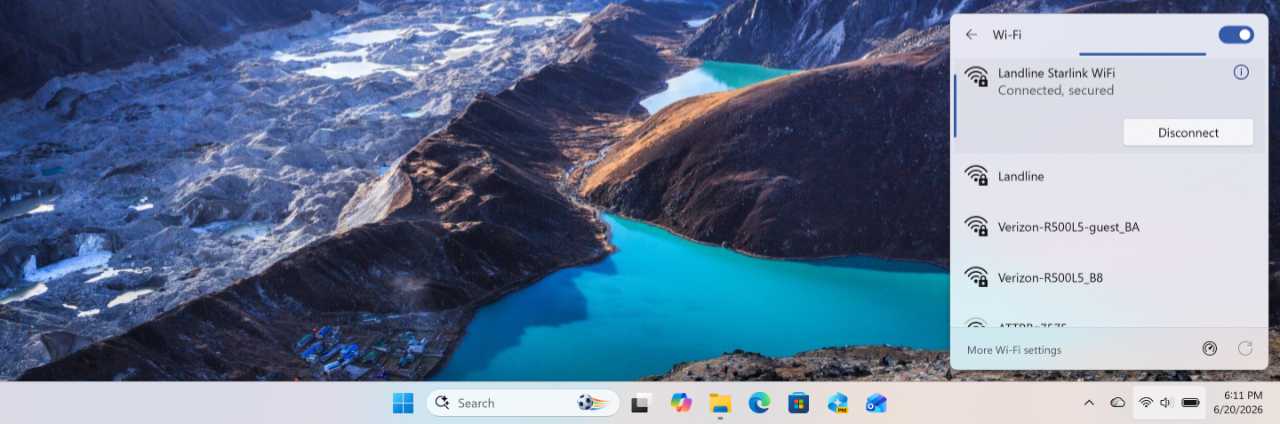
Here, you can toggle Wi-Fi on or off, see a list of available Wi-Fi networks and click one to connect, disconnect from or view the properties of a network you are connected to, click a “More Wi-Fi settings” button to open the Settings app open to the Wi-Fi settings page, trigger a web-based Internet speed test using your default web browser, or refresh the list of available Wi-Fi networks.
Less obviously, you can right-click a Wi-Fi network and access options like “Connect,” (if not connected), “Disconnect,” “Properties,” and “Forget.”
Bluetooth
This button is used to toggle Bluetooth on or off and to manage available Bluetooth devices. When you are connected to a Bluetooth device, the button’s label will display as the name of that device, and if Bluetooth is enabled but you are not connected to a device, it will be titled “Not connected.”
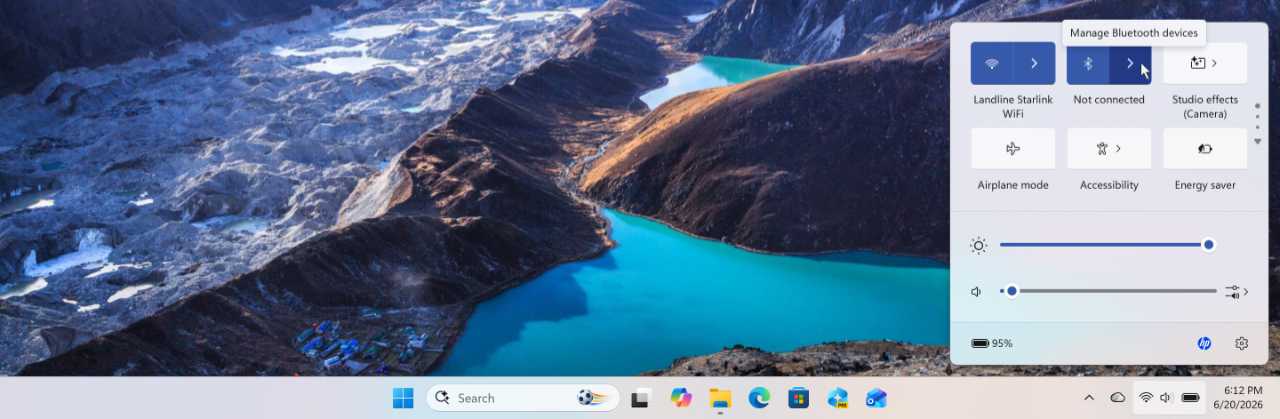
To see connected and available Bluetooth devices, click the right half of the button.

Here, you can toggle Bluetooth on or off, see a list of available Bluetooth devices nearby and click one to connect, and click a “More Bluetooth settings” button to open the Settings app open to the Bluetooth settings page.
What you can’t do here is remove a paired device–you cand do that via Bluetooth settings–and there are no additional right-click options.
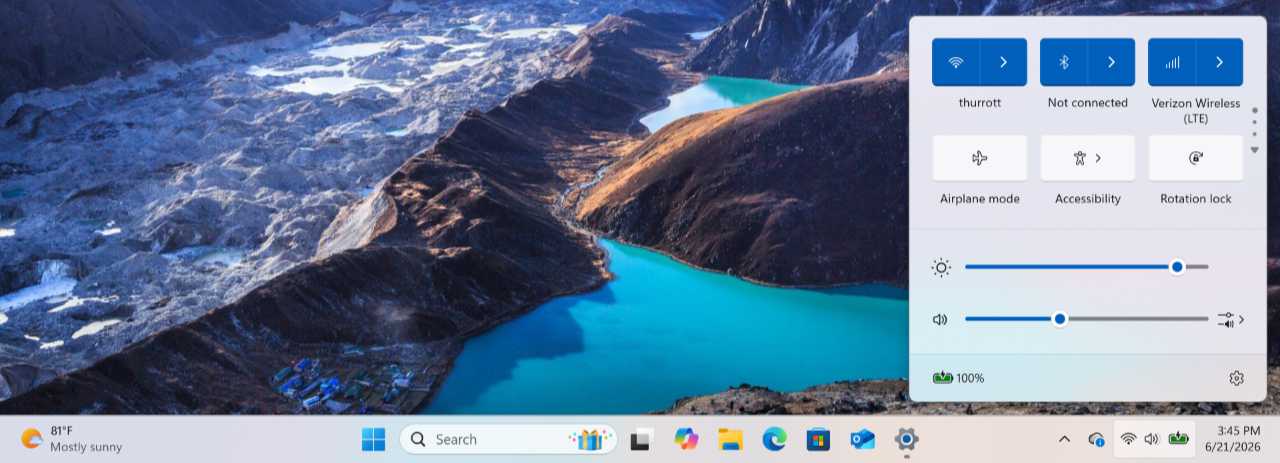
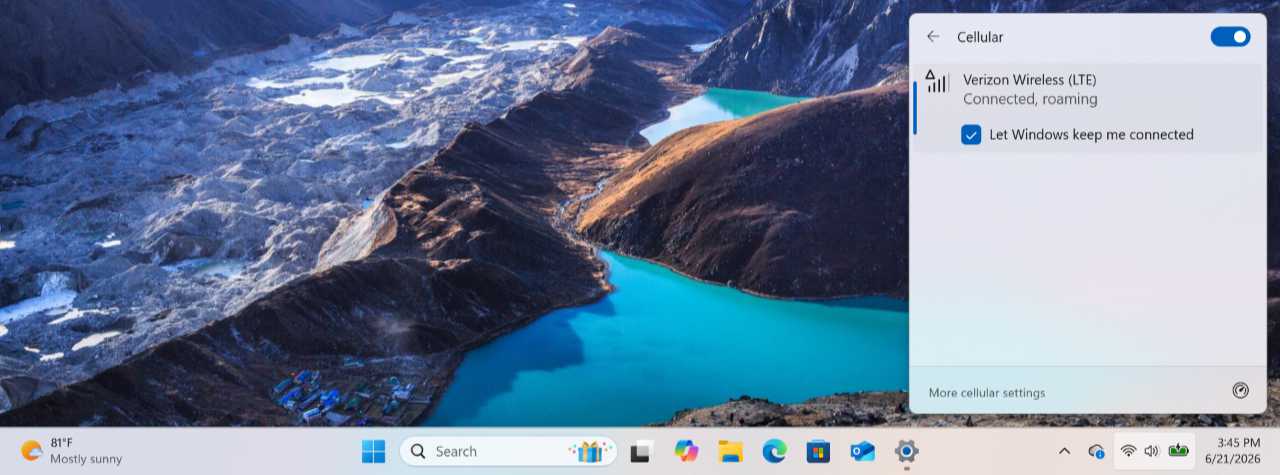
Cellular
This button appears in Quick settings if your computer is equipped with a cellular modem that lets it access the Internet using a cellular data connection provided by a mobile carrier. When you are connected to this type of network, the button’s label displays as the name of the cellular network to which you are connected. Otherwise, it may read “Connect with eSIM.”
You click the left side of the Cellular split button to toggle cellular connectivity on and off. And you click the right side to access a few options related to this unique type of connection.
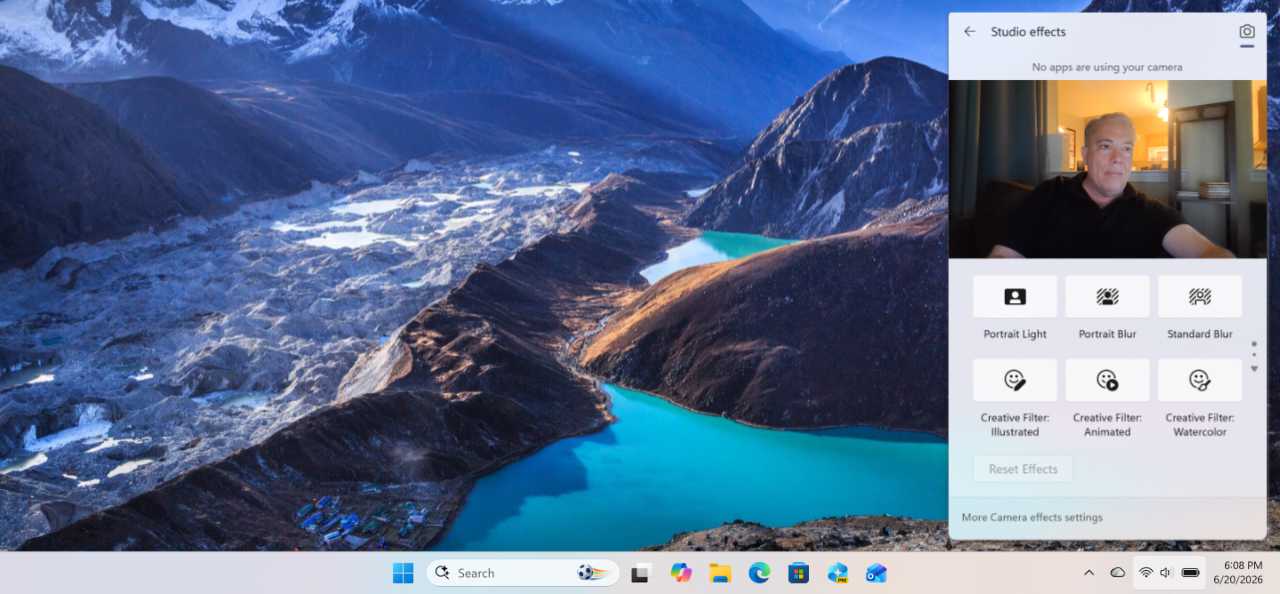
Studio effects
This button appears if your PC supports any of the Windows Studio Effects set of local AI-based camera and audio enhancements. When you click it, it displays a unique Studio effects page with camera controls, a camera preview, a scrollable grid of the available effects (which uses the same pips control as the quick access button area in the main Quick settings interface) that you can enable on the fly, and a “More Camera effects settings” link that opens the Settings app navigated to Bluetooth & devices > Cameras > the default camera.
Learn more: You can learn more about these features, their hardware requirements, and how you can configure each in the Windows Studio Effects chapter.
Airplane mode
This button acts as a toggle: When enabled, it will disable any wireless radios in your PC, including Wi-Fi, Bluetooth, and, if available, cellular broadband.
It’s not all or nothing. While your PC is in Airplane mode, you can individually enable any or all of the wireless radios in your PC. For example, you may still wish to use Bluetooth headphones while in Airplane mode while leaving Wi-Fi disabled. However you configure it, Airplane mode will remember, so the next time you toggle it on, it will leave whichever wireless radios you previously used in Airplane mode enabled going forward.
Energy saver
This button toggles the Windows 11 feature Energy saver on and off. When enabled, Windows 11 will limit background activities and notifications while dimming the screen to extend battery life.
Tip: By default, Energy saver is configured to turn on automatically when the PC’s battery life reaches 30 percent. This seems aggressive to me, so I usually configure it to come on when the battery reaches 10 percent instead. You can view this feature and change the configuration if desired by right-clicking the Energy saver quick setting button and choosing “Go to Settings.” The Settings app will open and navigate to System > Power & battery page, where you will find an “Energy saver” section.
Accessibility
When clicked, this button displays an Accessibility page that lists several accessibility features organized by Vision, Hearing, and Motor and Mobility categories. You can toggle any of these features on or off directly from this page without having to access Accessibility settings in the Settings app. The “More Accessibility settings” link at the bottom of the page will open Accessibility settings so you can access and configure these and other accessibility features.
Live captions
This button toggles Live captions on and off so you can get on-screen captions and, if enabled, live language translations, on the fly for any audio or video content playing on your PC.
Tip: Live captions appears as a pane at the top of the screen by default, but you can configure this feature directly from the pane and in the Settings app by navigating to Accessibility > Captions.
Night light
This button toggles Night light on and off. When enabled, Night light reduces the amount of cold blue light emitted by your PC’s display while amping up the warmer colors, which reduces eye strain.
Learn more: Night light can be configured in Settings > System > Display> Night light. There, you can customize its warmth and configure this feature to turn on and off automatically on a schedule, for example between sunset and sunrise. It’s not a bad idea.
Mobile hotspot
This button toggles the Windows 11 Mobile hotspot feature on and of. Mobile hotspots lets lets you share your Wi-Fi connection with up to 8 other devices. When it’s enabled, the Mobile hotspot button’s label displays the number of connections (like 1/8) and the name of your Wi-Fi network.

Learn more: You should configure Mobile hotspot before you enable it here. You can learn how in the Mobile Hotspot chapter.
Nearby sharing
This button toggles the Nearby sharing feature in Windows 11 on and off. When enabled, you can share share documents, photos, and other files with other Windows 11-based PCs on the same network using File Explorer.
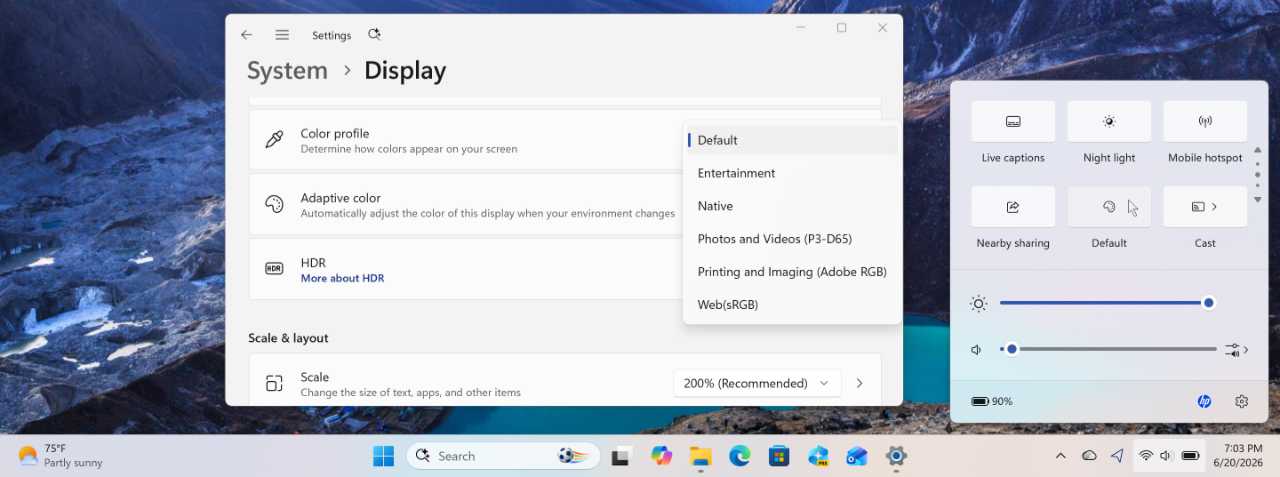
Color profile
If your PC has two or more color profiles installed, you will see a Color profile quick settings button, though it will never see that name in its label. Instead, the Color profile button will display as the currently-selected color profile. Each time you click this button, the color profile changes to the next color profile.
Cast
This button displays the Cast page when clicked, providing a way to connect to an available wireless display–including many modern smart TVs–using a Wi-Fi-based technology called Miracast. To connect to a wireless display, click it in the list. To disconnect from a wireless display, open the Cast pane and click the Disconnect button.

Keyboard shortcut: You can display this interface directly by typing Windows key + K at any time.
Learn more: I describe wireless display configuration in more detail in the Displays chapter.
Project
This button displays the Project page so you can configure how Windows 11 uses one or more secondary displays. By default, Windows 11 configures external displays to duplicate the primary display when connected, but this is rarely ideal. You can use this pane to extend the desktop–to use both displays, each with its own desktop–or to use only one of the displays.
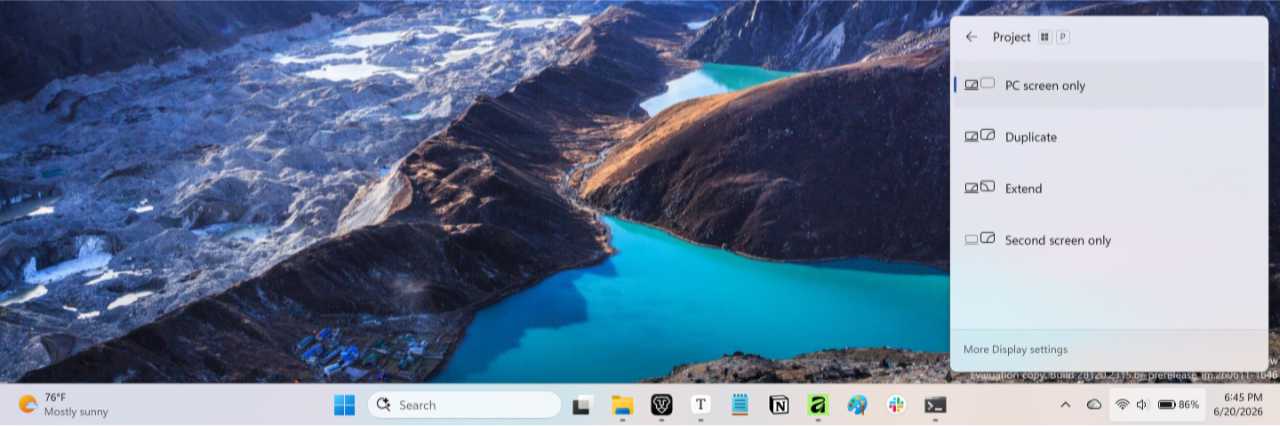
Keyboard shortcut: You can display this interface directly by typing Windows key + P at any time.
Learn more: You can learn more about secondary displays and the Project pane in the Displays chapter.
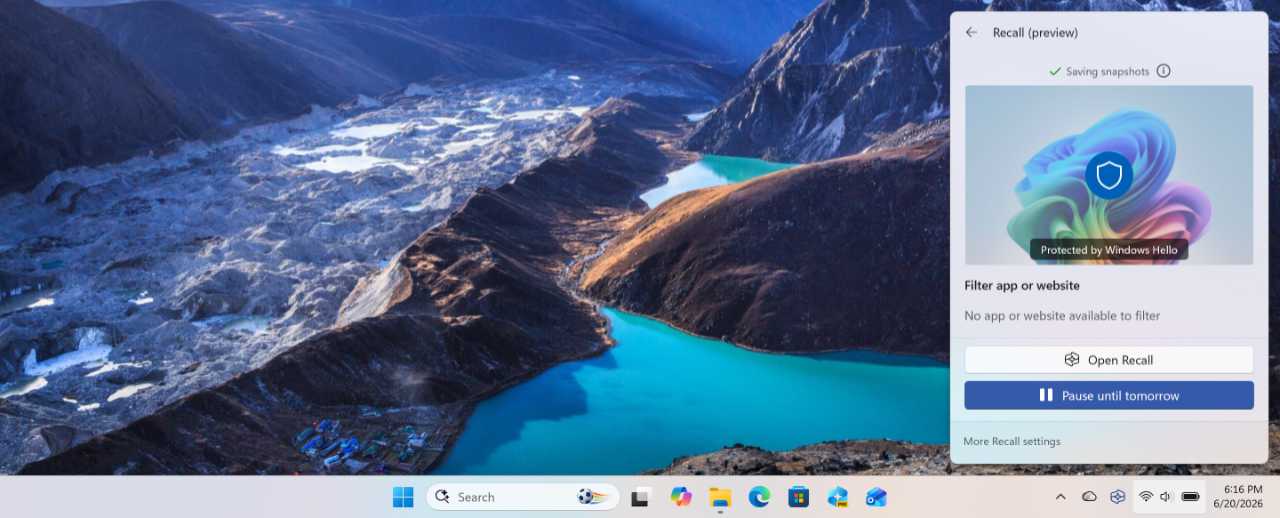
Recall
This button appears only if you have a Copilot+ PC. It provides a handy front-end to Recall so you can preview available snapshots, open the Recall app, or access Recall settings in the Settings app.
Shared audio
New to 2026, Windows 11 supports Shared audio, a way to play the same audio output to two compatible Bluetooth LE headphones, earbuds, hearing aids, or similar simultaneously. You can toggle this feature on using the “Shared audio” quick setting button, which only appears in Quick settings if it’s supported by your PC.
Tip: Unfortunately, Share audio also requires a Copilot+ PC, which can limit its availability.
When you click “Shared audio,” the Shared audio interface appears and lists the compatible Bluetooth audio devices that are paired with your PC.
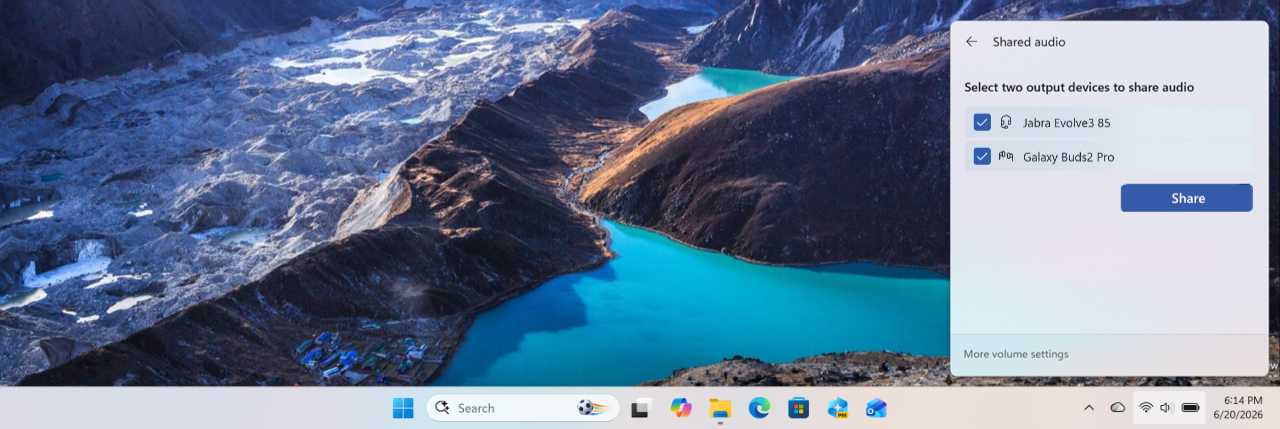
Select the two you wish to use and click “Share” to get started.
Rotation lock
This button appears if you have a tablet or 2-in-1/convertible PC that supports display rotation. When toggled on, it prevents the PC from rotating away from its current orientation, which can be Landscape, Portrait, Landscape (flipped), or Portrait (flipped).
Tip: You can manually configure a display orientation in the Settings app: Navigation to System > Display and locate “Display orientation” in the “Scale & layout” section of that page.
Brightness and Volume
The Brightness and Volume sliders below the quick settings buttons grid are straightforward: You use them to granularly adjust the display brightness and audio volume, respectively, between 0 and 100 percent. You can also click the icon to the left of the Volume slide to toggle Volume mute on and off.
Quick settings includes a “Brightness” slider you can use to control the brightness of the display.
Tip: Laptops and other portable PCs typically include dedicated keys in the top function row of the keyboard for increasing or decreasing screen brightness and for Volume up, Volume down, and Mute, and these keys are often easier and quicker to use.
Sound output
Windows 11 includes a useful “Sound output” interface that lets you switch between available audio output devices (like speakers, headphones, and the Shared audio feature noted above), spatial sound capabilities if available, and a volume mixer that lets you granularly adjust volume on an app-by-app basis.

You can access this scrollable interface by opening Quick settings and clicking the “Select a sound output” button to the right of the Volume slider.
Keyboard shortcut: You can also display “Sound output” directly at any time by typing Winkey + Ctrl + V.
Tip: This interface is a miniature version of the Settings page found by navigating to System > Sound > Volume mixer. They’re nearly identical, though the Settings version includes a useful “Reset sound devices and volumes for all apps to the recommended defaults” option that is missing from Sound output.

Gain unlimited access to Premium articles.
With technology shaping our everyday lives, how could we not dig deeper?
Thurrott Premium delivers an honest and thorough perspective about the technologies we use and rely on everyday. Discover deeper content as a Premium member.