Quick Settings
- Paul Thurrott
- Oct 03, 2022
-
1
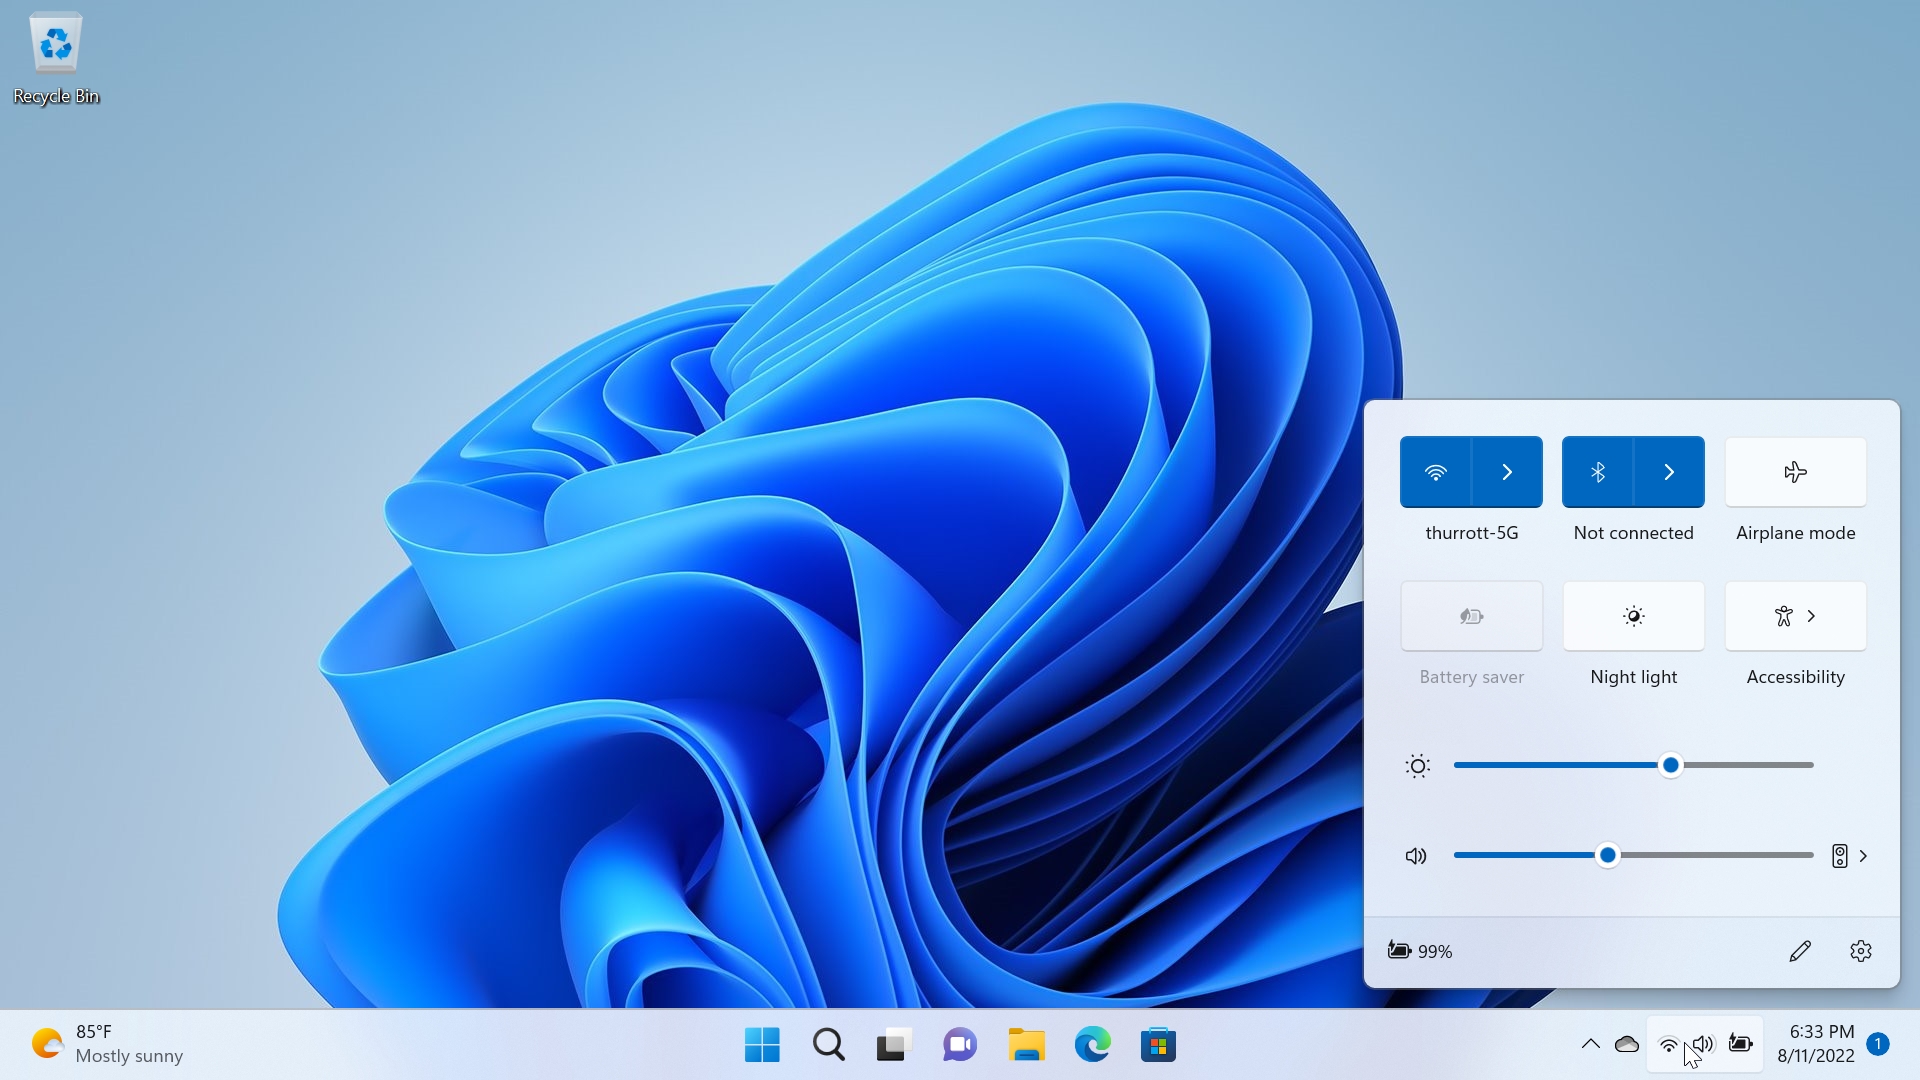
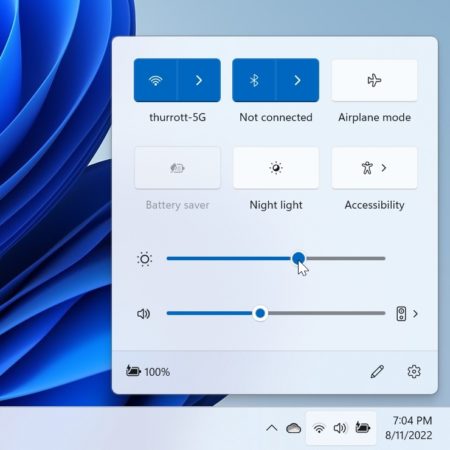
Quick settings is a new interface in Windows 11 that appears when you select the Network, Volume, or Power buttons in the Taskbar’s system tray. As its name suggests, Quick settings provides quick access to commonly-needed system settings like Wi-Fi, Bluetooth, Airplane mode, Battery saver, and more.
You can also open Quick settings by typing WINKEY + A.
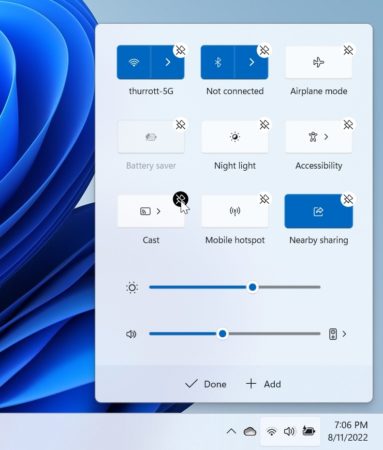
Quick settings displays a grid of quick setting buttons, brightness and volume sliders, a battery life display, and buttons to edit which quick settings buttons appear and access the full Settings app.
Where did it go?
If you are familiar with Windows 10, you may recognize Quick settings as the replacement for the quick actions area of the Action Center interface from that release. Windows 11 no longer includes an Action Center. Instead, its functionality is split between the Notification pane—which can be accessed by selecting the time/date display in the system tray—and Quick settings.
Quickly access commonly-needed system settings
Using the grid of quick settings buttons at the top of Quick settings, you can easily access certain commonly-needed system settings.
Quick settings displays six quick settings buttons by default. But you can remove any you don’t need and add additional quick settings if desired. This is described later in the chapter.
Quickly find and connect to a Wi-Fi network
The Wi-Fi quick setting is used to toggle Wi-Fi on or off and to manage available Wi-Fi networks. When you are connected to a Wi-Fi network, the name of that network will appear below the Wi-Fi quick setting button.
If Wi-Fi is disabled, the button will simply be titled as “Wi-Fi.” And if Wi-Fi is enabled but you are not connected to a network, it will be titled “Available.”
Wi-Fi quick setting is a split button, a special type of button that has two sides, each of which works like a unique button of its own. You can select the left side of this button to toggle Wi-Fi on and off. Or you can click the right side to see which Wi-Fi networks are available, connect to one, or disconnect from the currently-used Wi-Fi network.
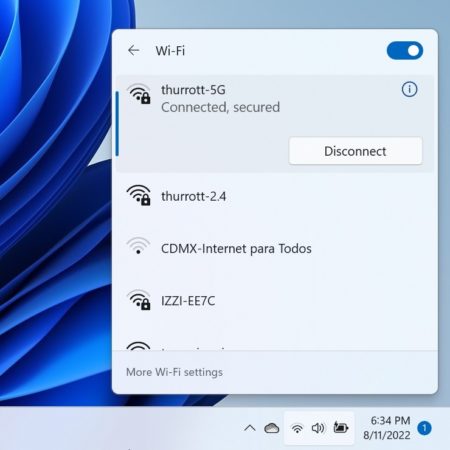
To access more Wi-Fi settings, open Quick settings, select the right side of the Wi-Fi quick setting button, and then select “More Wi-Fi settings.”
Quickly find and connect to a Bluetooth device
Bluetooth quick setting is used to toggle Bluetooth on or off and to manage available Bluetooth devices. When you are connected to a Bluetooth device, the name of that device will appear below the Bluetooth quick setting button.
If Bluetooth is disabled, the button will simply be titled as “Bluetooth.” And if Bluetooth is enabled but you are not connected to a device, it will be titled “Not connected.”
As with the Wi-Fi quick setting button, Bluetooth quick setting is a split button, a special type of button that has two sides, each of which works like a unique button of its own. You can select the left side of this button to toggle Bluetooth on and off. Or you can click the right side to see which Bluetooth devices are* paired* and which are available (ready to pair).
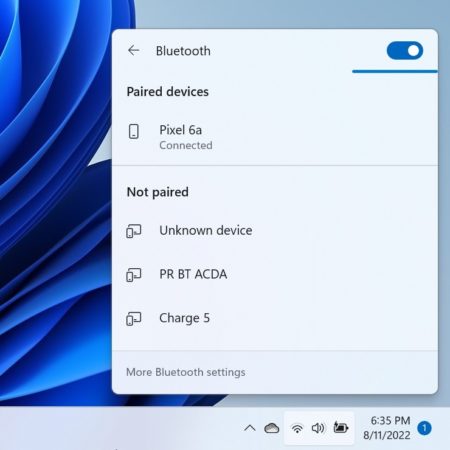
You can pair your PC with a Bluetooth device by selecting it in the list under “Not paired.” What you can’t do here is remove a paired device. To do that, you will need to open the Settings app. To do so, open Quick settings, select the right side of the Bluetooth quick setting button, and then select “More Bluetooth settings.”
Quickly toggle Airplane mode
The Airplane mode quick setting acts as a toggle: when enabled, it will disable any wireless radios in your PC, including Wi-Fi, Bluetooth, and, if available, cellular broadband.
While in Airplane mode, you can individually enable any or all of the wireless radios in your PC. For example, you may still wish to use Bluetooth headphones while in Airplane mode. And new to Windows 11, Airplane mode will remember that, so the next time you enable Airplane mode, it will leave whichever wireless radios you previously used in Airplane mode enabled going forward.
You don’t have to configure this per se, simply enable whichever wireless radios you want to use while in Airplane mode. But you can configure this feature if you’d like. To do so, open Quick settings, right-click the Airplane mode quick settings button, and choose “Go to Settings.” The Settings app will open with Airplane mode settings displayed.
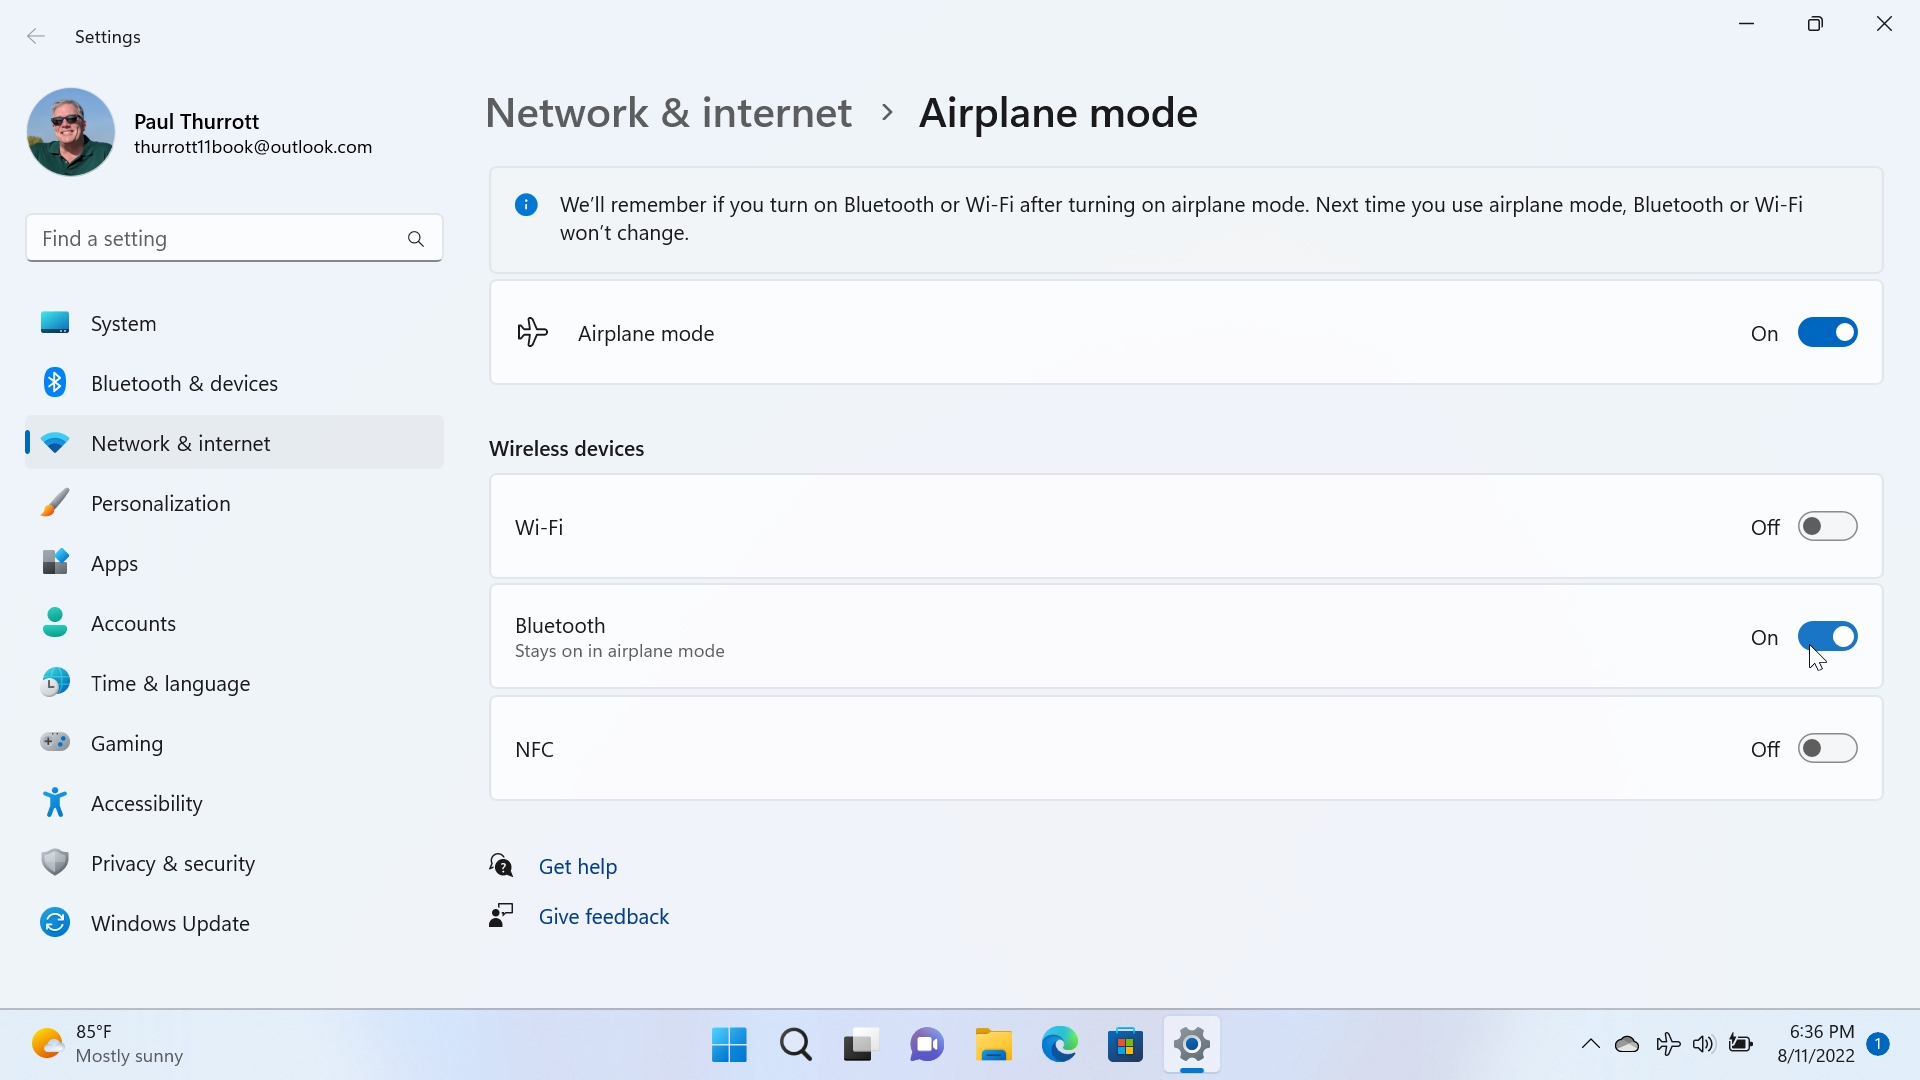
You can also just open Settings (WINKEY + I) and navigate to Network & internet > Airplane mode.
Here, enable any wireless radios you wish to keep enabled while in Airplane mode. If you previously enabled one or more while in Airplane mode, they will be enabled here as well.
Quickly toggle Battery saver
The Battery saver quick setting acts as a toggle: when enabled, it turns on Battery saver, a Windows 11 feature that limits background activities and notifications and dims the screen to extend your portable PC’s battery life.
Battery saver is configured to enable automatically when the PC’s battery life reaches 20 percent. To configure this feature’s behavior, open Quick settings, right-click the Battery saver quick settings button, and choose “Go to Settings.” The Settings app will open with Power & battery settings displayed and the Battery saver’s “Turn on now” button selected.
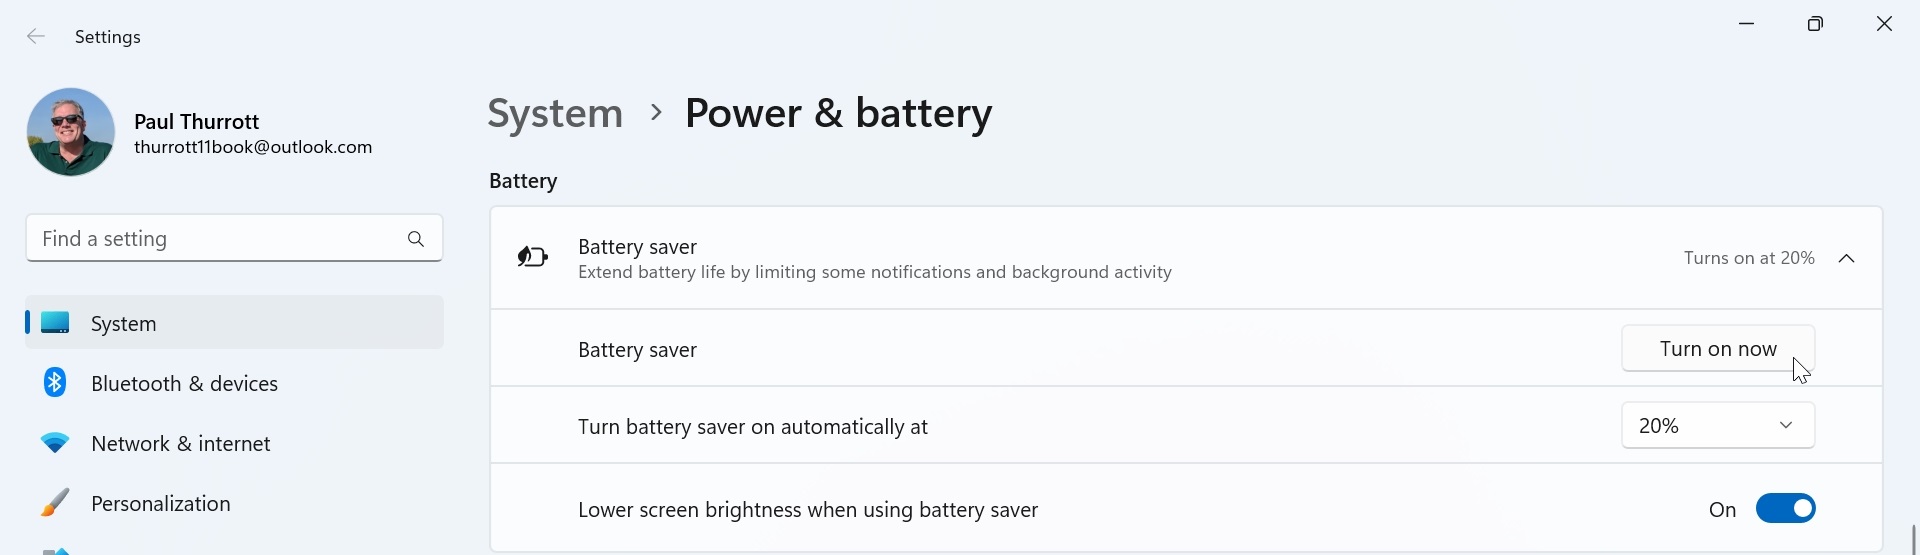
You can also just open Settings (WINKEY + I) and navigate to System > Power & battery.
Quickly toggle Night light
The Night light quick setting acts as a toggle: when enabled, it turns on Night light, a Windows 11 feature that reduces the amount of cold blue light emitted by your PC’s display while amping up the warmer colors, a change that will allegedly help you sleep better after using the PC at night.
Night light is useful enough that you may wish to configure it to come on automatically every night. To do so, open Quick settings, right-click the Night light quick settings button, and choose “Go to Settings.” The Settings app will open with Display settings displayed and the Night light setting’s “Off” button selected. Select Night light to navigate to Night light settings.
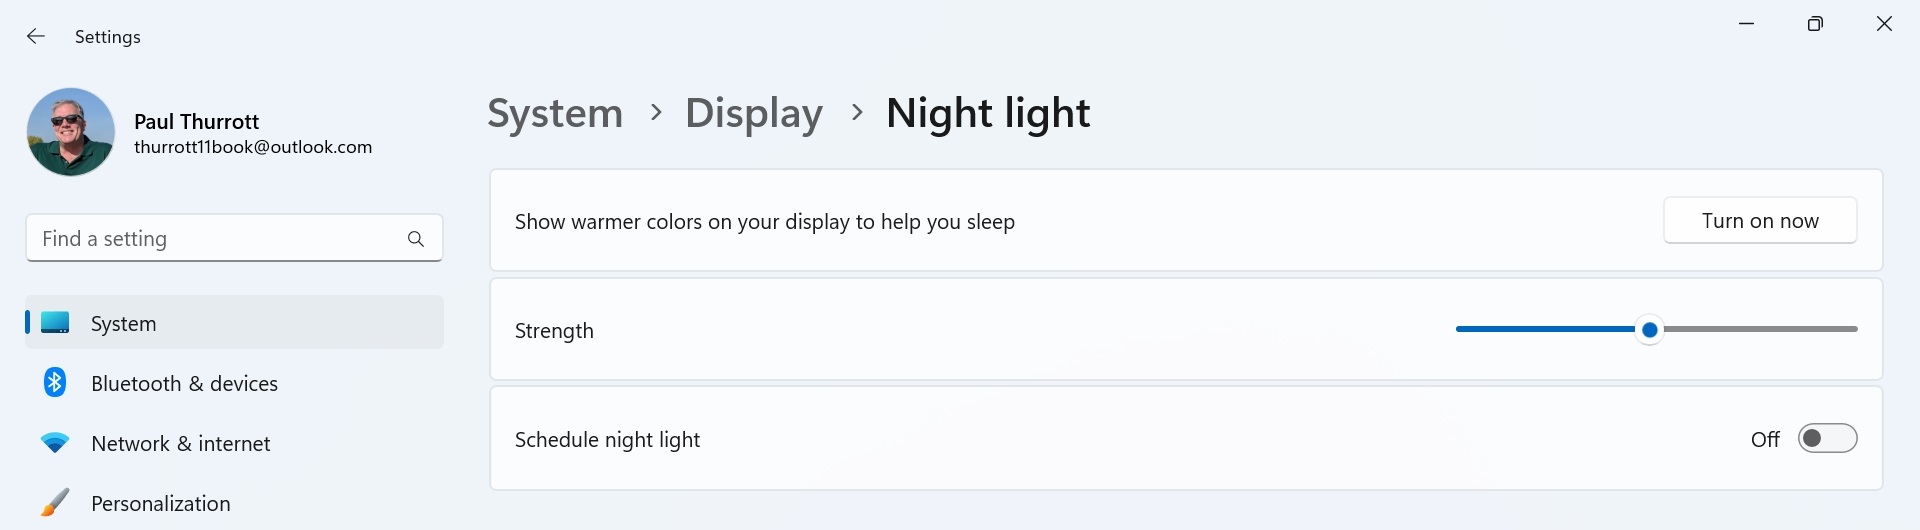
You can also just open Settings (WINKEY + I) and navigate to System > Display > Night light.
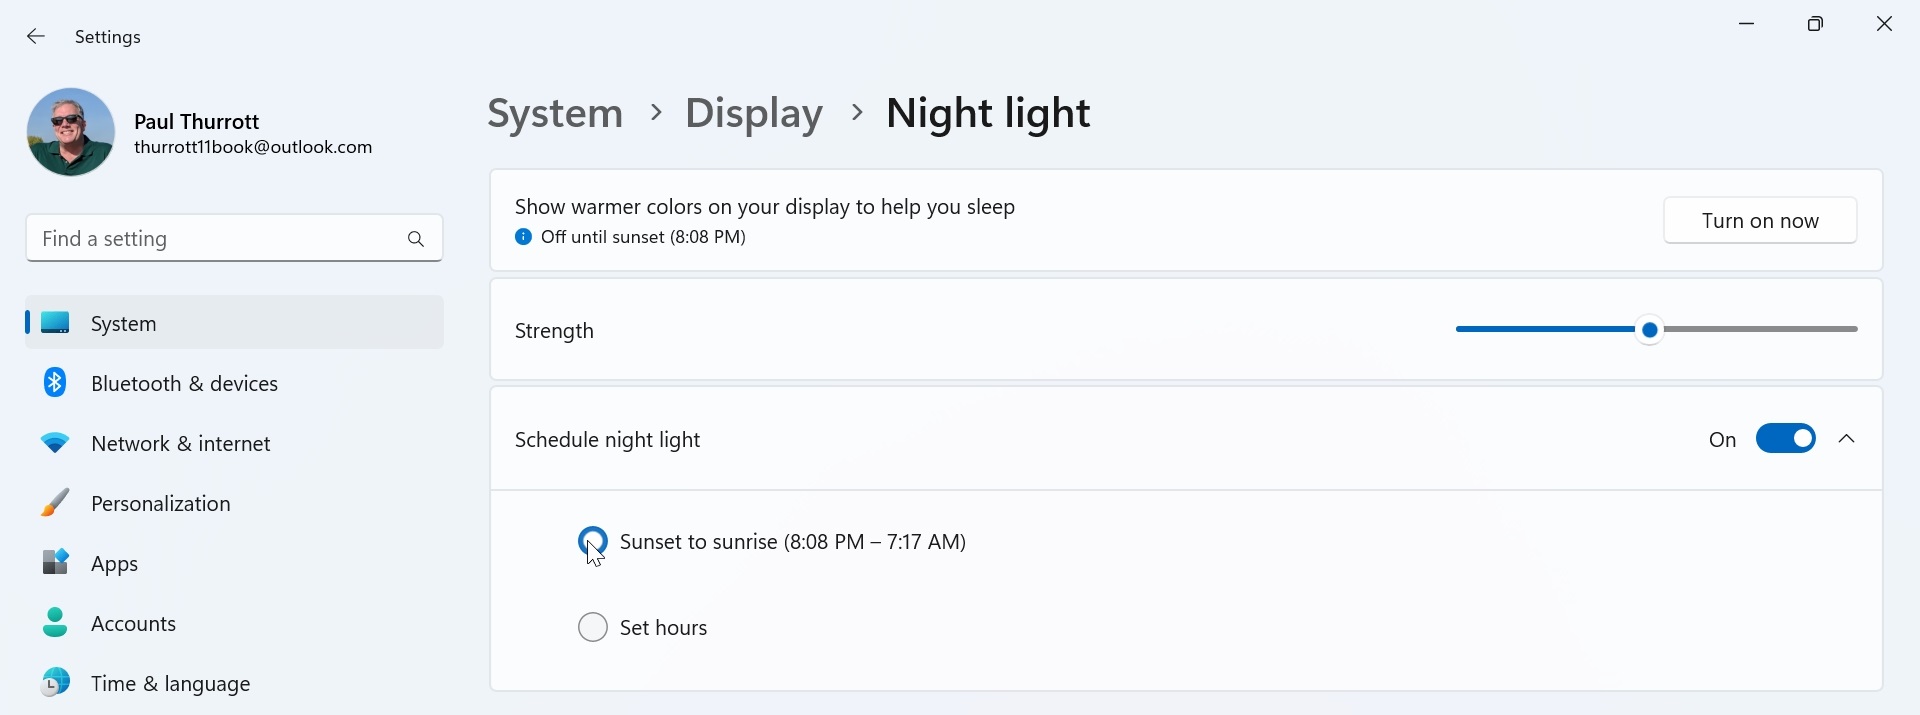
Here, you can use the Strength slide to determine how warm the display colors are when Night light is enabled—it will preview the change if you select or use the Strength slider—and use the Schedule night light setting to set up a schedule. The default is Sunset to sunrise, but you can configure it to whatever hours you prefer.
Quickly toggle some of Windows 11’s accessibility features
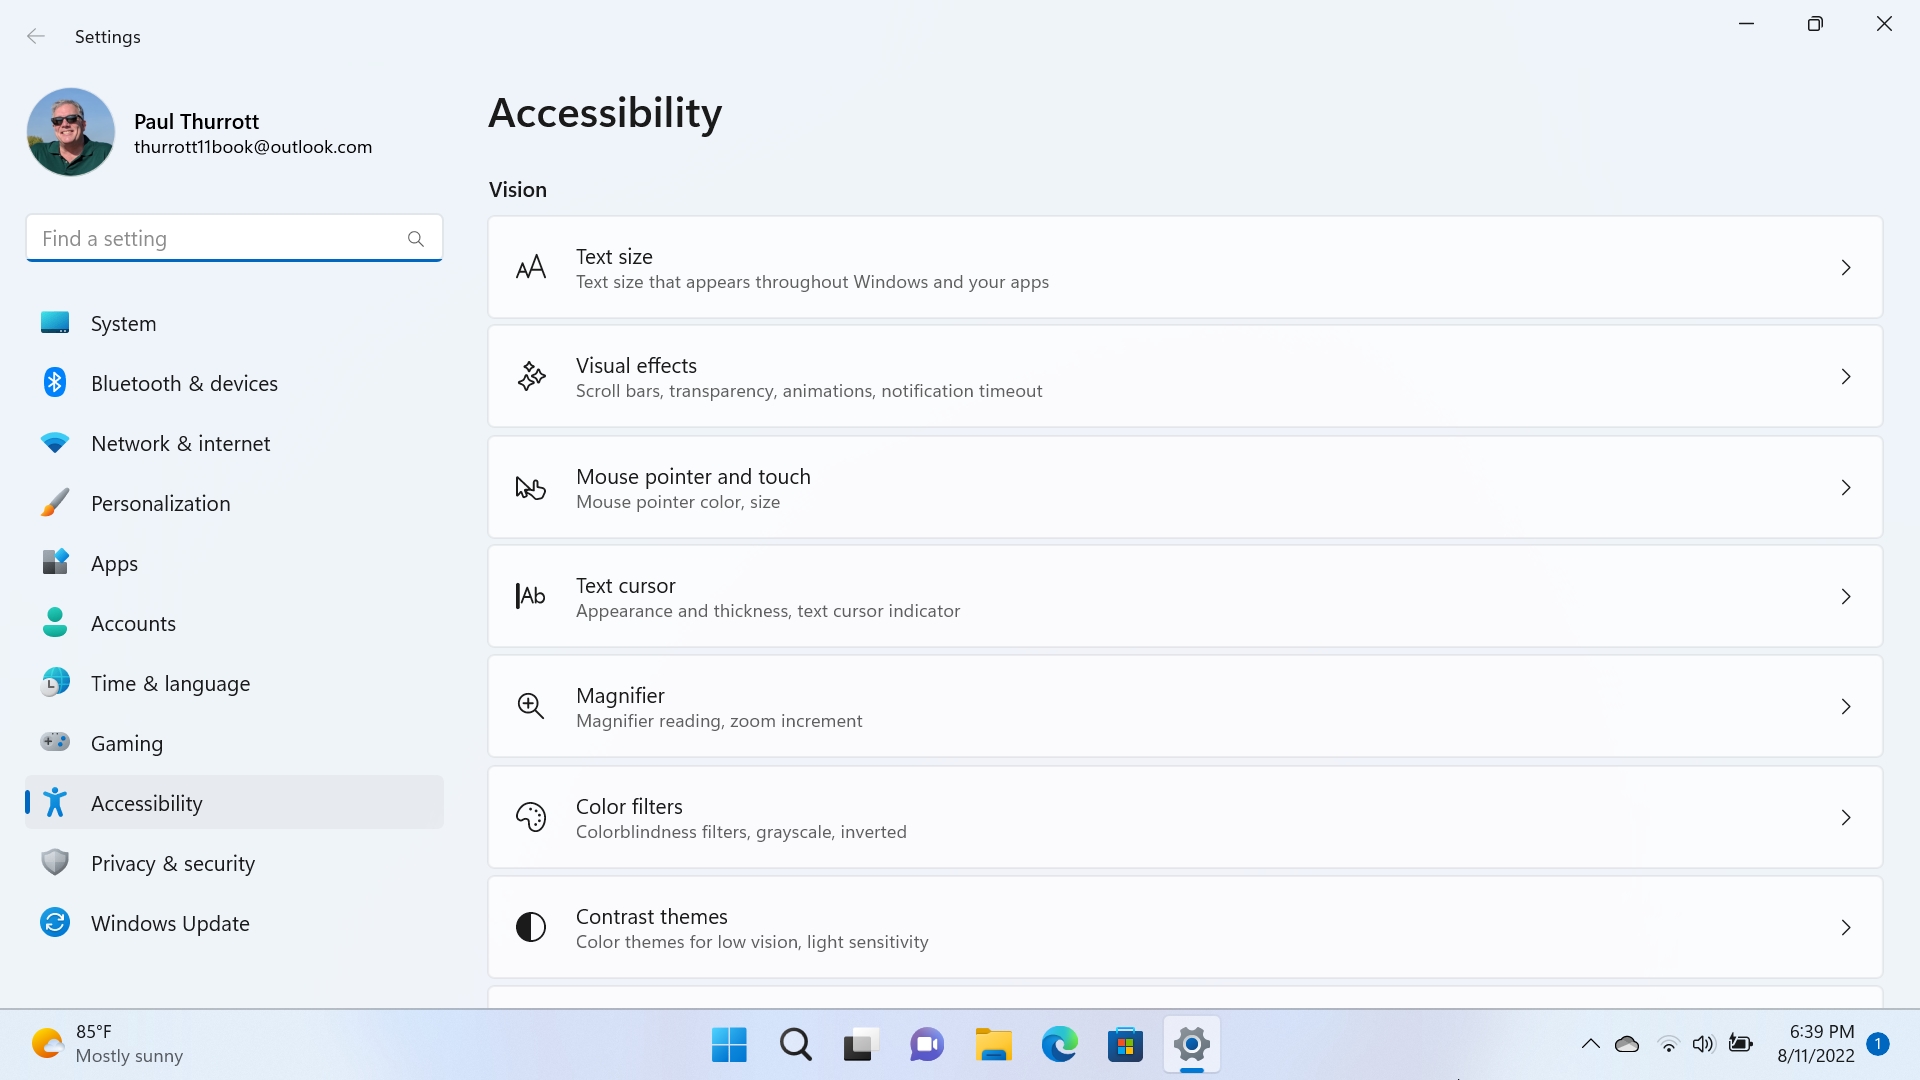
The Accessibility quick setting button is used to display the Accessibility pane, which lets you quickly toggle several key Accessibility features—Magnifier, Color filters, Narrator, Mono audio, and Sticky keys—on and off.
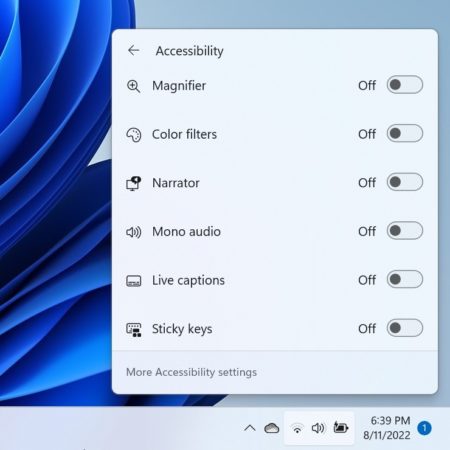
You can also quickly access Accessibility settings from this interface, which lets you configure any of Windows 11’s many accessibility features. To do so, open Quick settings, right-click the Accessibility quick settings button, and choose “Go to Settings.” The Settings app will open with Accessibility settings displayed.
Alternatively, open the Accessibility pane and select View Accessibility settings. Or, open Settings (WINKEY + I) and navigate to Accessibility.
Quickly access the Project pane
The Project quick setting button is used to display the Project pane, which lets you configure how Windows 11 uses an external display.

By default, Windows 11 configures external displays to duplicate the primary display when connected, but this is rarely ideal. You can use this pane to extend the desktop—to use both displays, each with its own desktop—or to use only one of the displays.
You can open the Project pane even more quickly by typing WINKEY + P.
Quickly cast to a wireless display
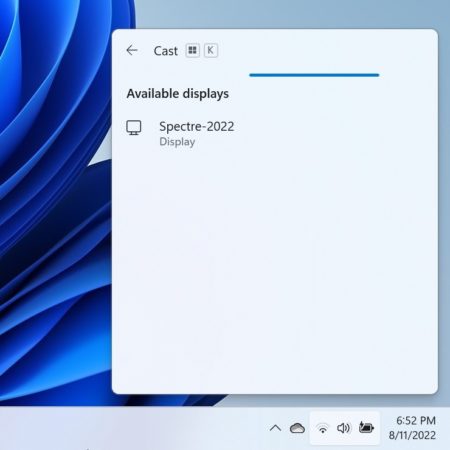
The Cast quick setting button is used to display the Cast pane, which lets you connect to an available wireless display—including many modern smart TVs—using a Wi-Fi-based technology called Miracast.
To view available wireless displays, open Quick settings and select the Cast quick setting button. The Cast pane appears and searches for available displays.
You can display the Cast pane even more quickly by typing WINKEY + K.
To connect to a wireless display, select it in the list. By default, Windows 11 will duplicate your PC’s primary display to the wireless display. But the Cast pane will now display other options so you can configure how the wireless display works.

Available options include:
Duplicate. This is the default connection type, where your PC’s primary display is duplicated on the wireless display.
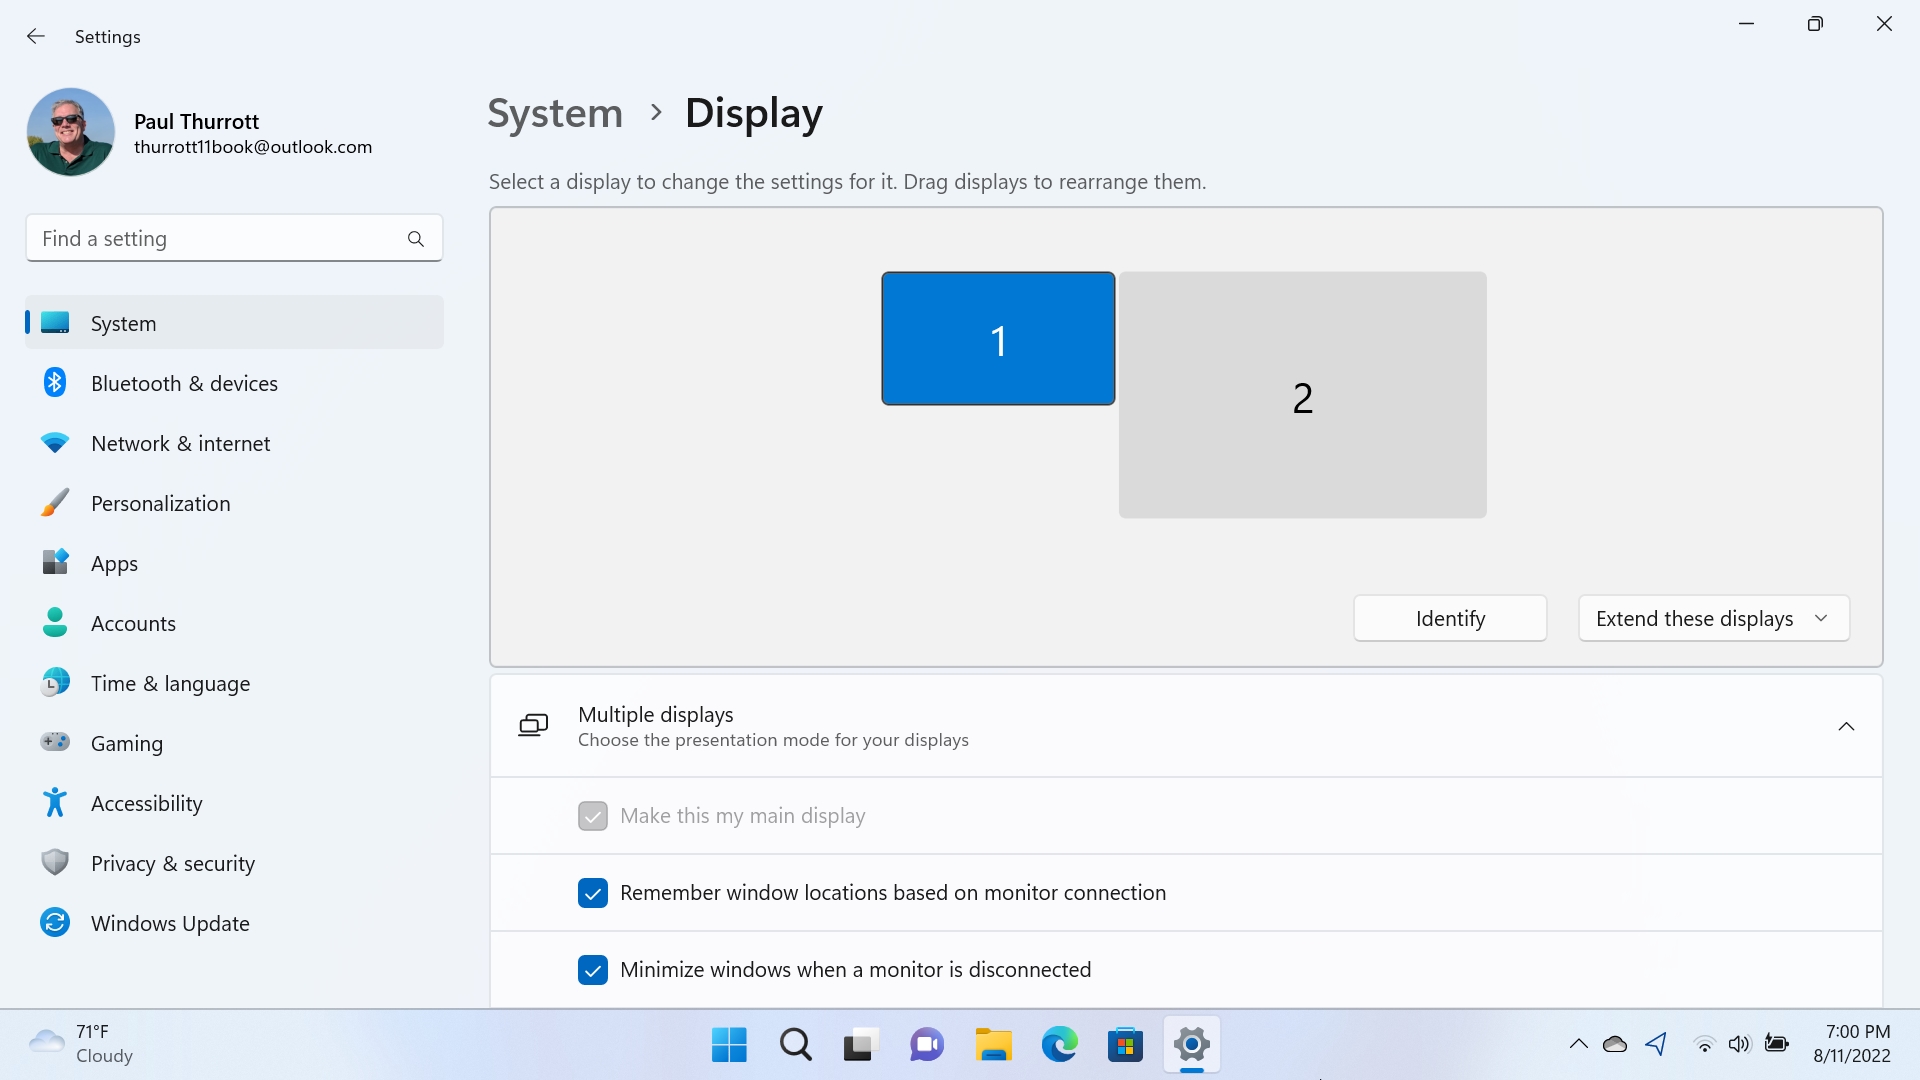
Extend. In this display mode, your PC’s display and the wireless display each show their own Desktop and can contain their own apps and other windows. And you can drag apps, windows, and other items between the two displays.
To manage this configuration, open Settings (WINKEY + I), navigate to System > Display, and then expand the multiple displays area.
Second screen only. In this display mode, your PC’s primary display is disabled and only the wireless display is used.
Allow mouse, keyboard, touch, and pen input from this device. Windows 11 allows you to configure your PC’s display as a wireless display that can be accessed from other computers and devices. When you connect to such a wireless display (which is really a PC), this option appears so you can use the wirelessly-connected PC’s input devices if desired.

To disconnect from a wireless display, open the Cast pane and select the Disconnect button.
Quickly toggle your mobile hotspot
Windows 11 provides a mobile hotspot feature that lets you share your Wi-Fi connection with other devices. You can toggle this hotspot on and off using the Mobile hotspot quick setting button.
That said, you will want to configure Mobile hotspot first. To do so, open Settings (WINKEY + I) and navigate to Network & internet > Mobile hotspot.
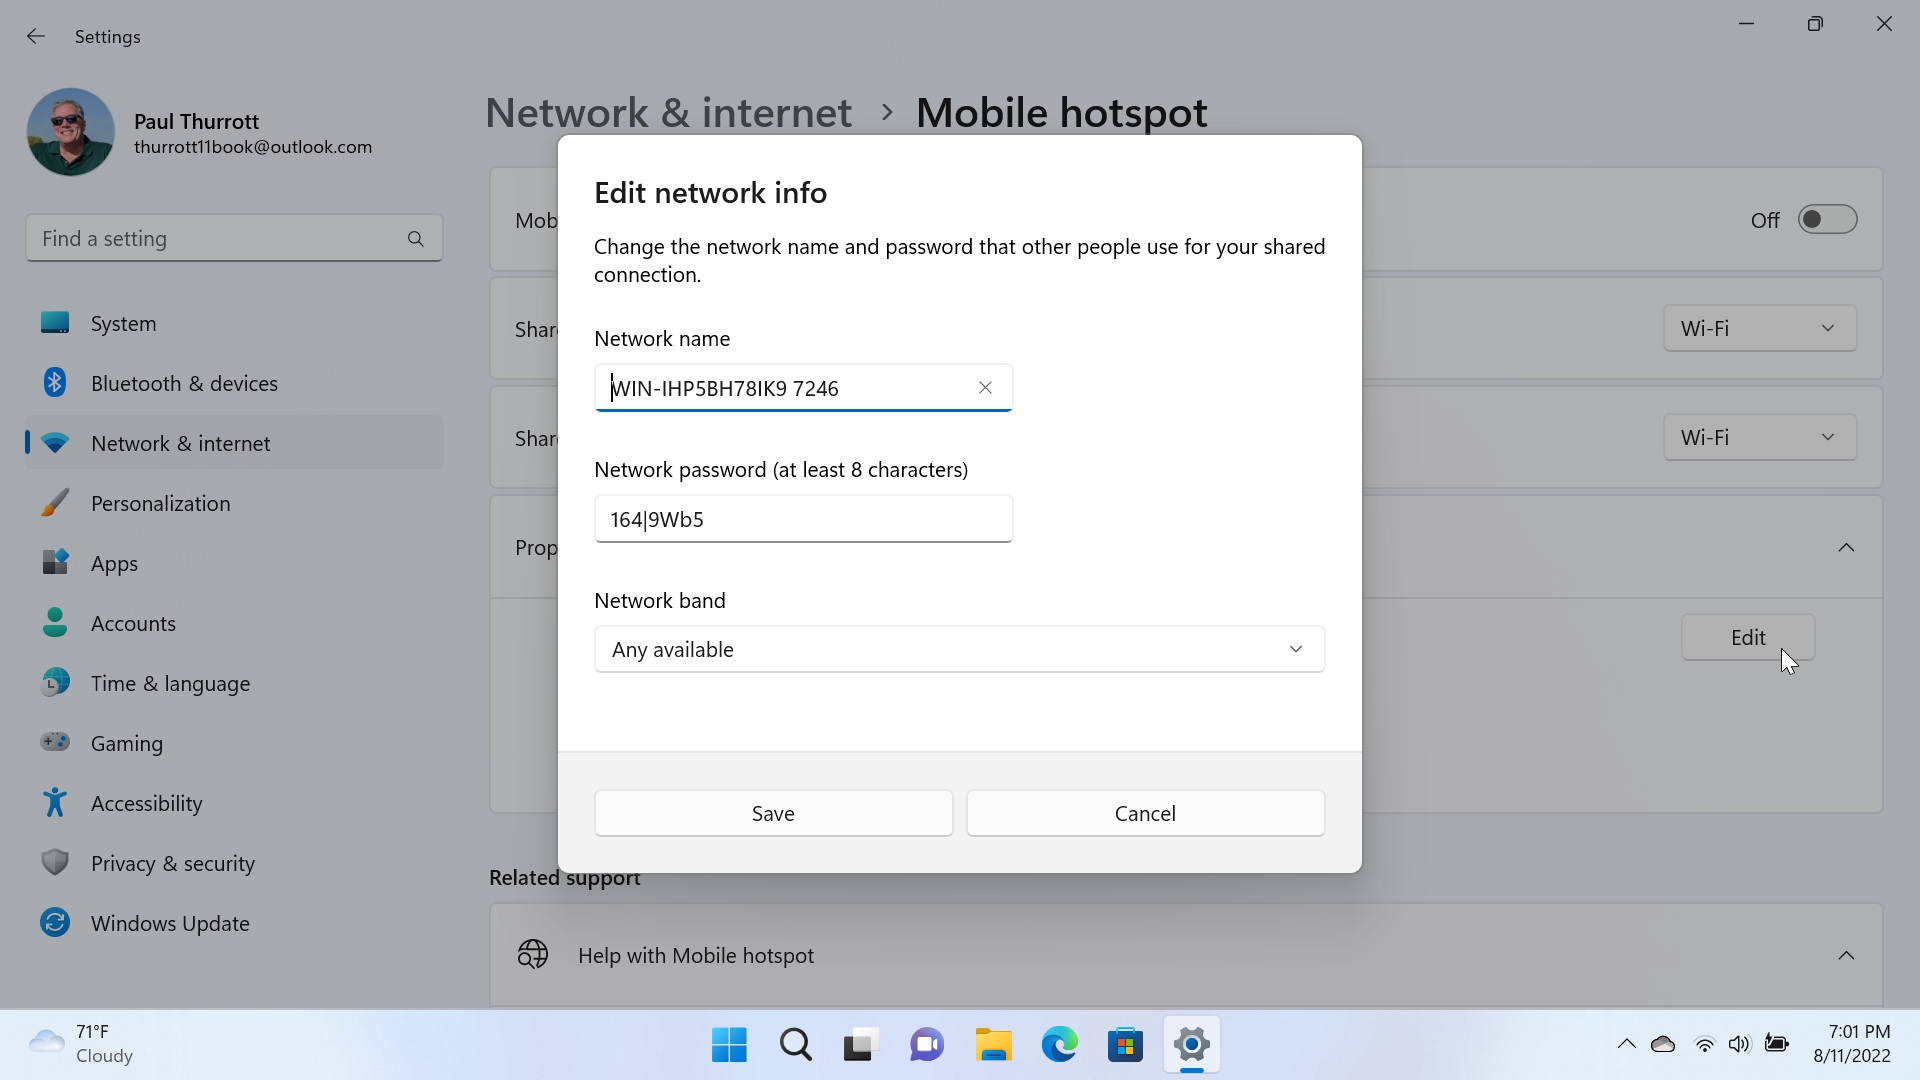
Here, you should click the Edit button in the Properties area to change the name and password (and, optionally, which Wi-Fi bands to use).
With that out of the way, you can quickly toggle your mobile hotspot from Quick settings. When enabled, the Mobile hotspot quick setting button’s title will display the name of the network and the number of connected devices.
Quickly share something with Nearby sharing
Windows 11 provides a feature called Nearby sharing that lets you use File Explorer to share documents, photos, and other files with other Windows 10- and 11-based PCs. You can also use Microsoft Edge to share website addresses with other Windows 10- and 11-based PCs.
When you toggle the Nearby share quick setting button to On, two things happen: Nearby share is enabled and its scope is configured to “Everyone nearby.” Then, you can use File Explorer or Microsoft Edge to share with any available PCs on the local Wi-Fi network.
Nearby share isn’t enabled by default and it’s not all that easy to use because both PCs need to be configured to use it. We discuss this feature in more detail in the Nearby Share chapter.
Quickly toggle your display’s rotation lock
If you have a tablet or convertible PC, you can use the Rotation lock quick settings button to prevent the display from rotating out of portrait mode if you rotate the PC in space. Curiously, this only works when the PC is in portrait mode. If it’s in the more typical landscape mode, Rotation lock is unavailable.
You can also toggle this setting in Display settings, though, again, it is only available when the PC is in portrait mode. To do so, rotate your PC’s display to portrait mode, open Quick settings, right-click the Rotation lock quick settings button, and choose “Go to Settings.” The Settings app will open with Display settings displayed and the Rotation lock’s On/Off switch selected.
Or, open Settings (WINKEY + I) and navigate to System > Display > Rotation lock.
Quickly adjust your PC’s screen brightness and volume
Using the two sliders in Quick settings, you can easily adjust your PC’s screen brightness and volume, respectively, using your mouse/touchpad, touch, or keyboard. Note that the Brightness slider isn’t available on all PCs.
Many portable PCs include dedicated keys on the keyboard for increasing or decreasing screen brightness and volume. This may be an easier and quicker way to do either.
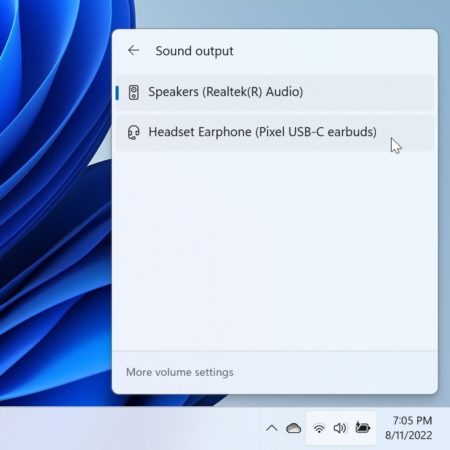
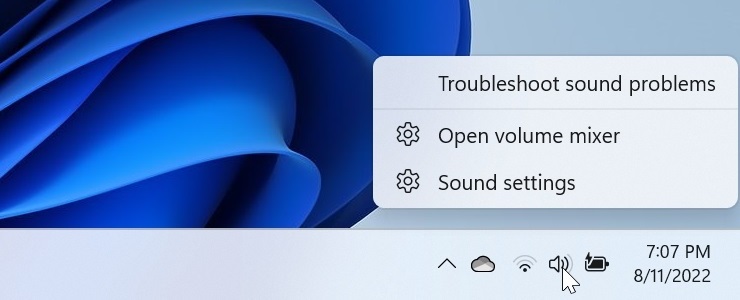
You can also use the volume slider to quickly switch to a different sound output device, if available. Just select the “Select a sound output” icon to the right of the slider. (It resembles a little speaker or headset.) Then you can choose from the available outputs.
Configure the quick settings buttons
By default, Quick settings displays six quick settings buttons. But you can arbitrarily add additional quick settings buttons—which will expand the height of the pane—or remove any buttons you don’t need. You can also reposition buttons within the quick settings grid.
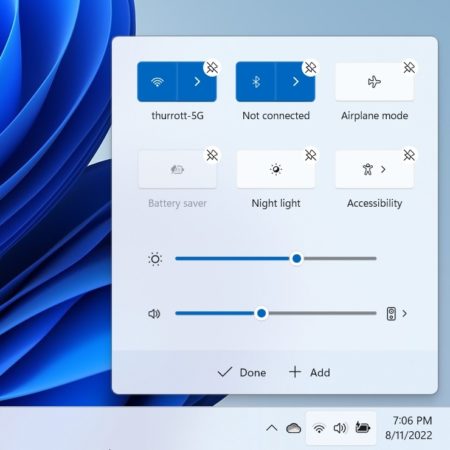
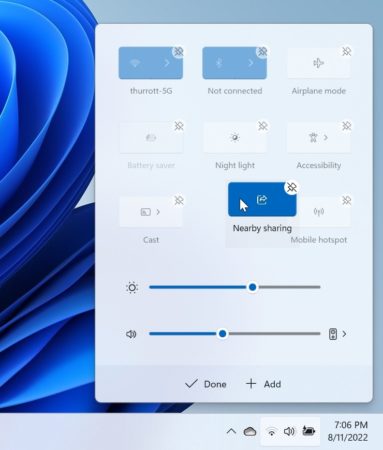
To do so, open Quick settings and select the Edit quick settings icon (it resembles a pencil). Quick settings enters an edit mode in which each of the available quick settings buttons displays an “Unpin” overlay and a new Add option is available.
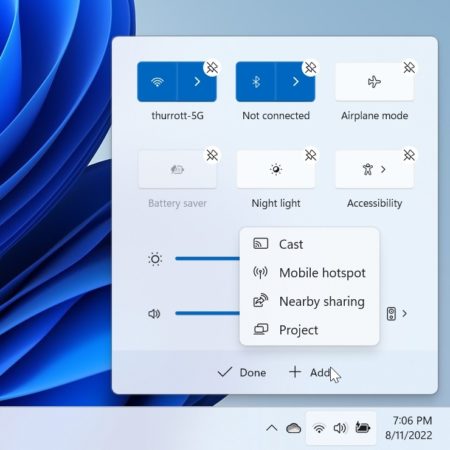
To add a new quick settings button, select Add and review the list of available choices. Then, select the button you would like to add.
To remove a quick settings button, select its Unpin overlay.
To reposition a quick settings button, select it in edit mode and drag it to a new location.
Open Settings
As you might expect, Quick settings also provides a way to open the Settings app. Just select the All settings button—it looks like a gear—in the lower right of the pane.
You can open Settings even more quickly by typing WINKEY + I at any time.
Directly access the Network, Volume, or Power settings
The Network, Volume, and Power icons in the system tray are unique in Windows 11 because they act like a single icon that opens Quick settings when you select any of them. But these icons behave more typically when you right-click them. That is, each displays a small context menu that is relevant only to the icon you right-clicked.

Gain unlimited access to Premium articles.
With technology shaping our everyday lives, how could we not dig deeper?
Thurrott Premium delivers an honest and thorough perspective about the technologies we use and rely on everyday. Discover deeper content as a Premium member.