Customize the Display (24H2)
- Paul Thurrott
- Oct 14, 2024
-
0
Windows 11 usually does a good job of configuring your PC to use its display at its native resolution and an optimal display scaling value based on its physical size and other factors. But you should still review these settings and ensure that they and other display-related options are configured to your liking.
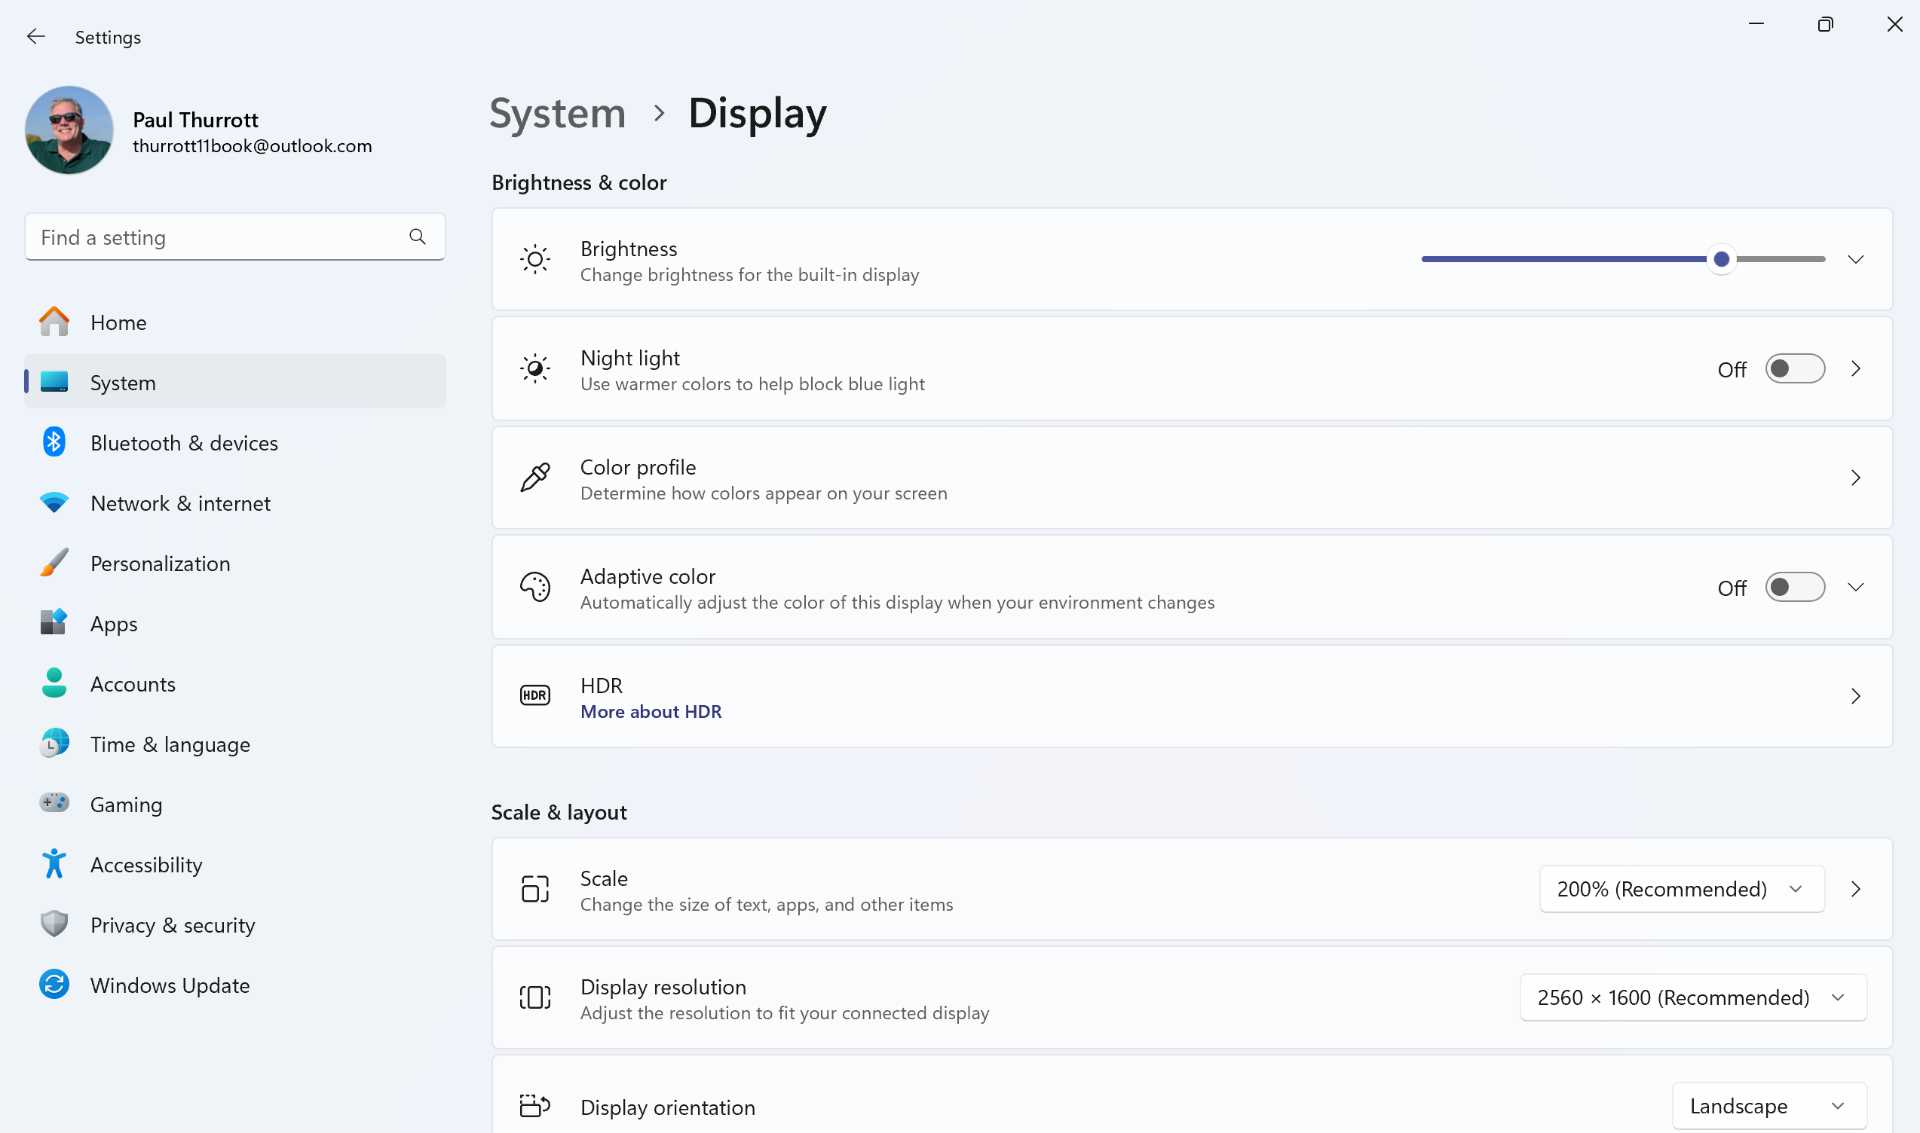
Most of this work occurs in Display settings, which you can find by opening the Settings app and navigating to System > Display.
There’s a quicker way to get to Display settings: Just right-click the Desktop and choose “Display settings” from the context menu that appears.
Configure the display resolution to be the native resolution
Display settings lets you choose a resolution for your display, with the native resolution usually being the optimal choice (and the highest resolution it offers). You can find this by opening Display settings and viewing the “Display resolution” setting in the “Scale & layout” section.
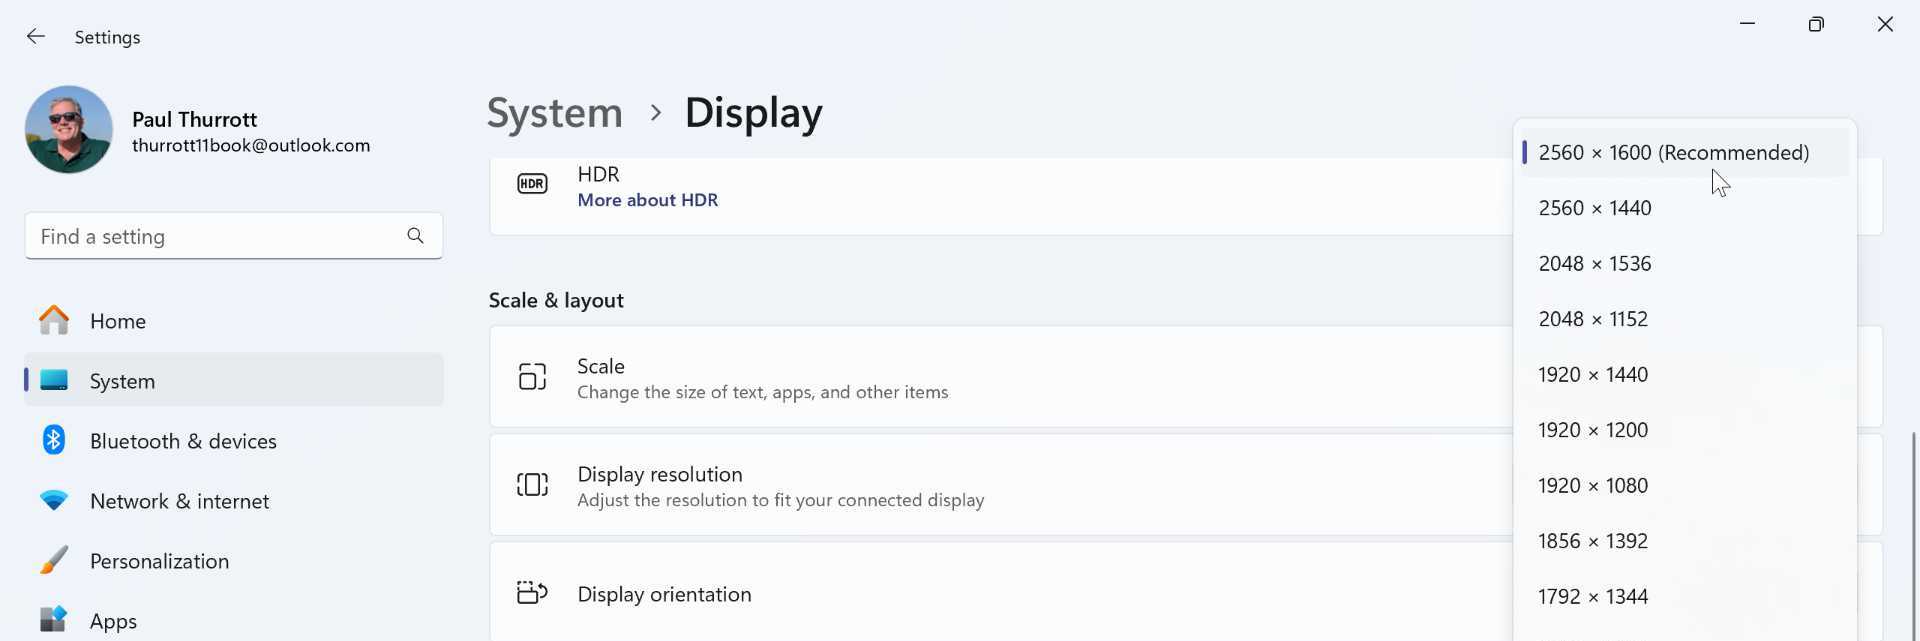
Check to make sure this setting is set to your display’s native resolution–it’s marked with “(Recommended)”–because lower resolution settings will make everything on-screen look blurry.
If you find user interface elements to be too small (or too big) at your display’s native resolution, you can make them bigger (or smaller) using the display scaling and text sizing settings noted below.
Configure the display scaling
Once the display is set properly to its native resolution, you can use the display scaling capabilities in Windows 11–also found under “Scale & layout” in Display settings–to scale all the user interface elements in the system so that they are sized as you prefer.
Here, for example, you can see the impact of switching a 14-inch Full HD+ display with a resolution of 1920 x 1200 from the default display scaling of 150 percent down to 100 percent: The on-screen user interface items, including the text, are all much smaller now.
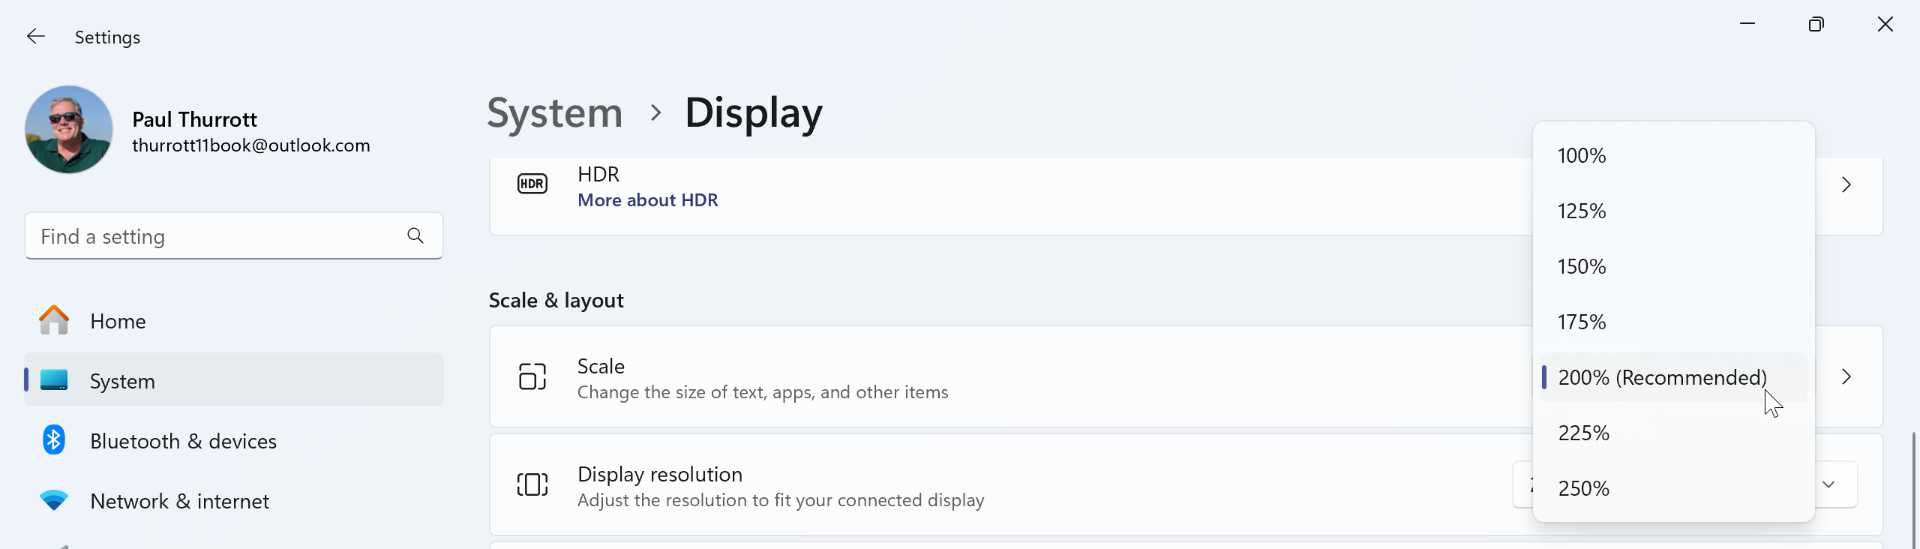
The scaling that Windows recommends is denoted with the text “(Recommended).” But feel free to change this setting to whichever value you prefer: Unlike with the resolution setting, none of the Scale choices will make the display look blurry. This is all about your eye comfort.
You can also configure a custom scaling size between 100 and 500 percent. This is not generally recommended because these custom sizes can sometimes cut off the display of some user interface elements. But if you’d like to give it a shot, select the “Scale” setting in Display settings (not the size drop-down but the setting itself) to navigate to the Custom scaling page.
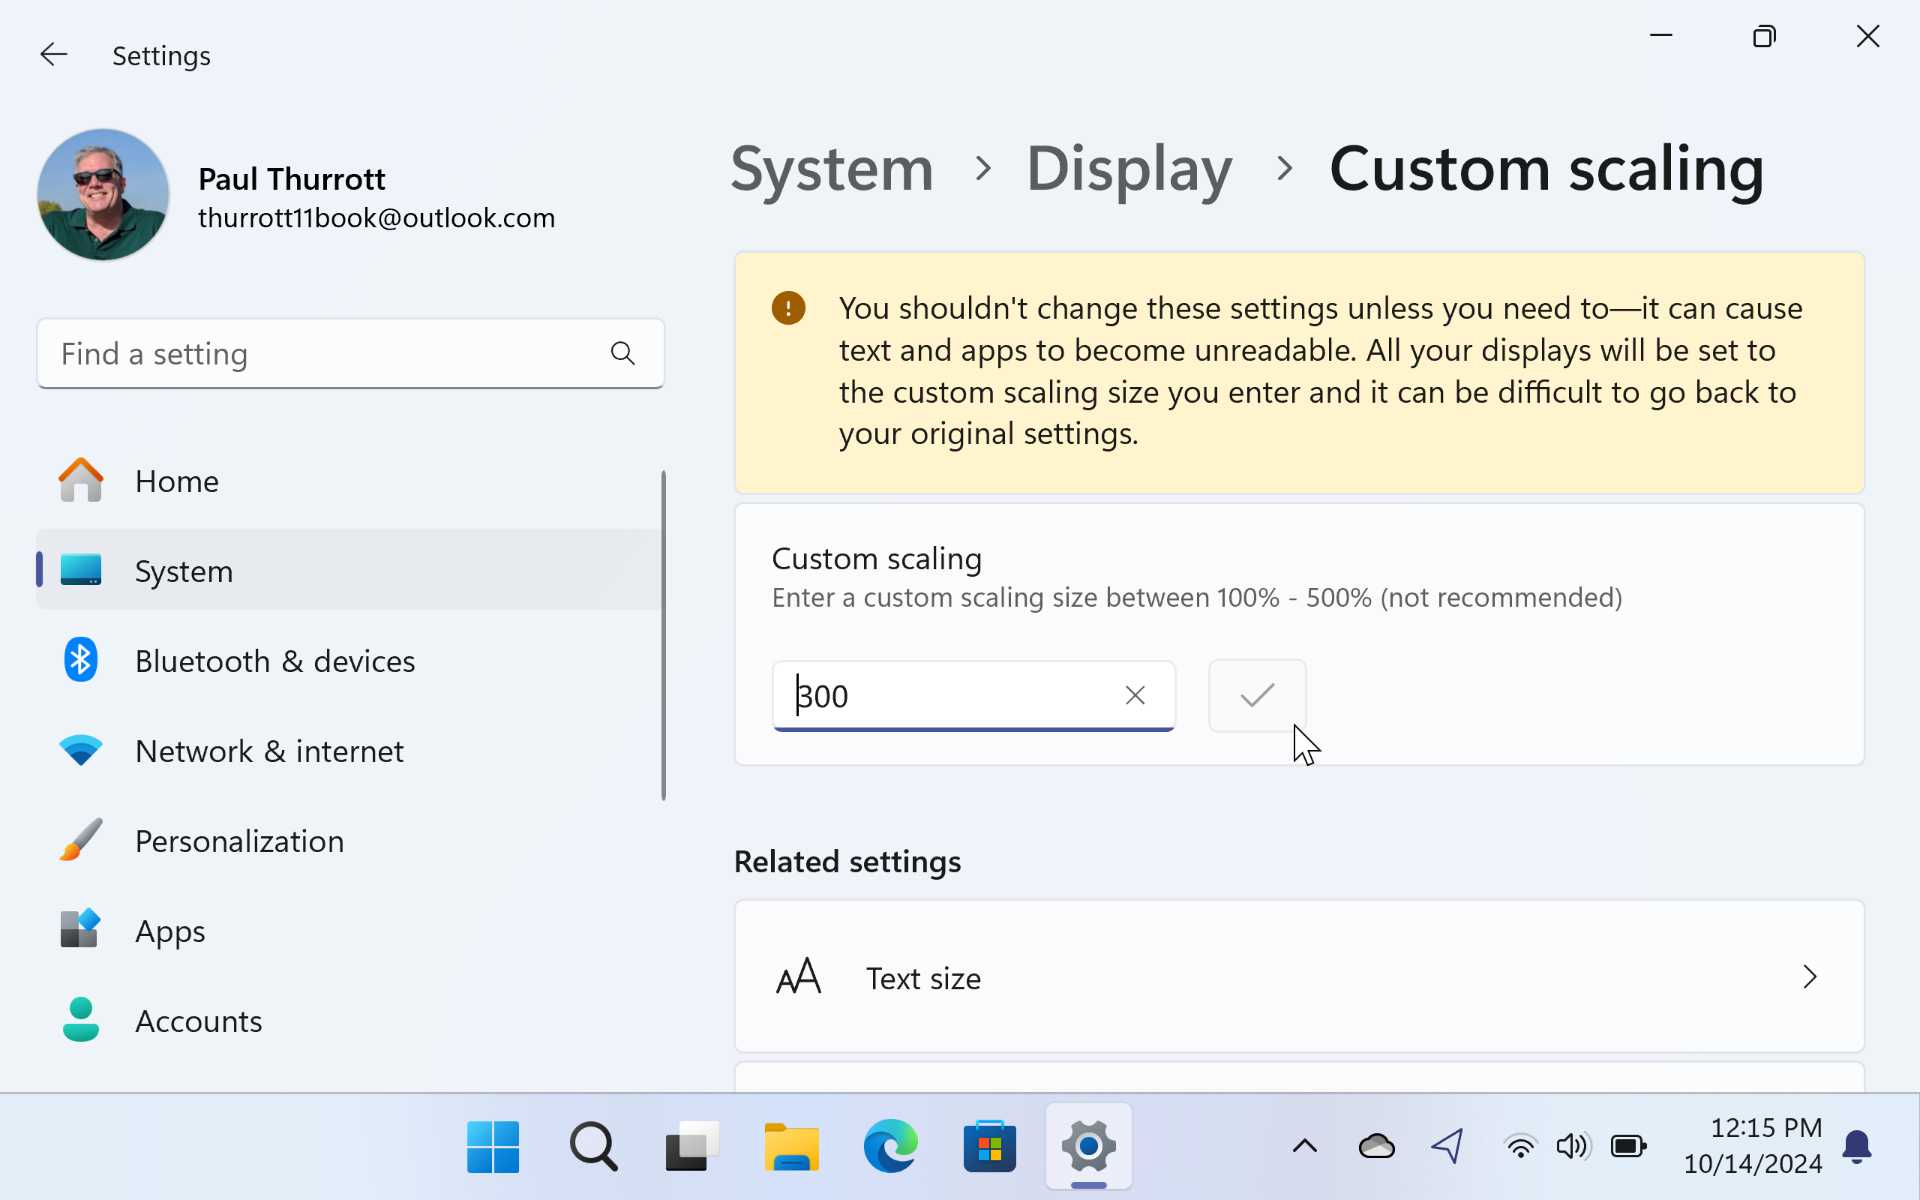
Here, you can enter a custom scaling value between 100 and 500 percent. You will need to sign out and then sign back in to see how the setting change impacted the display. It can be dramatic, as seen above.
Configure the size of on-screen text only
You can also optionally scale on-screen text independently of other user interface items. This is useful if you prefer to use a smaller display scaling setting and would like to make just the on-screen text bigger.
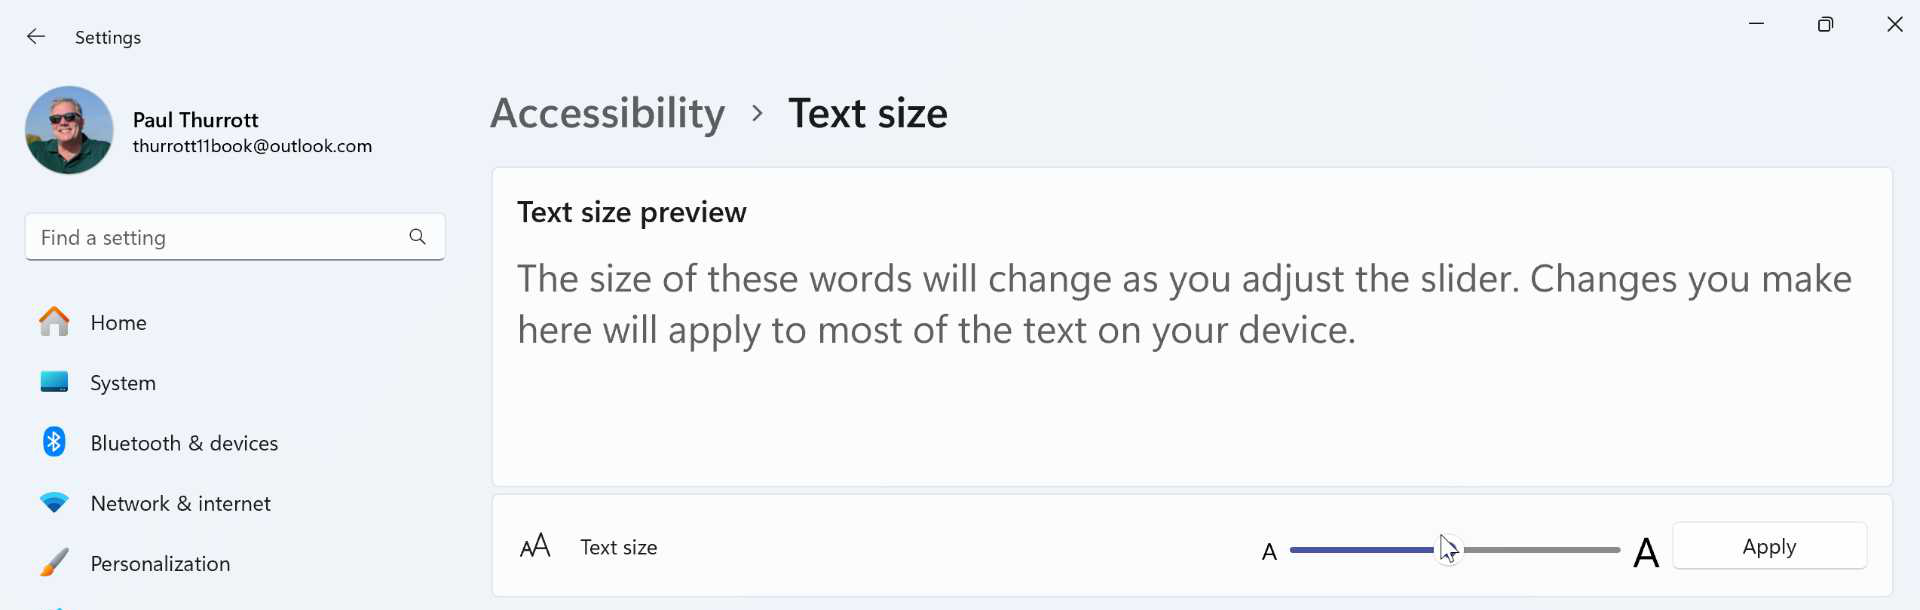
To change on-screen text size independently, open Settings and navigate to Accessibility > Text size. (Or, if you’re already in Display settings, navigate to Scale > Text size.)
You can also find this interface with Search or Settings search: look for make text bigger.
Here, you can use the “Text size” slider to scale on-screen text in 1 percent increments and preview the results in the Text size preview pane at the top. Select the “Apply” button when the text is the size you prefer.
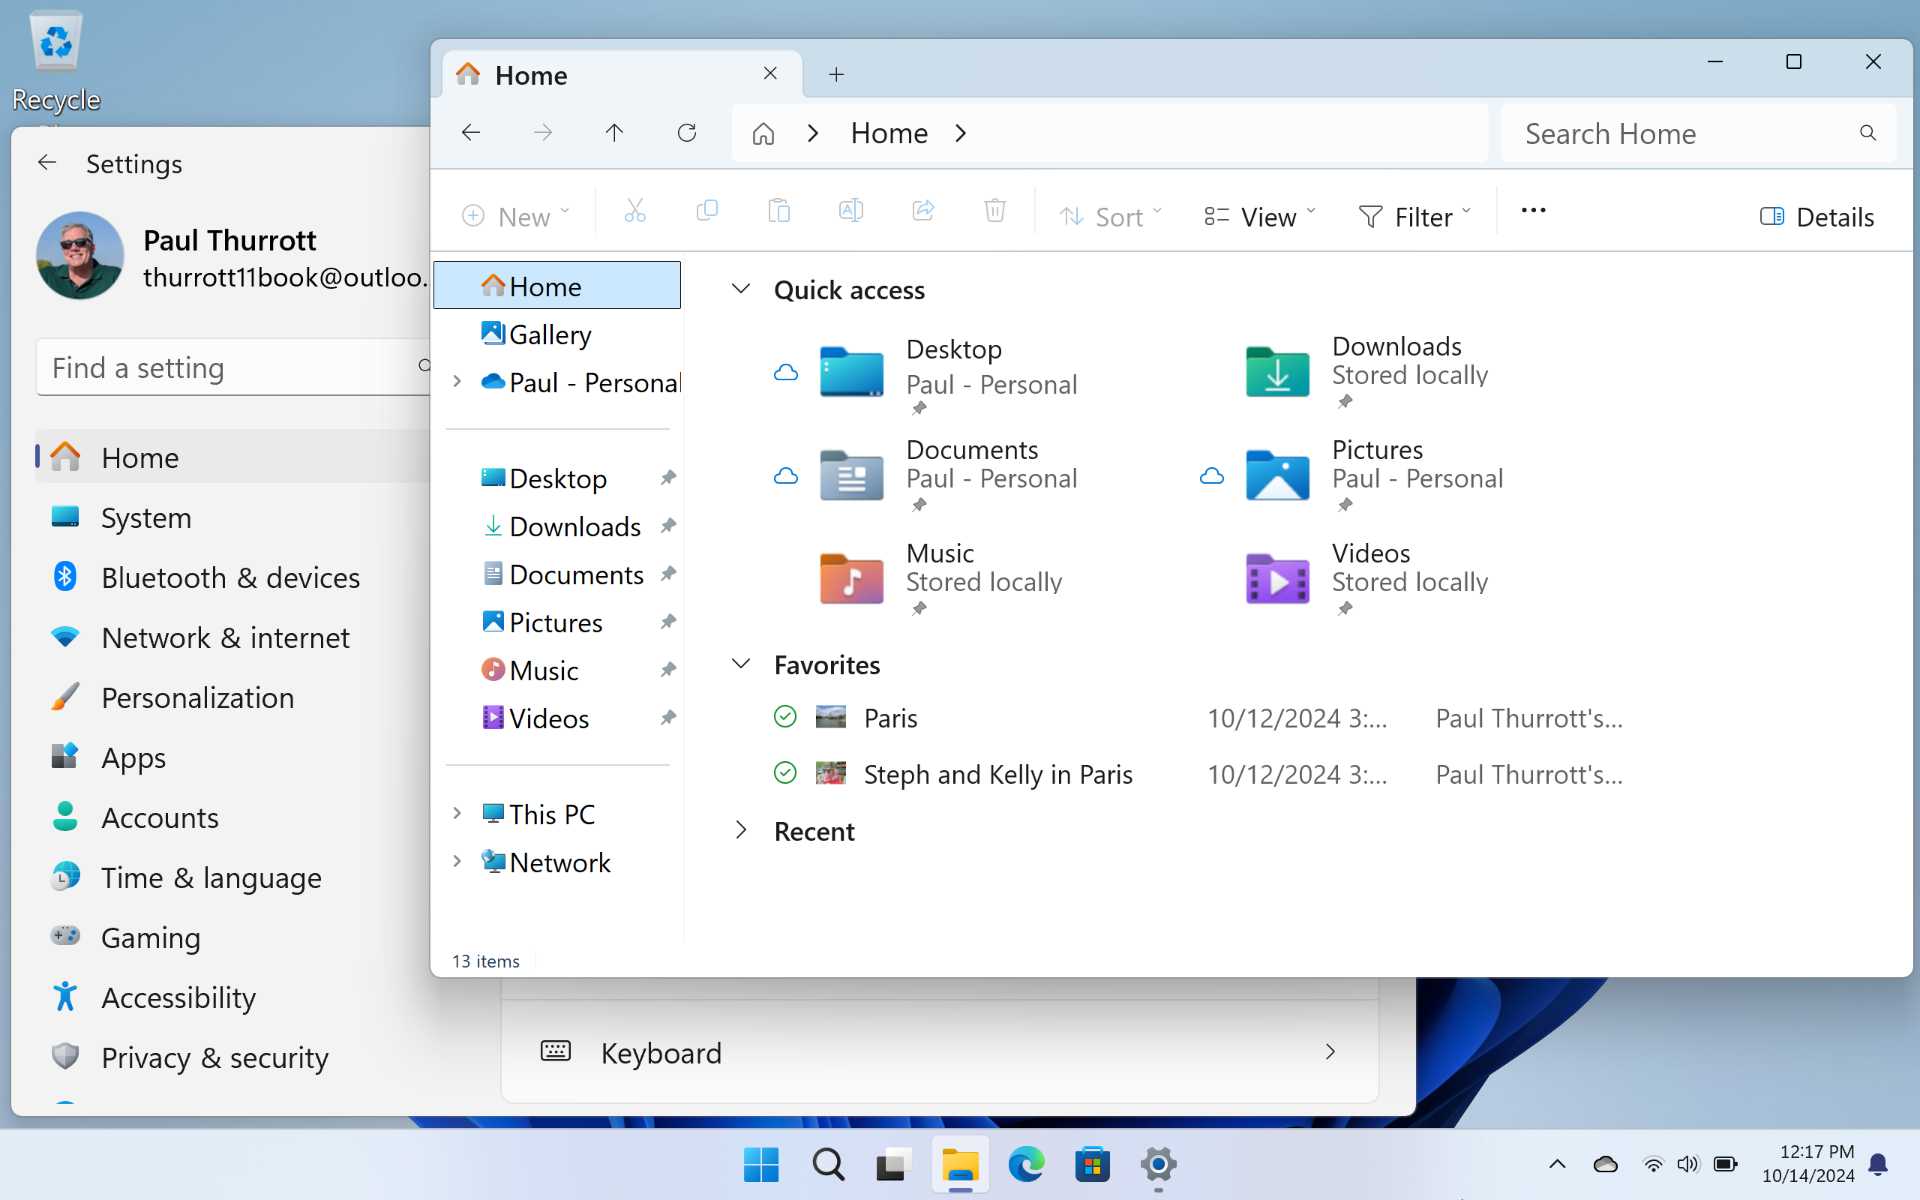
Below, you can see how changing the text size to 150 percent impacts the Windows 11 user interface: In modern apps, at least, it can be quite useful for those with aging eyes or vision issues.
Customize the display brightness
Windows will correctly configure the brightness of your display in most cases, and many modern displays support an auto-brightness feature that will adjust the screen brightness on the fly based on the lighting conditions around you or, if your PC hardware supports it, the content you’re viewing on the PC.
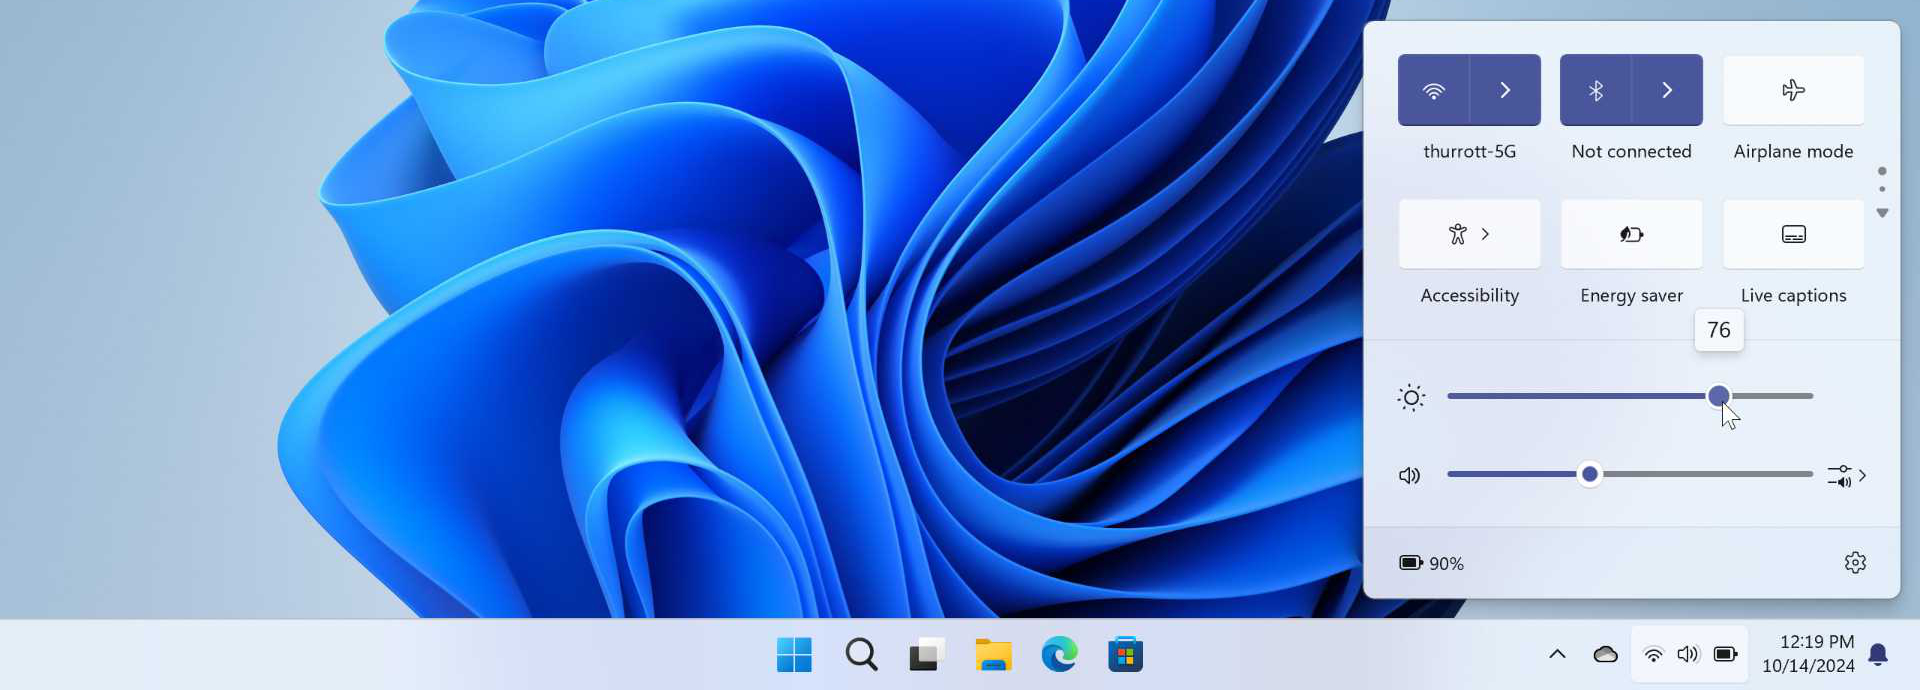
To change the display brightness on the fly, open Quick settings and use the Brightness slider.
Or, you can access your display’s brightness settings in the “Brightness & color” section of Display settings. If you expand this setting, you will see a Brightness slider, as with Quick settings. But if your hardware supports it, you will also see options to change the brightness automatically when the lighting changes and/or change the brightness based on the content you’re viewing.
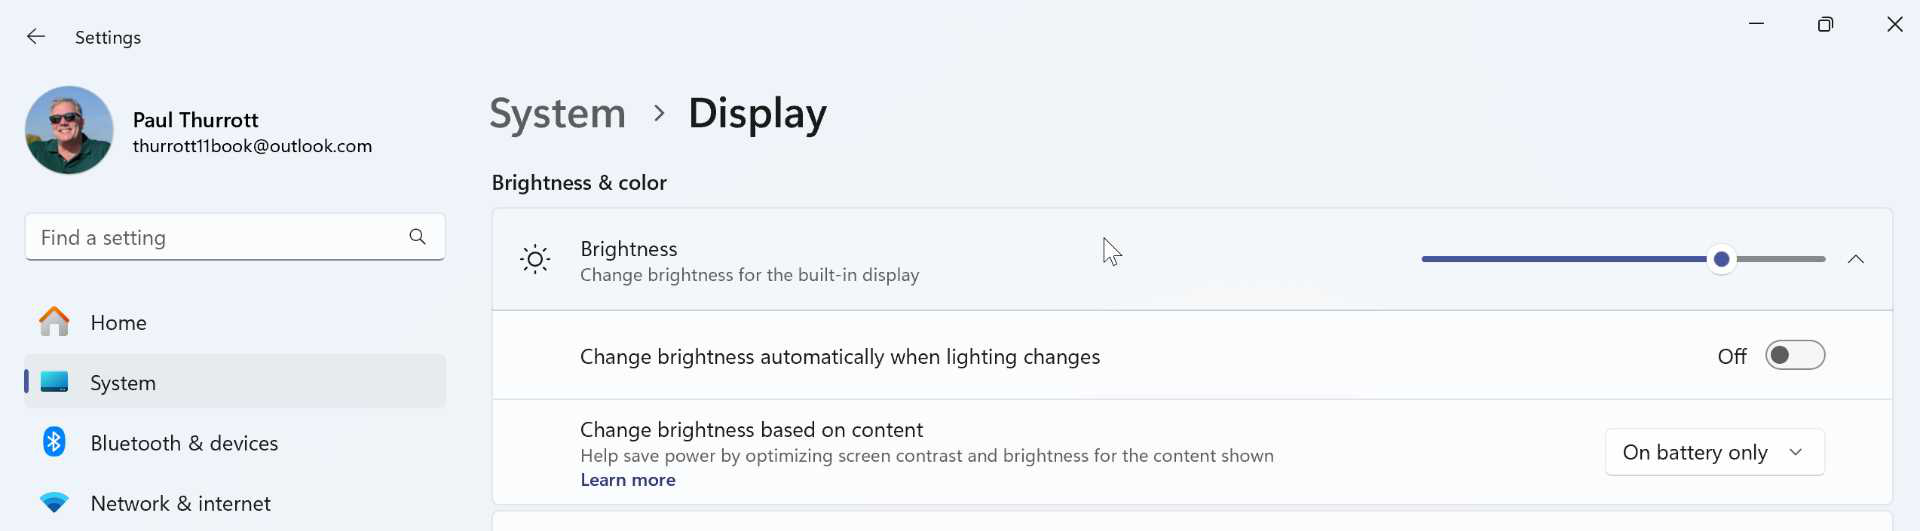
These settings can be hit or miss based on the quality of the display hardware. We recommend setting “Change brightness automatically when lighting changes” to “On,” and setting “Change brightness based on content” (if available) to “Always” or “On battery only.” And then keep an eye on how the display works–literally–and adjust as needed. If you find that the display brightness swings wildly or is too bright or too dim in certain conditions, you can just disable one or both of those settings.
If you’re using a laptop and certain desktop PCs, you probably have Brightness Up and Brightness Down keys in the function row of your keyboard for on-the-fly adjustments as well.
Enable and configure Night light
Like smartphones and other mobile devices, Windows 11 supports a special display mode called Night light that removes a configurable amount of blue light from your PC’s display, making it appear warmer and more orange-colored. This feature is especially desirable at night because blue light is very harsh to our eyes and can impact our ability to sleep normally.
You can toggle Night light on and off manually via a quick setting button in Quick settings. And you can do likewise in Display settings. But it’s better to set Night light to come on automatically on a set schedule–typically from sunset to sunrise–so that your display is always configured optimally for your eye health.
To do so, open Display settings and select the “Night light” setting in the “Brightness & color” section. (Not the toggle switch.) On the Night light settings page that appears, toggle the setting “Schedule night light” to “On.”
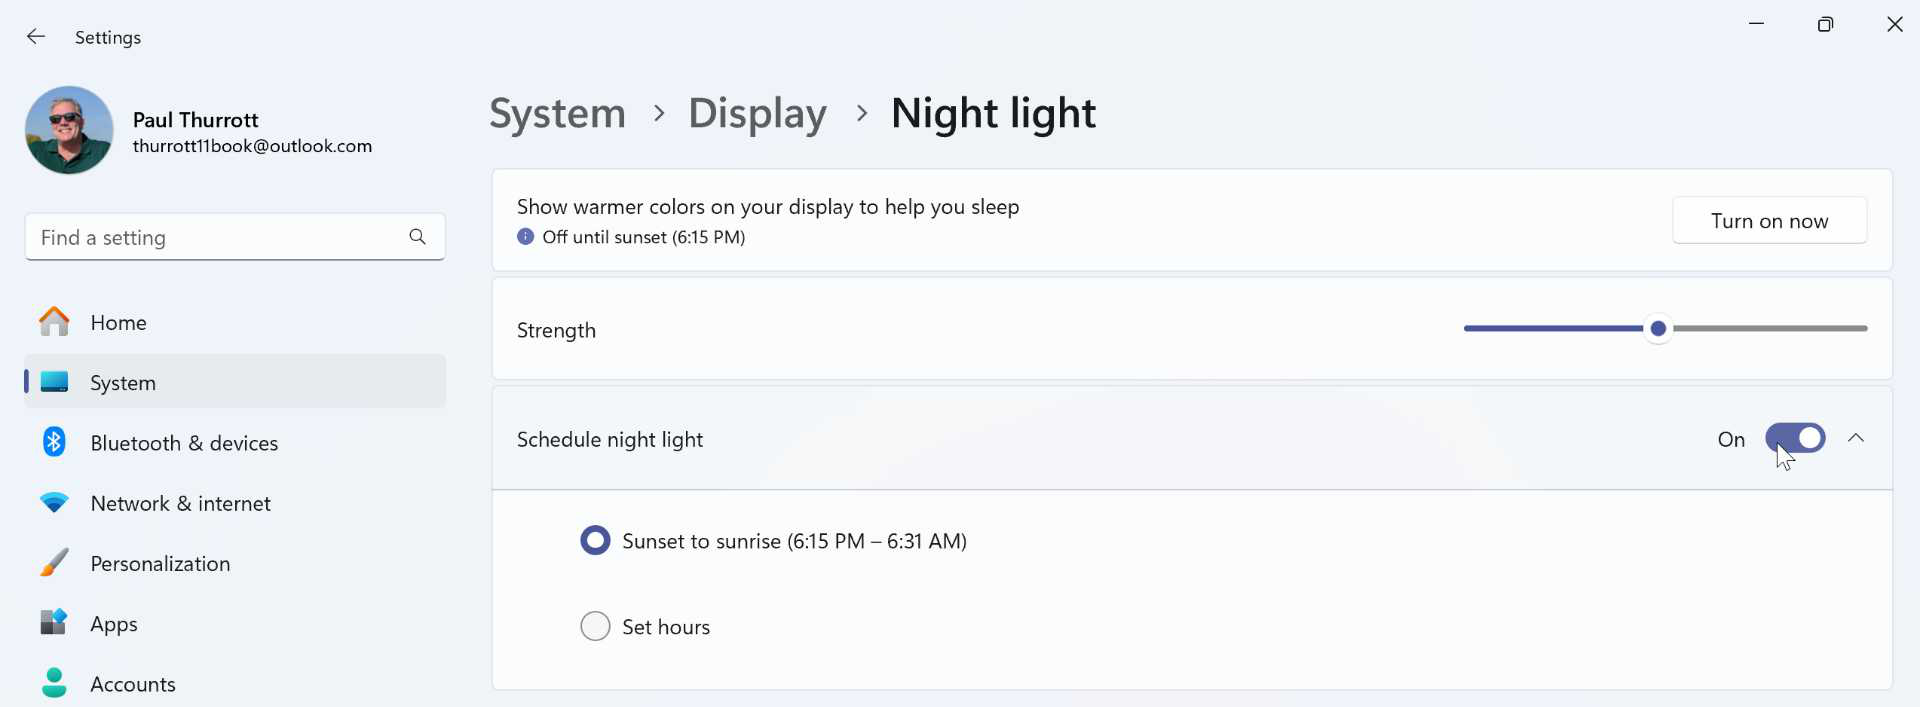
Here, you can choose “Sunset to sunrise,” the default, or make your own custom schedule.
Experiment with the “Strength” slider as well. It will temporarily adjust the display warmth as you do so so you can find the right setting.
Enable Adaptive color and configure a Color profile
Modern display panels can support a new feature called Adaptive color that automatically shifts the colors on-screen so that they look normal when you use the PC in any environment, regardless of the color or quality of the ambient light.
This feature was popularized by Apple as True Tone.
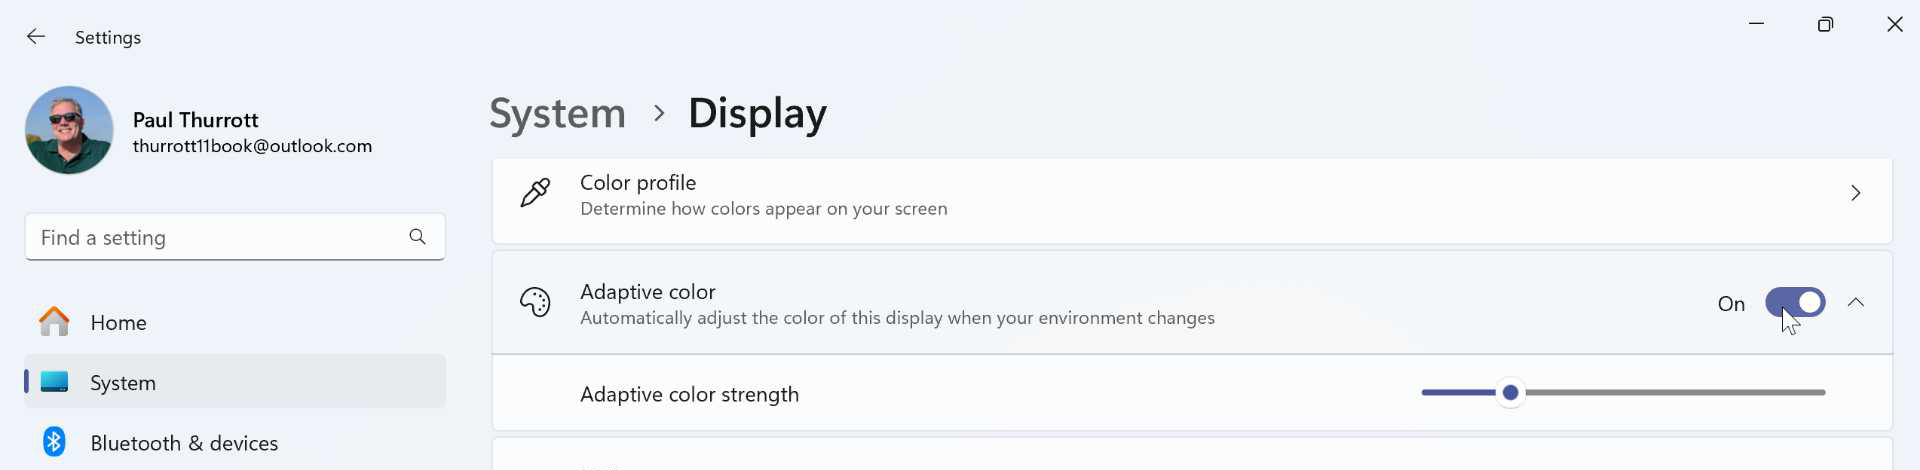
To see whether your PC supports this feature, open Display settings and look for an “Adaptive color” option in the “Brightness & color” section. If it’s there, ensure that it’s enabled.
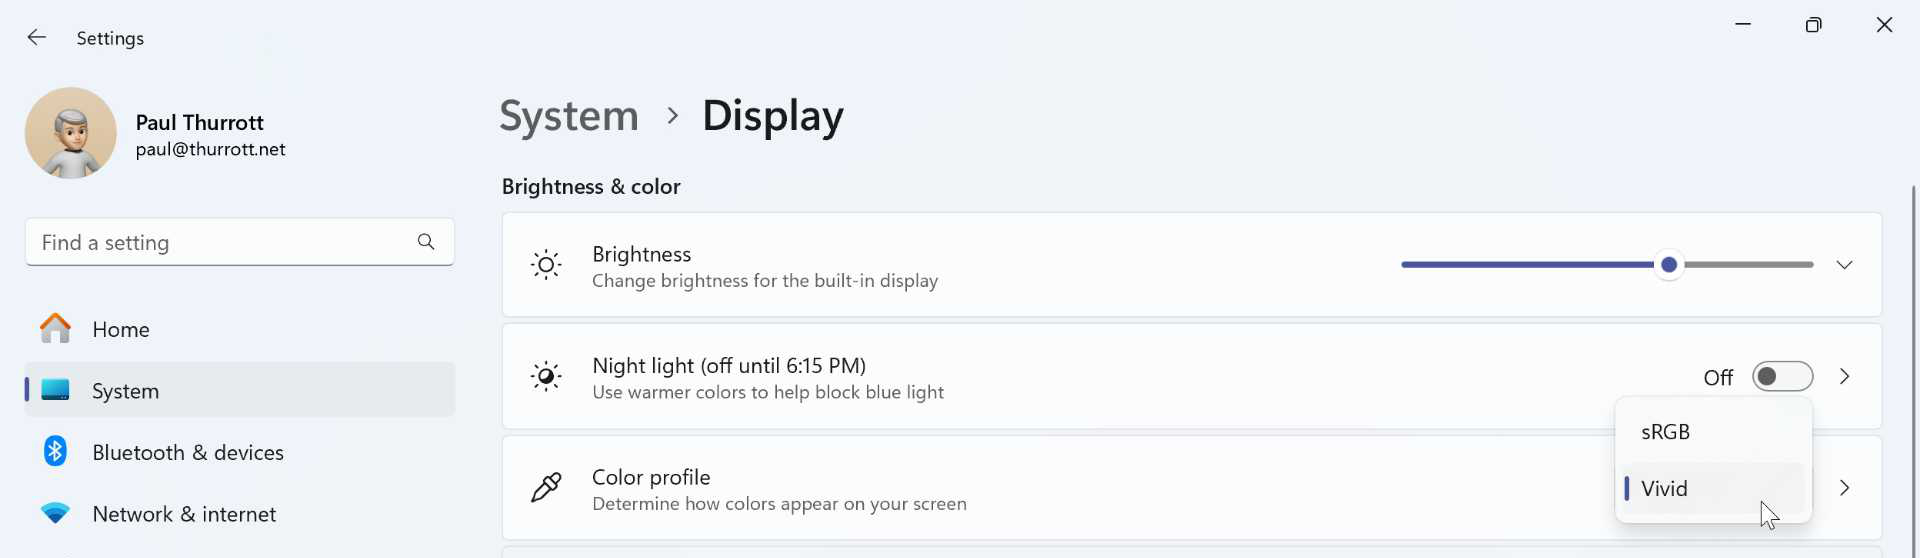
Adaptive color impacts another display feature called Color profile that is likewise limited to certain modern display panels. This feature is also found in the “Brightness & color” section in Display settings and it represents the system’s underlying color management capabilities. In short, you may be able to choose between different profiles–HDR, Vivid, sRGB and others–though the choices you see are PC-specific. (Some PCs don’t have these choices.)
Color management is most important to creative professionals who work with images and video, and the Color management settings page–which you can find by selecting the “Color profile” item in Display settings–is accordingly daunting.

But you don’t have to overthink this. If you do see the Color profile setting, you can experiment with the available choices in its drop-down menu and choose that one that looks best to you. It’s helpful to have an image or too handy so you can see the differences. Otherwise, it can be quite subtle.
Enable and configure HDR
Windows 11 supports a modern display standard called HDR (high dynamic range) that provides a superior picture than more traditional SDR (standard dynamic range) imagery, with brighter colors and deeper blacks. Depending on the capabilities of your PC’s display, you can enable HDR across the system or just play HDR videos in compatible apps.
To discover whether your PC supports HDR, open Display settings and select the “HDR” (or “Use HDR”) option under “Brightness & color” if available. This will open HDR settings.
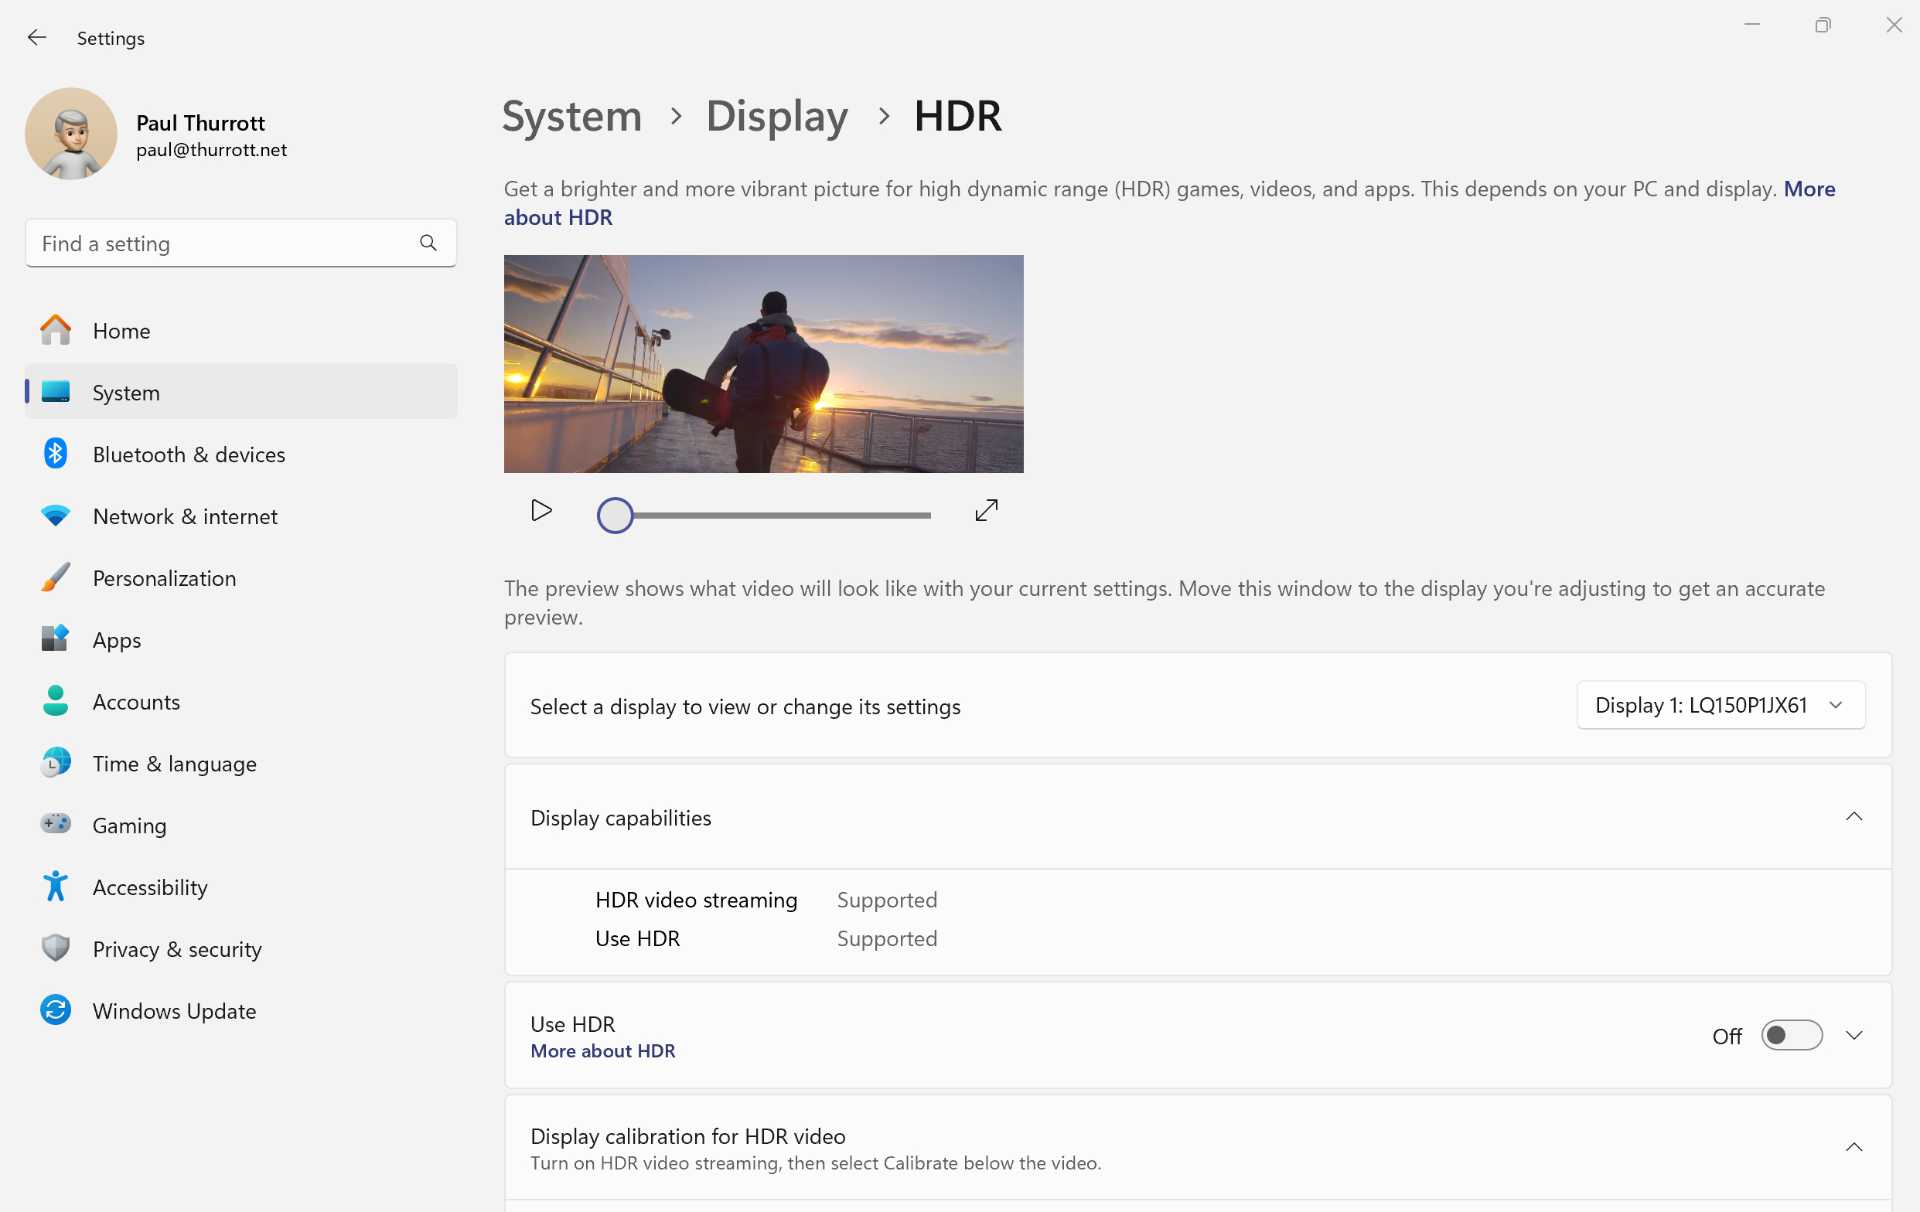
The “Display capabilities” section details whether your PC supports HDR (“Use HDR”) and/or HDR video streaming.
If your PC supports neither, then there’s nothing you can do. There are no configurable options here for you.
Configure HDR
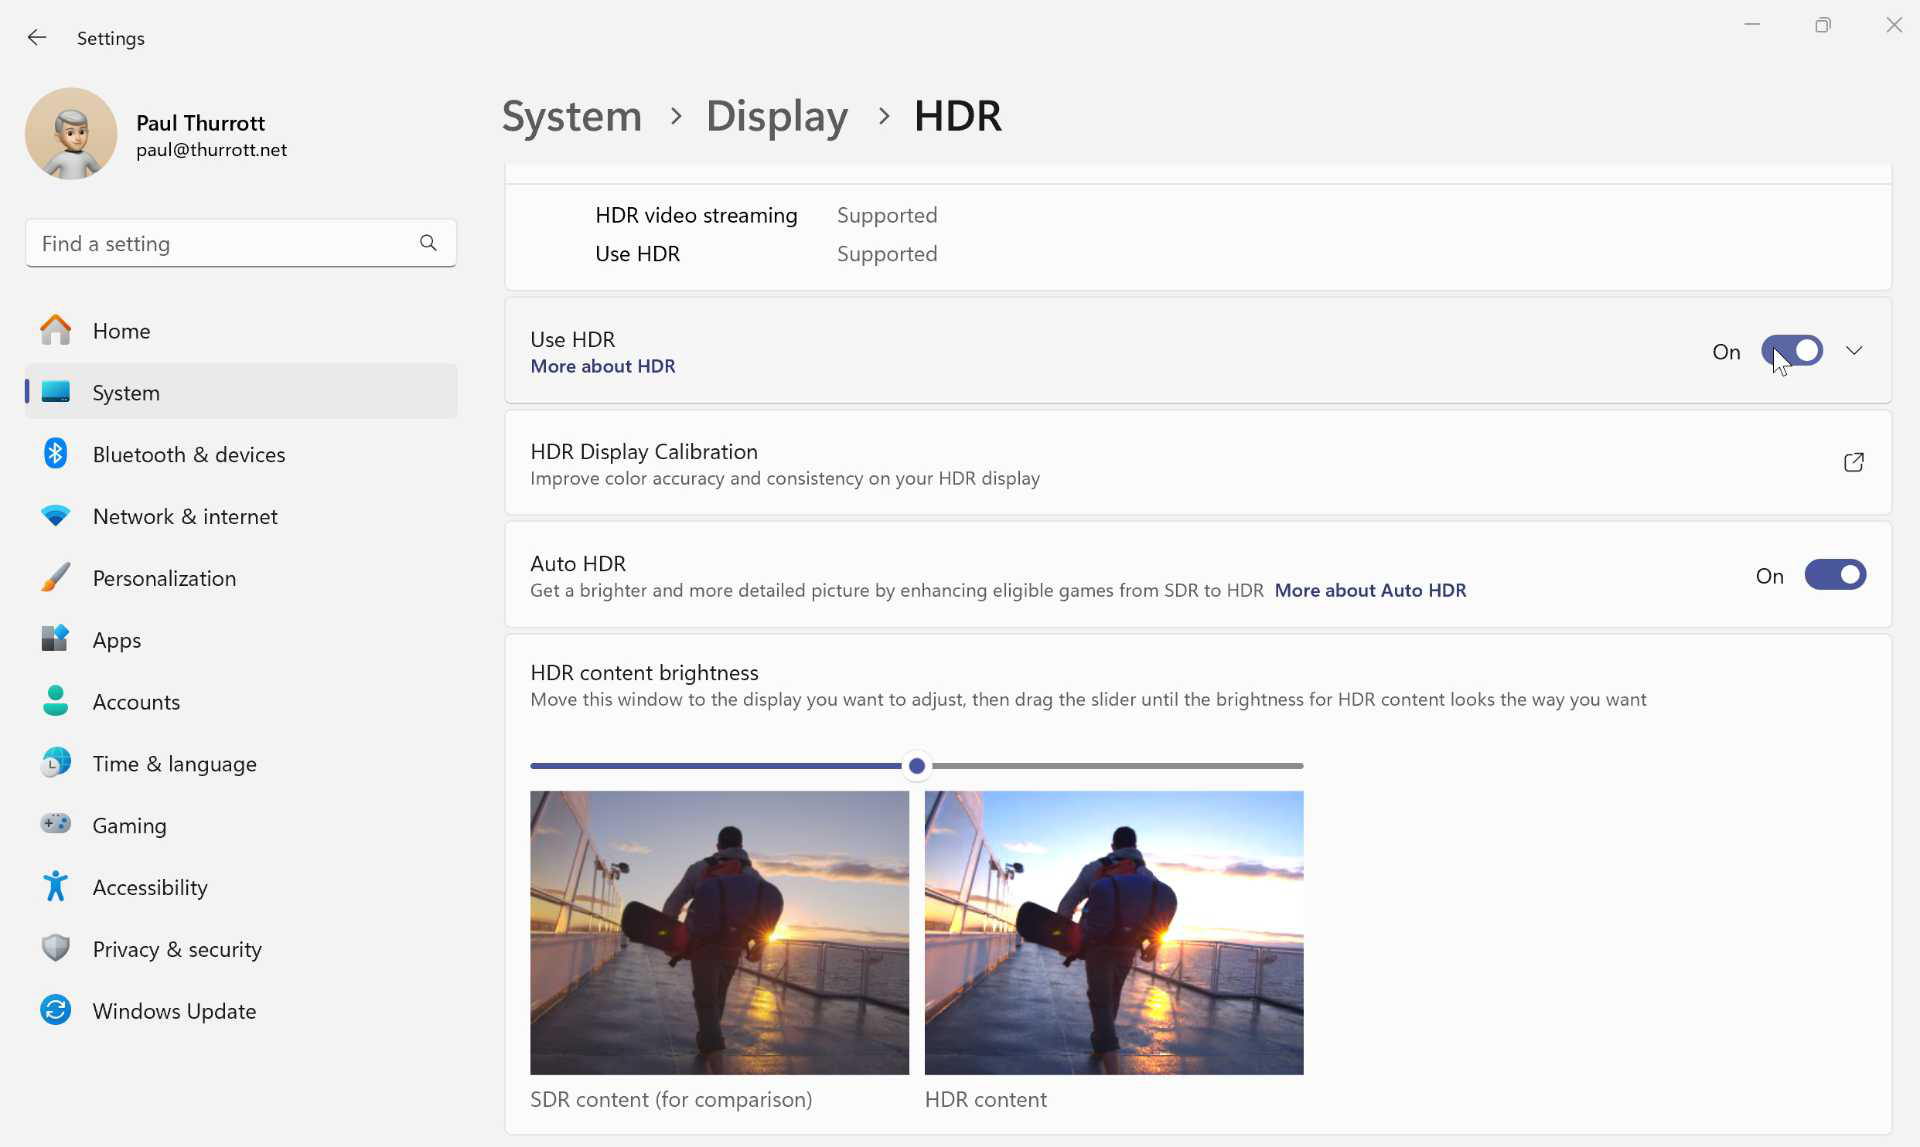
If you would like to take advantage of your PC’s HDR display capabilities, enable the setting “Use HDR.” When you do so, several other new settings appear in HDR settings.
If you have a portable PC, you may need to be connected to power to enable this option.
These can include:
Auto HDR. When enabled, this feature will apply HDR effects to older video games that were created before HDR. It doesn’t work with all games, and it doesn’t work with non-game content. So if you don’t play games, leave this setting configured to “Off.”
Turn off HDR when my PC is running on battery. Because HDR amps up the display brightness, it can adversely impact the battery life of portable PCs. In general, we recommend configuring this setting–found by expanding the “User HDR” setting–to “On.”
HDR content brightness. You can use this slider to adjust the brightness of the HDR effect to your liking.
HDR Display Calibration. This item launches the HDR Calibration app, which you can use to calibrate the display over a series of steps in a simple wizard.

The first time you use this feature, you will be prompted to download the Windows HDR Display Calibration app from the Microsoft Store.
Configure HDR video streaming
If your display supports HDR video streaming, you can configure video playback options in Settings > Apps > Video playback.
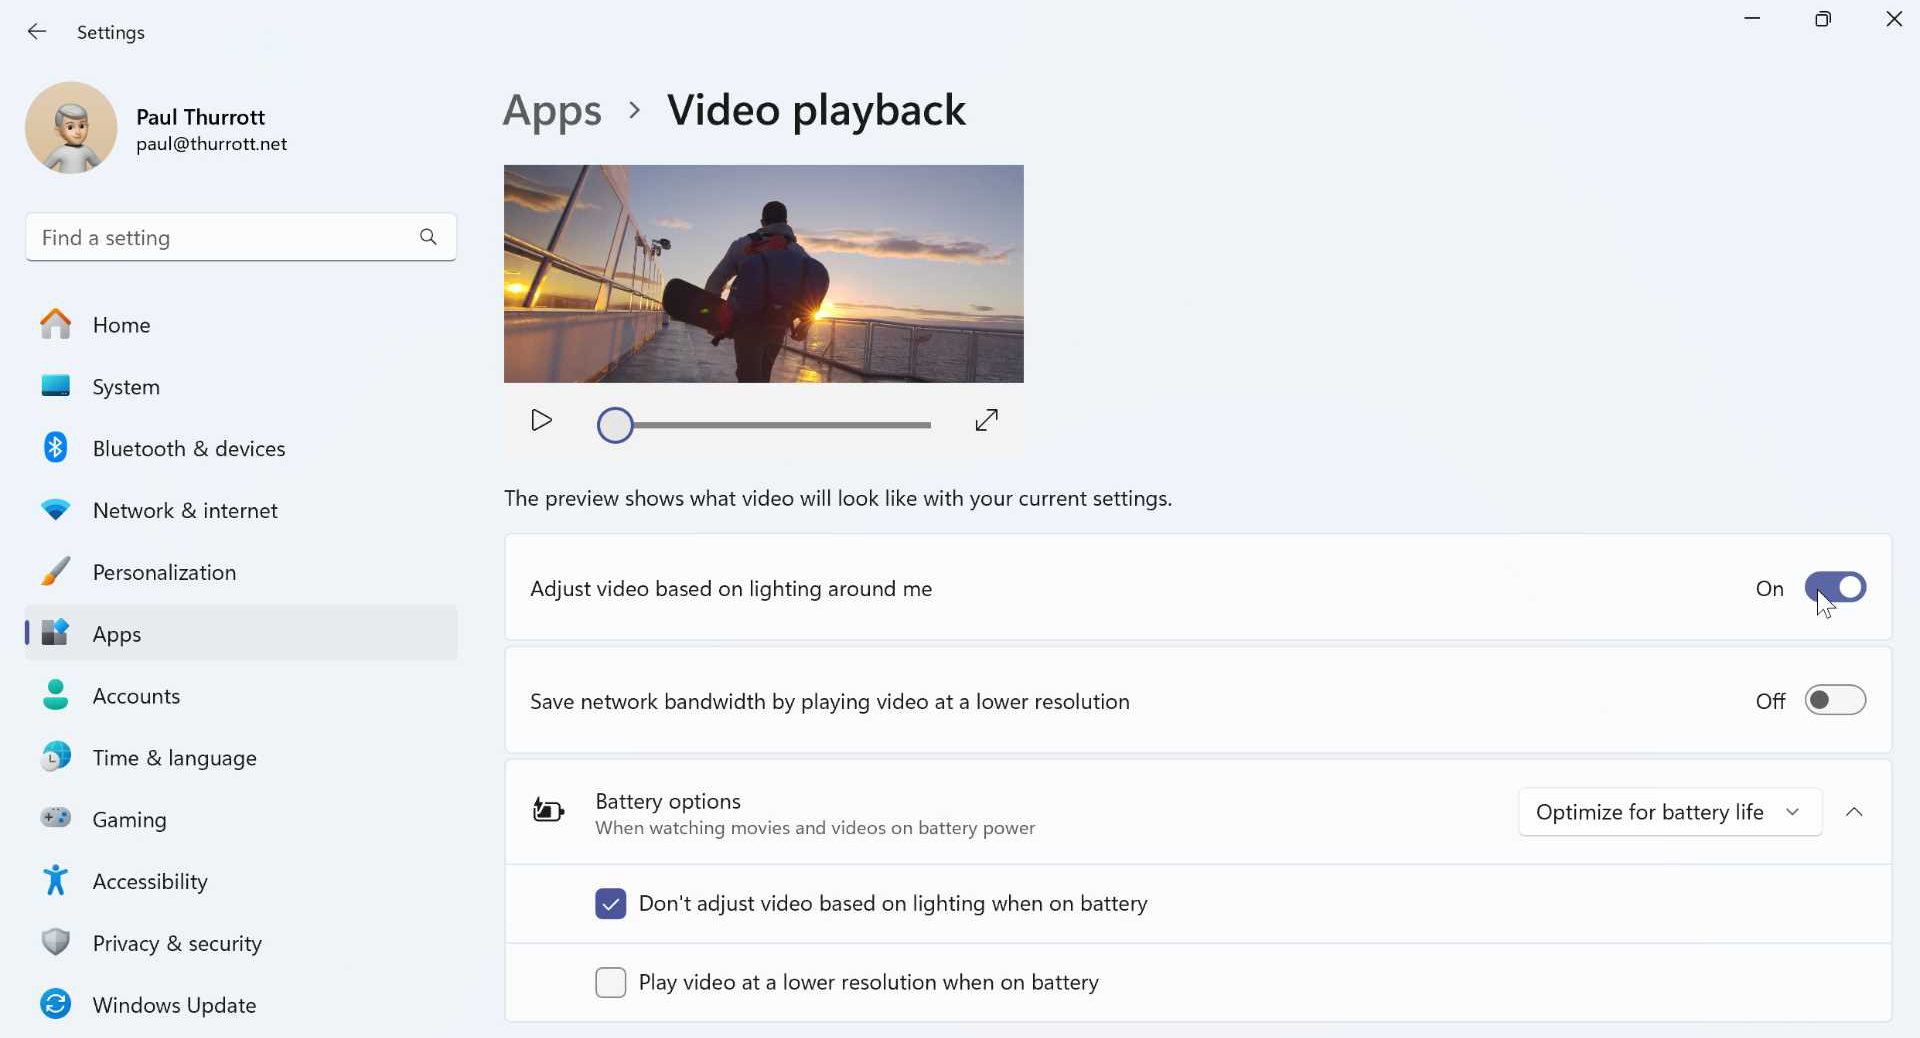
Here, you can configure Battery options–where the use of HDR is optimized for battery life or video quality–play video at lower resolutions on battery, and other options.
Configure the refresh rate
While many displays still only support a standard 60 Hz (or, in certain locales, 50 Hz) display refresh rate, modern displays, especially those designed for video games, entertainment, and video content creation now support faster refresh rates that update (or “refresh”) the display’s picture more frequently, creating a smoother, less flickery experience.
Some displays also support dynamic refresh rate capabilities that automatically adjust the refresh rate, providing an optimal balance between quality and battery life. For example, they might amp up the refresh rate when you’re scrolling through a long web page or document, stick to a standard refresh rate when you’re working otherwise, and then minimize the refresh rate when the PC is idle to save battery life.
Regardless of which display type your PC uses, Windows 11 is configured to use the standard 60 Hz refresh rate by default. So you will need to configure the display to use a faster (or dynamic) refresh rate if possible and if desired.
To do so, open Settings and navigate to System > Display > Advanced display. There, you will find a “Choose a refresh rate” settings under “Display information” that provides a drop-down list of refresh rate choices.
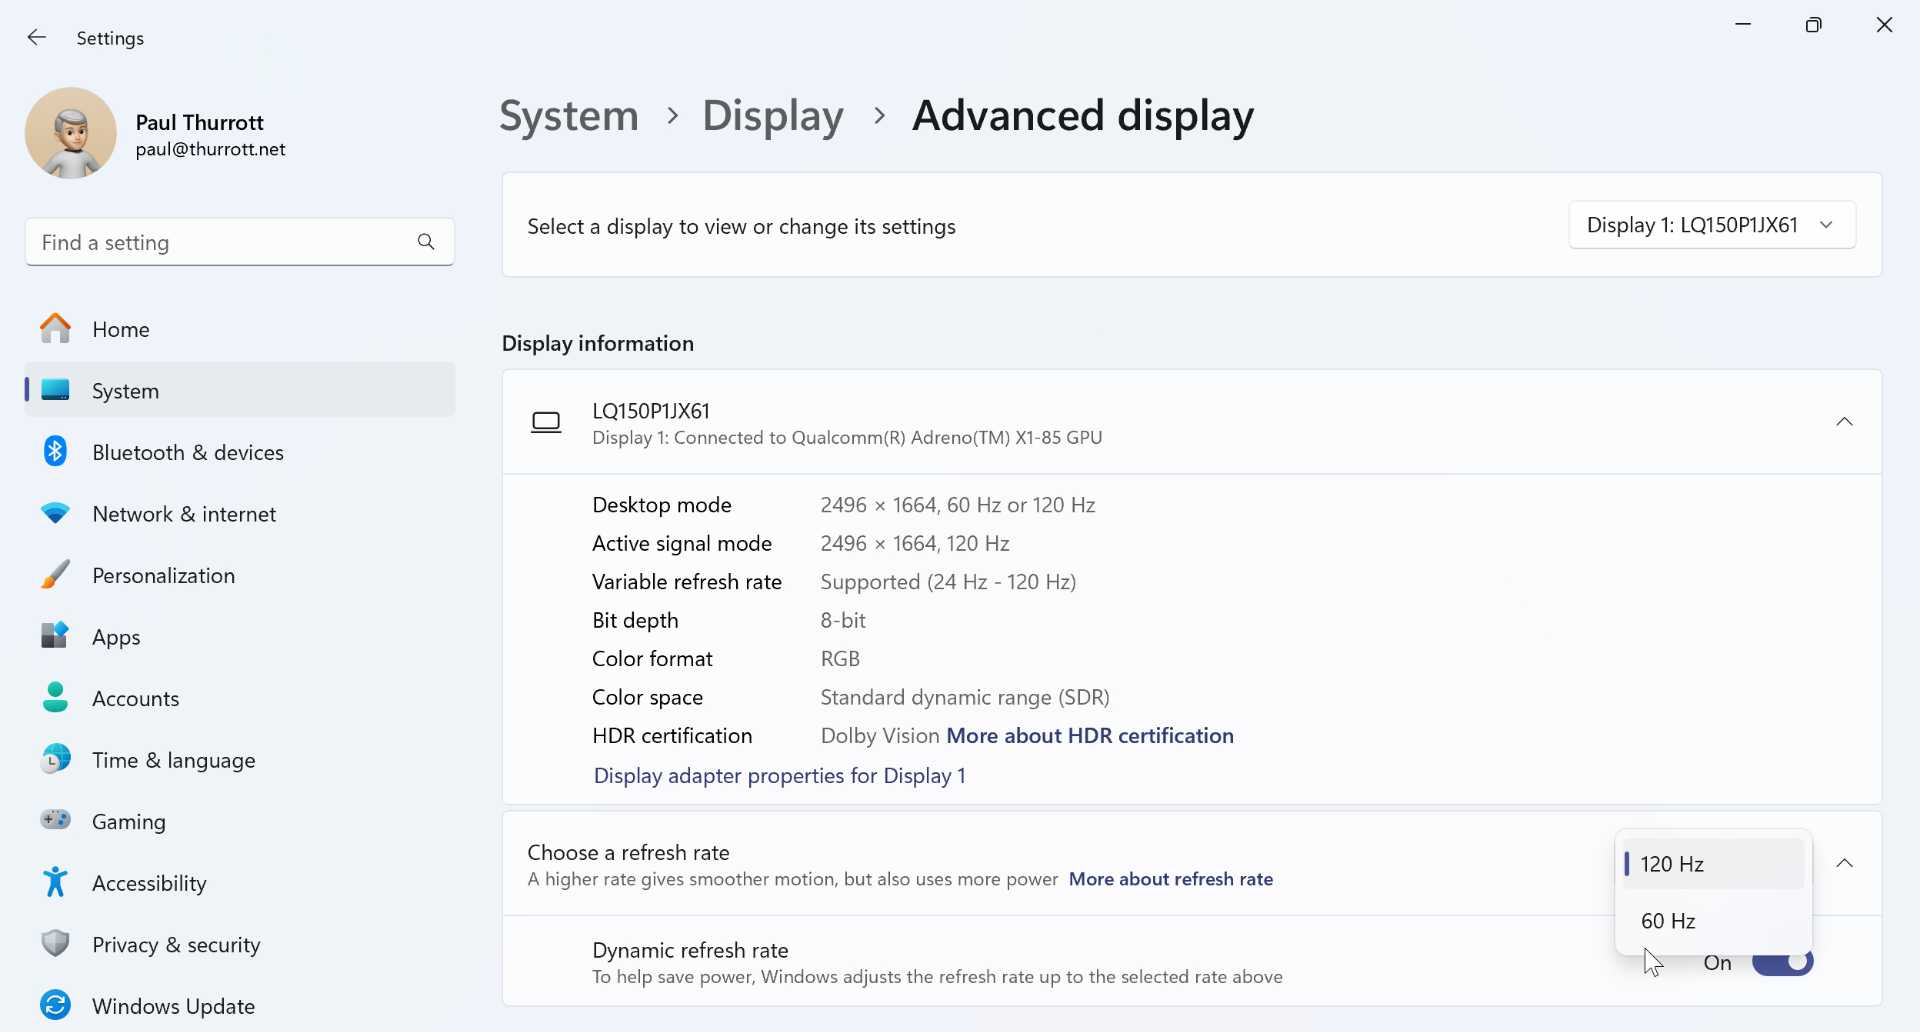

If 60 Hz is the only choice in the drop-down, then there’s nothing to configure: The display only supports a 60 Hz refresh rate. But you may see options such as 90 Hz, 120 Hz, or even higher, and can choose accordingly.
If you can expand the “Choose a refresh rate” item and see a “Dynamic refresh rate” option, you can enable that to have the best of both worlds.
Configure Auto super resolution (Auto SR)
If you own a Qualcomm Snapdragon X-powered Copilot+ PC running Windows 11 on Arm, you can access a unique feature called Auto super resolution (Auto SR) that’s designed to overcome the limitations of running PC video games–almost all of which were designed only for the traditional Intel-style x86/x64 architecture–under emulation. Auto SR works its magic by running games at low resolutions and using AI to upscale the graphics so that they appear to be high resolution. The result–when it works–is a hight quality experience with the high frame rates gamers expect.
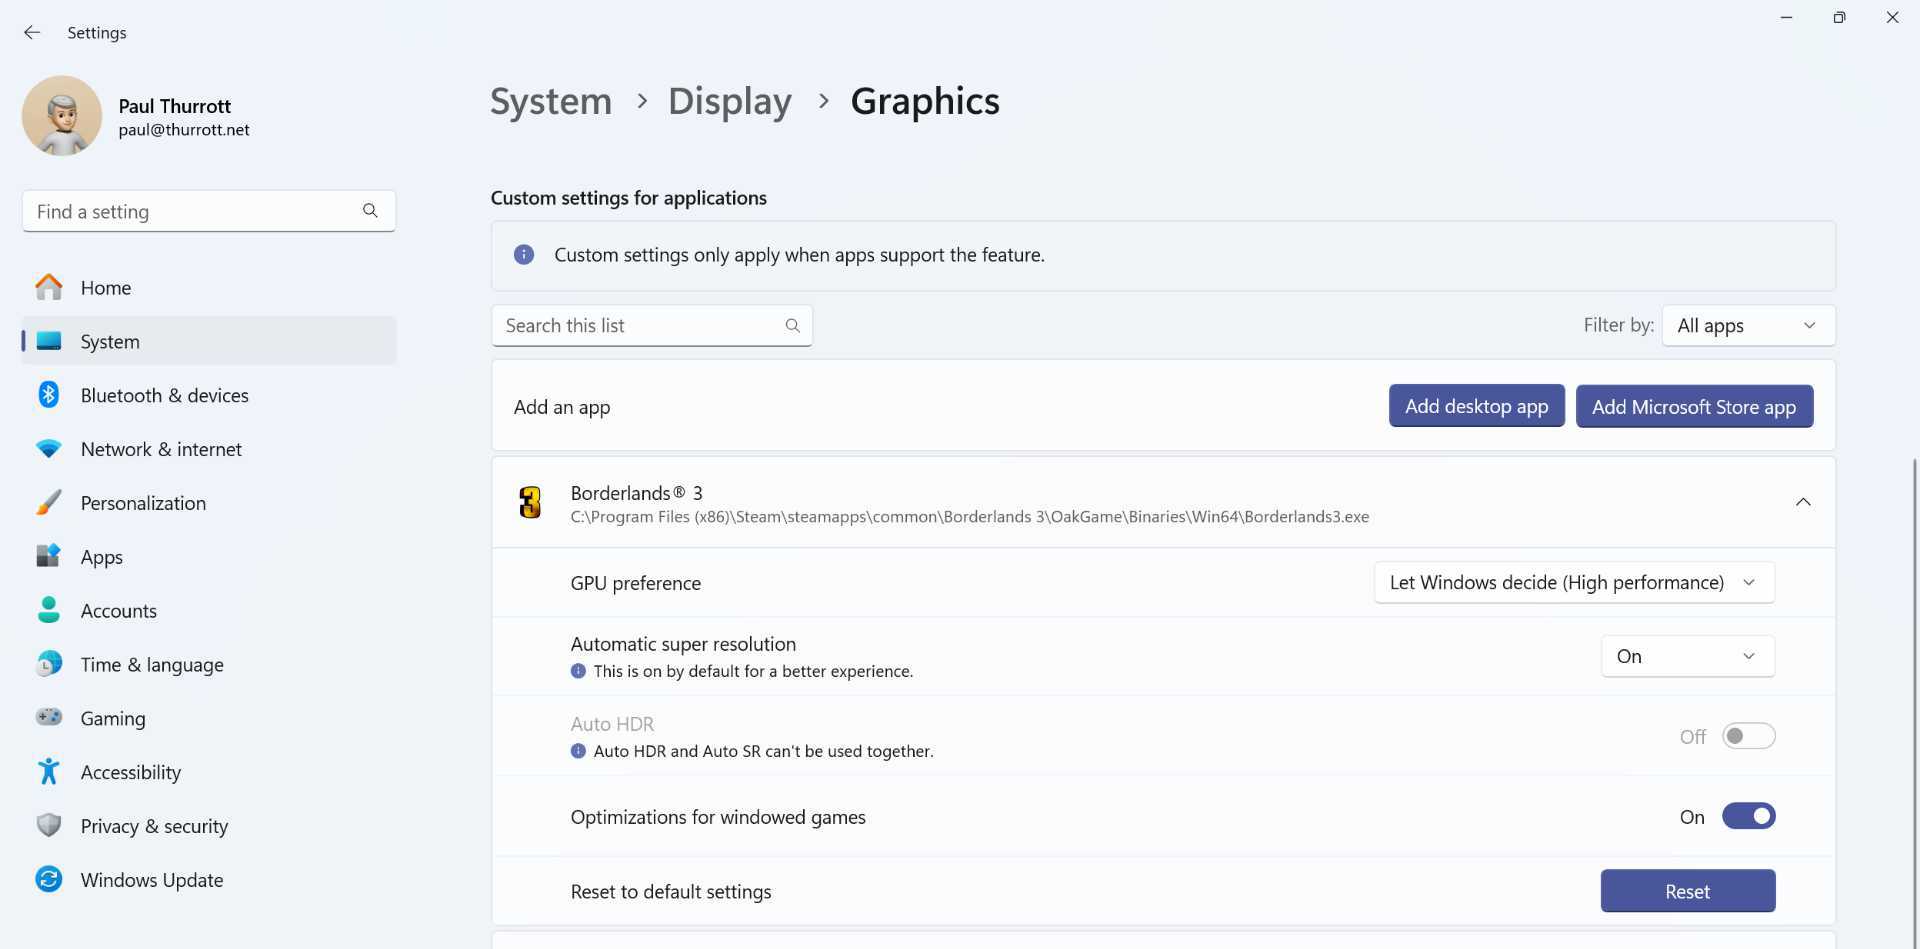
Auto SR is enabled by default, as you can see by opening Settings and navigating to System > Display > Graphics.
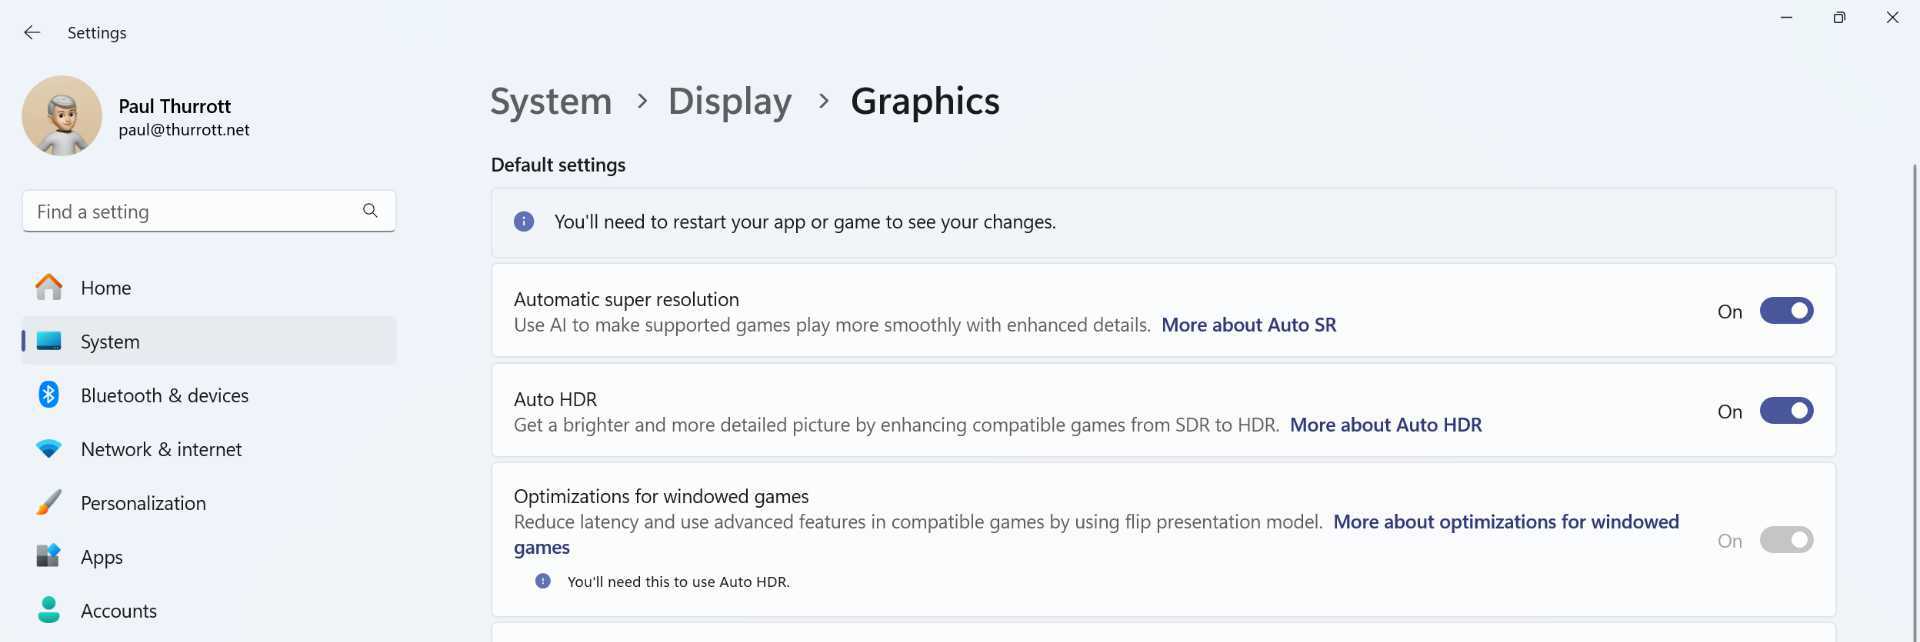
But you will also see specific Auto SR controls for each game you install. In some cases, Windows 11 will automatically configure Auto SR.
But in others, you will need to tweak settings, both here and in the game’s settings. Unfortunately, this experience is decidedly mixed. Some games work well, but others require significant effort.
The Windows on Arm Ready Software website is a useful resource for those looking for apps and games that work natively, or at least work, on Windows 11 on Arm. Its Games page is particularly helpful, as it details the Auto SR status for each title.
We will document Auto SR more thoroughly in a new chapter in the Xbox and Games section of the book soon.
But wait, there’s more
This chapter focuses only on the top-level display configurations you should make when initially configuring and personalizing Windows 11, and it assumes you’re only using a single display. But there is a lot more to discover, including Windows 11’s support for multiple displays, and we cover additional related topics in the Displays chapter.

Gain unlimited access to Premium articles.
With technology shaping our everyday lives, how could we not dig deeper?
Thurrott Premium delivers an honest and thorough perspective about the technologies we use and rely on everyday. Discover deeper content as a Premium member.