Storage
- Paul Thurrott
- Oct 20, 2022
-
3
Windows 11 includes tools to help you manage your PC’s internal and external storage devices. These devices are used to contain Windows and other system files, plus installed applications and your documents and other data files.
Storage basics
All Windows PCs have at least one internal fixed disk, typically a solid-state drive (SSD). But it’s possible to add additional disks to most desktop PCs and even some laptops, some of which may still be of the old-fashioned hard disk drive (HDD) type. And most Windows users are probably familiar with USB-based removable disks, which are typically SSDs, HDDs, or smaller-capacity drives (sometimes referred to as memory sticks or thumb drives).
Whatever the underlying technology, disks are divided, internally, into one or more volumes (sometimes referred to as partitions) that are formatted using a file system so that they can be used to store the files and folders required by Windows and its users.
For the most part, you don’t need to be concerned with the low-level details of how these storage devices interact with your PC. But it is helpful to understand the handful of Windows 11 storage features that you will run into from time to time. And that is what we discuss in this chapter.
Manage internal storage
Windows lets you manage how your PC utilizes the storage space in its internal drives and other storage devices. This functionality is especially useful for those with PCs that have a second storage device, since you can configure which to use for your apps, games, and data. For example, many PC gamers use a fast SSD for the system drive—where Windows is located—and then a larger HDD for installing games.
You manage internal storage devices with Storage settings, which can be accessed by opening the Settings apps (WINKEY + I) and navigating to System > Storage.
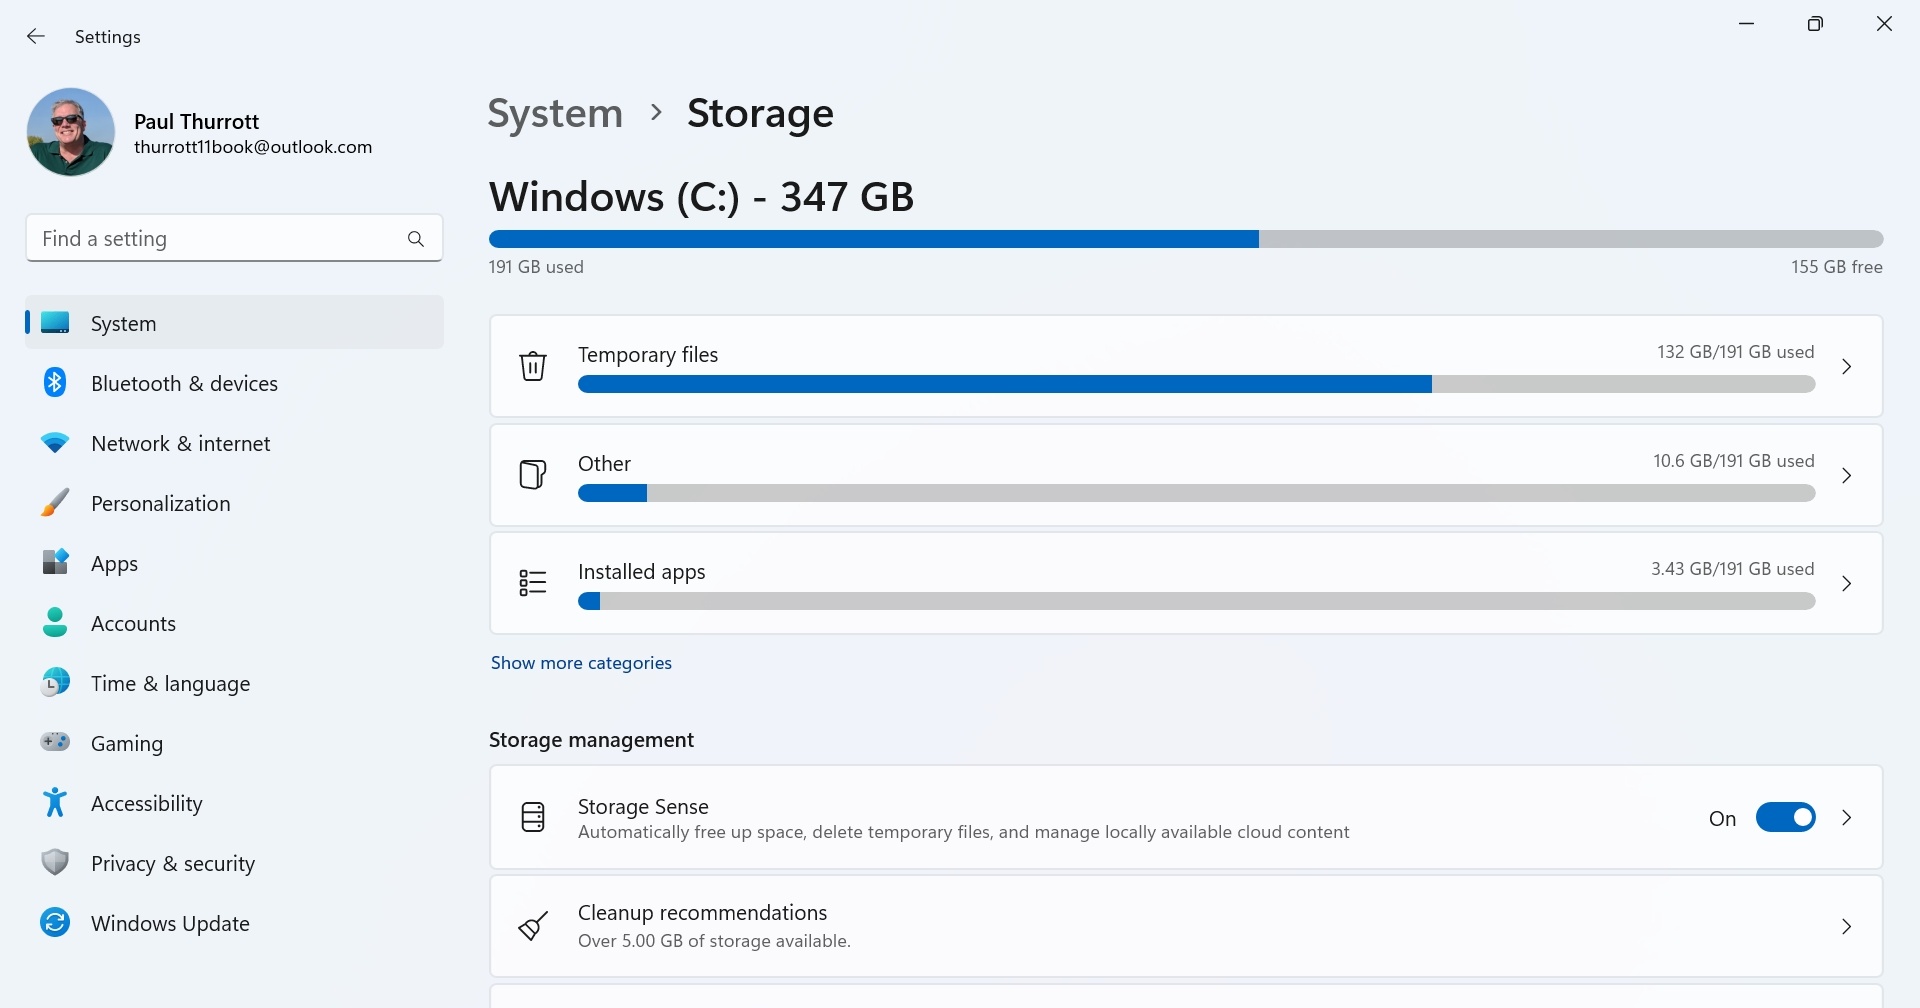
Under the “C:” drive heading—which is typically named “Windows (C:)” but will be labeled according to the name you see in File Explorer—you can see what types of files are taking up the storage space in your PC’s system drive.
The usage is grouped by type. Some of these entries are read-only, but some can be further configured. In the next few examples, we’ll explore some of the storage-related tasks you can accomplish here.
You can also see what’s taking up space on other fixed and removable storage devices by selecting the link “Storage used on other drives” under the Advanced storage settings header on the main Storage settings page.
Delete temporary files to free up storage space
You can often recover gigabytes of additional storage space by deleting temporary files. To do so, select Temporary files. On the page that appears, you can select various types of temporary files—like Windows Update Cleanup, Delivery Optimization Files, Temporary Windows installation files, and many others—to remove them and free up space.
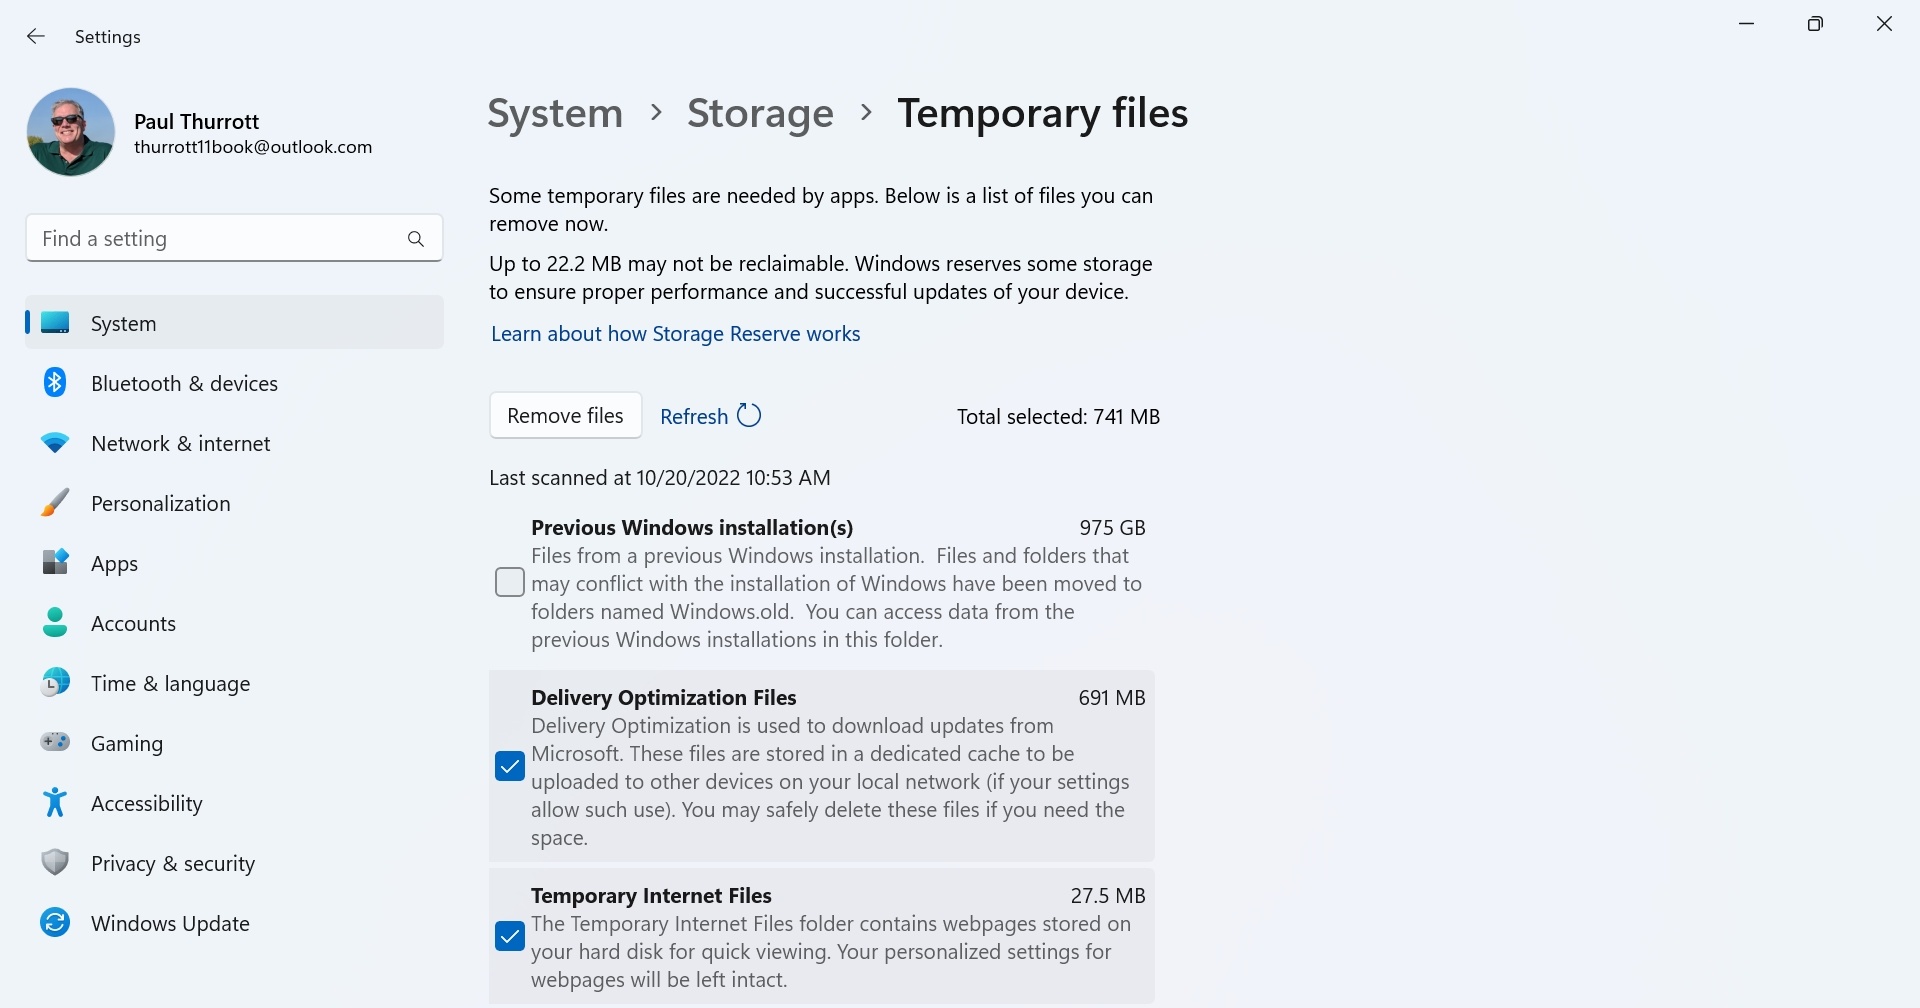
To free up space, select the times you wish to remove and then select the “Remove files” button. Then, select “Continue” in the prompt that appears. Windows will now delete the items you selected.
Move apps, games, or content to a different storage device
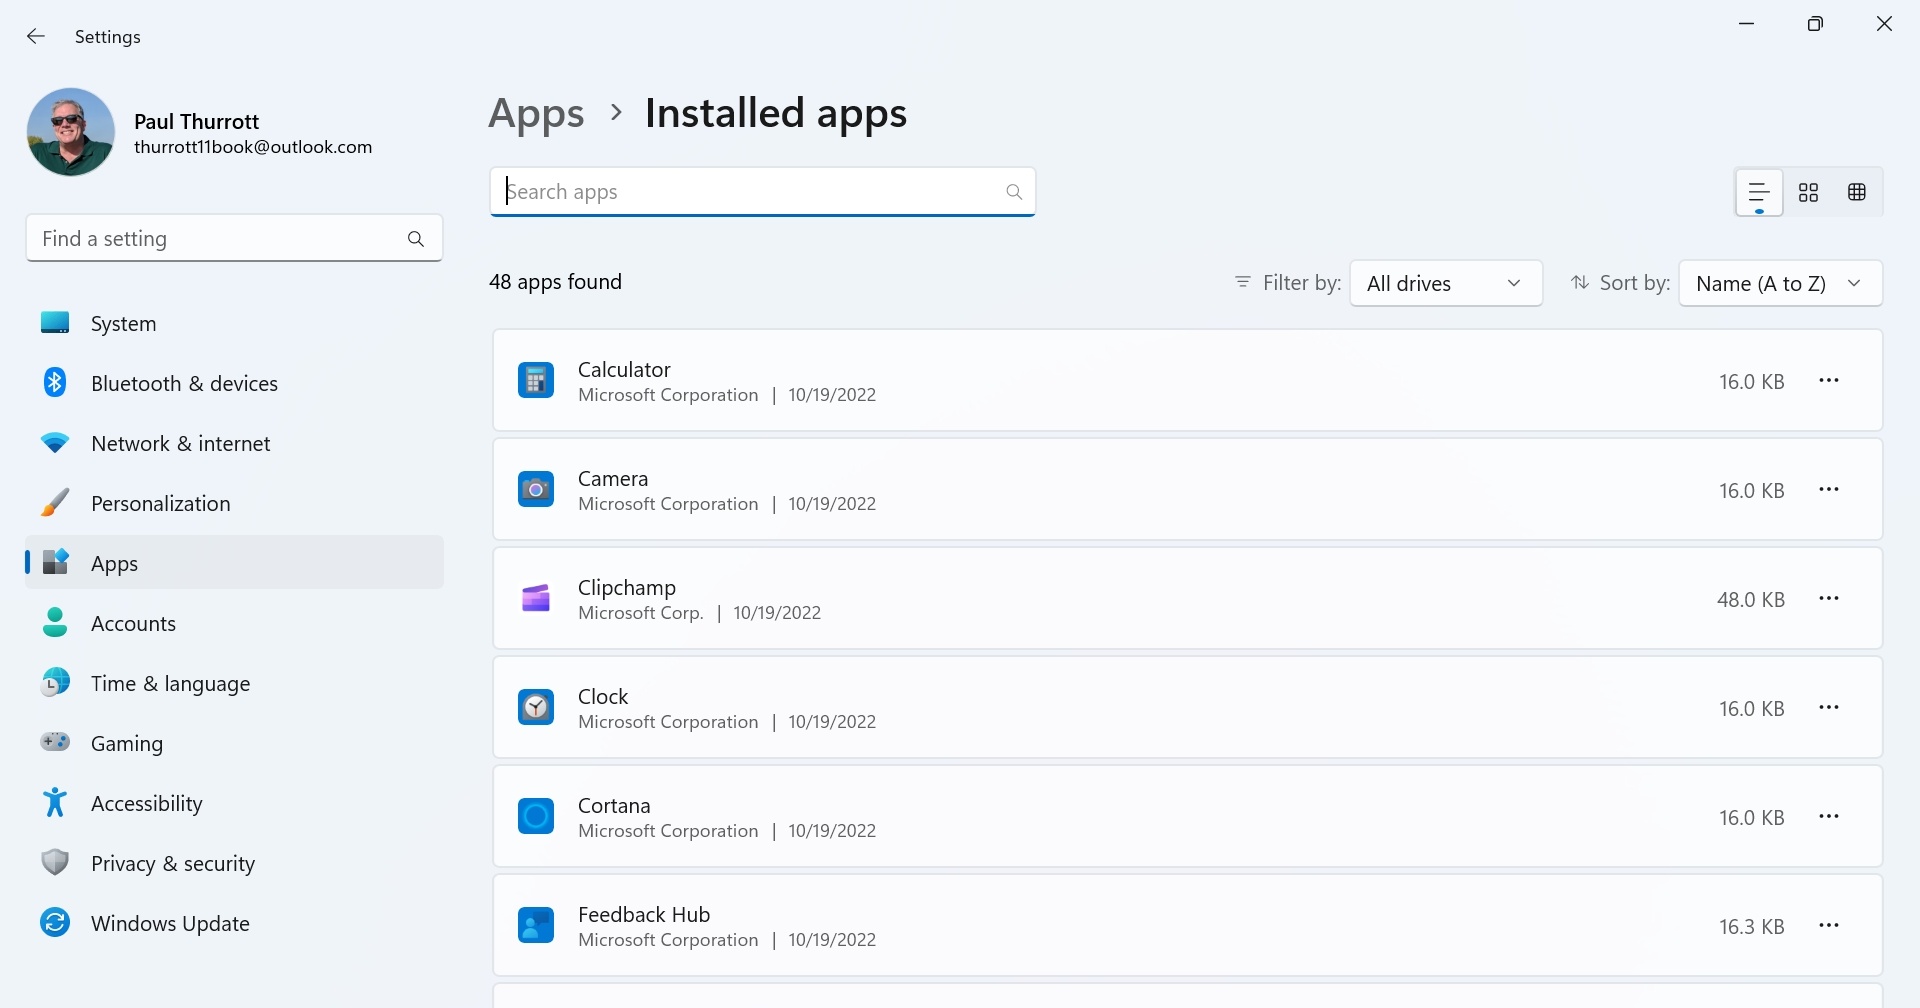
If you have a second drive, you can also save space on the system disk by moving apps and games to another location. To do so, select Installed apps.
Most of the apps that are built-in to Windows—Mail, Calendar, Photos, and so—can’t be moved to a different drive. But most Store apps and games you install yourself can be. To move an app to a new drive, select the “…” link next to it in the apps list and then select “Move” in the menu that appears.
If the Move item is grayed out, then you can’t move that app.
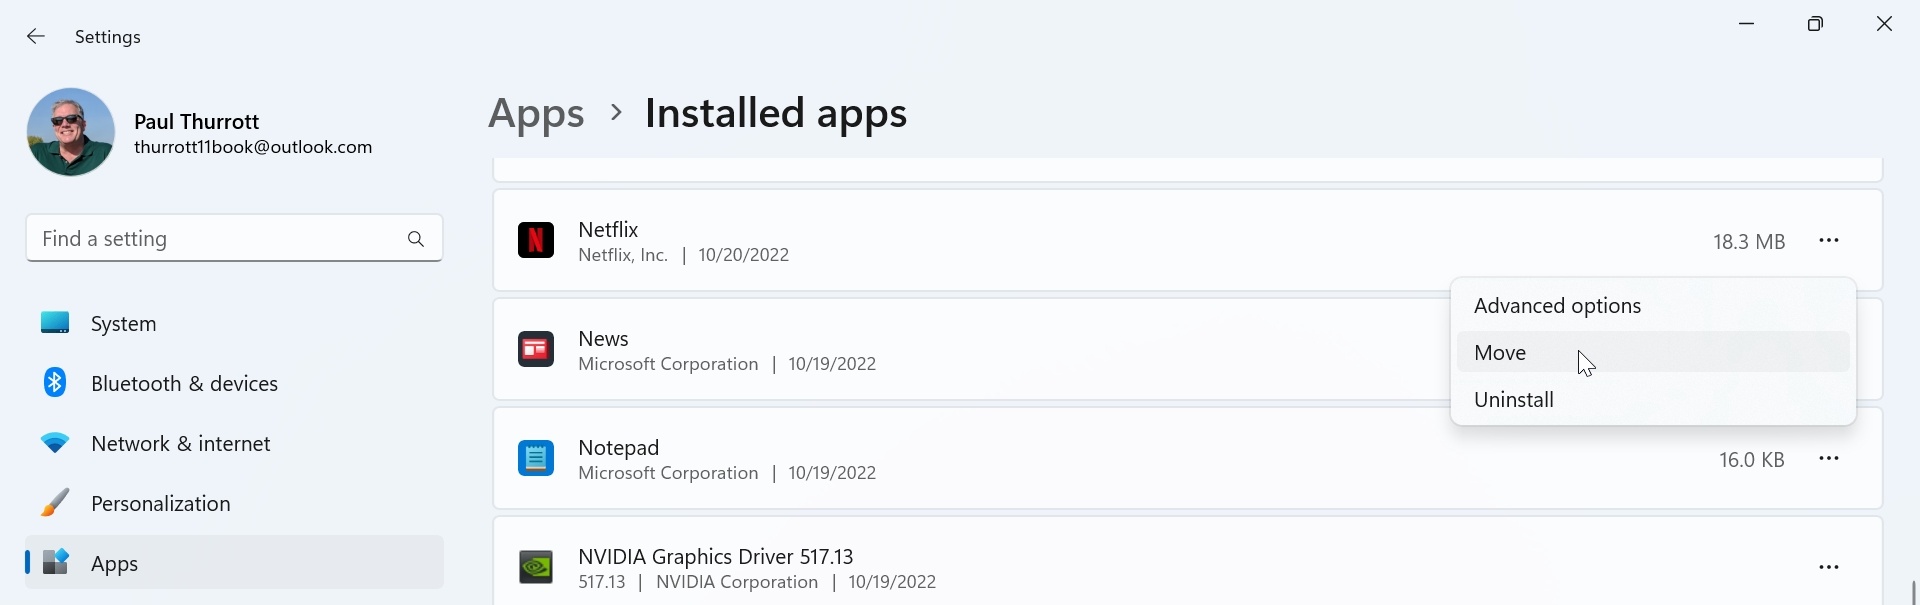
Then, in the pop-up that appears, choose the new drive to which to move the app and then click the “Move” button.
Get cleanup recommendations
If the tasks described above are too complicated or tedious to use, no worries: Storage settings includes a Cleanup recommendations feature that will examine your storage situation and recommend the best ways to free up space. To access this feature, select Cleanup recommendations. The Cleanup recommendations page appears.
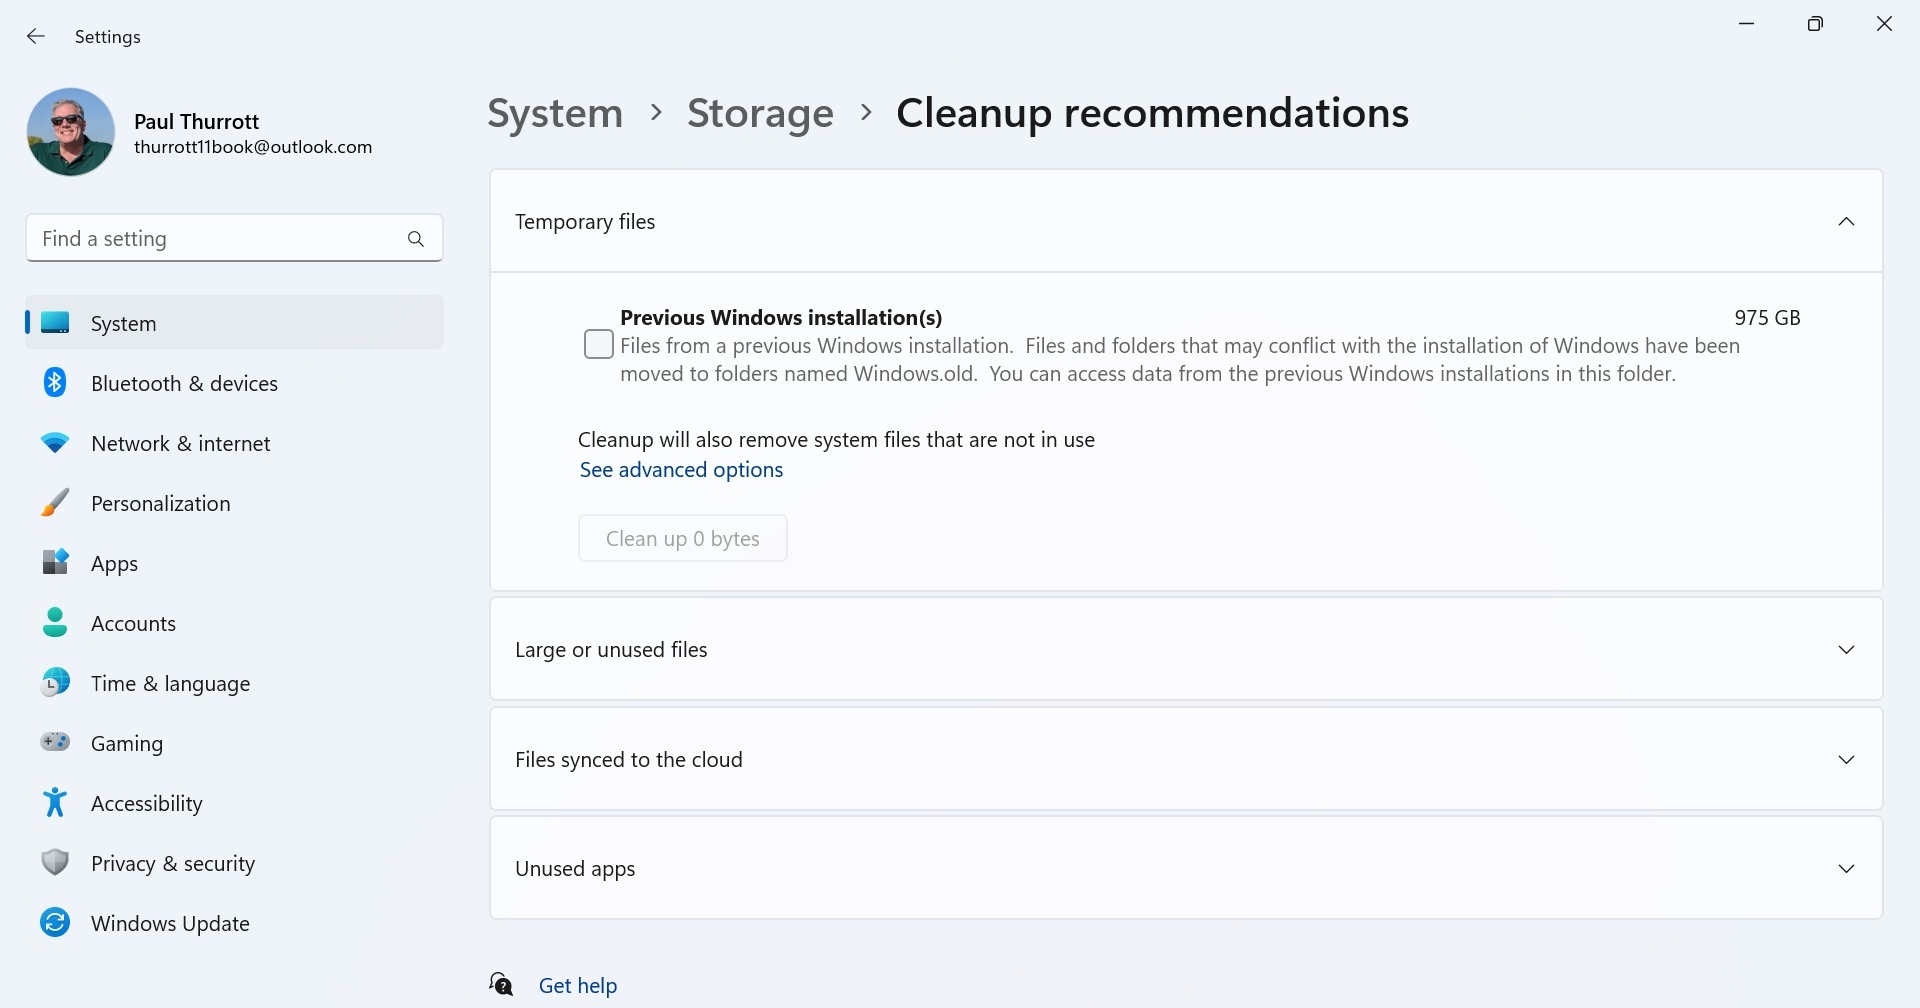
Here, you will see options related to temporary files, large or unused files, files that are synced to the cloud, and unused apps. In each case, you can see how much storage space you will free up by removing the recommended items.
To free up space, select one or more recommended items in one of the groups and then click the “Clean up” button and confirm your choice in the dialog that appears. Repeat with the other groups as necessary.
Cleanup recommendations is a modern replacement for a legacy utility called Disk Cleanup that is inexplicably still available in Windows 11. You can find it using Search.
Automatically manage storage space with Storage Sense
Instead of manually managing the storage space in your PC, you can simply rely on a Windows tool called Storage Sense to do so automatically. Storage Sense may be disabled by default—you can find out via the Storage Sense option in Storage settings—but when enabled, it automatically cleans up temporary files generated by the system and apps.
Storage Sense can also be configured to clean up certain types of files stored in your user account, and to do so on specific schedules. To examine the choices and configure this feature, select the Storage Sense option in Storage settings. (As opposed to enabling Storage Sense itself.) Storage Sense settings appears.
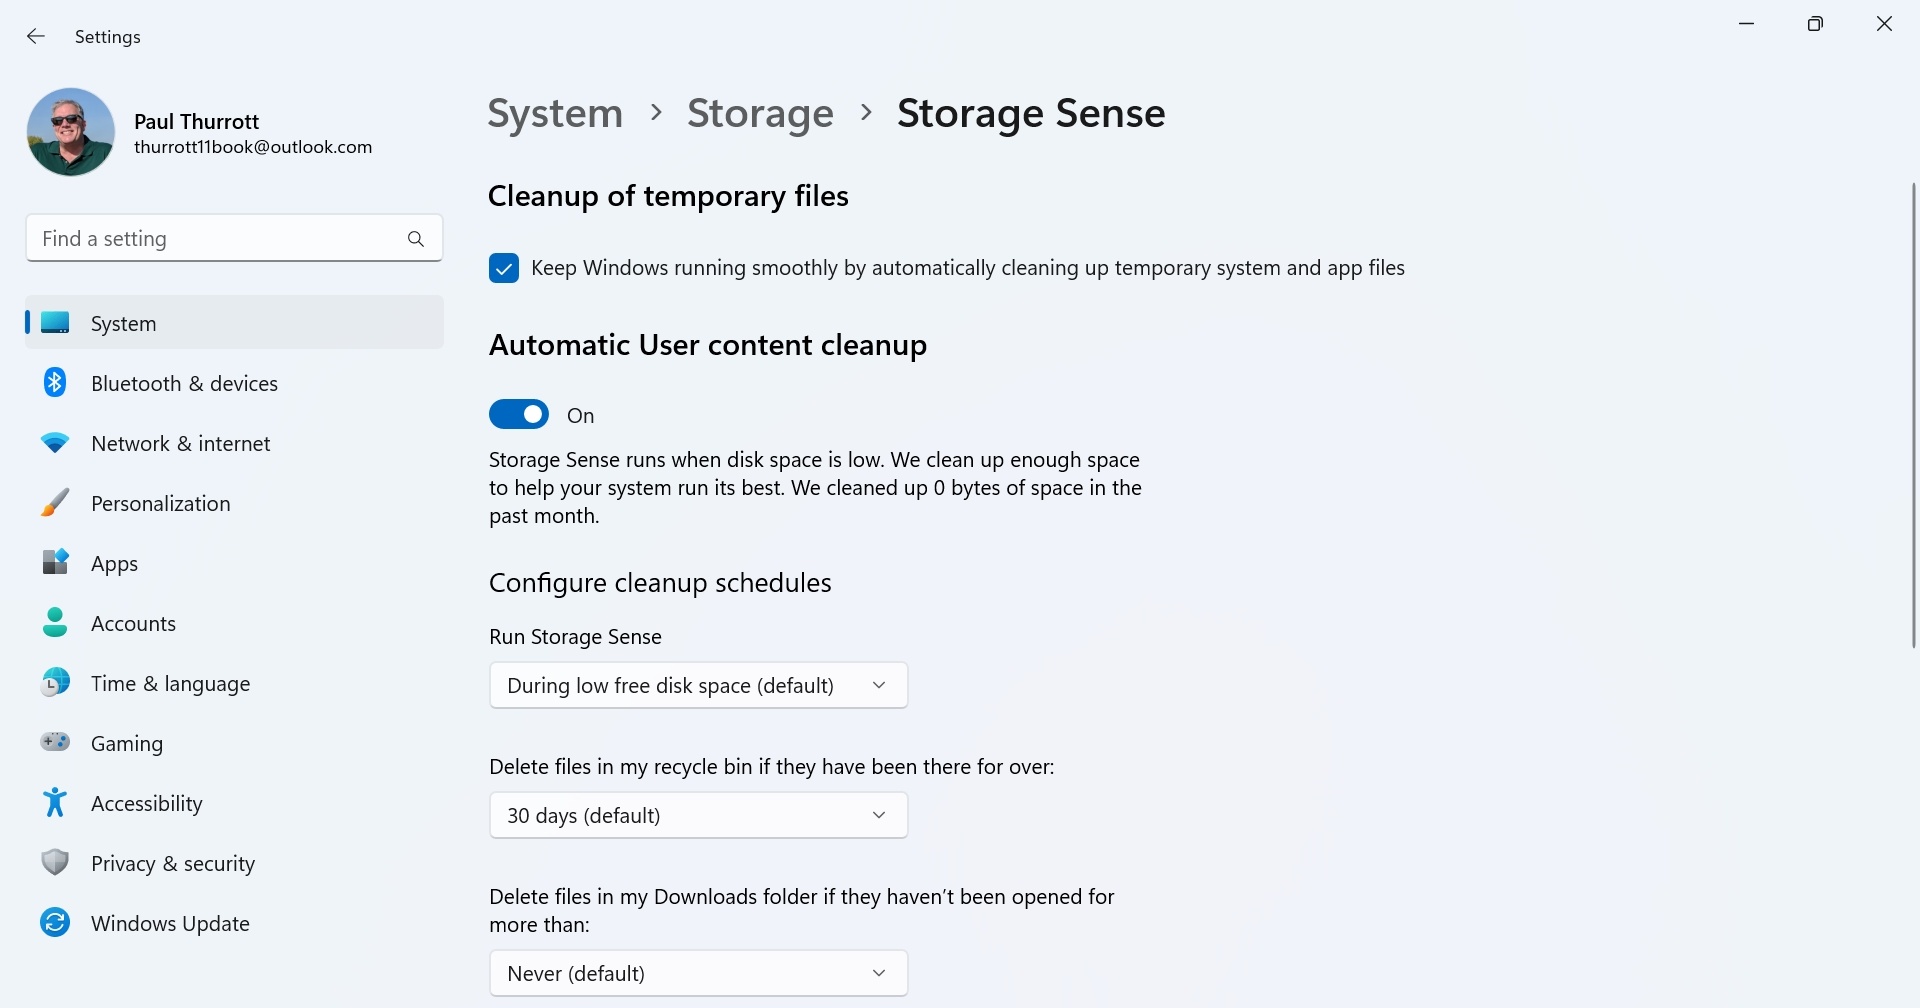
Here, you can configure the following options:
Cleanup schedules. Under “Configure cleanup schedules,” you can determine when to run Storage Sense, delete the files in your Recycle Bin, and delete the files in your Downloads folder.
Remove unused “cloud-backed content” from your PC. The confusing option found under “Locally available cloud content” will automatically remove locally synced OneDrive content that you haven’t accessed on a schedule you determine (after 1, 14, 30, or 60 days, or Never). The reason this is confusing is that it will not impact any files you’ve marked as being “Always keep on this device.”
Don’t worry about losing content: Windows will only remove the local copy of these files. The originals will remain in OneDrive and are always accessible from your PC as before.
Run Storage Sense now. If you don’t want to wait for Storage Sense to run automatically, you can make it happen immediately by clicking this button.
Configure where new content is stored
If you have more than one storage device, you can select the “Where content is saved” link under Advanced storage settings to configure where new apps, documents, music, photos and videos, movies and TV shows, and offline maps are stored.
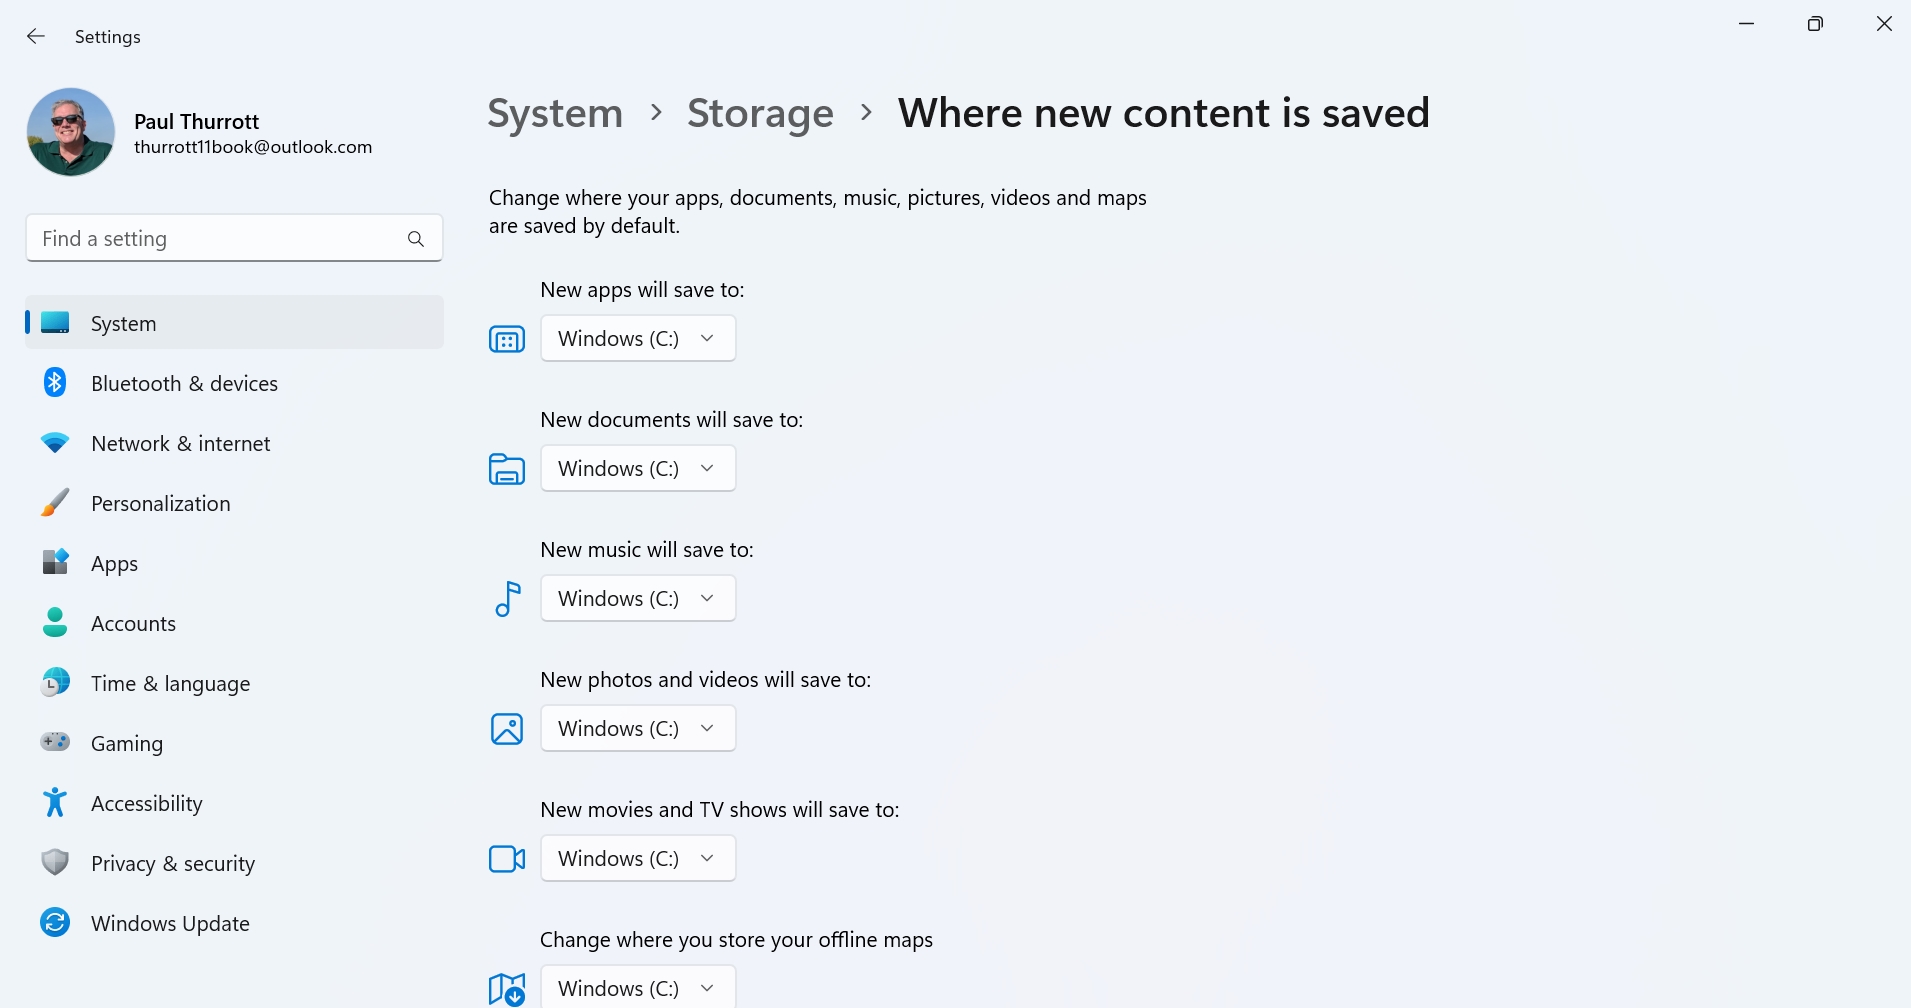
To make a change, just select the drop-down under one of the content types, select a new drive, and then click “Apply.”

When you do so, Windows will create a new folder structure to accommodate your choice. For example, if you move the location for new music content from the C: drive to the D: drive, Windows will create a D:[user name]\Music folder.
Manage removable storage
Storage settings also lets you configure your removable storage devices, but thanks to the unique capabilities of these devices, there are also additional options to consider.
Use Storage settings to manage removable storage
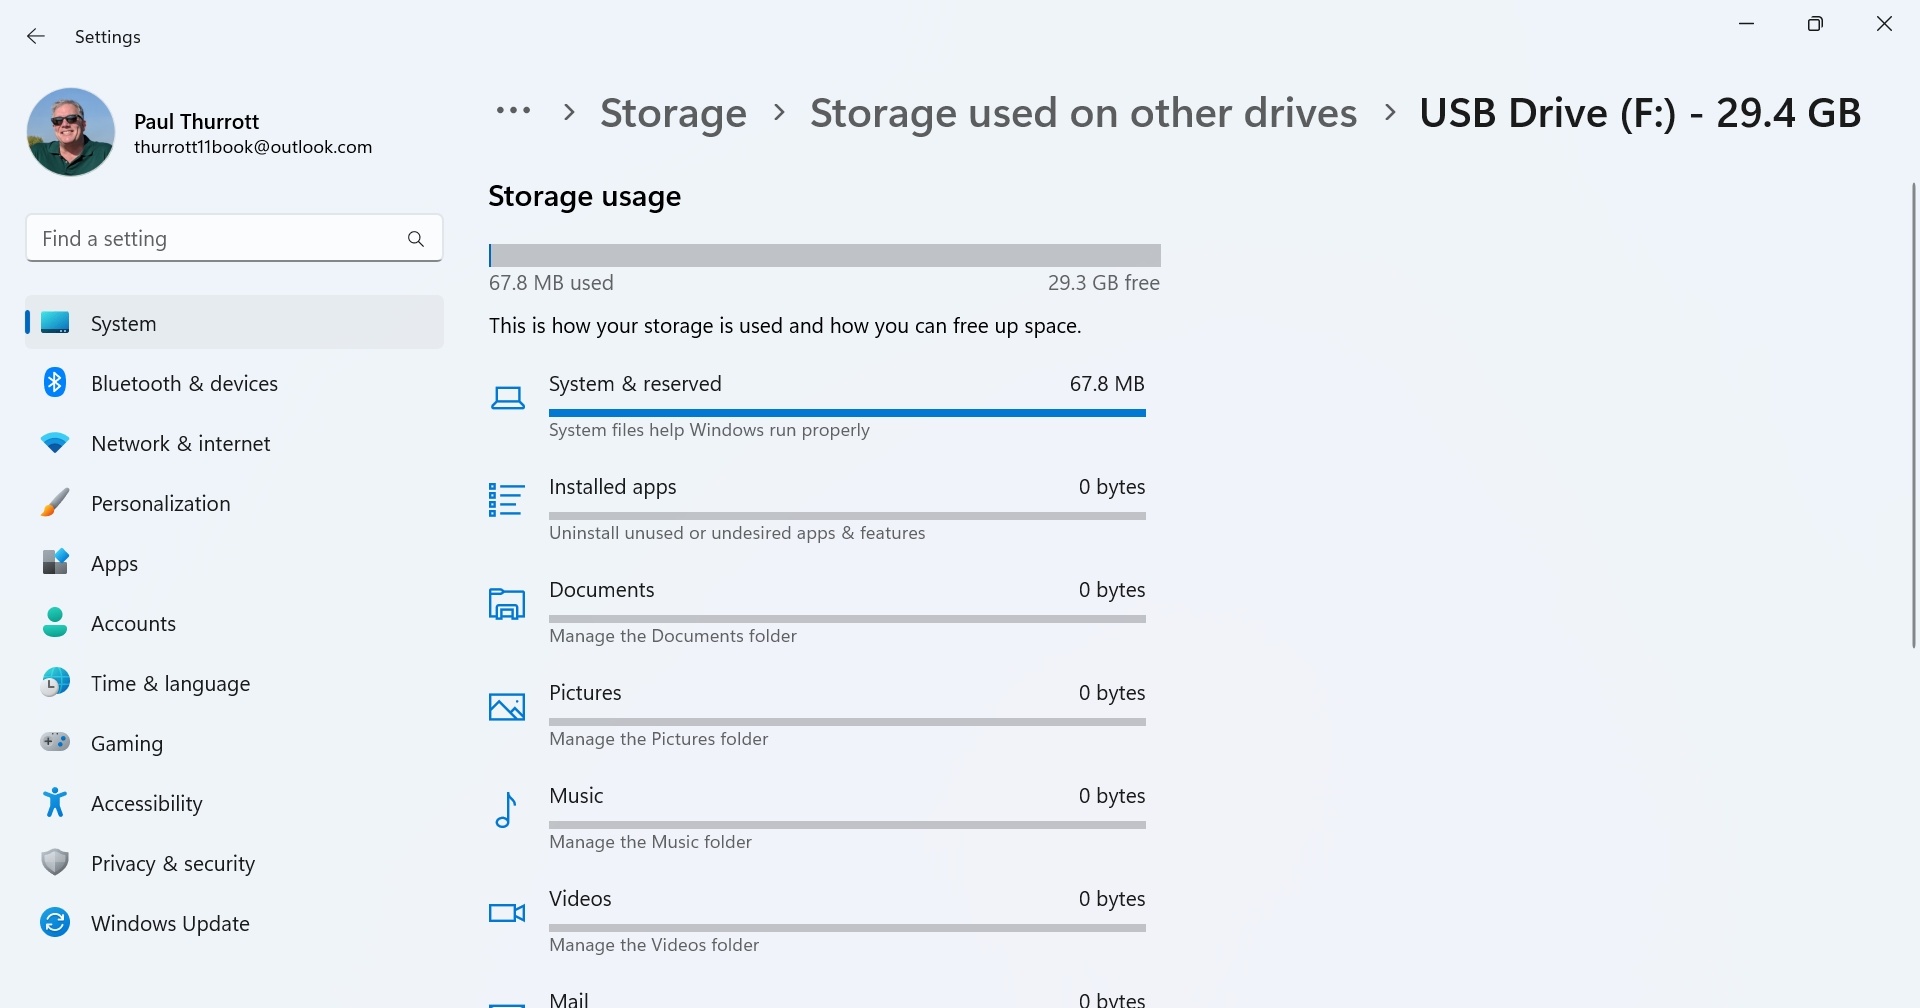
The Storage settings home page only displays storage usage for the system drive (C:), but you can view the storage used on other storage devices, including removable storage, by selecting Advanced storage settings and then “Storage used on other drives.” In the settings page that appears, you will see all of your storage devices.
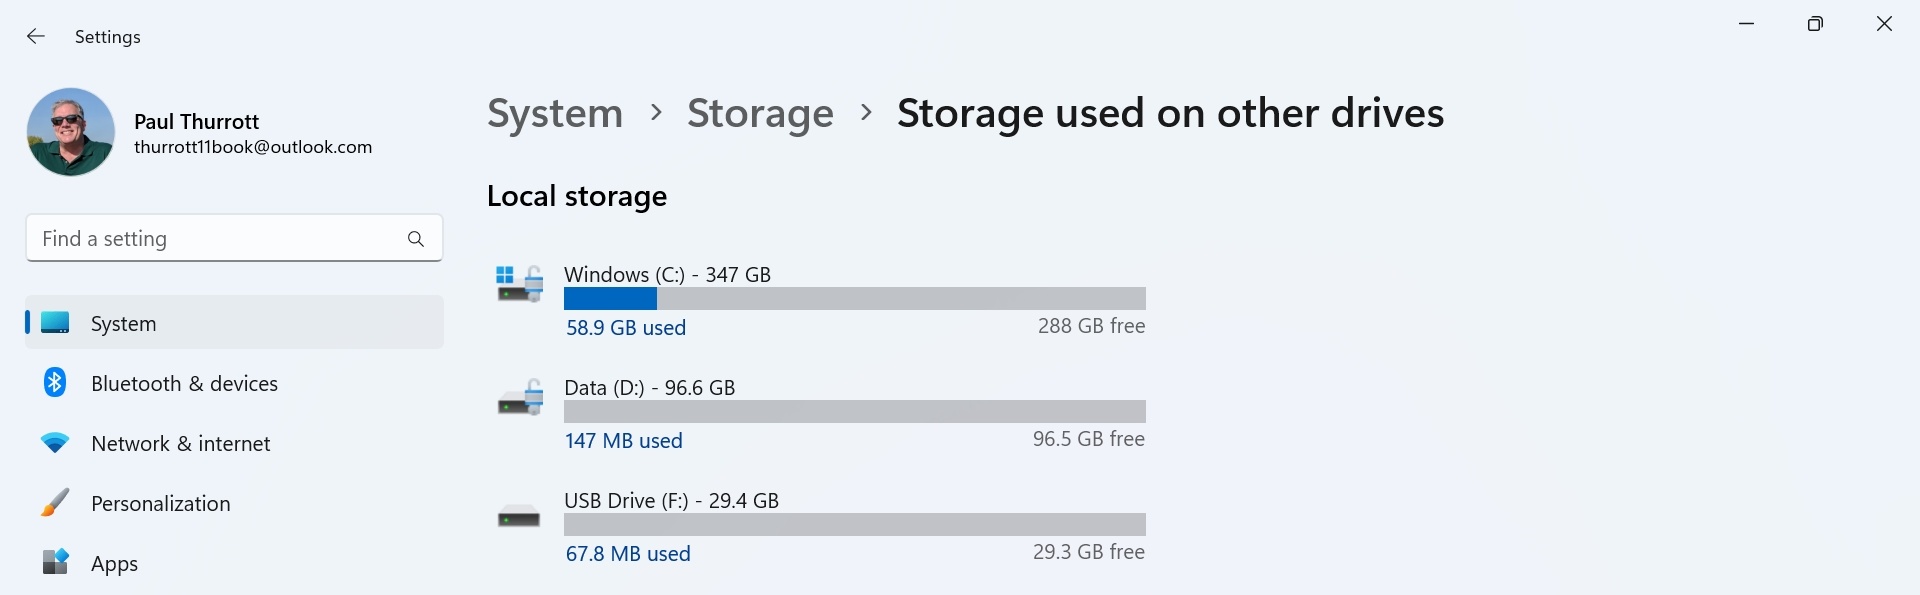
Then, you can select any drive and see how the storage is being used, with capabilities that are identical or similar to that described above.
Configure what happens when you insert a removable storage device
There is another interface in Settings that helps you configure what happens when you insert a removable storage device in a USB port on your PC. This feature is called AutoPlay.
To configure AutoPlay, open the Settings app (WINKEY + I) and navigate to Bluetooth & devices > AutoPlay. AutoPlay settings appears.
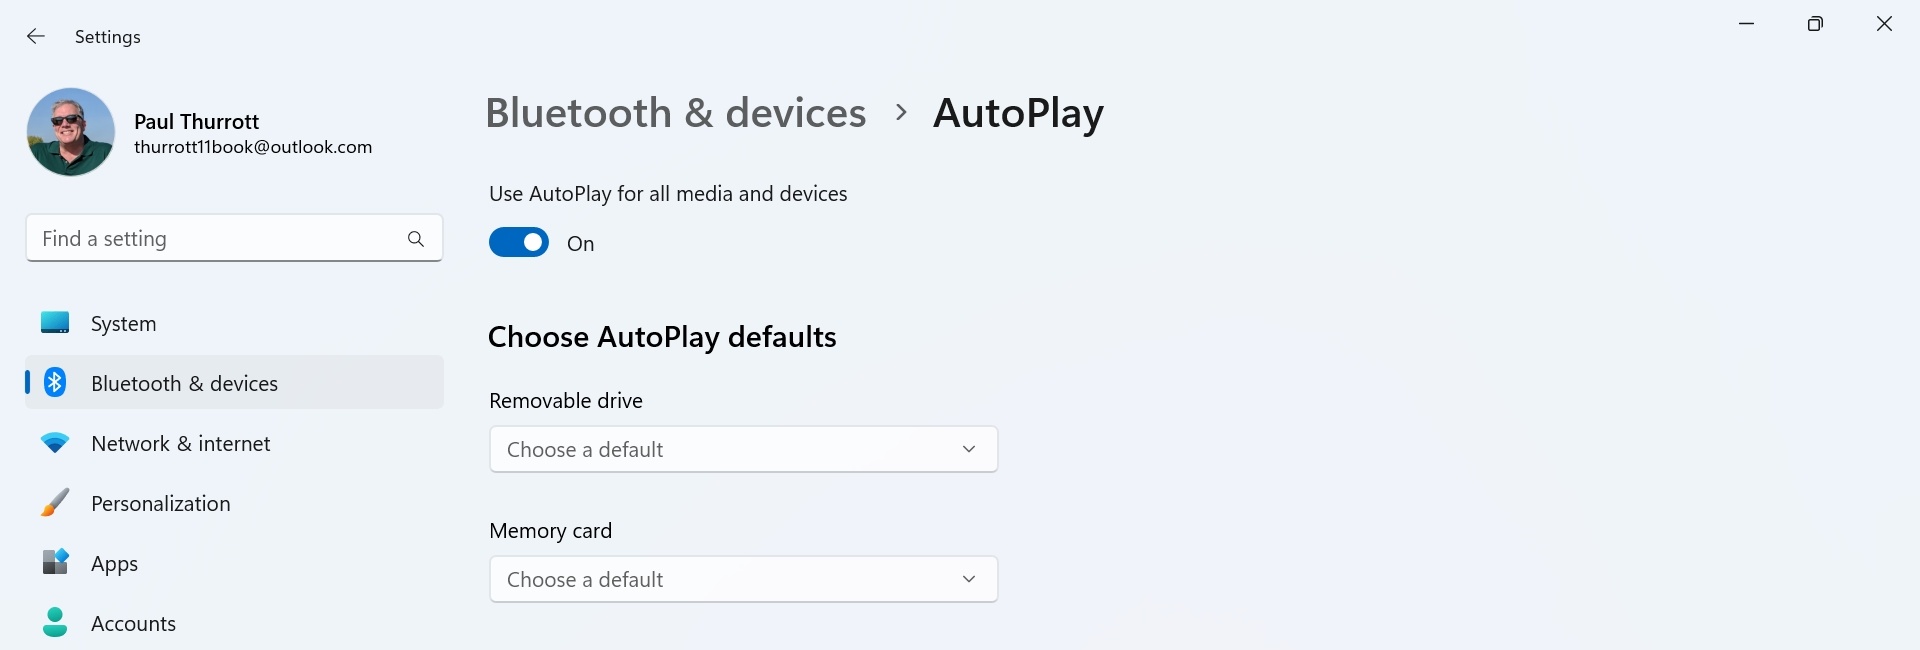
Here, you can globally enable/disable AutoPlay globally—it’s enabled by default—and determine what happens when you insert a removable drive or a memory card, or connect a smartphone.
You won’t see an option for your smartphone here until after you connect it to the PC over USB.
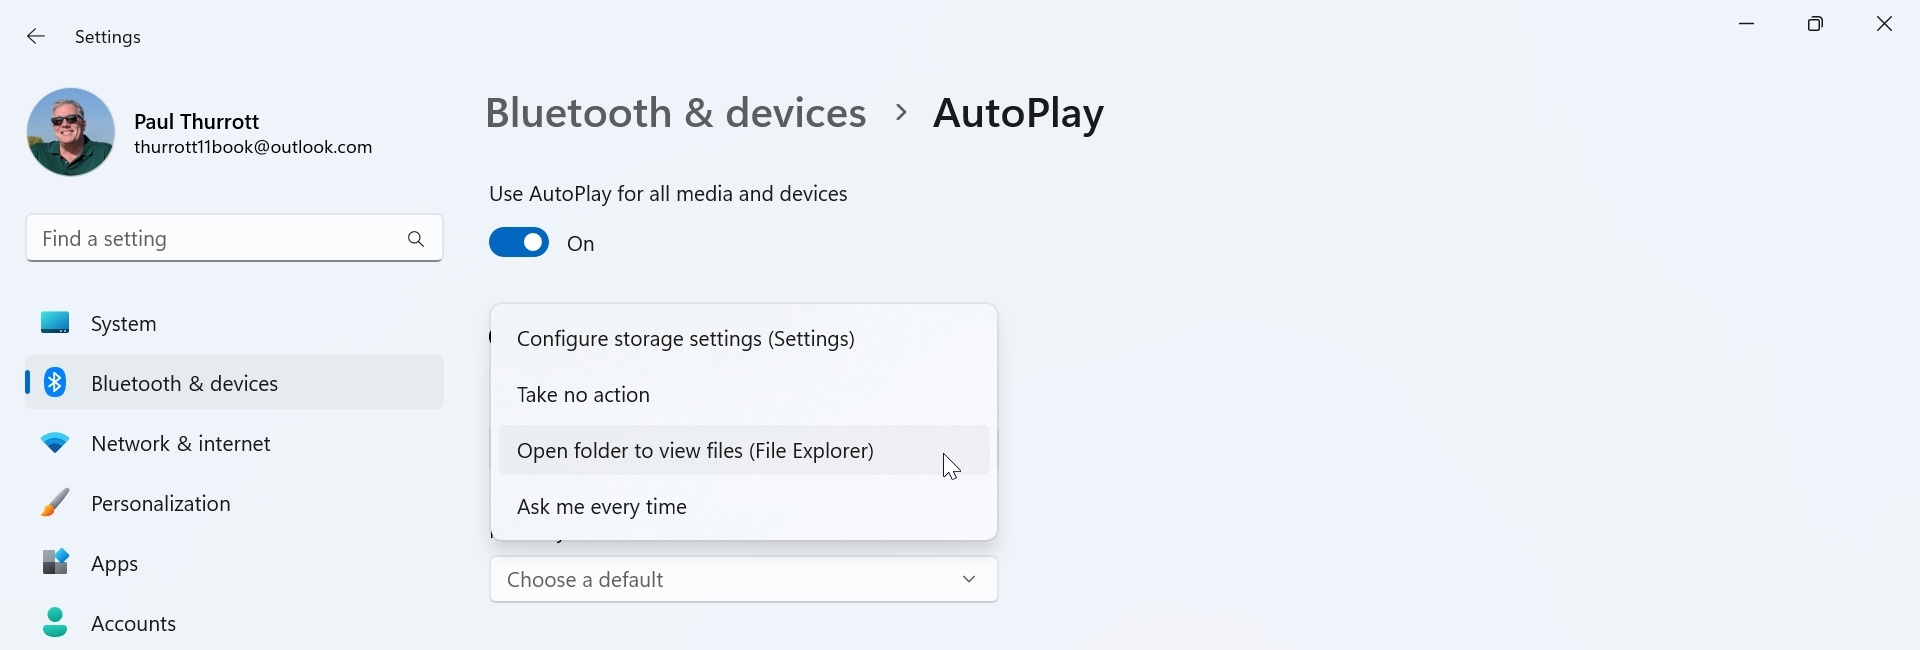
The options vary by device type, but with a removable drive, your choices include “Configure storage settings (Settings),” “Take no action,” “Open folder to view file (File Explorer),” and “Ask me every time.”
If you don’t configure AutoPlay, Windows will prompt you the first time you insert a removable storage device.
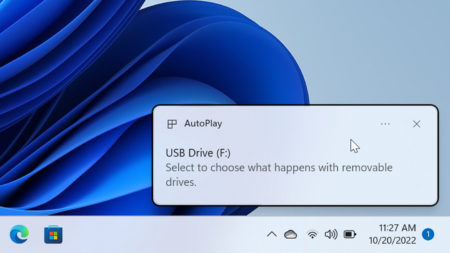
Select this notification to see a menu of the available choices, which map to the options noted above.
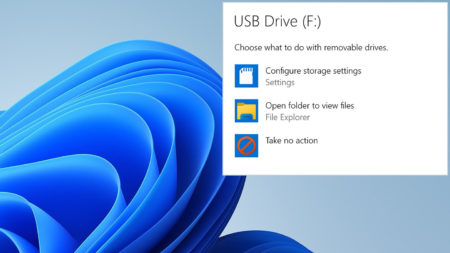
If you miss the notification or want to change your choice later, you can use AutoPlay settings at any time. Or just unplug the device and reinsert it.
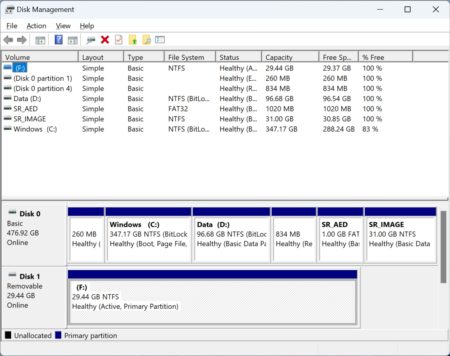
Get it done more quickly with Disk Management
Windows 11 still includes a legacy storage management utility called Disk Management that can come in handy from time to time. It is one of several tools that is made available from the Windows 11 Quick access menu, which you can display by right-clicking the Start button or typing WINKEY + X. But you can also find Disk Management with Search: begin typing its name (like disk m) and then select “Create and format hard disk partitions” in the search results.
Most of the functionality provided by Disk Management is available in Storage settings, making this tool somewhat redundant. But we still find it easier and quicker to accomplish certain disk-related tasks with Disk Management:
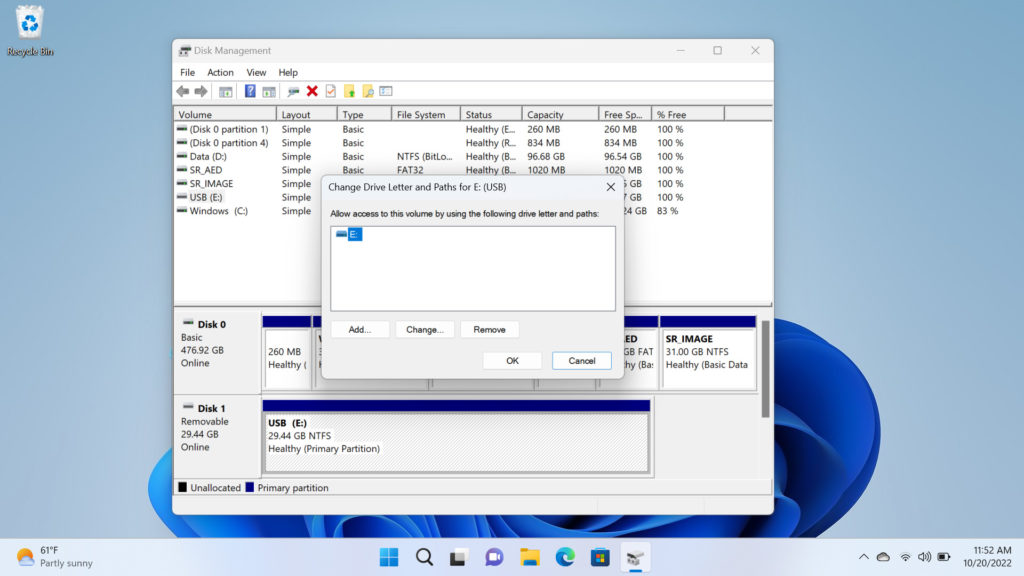
Change a drive letter. Windows 11 automatically assigns drive letters (like C: and D:) to every compatible volume found on any fixed and removable storage devices attached to the PC. But you may sometimes want to assign a specific drive letter to a (non-system) disk. To do so, right-click it choose “Change Drive Letter and Paths…”, and then use the window that appears to change the drive letter.
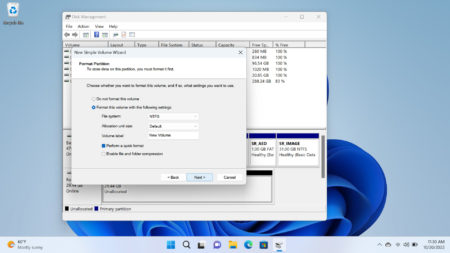
Format a removable disk that uses a file system Windows 11 doesn’t understand. If you insert a removable disk that is formatted using a file system that Windows doesn’t understand, it will not appear in File Explorer or be otherwise accessible. But you can often access these disks with Disk Management and, if desired, format them so that they will work normally with Windows. To do so, delete all of the volumes on the relevant disk, create a new simple volume, and then format it using the NTFS file system. (The default choice is FAT32 for some reason.)

Gain unlimited access to Premium articles.
With technology shaping our everyday lives, how could we not dig deeper?
Thurrott Premium delivers an honest and thorough perspective about the technologies we use and rely on everyday. Discover deeper content as a Premium member.