Device Encryption (Archived)
- Paul Thurrott
- Oct 20, 2022
-
4
Windows 11 includes a device encryption feature that helps protect the documents and other data that you store on your PC from being stolen or otherwise accessed by others. Device encryption is what’s known as a full-disk encryption solution because it is applied to an entire disk and not just to certain folders or files. It’s also automatic: device encryption is enabled on the PC when you sign in to Windows 11 using a Microsoft account for the first time.
Technically speaking, Windows 11 does not encrypt your entire system disk, which is divided into different logical volumes. Instead, it encrypts the C: drive, which is the volume that contains Windows and other system files. (This drive is often referred to as the system disk.) Any other volumes on this disk will not be encrypted (nor visible normally while using Windows 11).
If you sign in to Windows 11 with a local account, which we do not recommend, device encryption will not be enabled automatically. This is only one of many reasons why using a Microsoft account is more secure.
Oddly, there are two versions of device encryption, and which you get is determined by which Windows 11 product edition you are using. If you have Windows 11 Home, you have a basic, streamlined version of device encryption. But if you have Windows 11 Pro, you get a more configurable and manageable version called BitLocker drive encryption. Both share the same underpinnings, but BitLocker includes additional features as described below.
For the most part, using device encryption is seamless and not something you will notice. But it is important to understand that any files that you copy or move to an encrypted disk are encrypted during the copy or move process. Likewise, any files that you copy or move from an encrypted disk are decrypted during that process as well. Decrypted files can be read or used by anyone, on any PC.
When enabled, device encryption also provides some additional functionality to the system disk on which Windows is installed. For example, when the PC boots, it will examine the integrity of the system to ensure that nothing suspicious has happened to the PC’s firmware or startup files. If an issue is found, you’ll be prompted to provide the recovery key, which was saved to your Microsoft account and is like a very lengthy password. (This is discussed below.)
Manage device encryption
Device encryption doesn’t offer much in the way of management: this feature is enabled for you automatically when you sign into Windows 11 using a Microsoft account. However, you can ensure that device encryption is enabled and even disable this feature—which we do not recommend—using the Settings app.
To do so, open Settings (WINKEY + I) and navigate to Privacy & security > Device encryption.
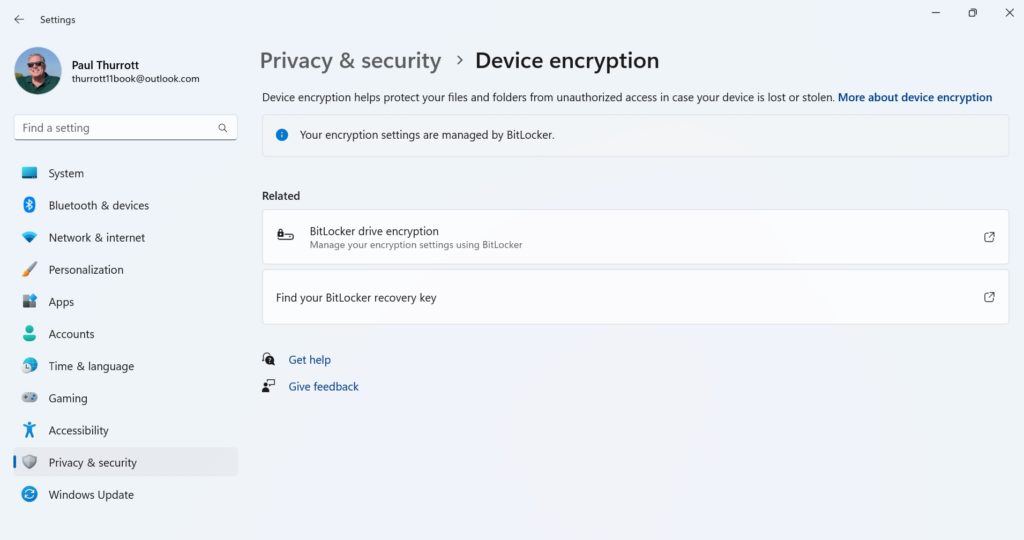
If you just signed into Windows 11 for the first time, you may see an “Encryption is in progress” message at the top of this Settings page. That message will disappear when Windows 11 finishes encrypting the system disk.
Here, you will find a toggle for device encryption and links to “BitLocker drive encryption” and “Find your BitLocker recovery key,” the latter of which launches your default web browser and displays an informational website.
If you are using Windows 11 Pro, the “BitLocker drive encryption” link will open the BitLocker Drive Encryption control panel as discussed in the next section. But if you are using Windows 11 Home, the Microsoft Store app will launch and amusingly try to sell you a $99 upgrade to Windows 11 Pro.
The only actionable option here is “Device encryption.” If you toggle that to “Off,” Windows 11 will decrypt the system drive, which could leave the files it contains open to being compromised.
Do not disable “Device encryption.”
However, if you are using Windows 11 Home, it is possible that device encryption is disabled, even if you have signed in with a Microsoft account. And that’s because this version of device encryption also requires a hardware feature called Modern Standby that isn’t required by BitLocker drive encryption in Windows 11 Pro. This feature allows Windows 11 to process background tasks when it is otherwise asleep, saving battery life, but it needs to decrypt and encrypt files as it works.
If you don’t see a Device encryption option in Settings on Windows 11, this is likely the issue.
Because Modern Standby-compatible hardware is a requirement to install and use Windows 11, this should never happen to you. But if you installed Windows 11 on unsupported hardware, as described in Upgrade to Windows 11 on Unsupported Hardware, it’s possible you will run into this problem: Modern Standby requires an enabled Trusted Platform Module (TPM) 2.0 chipset and Unified Extensible Firmware Interface) firmware. So make sure you meet the requirements and that TPM 2.0 is enabled in your PC’s firmware.
Manage BitLocker
If you have Windows 11 Pro, you can use the BitLocker Drive Encryption control panel, a legacy system management interface from previous Windows versions, to manage BitLocker and access a few additional features.
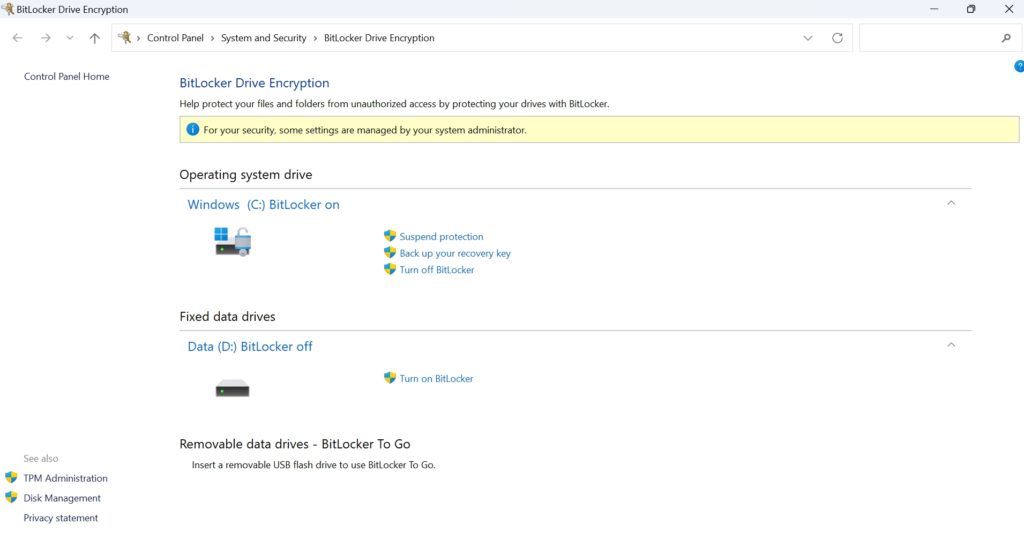
From here, you can manage any encrypted fixed and removable drives or encrypt any non-encrypted fixed and removable drives.
You can perform the following actions to a BitLocker-encrypted fixed disk such as your system disk:
Suspend protection. In rare cases—such as when your PC requires a firmware update—you may need to temporarily disable BitLocker’s full-disk encryption. This link lets you do so.
Back up your recovery key. This link displays the page of the BitLocker Drive Encryption wizard, described in more detail below, that lets you back up your BitLocker recovery key to your Microsoft account, a local file, or a printout.
Turn off BitLocker. If you wish to disable BitLocker entirely, this option is for you. Removing encryption can be time-consuming, but you can at least continue using the PC while this process occurs.
If you turn off BitLocker, the “Device encryption” option in Settings > Privacy & security > Device encryption will be switched to “Off” and the contents of that drive will no longer be protected.
If BitLocker is not enabled on this disk, you will see only one option, “Turn on BitLocker.”
Encrypt internal storage
You can use Bitlocker to encrypt any internal storage device—called a fixed disk—that is attached inside your PC.
You can also encrypt removable disks, like USB memory sticks and hard drives. This is covered in the section Encrypt removable storage below.
To encrypt a fixed disk, select the “Turn on BitLocker” link next to the appropriate disk under “Fixed data drives” (or, if it’s your system disk, under “Operating system drive”).
When you do so, the BitLocker Drive Encryption wizard starts and progresses through the following steps:
How do you want to back up your recovery key? First, the wizard will prompt you to back up the recovery key for the disk. This key can be used to unlock the drive if you try to access it from another computer, or if you try to reset the PC. Refer to the section Use the BitLocker recovery key for information about finding this recovery key later if you need it.
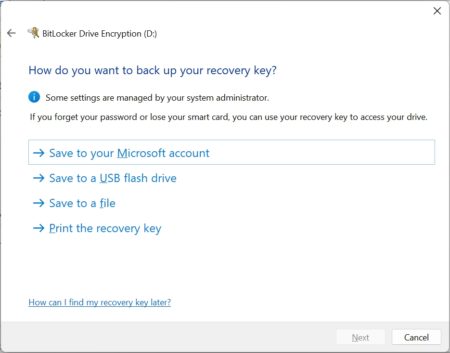
We strongly recommend saving the key to your Microsoft account, but you can use any or all of these options to back up the key.
Choose how much of your drive to encrypt. If this is a new disk, the default choice—“Encrypt used disk space only”—is fine, as there won’t be any private data hiding in unused parts of the disk. But if you are encrypting a disk you’ve been using for a while, the second option—“Encrypt entire drive”—is the safer, albeit slower, choice.
You can continue using your PC while BitLocker encrypts the disk, so there’s no good reason not to choose the second option with a previously-used disk.
Choose which encryption mode to use. Windows 11 provides an improved encryption scheme that is incompatible with older versions of Windows, including the initial shipping version of Windows 10 (version 1507, from 2015). But this isn’t an issue for fixed disks: So just choose the default “New encryption mode” option.
If you are encrypting removable storage, as described below, the second option, “Compatible mode,” may be preferable since that disk can be used with multiple computers, including some that might be running an older Windows version.
Are you ready to encrypt this drive? This is the moment of truth. If you’re ready to encrypt the drive, you will need to shut down all of your other applications now, as the PC will need to reboot first.
If this is the system disk, be sure to select the “Run BitLocker system check” option before proceeding. Doing so will ensure that BitLocker can read the recovery and encryption keys properly before encrypting the drive.
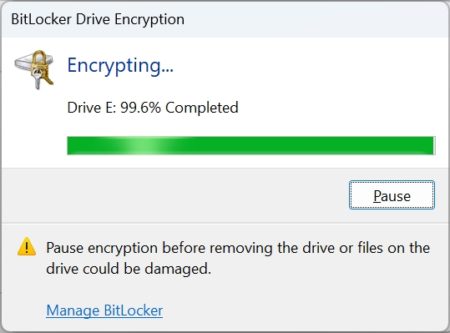
You can sign in and continue working normally while the disk is encrypting. Note that this process can take quite some time, especially for larger, already-used disks.
Encrypt removable storage
You can encrypt a removable storage device—like a USB memory stick or hard drive—using a Windows feature called BitLocker To Go.
To do so, insert the removable storage device into a USB port in your PC and then display the BitLocker Drive Encryption control panel. The device will appear under “Removable data drives – BitLocker To Go.”
You may have to expand the view of the drive using the caret over at its right before you can see it fully.
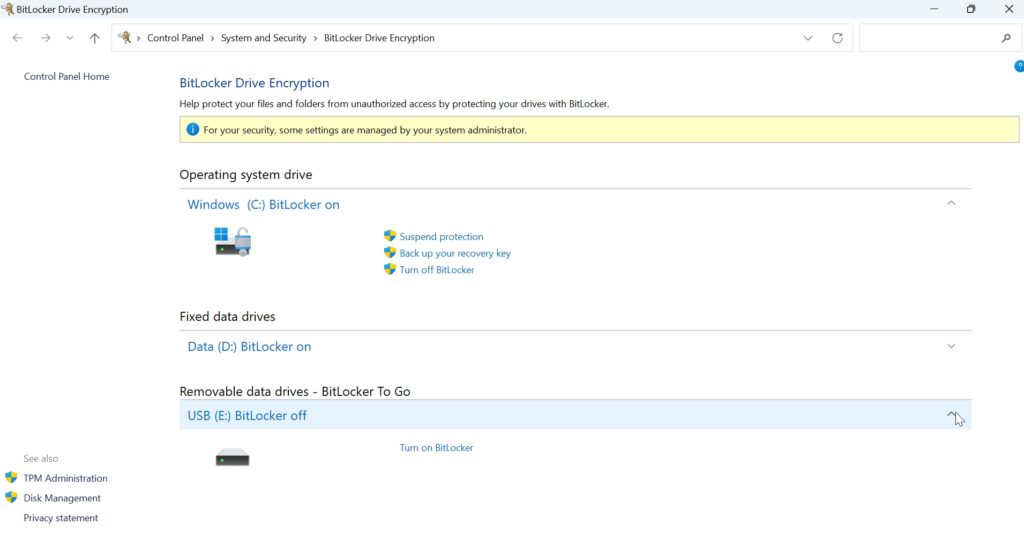
Now, select the “Turn on BitLocker” link next to the appropriate disk under Removable data drives – BitLocker To Go. (You may need to click the caret at the right to expand the view first.)
The BitLocker Drive Encryption wizard starts and progresses through the following steps:
Choose how you want to unlock this drive. Here, you must choose a method to unlock the disk. This can be a password—the typical method for most individuals—or a smart card, which is used in corporate environments and controlled by policy. Select “Use a password to unlock the drive” and then supply the same password twice in the provided fields.

Though Microsoft recommends that the password you use here contains some combination of uppercase and lowercase letters, numbers, spaces, and symbols, the only requirement is that it be at least 8 characters long.
How do you want to back up your recovery key? Next, the wizard will prompt you to back up the recovery key for the disk. This key can be used to unlock the drive if you try to use it with another computer. Refer to the section Use the BitLocker recovery key for information about finding this recovery key later if you need it.
Do not lose this key. The safest place to back it up is to your Microsoft account. Assuming, of course, that you’ve secured that account with two-step authentication.
You can back up the recovery key using any or all of the options provided by the wizard. You won’t continue to the next step until you choose “Next.”
Choose how much of your drive to encrypt. If this is a new disk, the default choice—“Encrypt used disk space only”—is fine, as there won’t be any private data hiding in unused portions of the disk. But if you are encrypting a disk you’ve been using for a while, the second option—“Encrypt entire drive”—is safer, albeit slower.
Choose which encryption mode to use. Windows now provides an improved encryption scheme that is incompatible with older versions of Windows, including the initial shipping version of Windows 10 (version 1507, from 2015). So, you should generally choose “Compatible mode” instead, since the removable disk can be used with multiple computers, including some that might be running an older Windows version.
Are you ready to encrypt this drive? If you’re ready to encrypt the drive, select the Start encrypting button. You can continue using your PC while the disk is encrypted.
Use a BitLocker-protected removable disk
You can use a BitLocker-protected removable disk with any edition of Windows 11. Doing so is just like using a normal, unencrypted disk, with one difference: you will need to provide its password first.
To see this, insert a BitLocker-protected removable disk or use a BitLocker-protected fixed disk for the first time in a computing session. Windows will display a notification in the bottom-right of the screen informing you that this disk is encrypted.
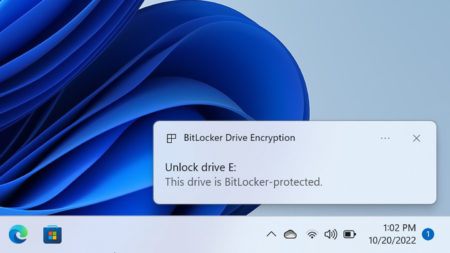
Select this prompt to enter the BitLocker password and access the disk normally.
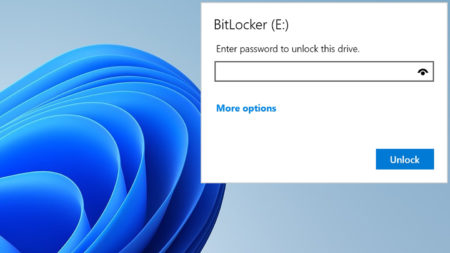
If you expand the “More options” link in this password entry prompt, you will see an option to automatically unlock the disk when it’s used on this PC. As long as you’re signing in with a Microsoft account, this option is safe to enable and makes dealing with BitLocker To Go encrypted removable storage devices a lot more seamless.
If you don’t respond to the notification quickly enough, you will need to unlock it with File Explorer: just open the drive as you would normally and the password prompt will appear.
Once you enter the password, the removable disk will behave normally and you can use it just like any other disk.
Manage an encrypted removable disk
Once you have inserted an encrypted removable disk in your PC, you can perform various encryption management tasks.
BitLocker To Go disk management requires Windows 11 Pro or better.
You do so with the BitLocker Driver Encryption control panel, where you will now see new options next to your encrypted removable disk.

These options include:
Back up your recovery key. This link displays the page of the BitLocker Drive Encryption wizard that lets you back up your BitLocker recovery key to your Microsoft account, local file, or printout.
Change password. This option lets you change the password used to enable access to the encrypted removable disk.
Remove password. If you have enabled smart card-based authentication for this removable drive, you can optionally remove the password, which is redundant and potentially less secure.
Add smart card. Corporate environments often provide smart cards to their employees as a more secure way to access resources like encrypted disks. This type of thing is very uncommon with individuals, however, and can usually be ignored.
Turn on auto-unlock. If you would prefer not to enter a password every time you insert this removable disk on this PC, you can disable that requirement using this option.
Turn off BitLocker. If you wish to disable BitLocker entirely, this option will let you do so. Removing encryption can be time-consuming, but you can continue using the PC while this process occurs.
Use the BitLocker recovery key
Every disk that is protected with device encryption has an associated recovery key—a 40-digit alphanumeric string of characters—that is saved to your Microsoft account. Windows 11 creates this key automatically when it first encrypts the system drive, and if you use BitLocker to encrypt other disks, you will be prompted to create a BitLocker recovery key at that time.
You must create a BitLocker recovery key for each disk you encrypt. As noted earlier, we strongly recommend that you save your BitLocker recovery keys to your Microsoft account’s OneDrive, where they can be accessed from any PC or mobile device for which you have secure access.
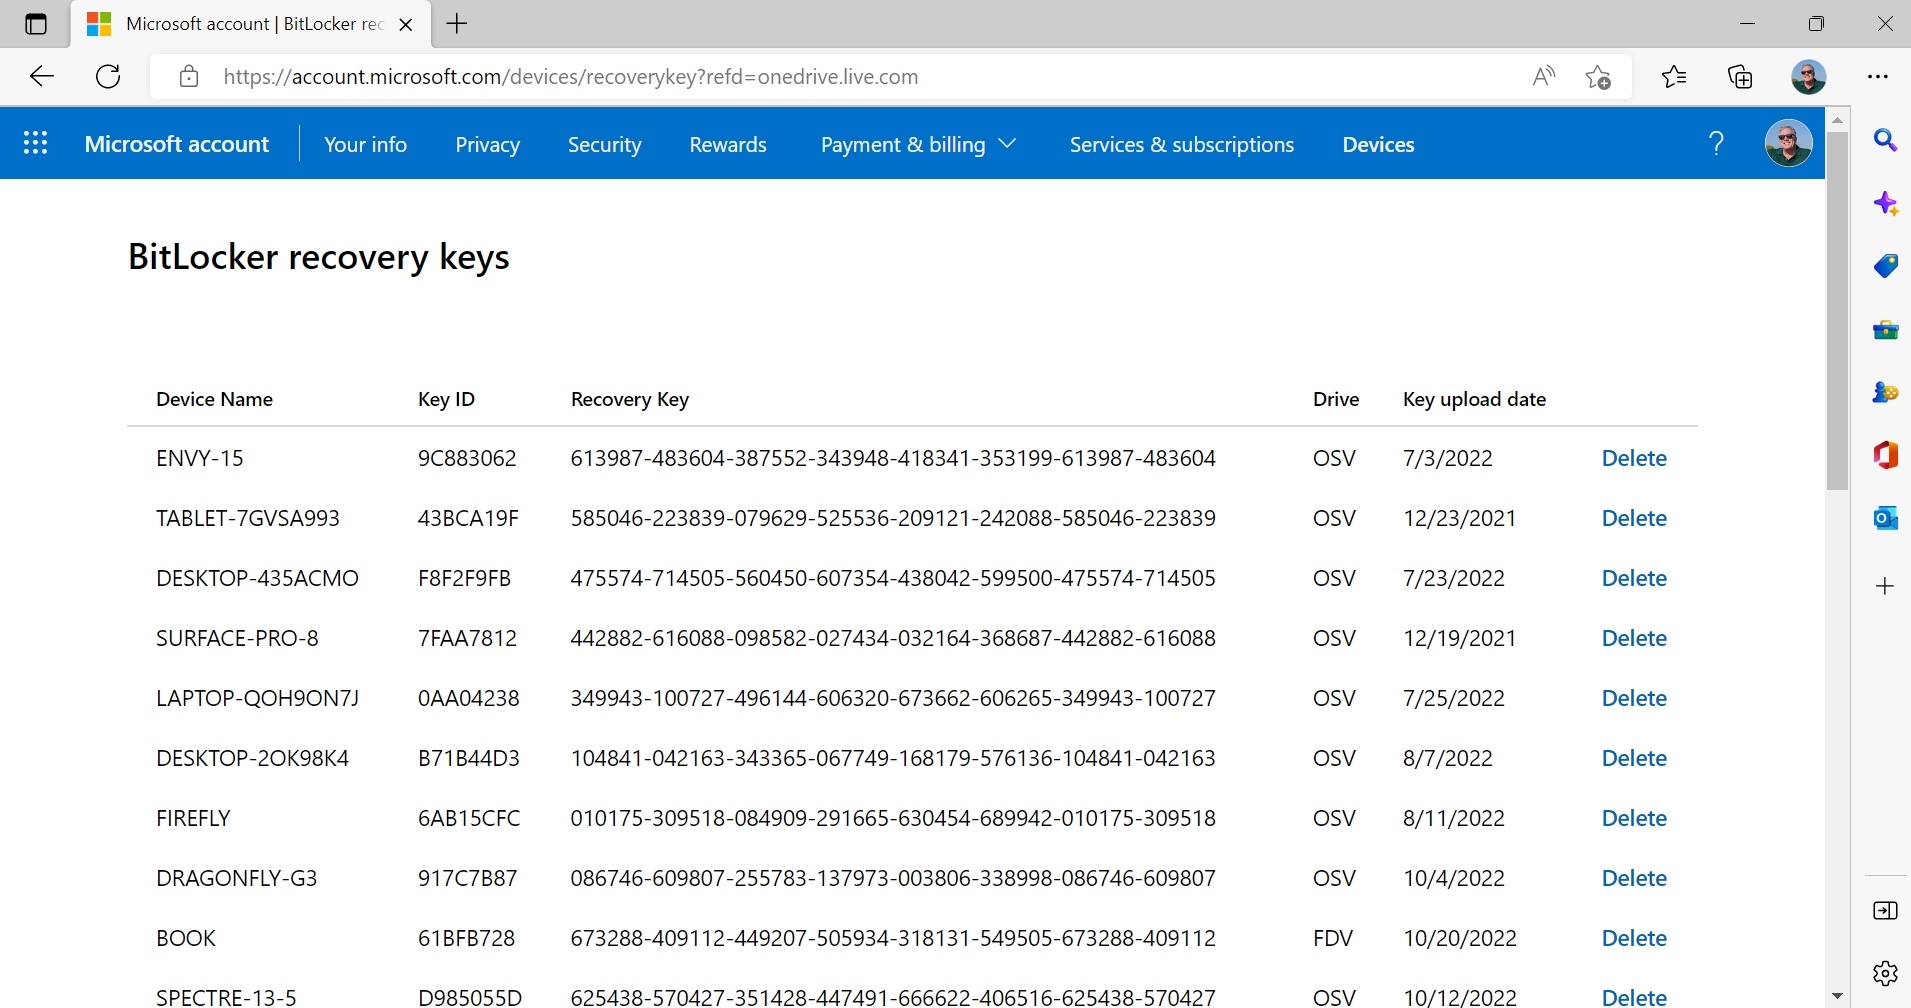
To access your recovery keys in OneDrive, open a web browser and navigate to
onedrive.com/recoverykey with any web browser. After signing in, you’ll be presented with the list of keys that are associated with your Microsoft account. Annoyingly, they are presented in no particular order and this list can not be sorted by date, PC name, or other criteria.
You can now use the appropriate recovery key to access an encrypted disk for which you’ve forgotten the password. You can also use this key if you created a recovery key for the system disk and the PC won’t boot because BitLocker discovered a potential issue.

Gain unlimited access to Premium articles.
With technology shaping our everyday lives, how could we not dig deeper?
Thurrott Premium delivers an honest and thorough perspective about the technologies we use and rely on everyday. Discover deeper content as a Premium member.