Touch, Pen, and Tablet
- Paul Thurrott
- Dec 20, 2022
-
0
In addition to supporting traditional PC form factors with their familiar keyboard, mouse, and touchpad interactions, Windows 11 also supports modern PCs with multitouch capabilities that let you interact by tapping or using gestures right on the display. Some PCs even come in tablet, 2-in-1, and convertible PC form factors that can physically transform between different usage modes, and some support smartpens so you can write or draw on the display.
Multitouch
Multitouch—sometimes just called touch—is the simplest and most common of these modern PC capabilities.
Tap, tap and hold, and grab
Thanks to our many years of experience with smartphones, using multitouch in Windows 11 is mostly intuitive: to select an object onscreen, simply tap the screen. To perform a right-click, tap and hold on the object you wish to do more. You can also “grab” items like icons and windows and drag them to a new location as you would with a mouse.
Throughout this book, we mostly stick with words that describe traditional PC actions with the mouse or keyboard. Each time you see the word “click” or “select,” for example, you can substitute the word “tap” if you’re using the PC’s multitouch capabilities. Likewise, you can substitute “tap and hold” for right-click.
Gestures
Windows 11 also supports touch-based gestures, which are actions you can perform with two or more fingers. The following gestures are available:
Scroll. Using two fingers, you can slide up or down on the screen to scroll through an app, document, or web page. (And, if it supports it, you can slide left and right to scroll horizontally.)
Zoom. Using a “pinch” gesture, you slide your thumb and index finger together on-screen to zoom in on whatever you’re viewing. Or, using a “stretch out” gesture, you slide your thumb and index finger away from each other on-screen to zoom out of whatever you’re viewing.
Minimize all windows. Using three fingers, slide down on the screen to minimize all open windows and display the desktop.
Restore all windows. Using three fingers, slide up on the screen to display (“restore”) all open windows.
Snap layouts. To access Snap layouts, drag a floating window a bit to display the bottom edge of the Snap layouts pane at the top of the screen. Then, move the window towards that pane to display the available layouts and then choose one.
You can learn more about Snap layouts in Snap.
Edge gestures
Windows 11 also supports edge gestures, which are gestures that start at any of the four sides of the PC’s display. The following edge gestures are available:
Widgets. Swipe in from the left edge of the display to open Widgets.
Notifications and Calendar. Swipe in from the right edge of the display to display the Notifications and Calendar panes.
Start. Swipe up from the middle bottom of the display to open the Start menu.
Quick settings. Swipe up from below the Network, Sound, and Power icons to open Quick settings.
Switch apps. Using three fingers, swipe left or right on-screen to switch to the previous or next app, respectively.
Use the Touch keyboard
For those instances in which you are using a PC’s multitouch functionality and need to type, just tap a text box, browser address bar, or any other area where you would normally enter text, and the Touch keyboard will appear onscreen.
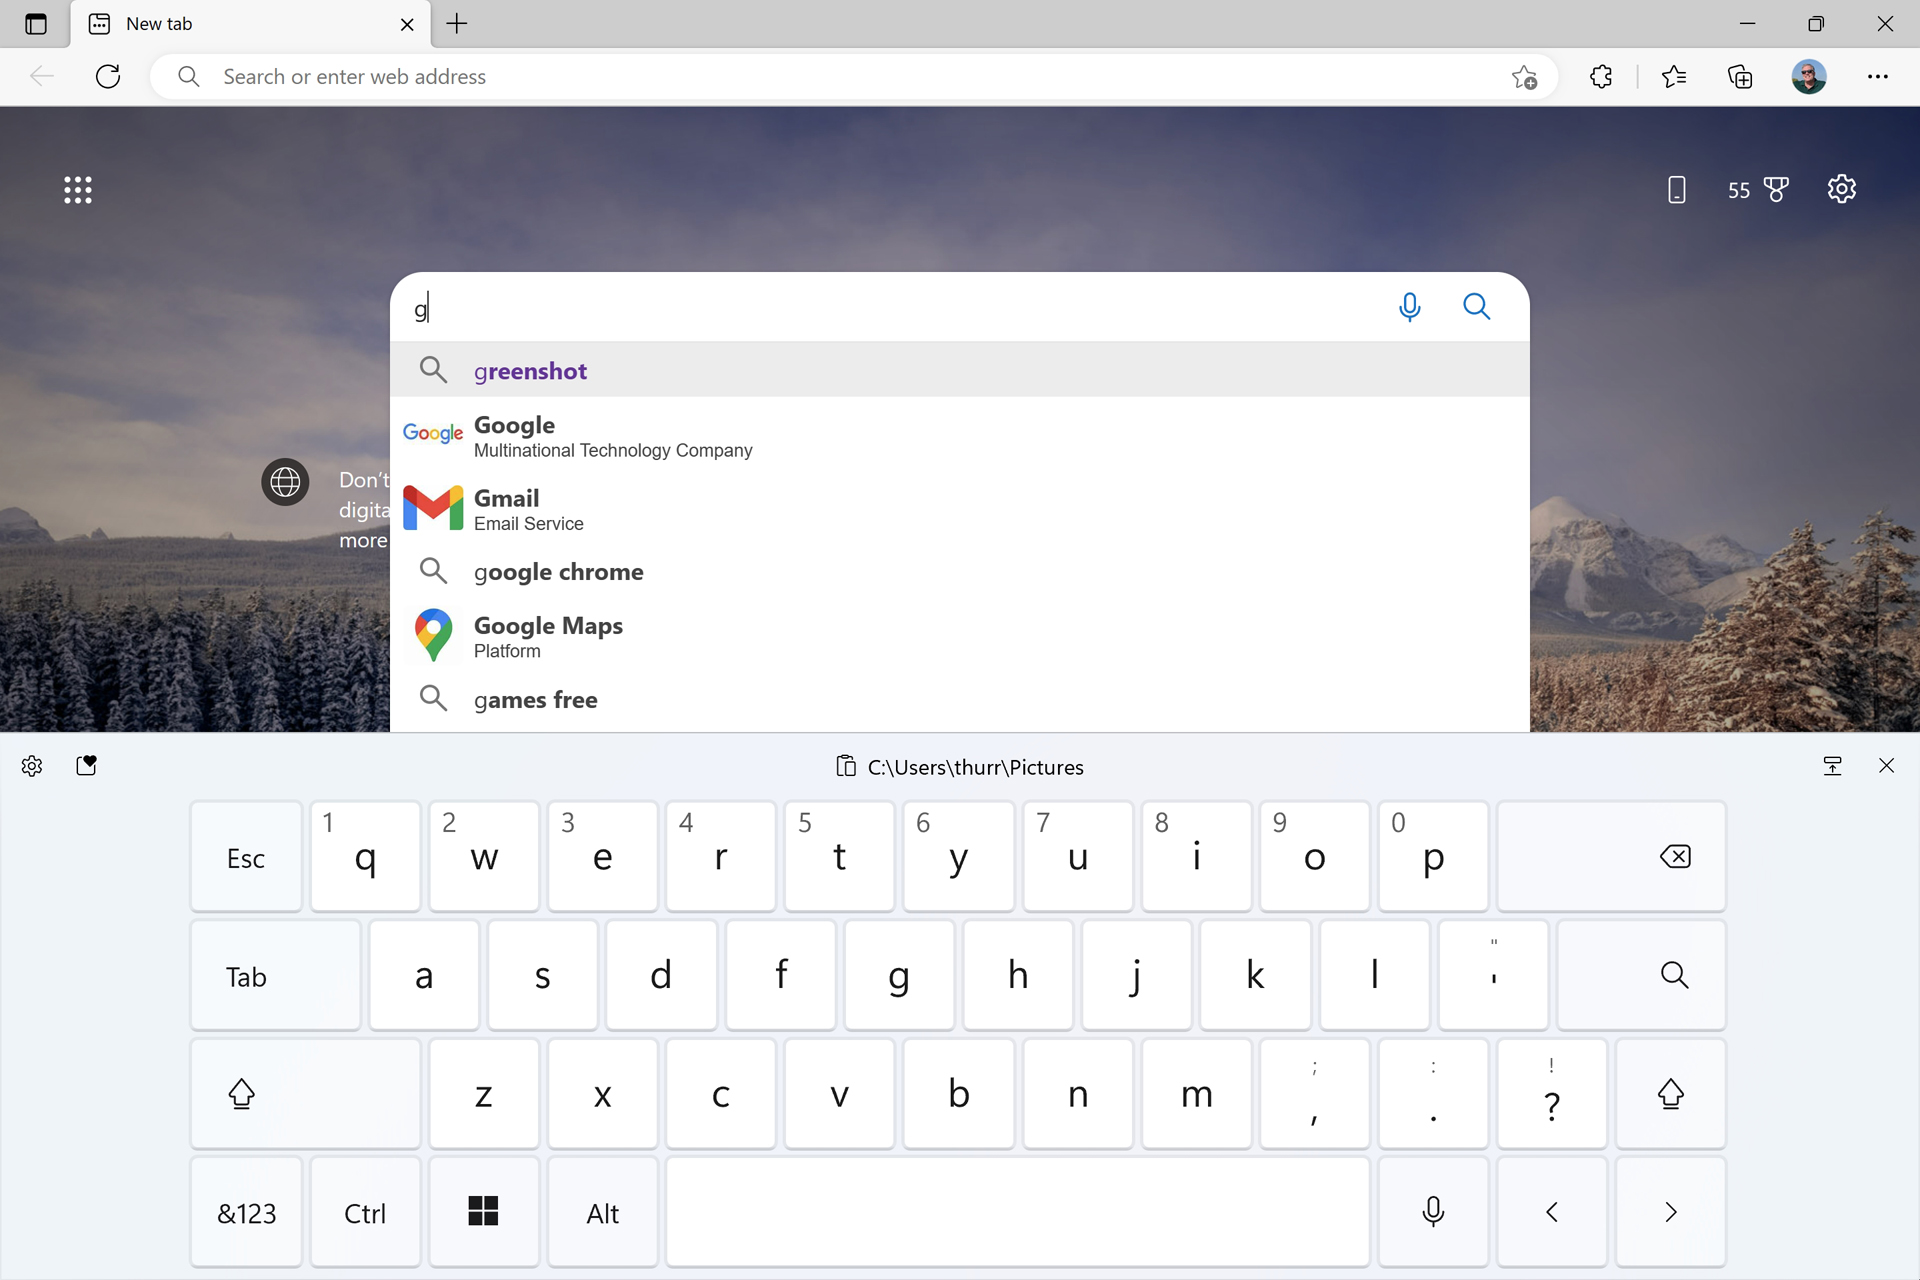
Multitouch-capable PCs typically display a Touch keyboard icon in the Taskbar’s system tray so you can trigger this utility manually. If you don’t see this icon, you can enable it: right-click the Taskbar, choose “Taskbar settings,” and then enable “Touch keyboard” under “System tray icons” in the Settings app window that appears.
The Touch keyboard works as expected, but it has some useful features that might not be immediately obvious. And it helps to get started with the Touch keyboard settings, which are found in the Settings app: navigate to Personalization > Text input to see what’s available.
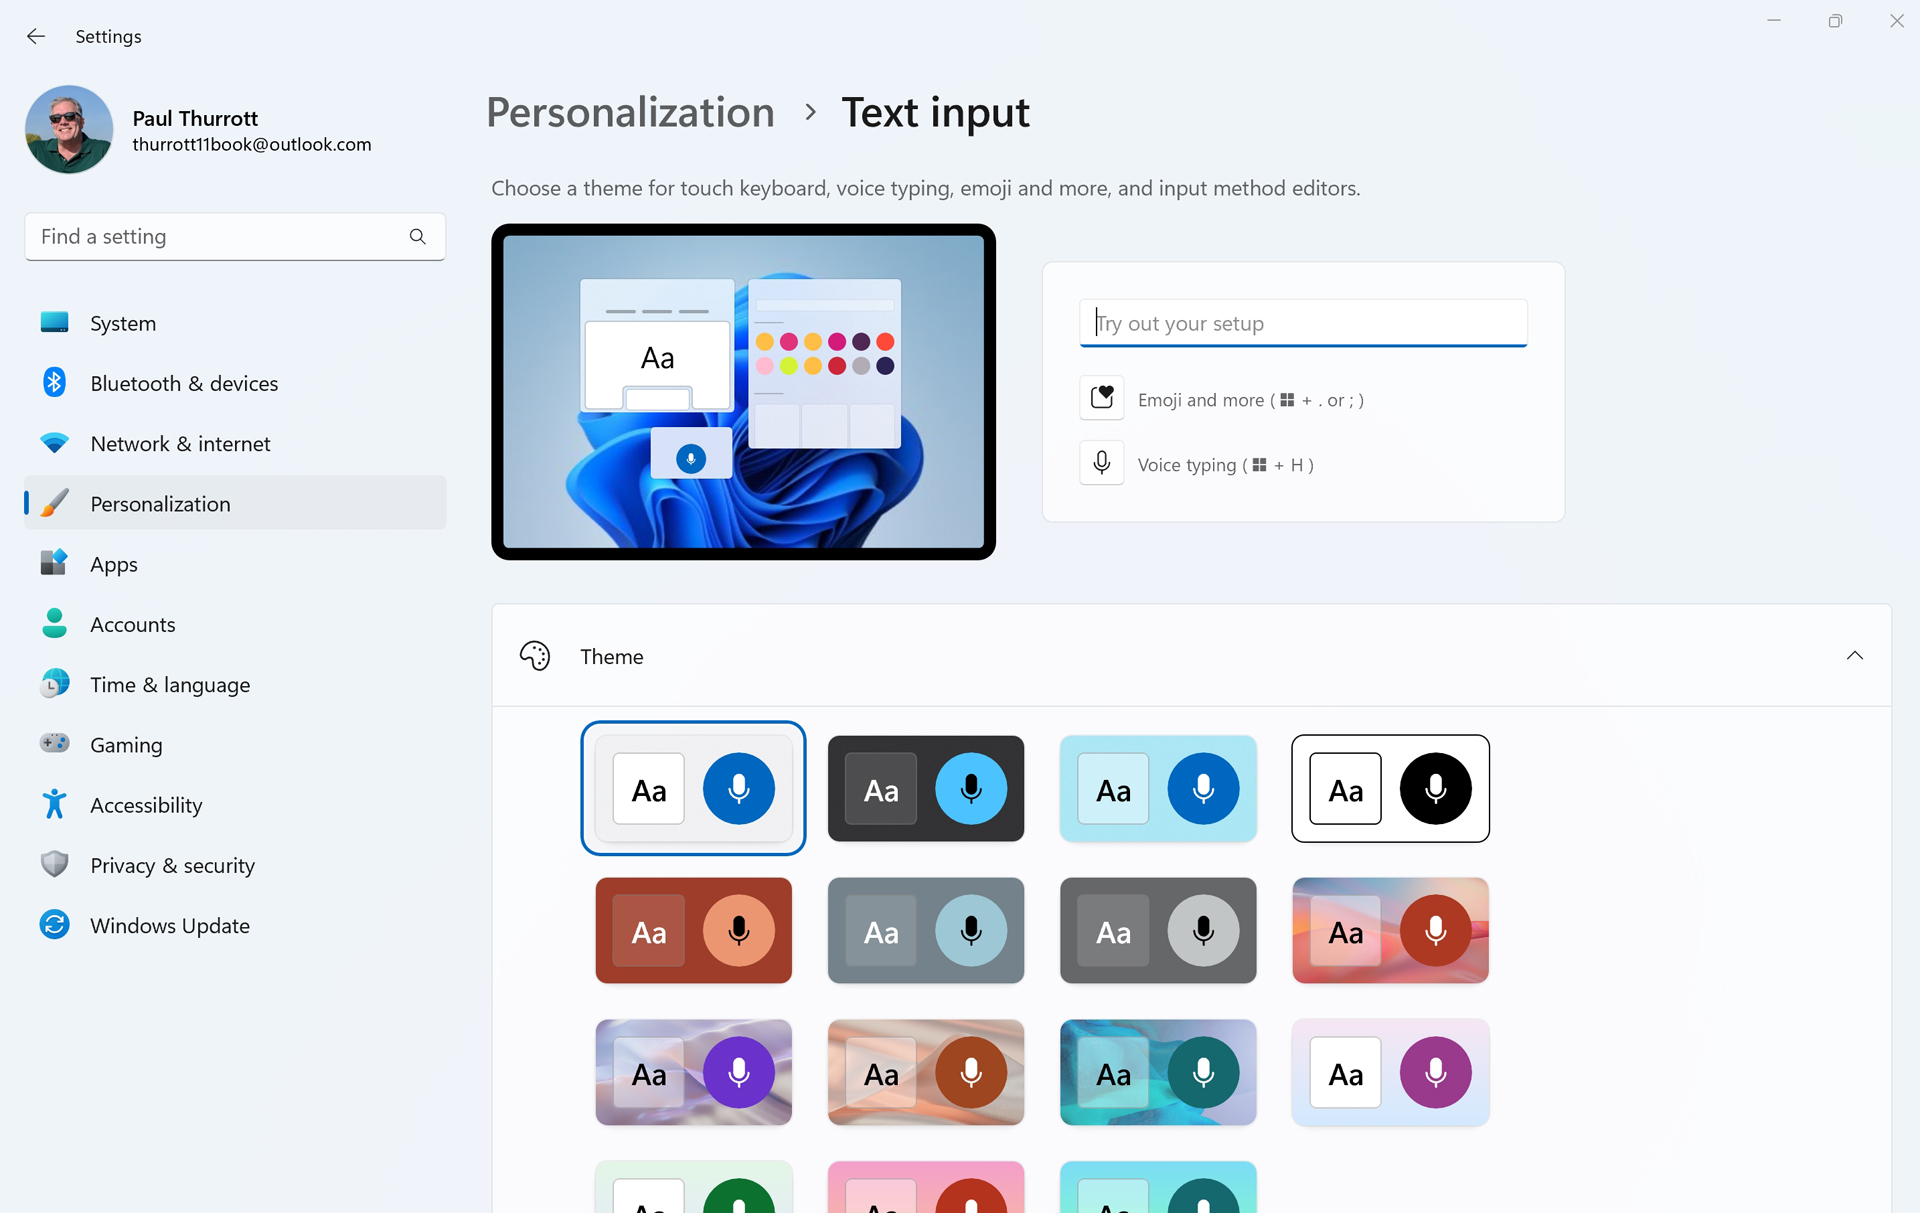
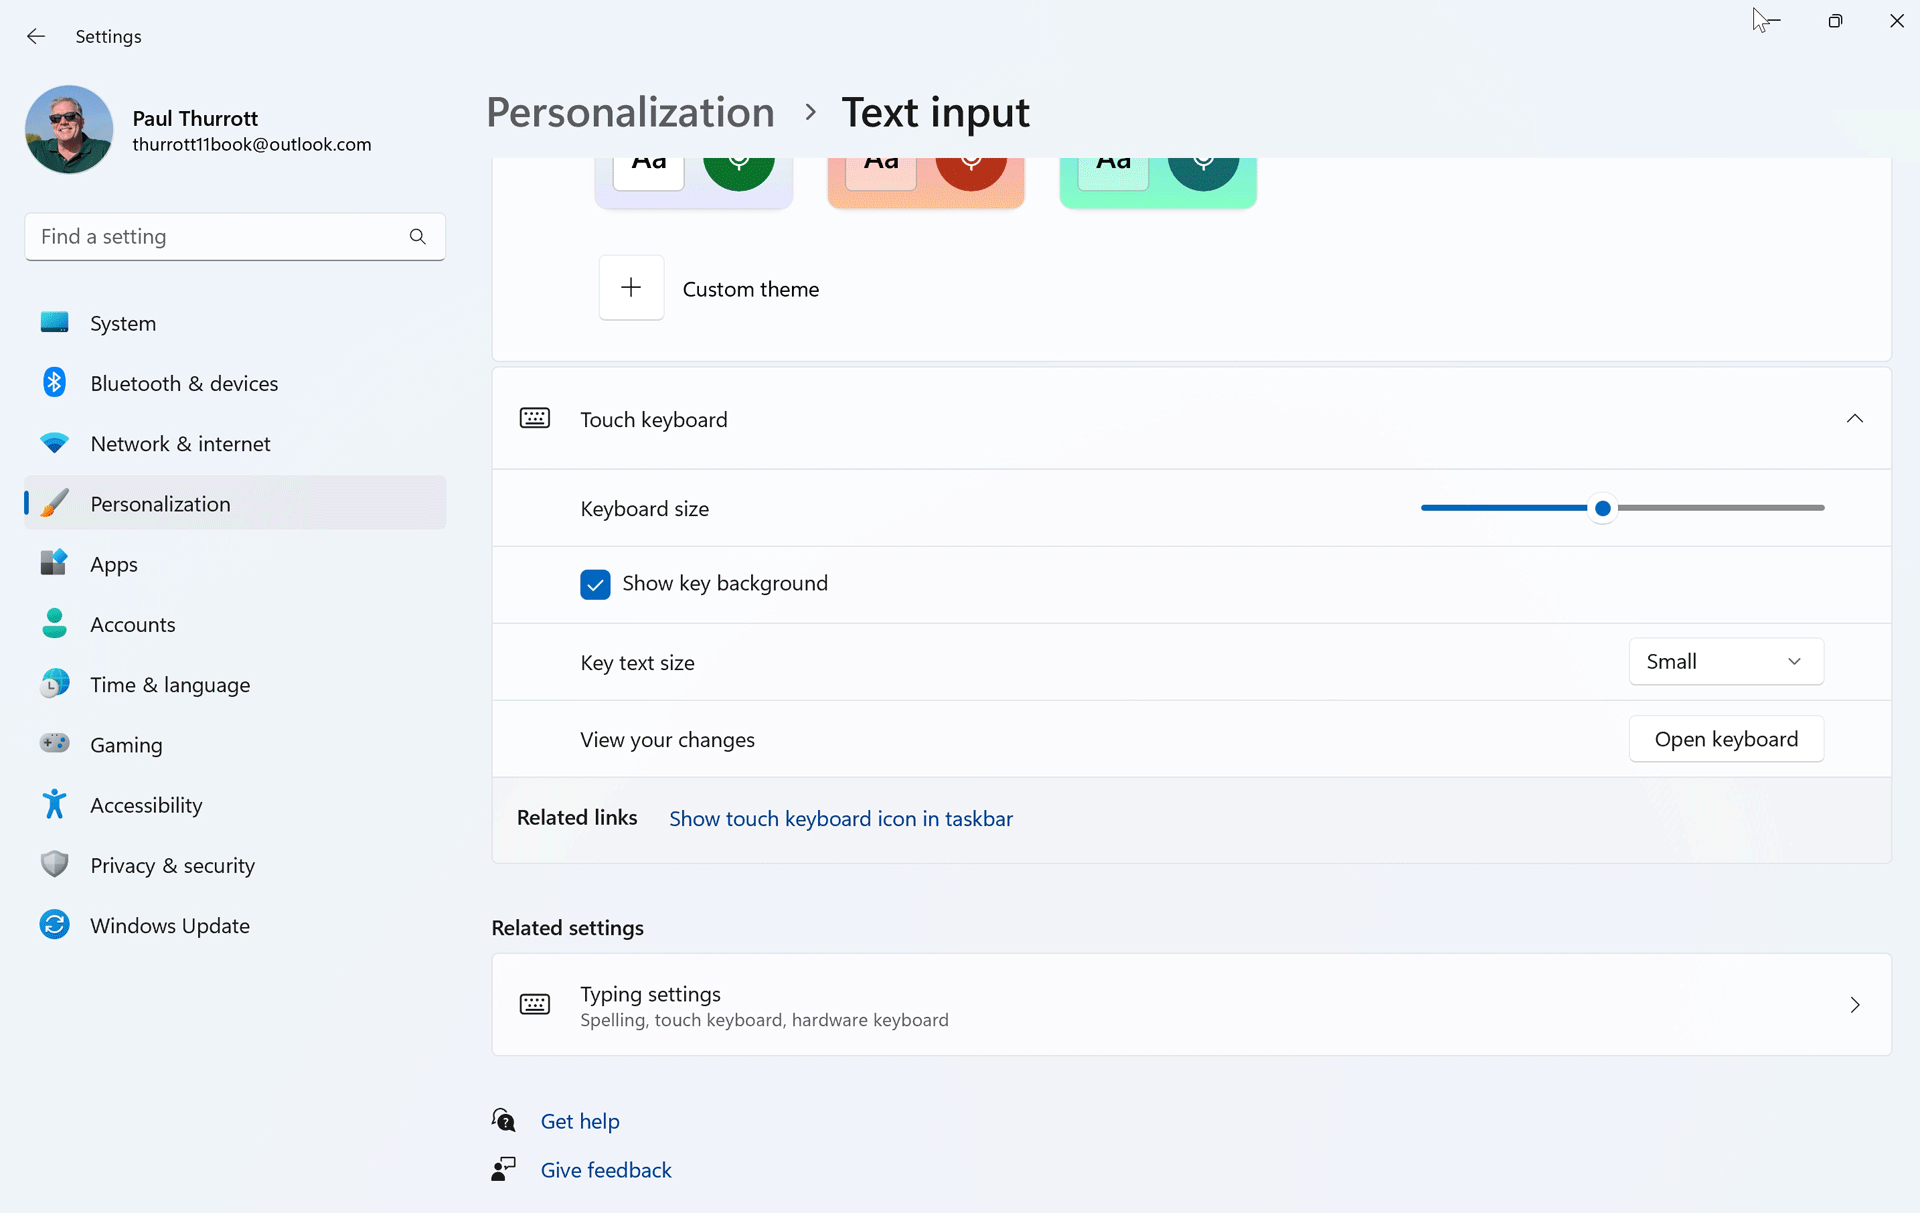
Here, there are three main areas: a preview area at the top where you can see how the changes you make will impact the real Touch keyboard, “Theme,” which lets you customize the look of the Touch keyboard with colors and background images, and “Touch keyboard,” which has options for keyboard size, whether the Touch keyboard should display button edges (“Show key background”), and key text size.
As for the keyboard itself, there are a few features to be aware of:
Layouts. Touch keyboard supports Default, Small, Split, and Traditional layouts, and you may want to experiment with each to see which you like best. For example, the Small layout resembles a smartphone keyboard. You choose the layout by selecting the Settings (gear) icon in the upper left of the Touch keyboard.

You can quickly toggle between the current layout and the Small layout by using the dedicated button to the left of the Close (“X”) button on the Touch keyboard.
Emojis and GIFs. Welcome to the 21st century: the Touch keyboard has a dedicated button for opening the Emoji keyboard, which also provides access to GIFs, emoticons, and various symbols.
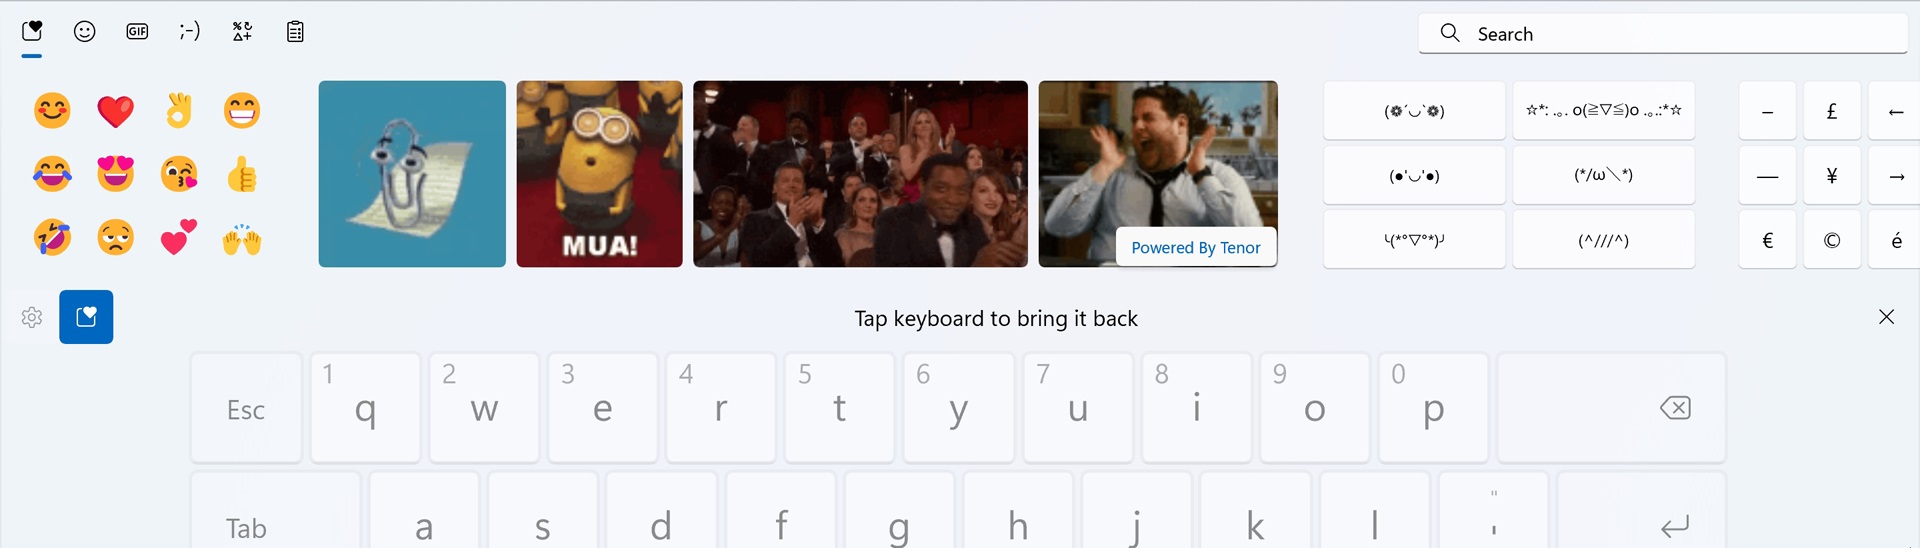
Clipboard. If there is a text-based item in the Clipboard, it will appear in the top middle of the Touch keyboard so that you can tap it to paste it into whatever app you’re using.
Smartpen
Some traditional PCs and most tablets, 2-in-1s, and convertible PCs support smartpen capabilities that let you use a powerful Windows 11 feature called Windows Ink so you can write and draw in specially-made applications and interact with on-screen user interface elements and other apps much as they would using a mouse or touchpad.
Smartpen capabilities vary by PC, and by smartpen, which can look, work, and feel just like real writing implements. Many support thousands of levels of pressure so that you can press down harder to get thicker or bolder drawing and writing strokes. Some support tilt, so that you can tilt the pen naturally to get broader strokes as you do. Some also include an electronic eraser that works exactly as you’d expect. And most support an extra button or two that can be programmed to perform specific actions when clicked, double-clicked, or pressed and held.
Using a smartpen is natural enough: it works much like navigating via touch, so you can do things like press and hold the pen on-screen to emulate a right mouse click. But some smartpens also provide a dedicated button on the barrel that provides right-click functionality.
Some Windows Ink features also work with touch—on compatible PCs—or even with a keyboard and mouse too. Here, we focus only on using Windows Ink with a smartpen, however.
Configure Windows Ink and your smartpen
If you’re going to use a smartpen with Windows 11, you should spend some time examining the available options for the pen and Windows Ink. These can be found in the Settings app: navigate to Bluetooth & devices > Pen & Windows Ink.
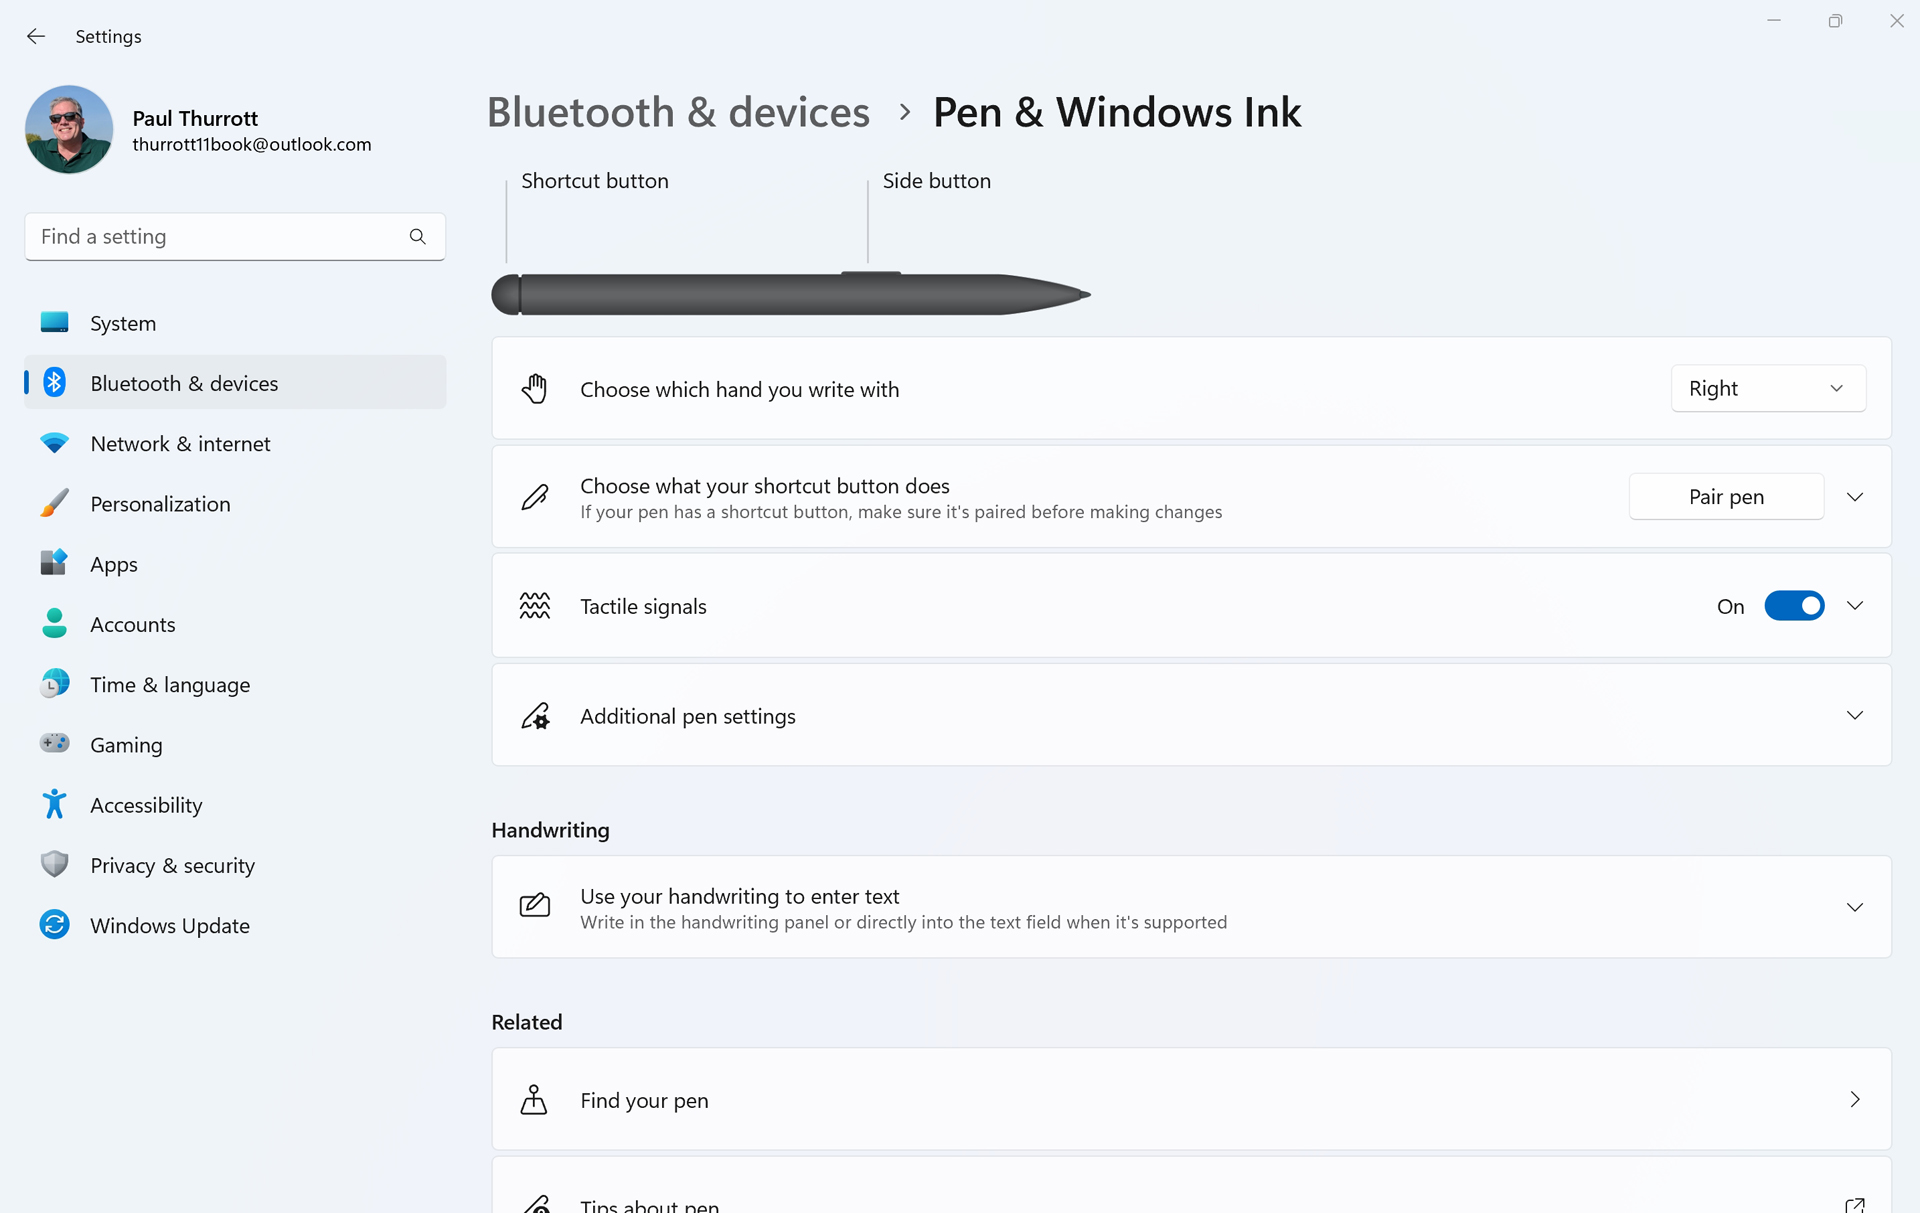
Some key options to consider include:
Choose which hand you write with. The smartpen is configured for right-handed use by default, so lefties will want to make sure to configure this for left-handed use.
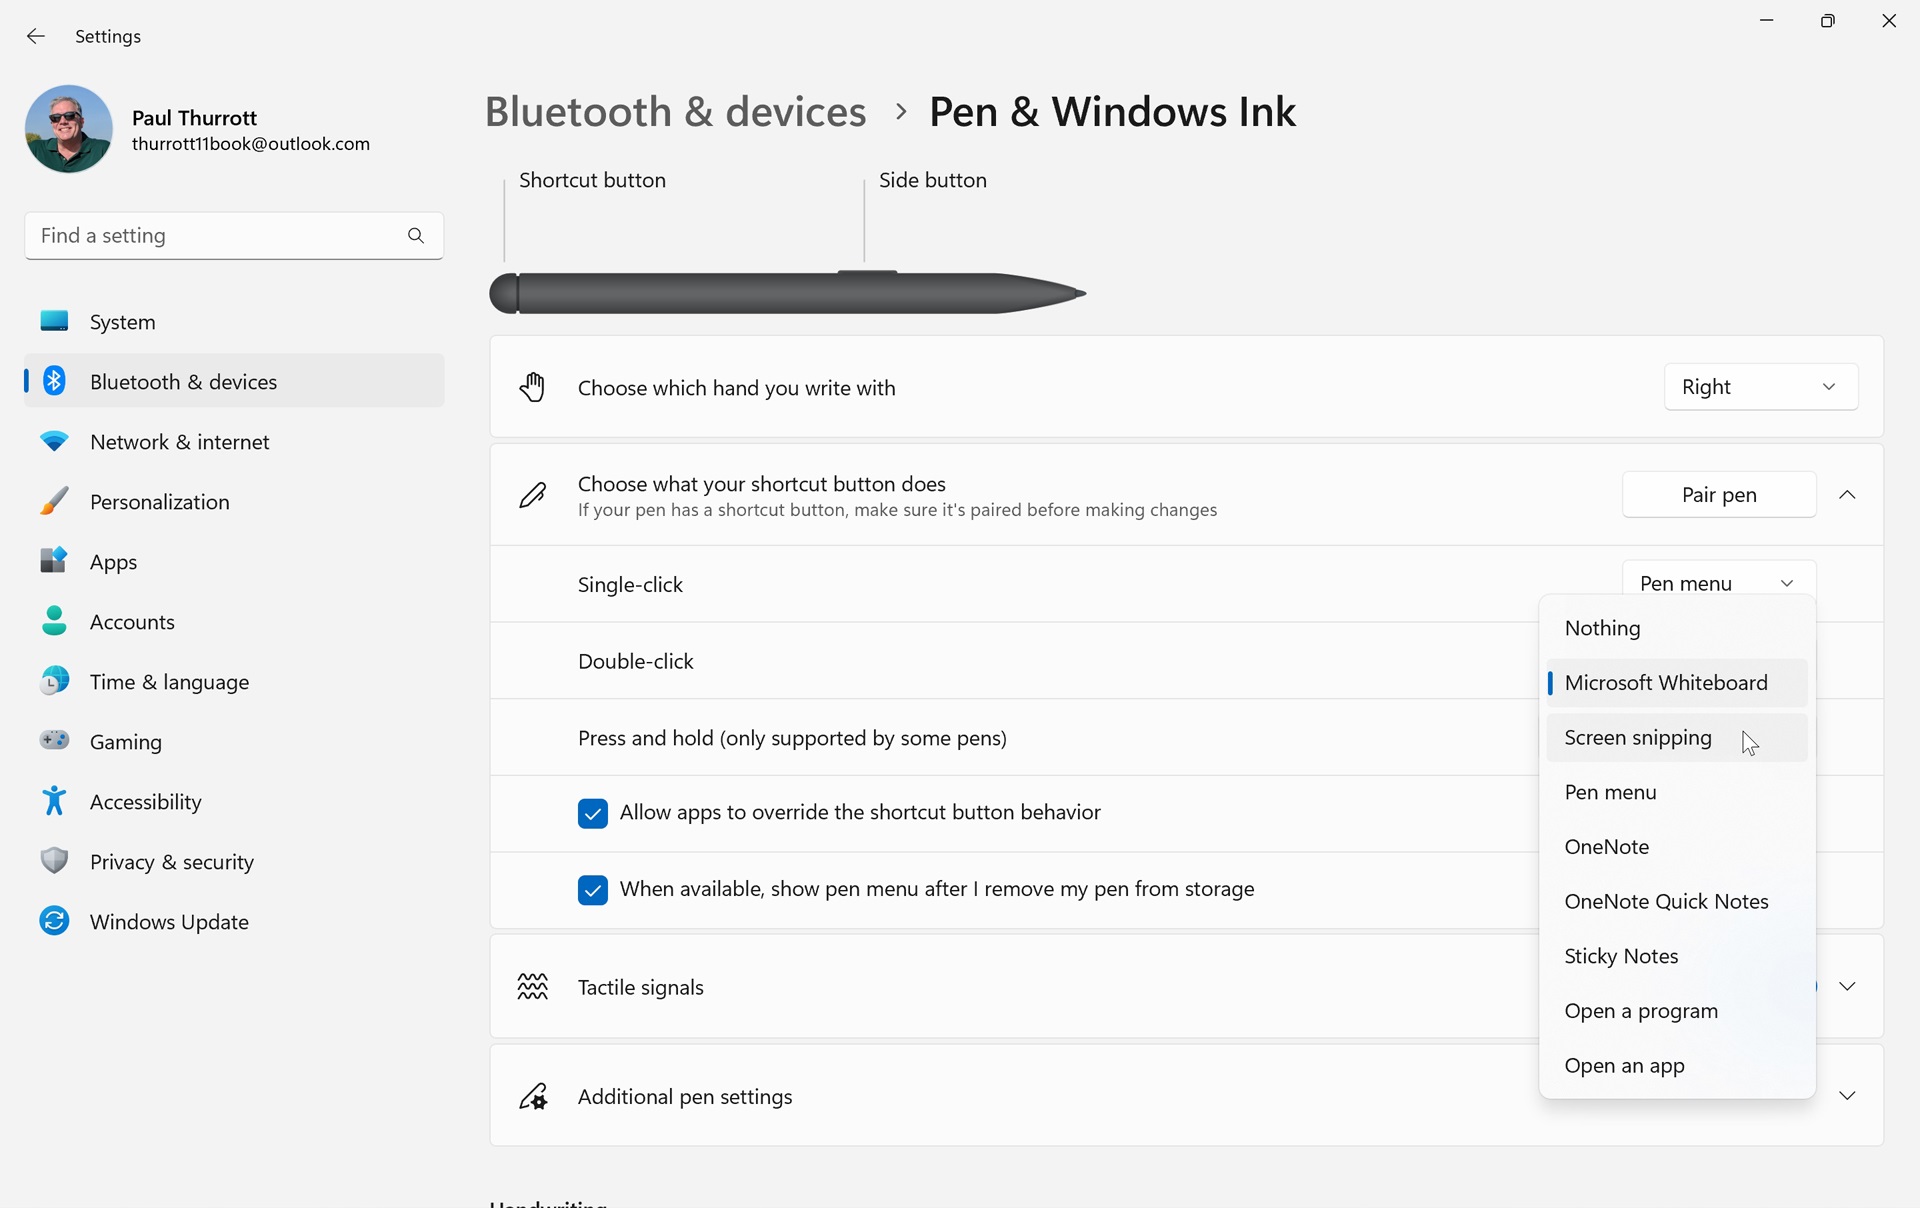
Choose what your shortcut button does. The Shortcut button on the end of the pen barrel can be configured to perform different actions when clicked, double-clicked, or pressed and held. These actions include opening the Pen menu (see below), opening one of the specific, pre-selected apps, opening any program (application), or opening any (Microsoft Store) app.
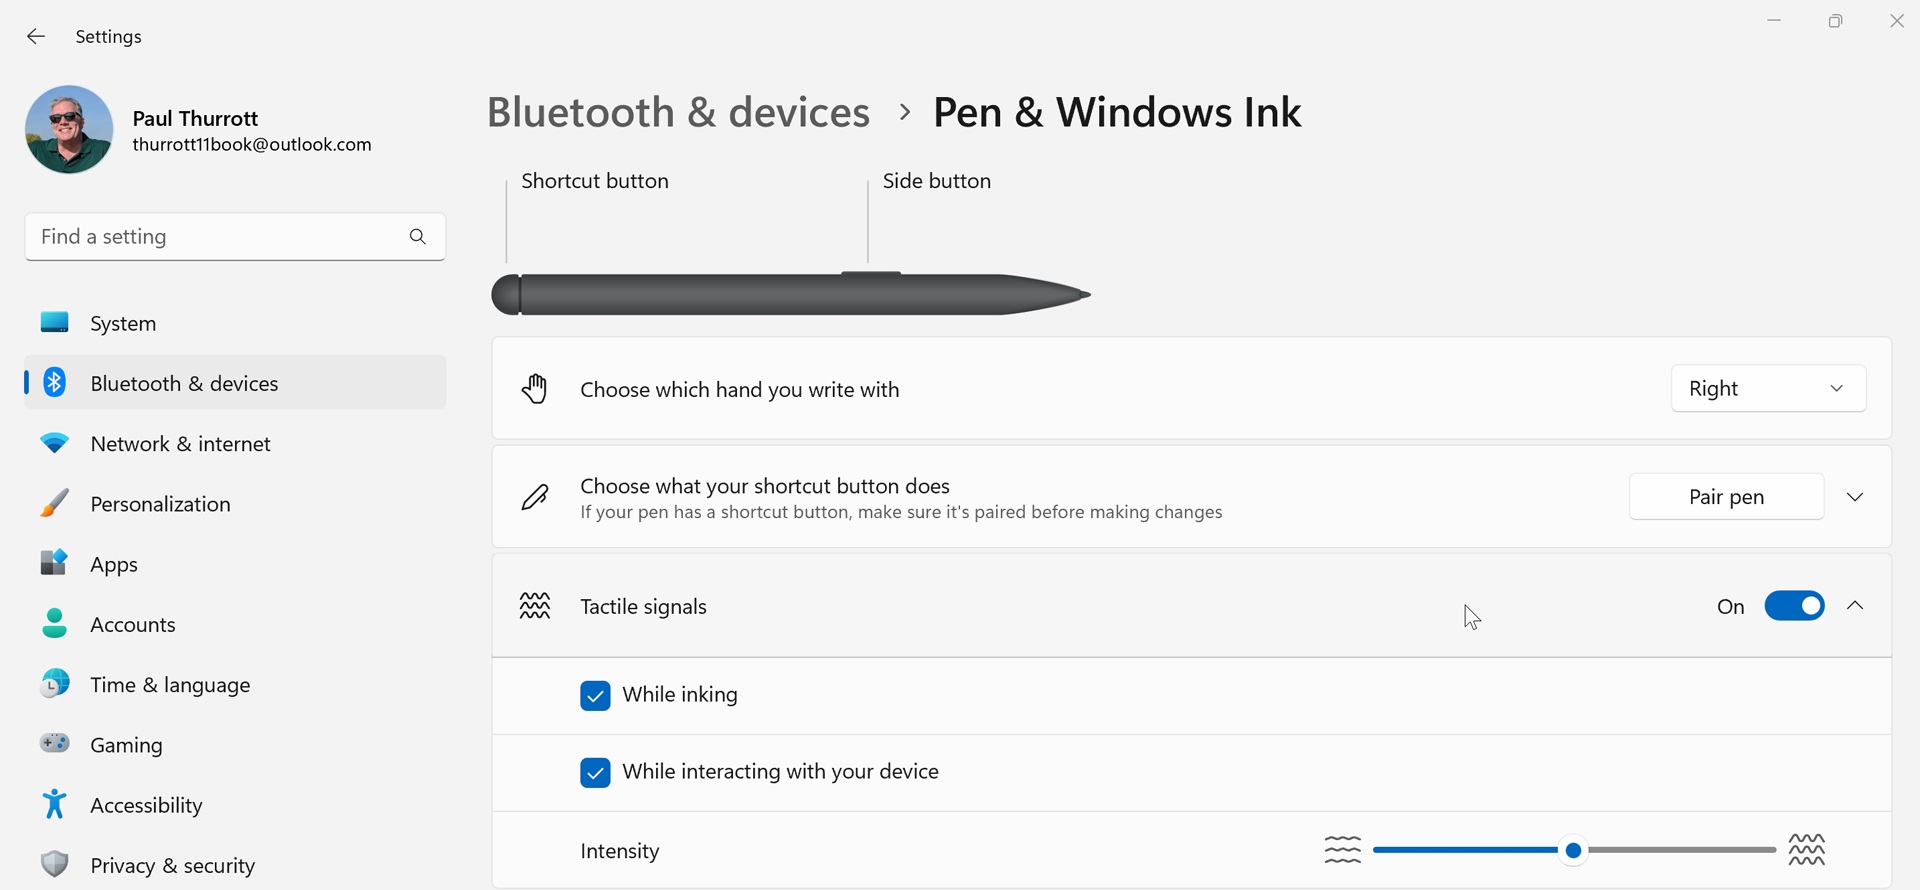
Tactile signals. This set of options appears if your smartpen supports haptics, which emulates the feel of a real pen writing on paper when in use.
Handwriting Under the “Handwriting section,” you will see options for configuring the font used in the Windows 11 handwriting panel or a supported app when you use the Touch keyboard to hand-write, the font size, and how text input should work when a physical keyboard isn’t available.
Use the Pen menu
The Pen menu is a front-end or launcher for the Windows Ink capabilities in Windows 11, as it lets smartpen users quickly access the key Windows Ink-compatible apps they need as quickly as possible. In many ways, it’s like a mini-Start menu for the pen.
The Pen menu was called Windows Ink Workspace in Windows 10.
There are various ways to display the Pen menu. By default, a Pen menu icon should appear in the Taskbar when you’ve paired a smartpen with your PC. (If it isn’t, you can enable it in the Settings app by navigating to Personalization > Taskbar.) Or, you can configure your pen’s Shortcut button to open the menu when you click, double-click, or press and hold it.
Oddly, you can’t open the Pen menu from the Start menu or Search. And there’s no keyboard shortcut.
Whichever method you choose, the Pen menu appears as a floating toolbar right above the Taskbar.
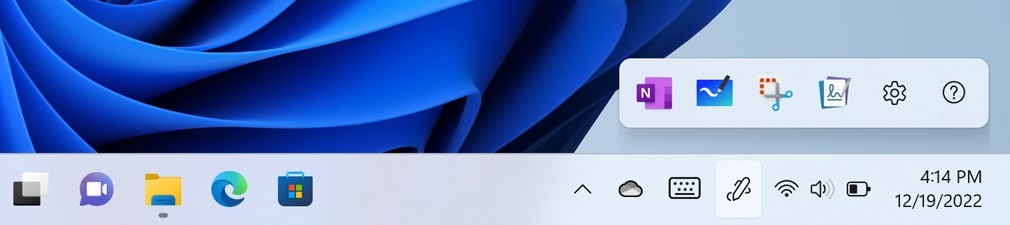
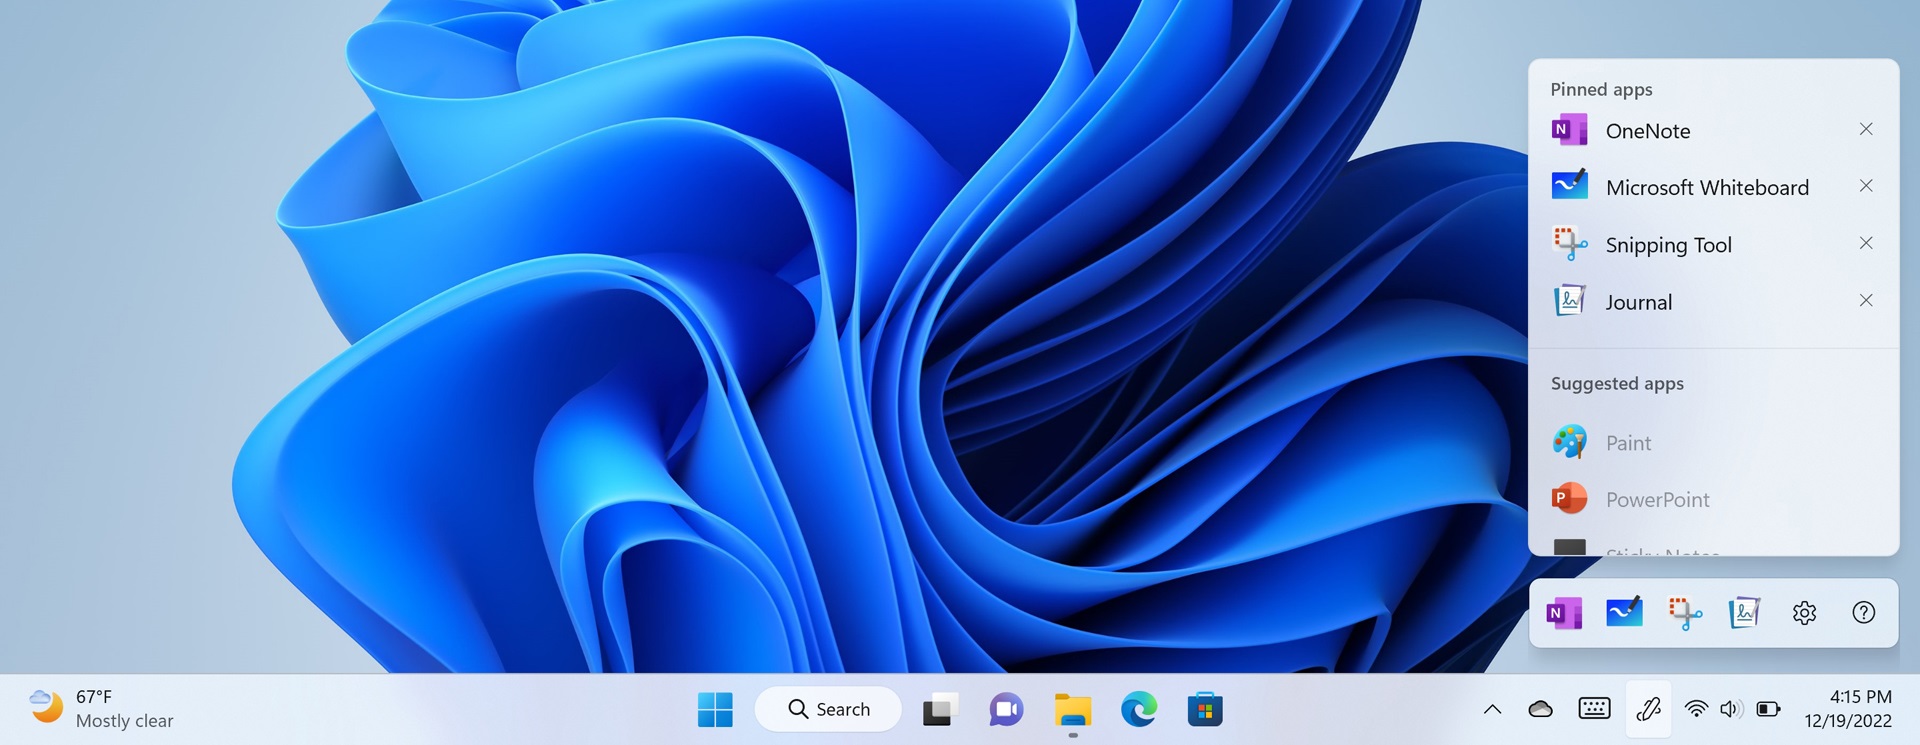
By default, the Pen menu has pinned shortcuts for four apps—OneNote, Microsoft Whiteboard, Snipping Tool, and Journal—plus “See more” (gear) and “Learn more about pen” icons.
The “See more” icon displays a small menu when selected. There are two items: “Edit pen menu” and “Pen settings.”
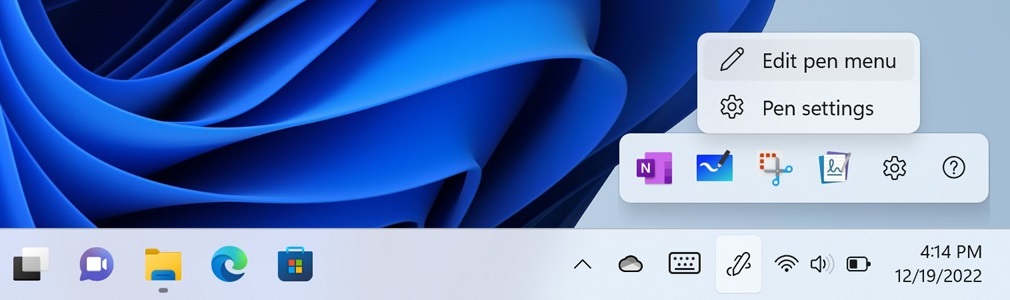
Editing the Pen menu is simple enough: Pinned items appear at the top and can be deselected if desired, and you will find other apps to pin in the Suggested apps and All apps lists below that.
Oddly, the Pen menu only lets you pin four app shortcuts at a time. So you will need to remove at least one shortcut before you can add another.
The “Learn more about pen” item launches the Tips app that is included with Windows 11 and displays a few tips about using a smartpen with Windows 11.
“Pen settings” opens the Settings app to Bluetooth & devices > Pen & Windows Ink.
Tablet experience
Windows 11 offers an integrated tablet experience that automatically optimizes the system for touch when you remove the keyboard from a tablet or transform a 2-in-1 or convertible PC into a tablet form factor. When you do so, the screen animates a bit and then the Taskbar icons are spread out a bit more so that they’re easier to select with a finger.
Here, you can see the Taskbar of a tablet with a keyboard connected.

And here is the same Taskbar when the keyboard is removed.

Yes, it’s a subtle change at best.
Where did it go?
Windows 10 offered a Tablet mode that made several changes to the system UI when you wanted to use a PC like a tablet: Start and all app windows were displayed full-screen, app and system tray icons disappeared by default, a Back button appeared on the Taskbar, and app title bars were hidden. This mode is not offered in Windows 11 and there is no way to enable it.

Gain unlimited access to Premium articles.
With technology shaping our everyday lives, how could we not dig deeper?
Thurrott Premium delivers an honest and thorough perspective about the technologies we use and rely on everyday. Discover deeper content as a Premium member.