Apps Basics
- Paul Thurrott
- Jan 03, 2023
-
0
As a full-featured desktop operating system for personal computers (PCs), Windows 11 supports running a wide array of apps, or applications, standalone software programs that perform specific tasks. Some of these apps are included with Windows 11, but most are acquired elsewhere, either from the web or from the Microsoft Store.
For the most part, it’s not important to understand the low-level differences between the different types of apps that Windows 11 supports. But here is a quick and high-level overview of the most common app types you can encounter.
Desktop apps. This app type uses technology that dates back to the 1990s, but it is also the most powerful type of app because it can integrate with the system at a deeper level than Store, web, or Android apps. Desktop apps typically include their own mechanism for downloading and installing updates. Typical examples include Microsoft Word and Excel, Google Chrome, and Adobe Photoshop.
Store apps. This isn’t so much a type of app as it is a description of where one acquires such apps, via the Microsoft Store, an app that is included with Windows 11 and works much like the App Store on an iPhone or iPad, or Google Play Store on Android. Many Store apps are modern mobile apps built on Microsoft technologies, but many are specially packaged desktop and web apps. Among the benefits of Store apps, updates are automatically handled by the Store. We discuss the Microsoft Store in its own chapter, but common examples of its apps include Mail, Calendar, Movies & TV, and Photos.
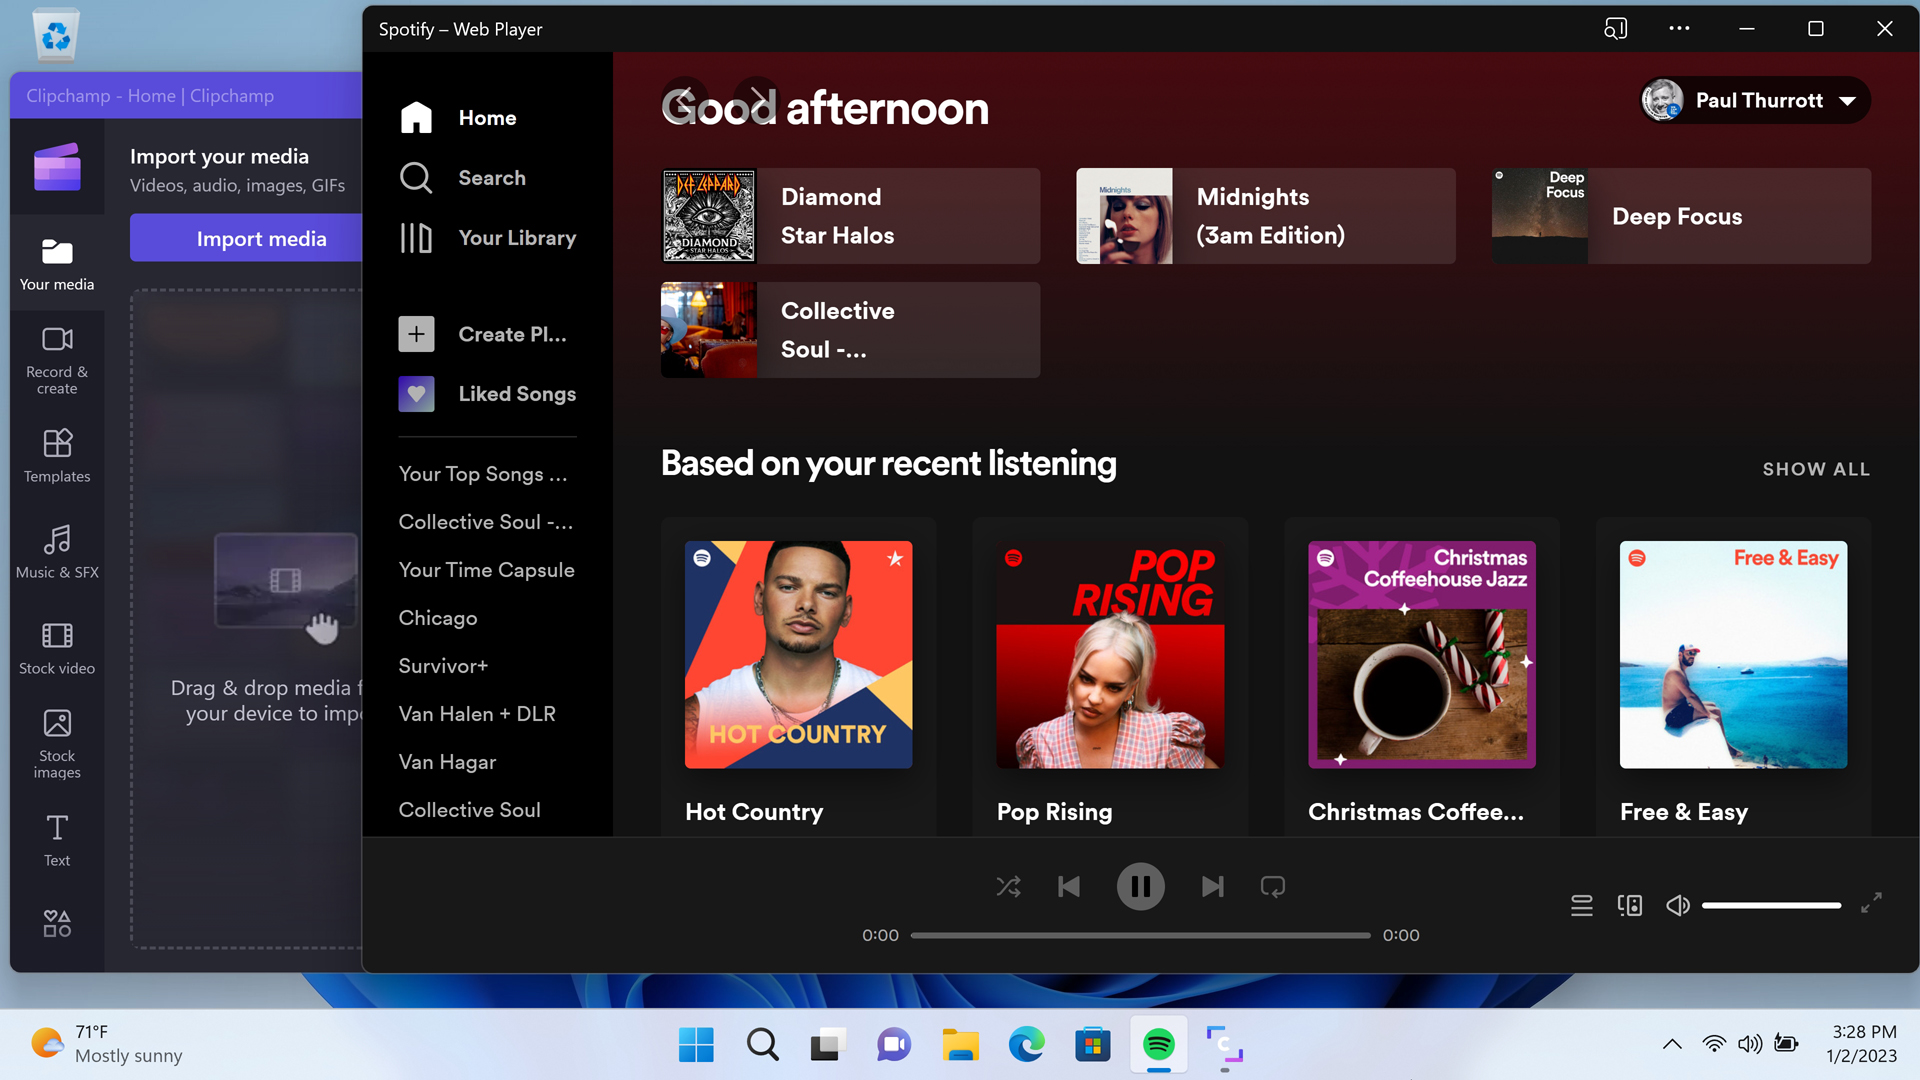
Web apps. Using modern web technologies, it’s possible to create web apps that are installed and run on your PC like other apps. Web apps can be quite sophisticated and though they are by nature cross-platform, they can also utilize native Windows 11 features like notifications, storage, and more. Web apps can be acquired on the web, as described in Microsoft Edge and Web Apps, or through the Microsoft Store, and they are updated automatically either way. Apps like Clipchamp (a video editor included with Windows 11) and Spotify are web apps.
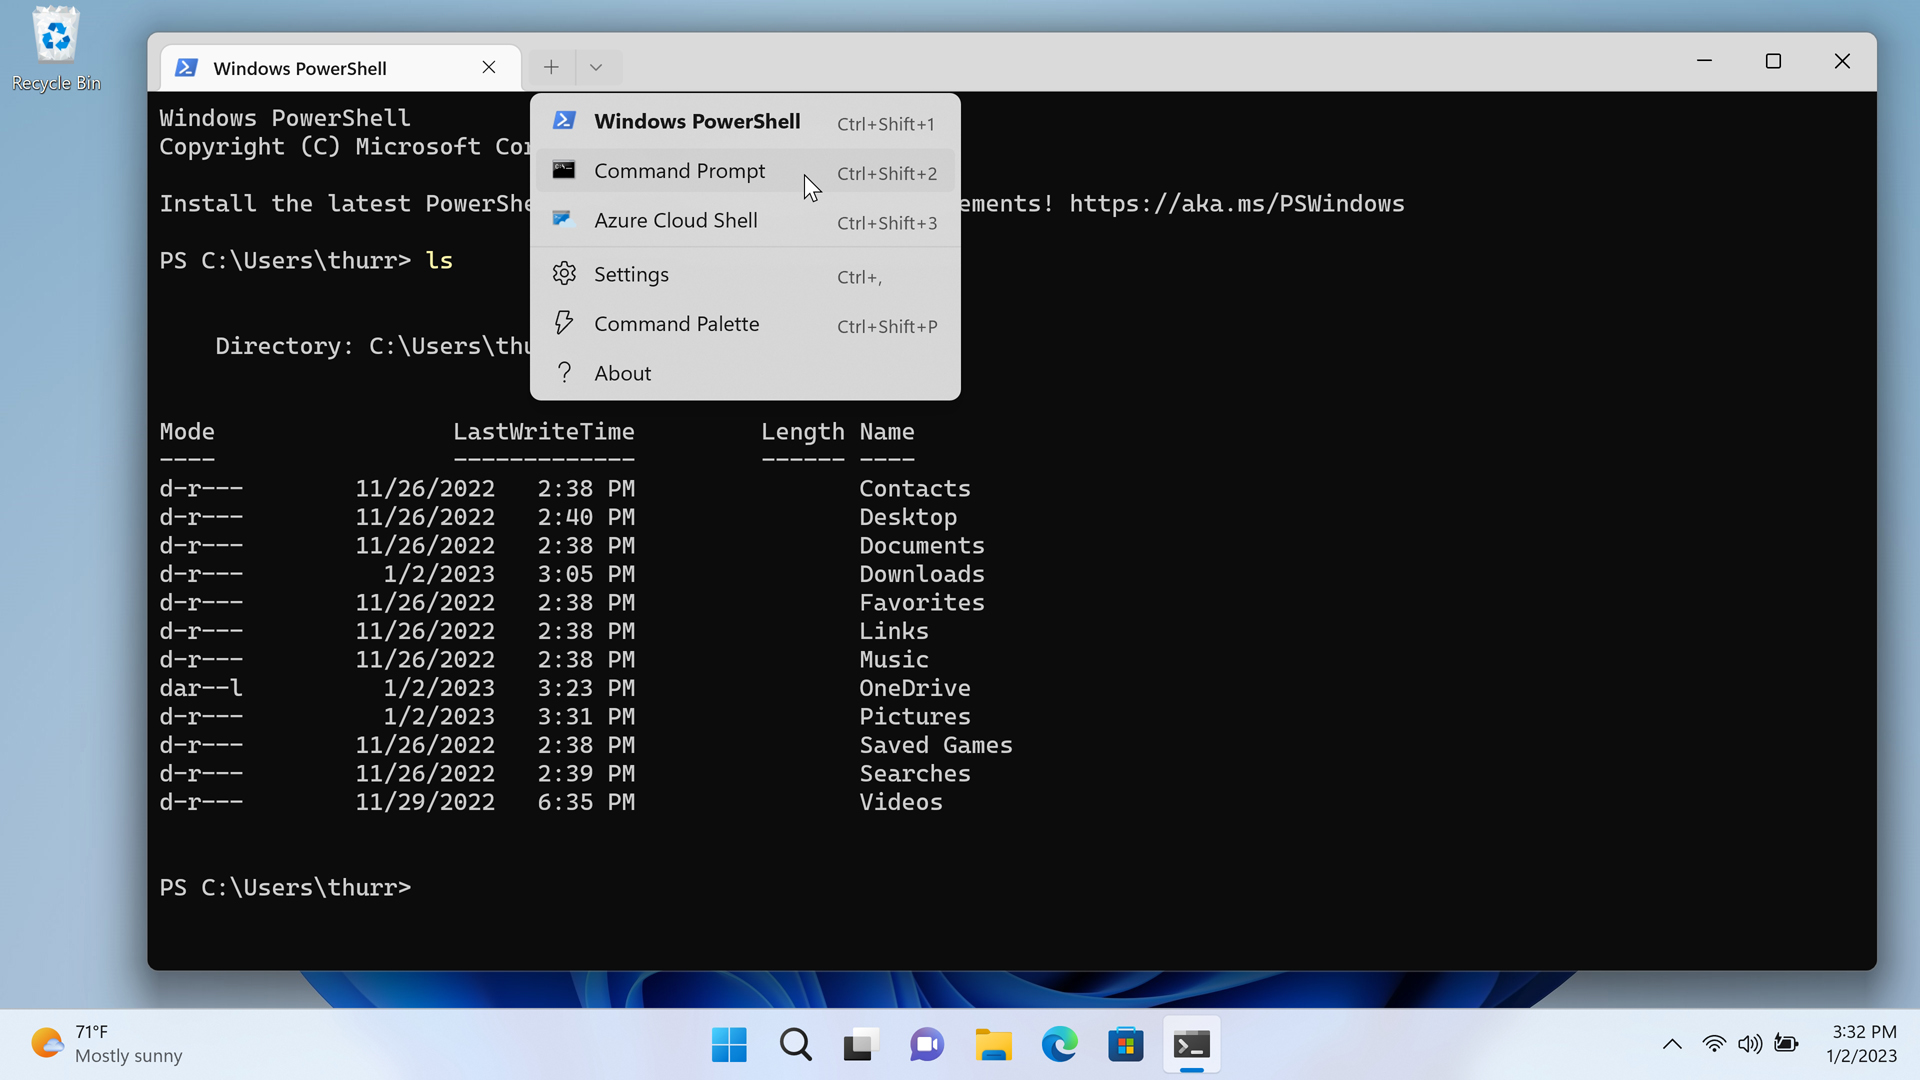
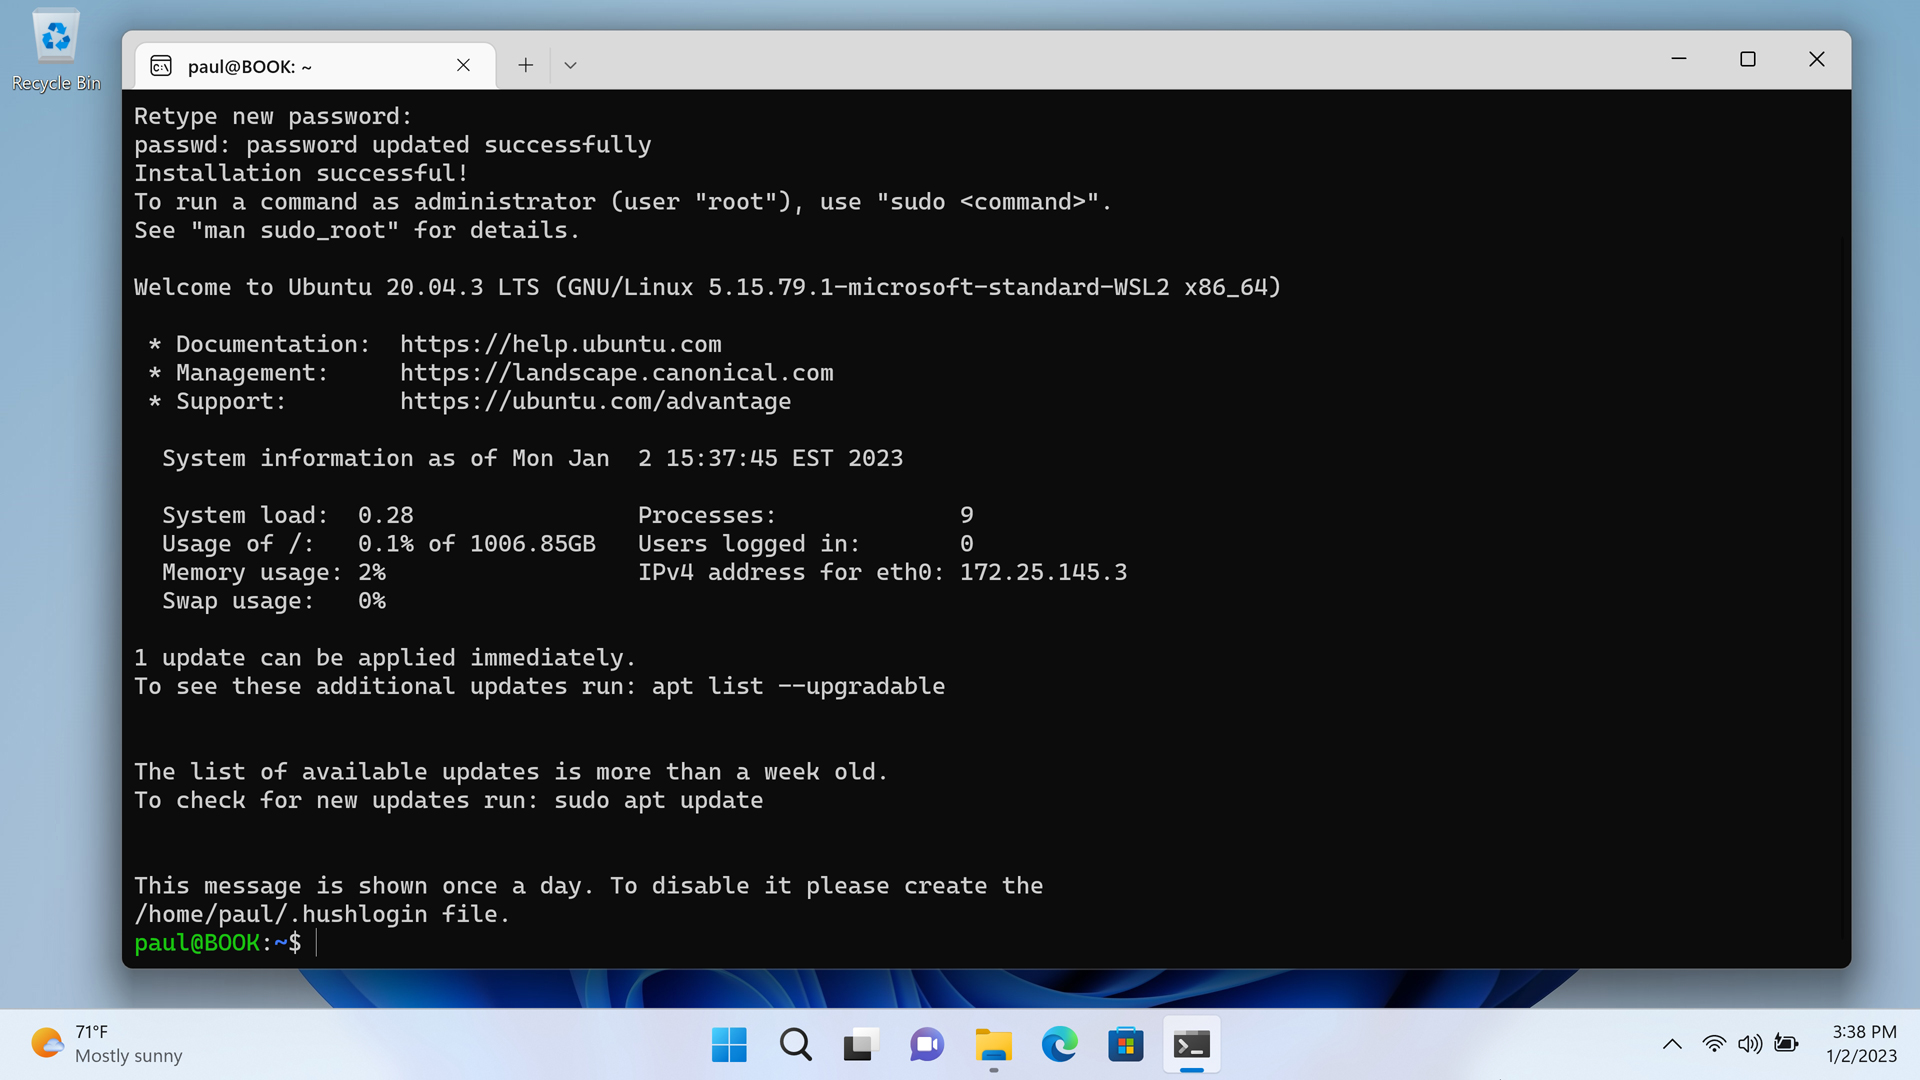
Command line apps. Windows 11 includes an app called Terminal that can run command-line apps in several different environments, including by default the MS-DOS-style Command Prompt and the .NET-based PowerShell. Each of these topics—Terminal, Command Prompt, and PowerShell—is covered in its own chapter.
Linux apps. Thanks to a technology called the Windows Subsystem for Linux, or WSL, it’s possible to install one or more Linux distributions in Windows 11 and then install and run Linux command line and graphical apps. This topic is explored in the Linux chapter.
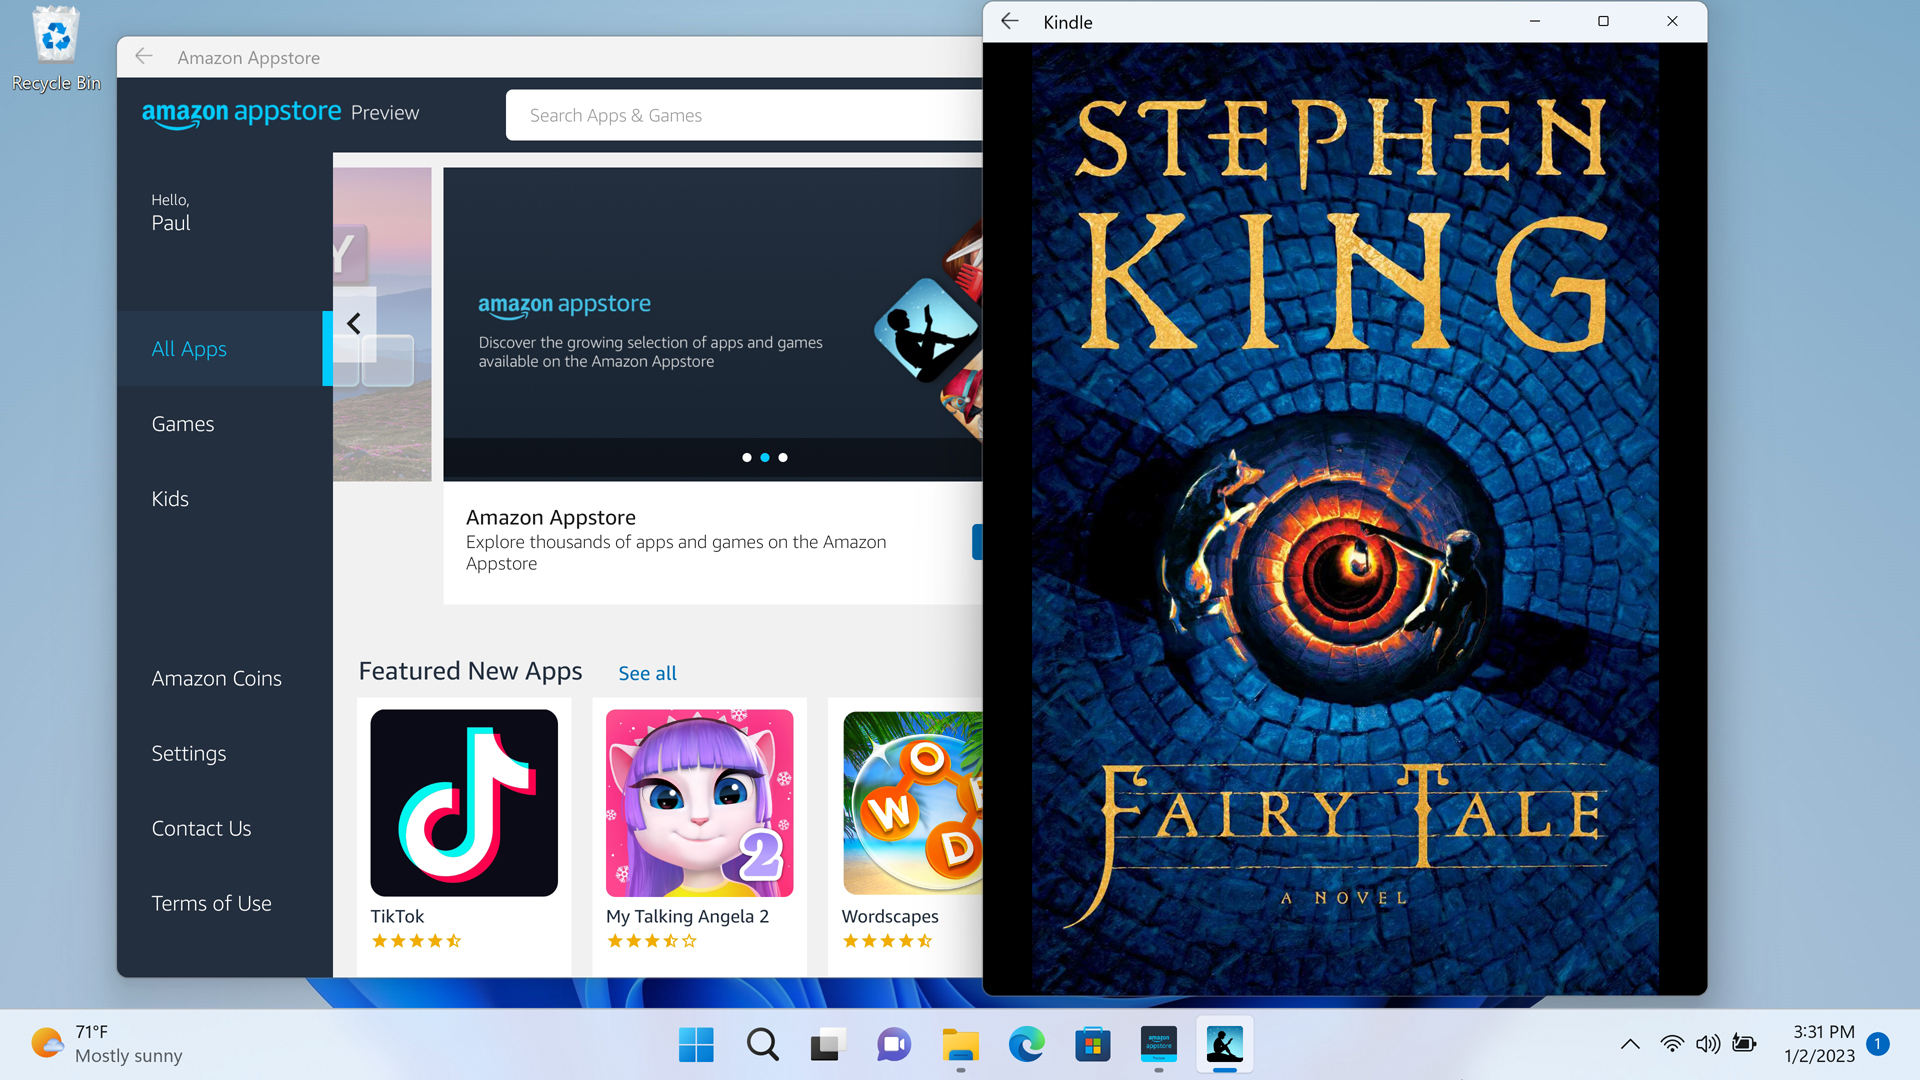
Android apps. Thanks to a technology called the Windows Subsystem for Android, or WSA, Windows 11 can also run Android apps. For now, distribution is restricted to a subset of the apps available in the Amazon Appstore for Android, including apps like Audible, Kindle, TikTok, The Wall Street Journal, and many games. But using a technique called sideloading, one can also install and run apps from the more voluminous and desirable Google Play Store as well. WSA and Android apps are discussed further in Android Apps.
Configure where you can get apps
By default, Windows 11 allows you to install apps from anywhere, but you can optionally configure the system to prefer apps from the Microsoft Store or, even more aggressively, to only allow you to install apps from the Microsoft Store and not from the web.
Where did it go?
This functionality was previously known as “S mode,” and it was designed to give Windows better performance and security by preventing users from installing apps from the web. However, customers rebelled at this limitation, and so now it’s just an optional feature you can configure if desired. It’s also less restrictive, since you can toggle it differently at any time. With S mode, once you turned it off, it was always off.
To configure this feature, open the Settings app and navigate to Apps > Advanced app settings.

The first option here, “Choose where to get apps,” is set to “Anywhere” by default. But you can change this to “Anywhere, but let me know if there’s a compatible app in the Microsoft Store,” “Anywhere, but warn me before installing an app that’s not from the Microsoft Store,” or “The Microsoft Store only (Recommended).”
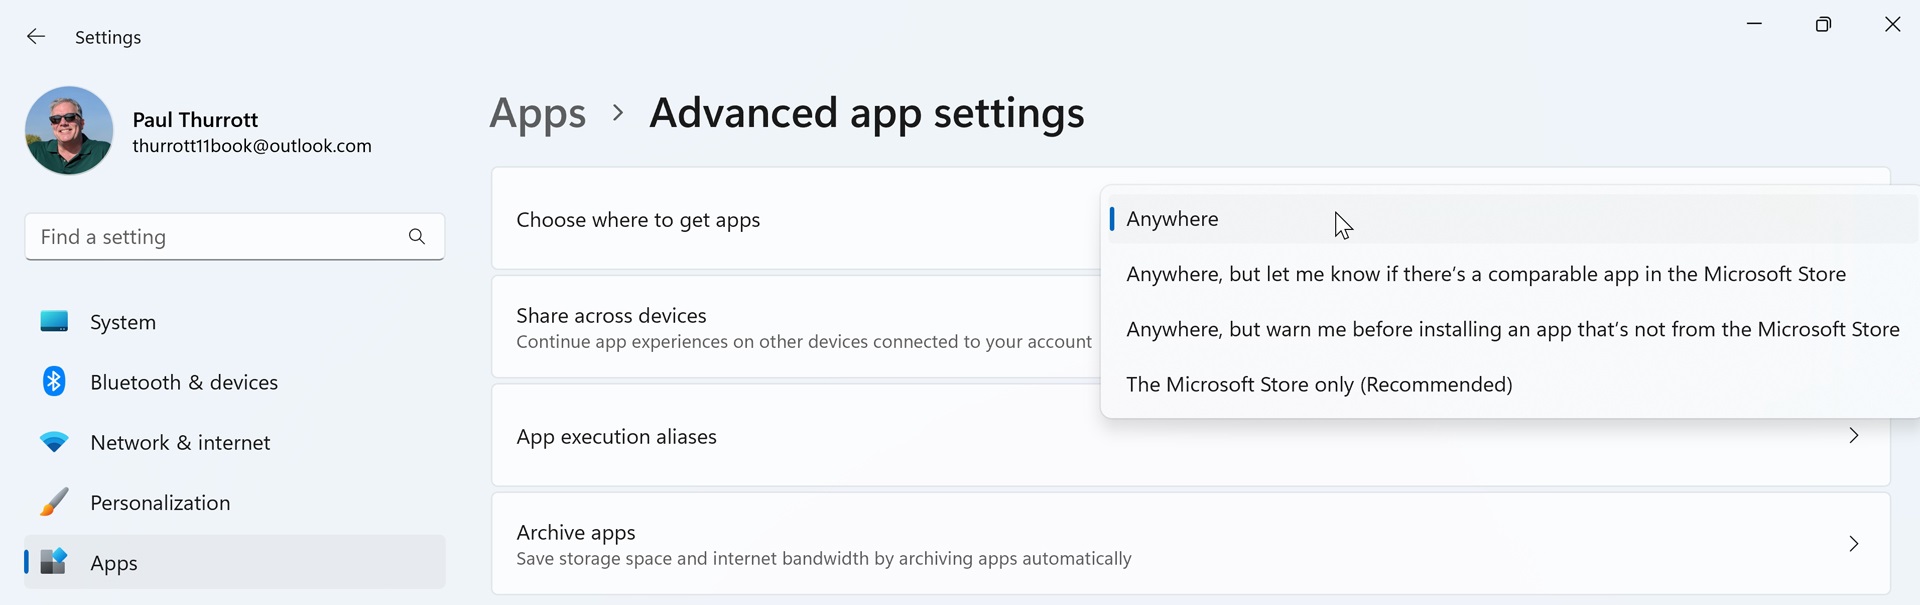
Because the selection of apps in the Microsoft Store is unlikely to meet your needs, we don’t recommend changing this to the latter setting. But there’s no reason not to consider either of the middle two options.
Uninstall an app
Windows 11 supports installing apps from a variety of sources, including the web, the Microsoft Store, and so on. But it provides a reasonably consistent experience for uninstalling these types of apps.
To easiest way to uninstall most apps is to find it in the Start menu—in Pinned, the All Apps list, or wherever—right-click it, and then select “Uninstall” from the context menu that appears.
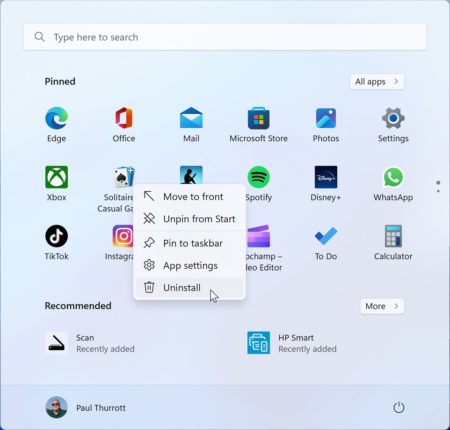
What happens next depends on the type of app you are uninstalling.
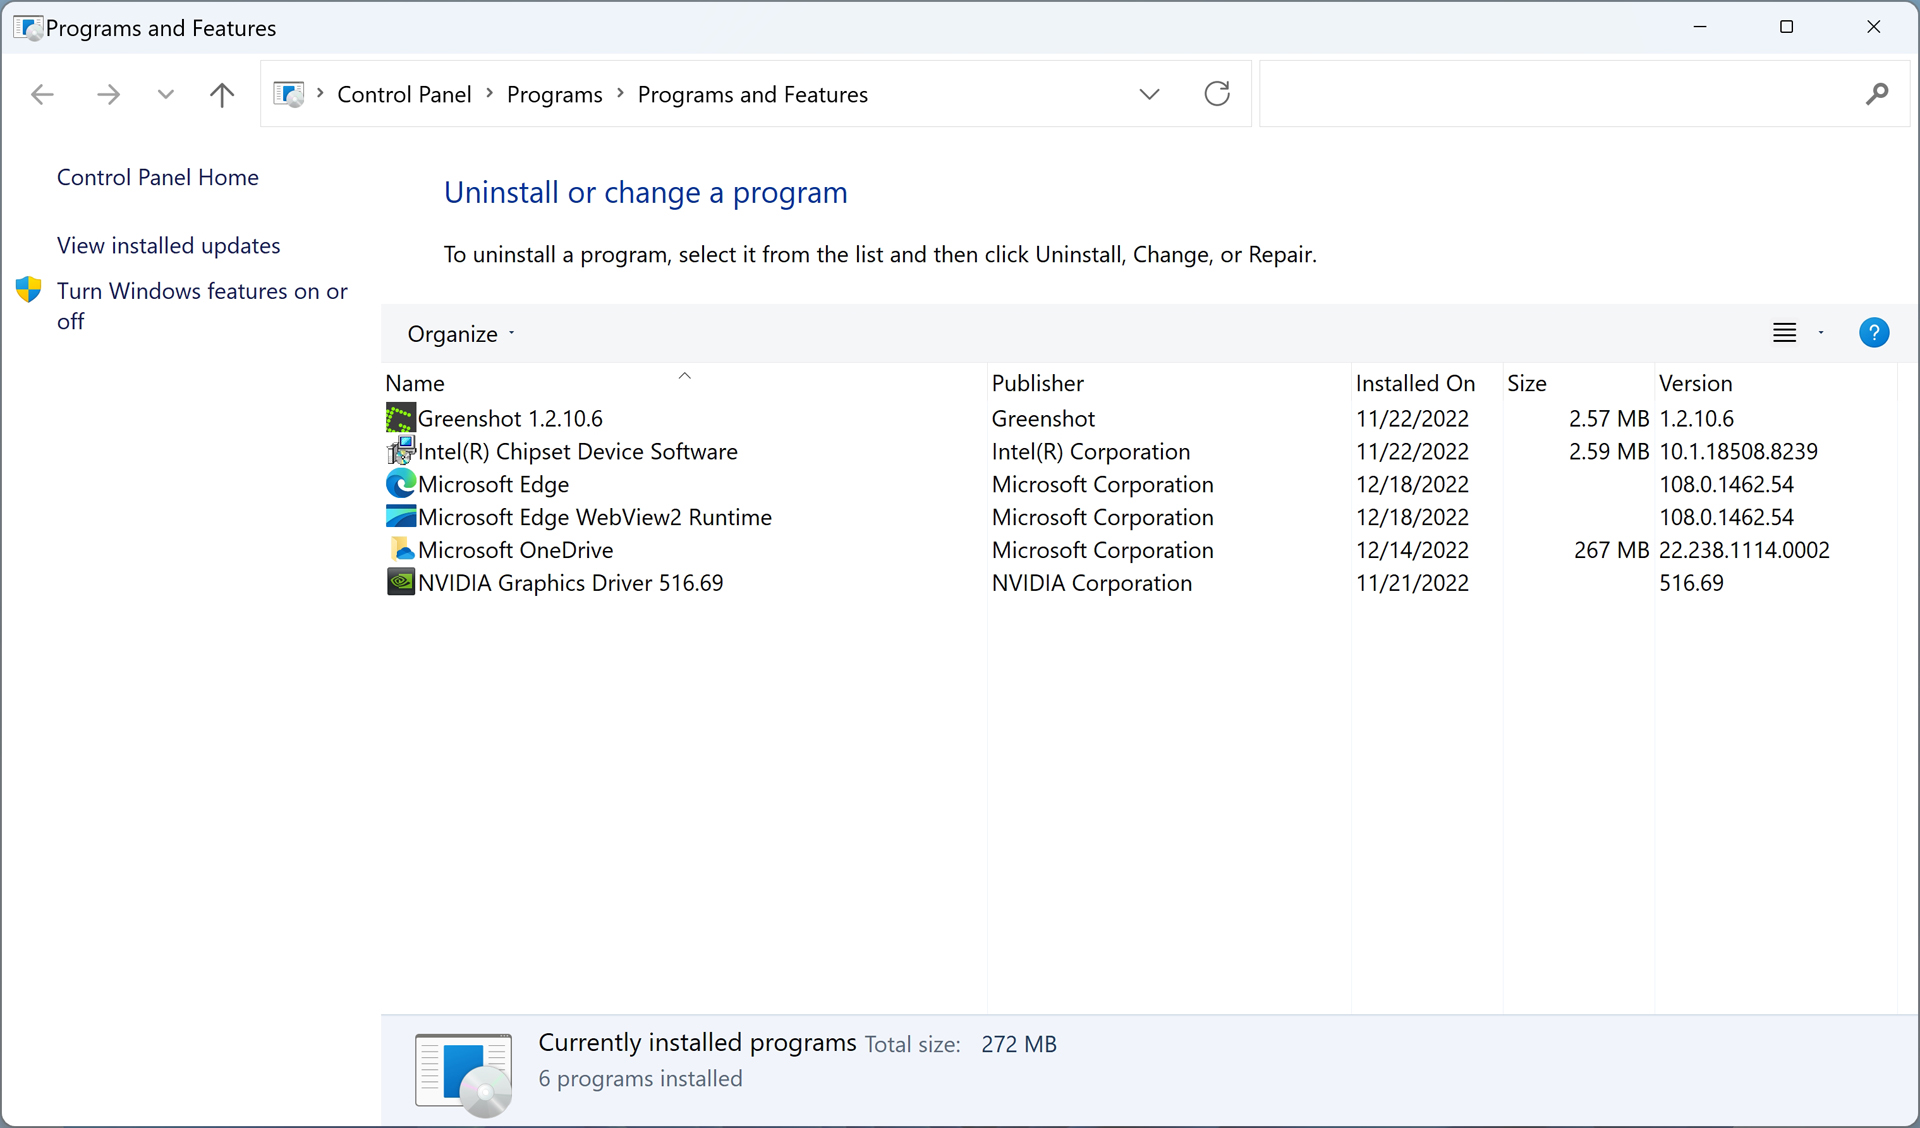
If it is a desktop app, the Programs and Features control panel will appear. Find the app in the list, select it, and choose the “Uninstall” button in the toolbar above the apps list.
If it is a web app that you installed with Microsoft Edge, you will be prompted to make sure you wish to uninstall the app.

You can also uninstall web apps from within Microsoft Edge. This is described in Microsoft Edge and Web Apps.
If it is a Store app, you will be prompted to make sure you wish to uninstall the app.

Don’t see an “Uninstall” option in the pop-up menu? Some of the Store apps that come with Windows 11 cannot be uninstalled normally.
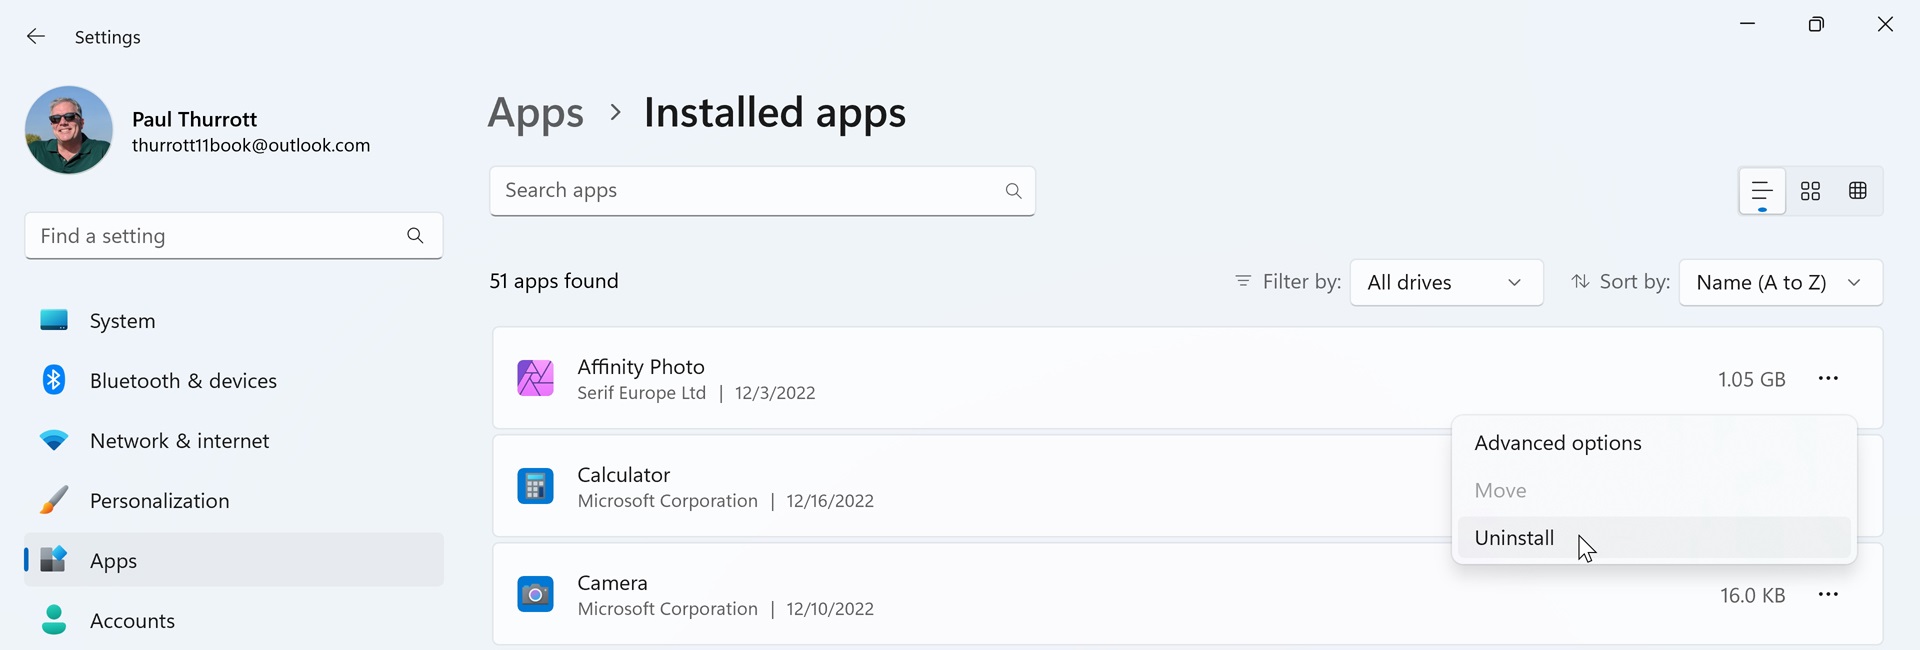
You can also uninstall an app using the Settings app. To do so, open Settings and navigate to Apps> Installed apps. Then, select the More options (“…”) link next to the app you wish to uninstall and choose “Uninstall.”
Configure default apps
Windows 11 provides a Default apps interface in Settings so that you can determine which apps respond to specific actions, such as opening common file types. To see this, open the Settings app and navigate to Apps > Default apps.

To change the default app for a particular action, simply select the app that is currently configured. On the page for that app, you will see which file or link types are configured to use that app by default.
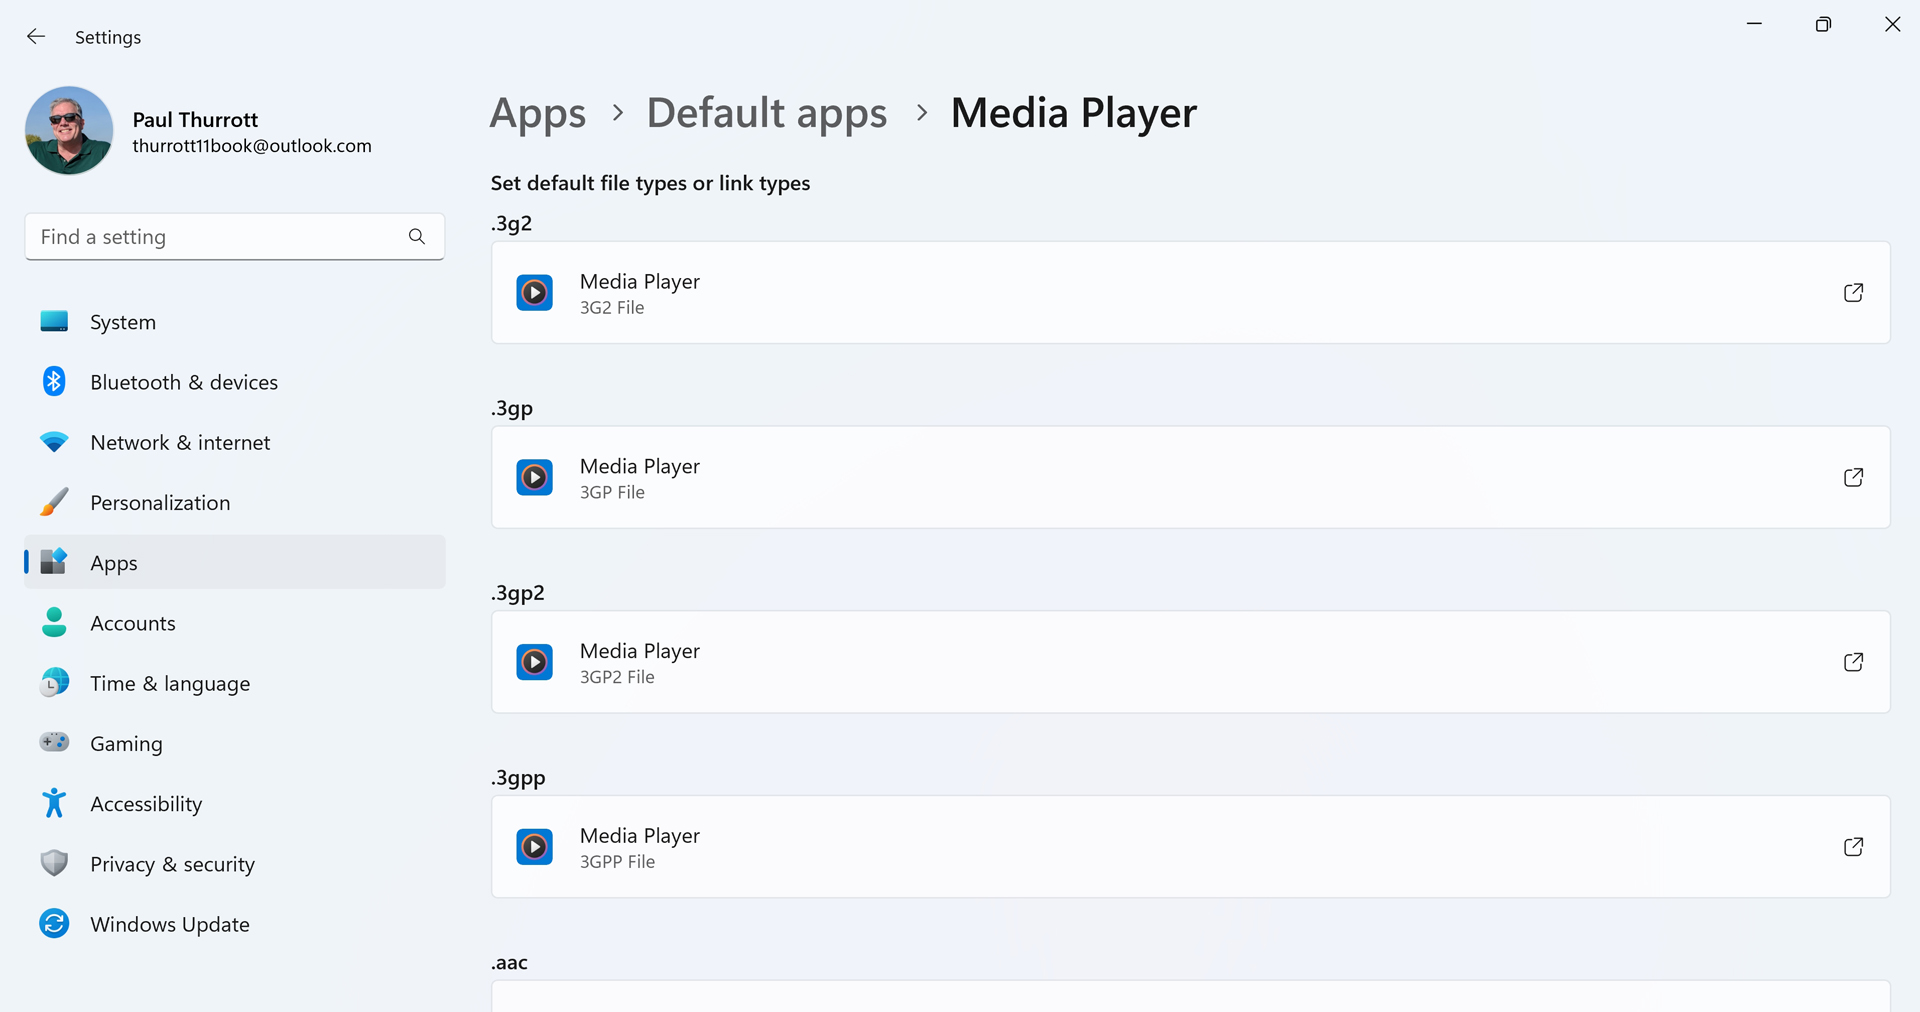
To change the association of a file or link type, select it in the list. A pop-up will appear, providing you with a list of the available options.

Web browsers like Microsoft Edge, Google Chrome, and Mozilla Firefox display an additional option, “Set default,” at the top of their Settings page so that you can quickly set that app as the default browser.
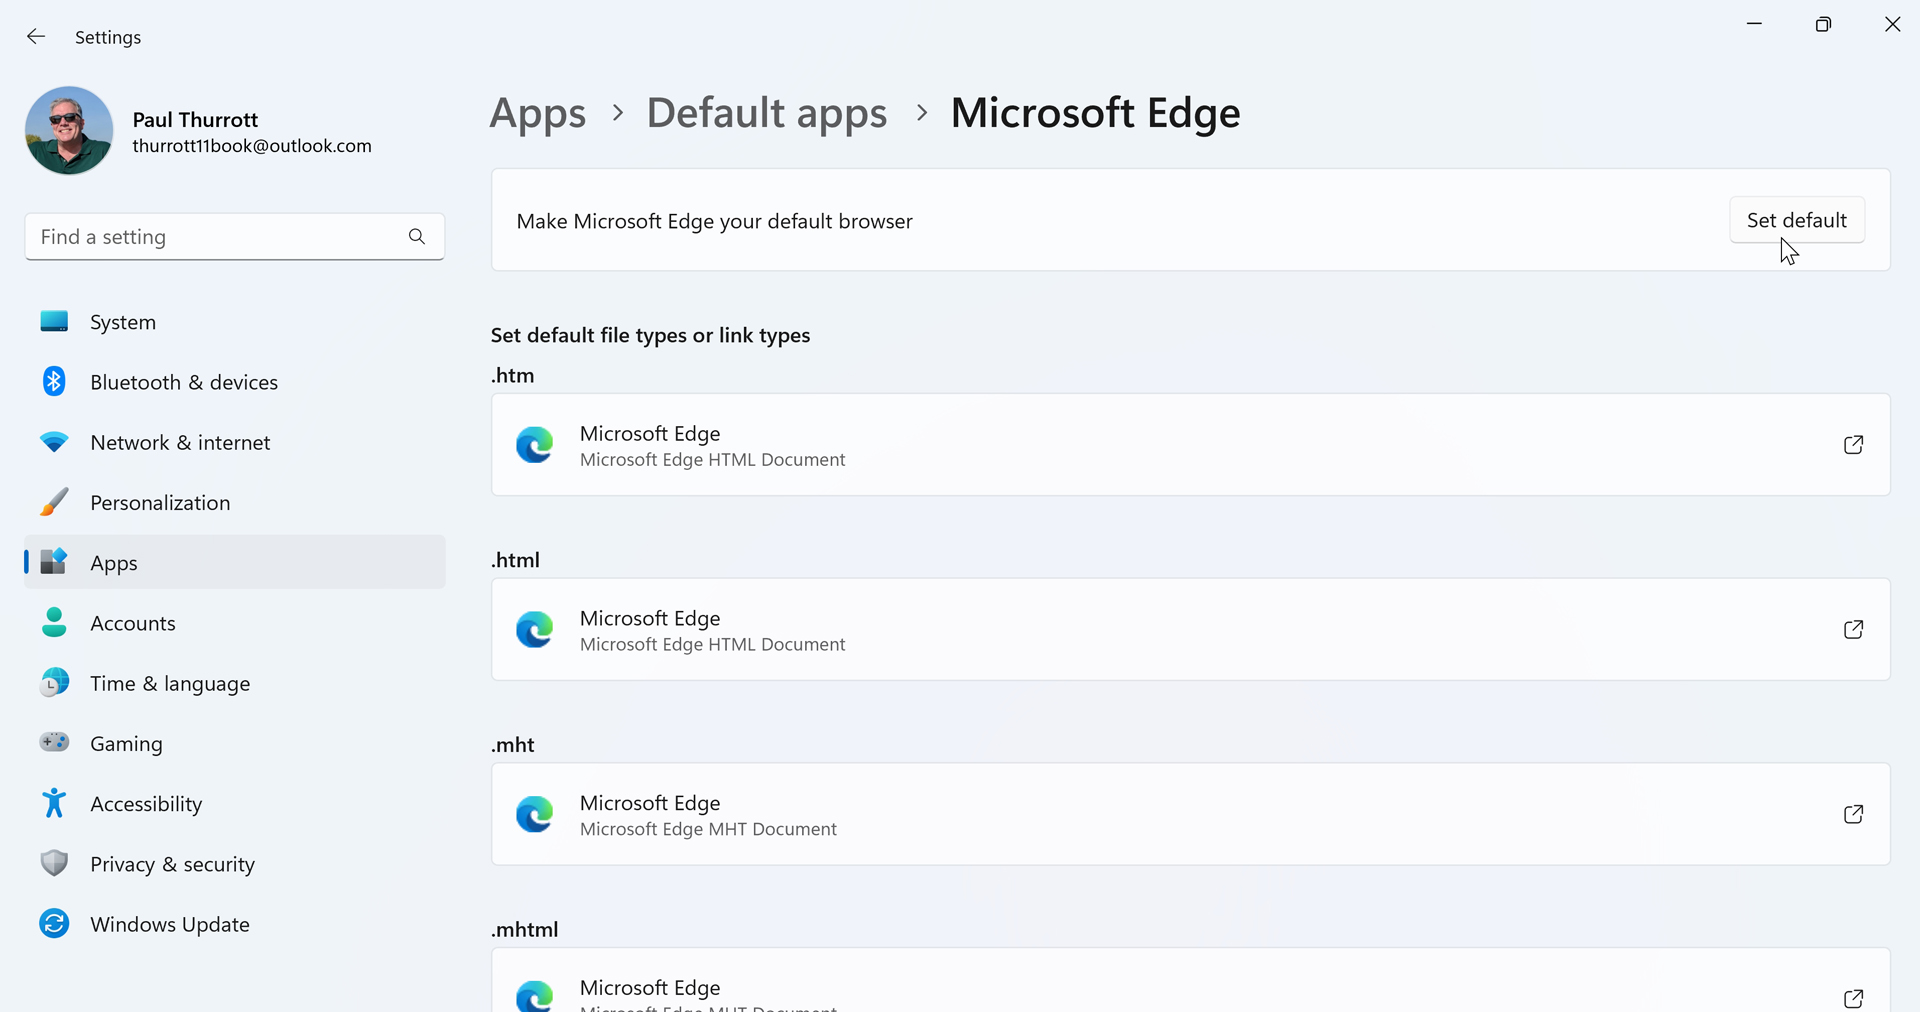
This option isn’t as full-featured as you might expect. When you choose to make a browser the default, it only changes the file and link associations of four types—.htm, .html, HTTP, and HTTPS—and there is nothing you can do to prevent Windows 11 from opening Microsoft Edge to accomplish certain actions, even when you’ve configured another browser as the default. For example, if you click a story in Widgets or a link in Search, Microsoft Edge will always open.
You will also be given the option to choose a default app the first time you open certain file types for the first time, or after you’ve installed a new app that can open different file or link types. You can use the pop-up that appears to choose an app for just this one time or always, the latter of which will make it a permanent change.
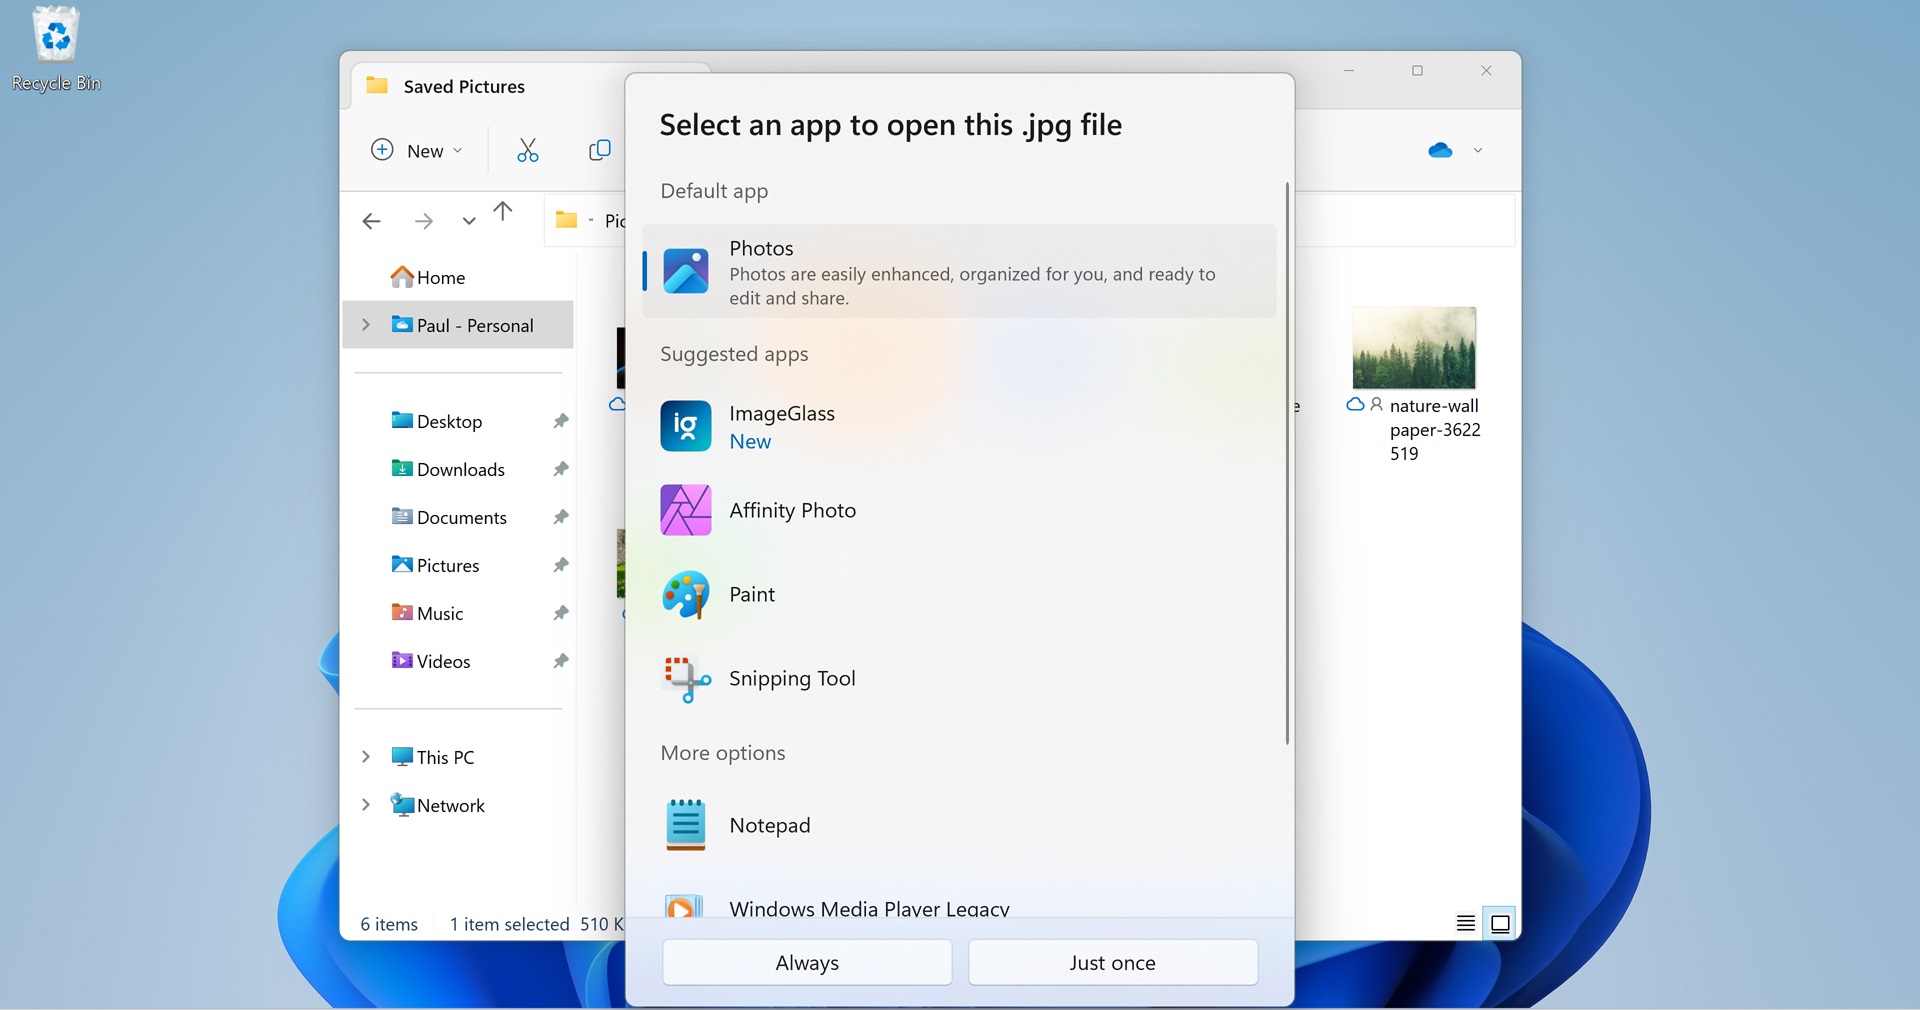
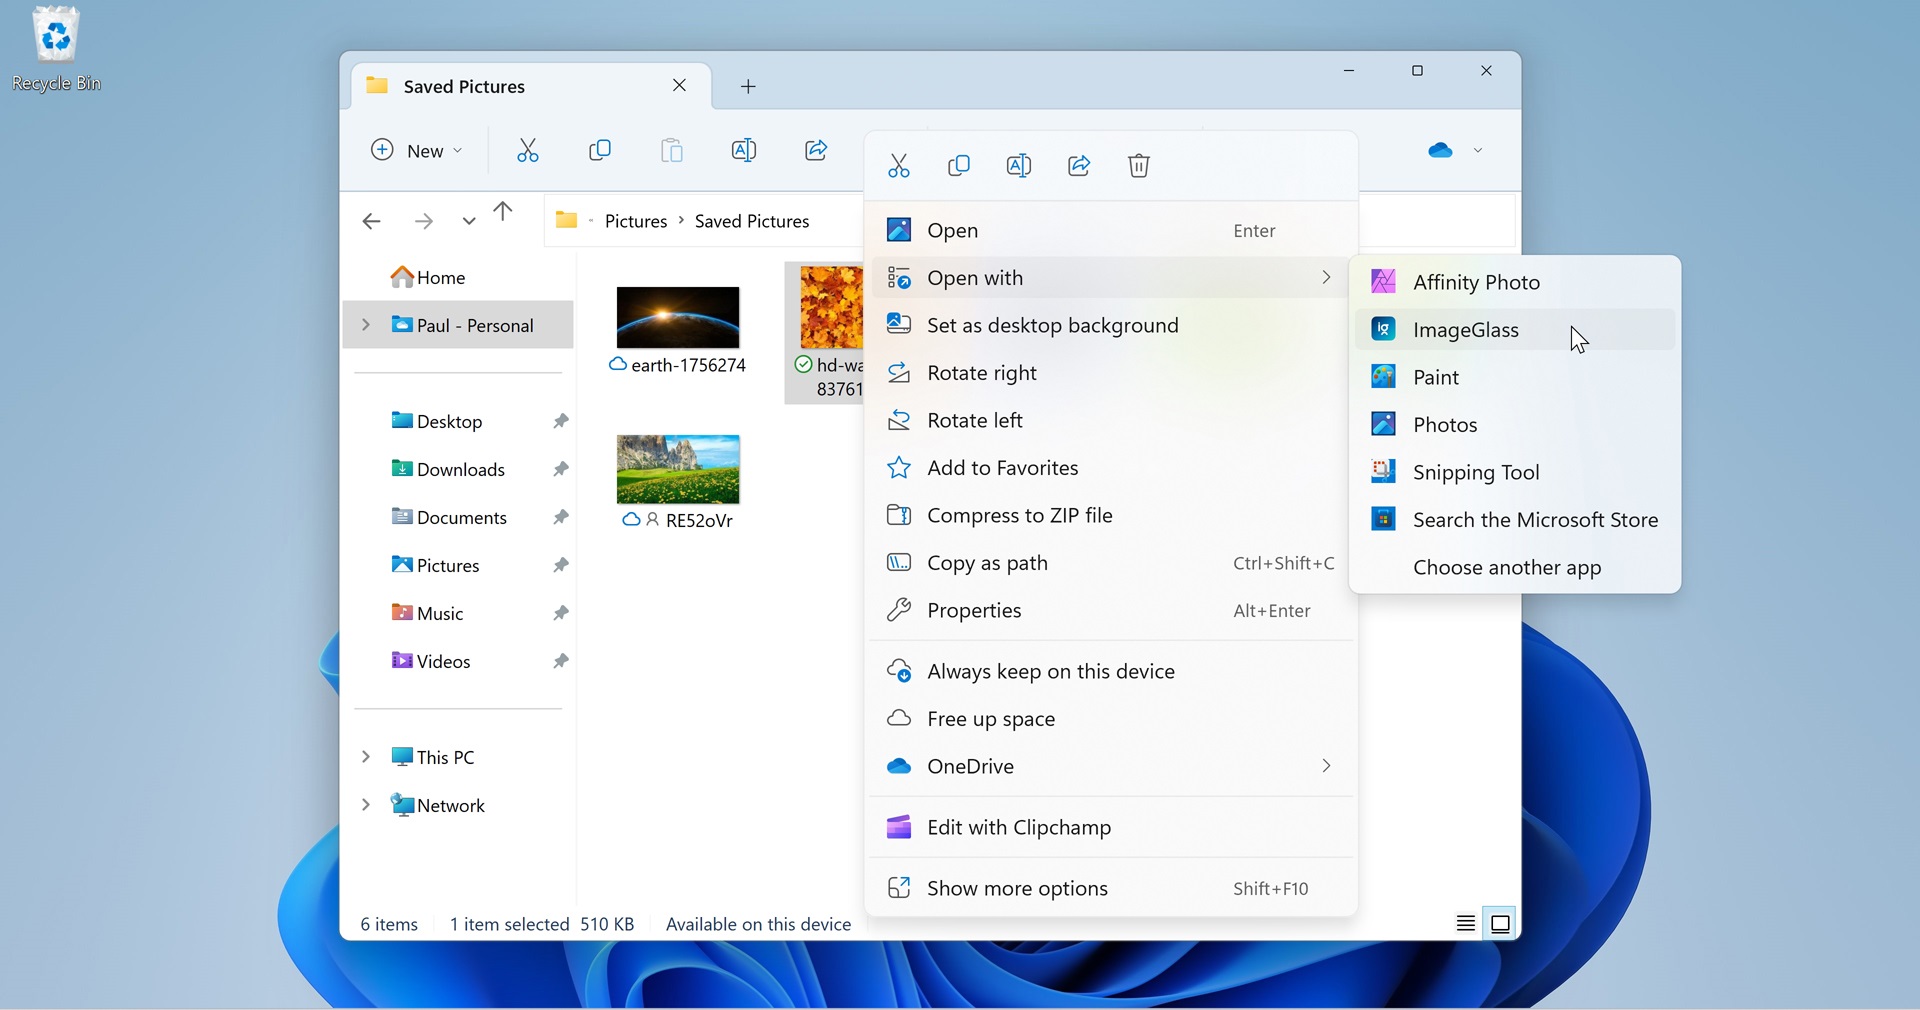
You can choose to open any document or other data file with a different app—or choose a different default app on the fly—by right-clicking it in File Explorer (or on the Desktop) and choosing “Open with” and then “Choose another app” from the context menu that appears.
Configure where apps are located
By default, apps are installed on your C: drive alongside Windows. But if your PC has multiple drives or partitions, you can change the default location for app installs and, in many cases, move Store apps to a new location.
Determine where new app installs are located
To determine where apps are installed by default, open the Settings app and navigate to System > Storage. Then, expand “Advanced storage settings” and select the link “Where new content is saved.”
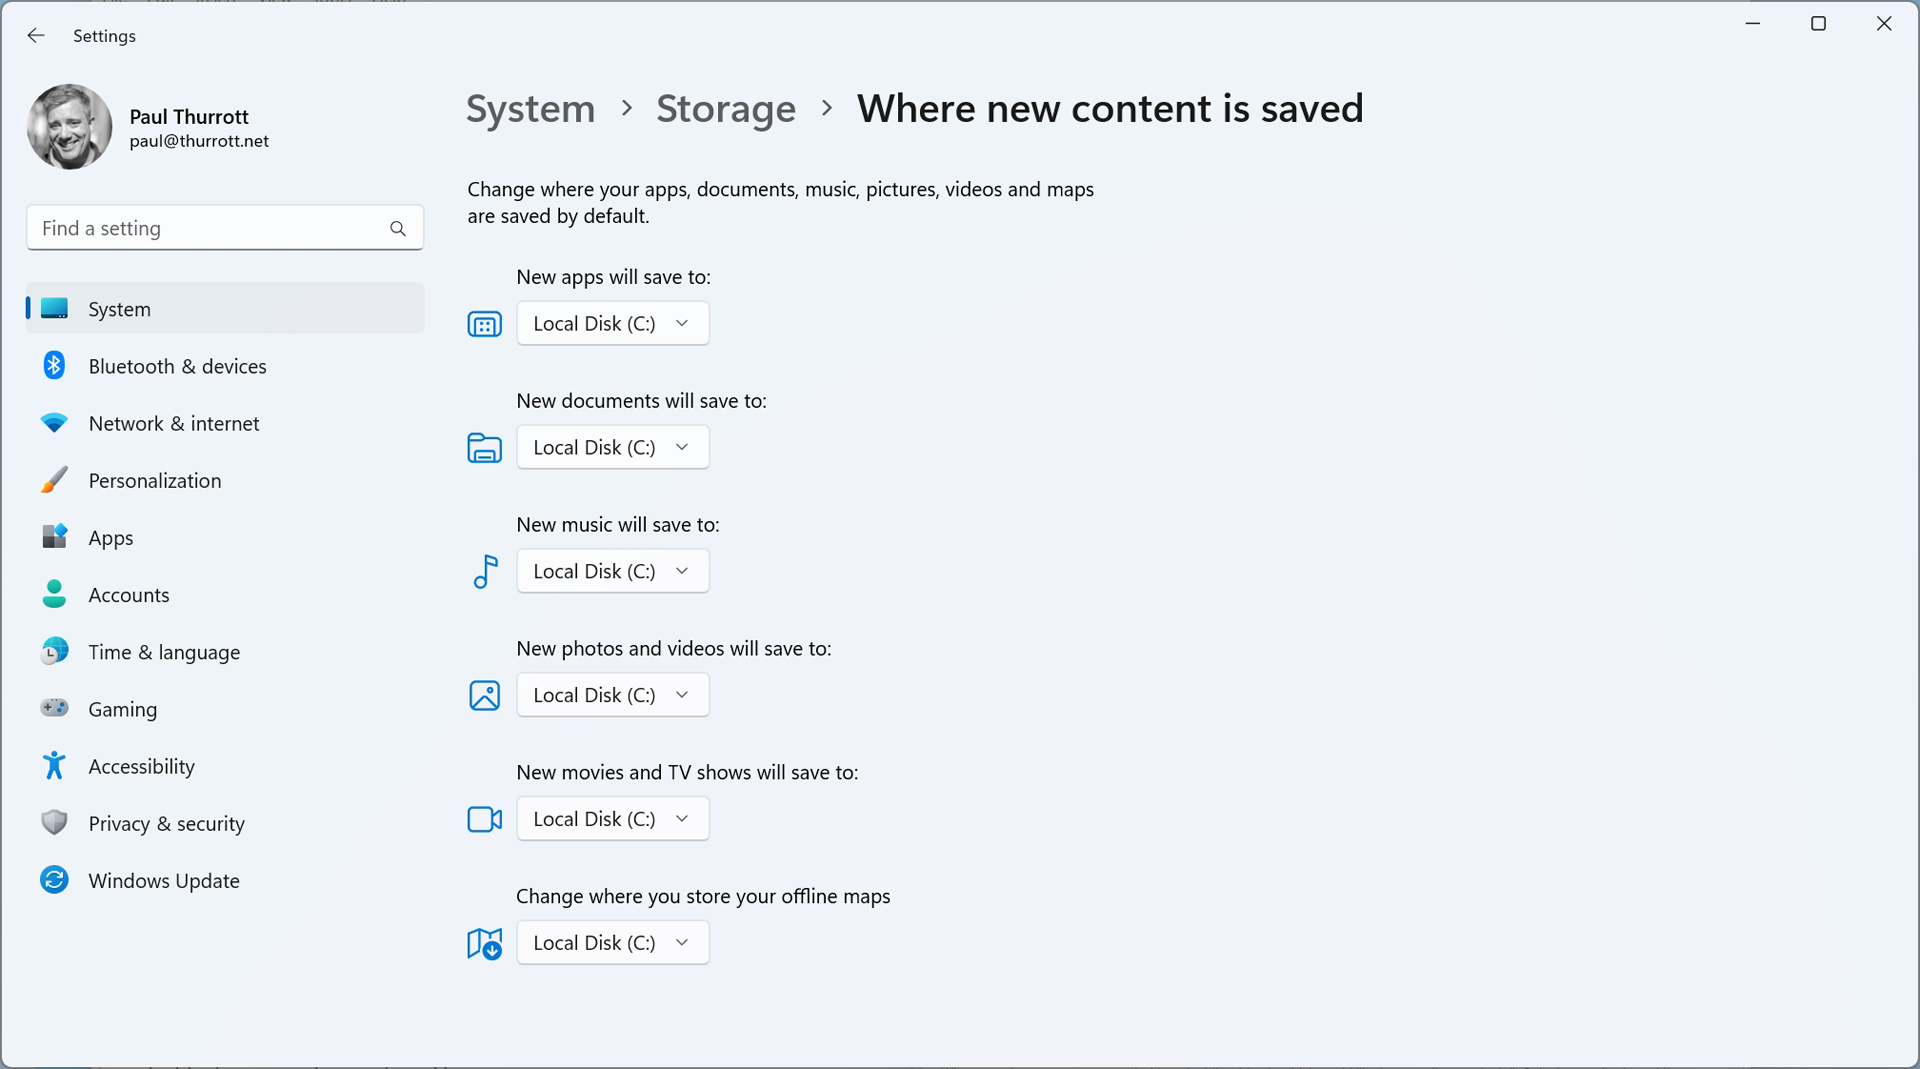
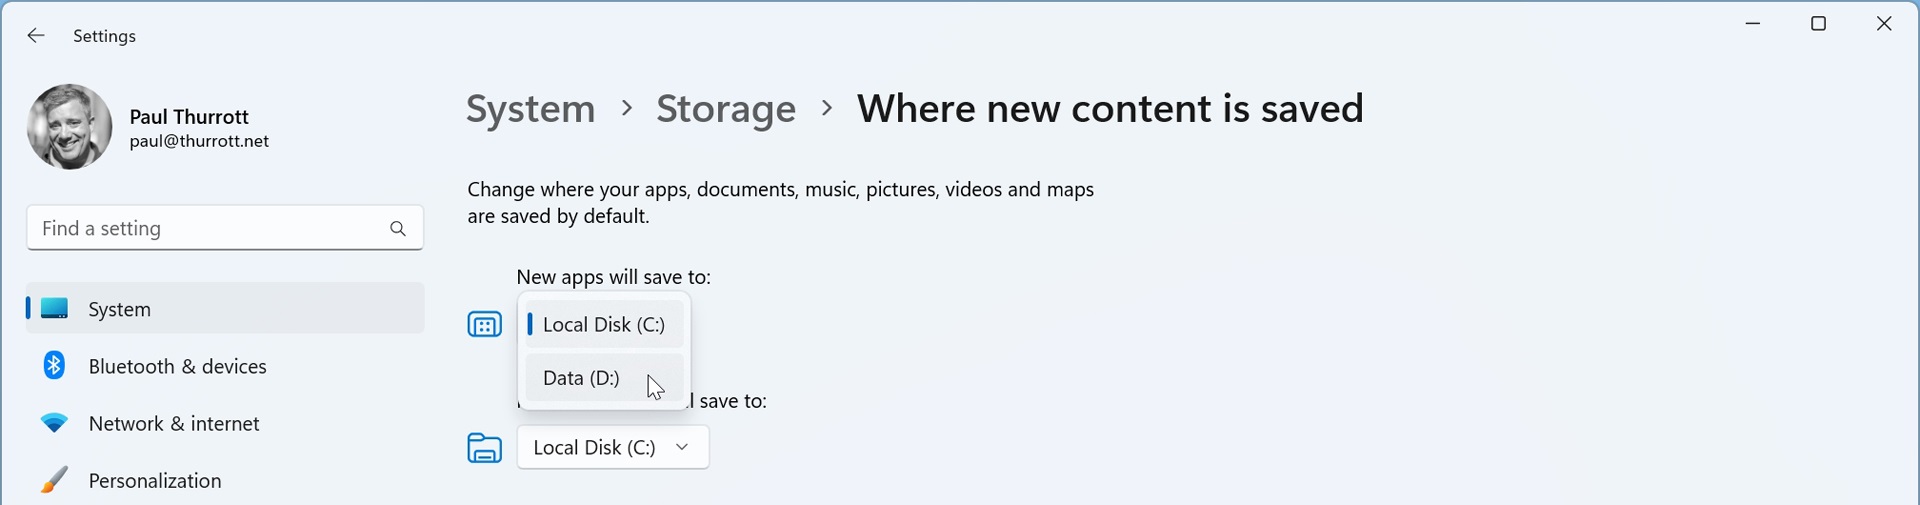
To change the location for new app installs to another drive, select the drop-down under “New apps will save to:” and change the location.
Move an existing app to a new location
You can also move many Store apps to a different drive. This is helpful if you are running out of space on a drive, or have installed a new drive for this purpose.
To do so, open the Settings app and navigate to Apps > Installed apps.
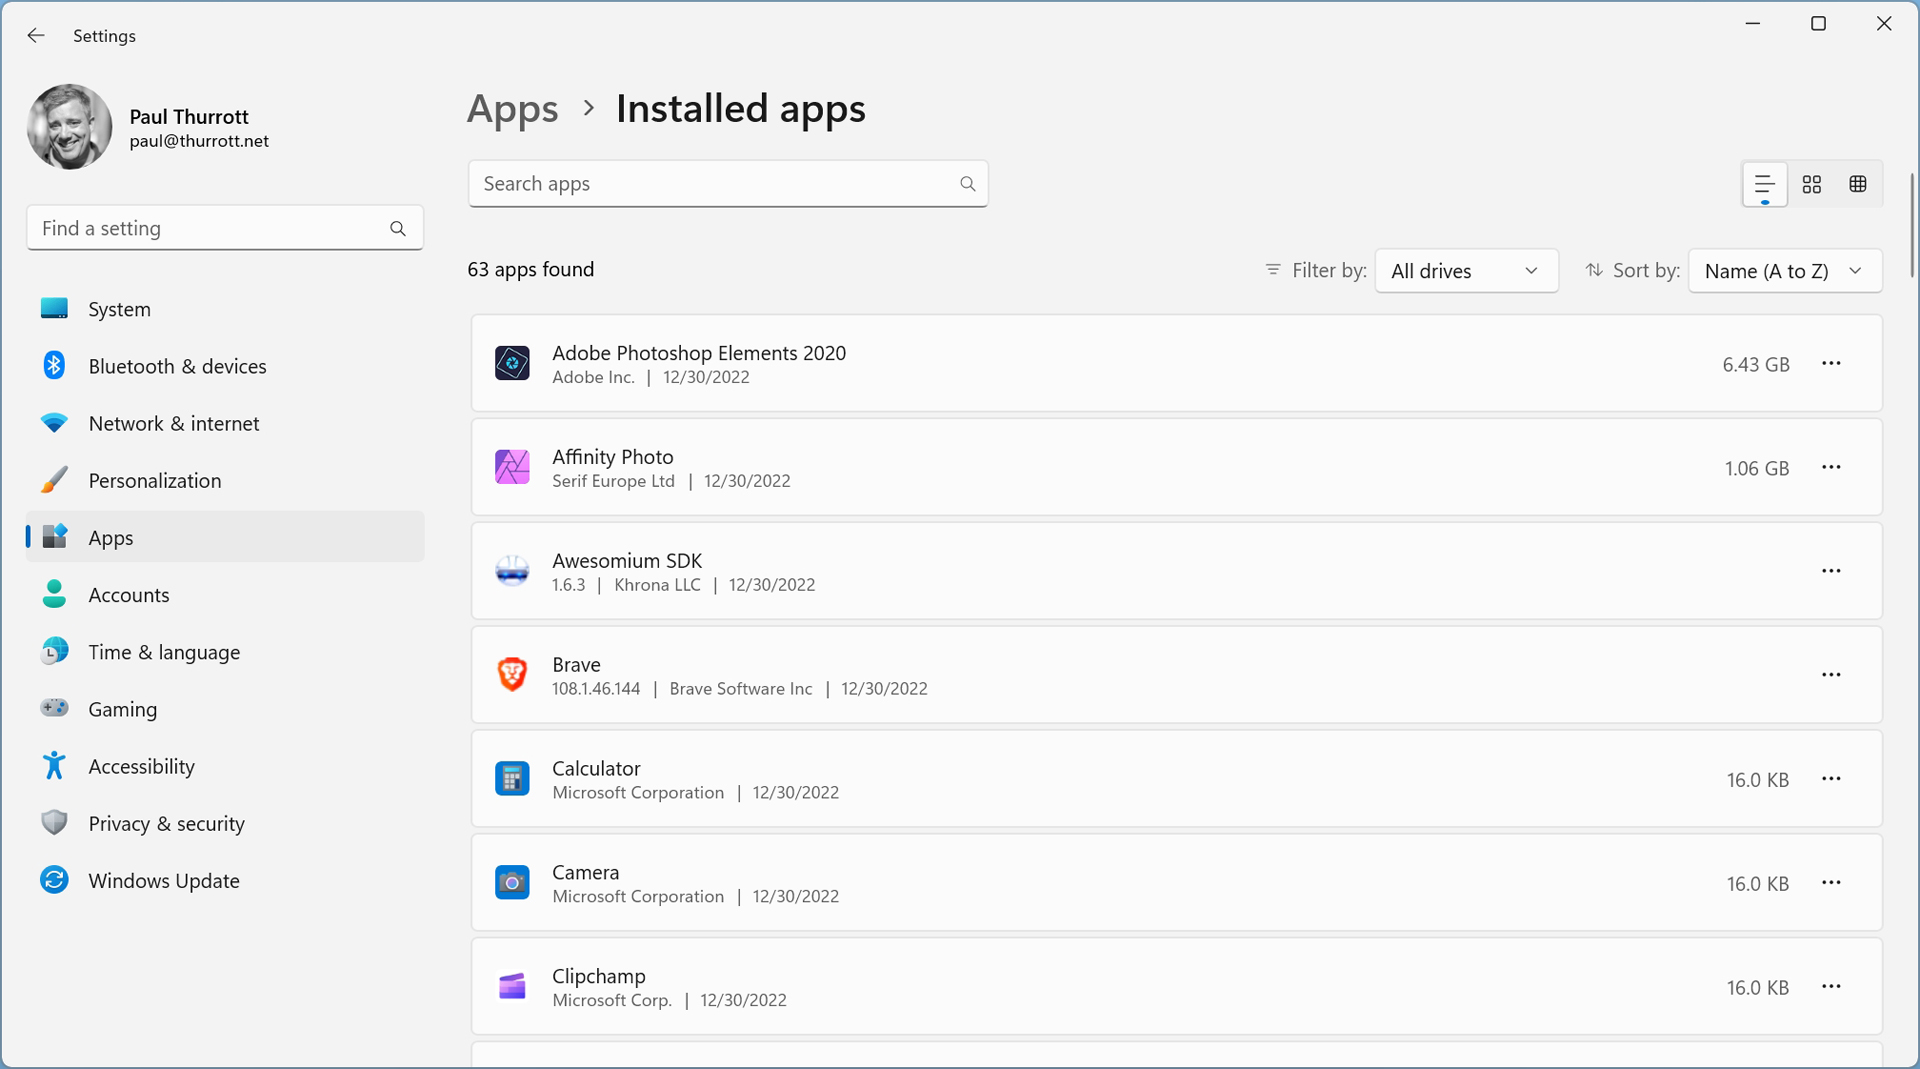
Then, select the More options (“…”) link next to the app you wish to move and choose “Move.”
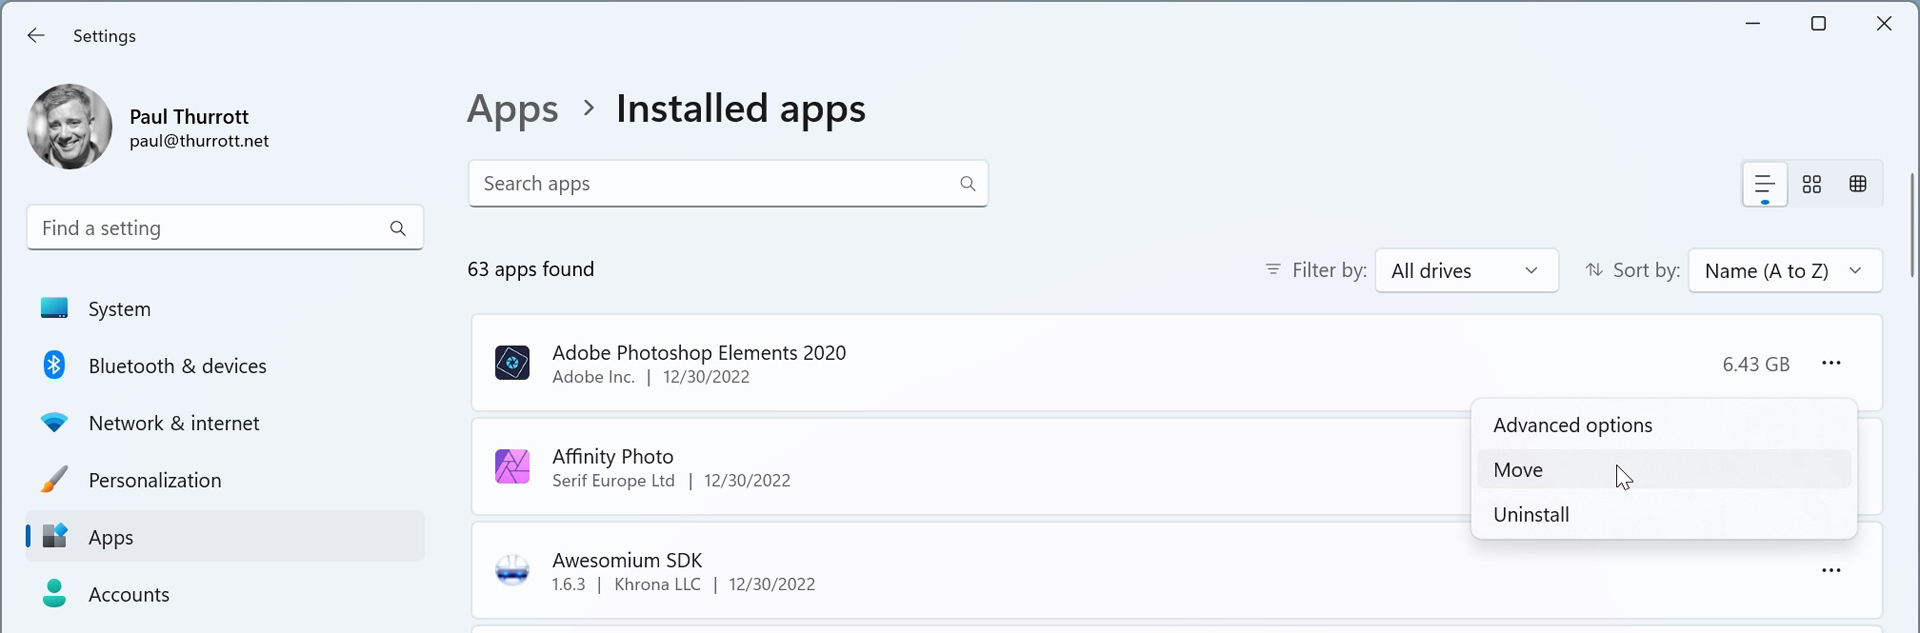
If this option is not available, then it’s not possible to move the install location of that app. Some Store apps, including many that come with Windows 11, cannot be moved.
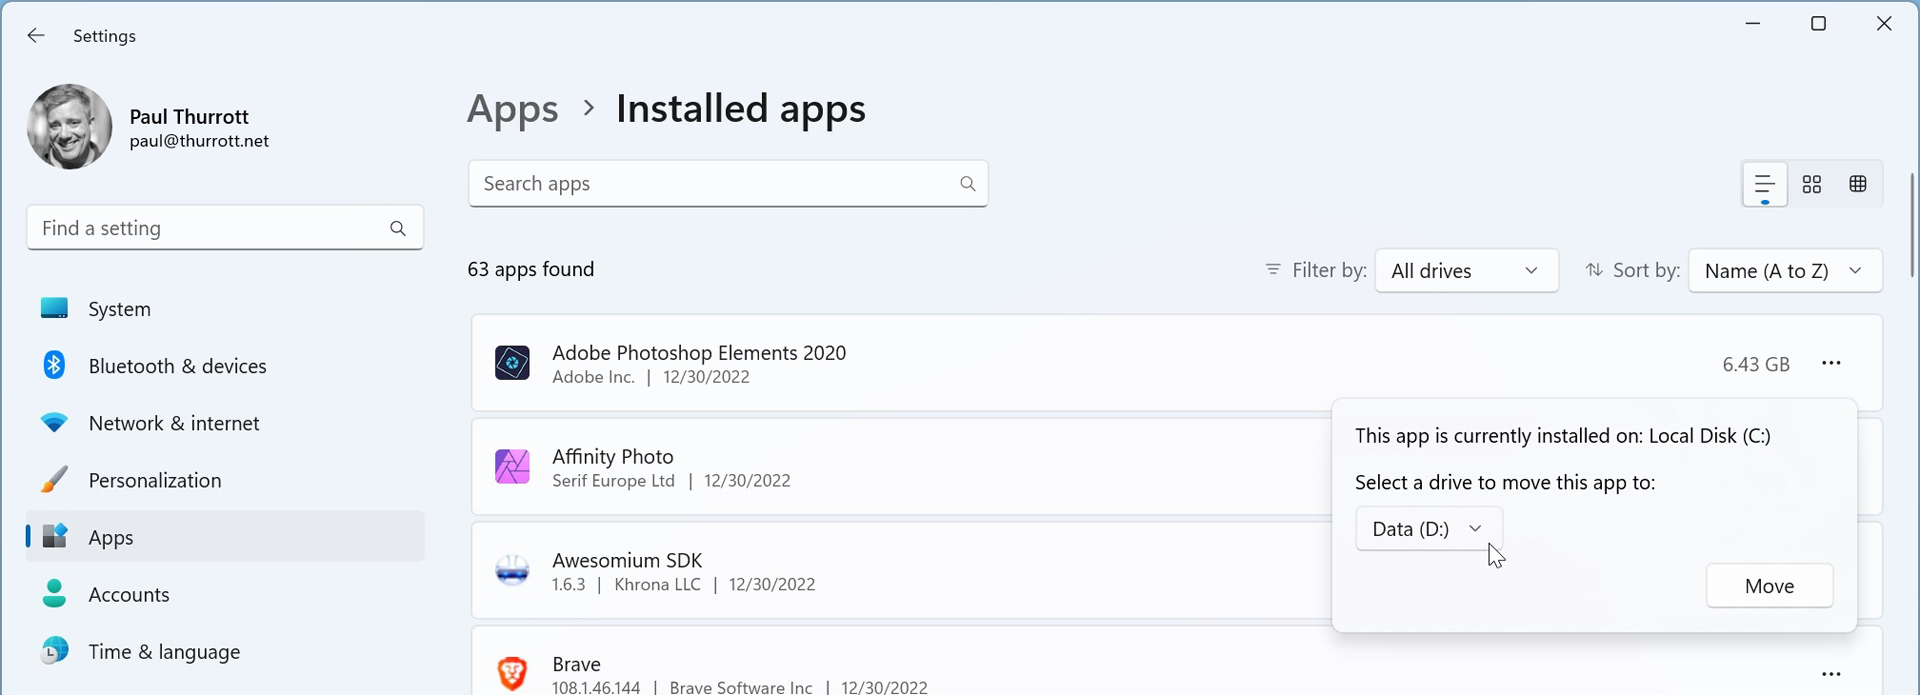
When you do so, you are prompted to select the drive to which you’d like to move the app install. Select accordingly and then click “Move.”
You can change the list of apps displayed here so that it sorts by size. To do so, select the “Sort by” item at the top of the list.

Gain unlimited access to Premium articles.
With technology shaping our everyday lives, how could we not dig deeper?
Thurrott Premium delivers an honest and thorough perspective about the technologies we use and rely on everyday. Discover deeper content as a Premium member.