- Paul Thurrott
- Jan 14, 2023
-
1
The Mail app can connect to one or more online accounts and help you manage your work and personal email in one place.
Get to know the Mail app
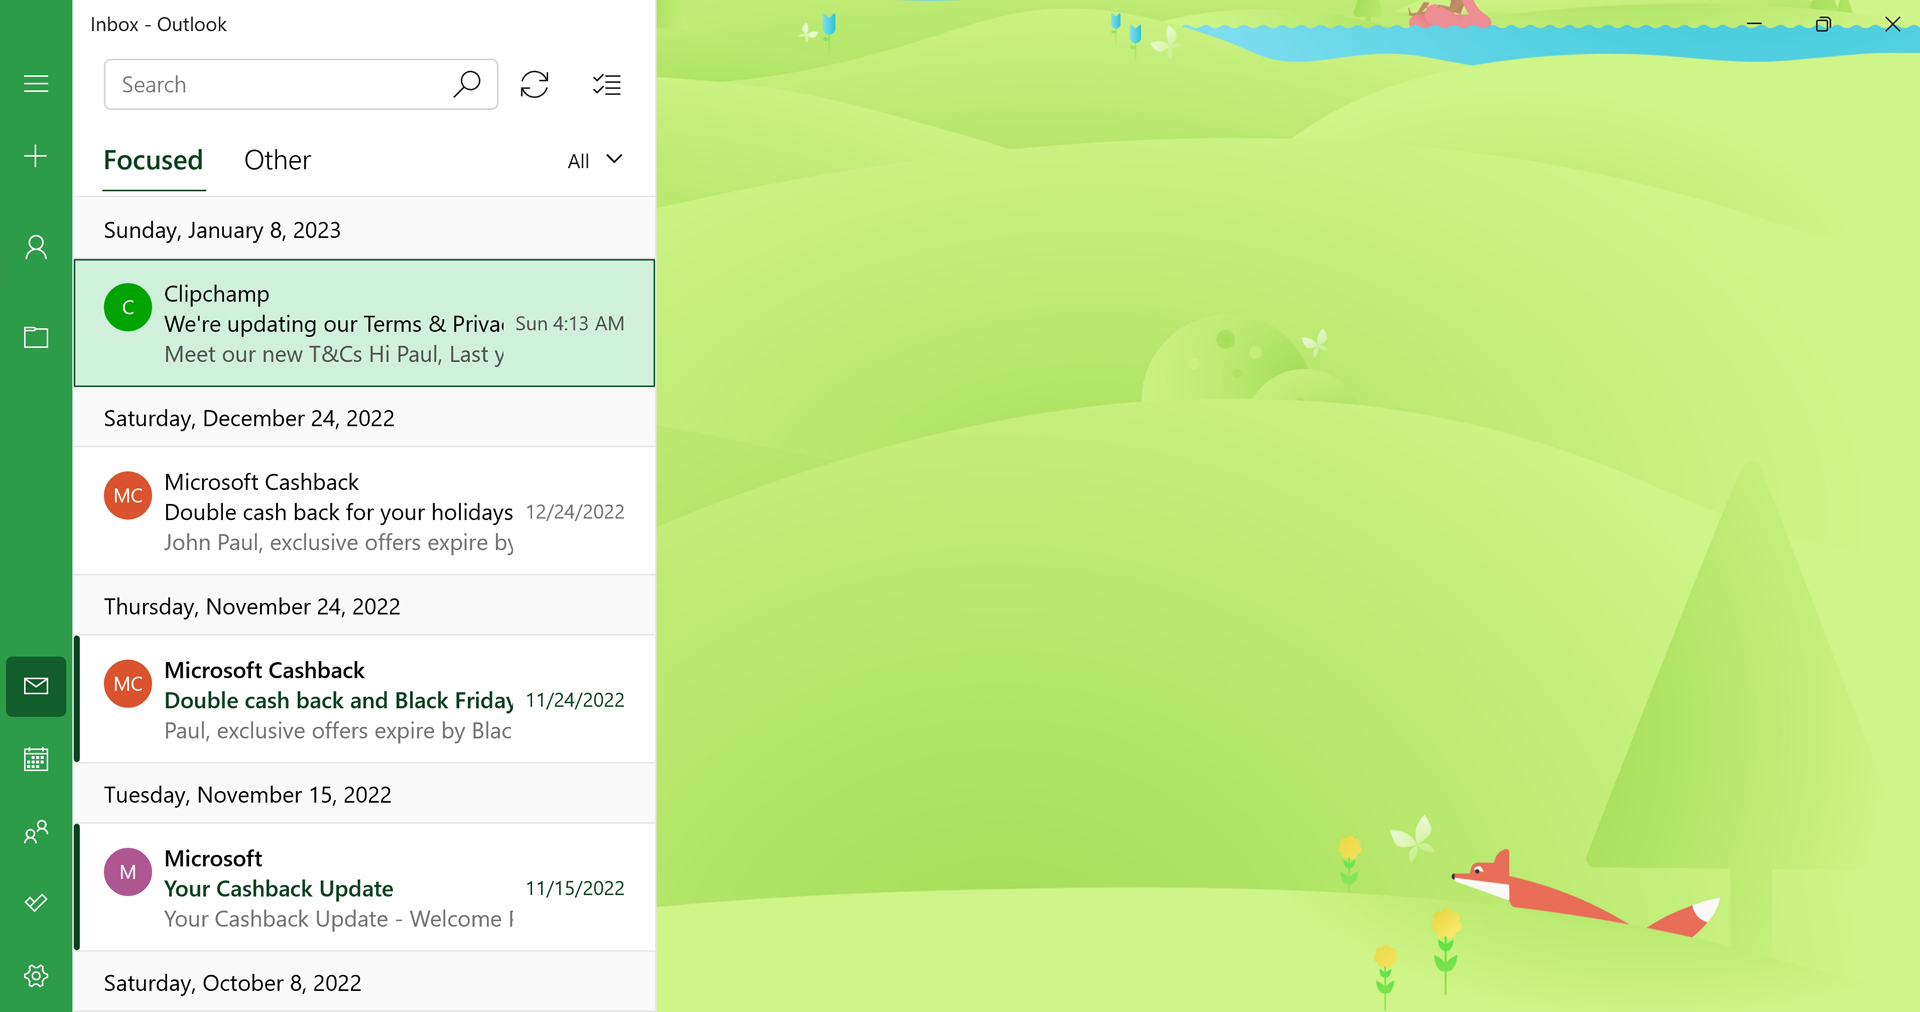
Mail provides a straightforward user experience that works a bit like Outlook.com and Microsoft’s other web-based email solutions. And as with those offerings, it provides three columns, or panes—Navigation, Messages, and Reading—which are arranged from left to right.
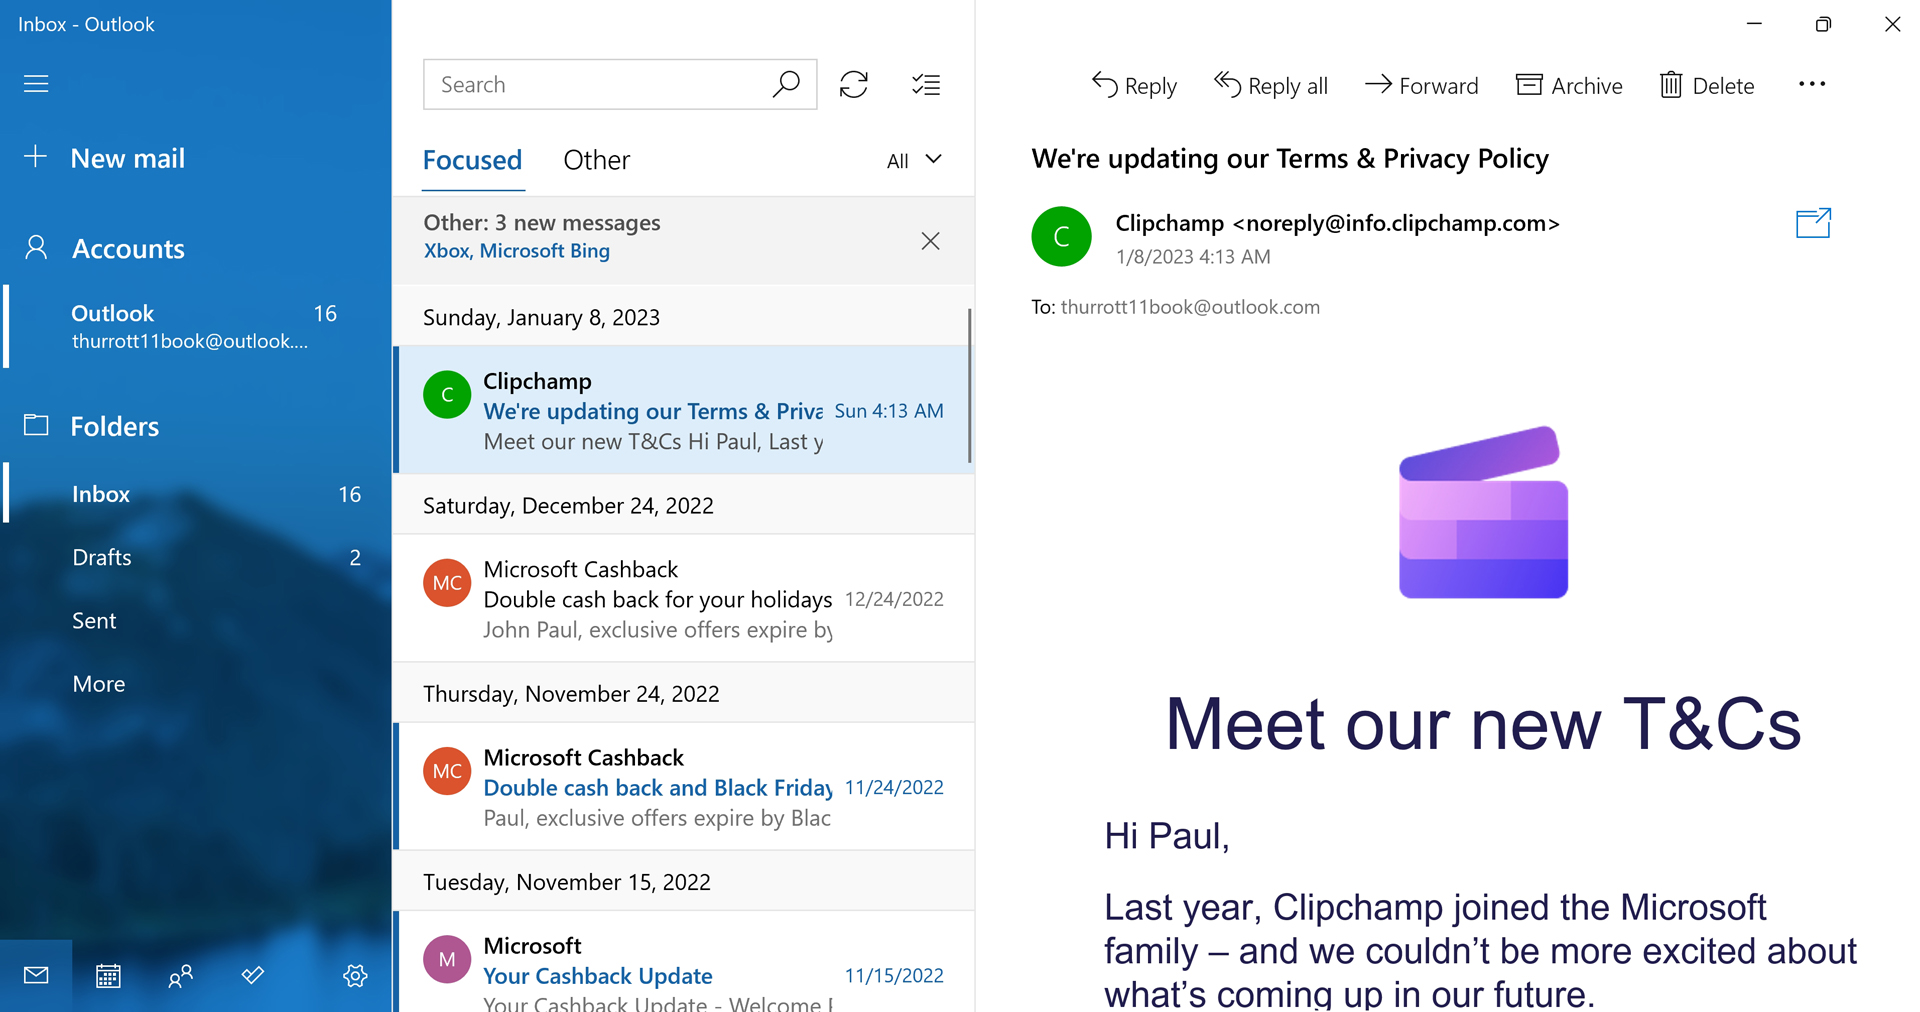
The Navigation pane on the left has an Expand/Collapse control—sometimes called a “hamburger”—in the top left. You can use this control to toggle between the pane’s two display states.
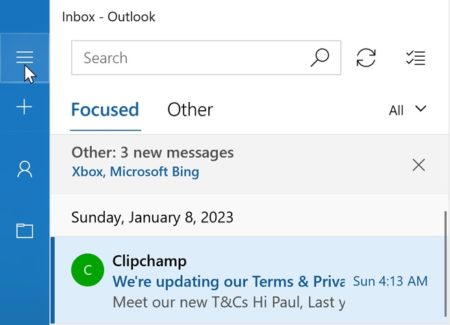
Regardless of whether it is collapsed or expanded, the Navigation pane provides a “New mail” button (“+”), your configured email accounts and the folders they contain, and links to related apps—like Calendar, People, and To-Do—and app settings.
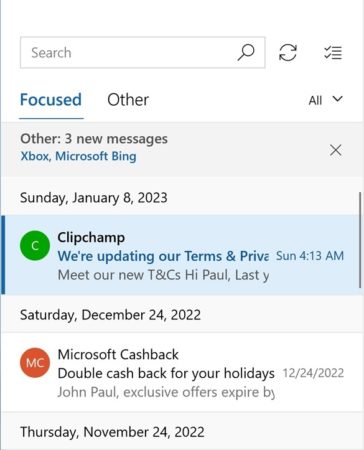
The Messages pane provides a search box and displays the contents of the currently selected folder, typically the Inbox folder, for the selected account.
The Reading pane will display the currently selected message. But if no message is selected, it will display the app’s background image instead.
When you create a new email message, the New Message view appears, replacing the Reading pane.
Manage your accounts
After you’ve used the Email & accounts interface in the Settings app to configure the online accounts you wish to use with Mail, you should then spend a bit of time examining how you will use those accounts in the Mail app.
Please refer to Email and Other Accounts to learn more about configuring accounts for use with the Mail app.
Manage how accounts and folders work in Mail
If you’re using Mail with just a single account, things are simple: Mail will act as the front-end for that one account, letting you access your Inbox and other email folders, much as you’d expect.
But things get more interesting when you use Mail to manage two or more accounts. In this case, each account is accessed separately in the Navigation pane by default. But you can optionally use a single Linked inbox view that consolidates two or more accounts into a single view. So you have a choice to make.
Manage multiple accounts separately
By default, Mail presents multiple accounts separately in the Navigation pane. To switch between them, simply select the account name under Accounts (or, with the Navigation pane collapsed, choose All accounts and then the account). As you do, the Favorite folders list—under Folders—will change to match the actual folders found in the selected account. (With the Navigation pane collapsed, you will see the full folder list.)
Favorite folders are described below.

Manage multiple accounts together using linked inboxes
Mail offers a Linked inbox feature for those who prefer to manage two or more accounts using a single view. When you link inboxes this way, your email isn’t really “mixed” together up in the cloud. Instead, you can just view your email from multiple accounts in a single view in the Mail app. This can be more convenient than switching between accounts with the Navigation pane.
You can arbitrarily link inboxes from any number of email accounts. For example, if you have three accounts configured in Mail, you might link all three, or you might link two and leave one separate. It’s your choice.
To link inboxes, open Mail settings and navigate to Manage accounts. Then, select Link inboxes. The Link inboxes window appears, letting you choose which inboxes to link and, optionally, choose a name for the linked inbox.
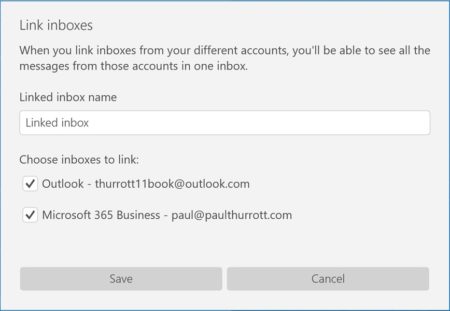
If you’re using a Mail feature called Focused inbox, you may see a warning that this feature is not compatible with linked inboxes. Focused inbox is described later in the chapter.
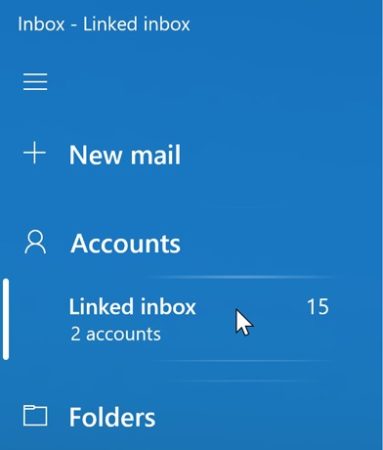
When you make your selections, the linked inbox will replace the selected accounts in the Navigation pane, and the Folders list will present a consolidated view of the contained account folders.
Mail is smart enough to associate the messages with the right accounts. So if you delete or move an email message, the changes occur in the correct place.
If you wish to later remove accounts from a linked inbox, open Mail settings, navigate to Manage accounts, and then select the linked inbox. In the window that appears, you can uncheck the accounts to remove. Or, select Unlink inboxes to manage each account separately.
Determine which folders appear under an account
Mail displays frequently-used folders called Favorite folders for each configured account in the Navigation pane. You will typically see folders such as Inbox, Drafts, and Sent (or similar) by default. But if you organize email in a unique way with your own custom folder structure, you can configure your own favorite folders. You can also remove favorite folders you don’t use very often.
To do so, select Folders (or More) in the Navigation pane to display an All folders view.
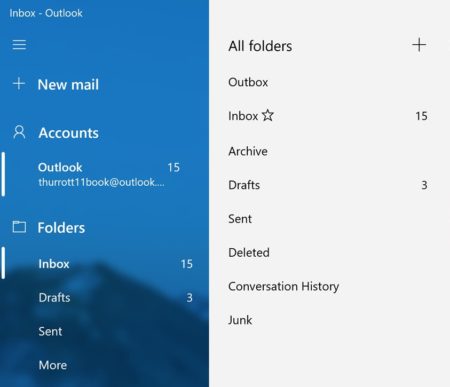
Favorite folders are denoted in the All folders view with a star icon next to their names.
To add a favorite folder, right-click it in the All folders view and choose “Add to Favorites” from the context menu that appears.
To remove a favorite folder, select “Remove from Favorites” instead.
Read and send email messages
As with other email solutions, you will spend most of your time in Mail reading and replying to messages, and sending new email messages.
Read and manage an email message
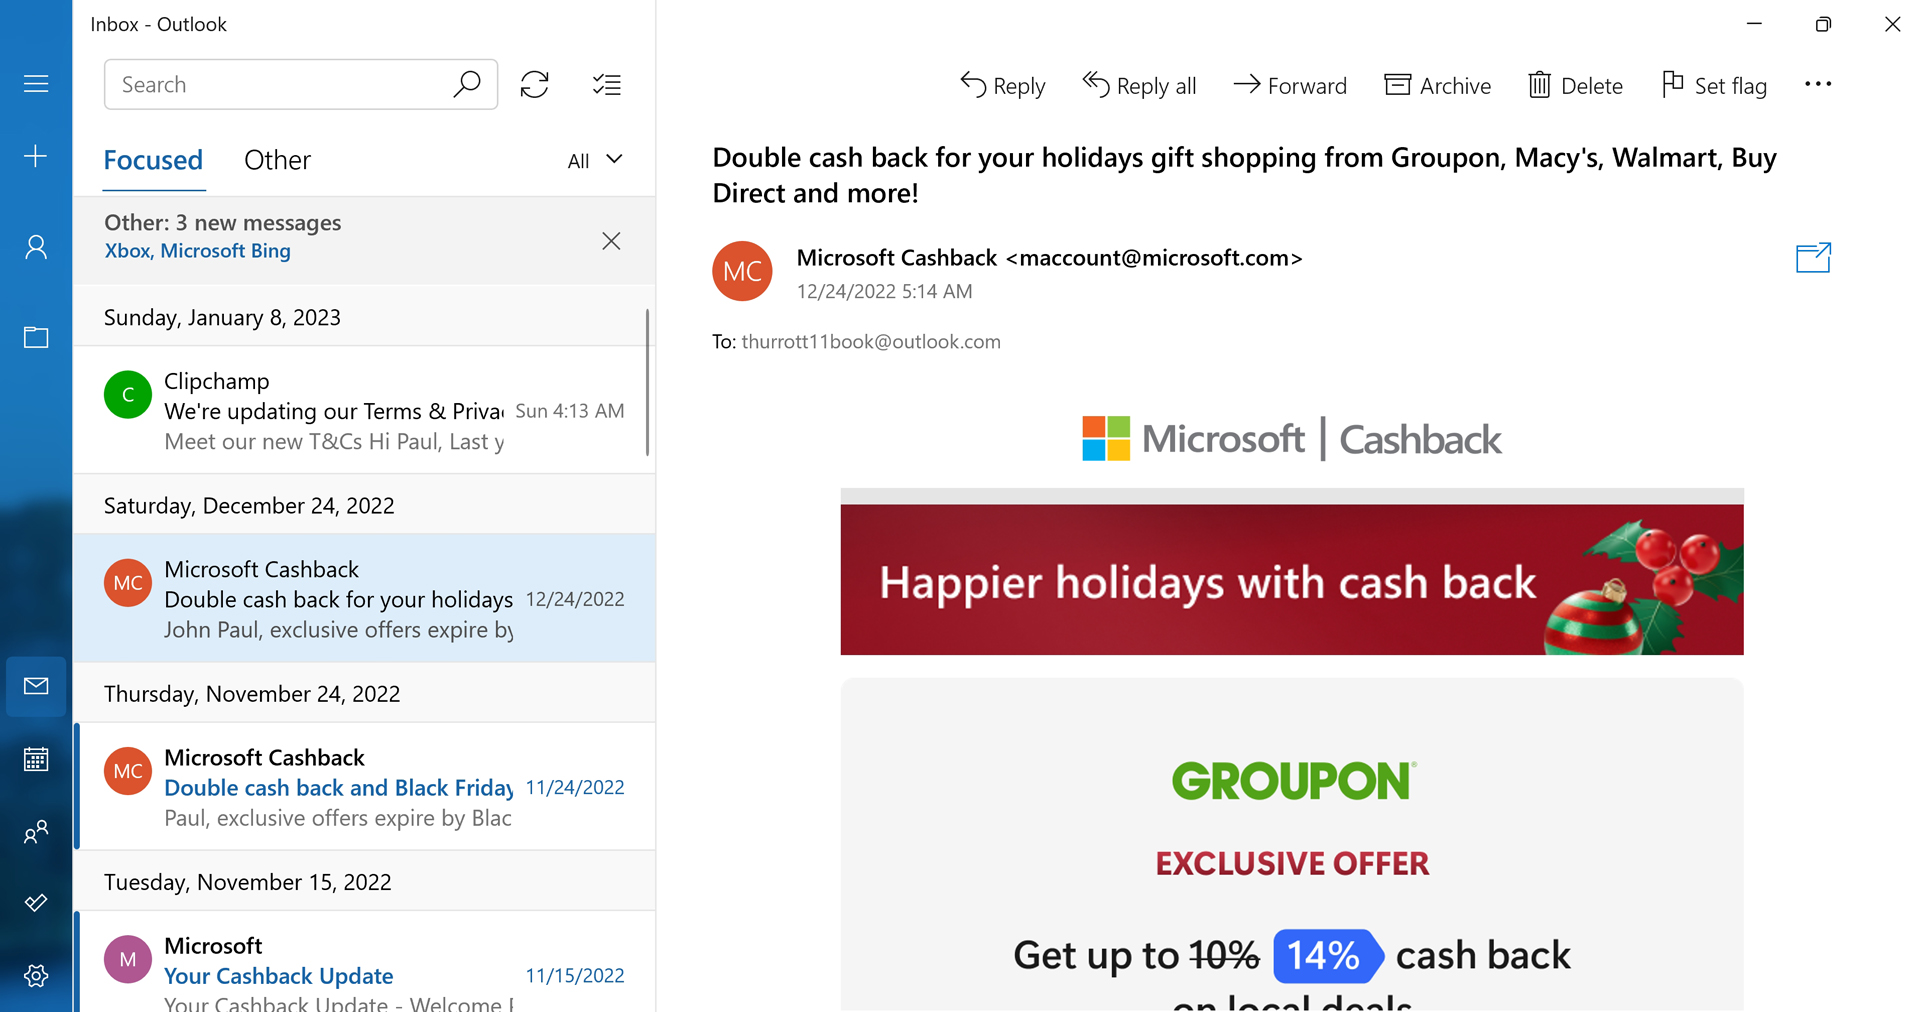
To read an email message, simply select it in the Messages pane. The contents of the message will appear in the Reading pane.
You can configure whether displaying a message this way will mark it as read in the cloud. Please refer to the Customize Mail section for details about this behavior.
From here, you can perform a number of additional tasks. These include:
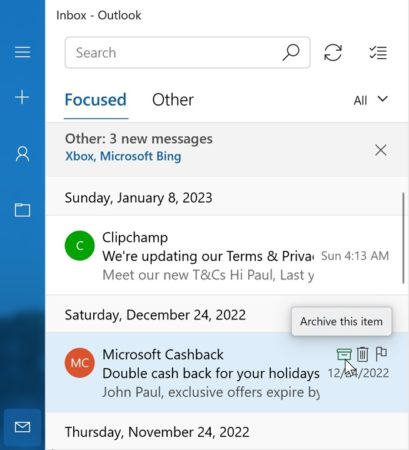
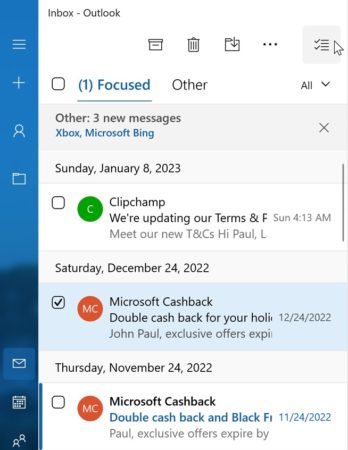
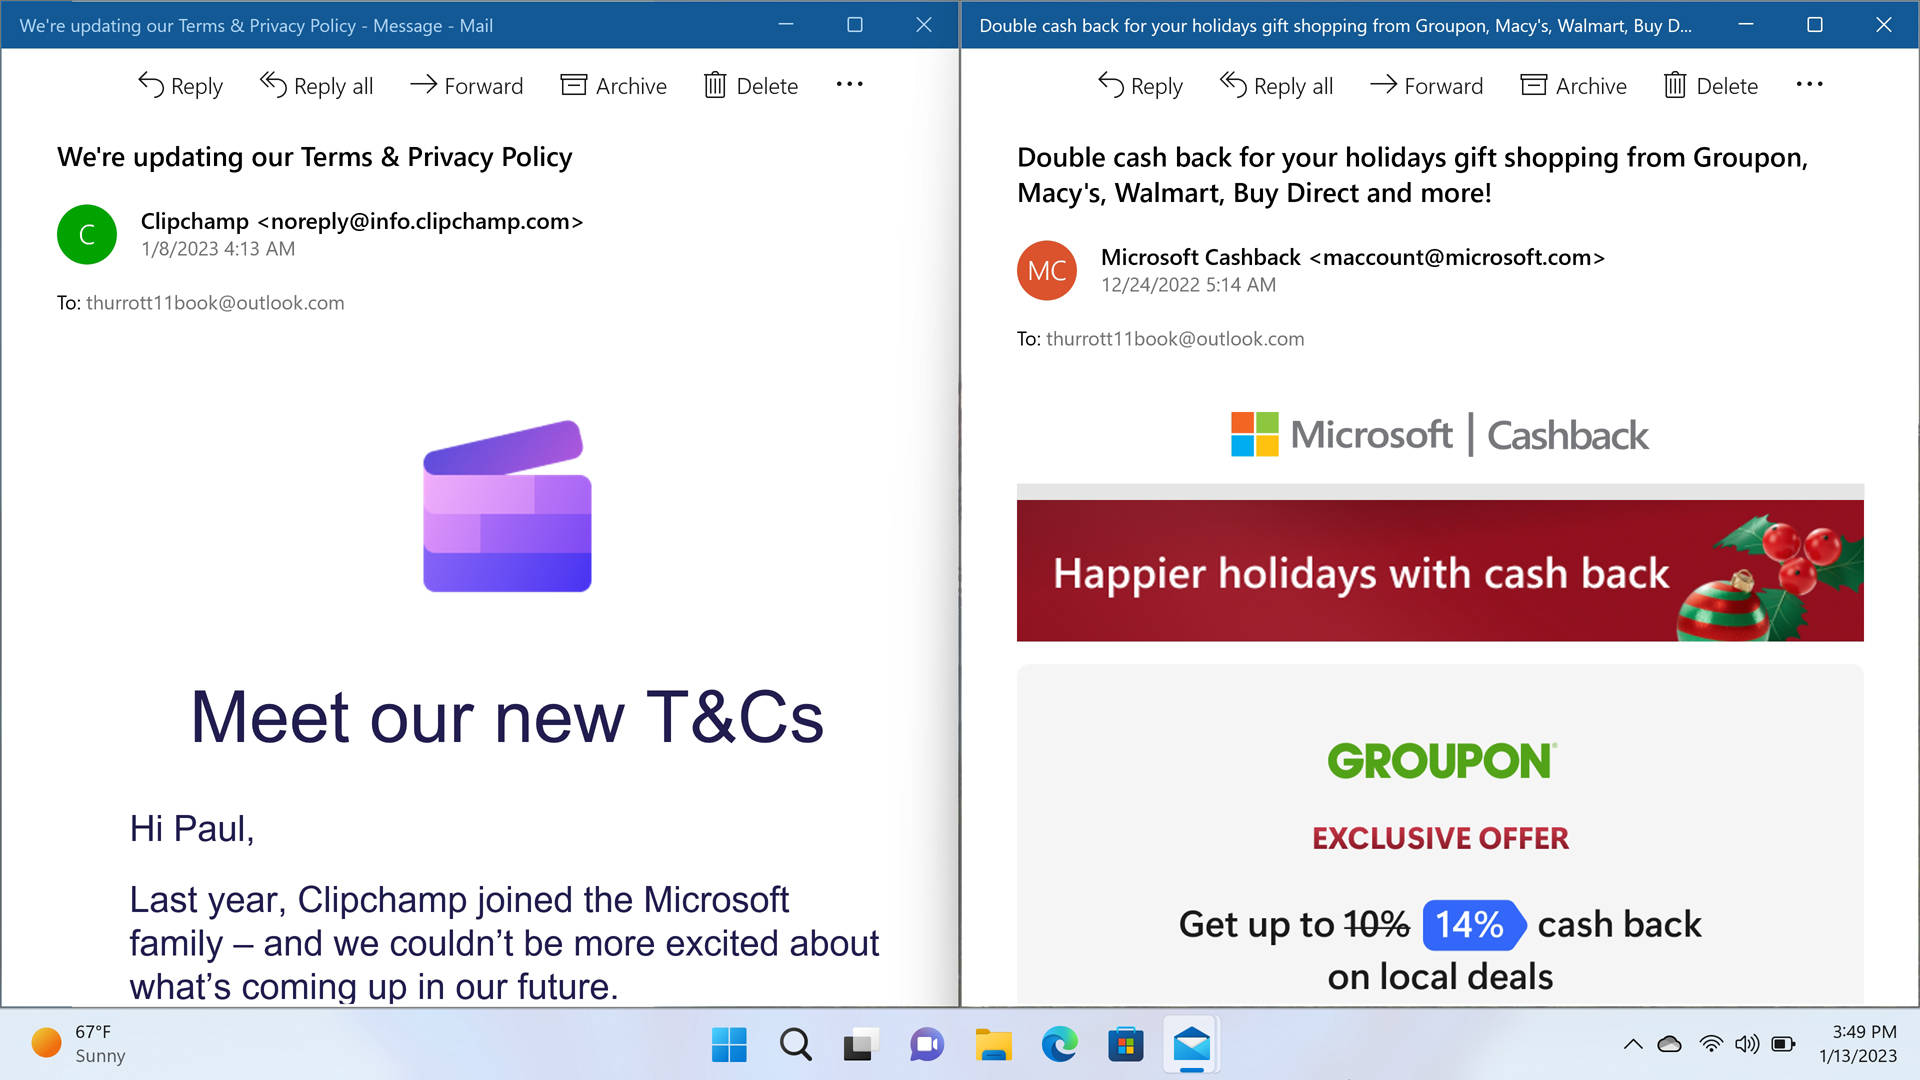
Quickly archive, delete, or flag the message. Mail supports Quick Actions, which can be accessed via mouse—by mousing over the message header in the Messages pane, as seen below—or by touch, using a set of configurable swipe actions that are described in Customize Mail at the end of the chapter.
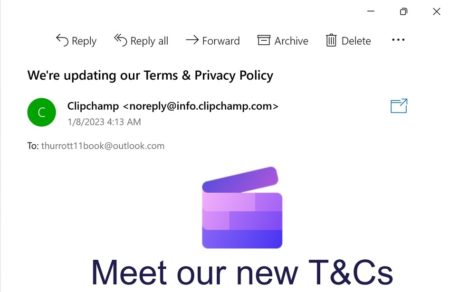
Reply or forward the message. Using the Reply, Reply all, or Forward toolbar buttons, you can respond to or forward the currently-viewed message.
Archive the message. To save the message in the cloud but remove it from your inbox, select the Archive toolbar button.
Delete the message. Select the Delete button to delete the currently-viewed email message.
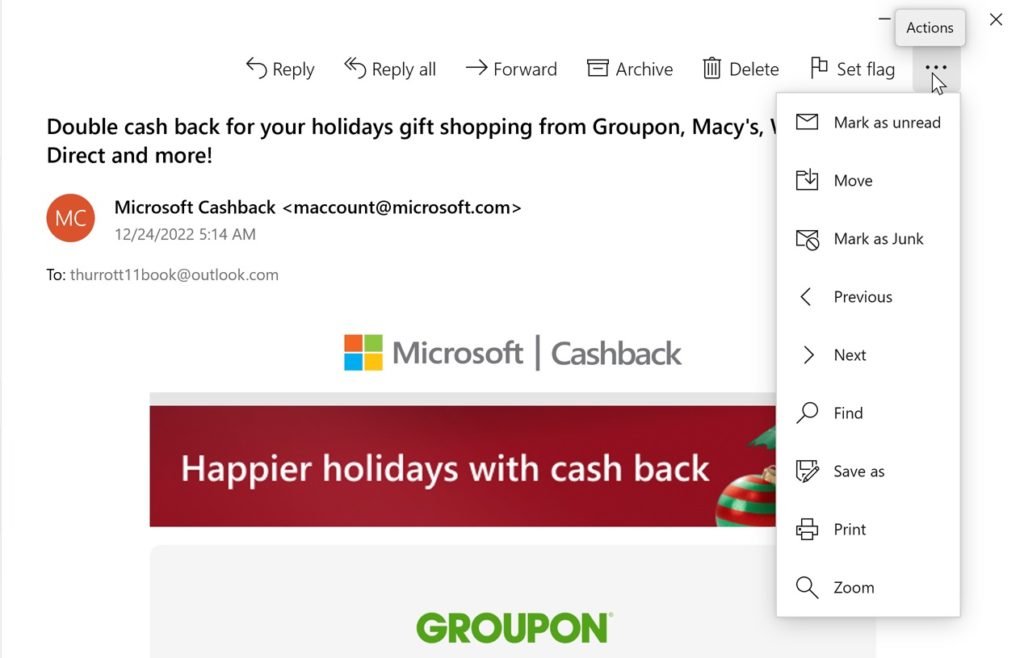
Perform other actions. Be sure to check out the Actions toolbar button (“…”) to find more actions to perform on messages, including setting a flag (a feature of Microsoft email services), marking the message as read/unread, moving the message to a new folder, navigating to the previous or next message, printing the message, and more.
Open the message in a new window. The Open message in a new window button—found in the top right of the Reading pane, below the toolbar buttons—does exactly what it says it does. This is described in the section Open an email message in a new window, below.
Manage multiple messages
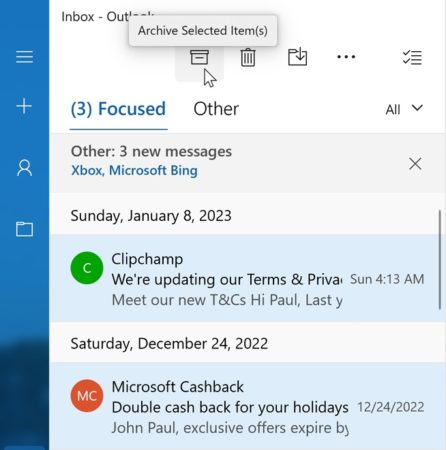
In addition to viewing and managing a single email message as above, Mail lets you select multiple messages at the same time and perform some actions on them.
To do so with a keyboard and mouse, hold down the CTRL key and select two or more messages in the Messages pane using the mouse. The available actions you can employ—Archive, Delete, Move, and so on—will appear as toolbar icons at the top of the Messages pane and in a drop-down Actions (“…”) menu.
You can also right-click on the selected messages to access the same actions in a context menu.
Mail also supports a special selection mode that lets you perform actions on multiple messages using touch. To access it, click the Selection mode icon at the top right of the Messages pane. When you do, a selection box appear to the left of each message, and you can tap within each box to select the messages you wish to manage.
Create and send a new email message
To create a new email message, select the New mail (“+”) link in the upper-left corner of the app window.
Fans of keyboard shortcuts can type CTRL + N instead.
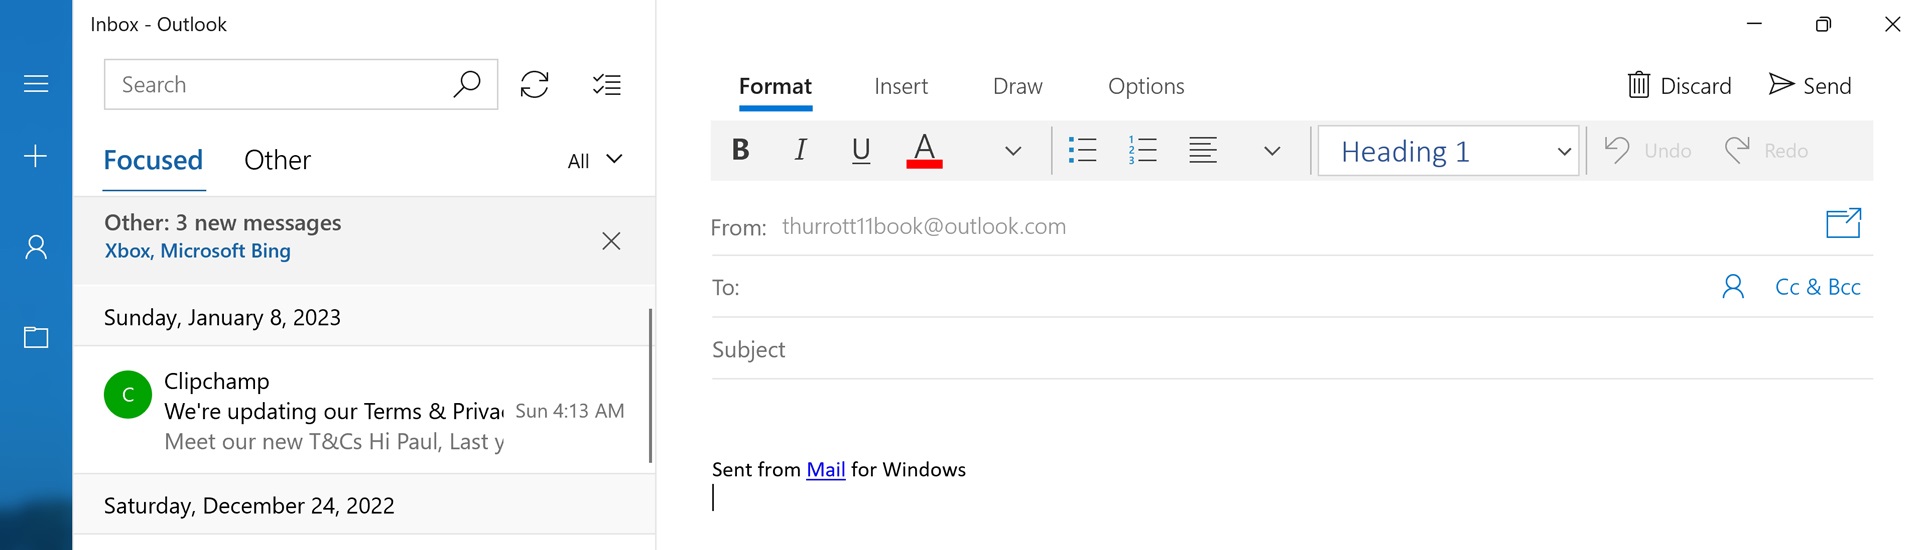
When you do so, the Reading pane is replaced by a New Message view.
Most of this is quite straightforward. However, here are a few less obvious tidbits.
If you have configured multiple email accounts, you can choose which to use for the new message. How you do so depends on whether you’re using linked inboxes. If you are, you will be prompted to choose the account when you select “New mail.” Otherwise, you must select the sending account in the Navigation pane before selecting “New mail.”
Outlook.com users can choose an alias. If you’re using an Outlook.com account, you can choose which alias to use for the new message. See the section Send an email message using an Outlook.com alias below for more information.
Mail uses Microsoft Word for its editor. Mail uses a Microsoft Word-based text editor. It includes a tabbed ribbon interface and built-in spell checking, and it lets you paste complex documents from Microsoft Word into Mail. As you can see, there are many options in the message toolbar related to text formatting. (To access these options, select the body of the email message.)

You can add attachments and embed content directly in the email message. You can attach one or more files to a message, as you do with other email clients. But you can also embed pictures, tables, and hyperlinks directly in a message too. Check out the Insert tab for the available options. Or, simply drag a file onto the Mail window to attach it that way.
You can configure the default font for new email messages. Navigate to Mail settings > Default Font to customize the font used for new email messages (and do so on an account-by-account basis if desired).
Oddly, there’s no way to configure Mail to send plain text messages.
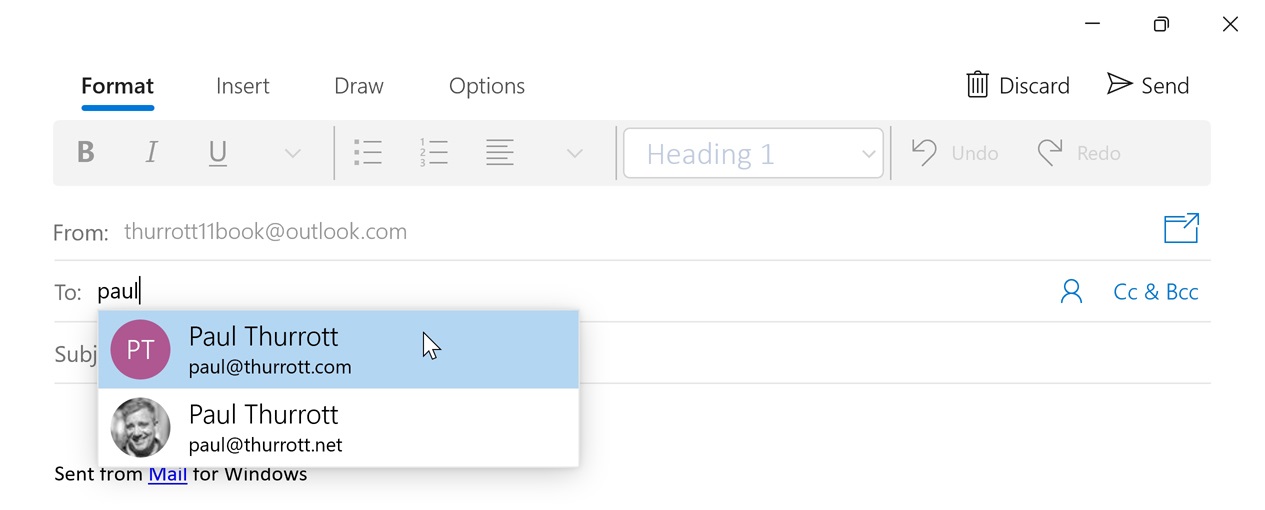
Contacts will auto-complete as you type. When you select the To: (or CC: or BCC:) field and start typing the name of the intended recipient, Mail will provide an auto-complete drop-down of the contacts who match what you’re typing.
Remember, you can open the message in a new window. See the section Open an email message in a new window, below, for more information about this useful feature.
Send an email message using an Outlook.com alias
The Mail app supports Outlook.com aliases, so you can send email from any alias that is associated with your account.
What’s an alias, you ask? In short, it’s just another email address you can use with your Outlook.com account. Which is also your Microsoft account.
That is, the email address that you first used to create your Microsoft account—usually at Outlook.com these days—is considered your primary alias. It’s what you use to sign in to your Microsoft account and access the services that are associated with that account. But you can also configure other aliases for your Microsoft account. These aliases are alternate ways with which you can sign in to your Microsoft account. And they can be used to send and receive email, too.
You can learn more about Outlook.com aliases on the Microsoft Support website.
To send an email from an Outlook.com alias, create a new email message as described above, selecting your Outlook.com account if you have multiple email accounts configured in the app. Then, select your email address in the To: field. A pop-up menu will appear, listing your primary Outlook.com email address and any aliases you have configured.
Now, just select the alias you wish to use from the list.
You cannot create or manage your Outlook.com aliases in the Mail app. Instead, you will need to visit the Microsoft account website to do so.
Use Mail more efficiently
The Mail app looks and works like many other email solutions, so you should be able to get up and running very quickly. But can be more efficient if you master some of Mail’s unique but less obvious features.
Open an email message in a new window
When you are reading or composing an email message, you will see an “Open message in a new window” button below the right side of the toolbar.
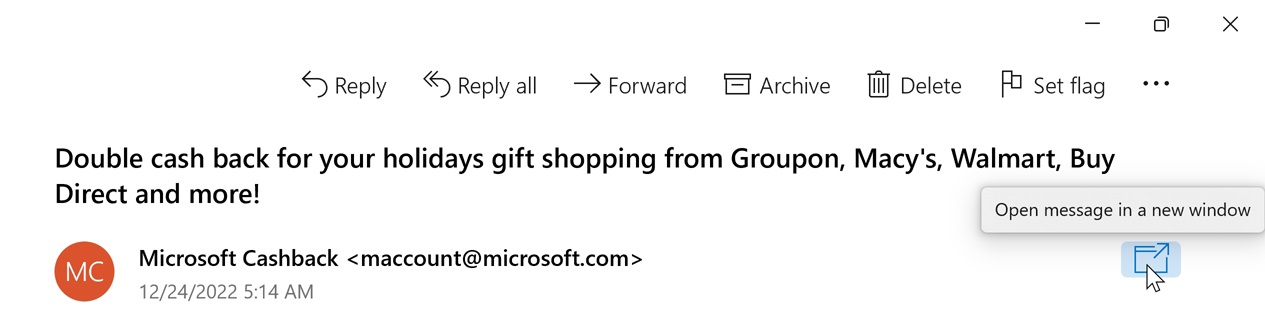
To open the current message in a new window, select this button.
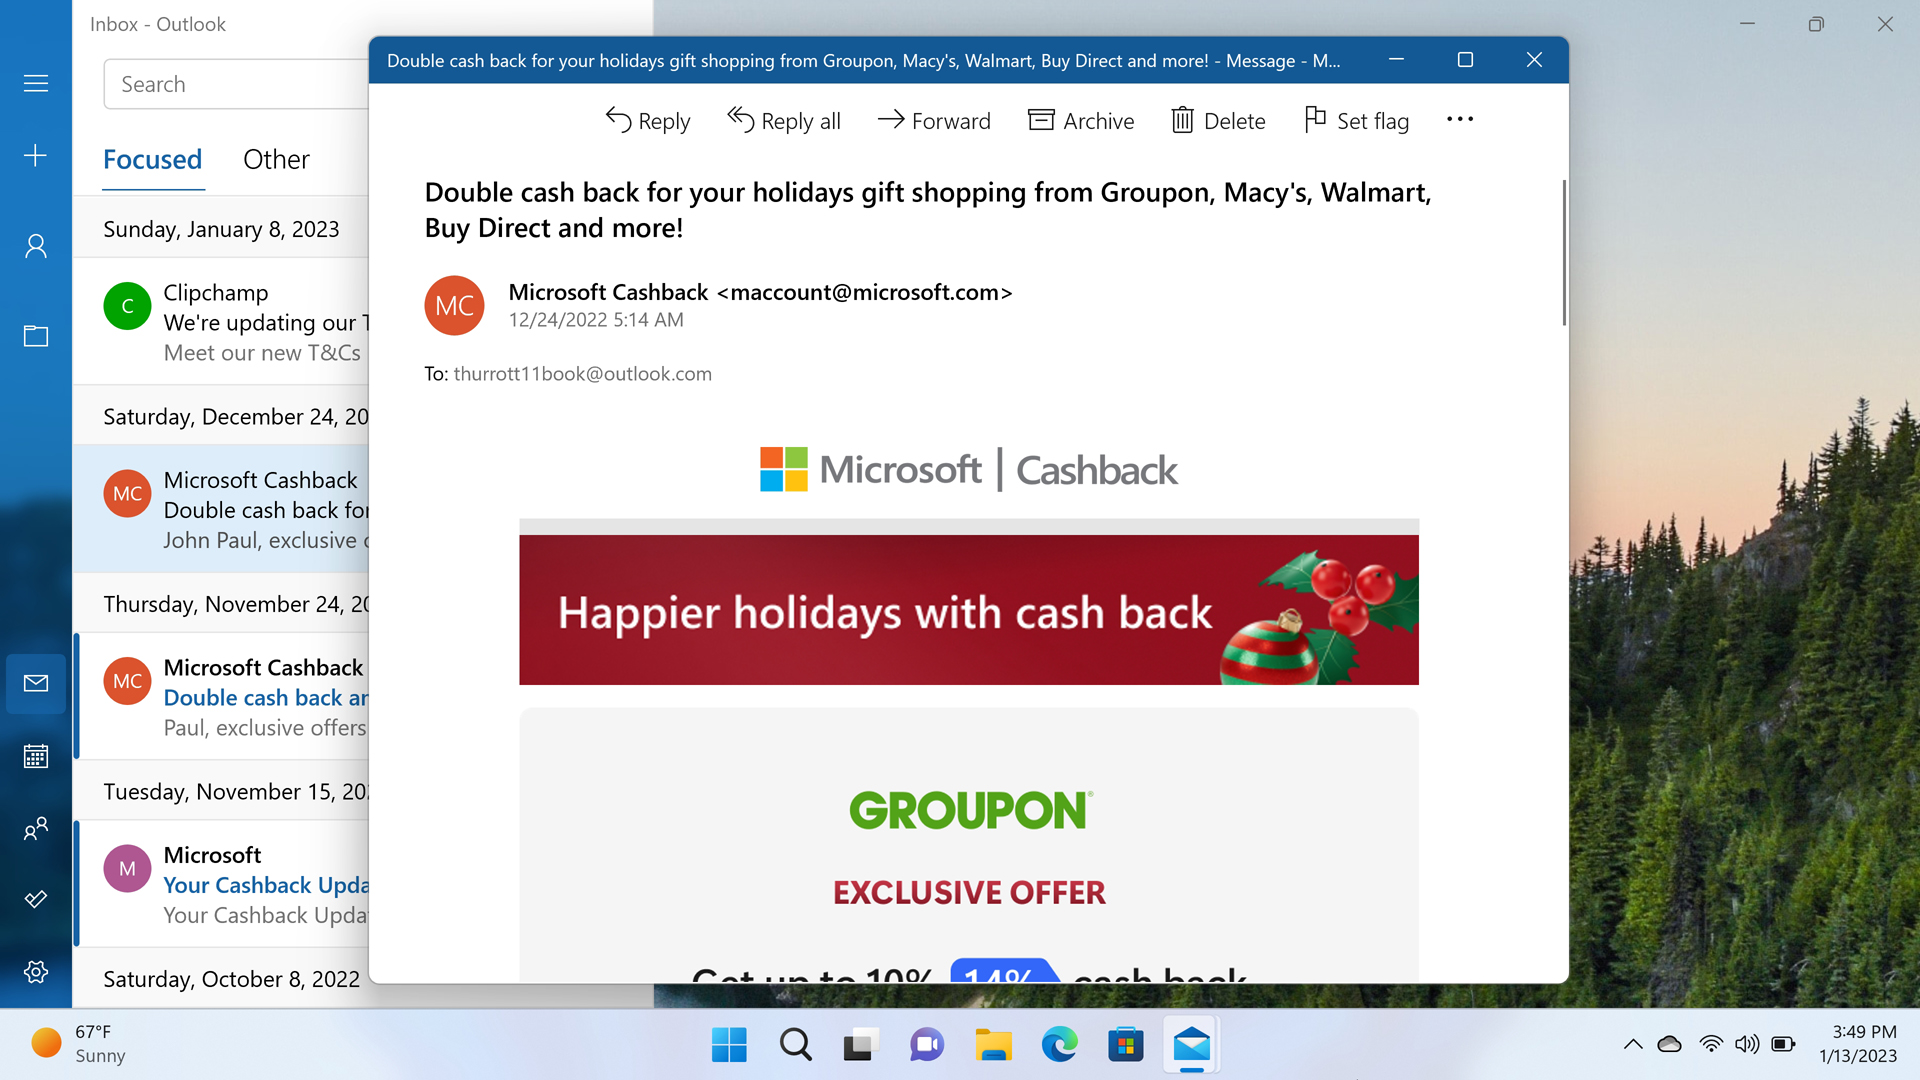
Once you open a message in a new window, you can arrange it on-screen as you would any app window. So you could snap it side-by-side with the main Mail app window or even another email message window.
You can open any number of messages in new windows as you desire.
Focus on what’s important with Focused Inbox
Like other Microsoft email solutions, Mail includes a feature called Focused inbox that can help you focus on your most important emails and ignore newsletters and other machine-generated email messages. Once enabled, Focused inbox will split the Messages pane into two tabs, called Focused and Other.
Focused inbox only works with Microsoft email services like Outlook.com and Microsoft 365.
The Focused tab includes those emails that Mail believes are important. Meanwhile, the Other tab lists all of your other emails.

Focused inbox is sometimes enabled automatically when you add a compatible account to Mail. If not, you can enable it manually by navigating to Mail settings > Focused inbox. Then, enable this feature for the account(s) that support it.
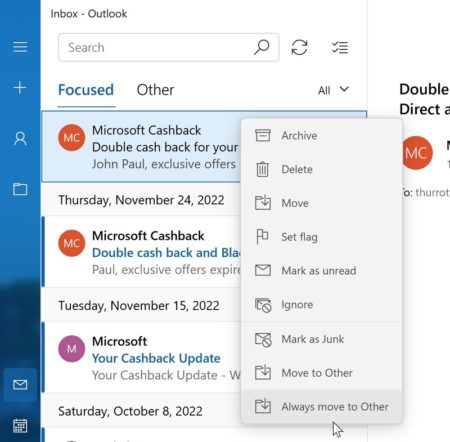
Focused inbox may not work very well at first. But you can train it to understand what’s important to you by moving messages to the appropriate tab. To do so, right-click the email message in the Messages view and choose “Always move to Focused” or “Always move to Other” in the pop-up menu that appears.
Get someone’s attention with @mentions
Taking a cue from social networking services like Facebook and Twitter, Mail supports a feature called @mentions—pronounced “at mentions”—that lets you easily find people in your contacts list and call them out in email messages. It’s a neat new way to get someone’s attention.
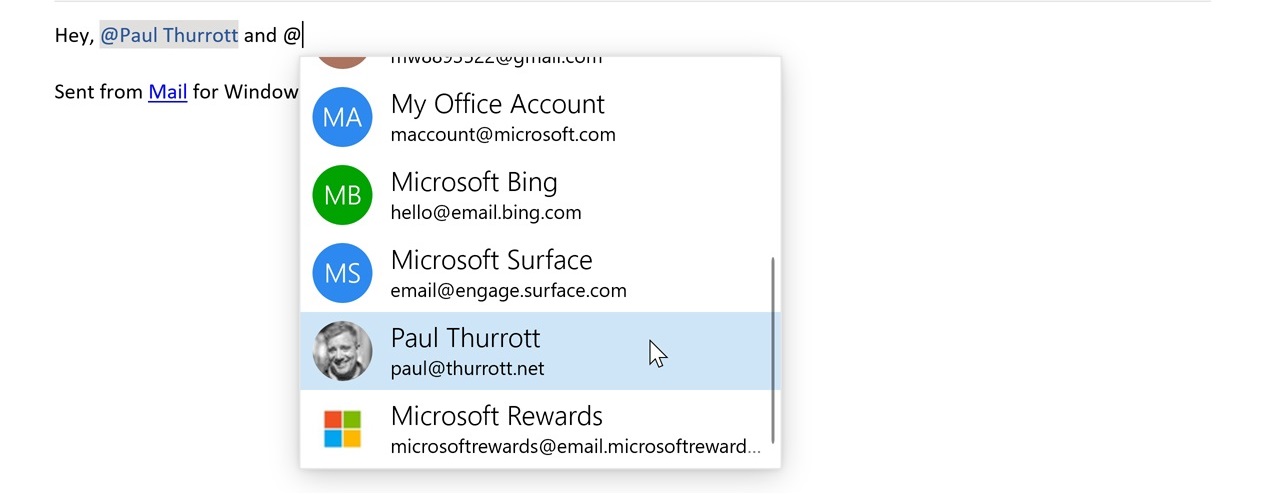
To add an @mention to an email message, simply type the @ character inside the message followed by a letter. When you do, a drop-down menu appears, listing the contacts that match what you’ve typed. Keep typing to further filter the list and find the right contact.
Once you select a person from the list, that contact will automatically be added to the To: field if they were not added there previously.
@mentions are also actionable hyperlinks within an email message: You can click one to send a new email message to that contact.
Customize Mail
You can customize the behavior of Mail using its settings interface, which is accessible via the Settings (gear) icon in the lower left of the app window. Anyone who intends to use Mail should examine all of the available options here at least once.
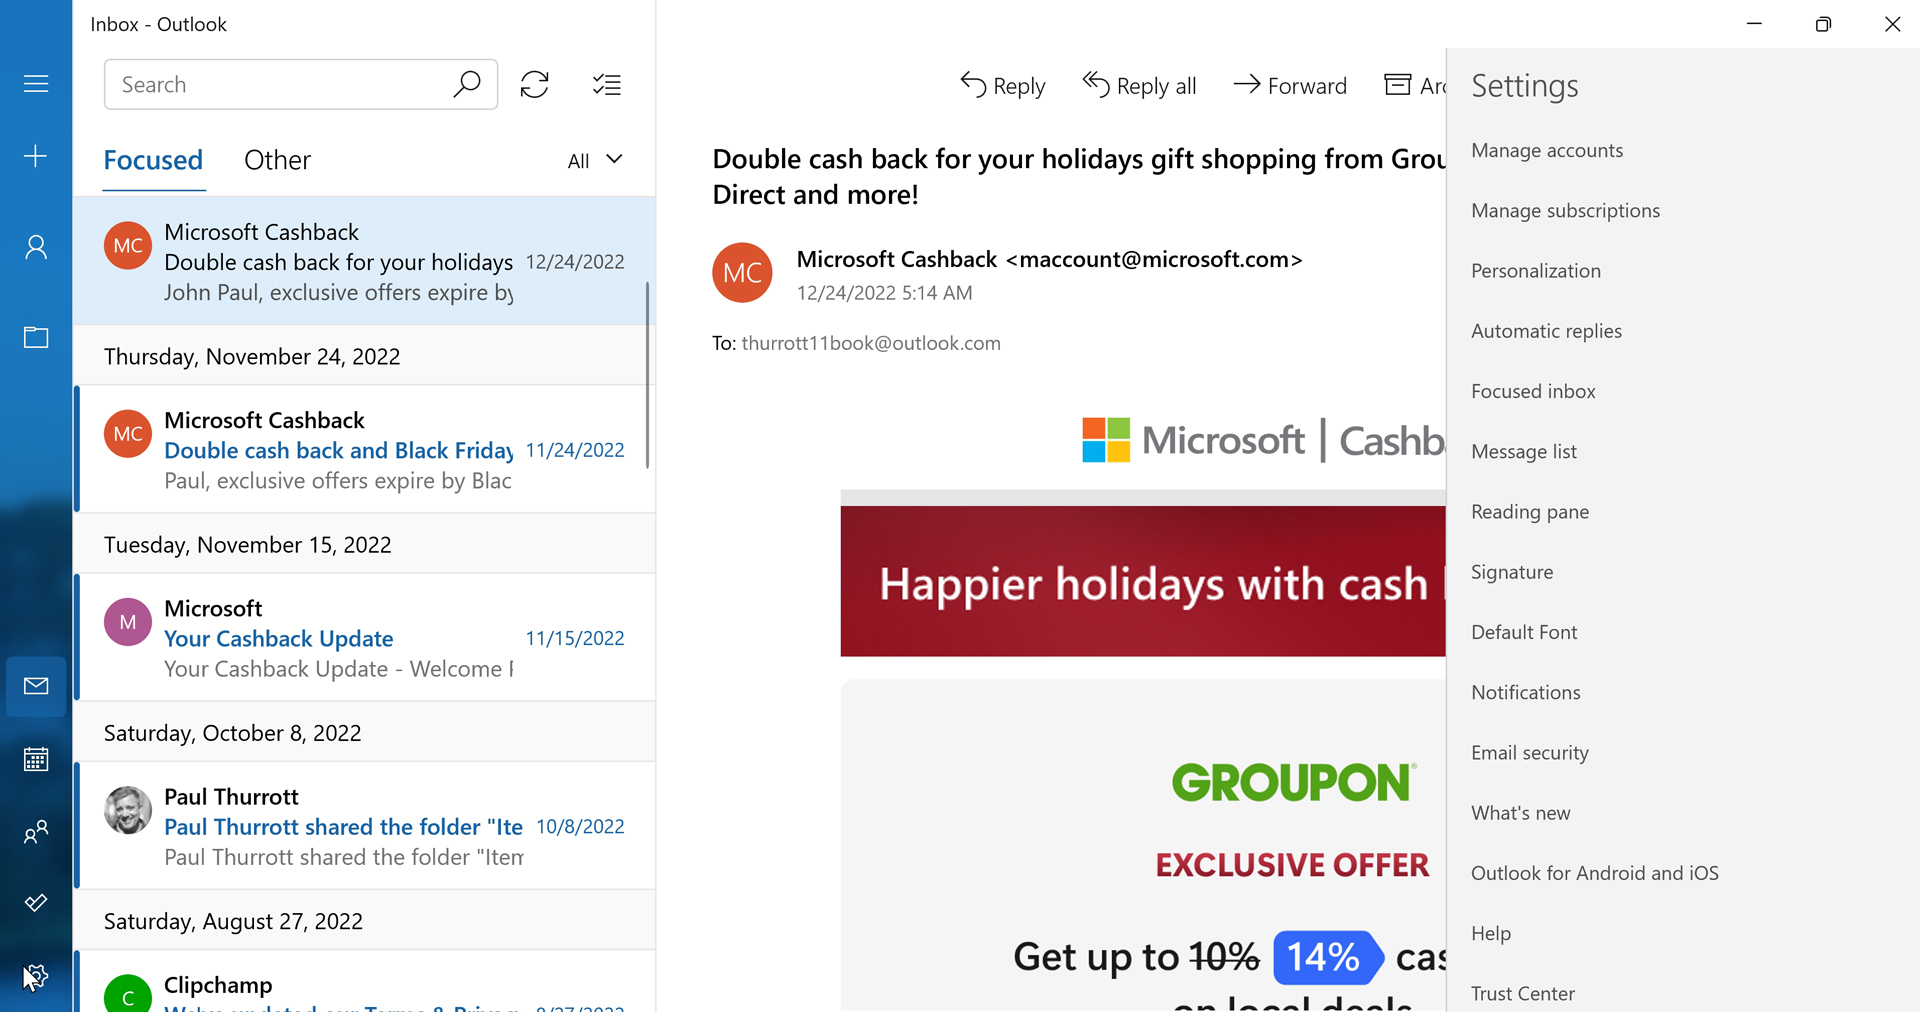
While many of the options available here are obvious, some merit further discussion.
Personalize the look of the Mail app
You can configure various features that can alter the look and feel of the Mail app. To do so, visit Mail settings > Personalization.
Mail’s color scheme consists of two parts, an accent color and an app mode, the latter of which can be Light, Dark, or whatever the Windows app mode is set to. Each can be configured to your liking, assuming you don’t mind choosing from just a handful of custom colors for the accent color.
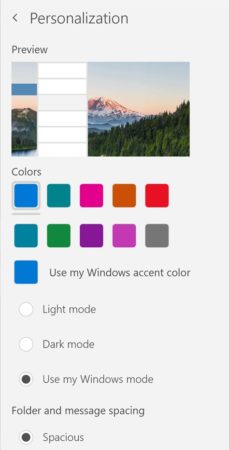
The system-wide app mode is configured in the Settings app by navigating to Personalization > Colors > “Choose your default app mode.”
Somewhat unique among the apps that come with Windows 11, Mail is also configured with a background picture by default. While that is unusual, you can at least change the picture in the Background section of Settings > Personalization.
Configure how messages are read in Mail
You can determine how Mail arranges and manages email messages. To do so, visit Mail settings > Reading pane.
There are numerous options to consider here. Some of the key options include:
Whether to automatically open the next message when you close the current message. If you are reading an email message and close it in some way—perhaps by archiving, deleting, or moving it to a new folder—Mail will clear the Reading pane and display the background picture. Optionally, however, you can enable the option “Auto-open next item” and Mail will instead display the next email message.
Whether to automatically mark email messages as read and, if so, when. Using the options under “Mark item as read,” you can configure how each email message is marked as having been read: When the selection changes (the default), never (“Don’t automatically mark item as read”), or when viewed in the reading pane for some number of seconds.
Whether to automatically display external content. Many HTML-based emails will try to display images, and style formats that need to be downloaded from a web server. By default, Mail will not download this content. But by using the options under “External content,” you can decide whether to do so on an account-by-account basis. If you do decide to not download external content by default, you can do so on the fly when you are viewing a message.
Configure other Mail options
Settings in Mail provides a number of other useful options, many of which can be configured on a per-account basis if desired.
Key options include:
Focused inbox. Mail, like other Microsoft email apps, supports a unique feature called Focused inbox, and it is enabled by default on those accounts that support it. This feature is described earlier in the chapter, but you can manage Focused inbox by navigating to Mail settings > Focused inbox.
Conversation View. By default, Mail displays messages using something Microsoft calls Conversation View, where email messages in the Messages pane are grouped by conversation instead of in strict chronological order. If you don’t like this arrangement, you can disable Conversation View by navigating to Mail settings > Message list > Organization and change this to “Individual messages.”
Swipe actions. If you’re using Mail on a touch-first device like a tablet PC, you can configure two Quick Actions as swipes—where you swipe left or right on an email message in the messages pane—for quickly triaging email messages. Available choices for each action include Set/Clear flag, Mark as read/unread, Archive, Delete, Move, and Move to Junk. You do so in Mail settings > Message list > Swipe actions.
Signature. By default, Mail is configured to add the lame signature “Sent from Mail for Windows” to the end of every email message you send. You can edit this text or, better yet, just delete it in Mail settings > Signature.
Notifications. You can configure whether Mail notifications appear in Action Center, as they do by default, and whether to display a notification banner, play a sound when new email arrives, and/or show notifications for email folders you’ve pinned to Start. You do so in Mail settings > Notifications.

Gain unlimited access to Premium articles.
With technology shaping our everyday lives, how could we not dig deeper?
Thurrott Premium delivers an honest and thorough perspective about the technologies we use and rely on everyday. Discover deeper content as a Premium member.