Photos
- Paul Thurrott
- Feb 05, 2023
-
1
The Photos app lets you view, edit, manage, and share photos stored on your PC, phone, OneDrive, and, optionally, Apple iCloud.
Where did it go?
The Photos app is all-new in Windows 11: it replaces an app by the same name from Windows 10 that also included an integrated video editor. That video editor is no longer necessary because Windows 11 includes a separate but superior video editing solution called Clipchamp. But if you are familiar with the old Windows 10 Photos app and would still like to use it for some reason, you can do so: it’s available in the Microsoft Store as Microsoft Photos Legacy.
Photos consists of two primary experiences:
Photo viewer Photos is configured as the default app for common image file formats like BMP, GIF, HEIC, JPG/JPEG, PNG, and others. So when you open such a file, the Photos app’s photo viewer window will appear and display the image.
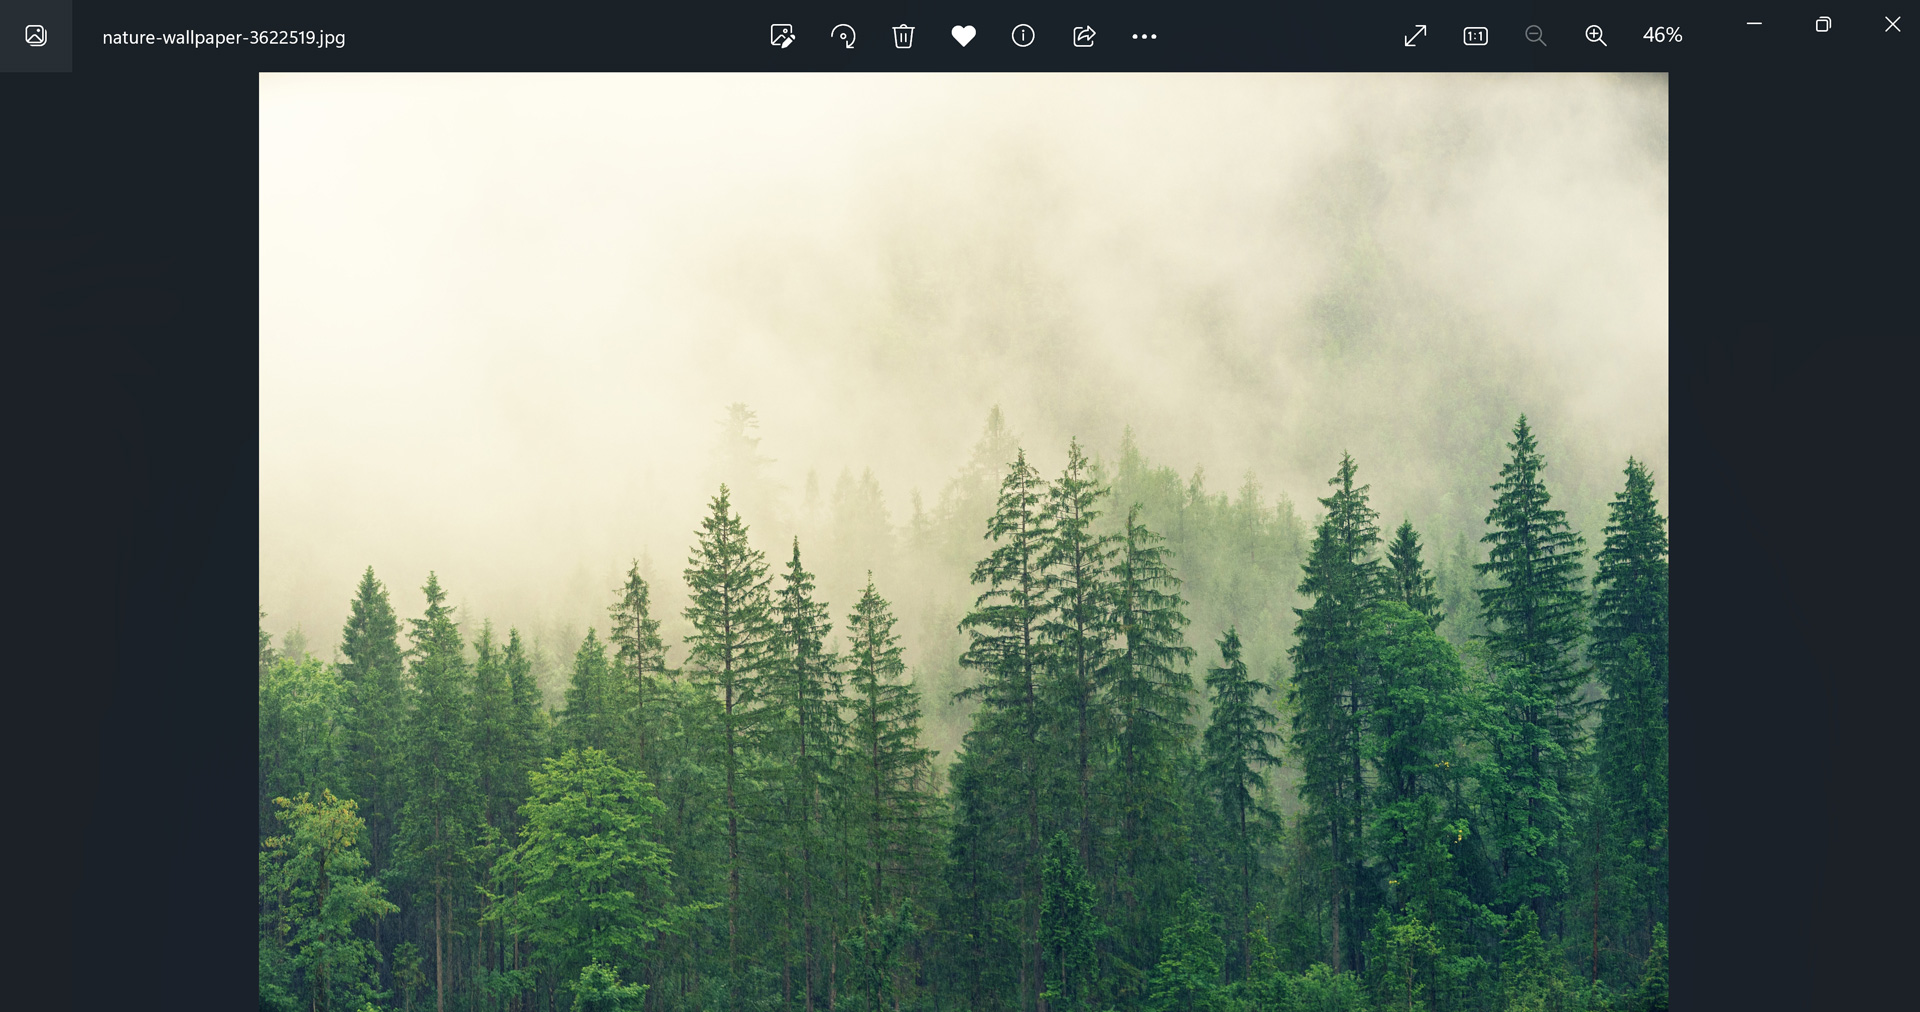
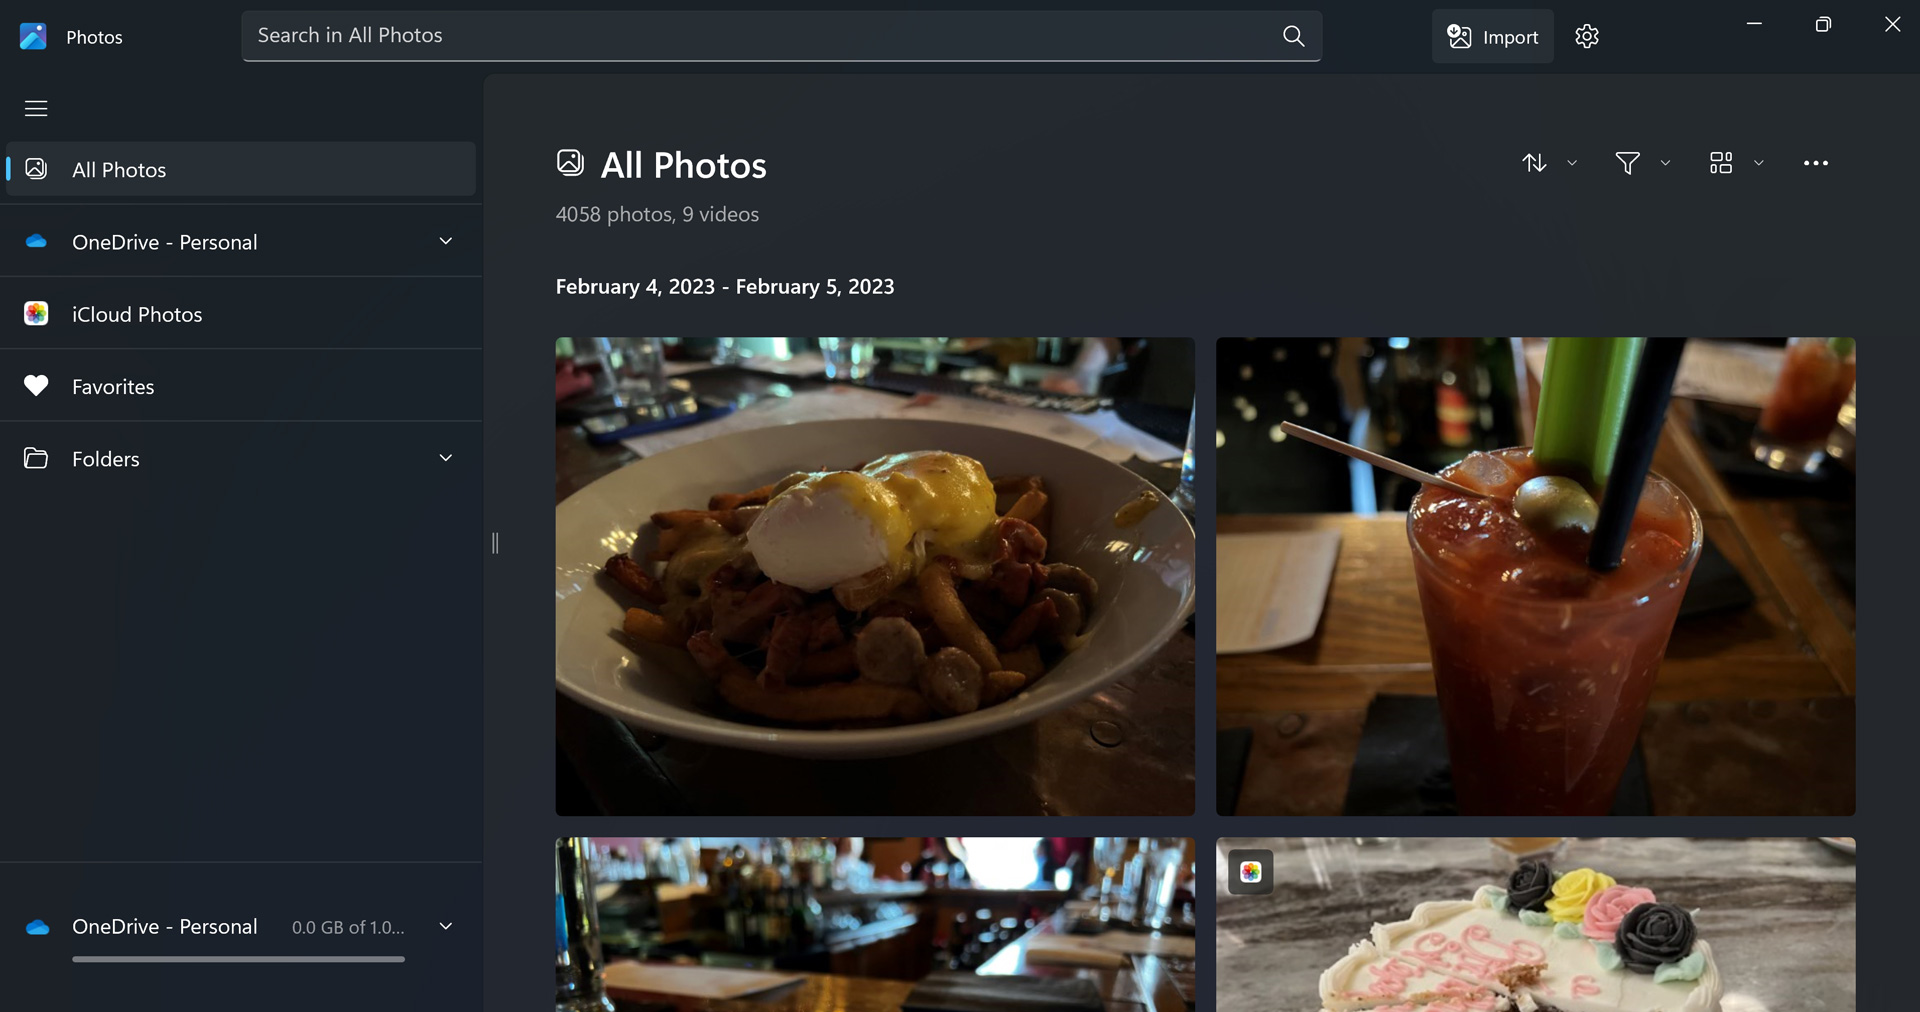
Photo browser. When you run Photos from the Start menu or elsewhere, you are presented with the full app experience, which includes a navigation pane called the filmstrip for accessing different photo sources and a gallery feed view with thumbnails of your photos across the currently selected source. The default view displays all of your photos across all configured sources together. But you can select any source in the filmstrip to only display photos from that source.
Use Photos to view one or more images
Because Windows 11 uses Photos as the default viewer for most popular images format, this app will launch in its photo viewer mode when you open a supported image file.
Photo viewer basics
Photos offers a relatively sophisticated photo viewing experience. If the image you are viewing is the only image in its folder, the Photos app will display the image with its toolbar and no other controls.

But if there are other images in that folder, Photos will display navigational controls that include “Previous” and “Next” buttons on the sides of the app window and a pane of thumbnails representing the other images.
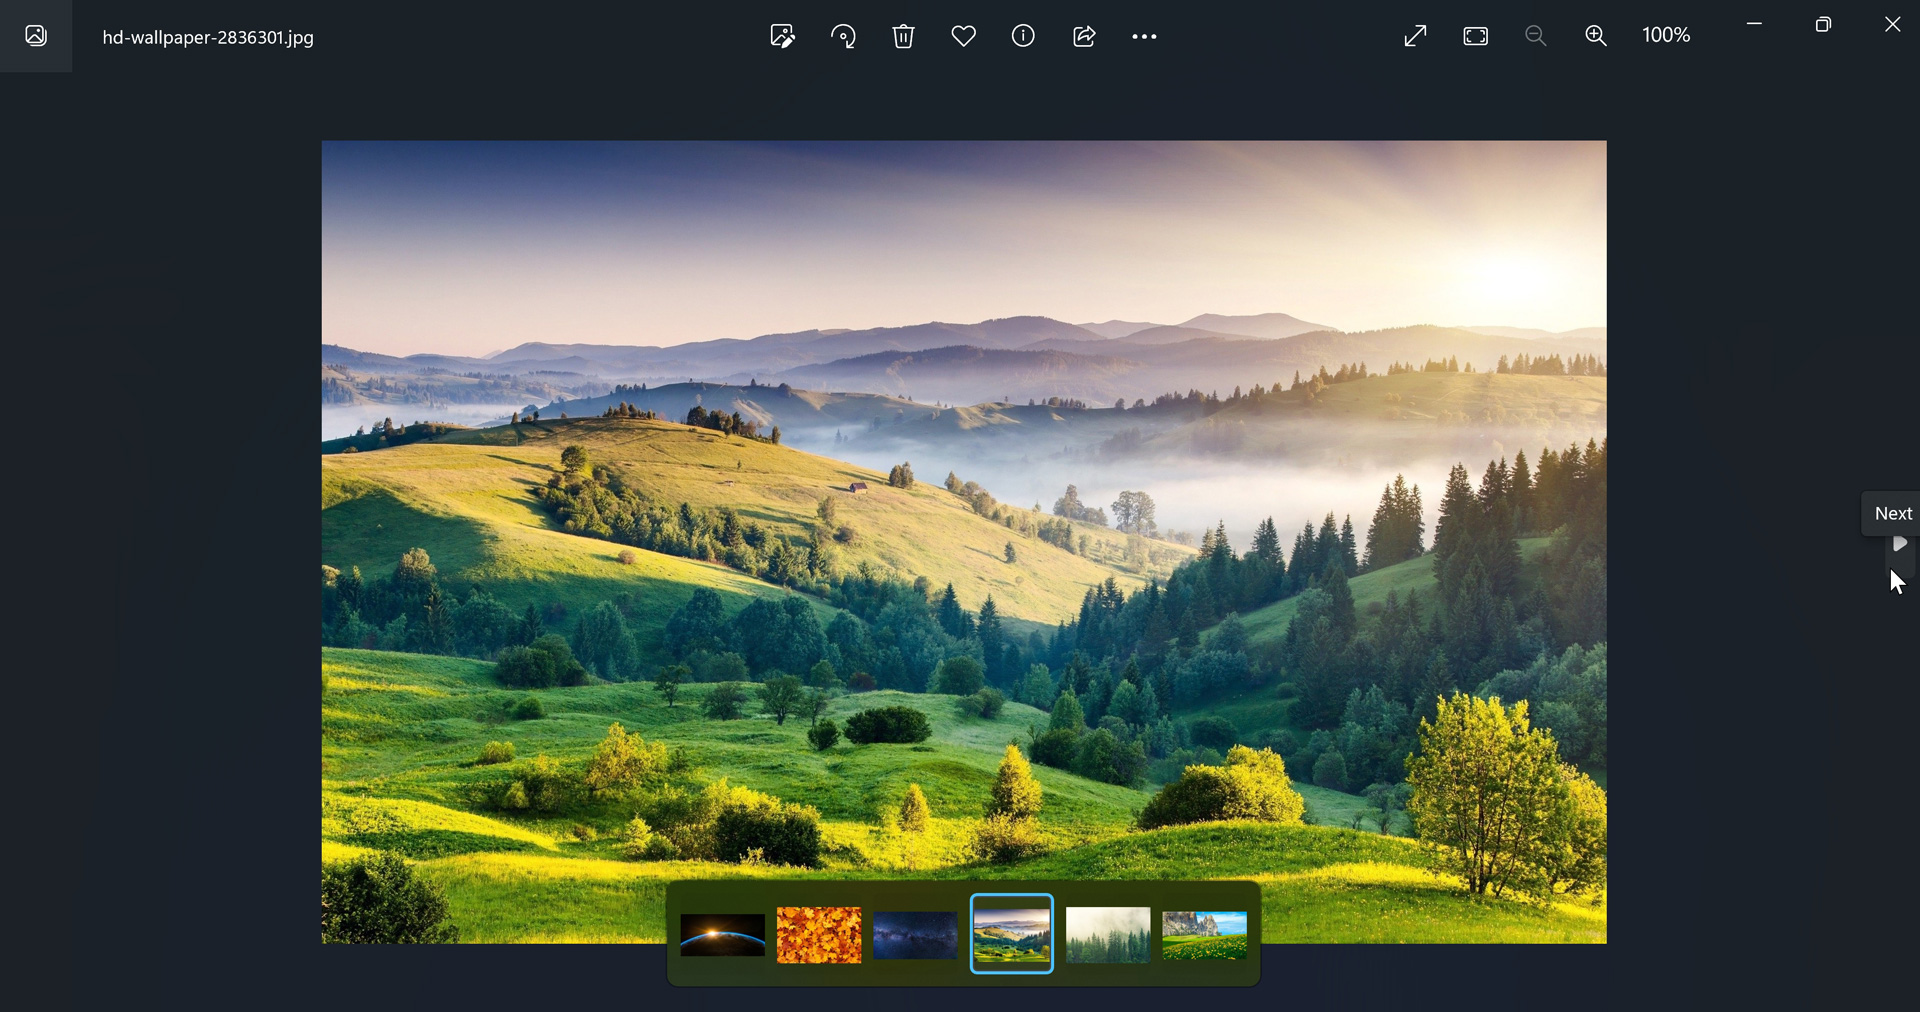
You can also type LEFT ARROW or RIGHT ARROW to navigate between each image in the current folder.
The “Previous” and “Next” buttons auto-hide and will reappear if you mouse over to one of the window edges. And you can toggle the display of the filmstrip by clicking anywhere on the image you’re viewing.
You can also toggle the filmstrip display by typing F.
The filmstrip also lets you select multiple images to perform a limited range of actions across two or more images. This is described in the next section.
You may be surprised to discover that typing ESC will close the Photos app when used in photo viewer mode.
By default, the Photo app’s photo viewer experience will display images at their normal size, unless the image is bigger than the app window, in which case it will fit the image to the window. But you can also zoom in and out of an image using the scroll wheel on your mouse.
Or, type CTRL + PLUS to zoom in on an image or CTRL + MINUS to zoom out of an image. To return the image to its default size, type 0 (zero).
Photo viewer actions
The Photo app’s photo viewer experience supports a wide range of actions that you can undertake by clicking the appropriate button or other control. These actions include:
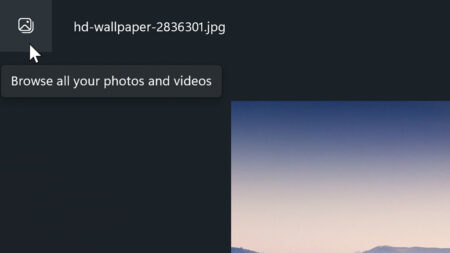
Browse all your photos and videos. Click this item in the upper right of the photo viewer to open the Photos app photo browser window.
Edit image. Click this item to access the Photos image editing experience, which is described in the next section.
You can also type CTRL + E to edit an image.
Rotate. Click this item to rotate the image by 90 degrees to the right.
You can also type CTRL + R to rotate an image.
Delete. Click this item to delete an image. You will be prompted to make sure this is what you want.
You can also type DELETE to delete an image.
Favorite. Click this item to add the image to your list of favorite photos. Favorites are discussed briefly later in the chapter.
You can also type L to add the image to your favorites.
File info. Click this item to display an Info pane that displays relevant meta-data for the image, if any.
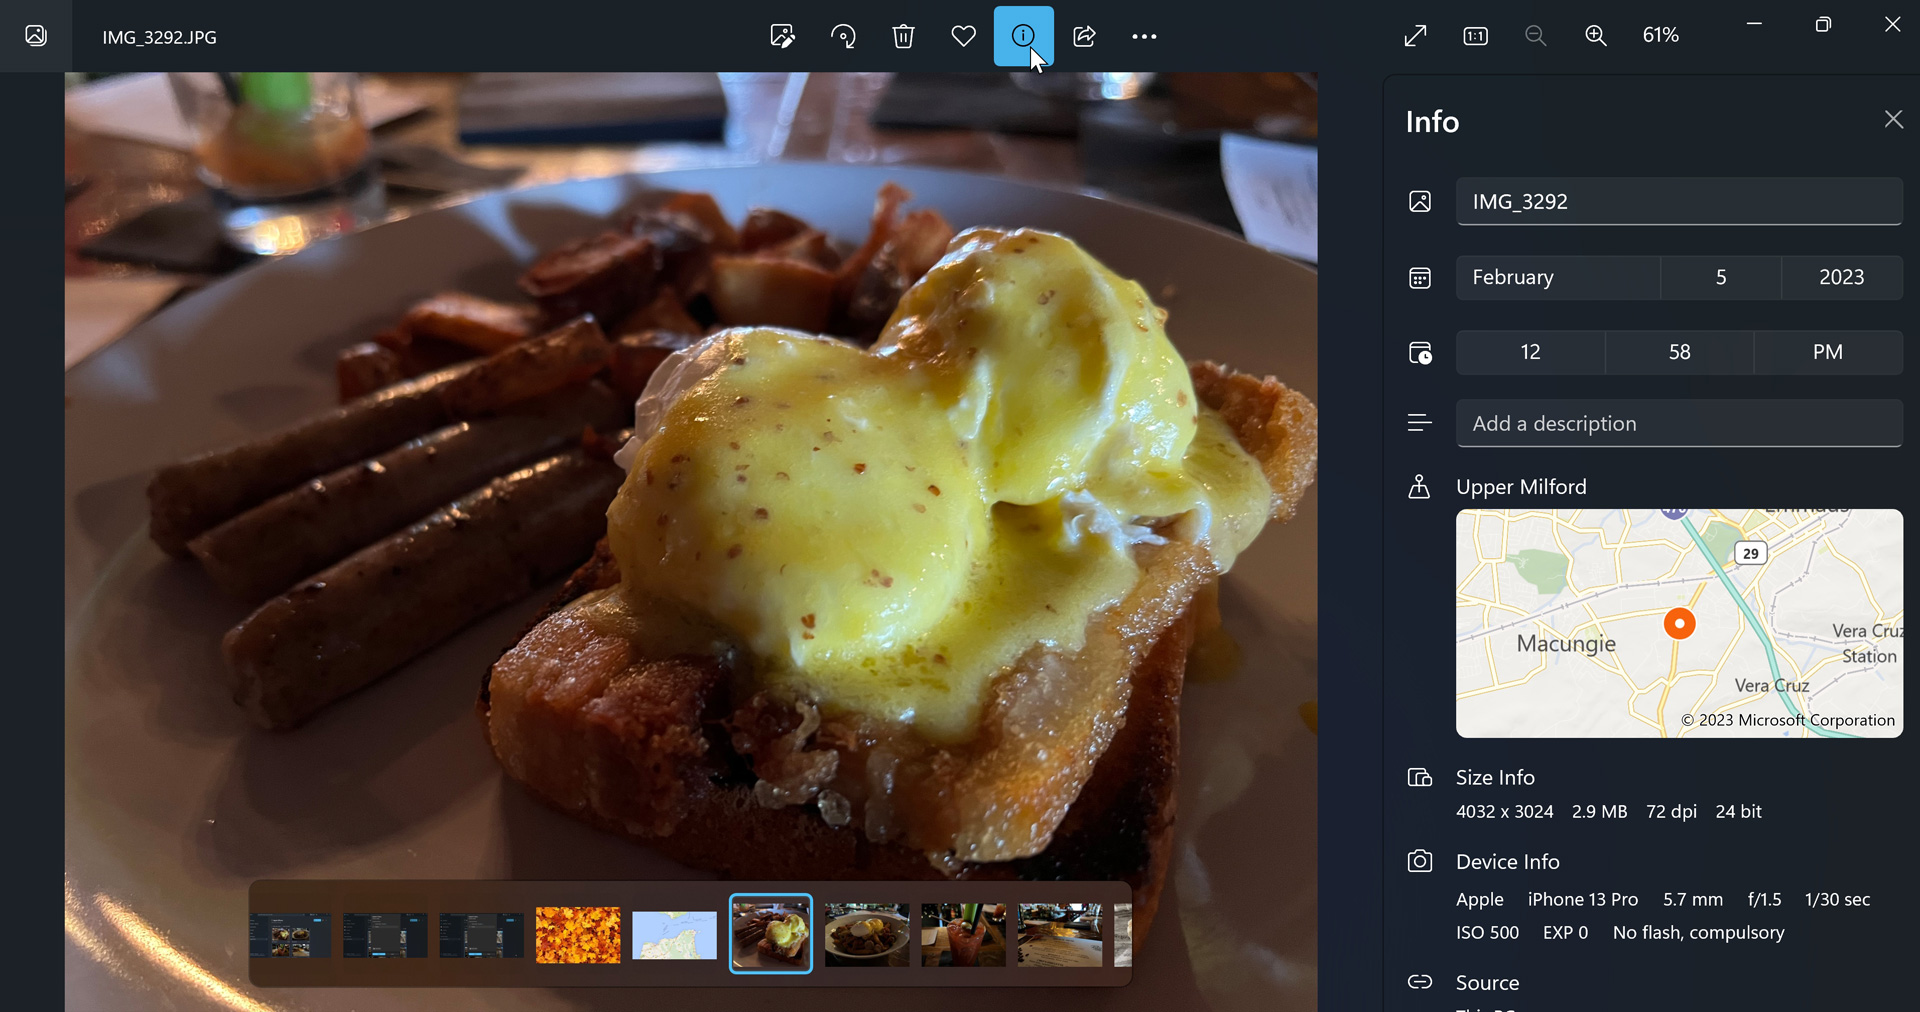
You can also type ALT + ENTER to toggle the display of the Info pane.
Share. Click this item to display the standard Windows 11 Share pane so that you can share the image using Nearby sharing or compatible apps.
Create a video with Microsoft Clipchamp. Click this item open Clipchamp and create a new video featuring this image.
Clipchamp is described in the Clipchamp chapter.
Save as. Click this item to save the image to your PC.
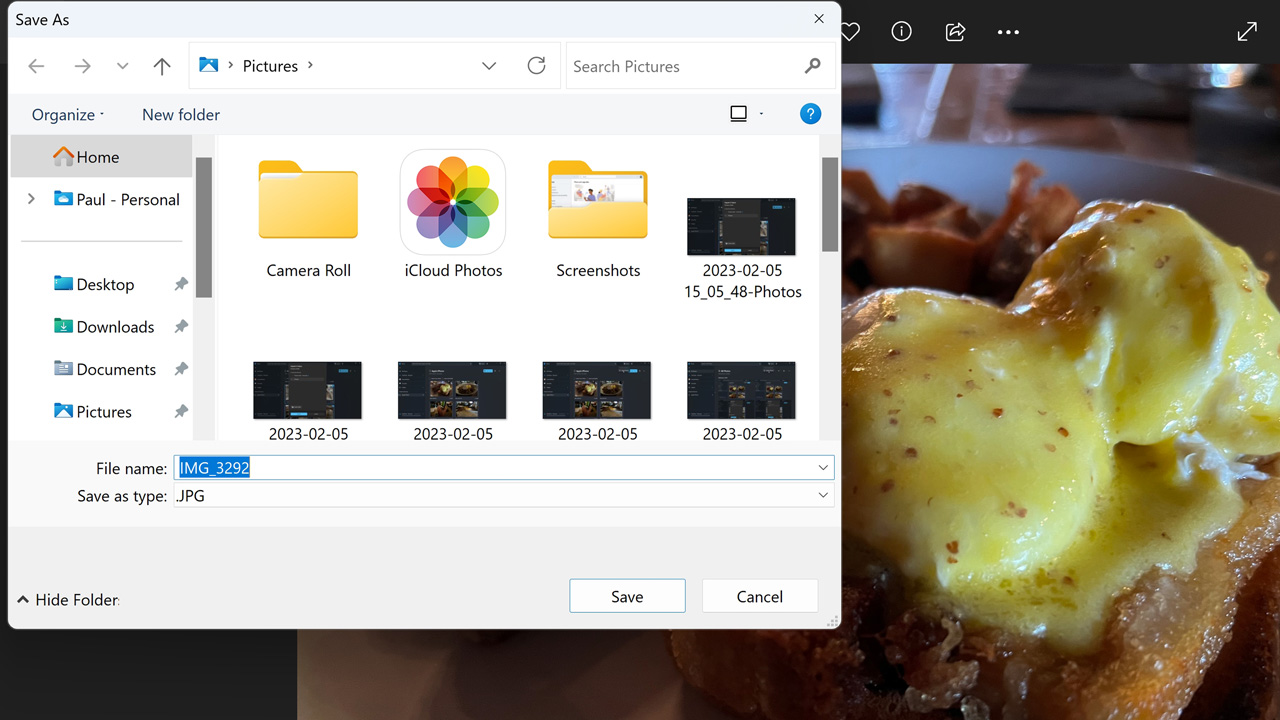
You can also type CTRL + S to save an image.
Print. Click this item to print the image.
You can also type CTRL + P to print an image.
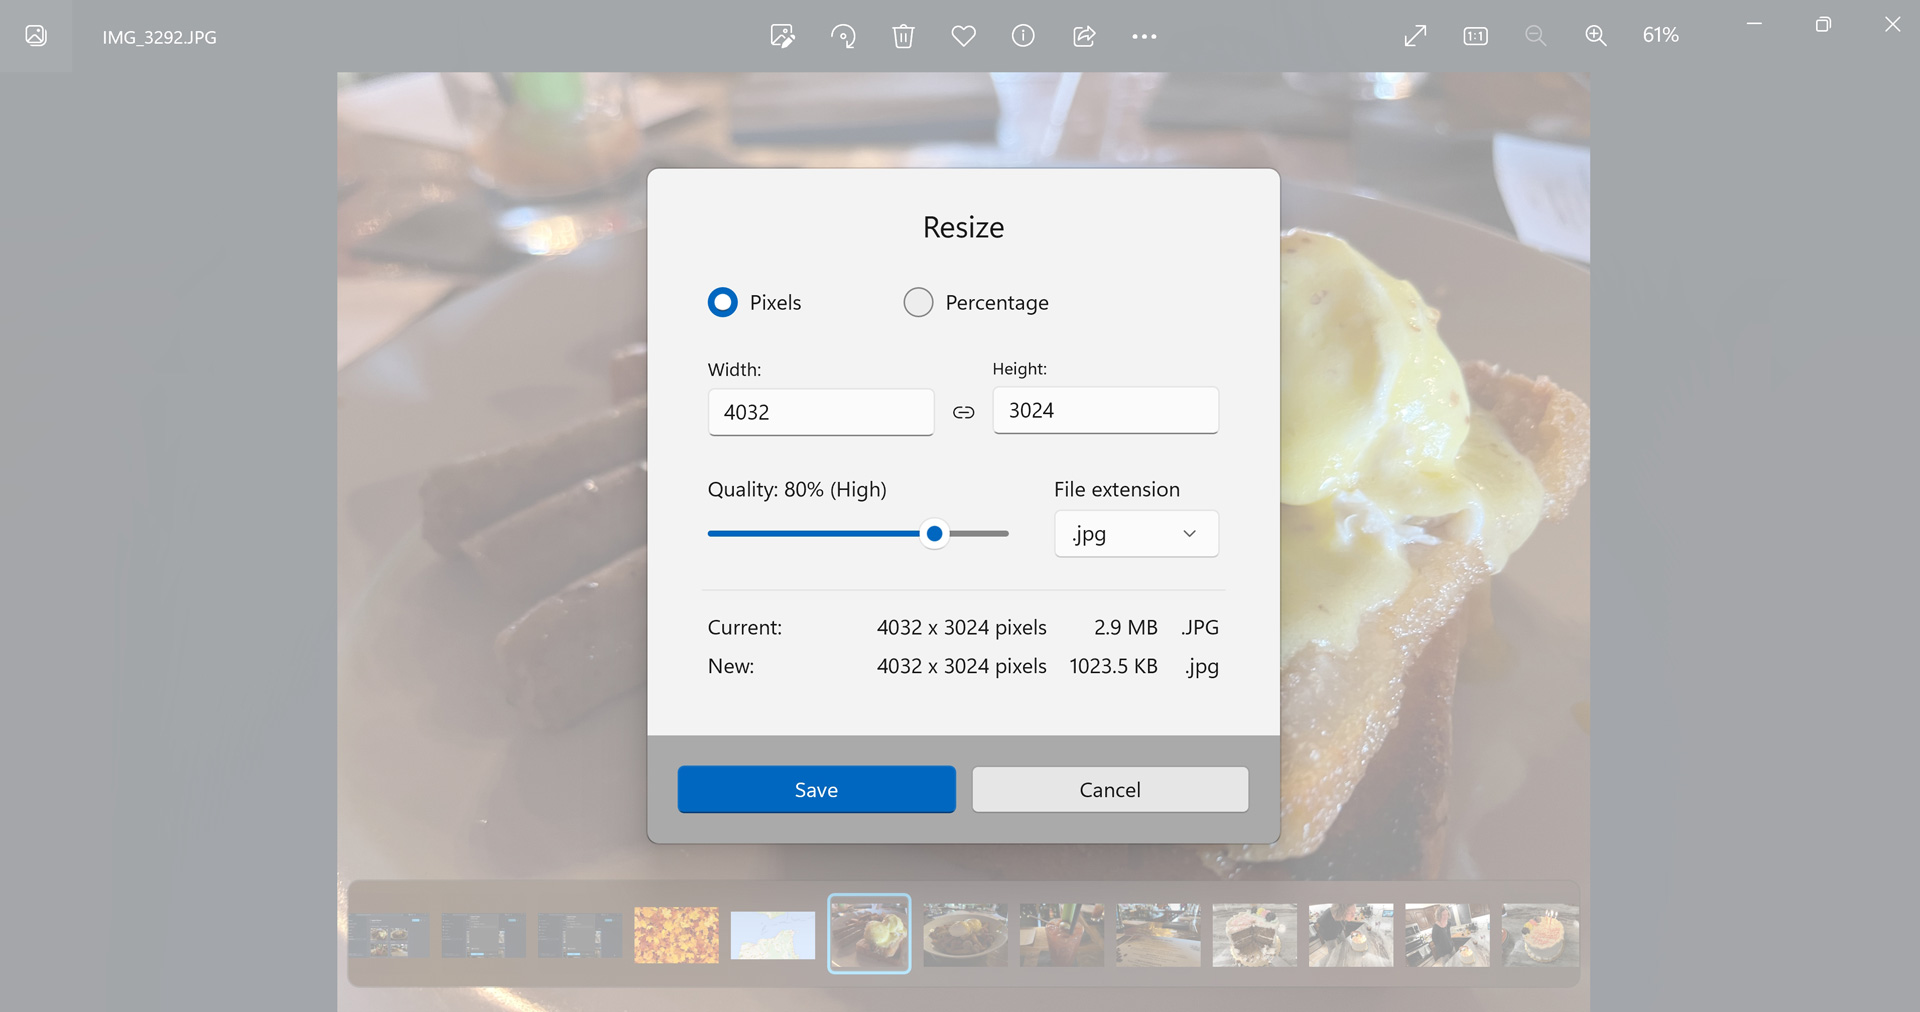
Resize image. Click this item to display the Resize window, which provides various resizing, quality level, and formatting choices.
Copy. Click this item to copy an image to the Clipboard so that you can paste it into another application.
You can also type CTRL + C to copy an image to the Clipboard.
Copy as path. Click this item to copy the full path to the image file to the Clipboard so that you can paste it into another application.
You can also type CTRL + SHIFT + C to copy the full path to the image file to the Clipboard.
Set as. Select this item to set the image as the lock screen or Desktop background.
You can also type CTRL + L to set the image as the lock screen background. or, type CTRL + B to set the image as the Desktop background.
Fullscreen. Click this item to display the image in full-screen.
You can also type F11 to toggle full-screen mode.
Send feedback. Click this item to give feedback about the Photos app to the Windows team using the Feedback Hub app that’s included with Windows 11.
Zoom to fit/Zoom to actual size. Click this item to toggle the display of images between Zoom to fit and Zoom to actual size.
You can also type CTRL + 0 to zoom the image to fit in the window. Or, type CTRL + 1 to display the image in its actual size.
Zoom out. Click this item to zoom out of the image.
Or, type CTRL + MINUS to zoom out of an image.
Zoom in. Click this item to zoom into the image.
Or, type CTRL + PLUS to zoom in on an image.
In addition to the items that are available via buttons and other controls in Photos, you can also right-click the image to display a similar list of actions in a context menu.

For the most part, these items duplicate the actions noted above. But there are a few small differences. The “Zoom out” and “Zoom in” items are available via the “Change small media settings” menu item. There’s a Show Filmstrip item for toggling the filmstrip. And there are “Open with” and “Open in File Explorer” items.
Finally, you can use the filmstrip to multi-select images so that you can perform a limited set of actions on them at the same time. To do so, display an image in the photo viewer, then mouse over the thumbnail of another image in the filmstrip to reveal a selection box. Click that box to select the image.

Repeat this process until you’ve selected all of the images you need. Then, right-click in the image viewing area to see a list of available actions.

Edit an image
To edit an image, display it in the Photos app’s photo viewer experience. Then, select the Edit image button in the toolbar. The image editing experience appears.
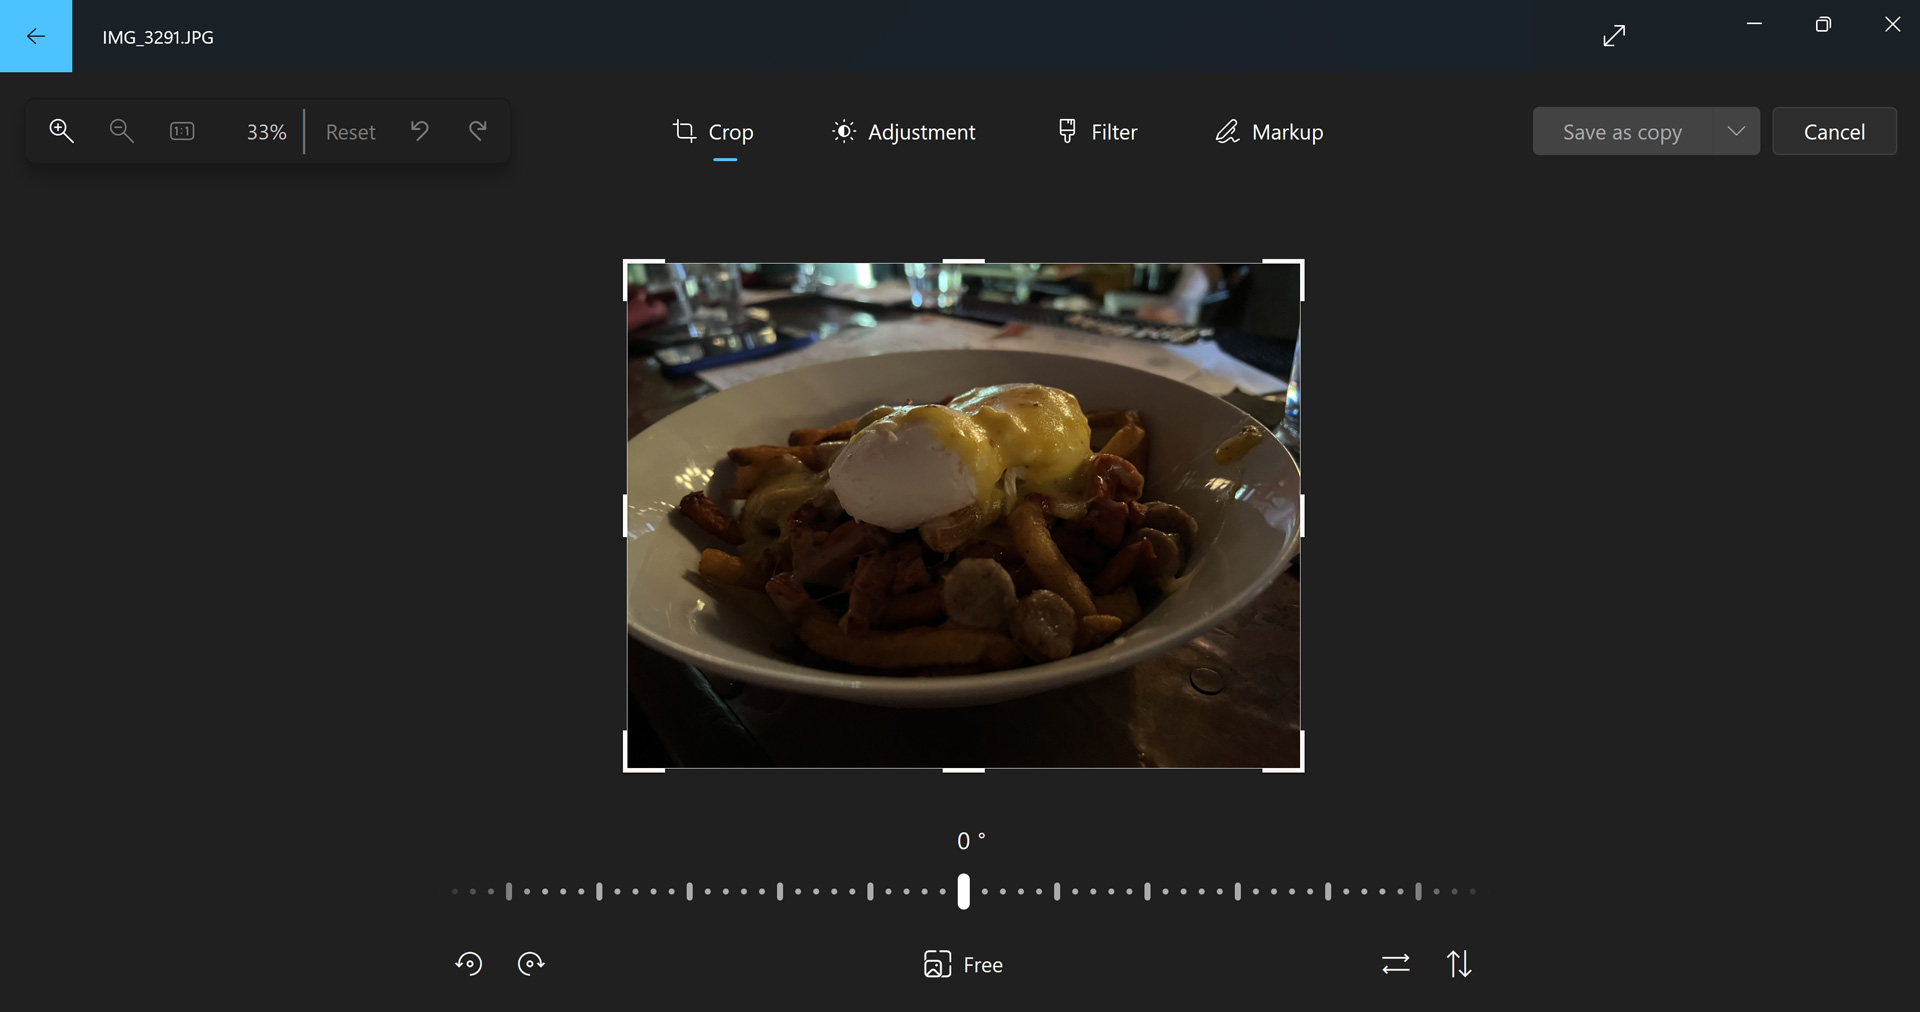
Aside from some zoom controls, the following actions are available here:
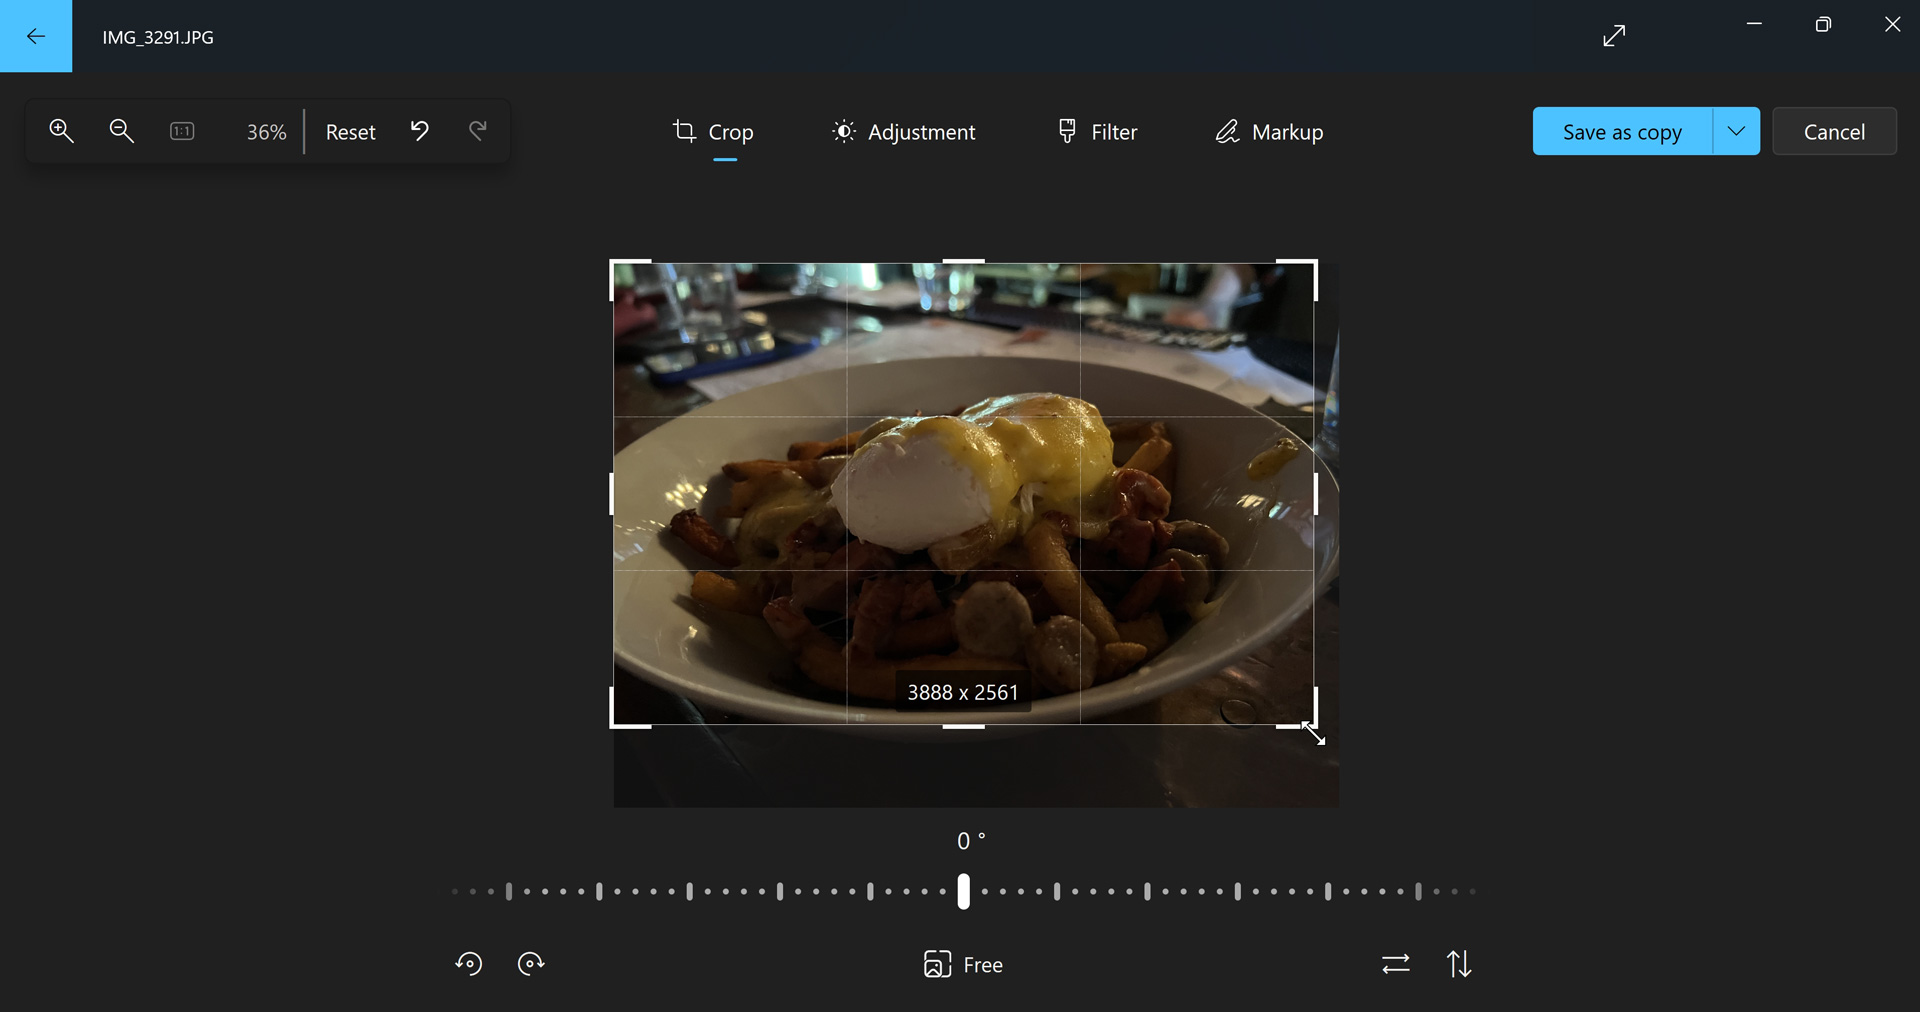
Crop. Here, you can use the selection handles to adjust the cropping area and then crop the image accordingly.
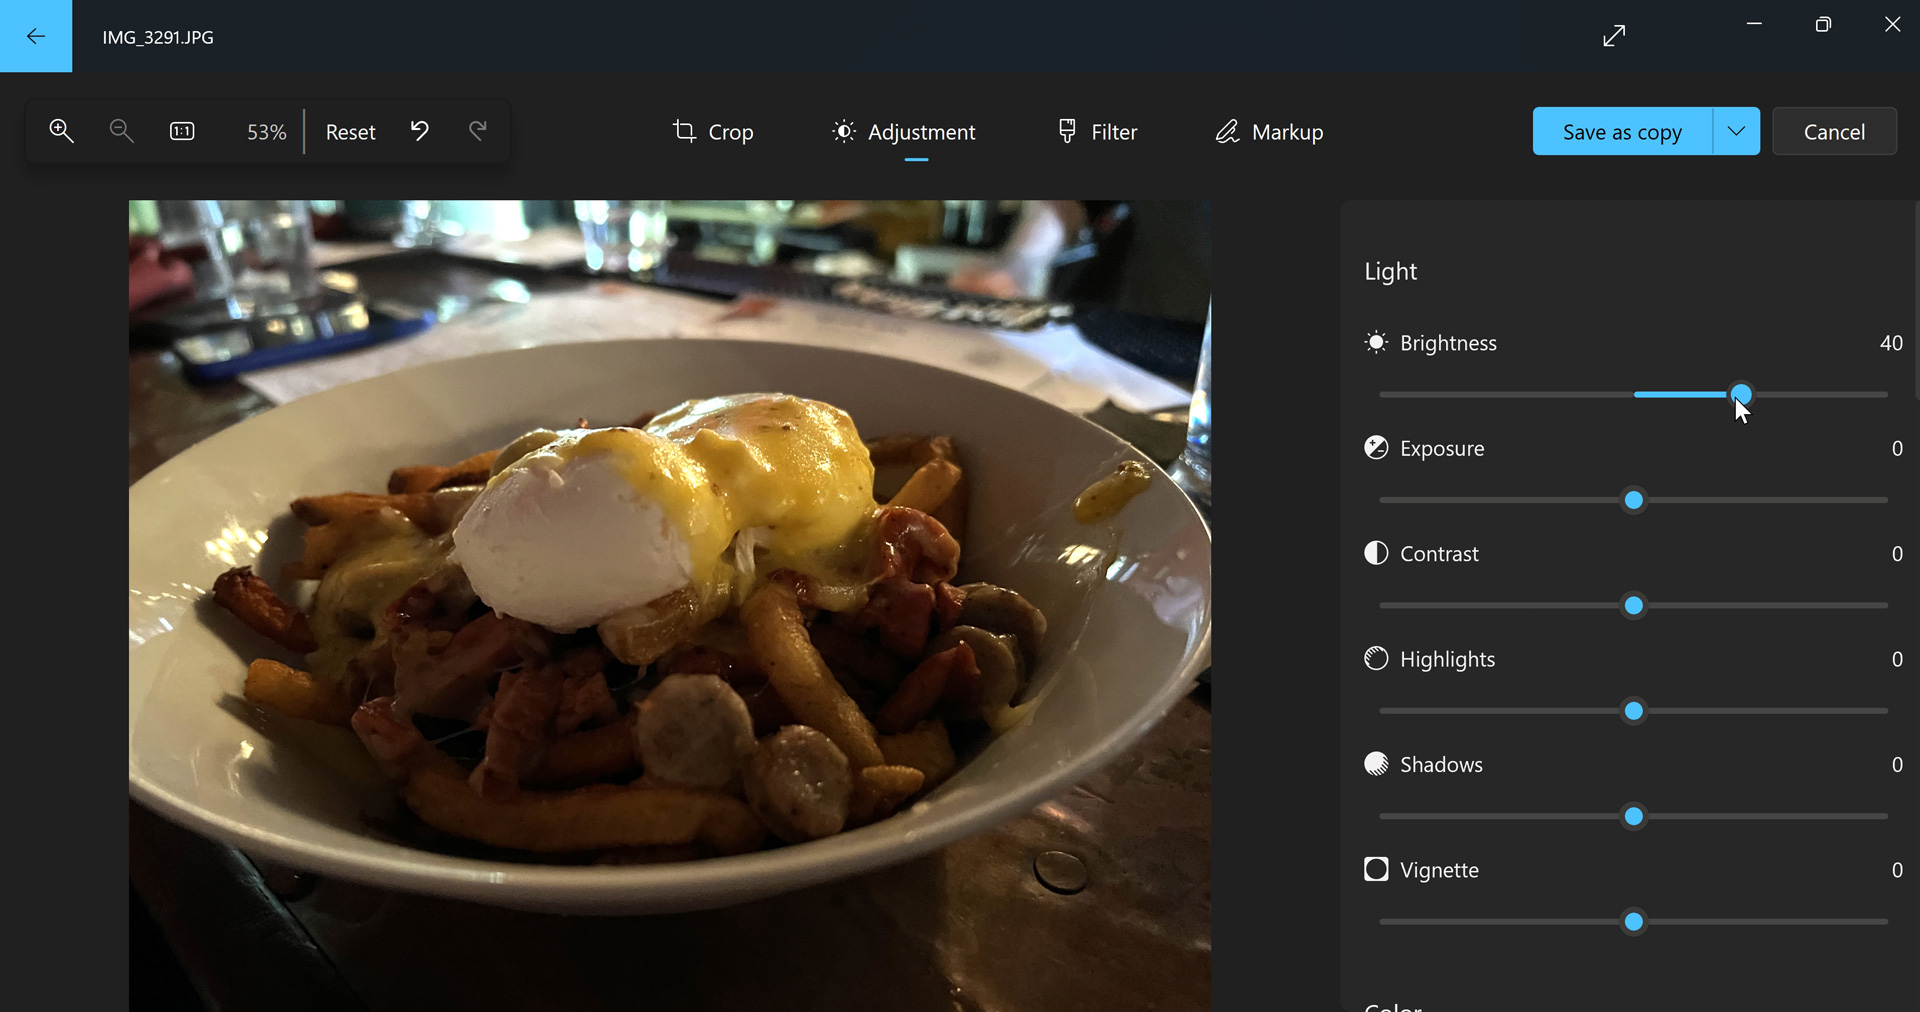
Adjustment. This action provides you with several light and color adjustment sliders. For example, to adjust the exposure, drag the Exposure slide to the right or left.
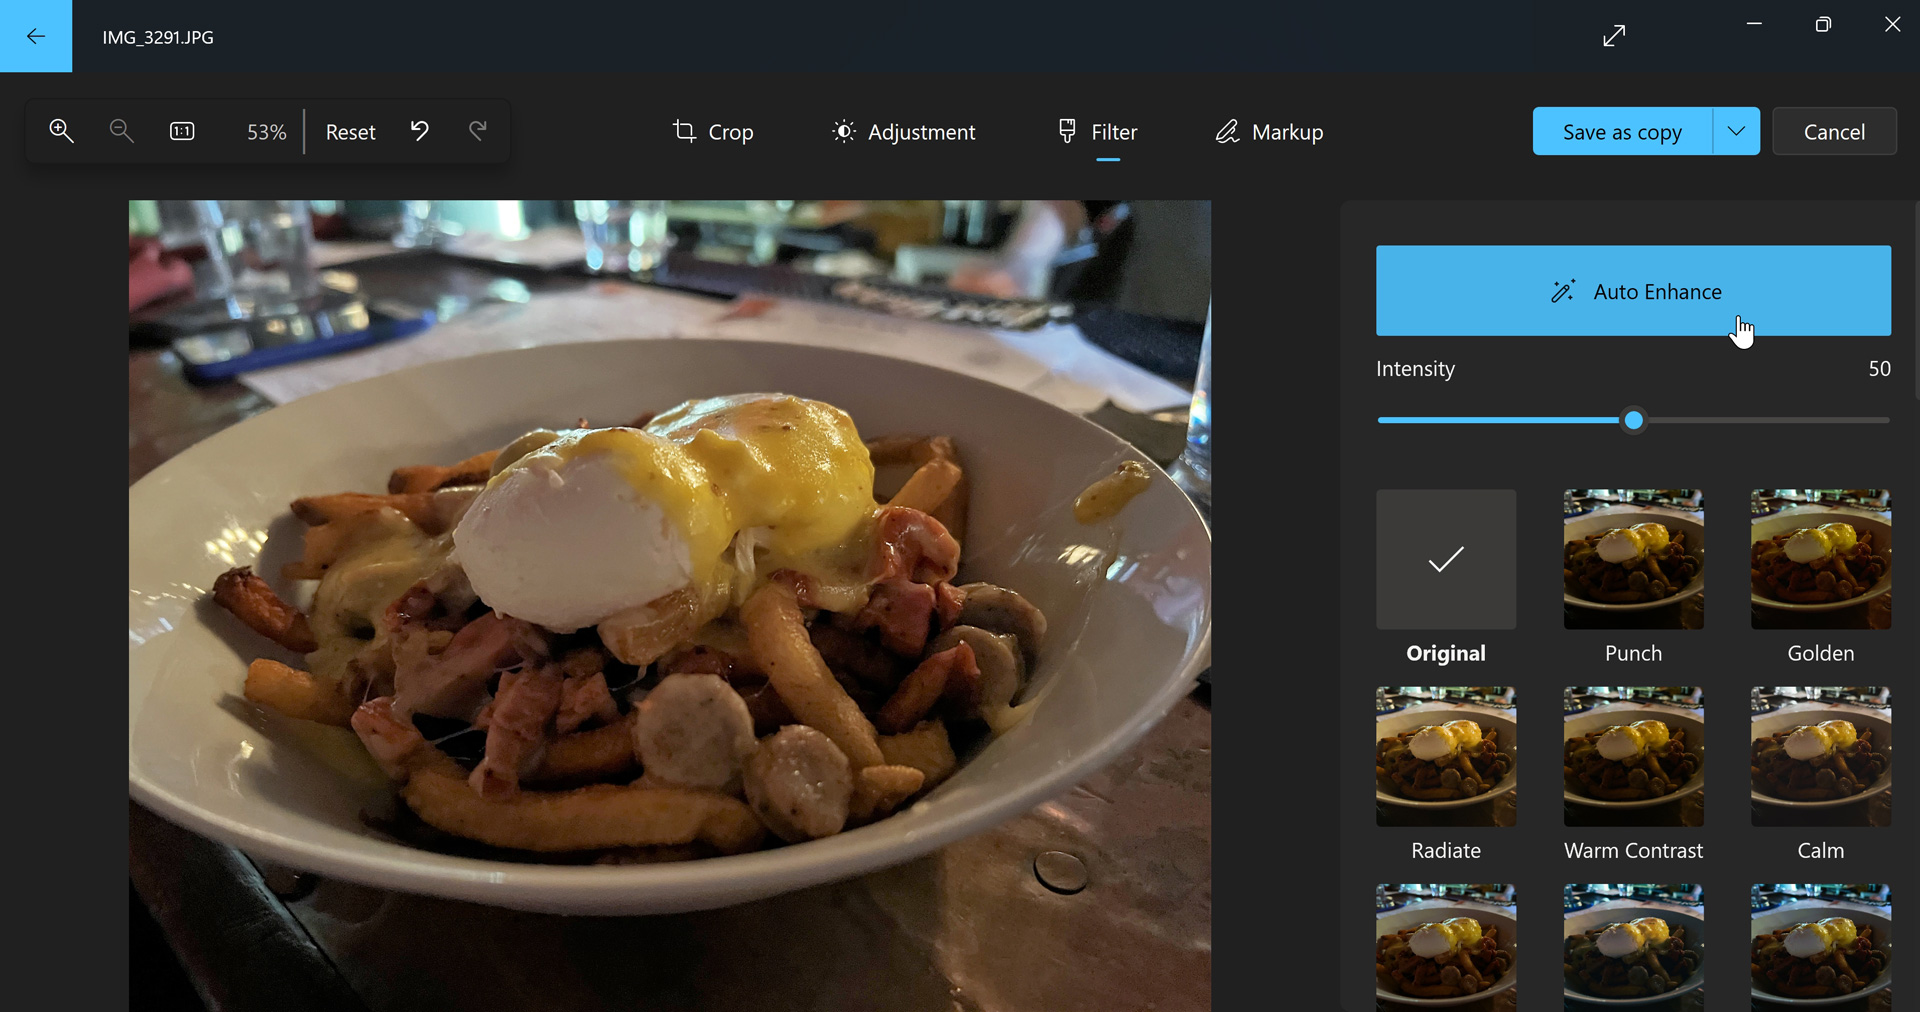
Filter. Here, you will find several filters—Punch, Golden, Radiate, Warm Contrast, and many more—plus an Auto Enhance button that will evaluate the image, make an adjustment, and then let you fine-tune it with an Intensity slider.
Markup. Here, you can use pens and a highlighter to markup an image. Or use “Remove ink strokes” and “Clear all ink strokes” tools to correct any mistakes you made.
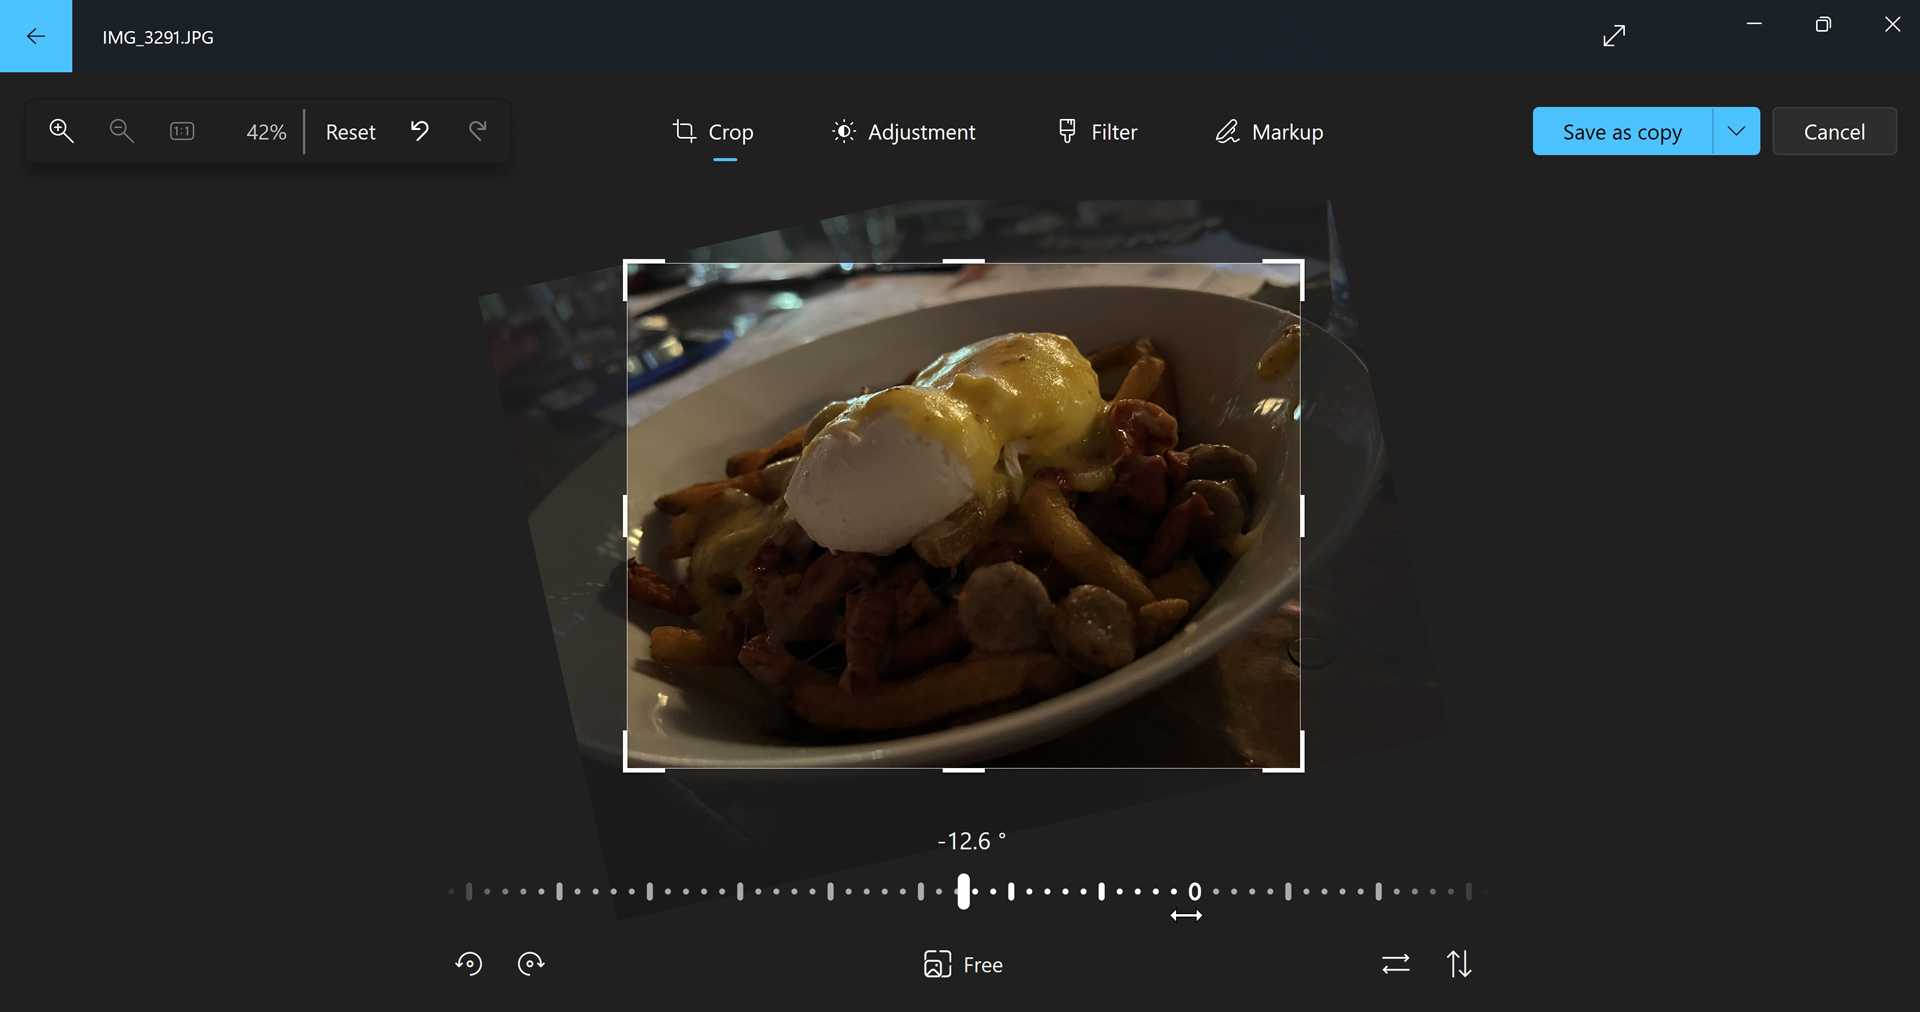
Rotate and crop. At the bottom of the image editing experience, you will find a rotation slider, buttons for rotating the image 90 degrees to the left and right, a button for more aspect ratio options, and buttons to flip the image horizontally and vertically.
Configure Photos as the default viewer
If Photos is not configured as your default image viewer, there are two ways to fix this. Neither is ideal: there is no single button to click to make Photos or any other app the default for images.
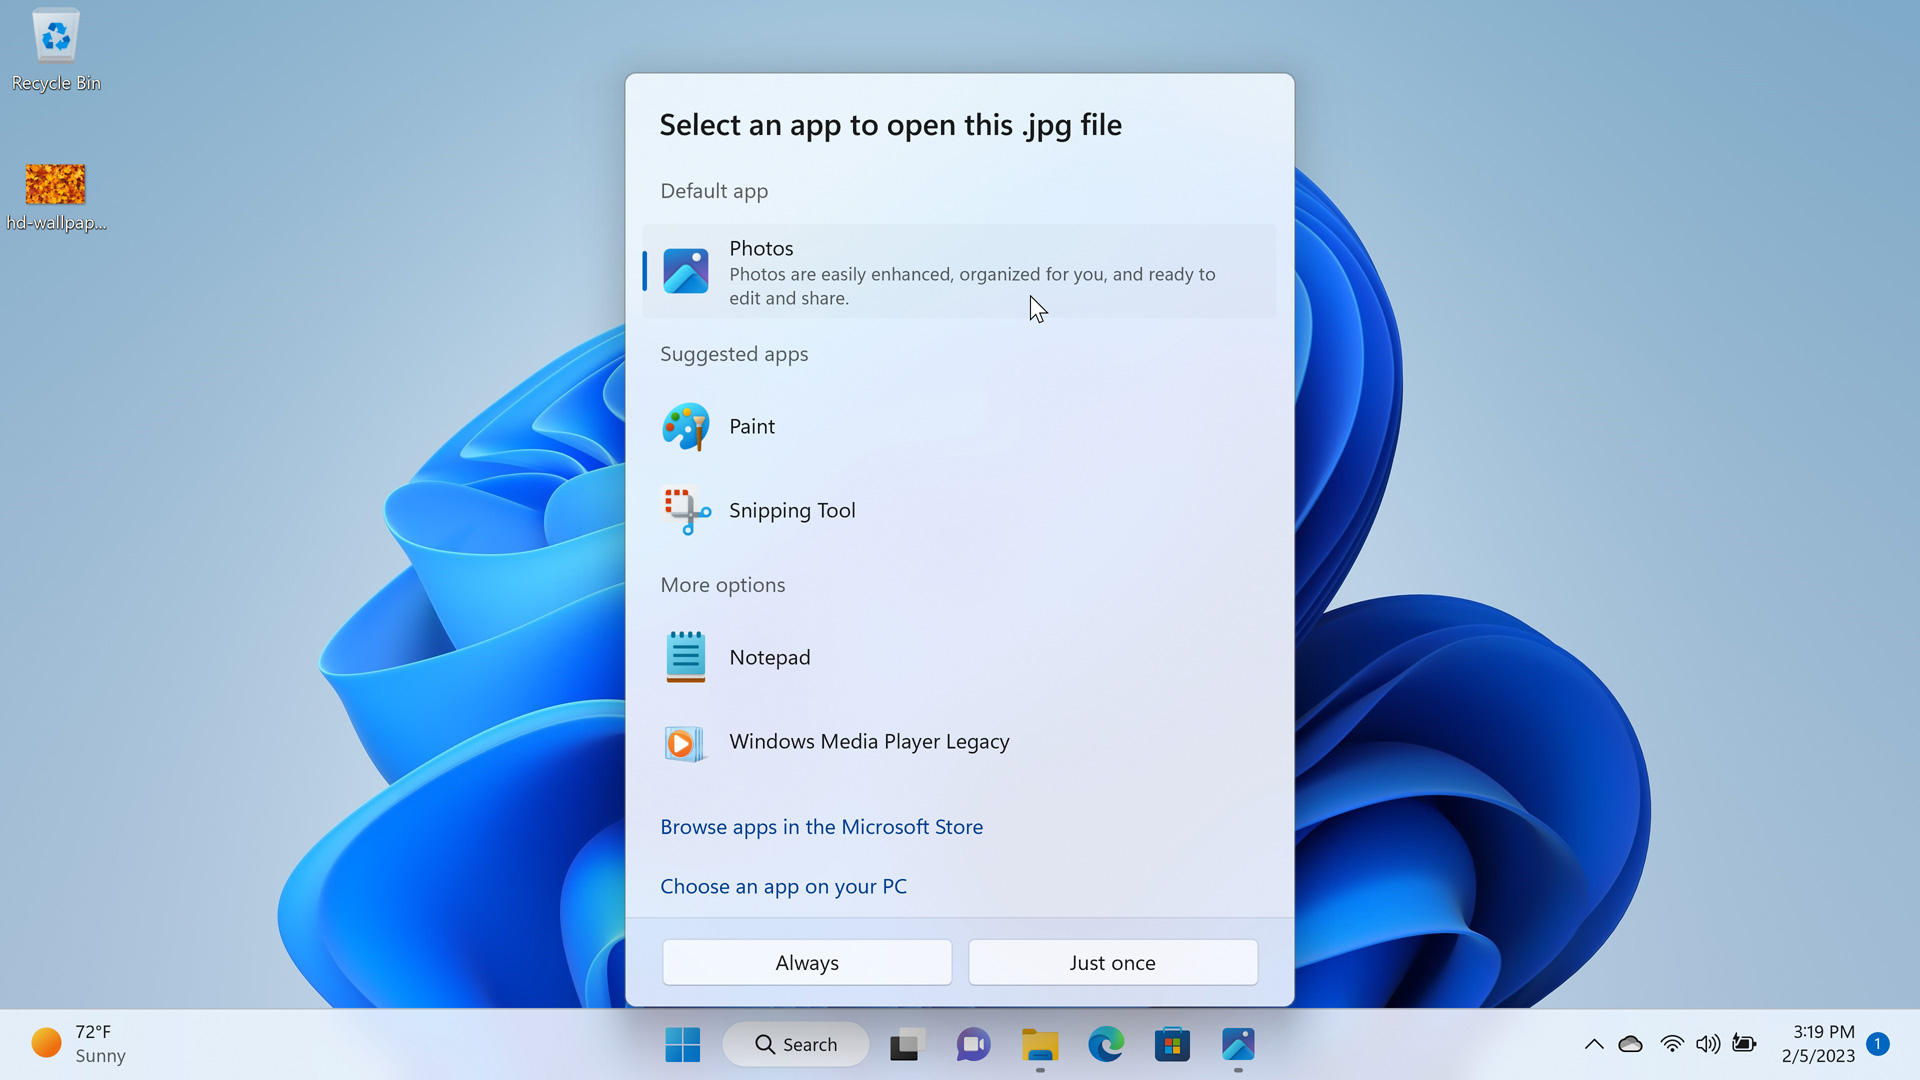
Open as. Right-click an image file, and then select Open with > Photos to open it in Photos just this one time. Or, select Open with > Choose another app and then choose Photos from the list of compatible apps in the Select an app to open this file window that appears.
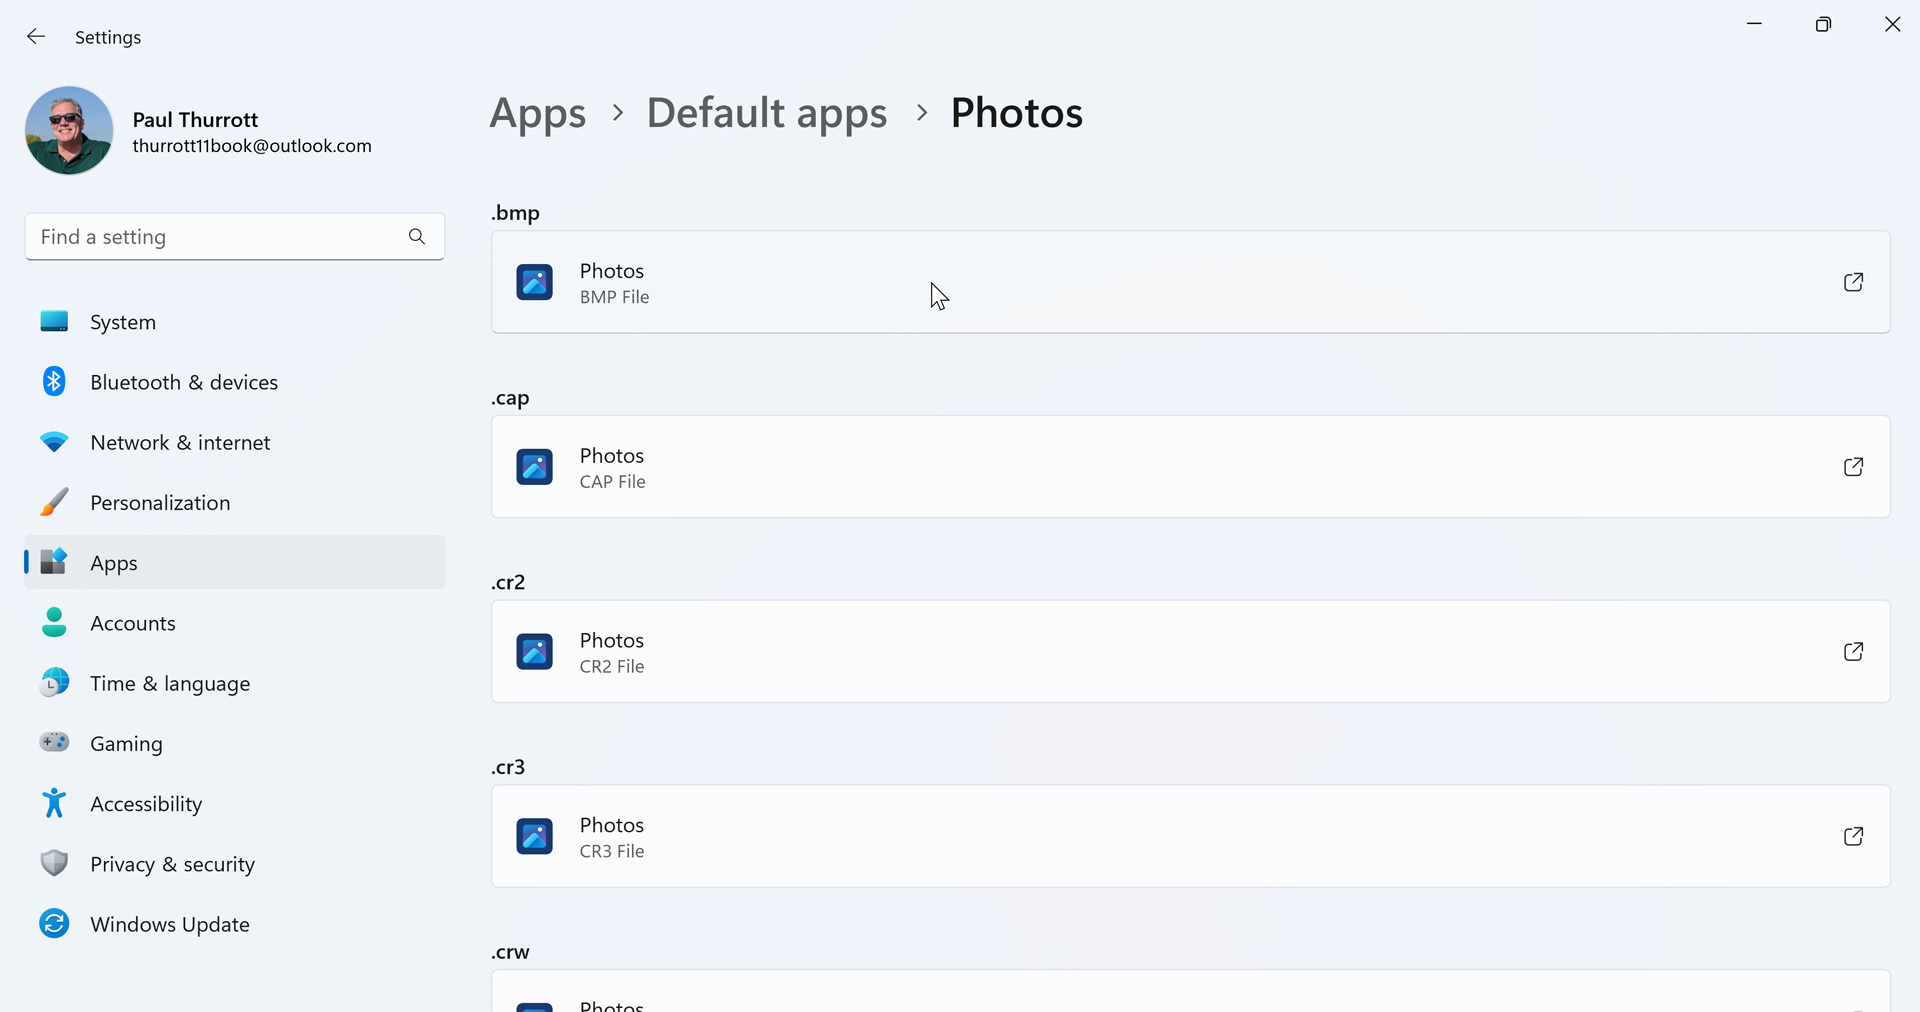
Settings app. Open the Settings app, navigate to Apps > Default apps and then select Photos in the list of apps that appears. Then, scroll through the list of file formats and change some key formats to use Photos by default. (We recommend making this change for BMP, GIF, HEIC, JPG, JPEG, and PNG.)
Use Photos to manage your photos and other image files
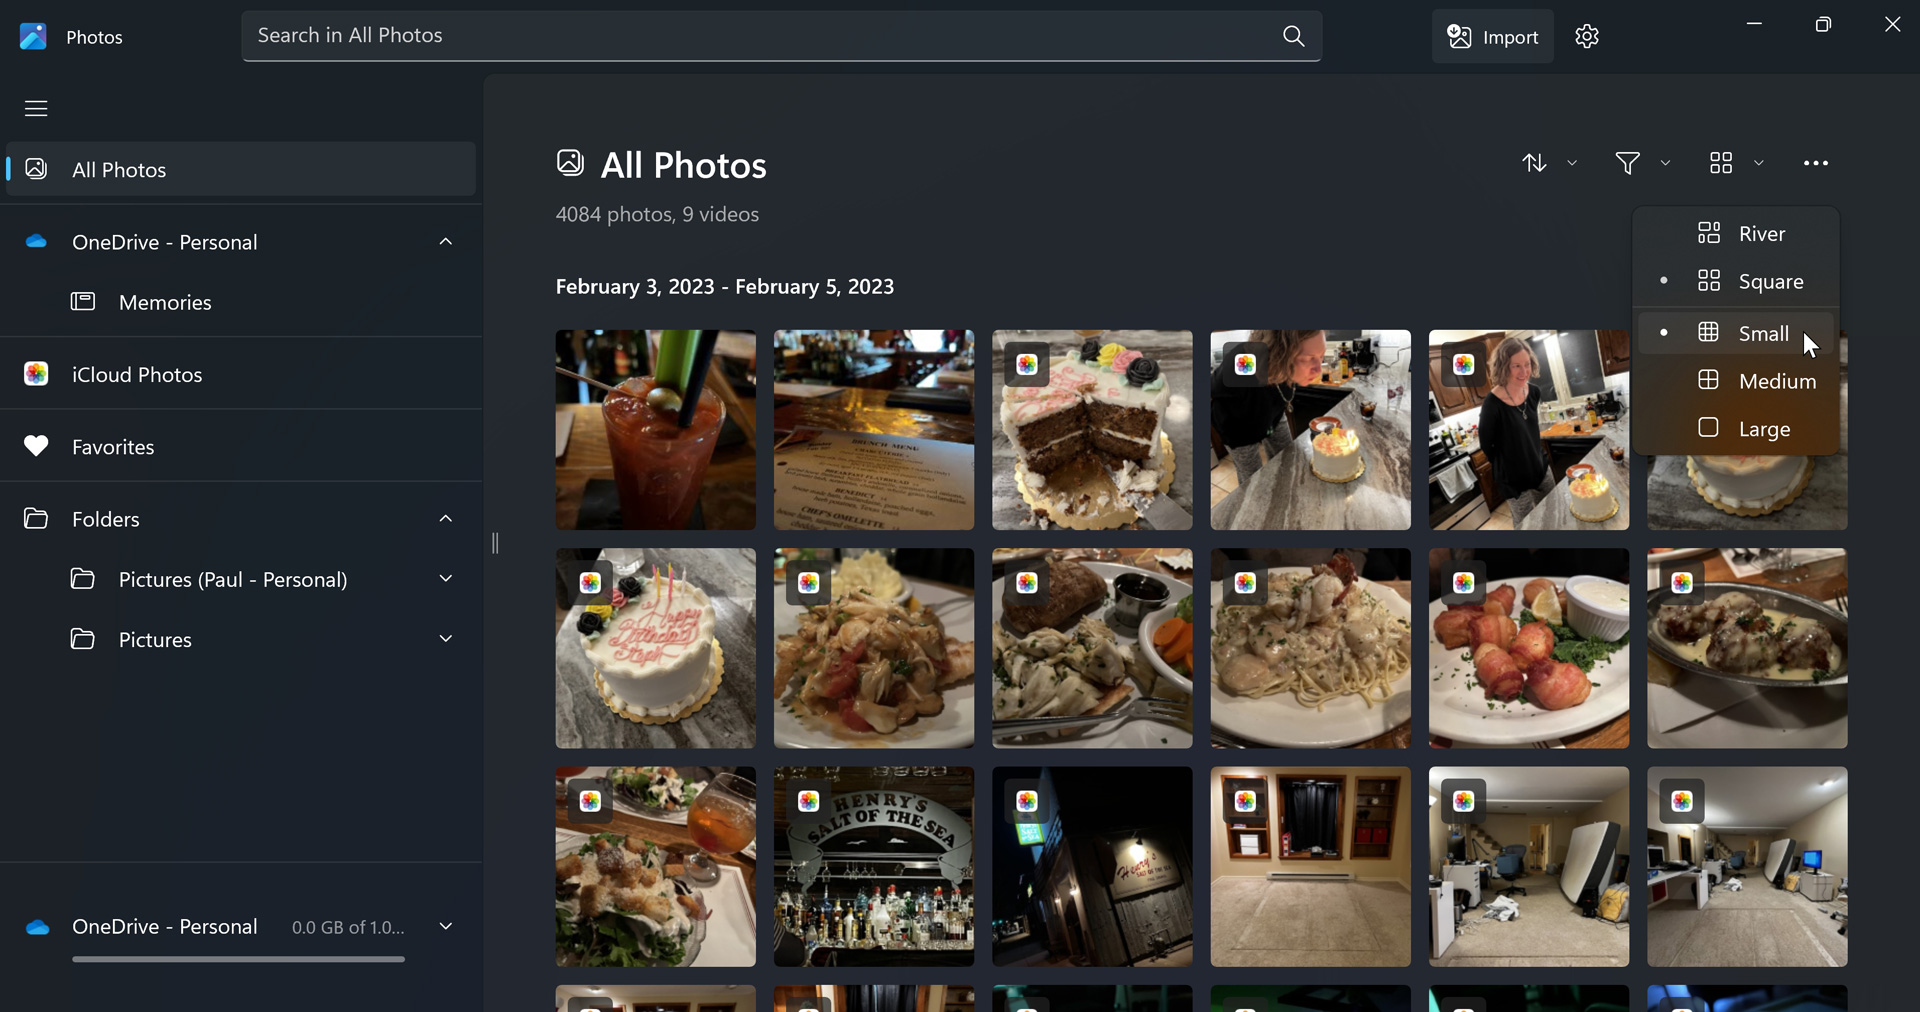
By default, Photos displays photos found in your OneDrive and in your Pictures folder. And the default view, All Photos, commingles the contents of those locations in a single place.
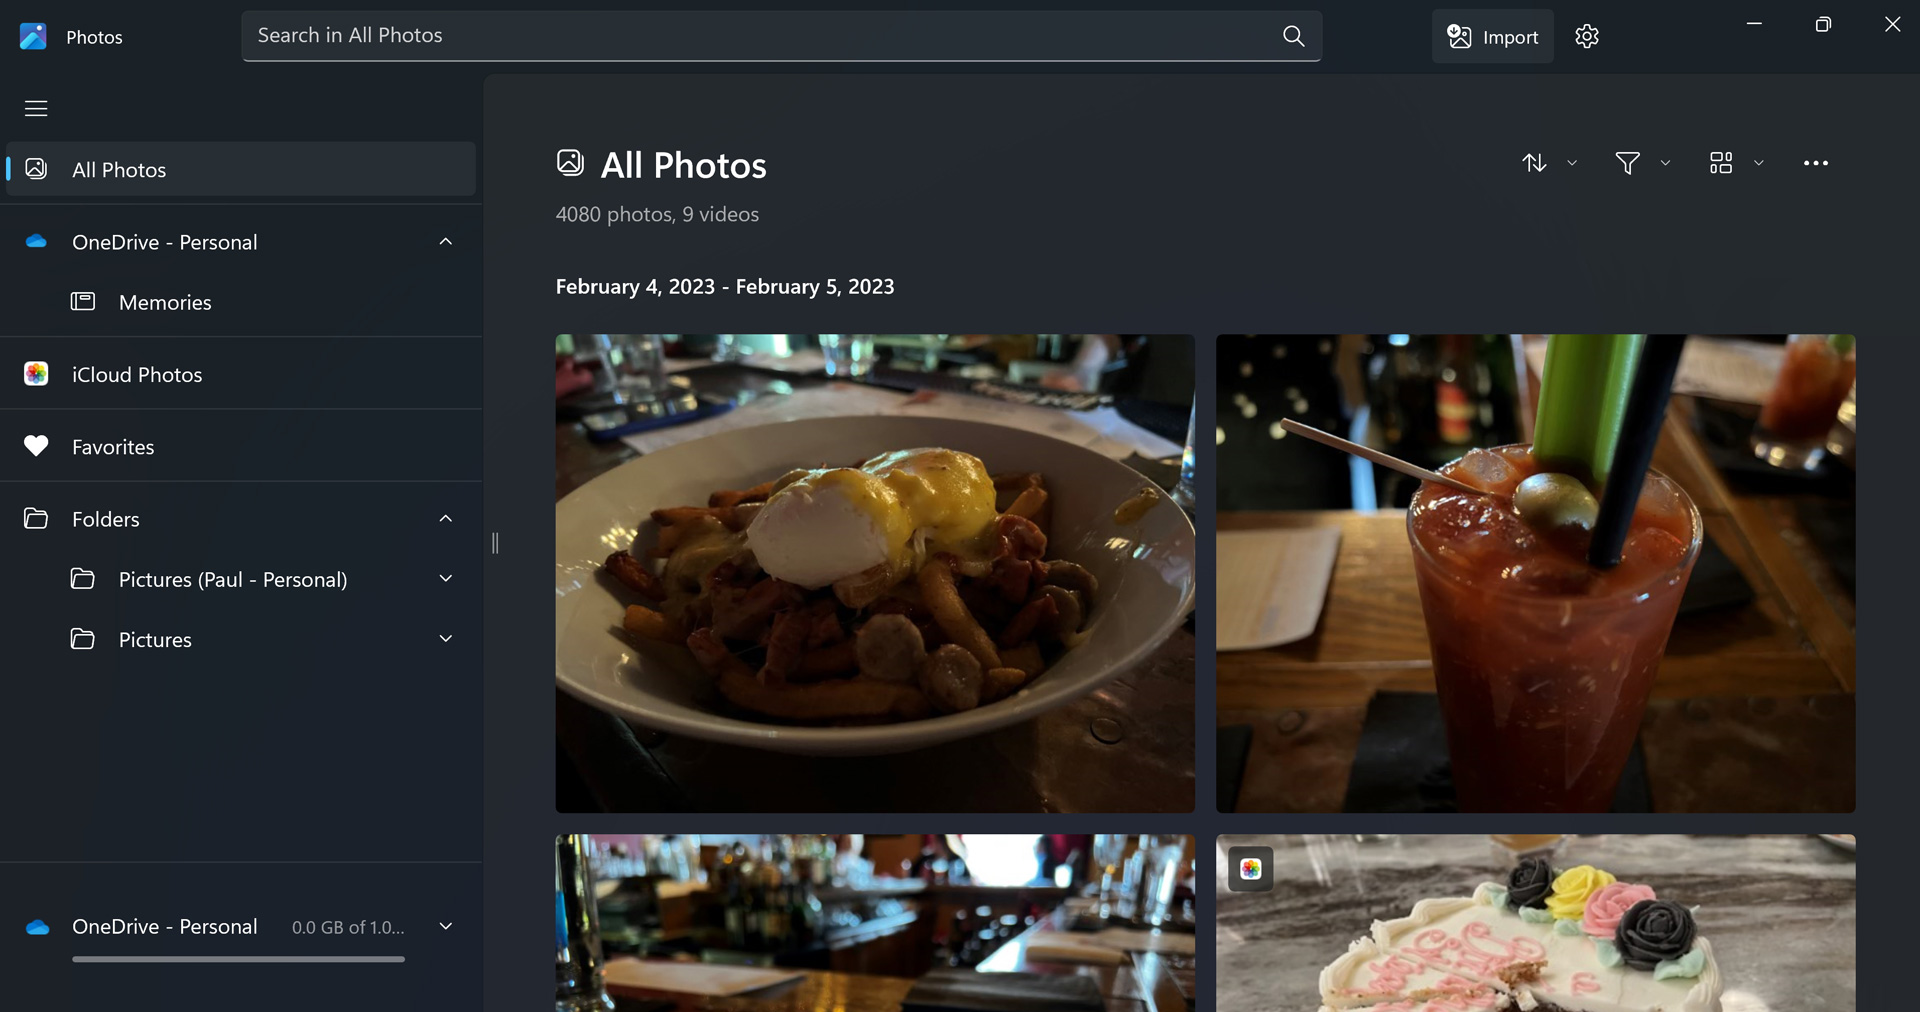
You can use the other items in the navigation pane to filter the view to specific locations. Available locations include:
OneDrive. Here, you can browse the photos and other images in your OneDrive. A Memories sub-item lets you view any memories that OneDrive has created for you.
iCloud Photos. If you use an iPhone, you probably back up your photos to Apple’s iCloud service. If so, you can connect that service to Photos by installing the iCloud app from the Microsoft Store and signing in to your Apple ID. Then, your iCloud photos will appear in Photos too.
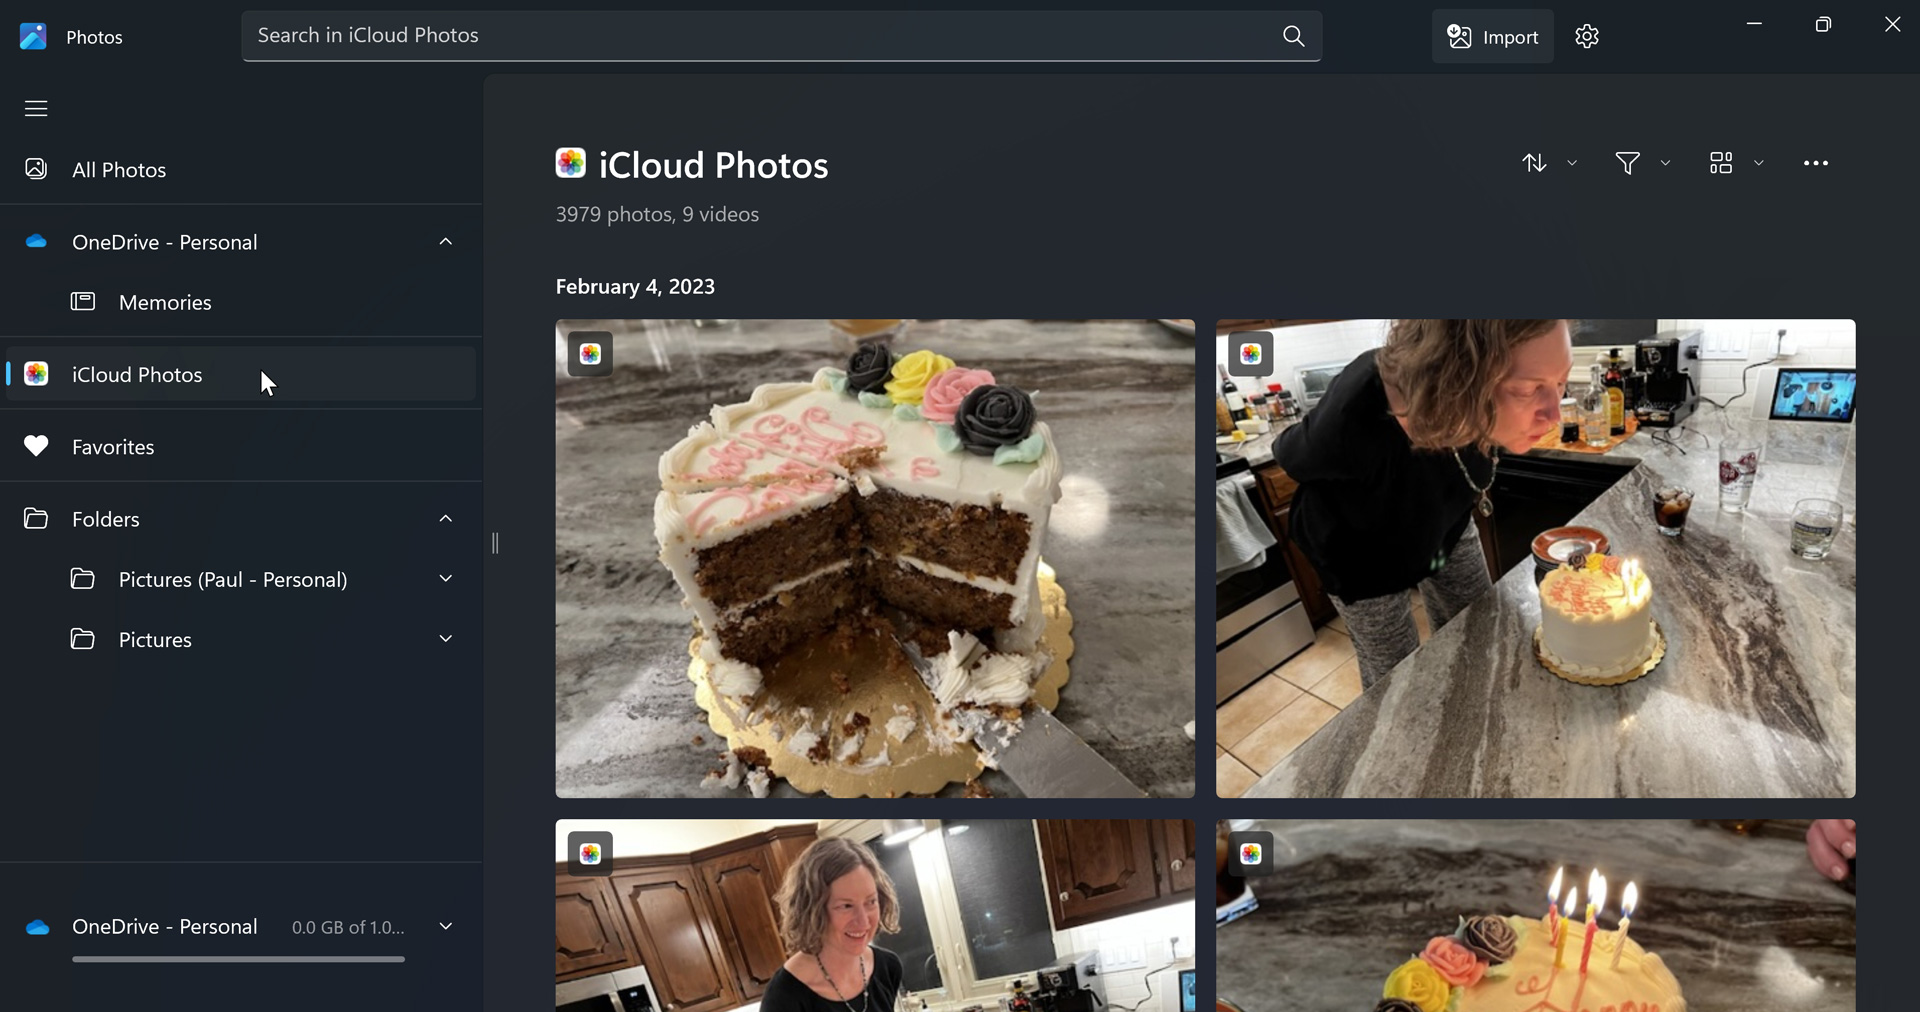
Not an iCloud user? You can remove the iCloud item from the navigation bar. To do so, open Photos settings and change the option “Show iCloud Photos” to Off.
Favorites. Like a web browser, Photos lets you mark individual photos as favorites so that you can view your favorite pictures and videos in a single location.

Favorites only works with JPEG images and MP4 videos.
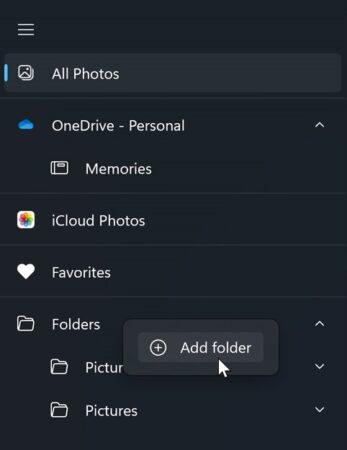
Folders. Here, you will see the folders on your PC that are configured to work with Photos. By default, you will see your local Pictures folder and your Pictures folder in OneDrive. But you can add any other folders you use by right-clicking “Folders” and choosing “Add folder.”
You can sort and filter the view of each source using the buttons above the gallery feed. There’s also a “Gallery types and sizes” button for changing how image thumbnails are displayed.
Import photos and videos from your smartphone or another device
To import photos from another device—like a smartphone, camera, or USB hard drive—connect the device to your PC. If this is the first time you’ve connected this device, you will be prompted to choose what happens when you do this. One of the choices is “Import Photos and Videos – Photos,” which will semi-automate the process. But you can always kick off the import directly from the Photos app.
To do so, open Photos, click the “Import” button and then select the correct device from the menu that appears.

When you do, Photos will display all of the photos on the connected device. This could take a while if there are lots of photos on the device.
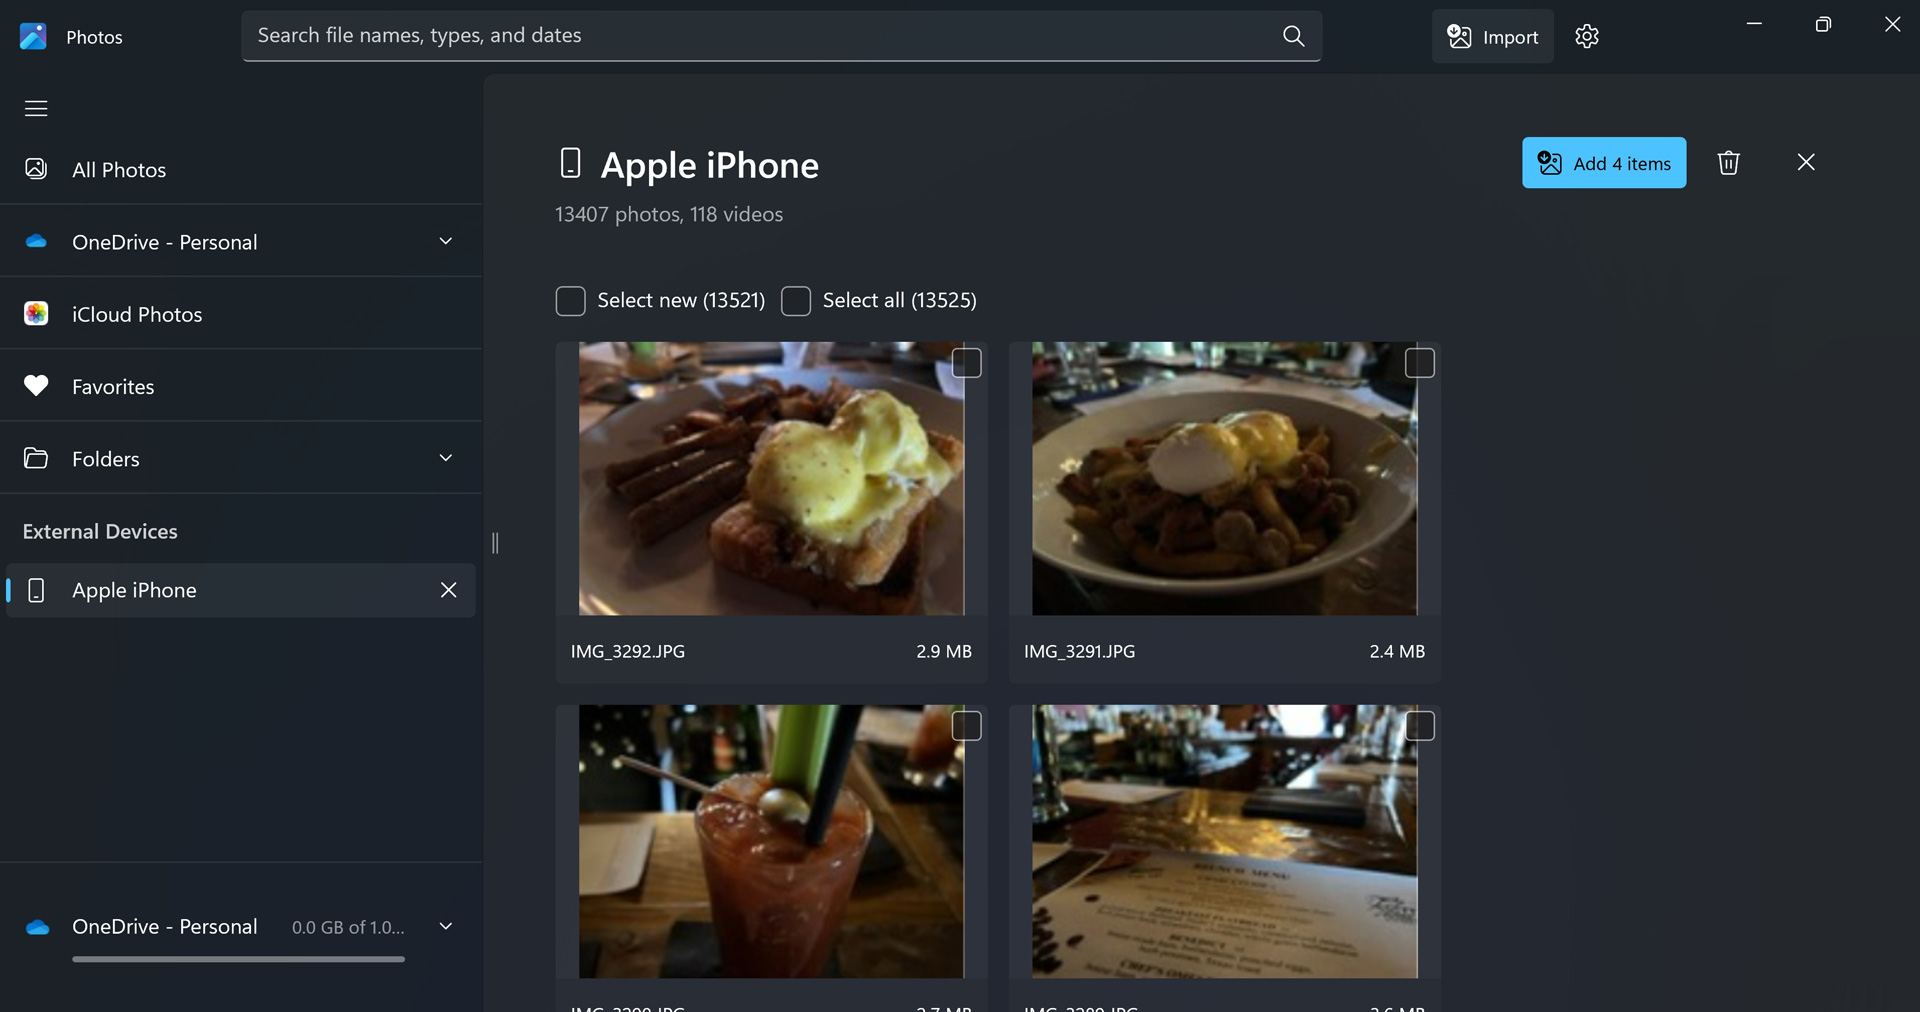
You will also see a new “External Devices” section appear in the navigation pane. The connected device is selected.
Then, you can select the items you wish to import. When you click “Add items,” you can also choose where to import them into your PC’s file system.
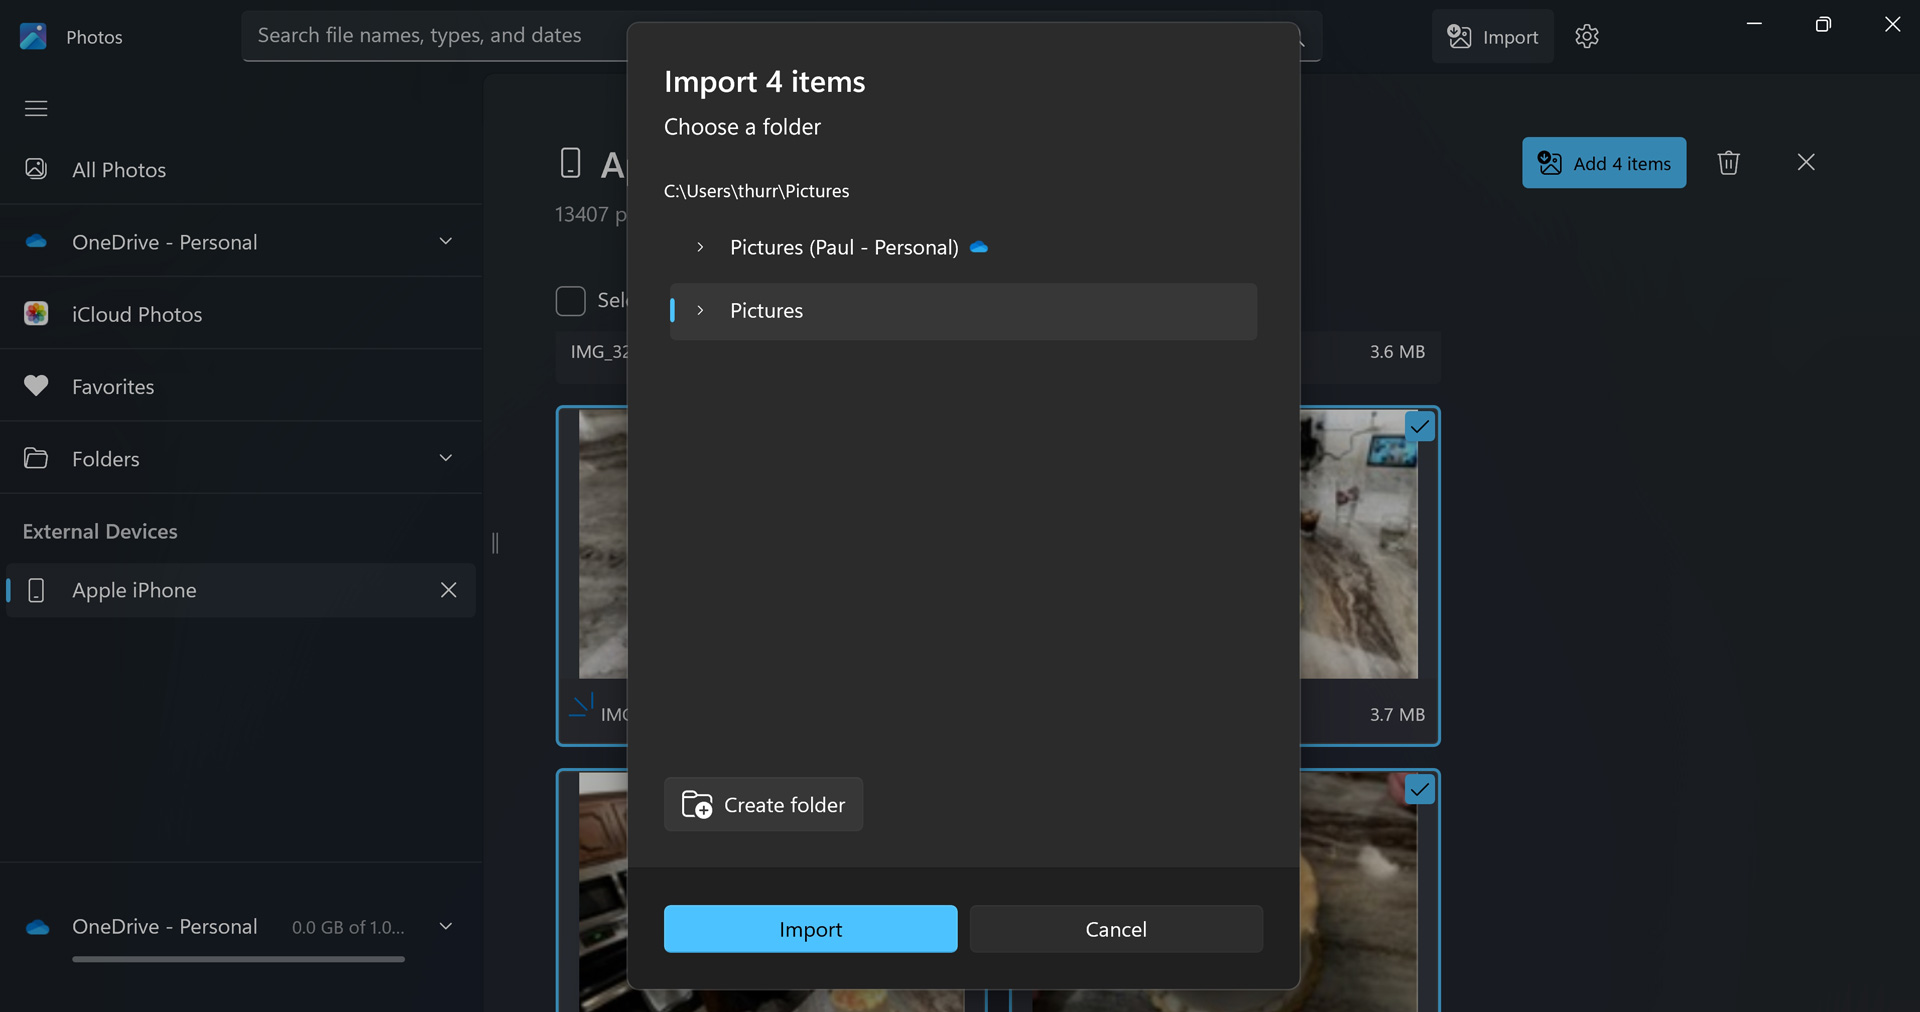
What you can’t do is determine how the imported files will be named: they will retain their original file names as they are imported.

Gain unlimited access to Premium articles.
With technology shaping our everyday lives, how could we not dig deeper?
Thurrott Premium delivers an honest and thorough perspective about the technologies we use and rely on everyday. Discover deeper content as a Premium member.