Media Player
- Paul Thurrott
- Feb 07, 2023
-
1
The Media Player app lets you access your personal music and video collections. This can include any combination of content that you’ve purchased online (music only for the most part), ripped from CD, DVD, or Blu-ray, or downloaded from the Internet and now store on your PC or on other PCs on your home network.
Media Player can only access content that is unprotected by Digital Rights Management (DRM) technologies. So it cannot display the movies and other videos you may have purchased from online services like Apple, Google, or the Microsoft Store. Nor can it play music from subscription music services like Apple Music, Spotify, or YouTube Music.
You can use the Movies & TV app to access movies or TV shows you’ve purchased from Microsoft.
Where did it go?
Media Player is the successor to Groove Music, which was itself the successor to Xbox Music. In the years since these apps were an ongoing concern, Microsoft has removed most of the functionality that made them interesting, including streaming music from OneDrive, an online music store, and a music service called Groove Music Pass. Today, Media Player is designed so that you can play your own local content only.
Get to know Media Player
Media Player is a basic, straightforward app. As with many of the other apps built into Windows 11, it features a collapsible navigation pane on the left and a larger area for content. But because of its function as a media player, it also includes unique playback controls on the bottom.
Here is a quick rundown of the major experiences offered by Media Player.
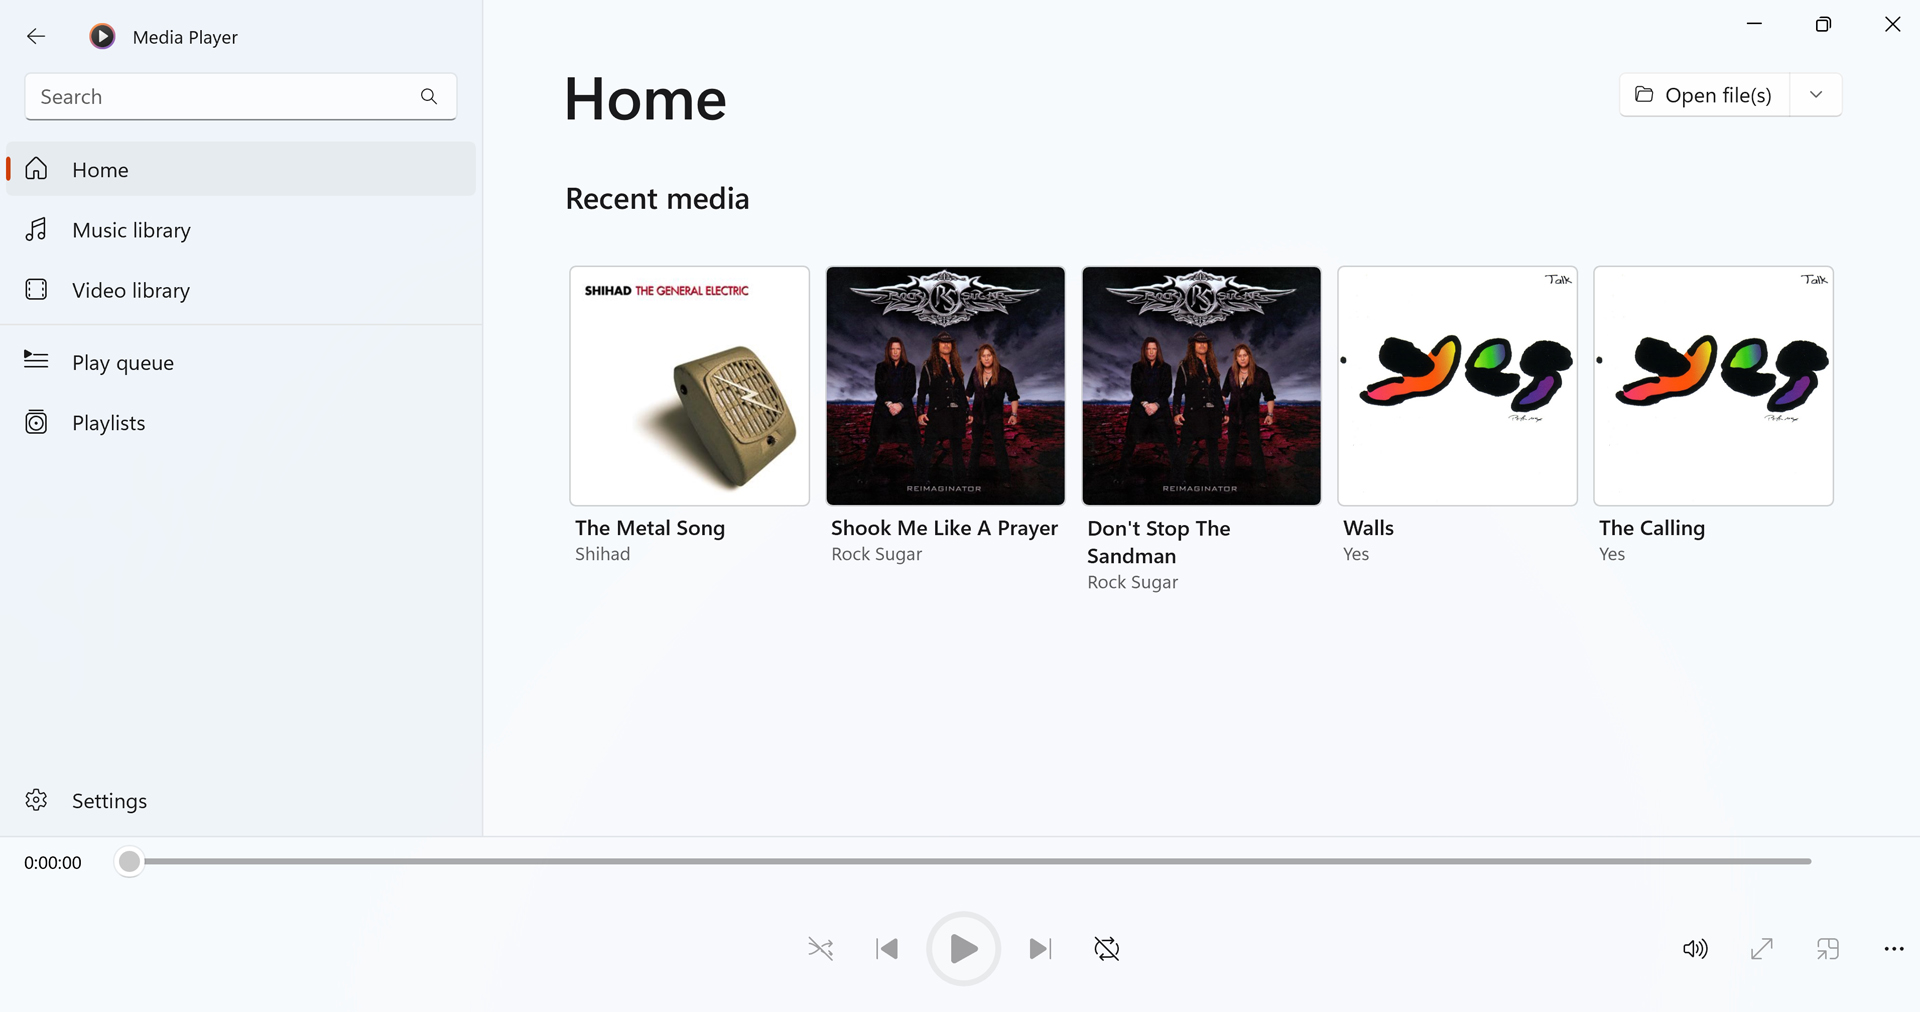
Home. Here, you can quickly access the media you’ve most recently enjoyed.
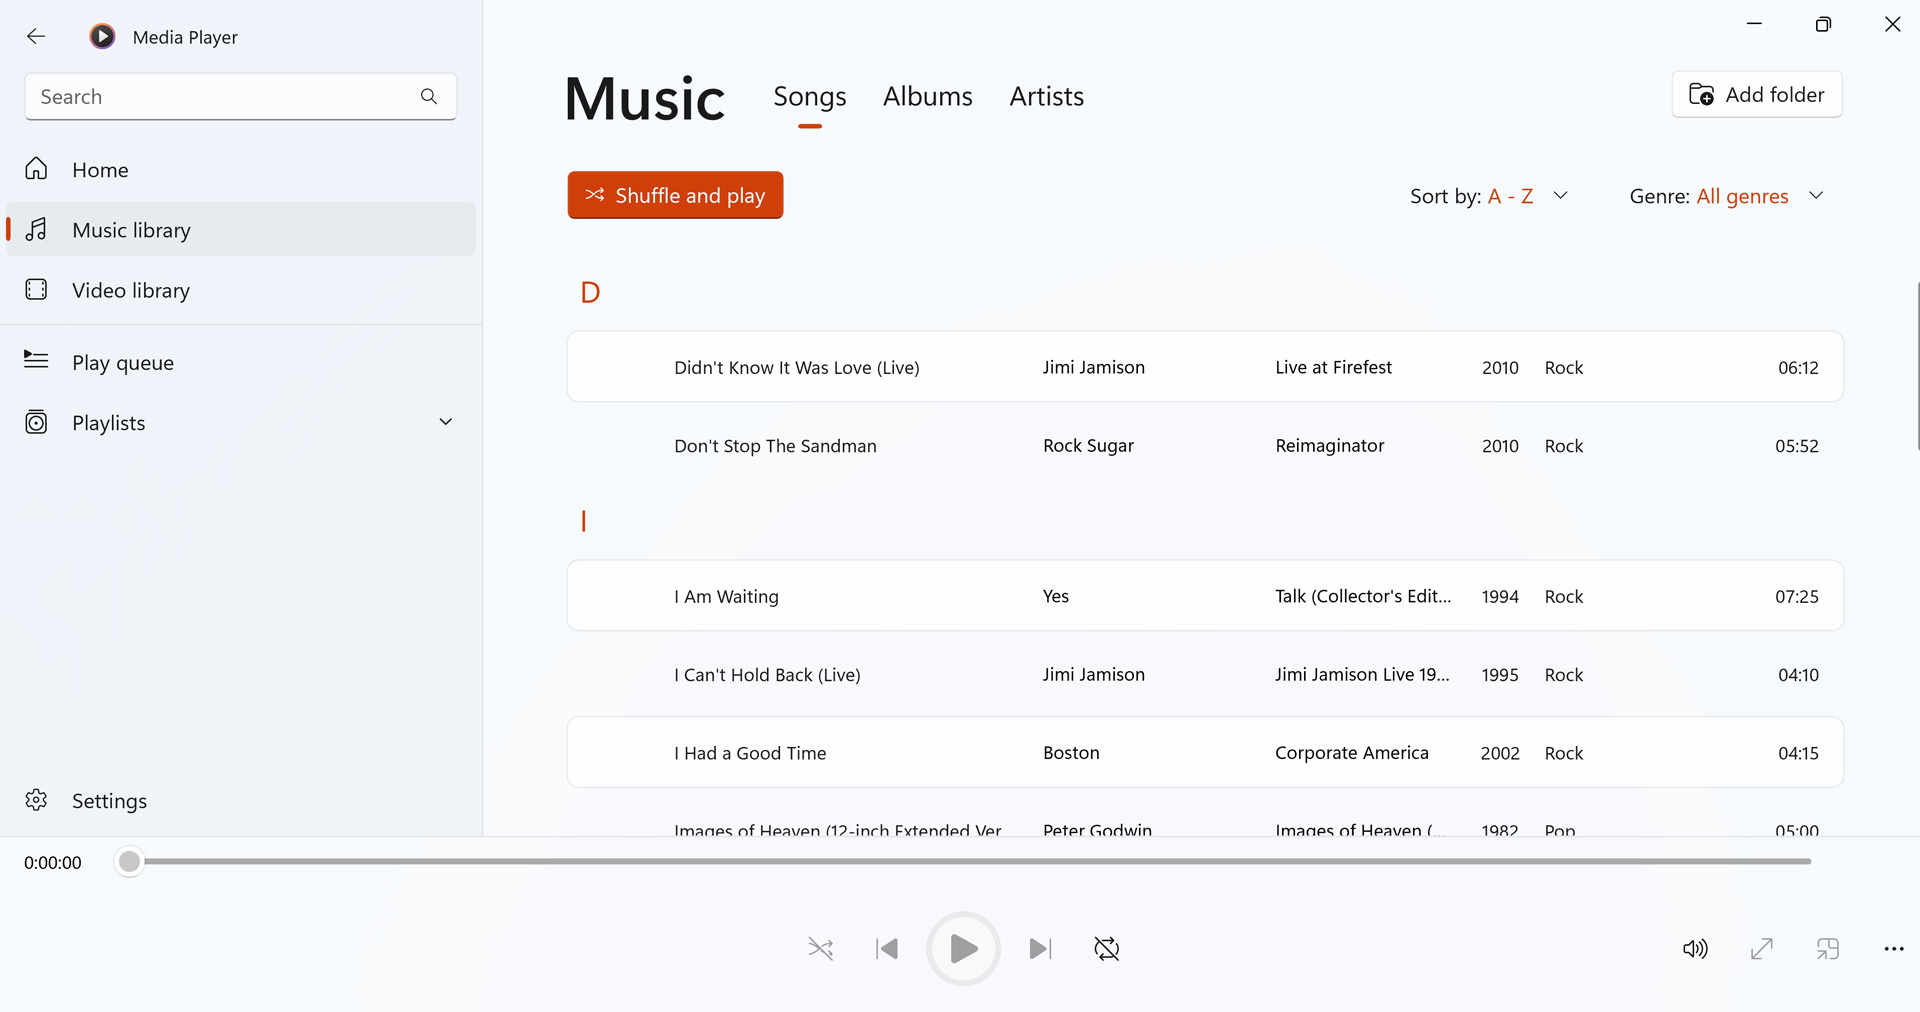
Music library. This view lets you access the music files you have in connected folders.
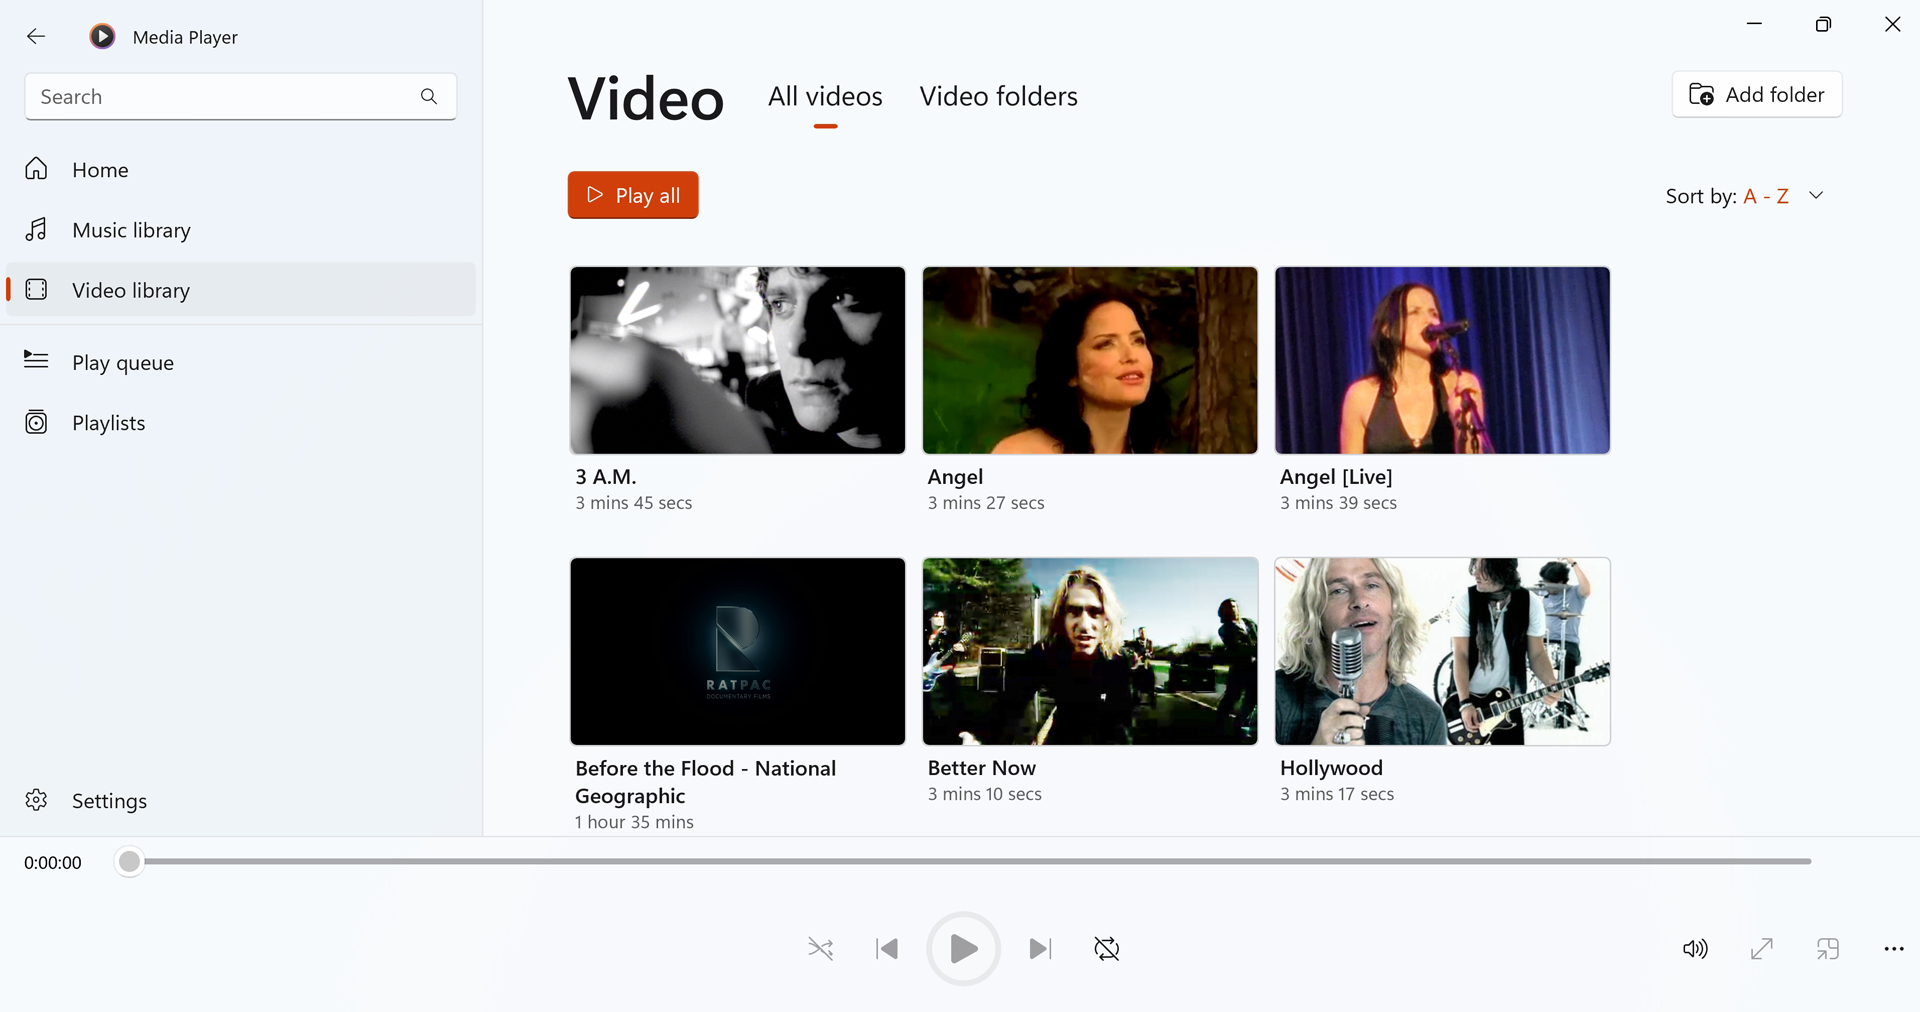
Video library. This view displays the video content you have in connected folders.
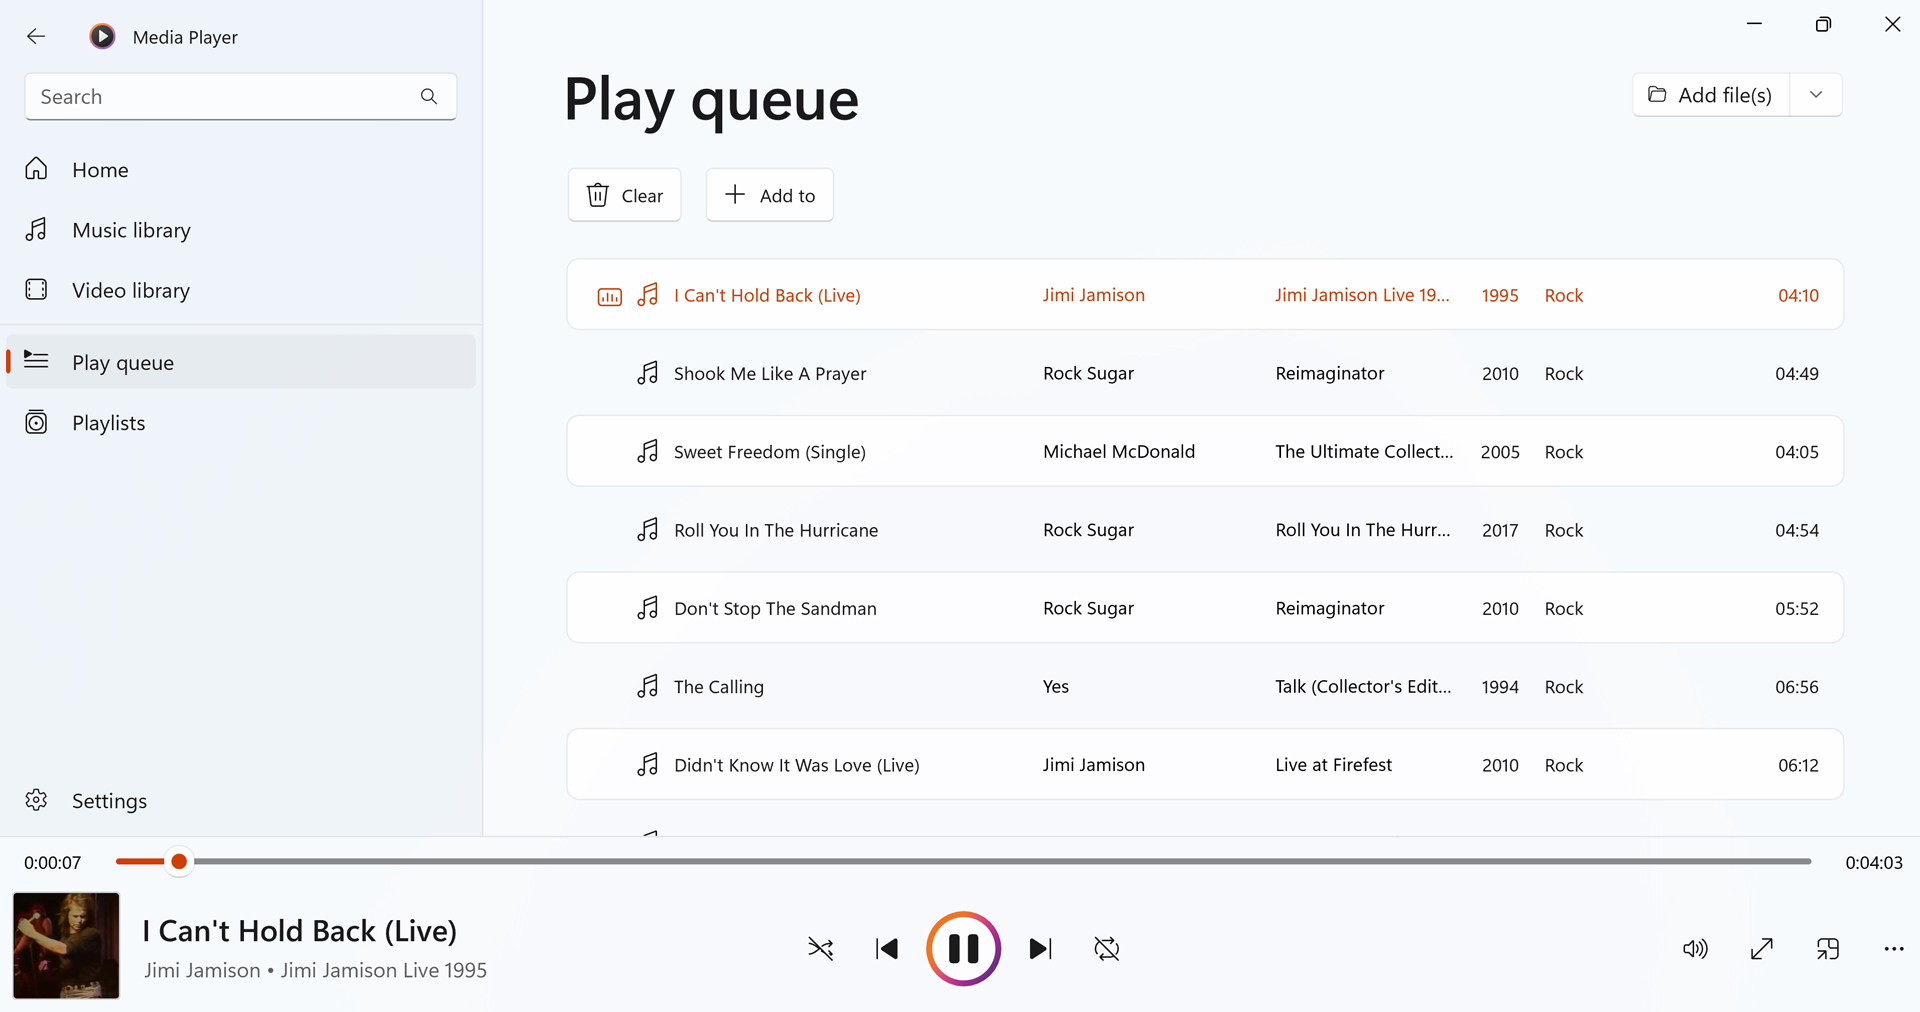
Play queue. This view helps you manage the play queue, the list of content that is currently playing.
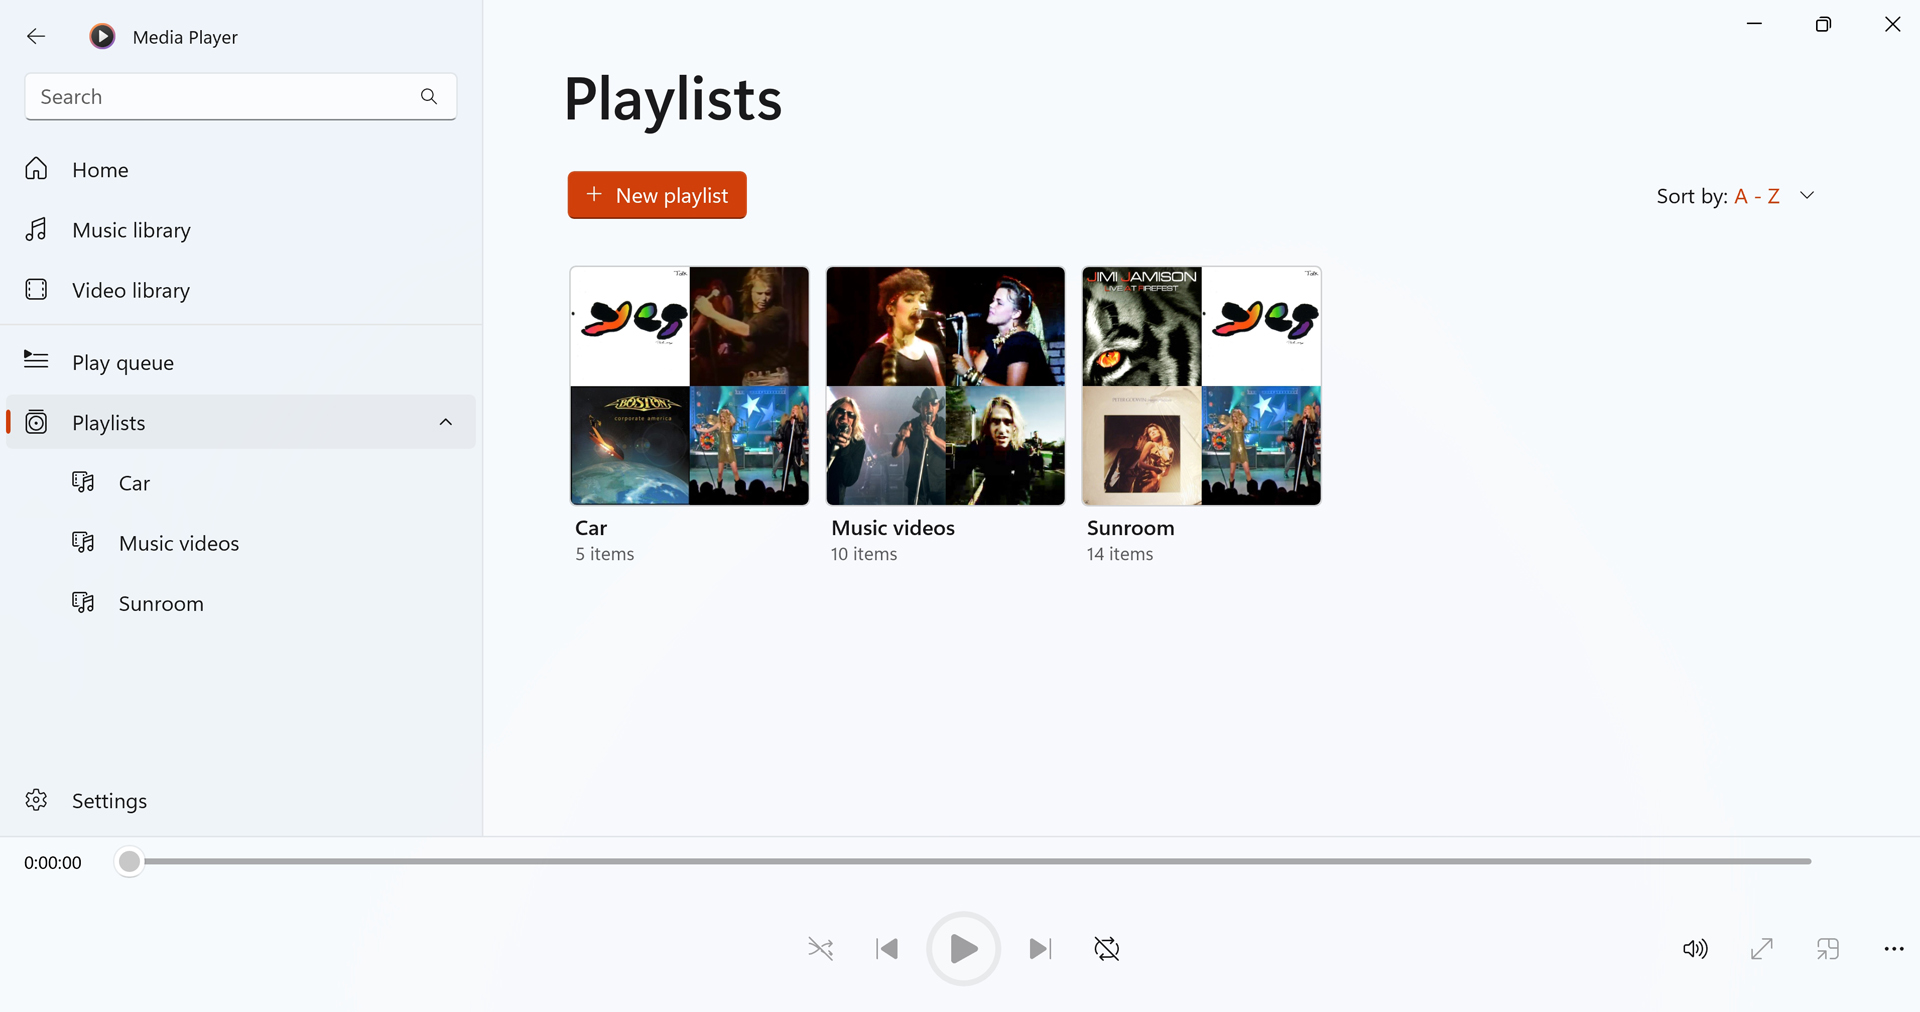
Playlists. Media Player lets you make and manage your own playlists of music and/or videos, lists of content that can be played together as a group, like the modern version of a mix tape. That is, they’re a way for you to organize songs you like, or that go together well.
Configure Media Player
Most Windows 11 users can safely ignore Media Player. But if you have locally stored music or video libraries, this app isn’t a bad solution for accessing that content. And you should spend a few minutes configuring the app, mostly so that it knows where to find your content.
To do so, click the “Settings” button at the bottom of the navigation bar. Media Player settings appears.
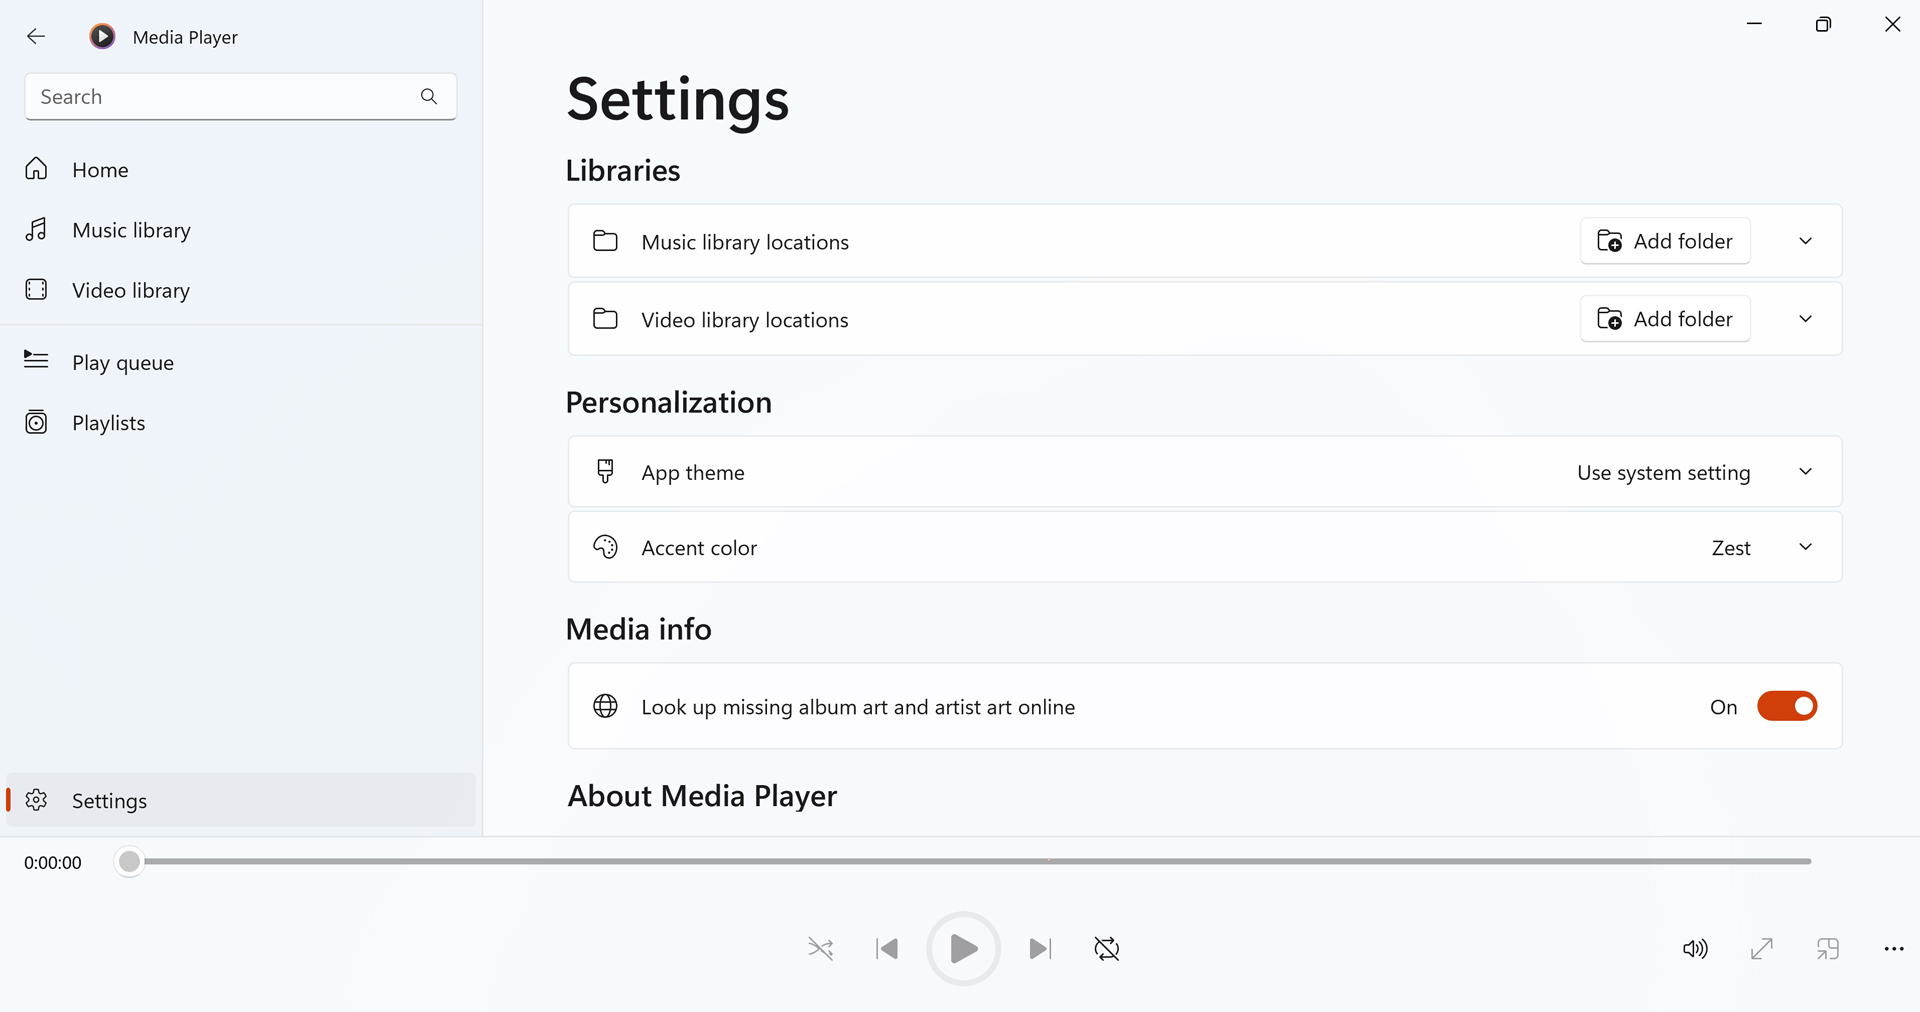
Here, you can make the following customizations.
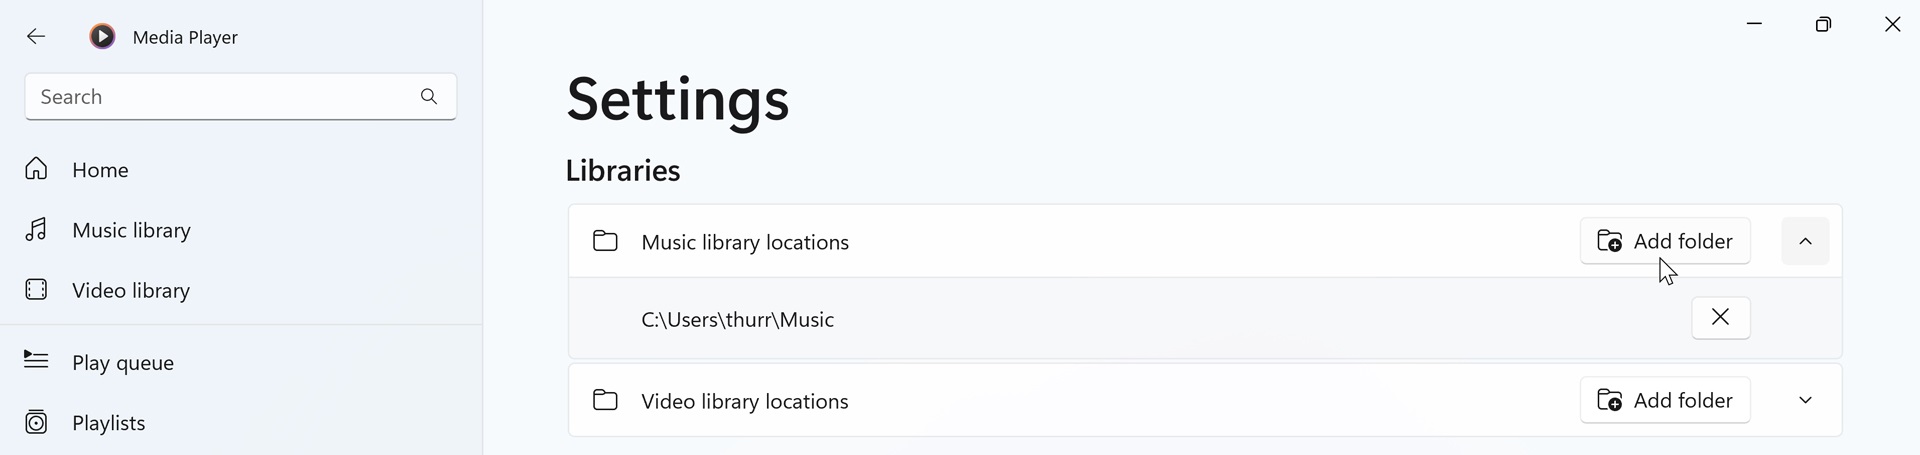
Music library locations. By default, Media Player is configured to look for music files in your Music folder (C:\Users[user-name]\Music). (You can see this by expanding the Music library locations item in settings.) You can remove existing locations or, by clicking the “Add folder” button, add new locations.
Video library locations. The Media Player video library works identically to the music library, except that the app looks for videos only in your Videos folder (C:\Users\user-name\Videos) by default. You can remove and add locations here as needed, of course.
App theme. Like many other Windows 11 apps, Media Player uses the system-wide color mode (Light theme or Dark theme) that you configure in the Settings app in Personalization > Colors. But you can change that here.
Accent color. Media Player is also unique among the built-in Windows 11 apps in that it uses its own fun accent color, “Zest,” by default. But you can configure the app to use the system accent color like other apps if you prefer.
Media info. By default, Media Player will connect to an online database to look up any missing album and artist art when possible. This is probably desirable for most, but if you would prefer it not to do so, you can disable this feature.
Manage your music library
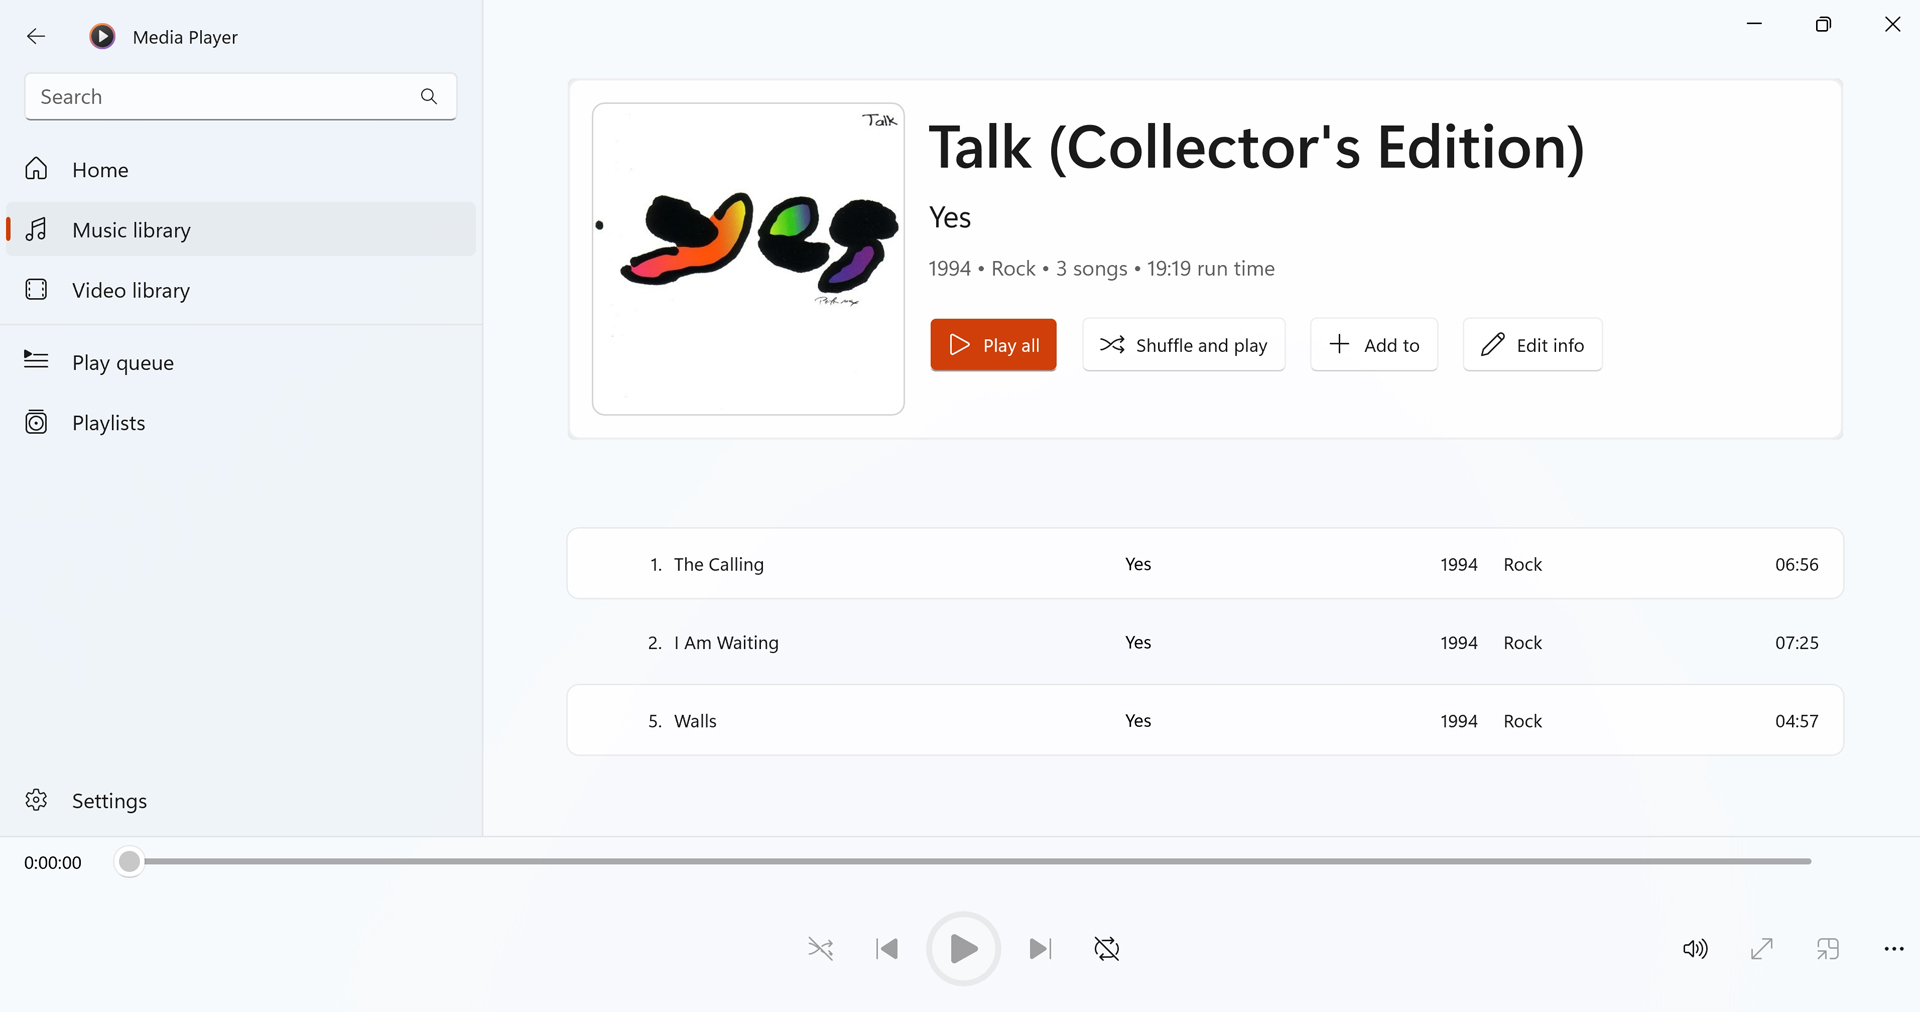
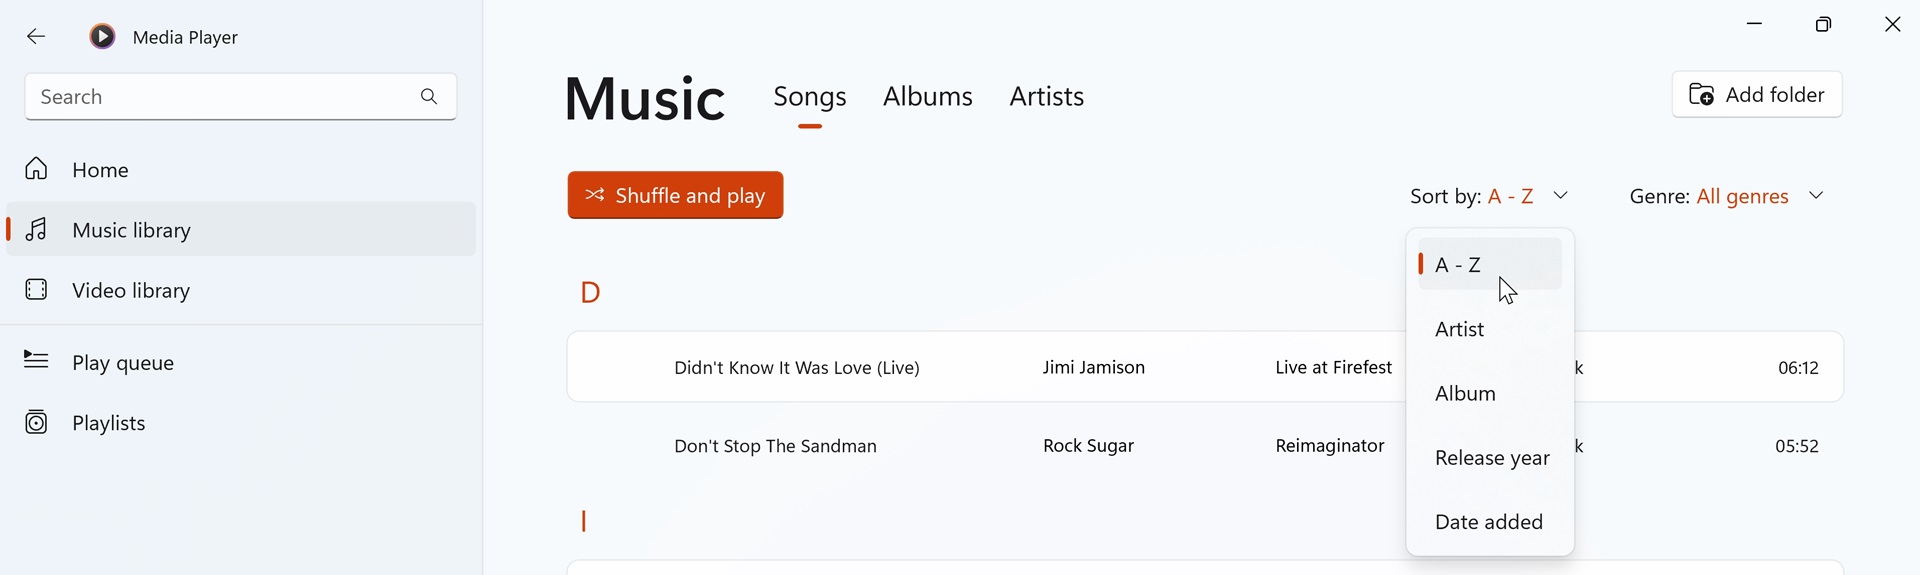
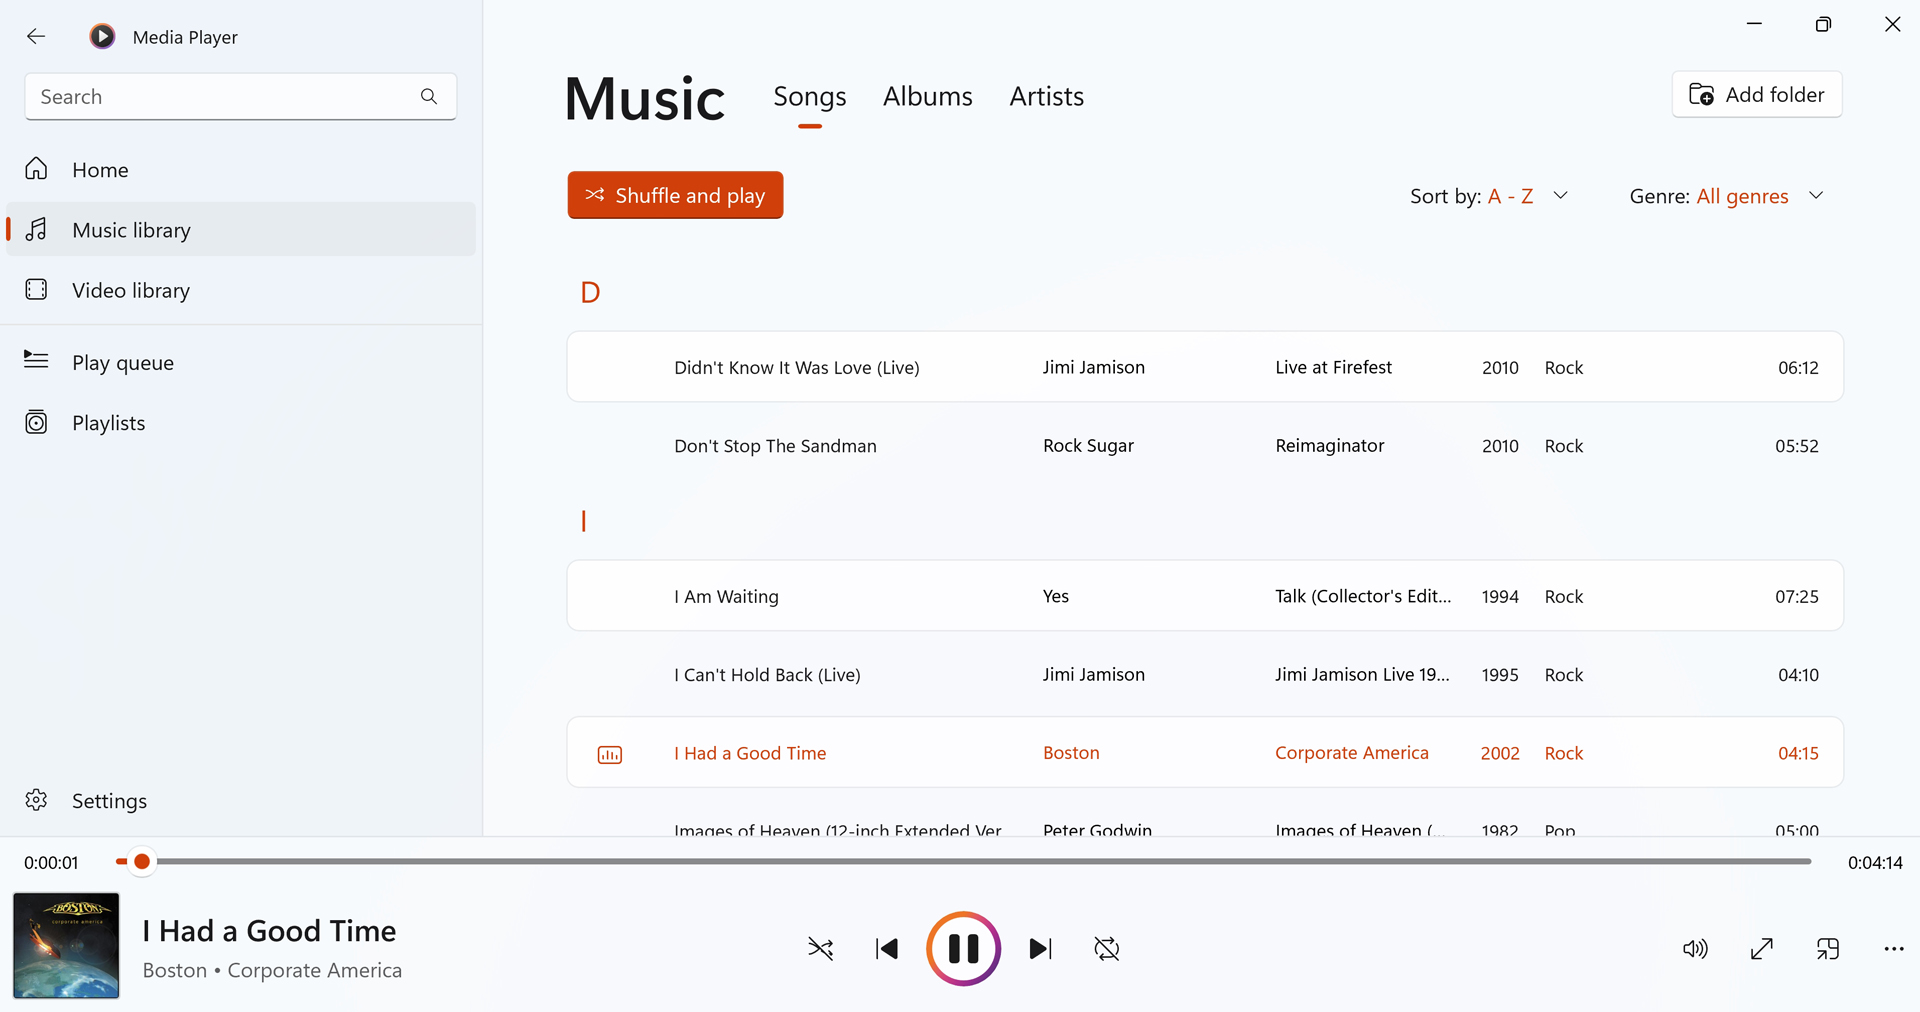
Once you’ve configured Media Player with the location(s) of your music files, you can use the app to manage that music. You do so via the Music library view, which provides you with three tabs, Songs, Albums, and Artists. Songs is the default view.
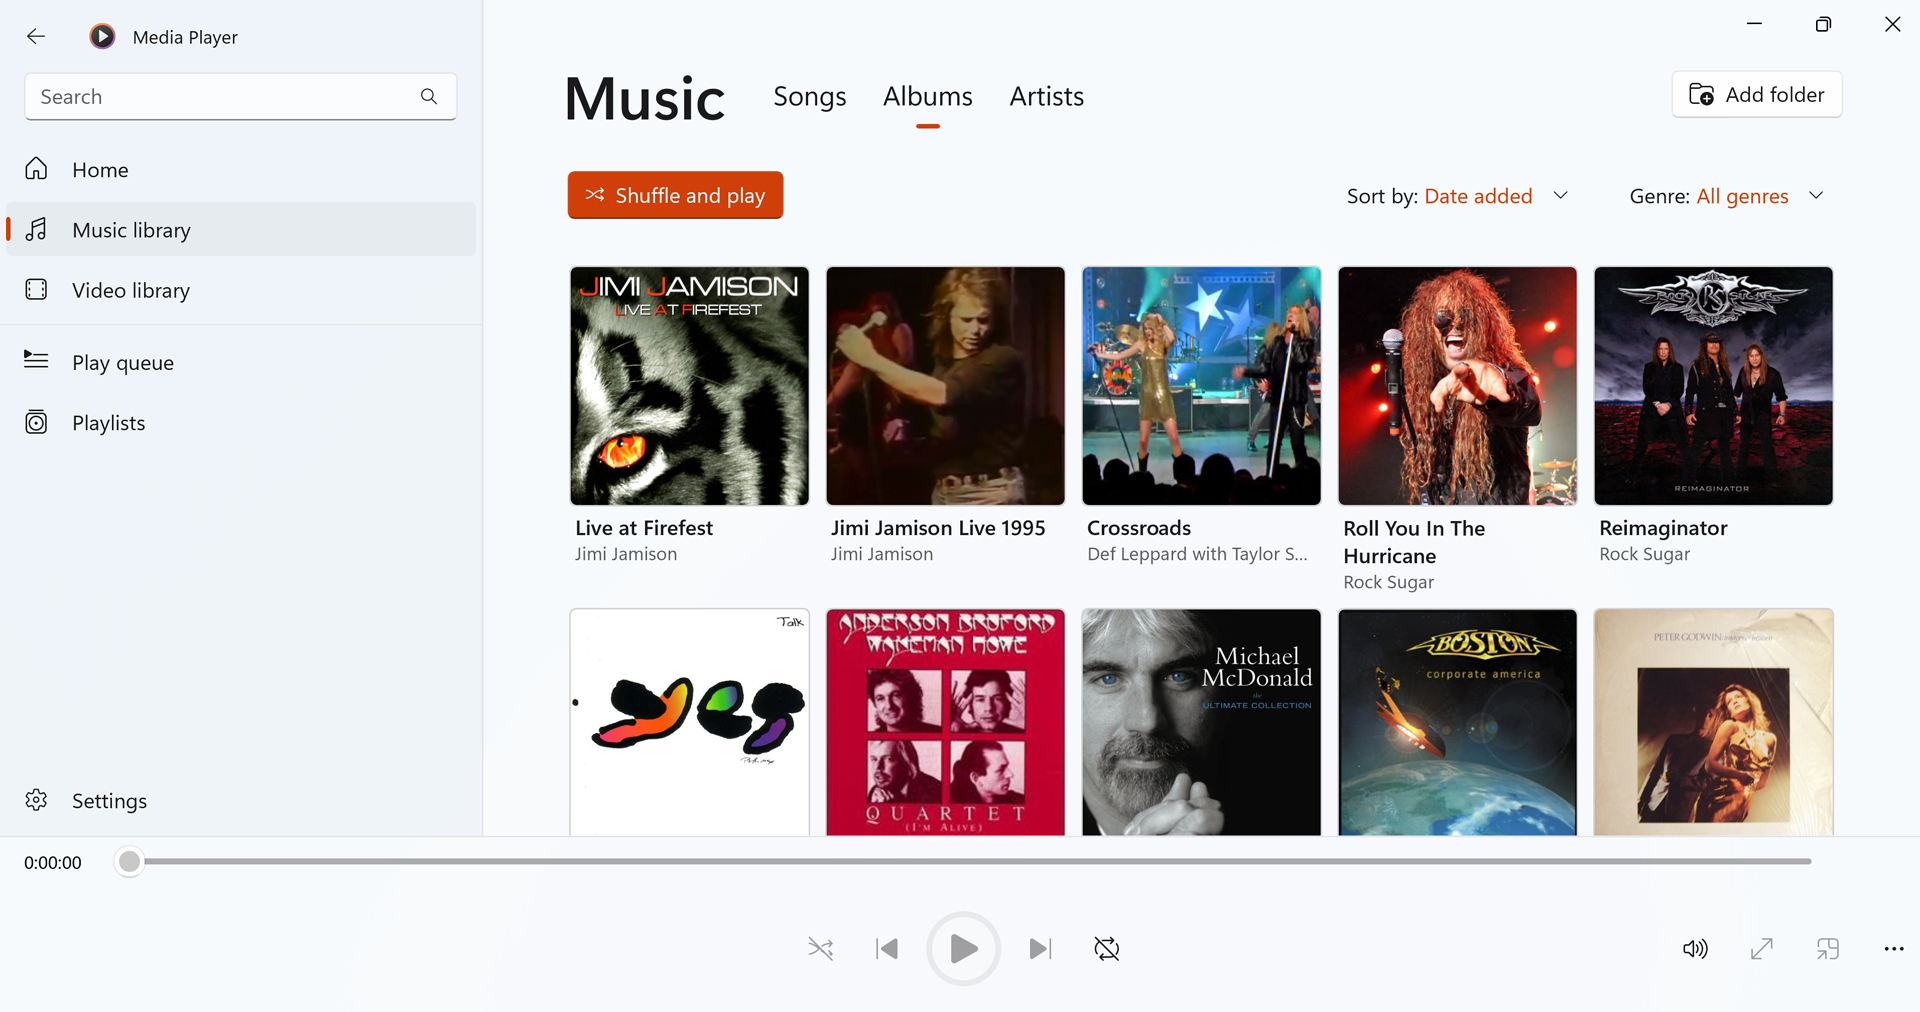
Though each tab view looks a bit different—Songs is presented in a list view, Albums are displayed with square album art, and Artists display in circles—each works similarly. But the Albums and Artists views let you view an item by selecting it.
The Albums and Artists views also offer a “More options” overlay (“…”) that provides a context menu of additional actions when selected.
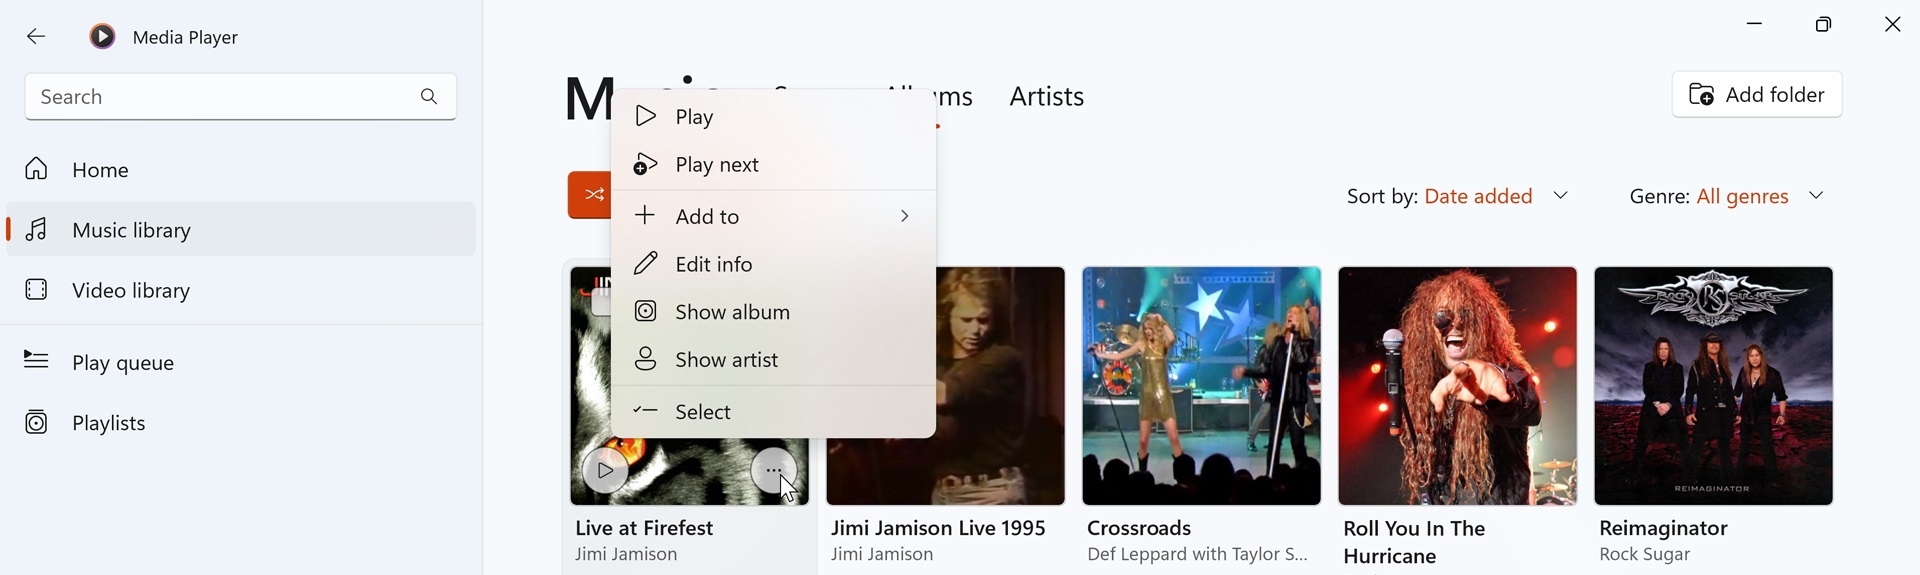
You can also multi-select items in each view: just click the “Select” overlay—a small rectangle that appears when you mouse-over any item—on one or more items to perform actions like “Play,” “Play Next,” or “Add to.”
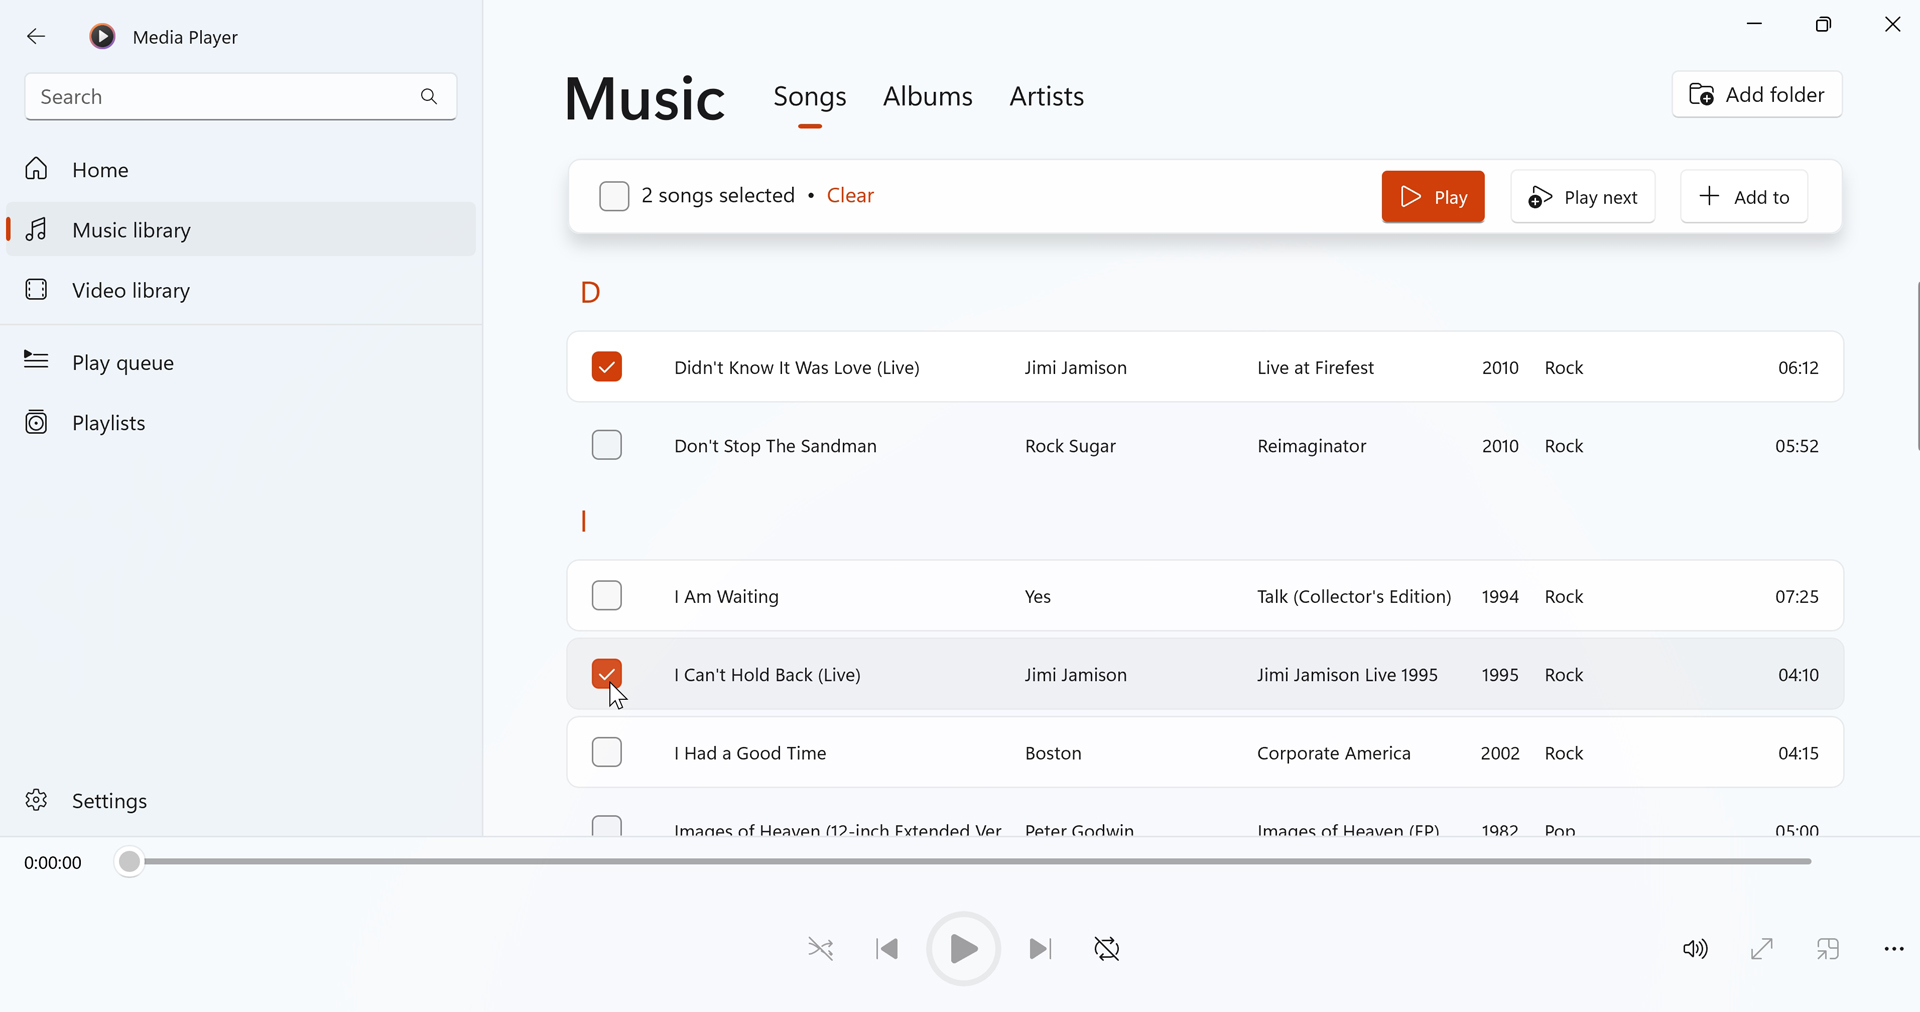
Each of these tabs also provides sorting and genre filters. So you should have no trouble seeing only the music you wish to see.
Control music playback
To play music, click the “Play” button associated with a song, album, or artist. The item will begin playing and the playback controls at the bottom will display album art if possible and allow you to access its various features. From here, you can do the following:
Access the playback controls. Media Player offers all the expected playback controls in the middle bottom of the window, including Play/Pause, Next, Previous, Shuffle, and Repeat. You’ll also find a scrubber for moving to a specific point in the content you’re enjoying and a Volume button.
Access the play queue. To see the list of songs that are currently playing, select “Play queue” in the navigation pane. Here, you can add and remove songs, rearrange songs with drag and drop, manually switch to a different song, and clear the queue.

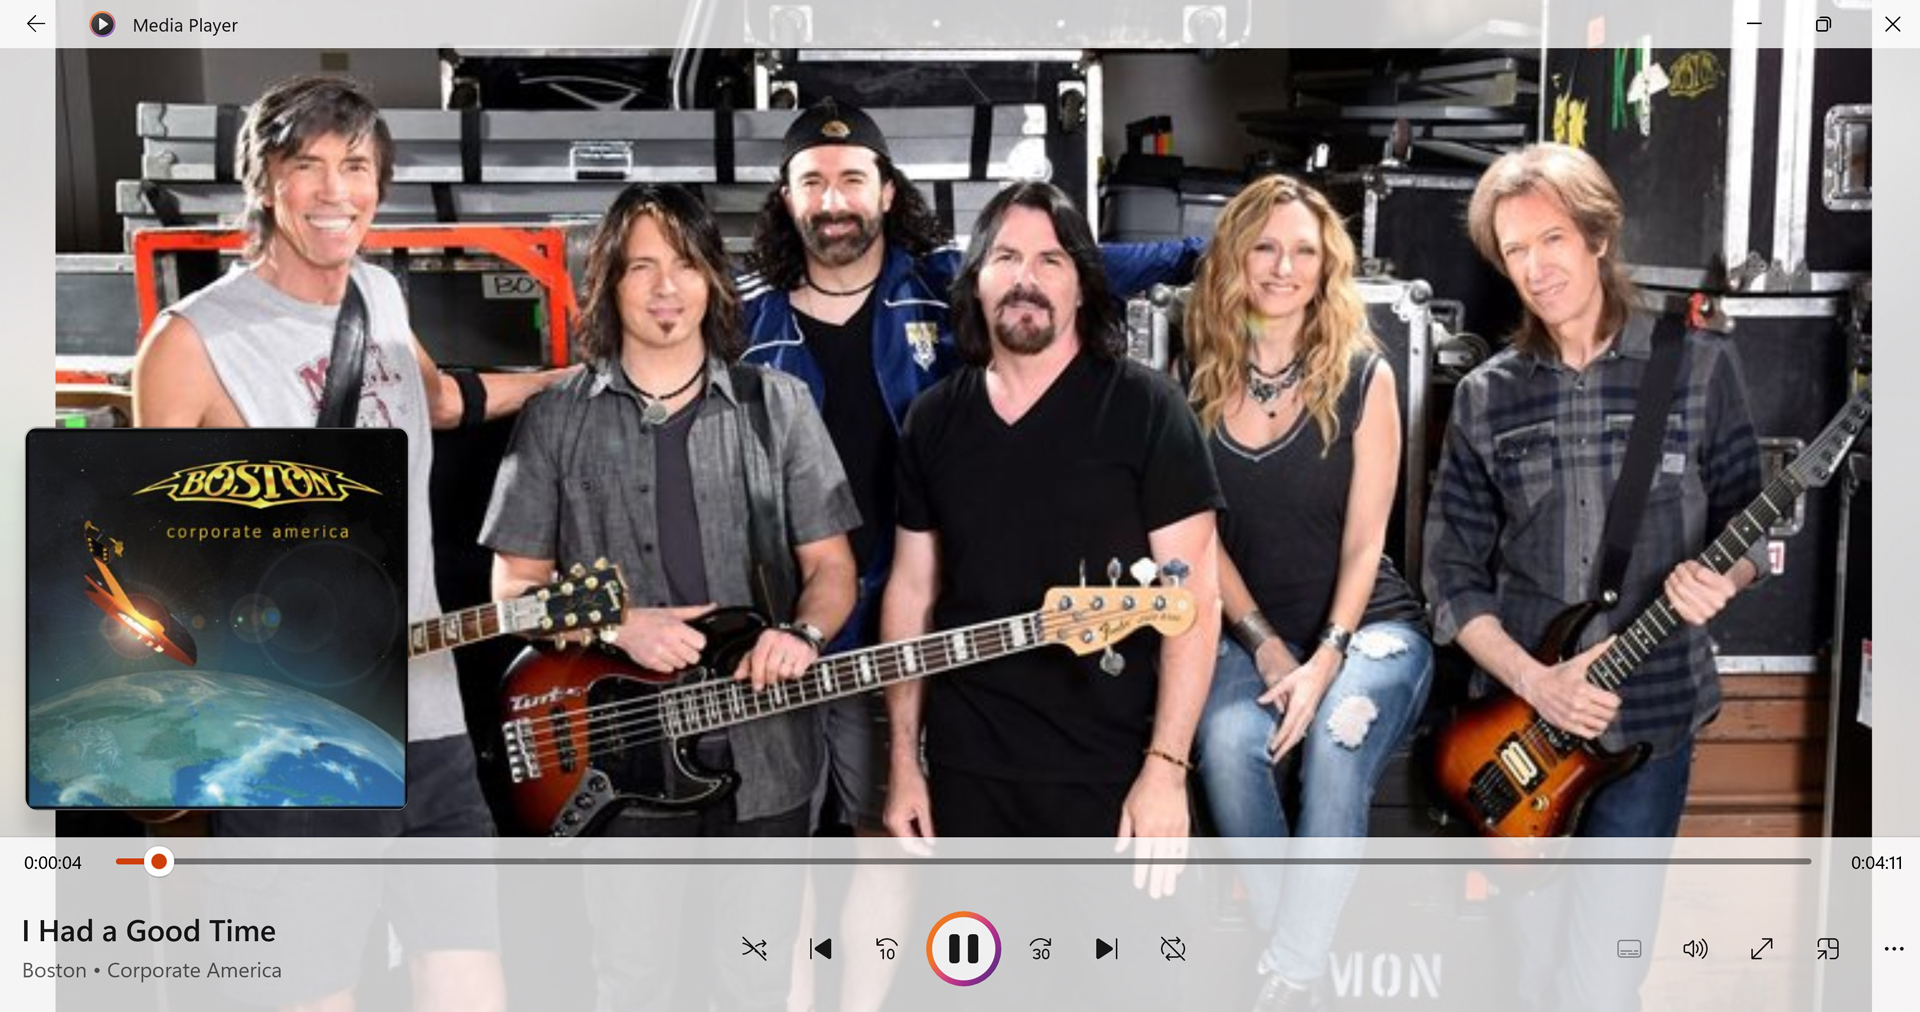
Display Now playing. Like its predecessors, Media Player offers a nice Now playing experience with artist imagery: to access it, select the album art in the Now playing thumbnail in the lower left corner of the app window. You can also put the player in full-screen mode using the “Full screen” button in the bottom right.
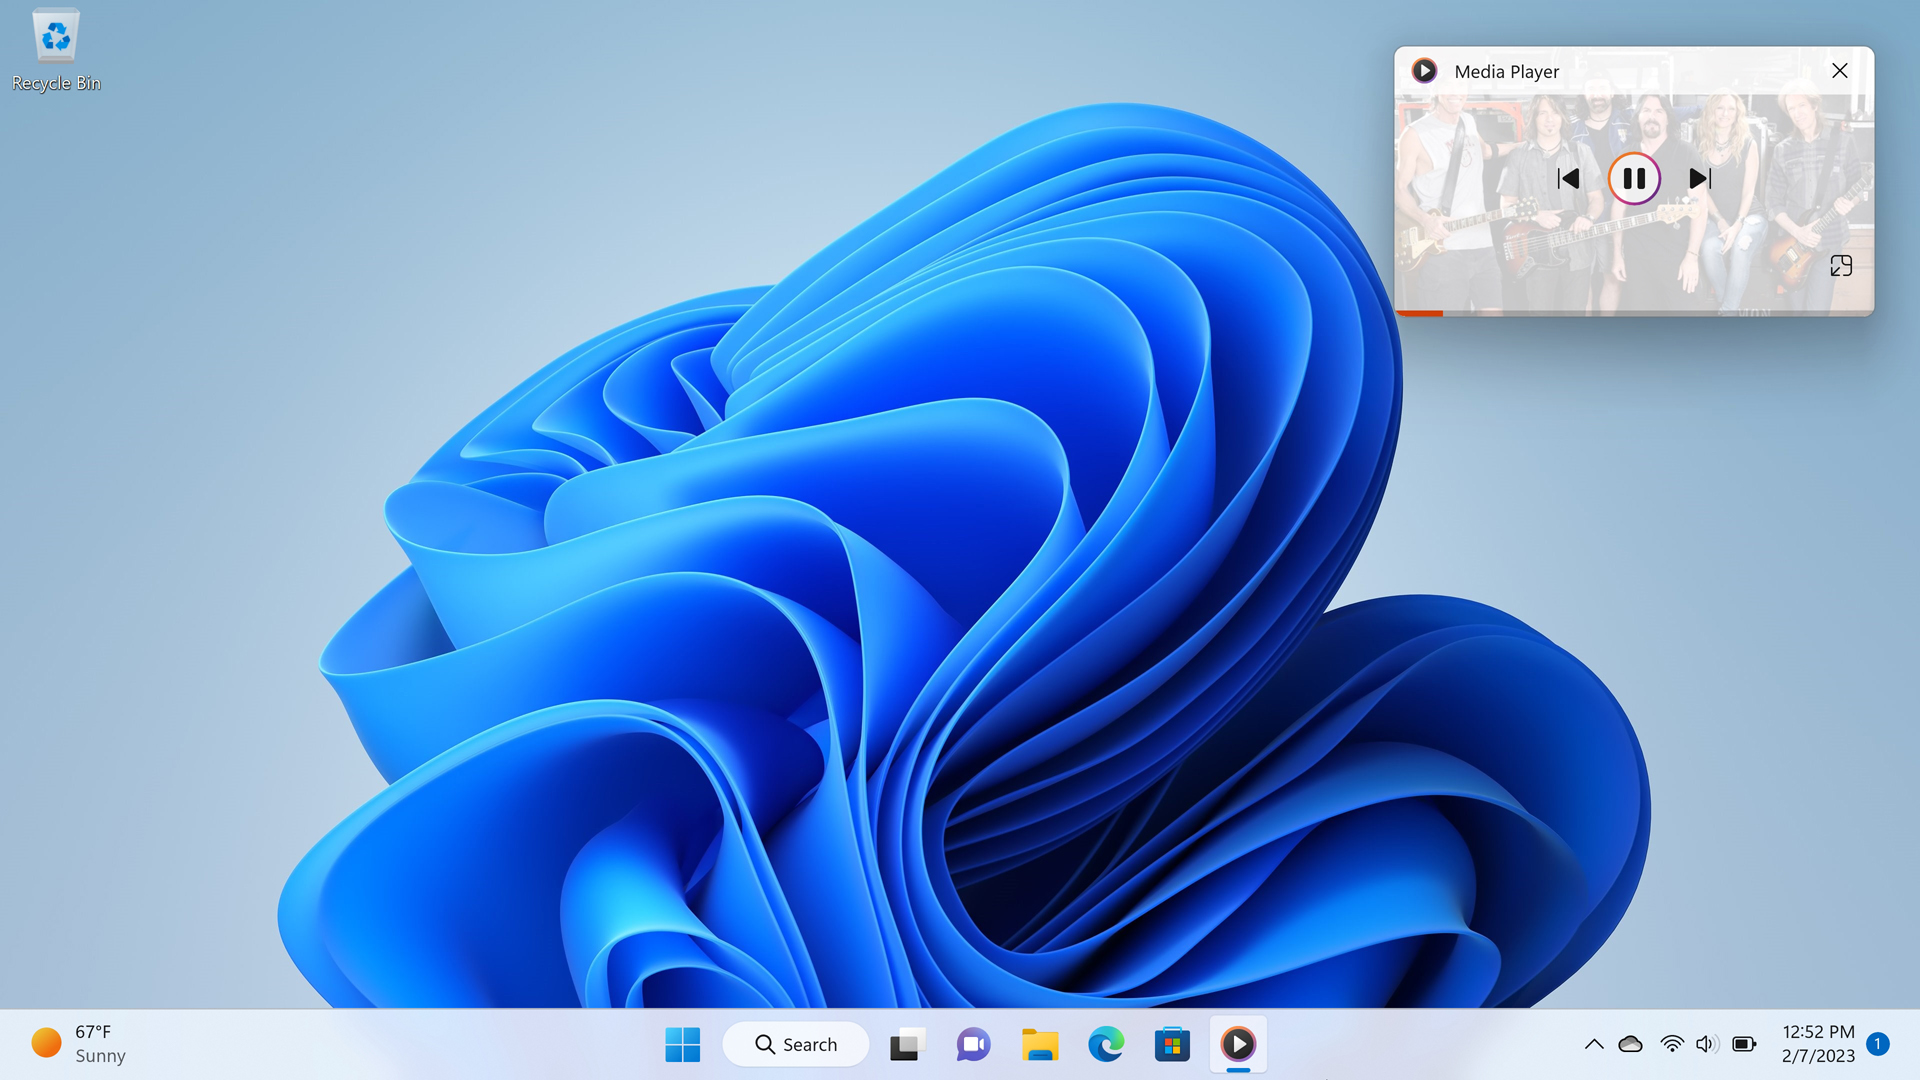
Use the Media Player mini-player. If you use Media Player to start some music playing so you can go do other work, you may want to try the mini-player, which shrinks the app down to a small window that will always stay on top of other windows and provide basic playback controls when moused over. Click the “Mini player” button in the lower right of the app window to access this mode.
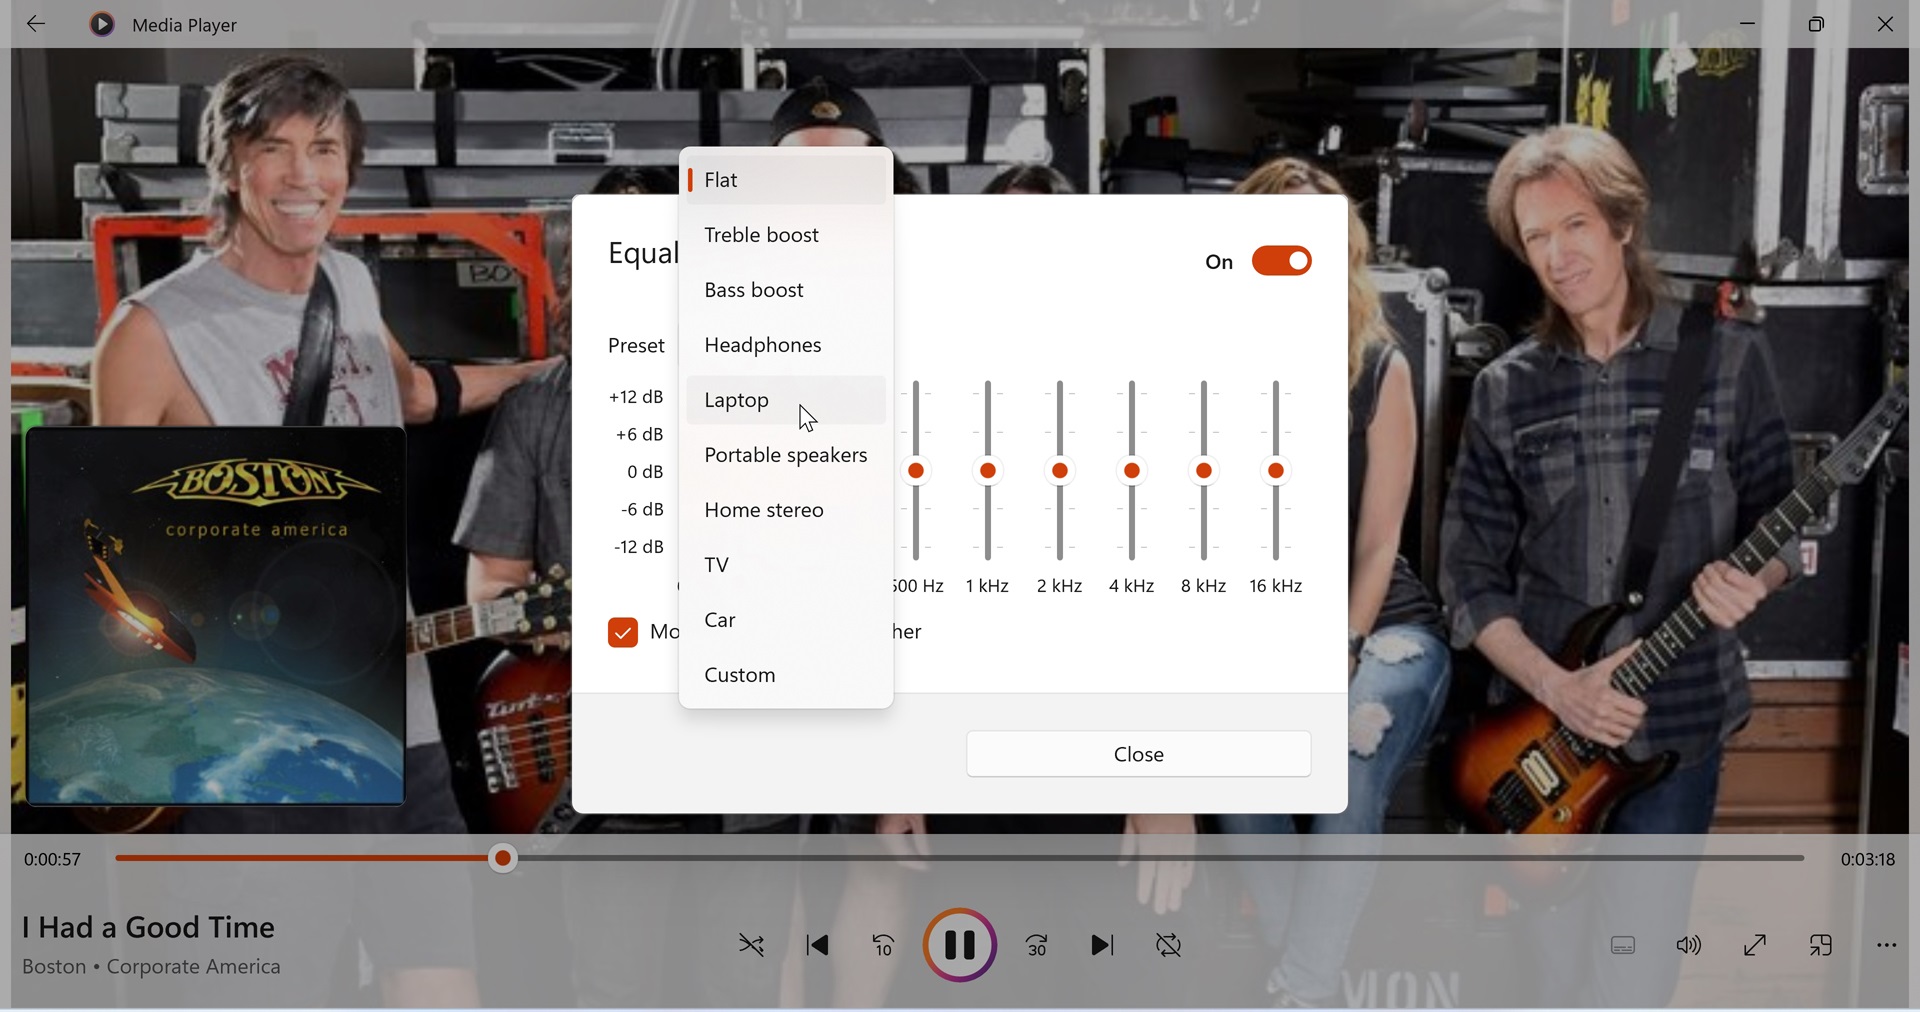
Control sound quality with the equalizer. Media Player includes a software-based equalizer that helps you customize how music playback sounds. It’s disabled by default and a bit hard to find: Click “More options” (“…”) in the lower-right and then choose “Equalizer.” Here, you customize a wide range of sound frequencies instead of just bass and treble, or choose between a variety of presets.
Change the playback speed. Also available from the “More options” menu is a set of controls that let you speed up or slow down the playback speed. This isn’t super-useful for music, but it can be useful for spoken-word content.
Cast the content to another device. Media Player can “cast” (stream) content to Miracast-compatible displays and other devices. This might be useful if you want to play music through a smart TV or stereo system and happen to have a compatible product. Just select “More options” > “Cast to device.”
Manage your videos
Once you’ve configured Media Player with the location(s) of your videos, you can use the app to manage that content. You do so via the Video library view, which provides you with two tabs, All videos and Video folders. Each view displays thumbnails for the contained videos.
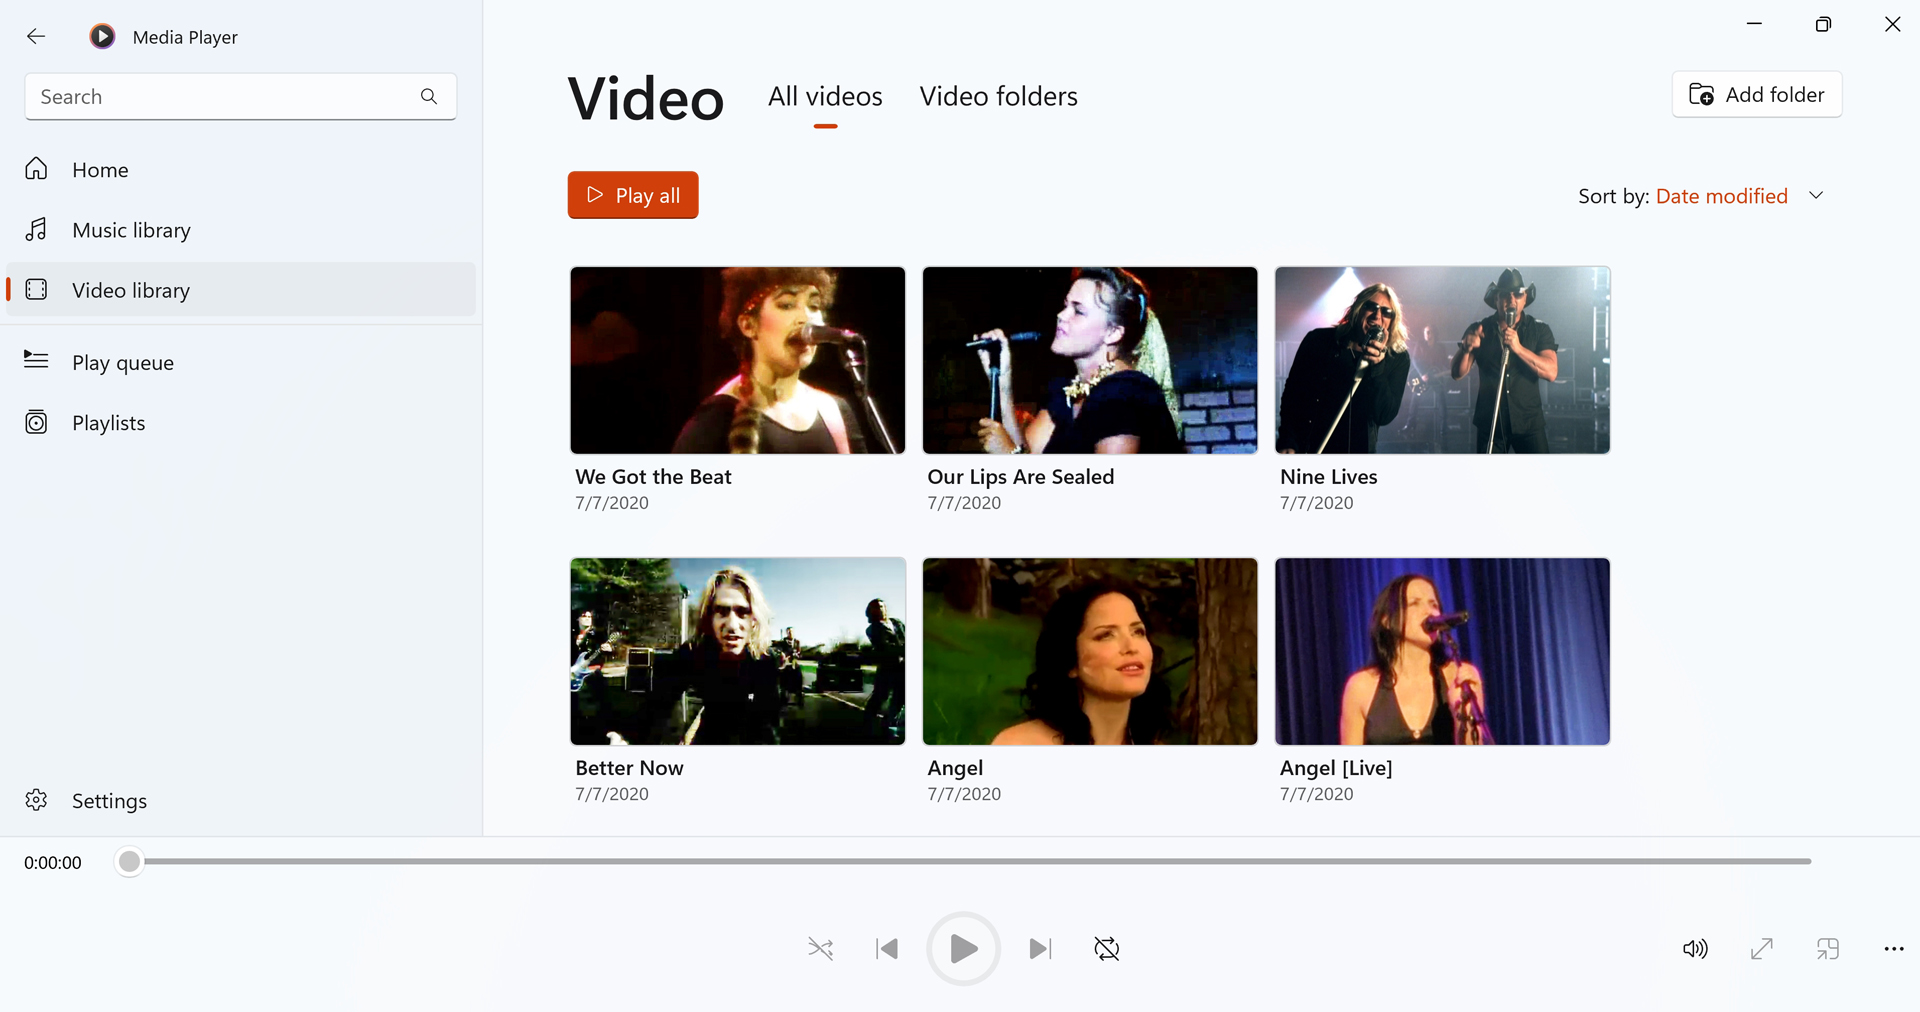
The All videos video commingles all of the videos from each of the locations you’ve configured into a single view that’s sorted according to the “Sort by” filter (which can be set to alphabetical or by date modified).
Video folders, meanwhile, separates the videos into groups representing each configured folder.
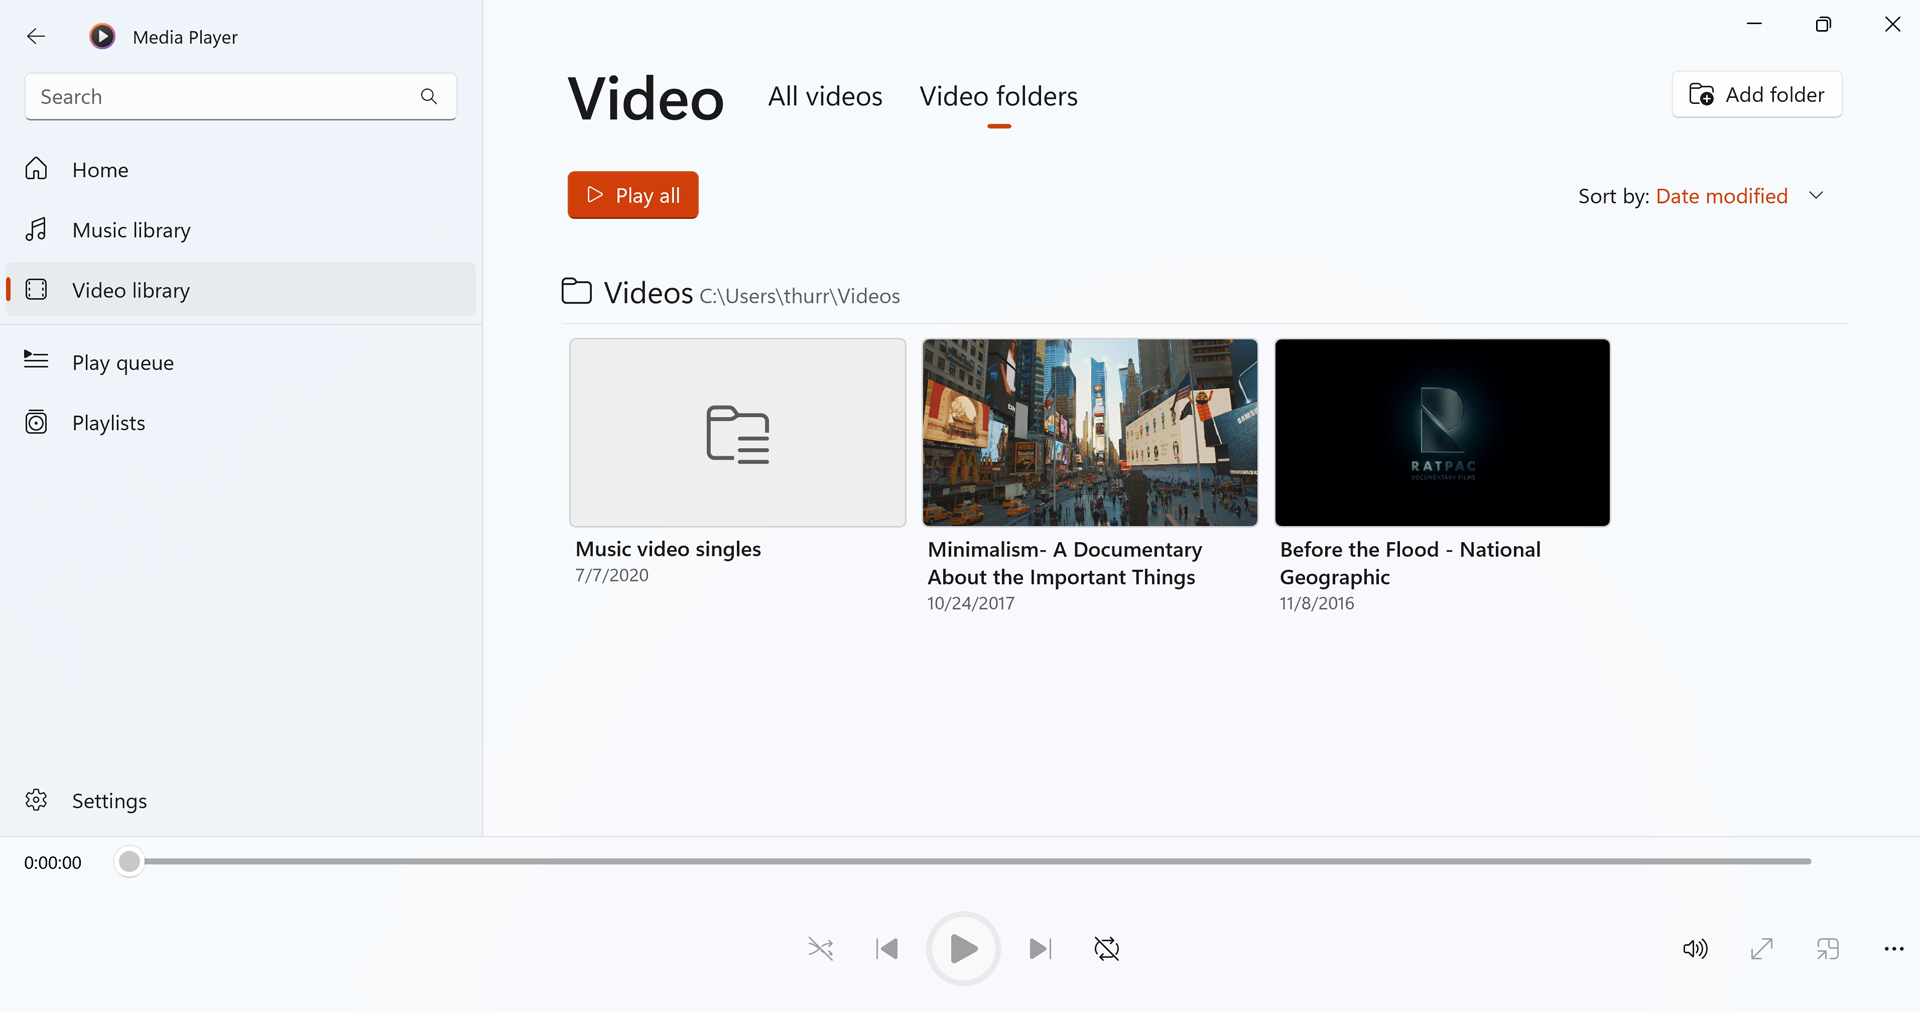
If a configured folder has its own sub-folders, you can navigate further into each from the Video folders view as well.
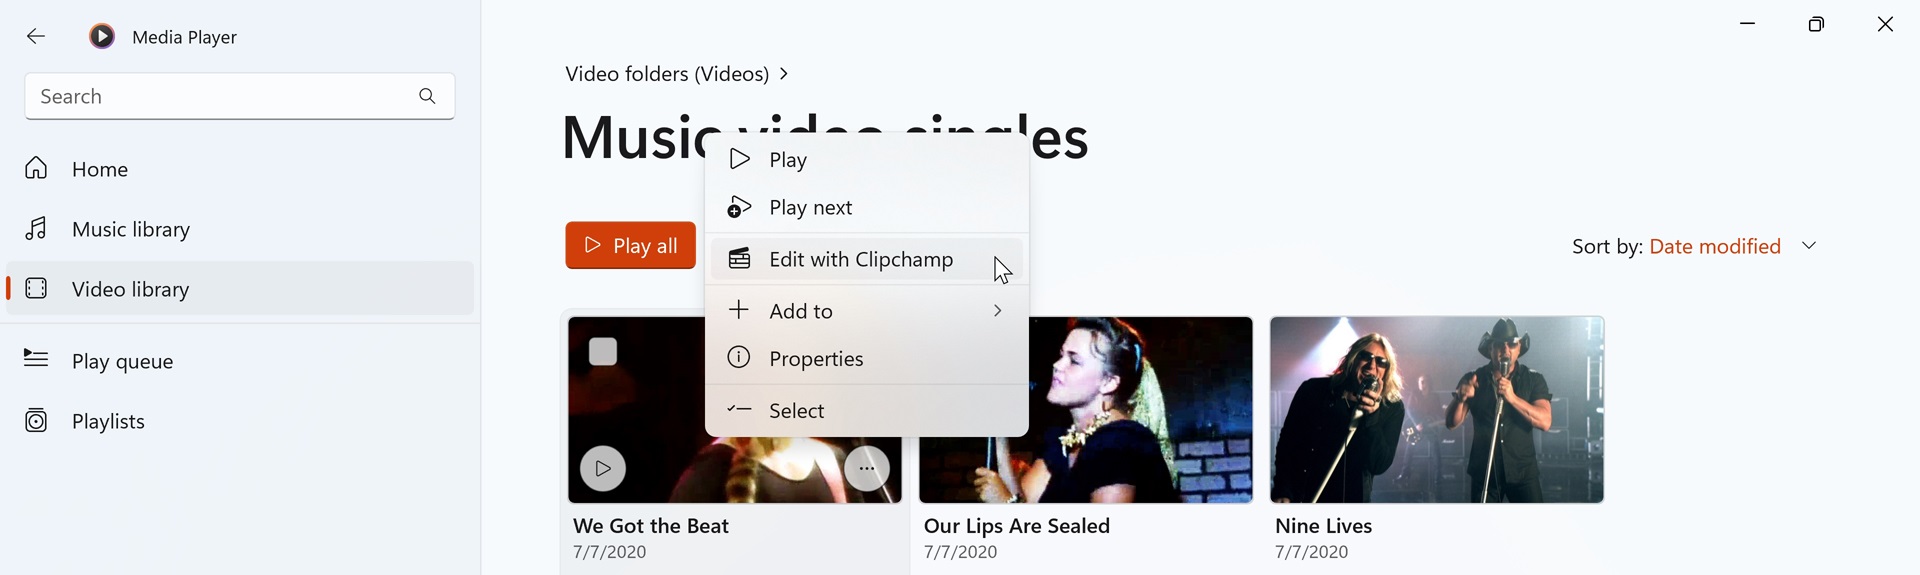
Video management works much like music management: you can access a “More options” item on each thumbnail to display a list of actions applicable to videos and you can multi-select videos to perform a more limited set of actions against teh group.
While playing a video, Media Player provides a few different video-related options in the playback controls.
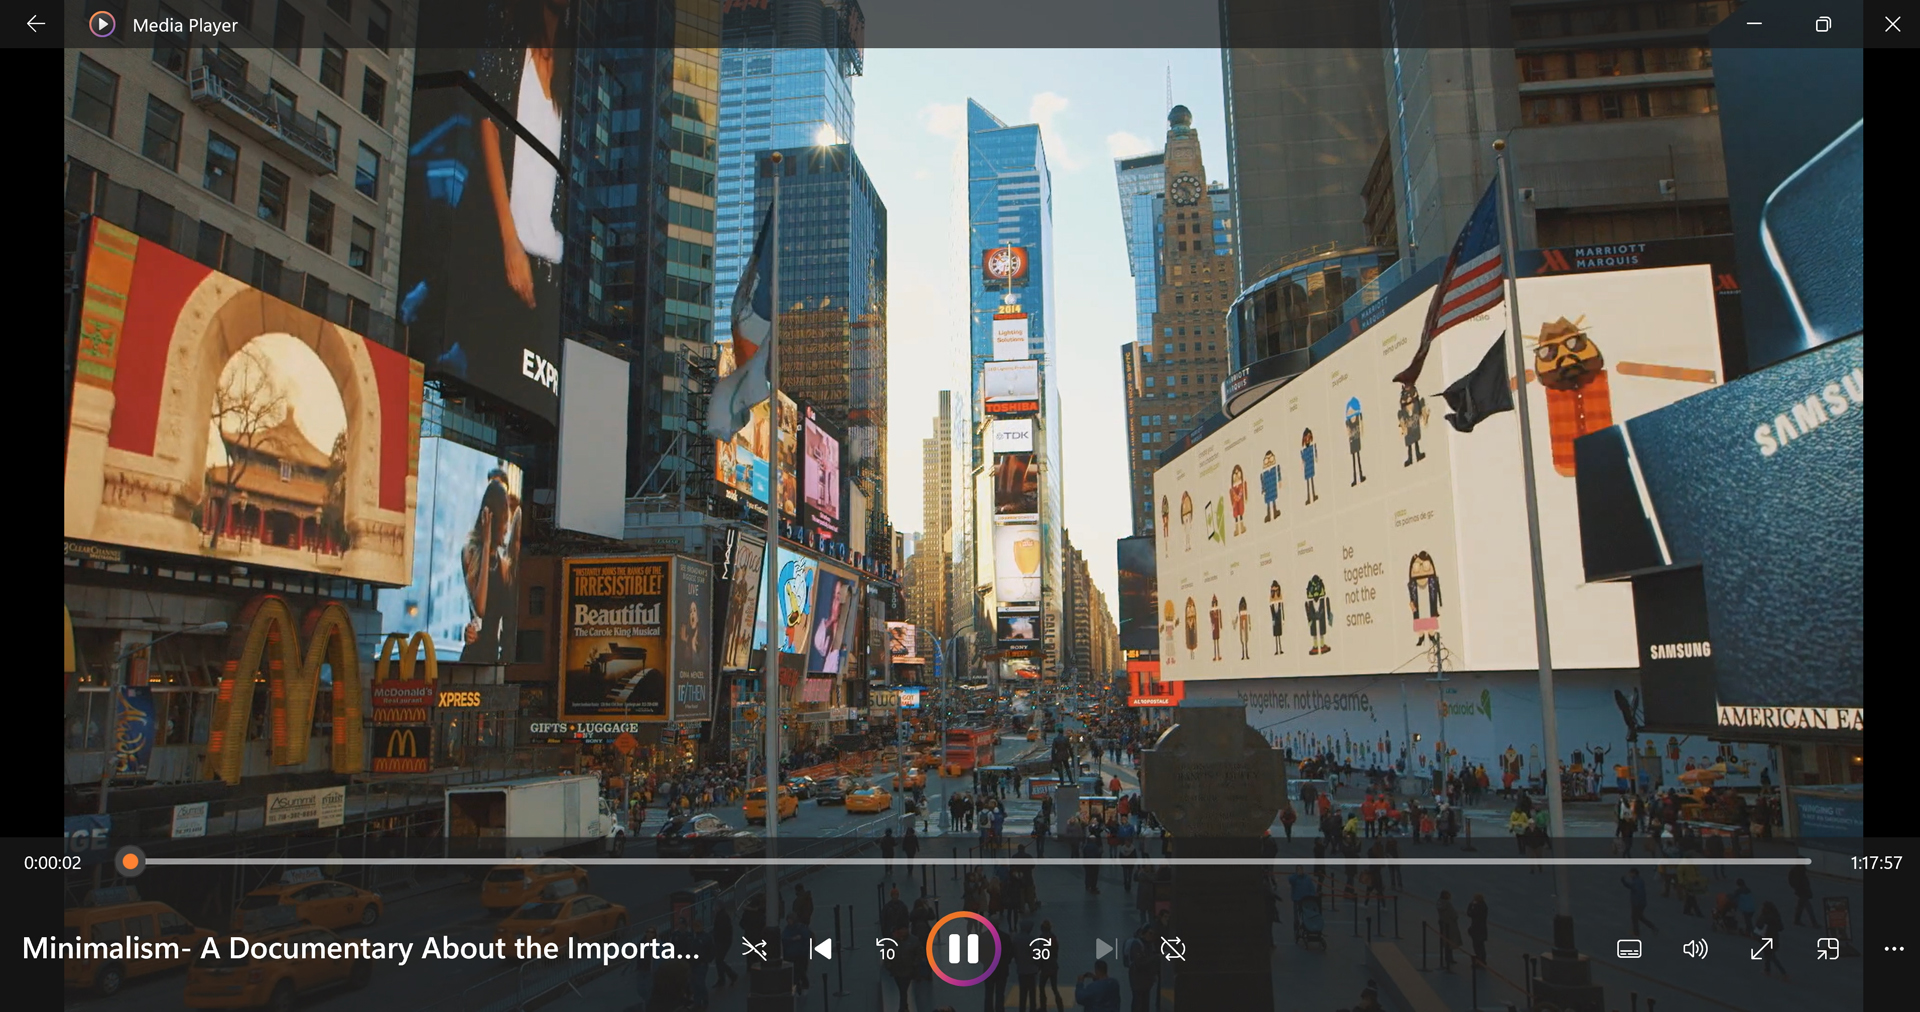
These include:
Languages and subtitles. Click this button to choose between any subtitles, language tracks, and/or audio options (like stereo and surround), if available.
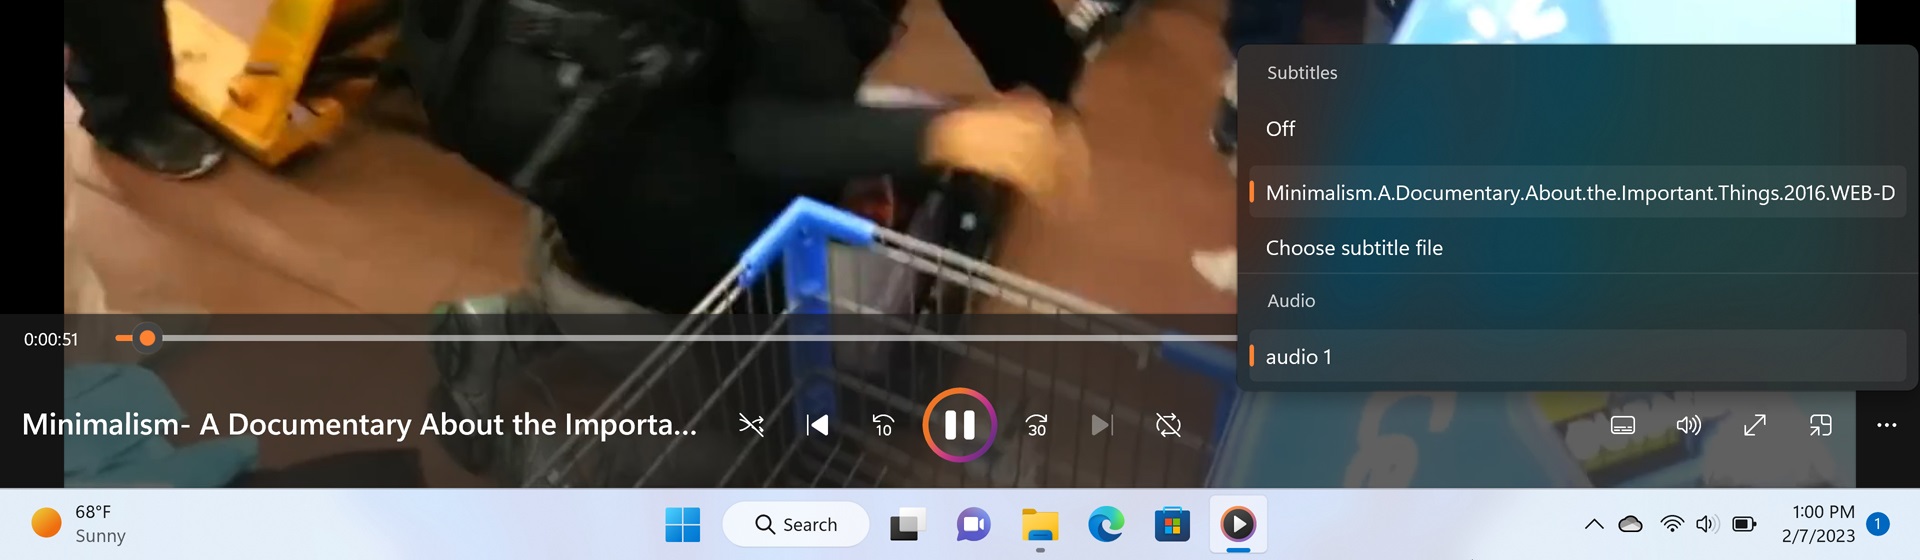
More options. This item displays a menu that includes the two video-related options described above.
During playback, the play queue is replaced with just that one video. And a thumbnail of the video will appear in the Now playing thumbnail in the lower left corner of the app window if you return to the library management interface.
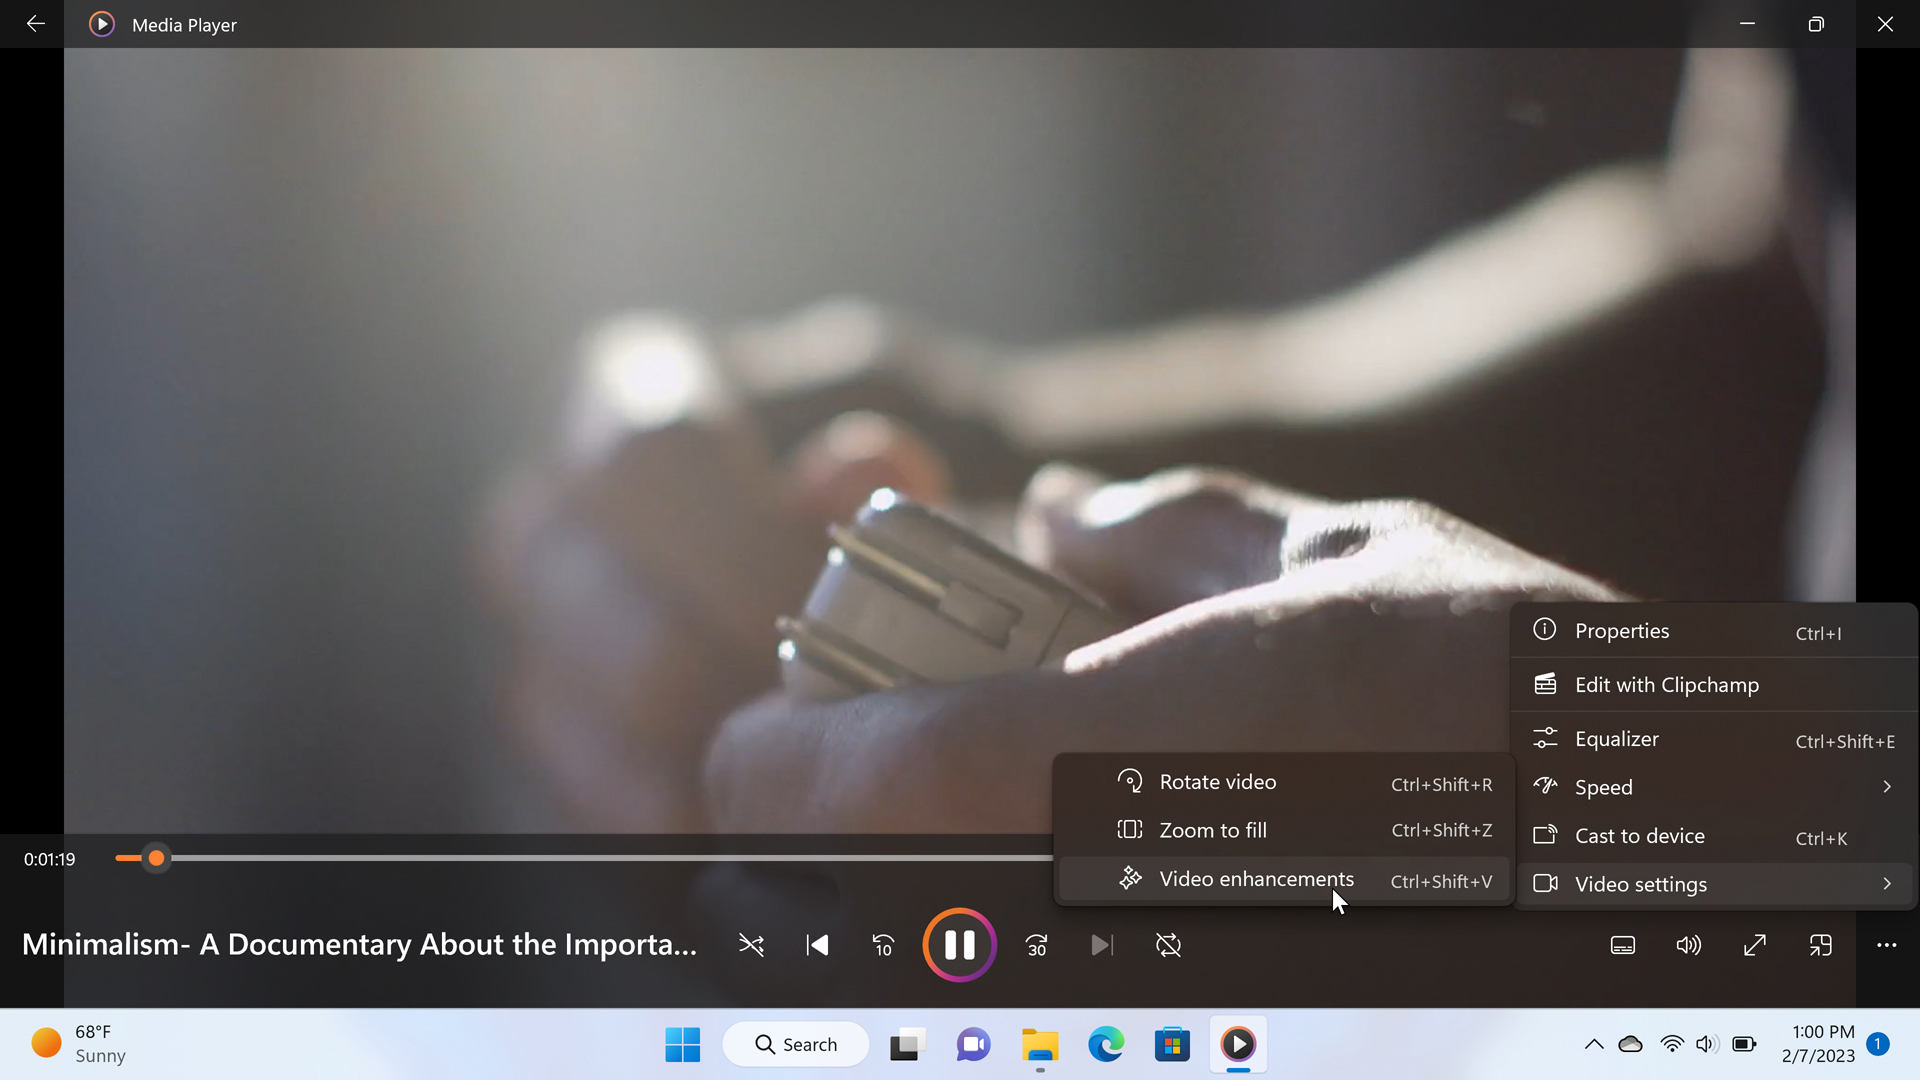
The “More options” menu in the lower-right of the app window provides many of the same actions described above, but there are some video-specific actions too. These include:
Edit with Clipchamp. Click this item to open the current video in the Clipchamp video editor.
Video settings. This item provides three sub-menu items: Rotate video, Zoom to fill, and Video enhancements, the latter of which is an optional feature you can enable to customize the brightness, contrast, color saturation, and hue of the playing video.
Create and manage playlists
Media Player also lets you make and manage your own playlists via the Playlists area at the bottom of the navigation bar. Playlists are lists of songs, videos, or songs and videos that can be played together as a group, like the modern version of a mix tape. That is, they’re a way for you to organize songs and videos you like, or that go together well.
To create a playlist, navigate to Playlists and click the “Create a new playlist” button. Or, select one or more songs or videos, and select “Add to” > “New playlist.” Each playlist you create will appear under Playlists in the navigation bar.
From there, you can add more content to the playlist (“Add to” > “playlist name“).
To manage a playlist, select it under Playlists in the navigation bar.
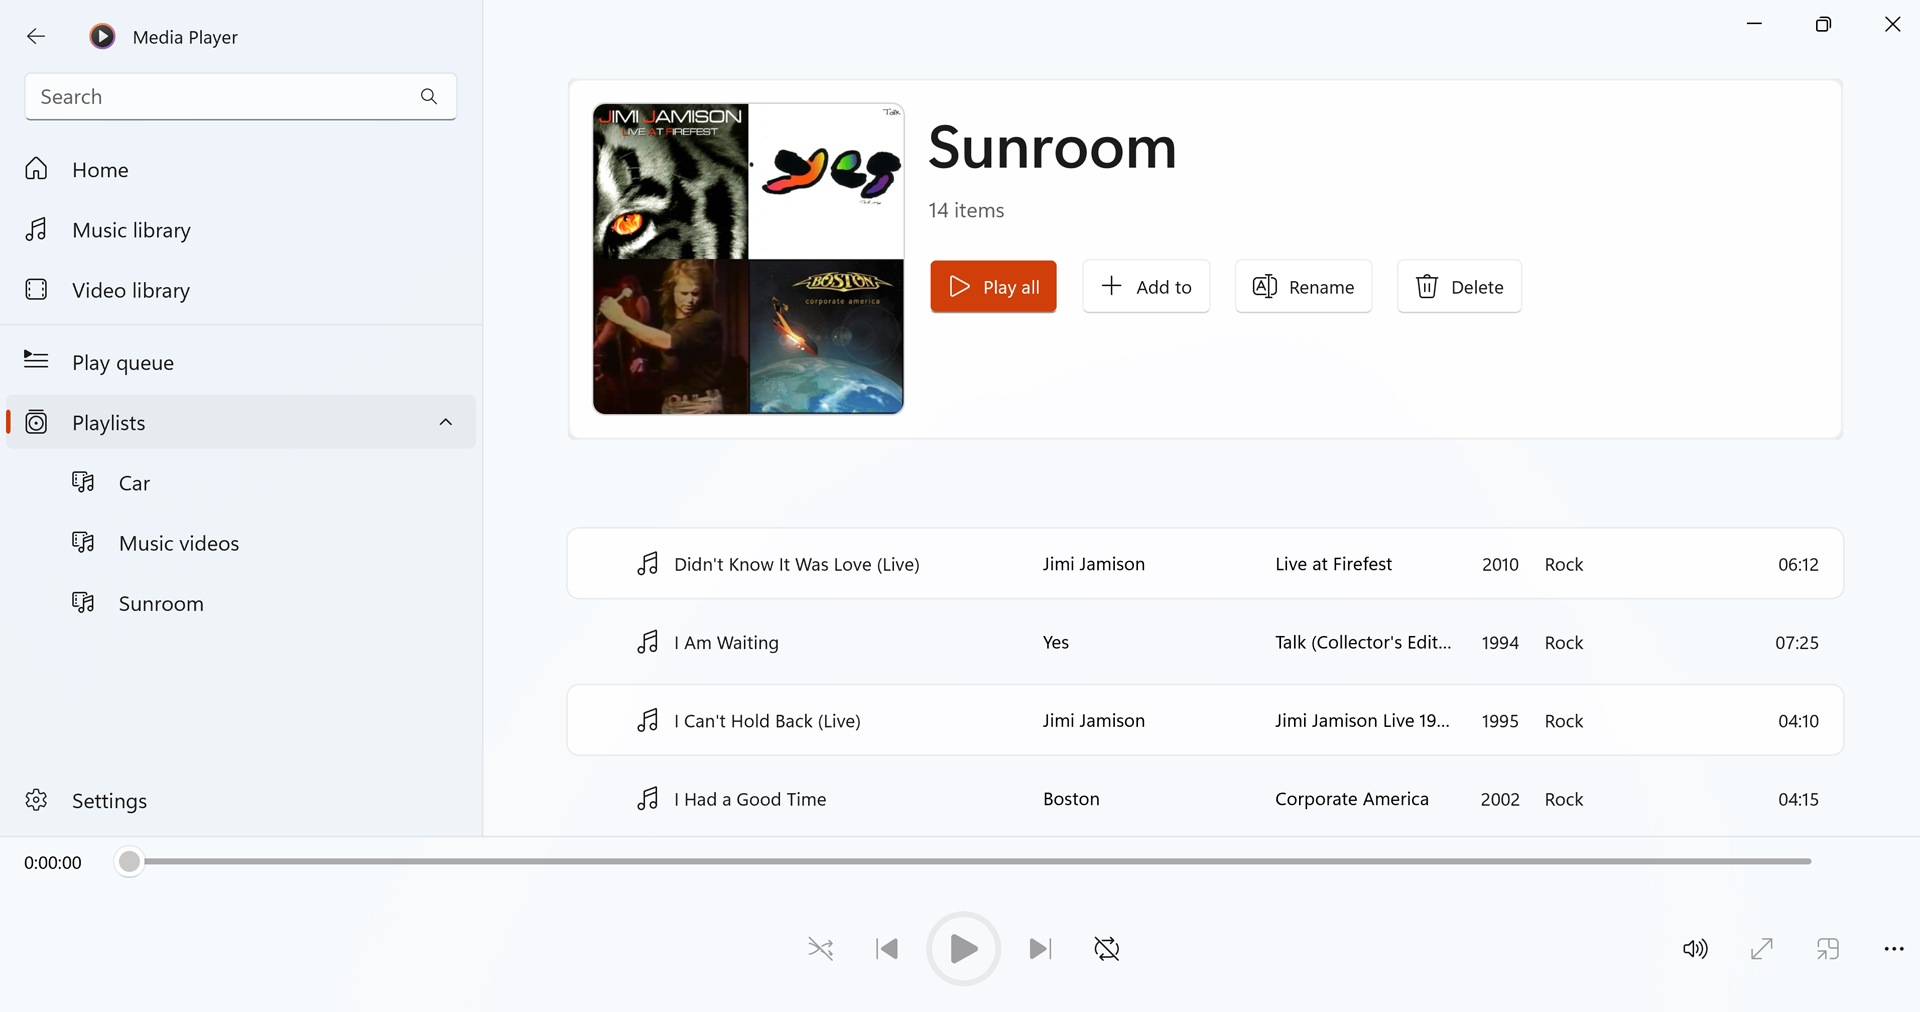
Here, you can reorder the content with drag and drop, remove content (right-click and choose “Remove”), or rename or delete the playlist.
Like songs, albums, artists, videos, or folders of videos, you can of course play a playlist in order or shuffled. That, after all, is the point.

Gain unlimited access to Premium articles.
With technology shaping our everyday lives, how could we not dig deeper?
Thurrott Premium delivers an honest and thorough perspective about the technologies we use and rely on everyday. Discover deeper content as a Premium member.