Terminal
- Paul Thurrott
- Mar 29, 2023
-
3
The Terminal app is the default command-line experience in Windows 11, replacing the Windows Console Host from previous versions. Command-line applications–sometimes called console applications–provide text-based interfaces that harken back to the earliest days of personal computing.
Terminal is even more powerful than its predecessor in part because it can host multiple command-line environments, each with its own set of commands–text-based applications that perform specific tasks and return text-based results–and syntax. And Windows 11 includes two of these environments, Command Prompt, which is based on the original versions of MS-DOS, and Windows PowerShell, an object-oriented task automation solution that was originally created for IT pros and system administrators.
Furthermore, you can add more command-line environments to Windows 11, and if you do so, they can be accessed in Terminal alongside Command Prompt and Windows PowerShell. For example, when you install the Windows Subsystem for Linux as described in the Linux chapter, you can also install one or more Linux distributions, each with its own command-line environment.
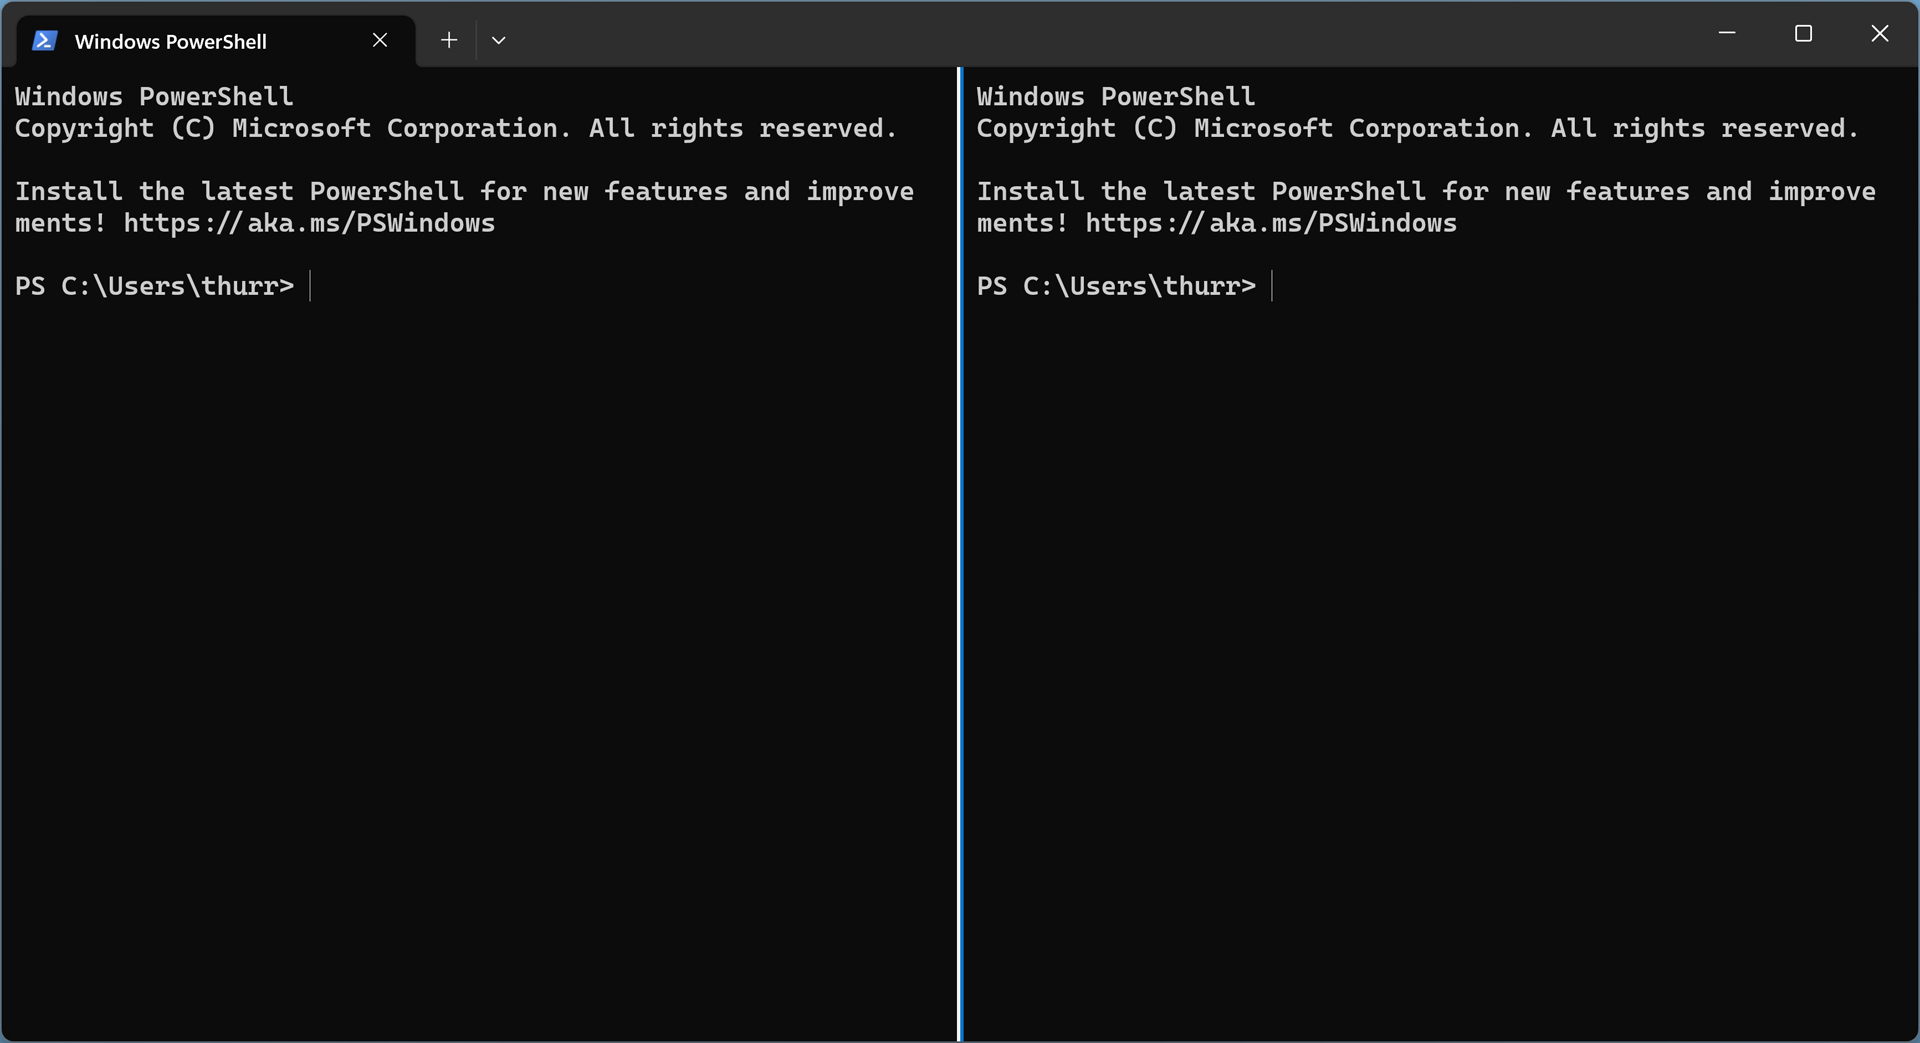
Terminal also supports multiple profiles, each representing an individual command-line environment, and you can access multiple profiles simultaneously, each in its own tab–similar to how Microsoft Edge and other web browsers work–or side-by-side in panes. Terminal also has the notion of a default profile that determines which of the available command-line environments appears each time you first launch the app. Windows PowerShell is configured as the default profile, but you can change that if you’d like, as described below.
Get to know Terminal
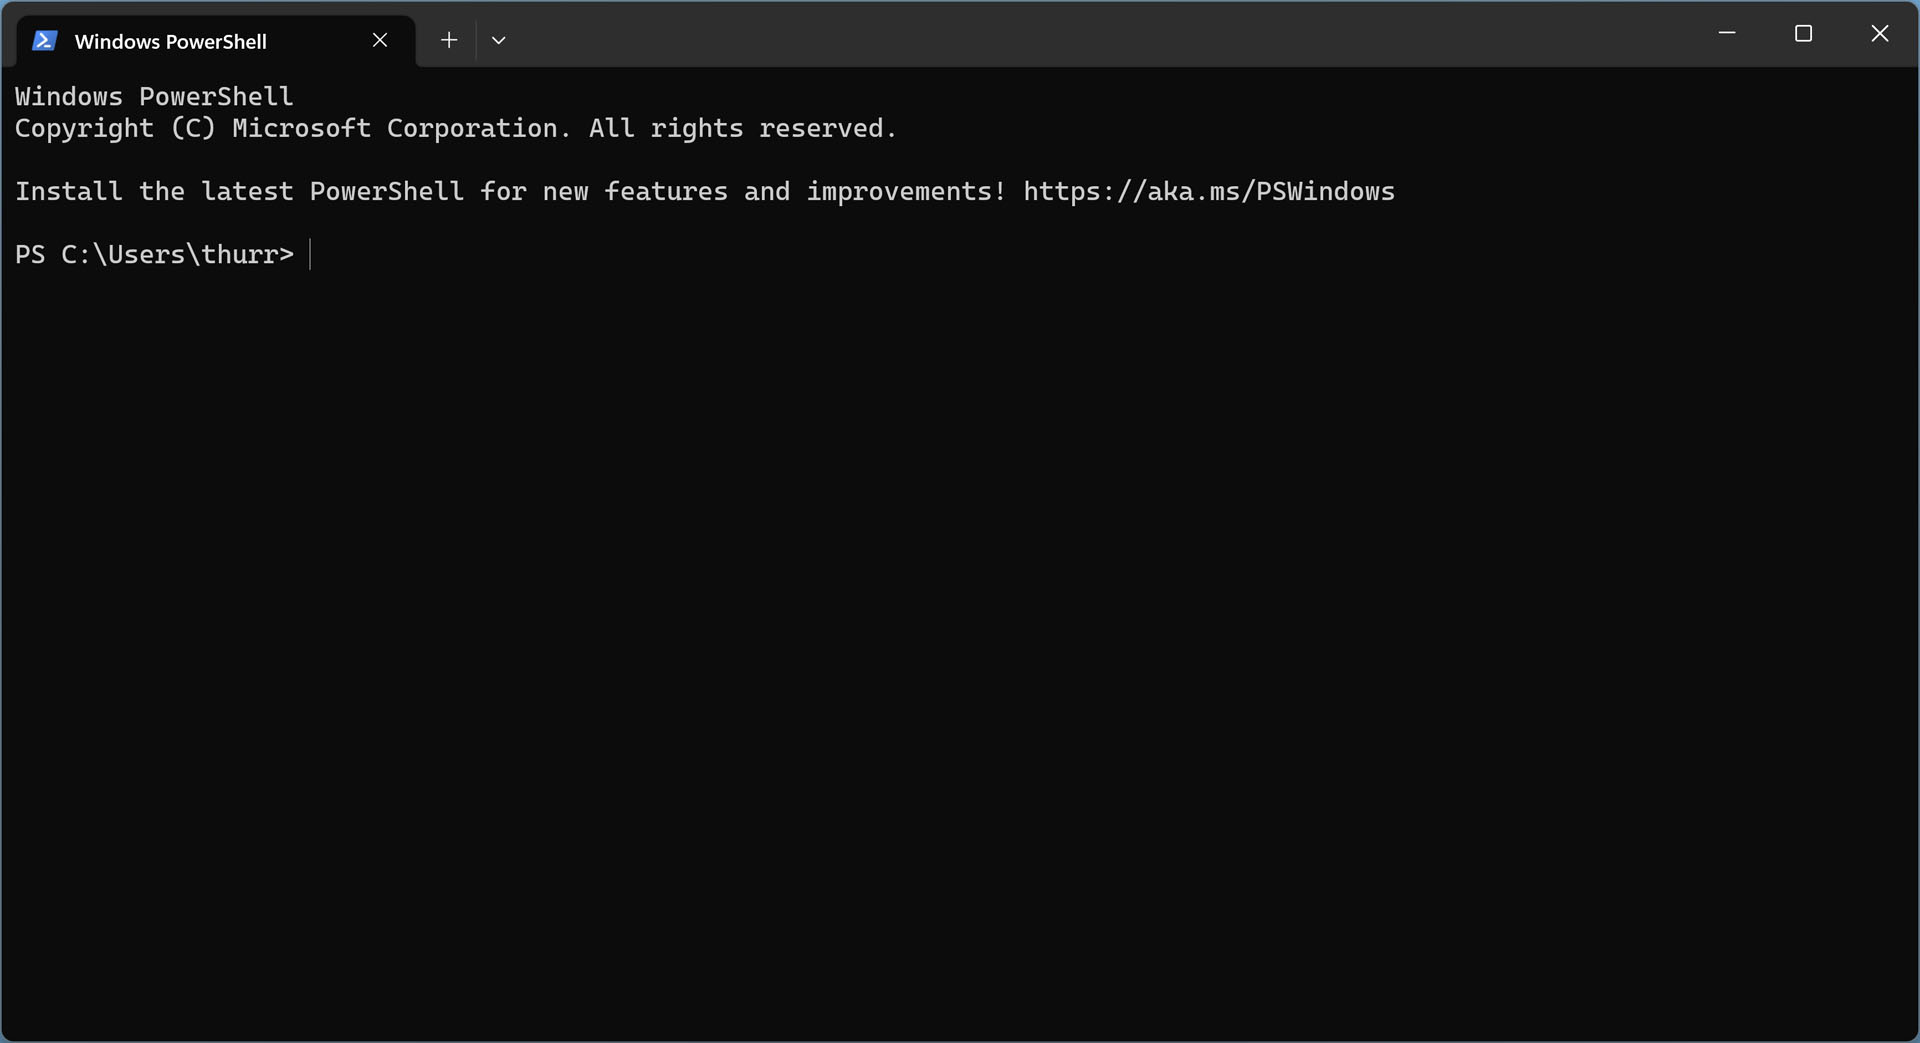
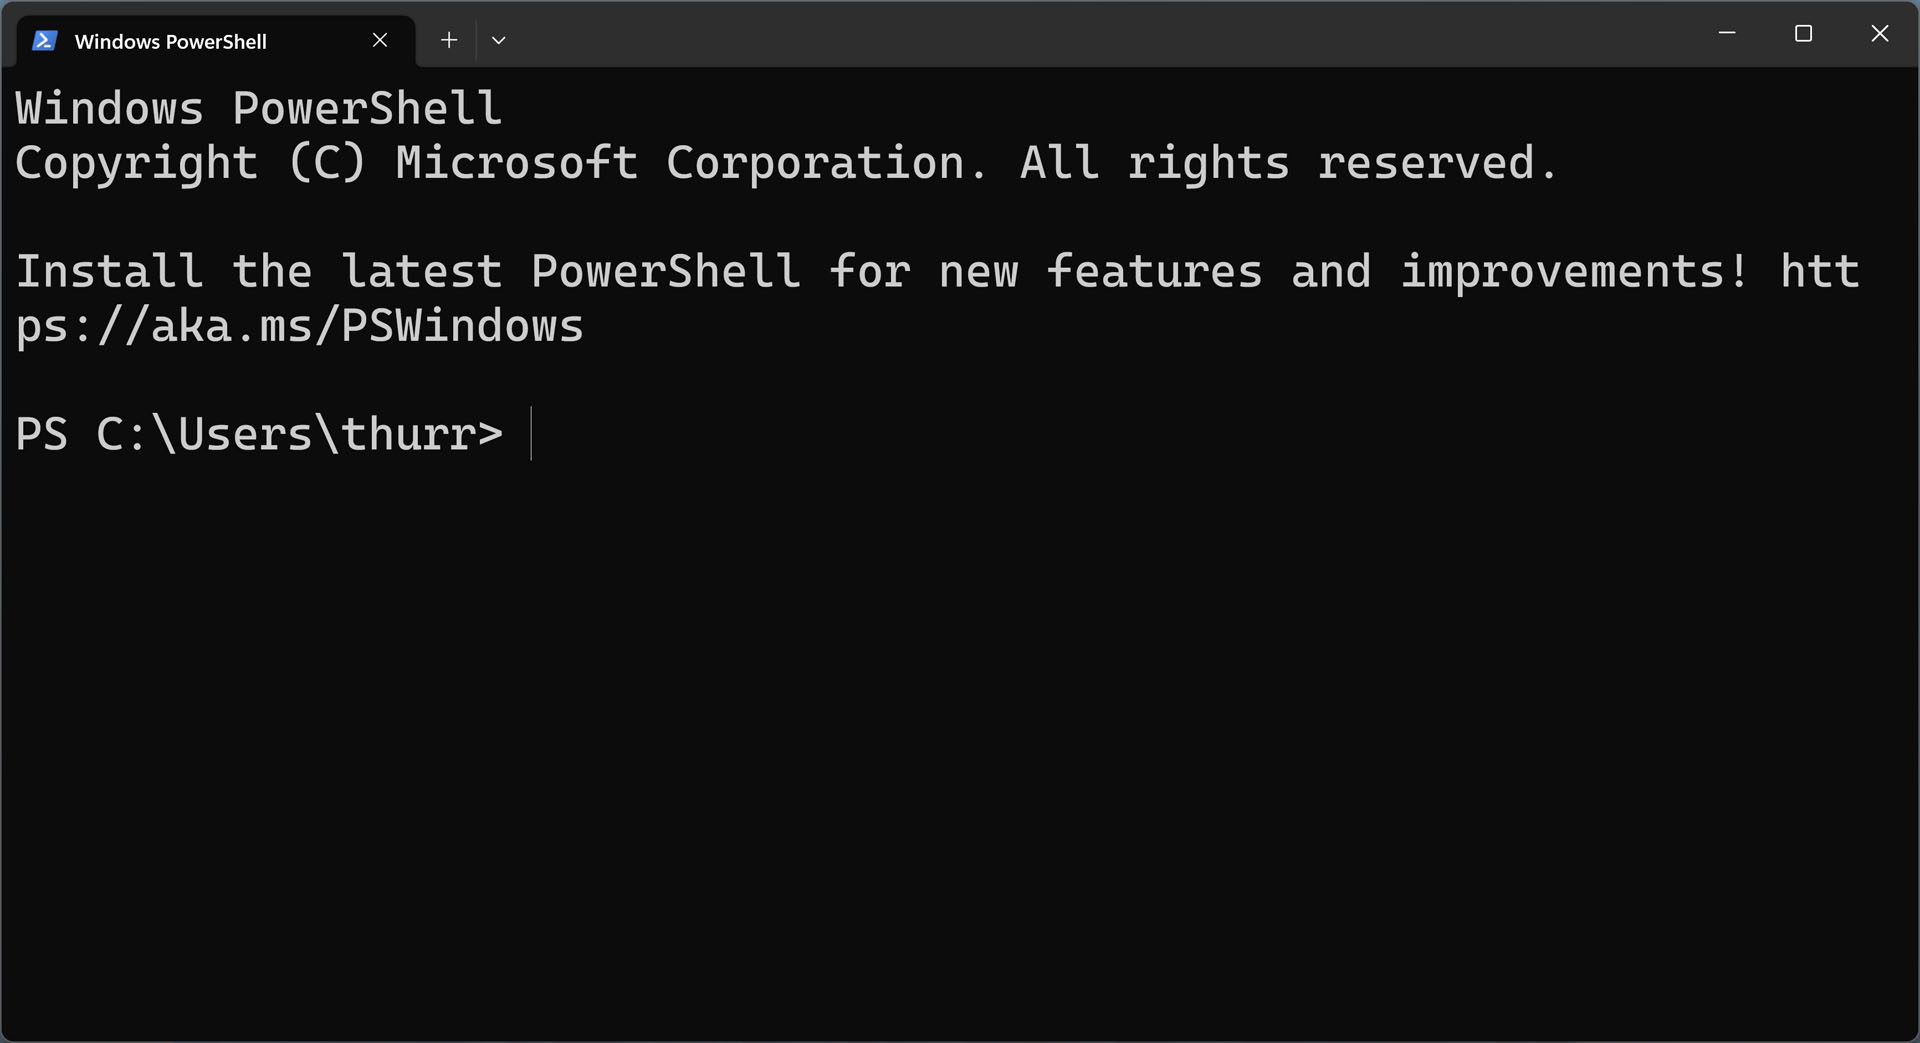
Terminal is a simple, tab-based application in which each tab contains its own command-line environment. It opens with a single tab by default, and that tab contains a Windows PowerShell environment by default.
To open a new tab with the default profile, click “Open a new tab” (the “+” button in the title bar).
Or, type CTRL + SHIFT + T.
To open a new tab with a different command-line profile, click the other “Open a new tab” button, which resembles a carat. (I know.) Then, select the appropriate profile from the list of options that appears.
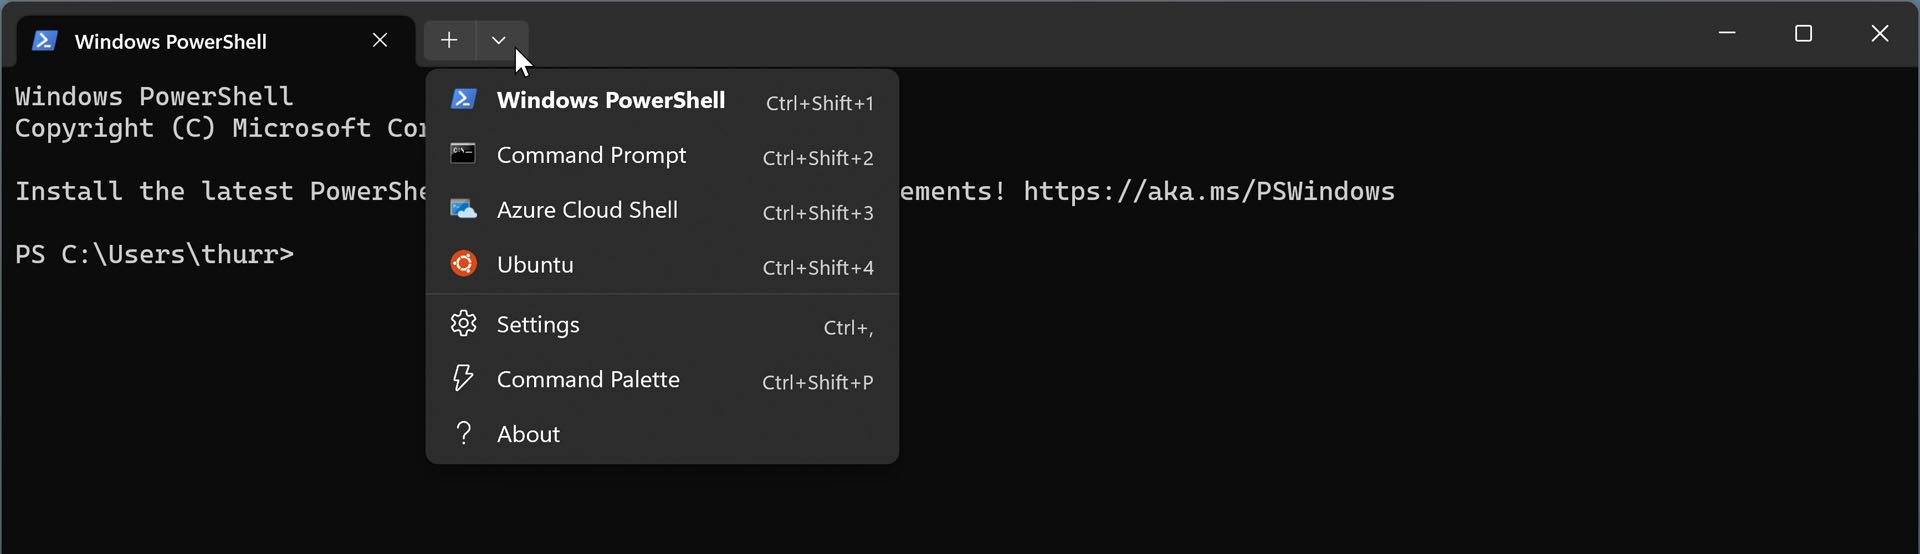

You can also use the appropriate keyboard shortcut as noted in that menu. For example, CTRL + SHIFT + 2 will open a new tab using the Command Prompt profile.
To switch between tabs, select the appropriate tab.
Or, type CTRL + TAB to cycle between available tabs.
To close a tab, click its “Close tab” button (“x”).
Or, type CTRL + F4 to close the current tab.
To close Terminal, type exit and tap ENTER. Or, click the Close window button. If there are multiple tabs open, you will be prompted before Terminal closes. Otherwise, it will simply close.
Terminal has a unique feature called the Command palette that lets you easily invoke actions, which are commands that this app understands. To display the Command palette, click “Open a new tab” (the caret version) and then select “Command palette” from the menu that appears.
You can also type CTRL + SHIFT + P to display the Command palette.
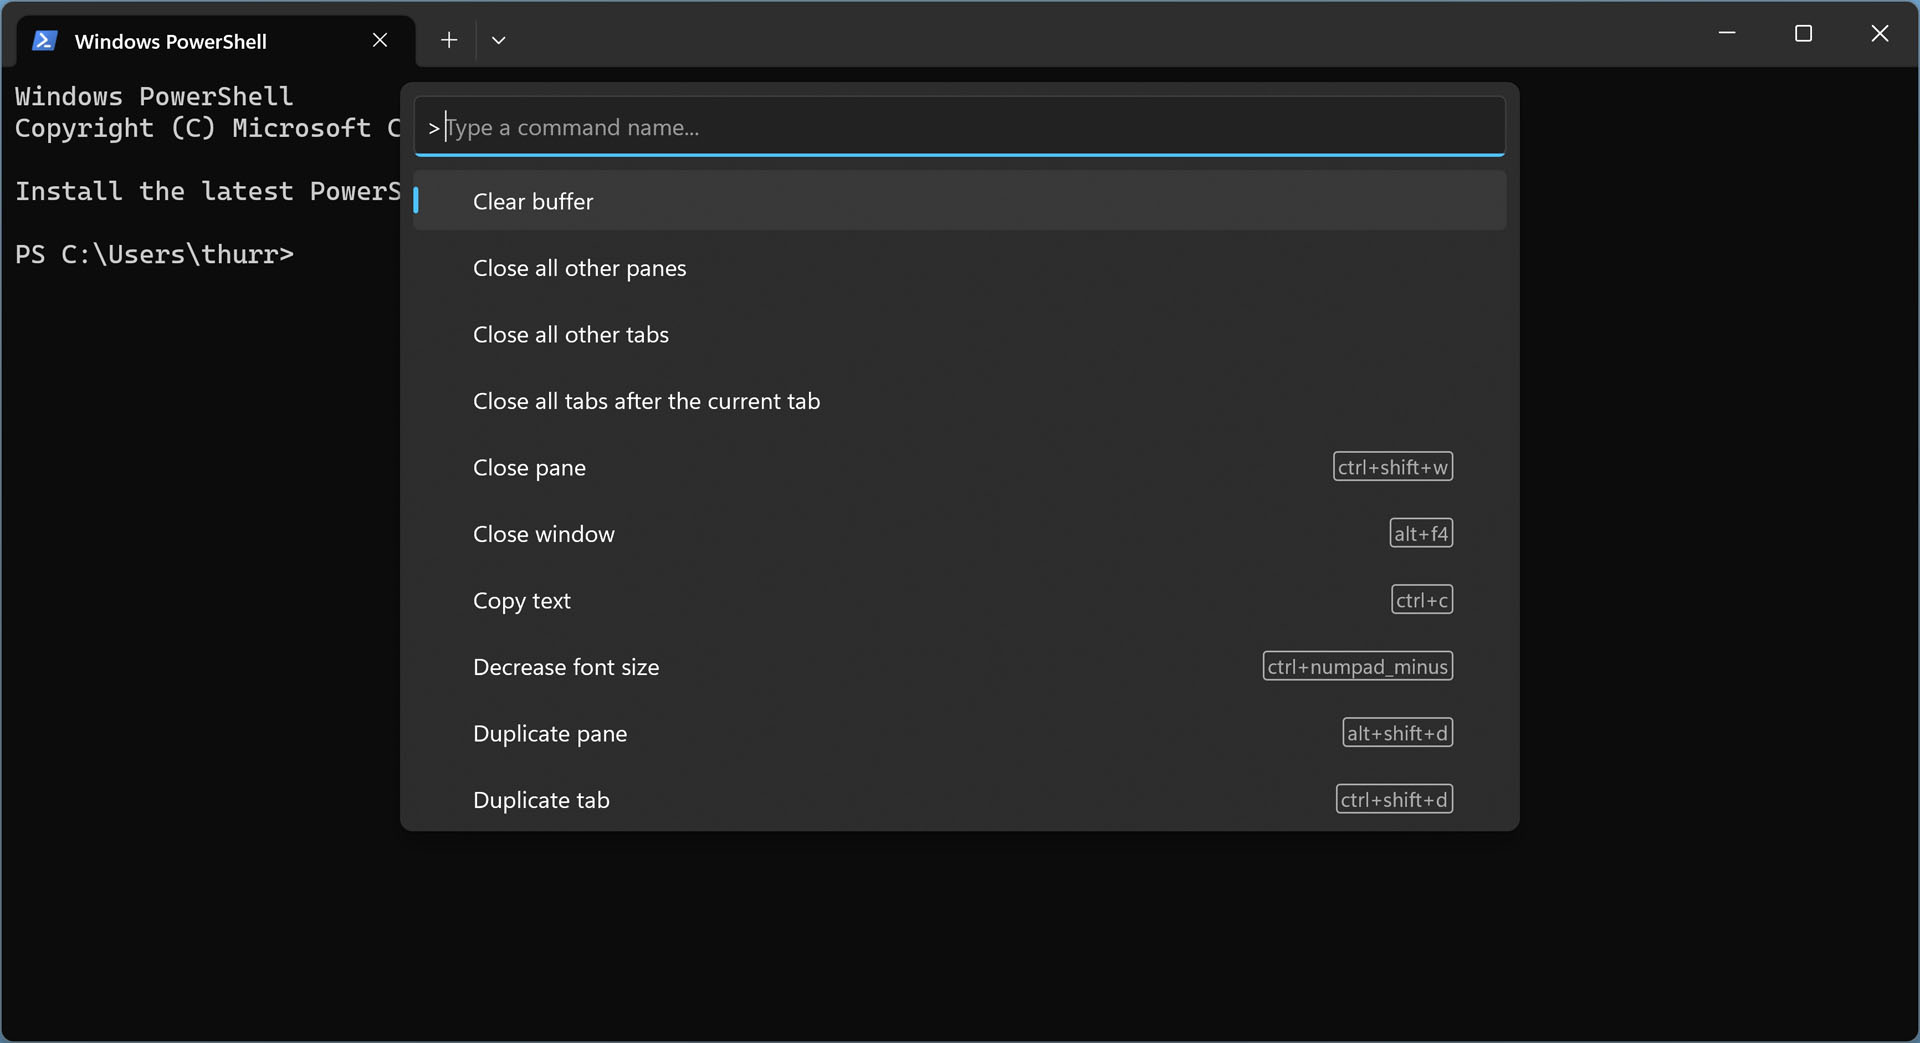
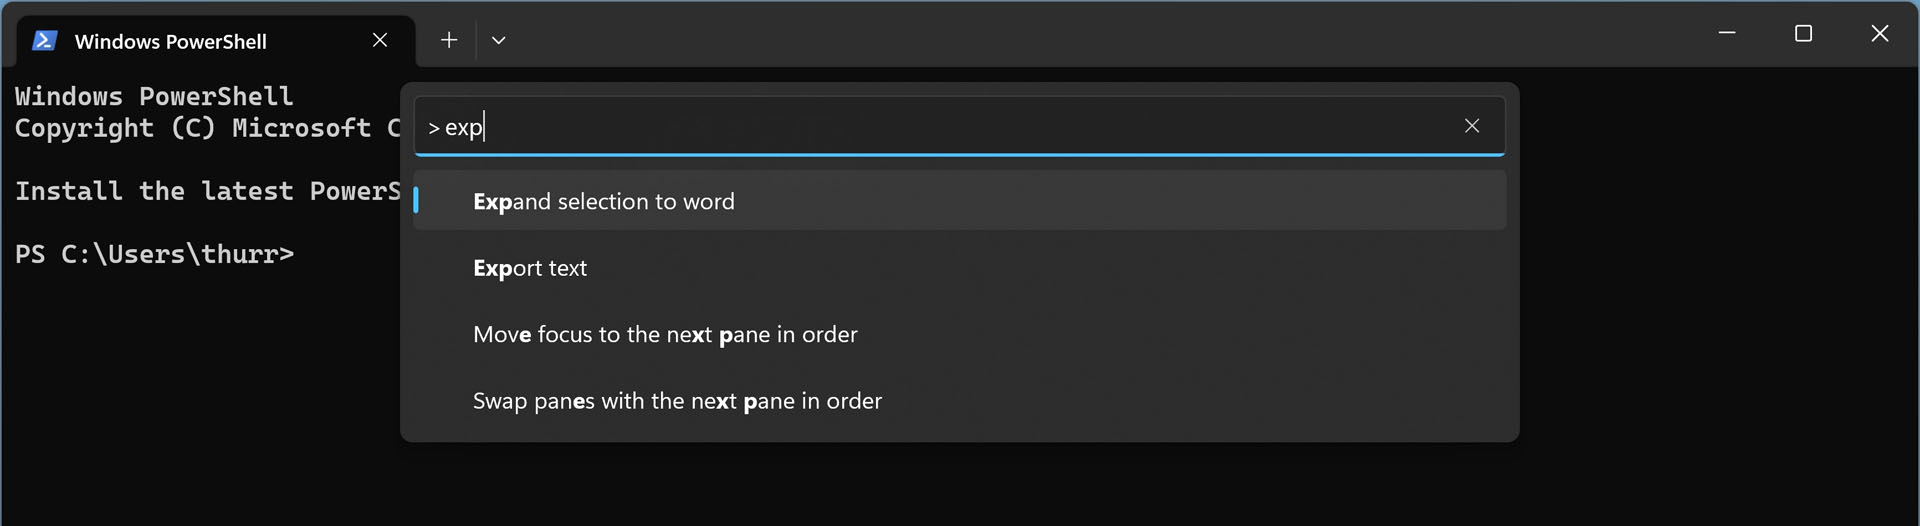
The Command palette is handy when you don’t know how to do something specific. To find what you’re looking for, you can scroll through the list of actions shown in the drop-down, or you can begin typing and the Command palette will filter the list based on what you type.

Finally, Terminal supports web browser-like zoom capabilities, letting you temporarily resize the text in the current command-line environment on the fly. For example, if you zoom in a few times, the text gets quite big.
Because there’s no obvious UI to help you zoom, keyboard shortcuts make the most sense:
- Zoom in. To zoom in–make the text bigger–type CTRL + Plus.
- Zoom out. To zoom out–make the text smaller–type CTRL + Minus.
- Return to default zoom level. To return to the default zoom level, type CTRL + 0.
The default zoom level is configured in Terminal settings and can be configured on a profile-by-profile basis. We discuss customizing a profile later in the chapter.
Launch Terminal
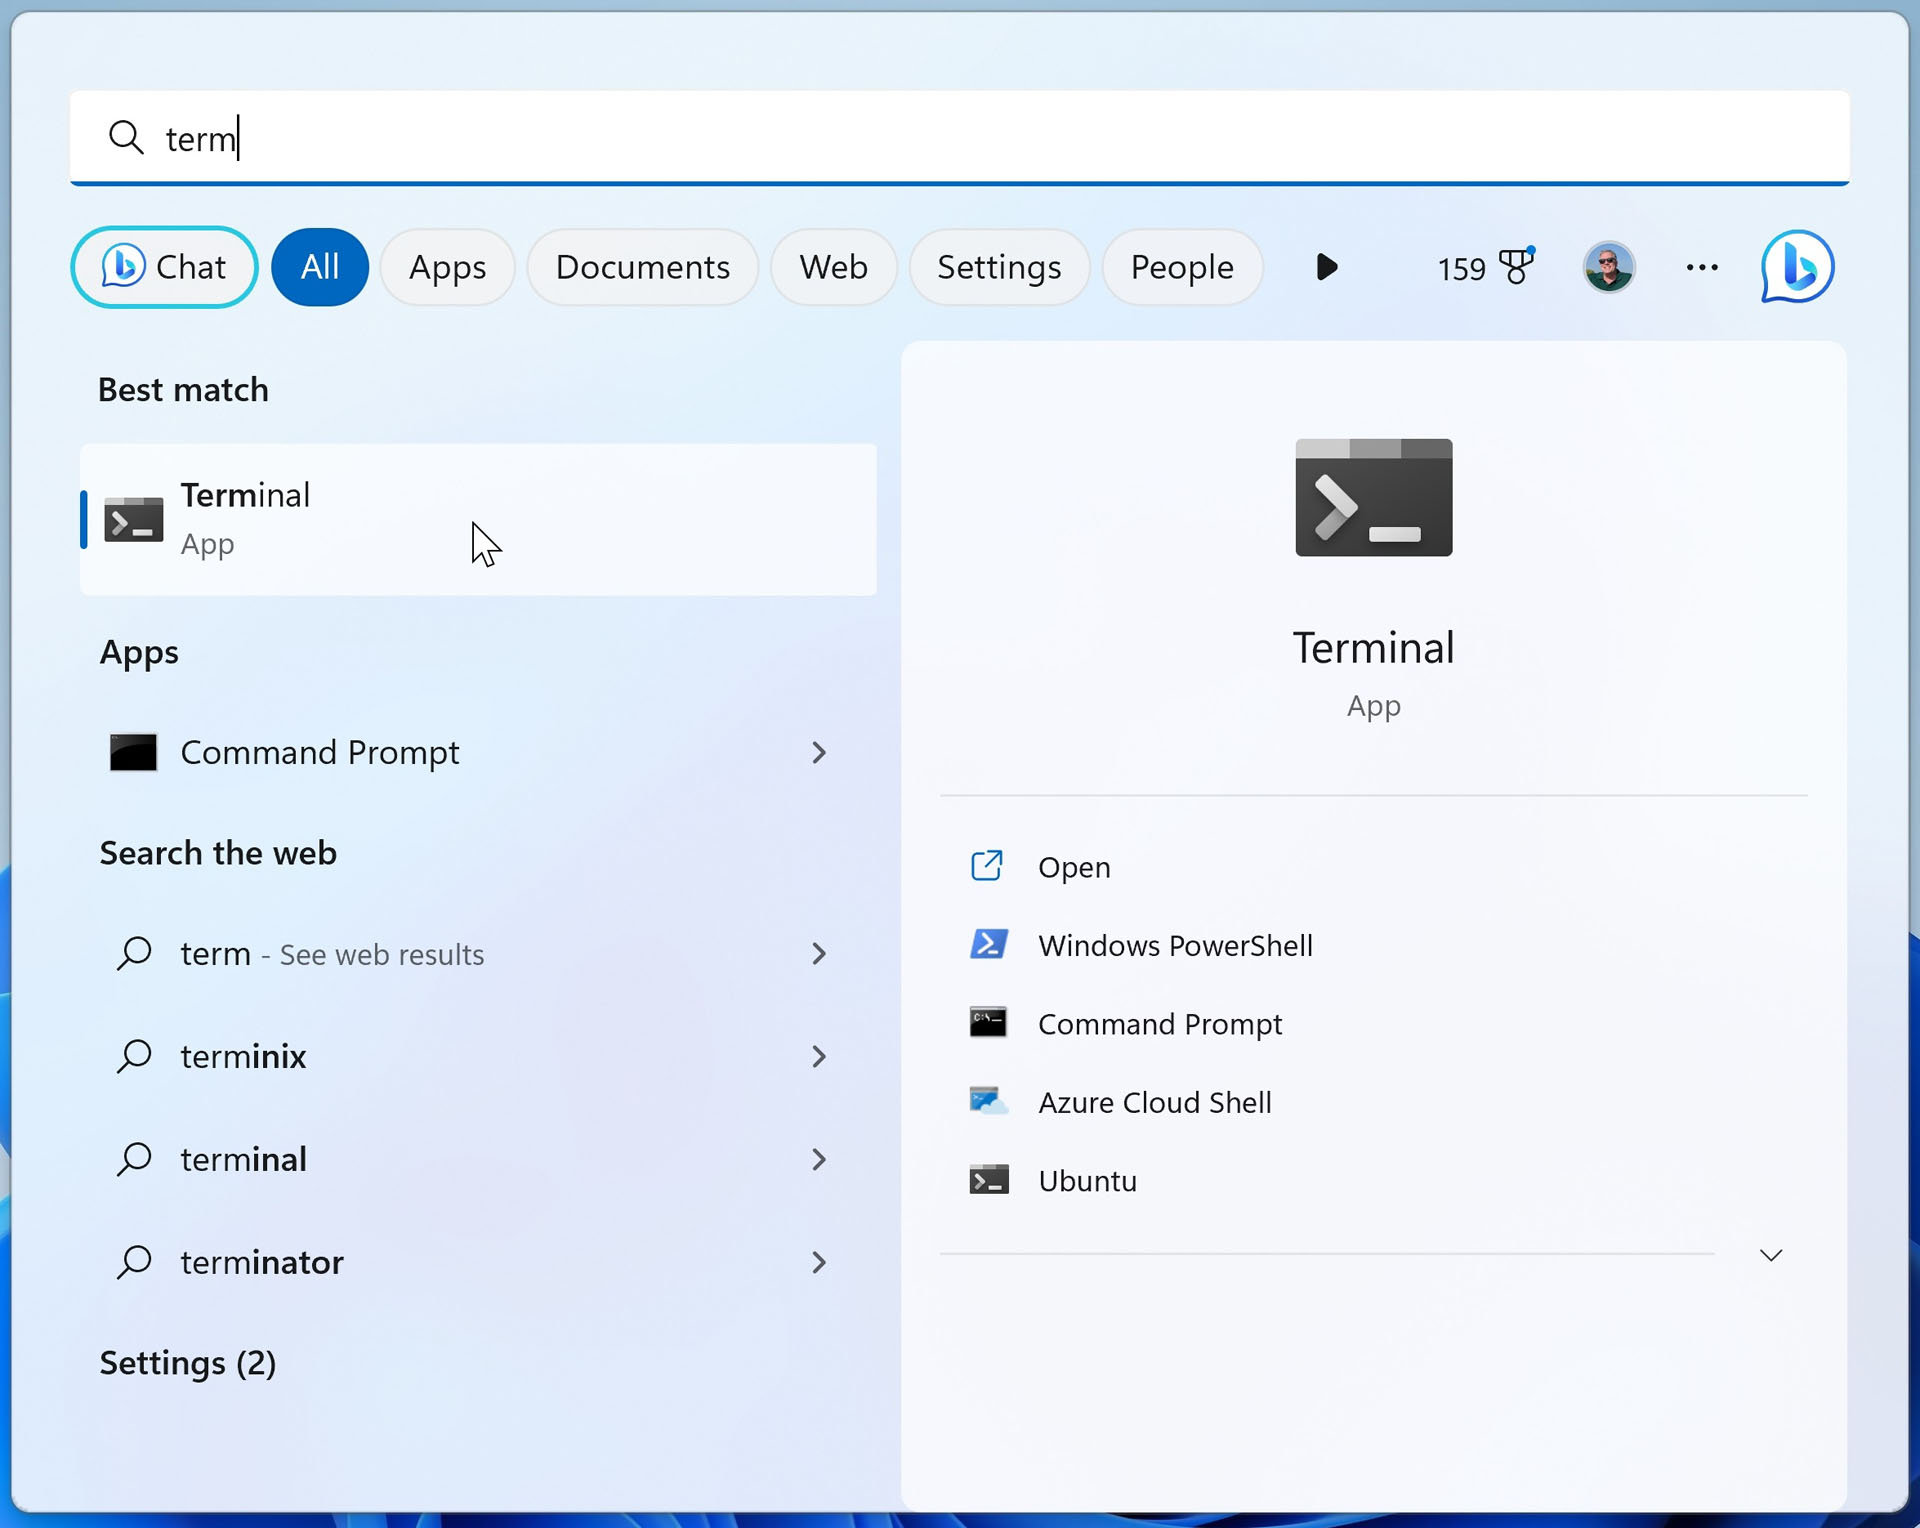
Though it is used to access command-line environments like Command Prompt and Windows PowerShell, the Terminal app itself is a standard graphical app, so it can easily be launched via Start or Search. This also means you can pin Terminal to Start or the Taskbar if you need to use it frequently.
Sometimes, you will be instructed to open Terminal–or an individual command-line environment–as an administrator so that you can perform a troubleshooting or system-level task that requires additional privileges.
You can launch Terminal as an administrator as you would any other app: locate it in Start, right-click, and choose “Run as administrator.” Then, click “OK” in the User Account Control (UAC) dialog that appears.
But you can also launch an individual command-line environment as an administrator from within Terminal. To do so, click “Open a new tab”–the chevron-like icon in the app’s title bar–and then press CTRL as you select the command-line environment you need.
Here, too, you will need to address a UAC dialog. But the environment you selected will open in its own window, as opposed to a new tab, as is usually the case, for security reasons.
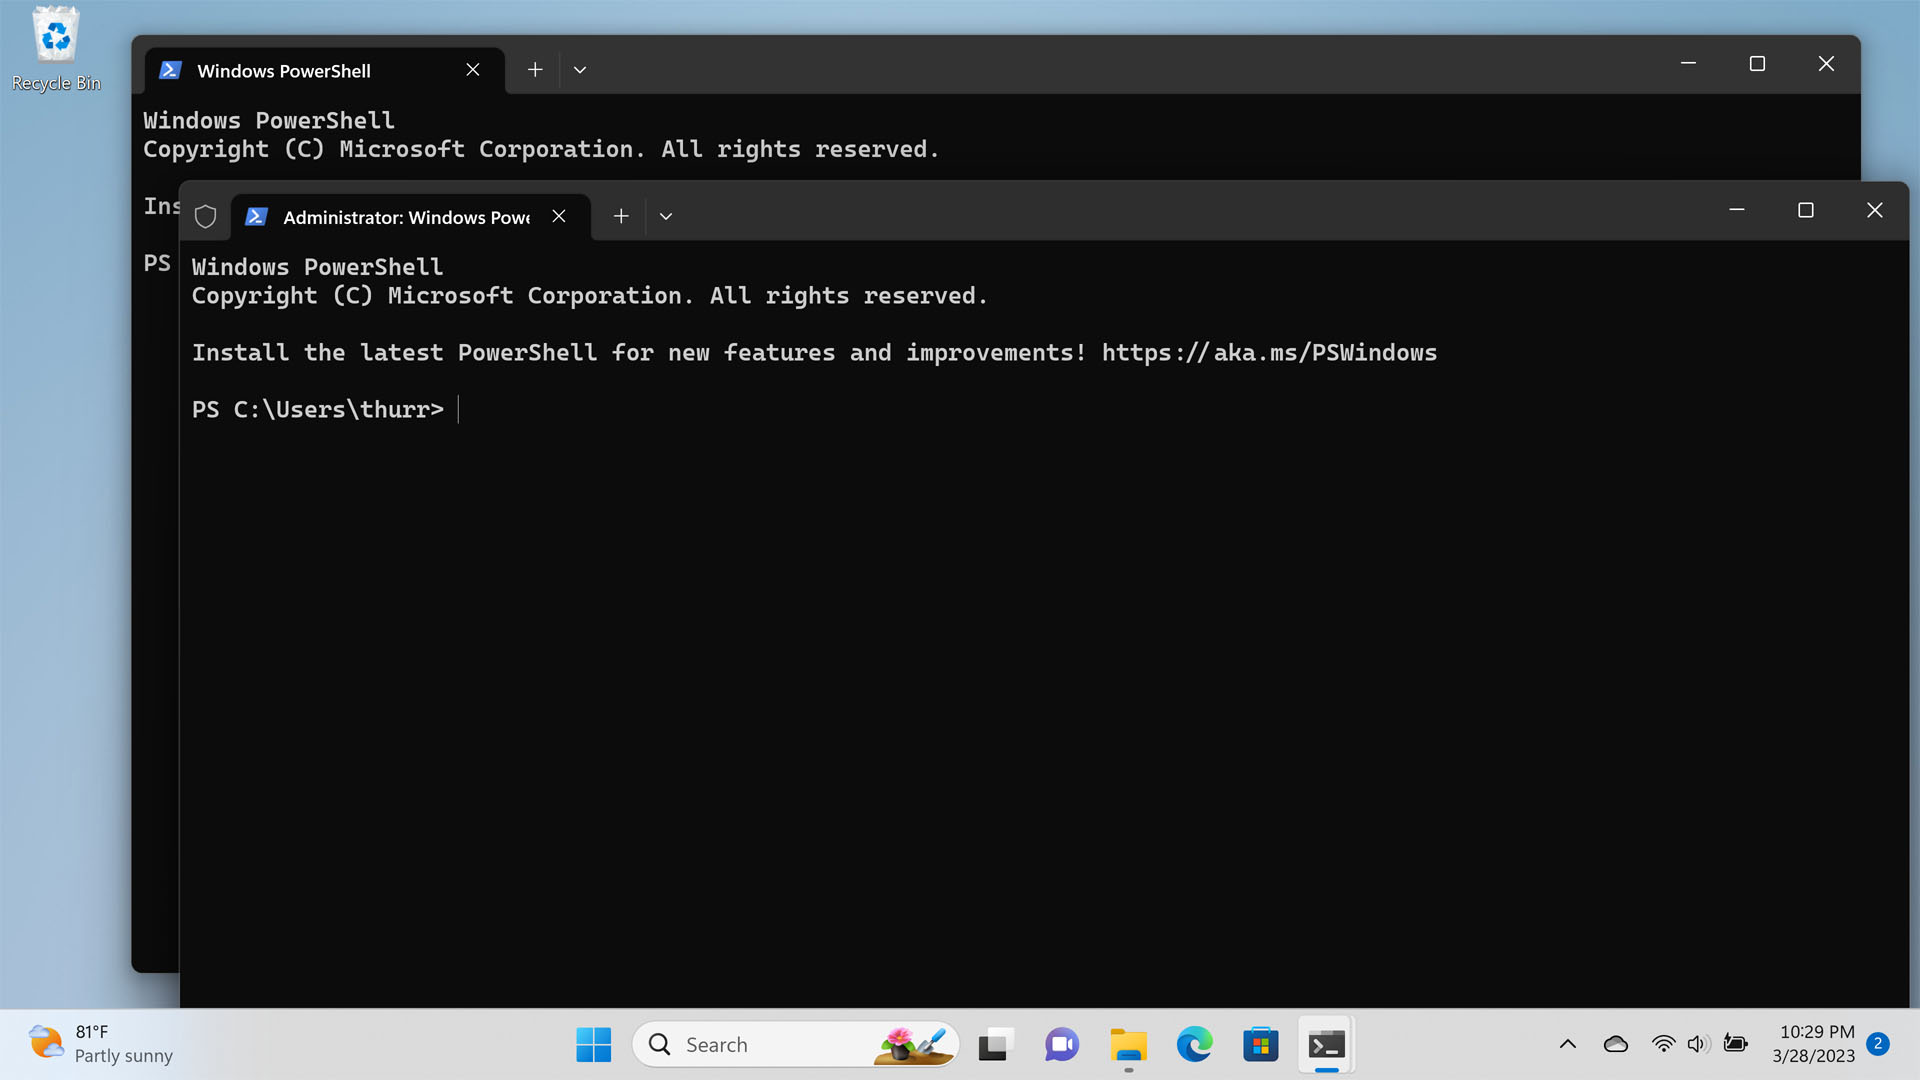
As you can see, a command-line environment opened with administrator privileges has a small shield icon, and, in the tab, the text “Administrator:” is prepended to its name so you can easily differentiate it from non-admin environments.
OK, there’s actually one more handy way to run Terminal: open Start (or the Run box via WINKEY + R), type wt, and then hit ENTER.
Configure Terminal
Terminal can be customized almost endlessly, so you will want to spend some time examining its many settings. These are available from the Terminal settings–it appears as a tab, of course–which can be accessed by selecting “Open a new tab” (chevron) and then “Settings.”
Or, just type CTRL + comma (“,”).
There are so many settings here that we’ll just discuss some of the more high-impact changes you can make.
Determine what happens when you start Terminal
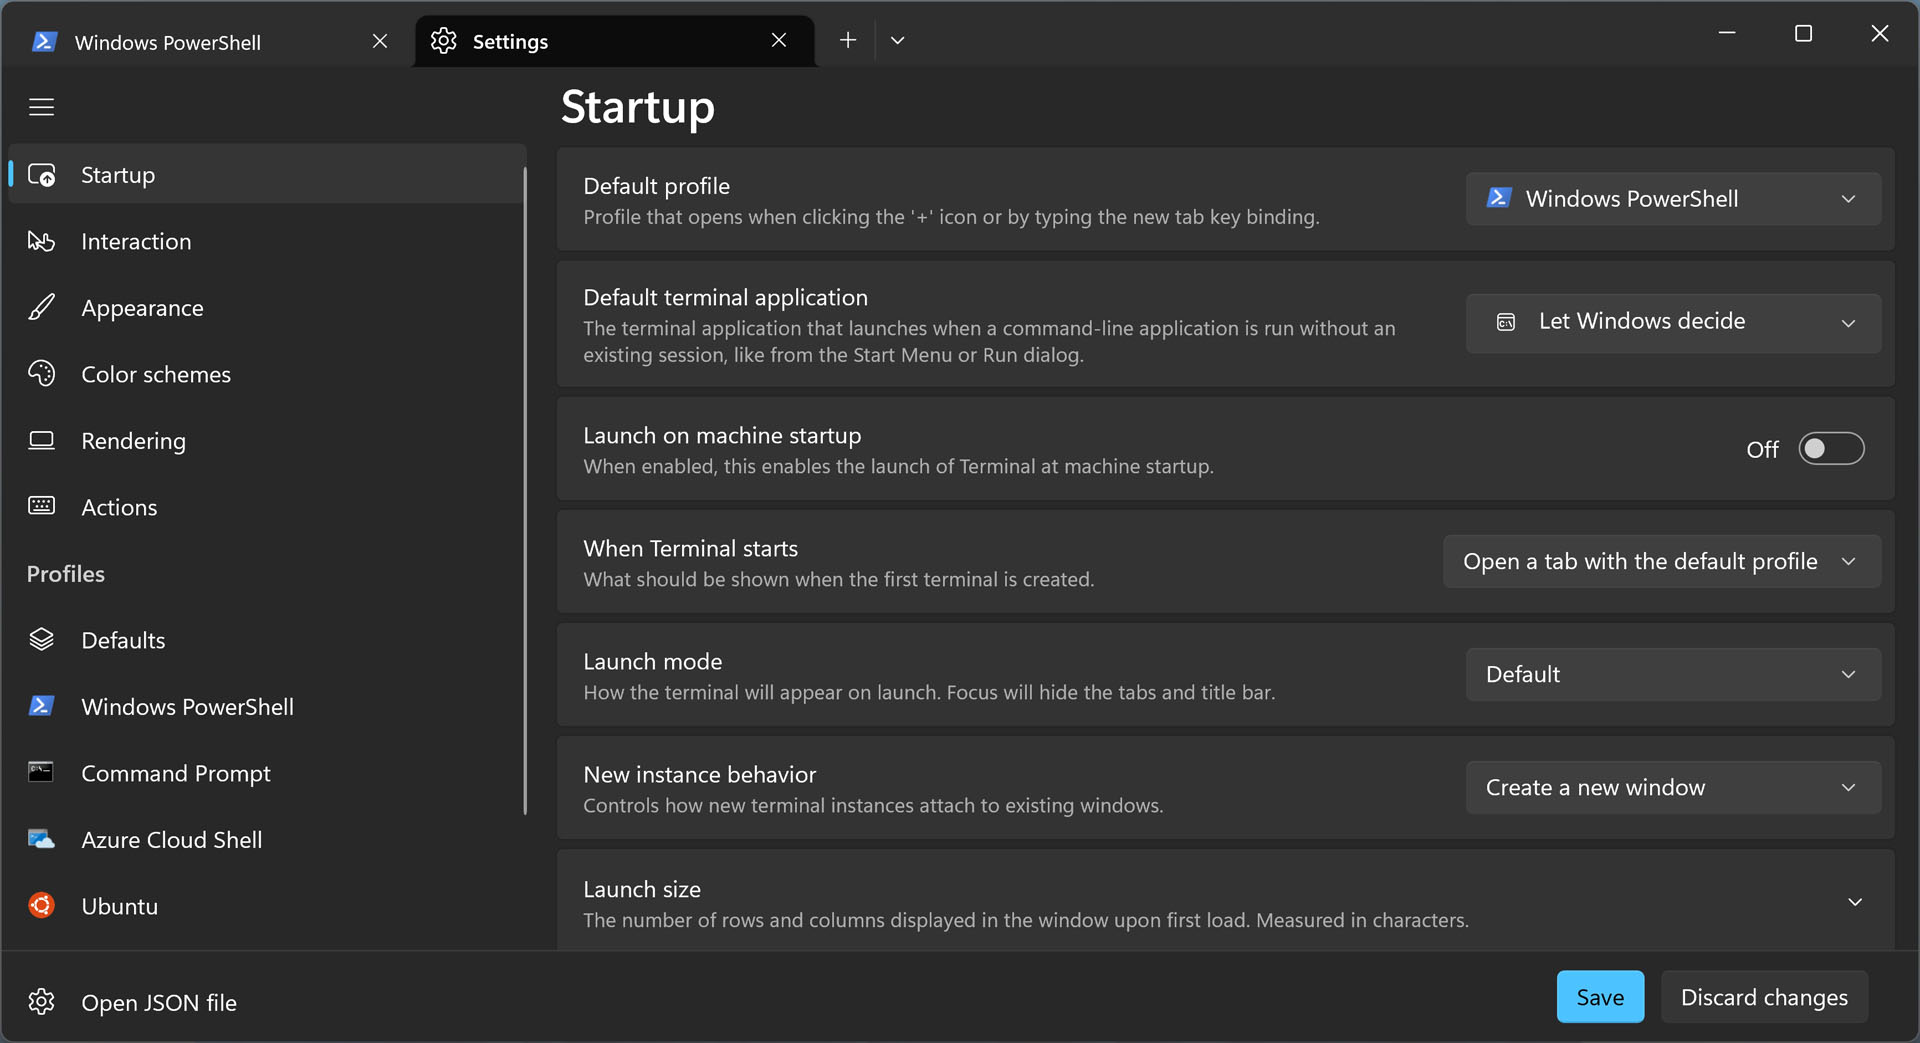
In the Startup page of Terminal settings, you will find several settings related to what happens when you start the app. Some key settings here include:
Default profile. This setting determines which command-line profile that Terminal uses first run or when you click the “Open a new tab” button. It’s set to Windows PowerShell by default, but you can change it to any installed command-line environment.
Default Terminal application. This setting determines which command-line experience is configured as the default terminal application in Windows 11. It’s set to “Let Windows decide,” ensuring that Terminal is the default terminal application. But you can manually set it to Windows Console Host or Terminal if you want.
Set to its default configuration, “Let Windows decide,” Terminal will respect the choice that you configured in Windows 11. This happens in the (Windows) Settings app: navigate to Privacy & security > For developers and inspect the setting “Terminal” to see the global setting.
When Terminal starts. This setting determines how Terminal opens when you start it, either with a single tab open to the default profile (the default) or with whatever windows or tabs you were using in your last Terminal session.
Launch size. By default, Terminal opens with a text-based command-line environment that is 120 characters (or columns) wide and 30 characters (or rows) tall. You can use this setting to change either of those values.
Determine how Terminal looks
The Interaction, Appearance, and Color schemes pages in Terminal settings each contain several options related to how Terminal looks. Some key settings here include:
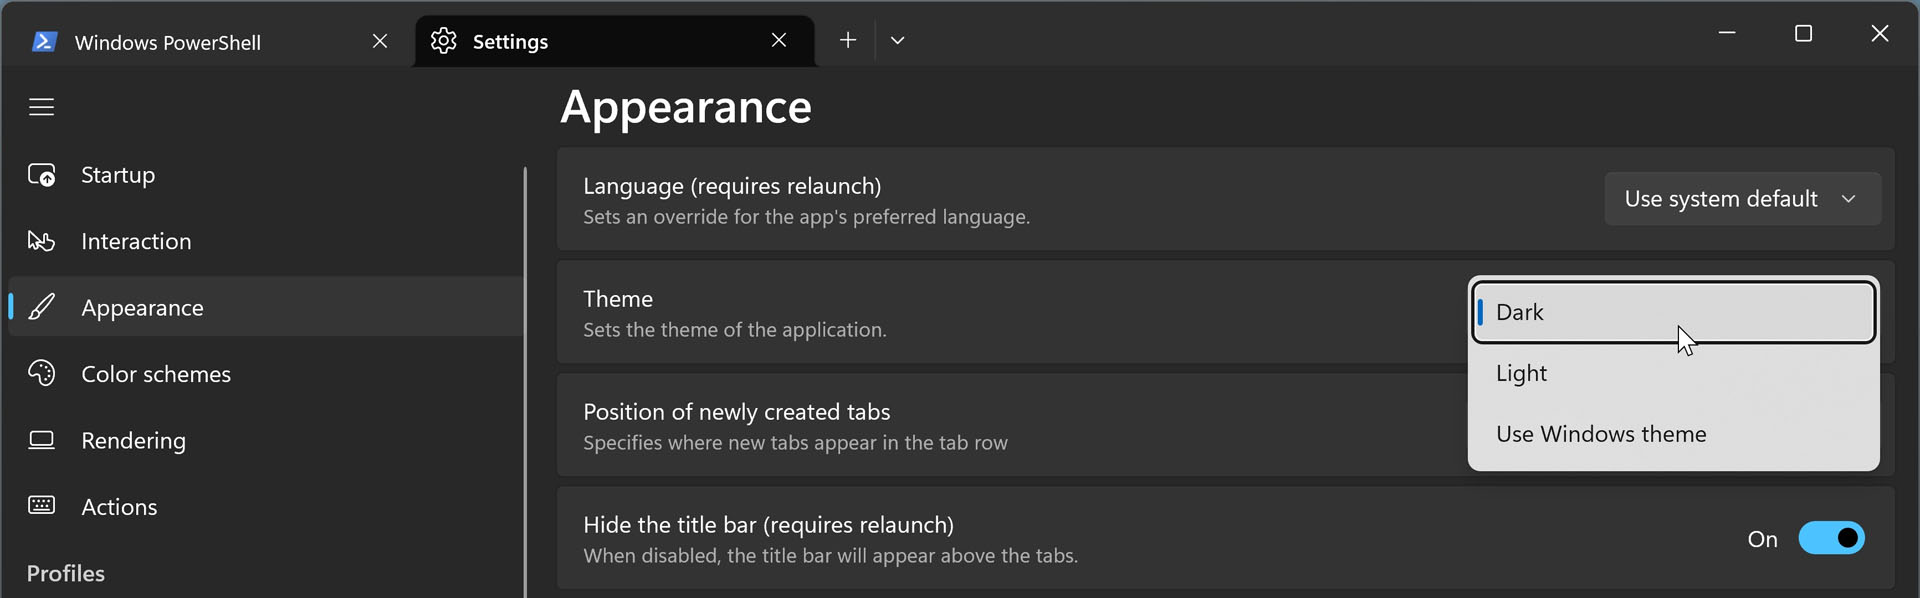
Appearance > Theme. Here, you can set the application theme for Terminal to Dark (the default), Light, or “Use Windows theme.”
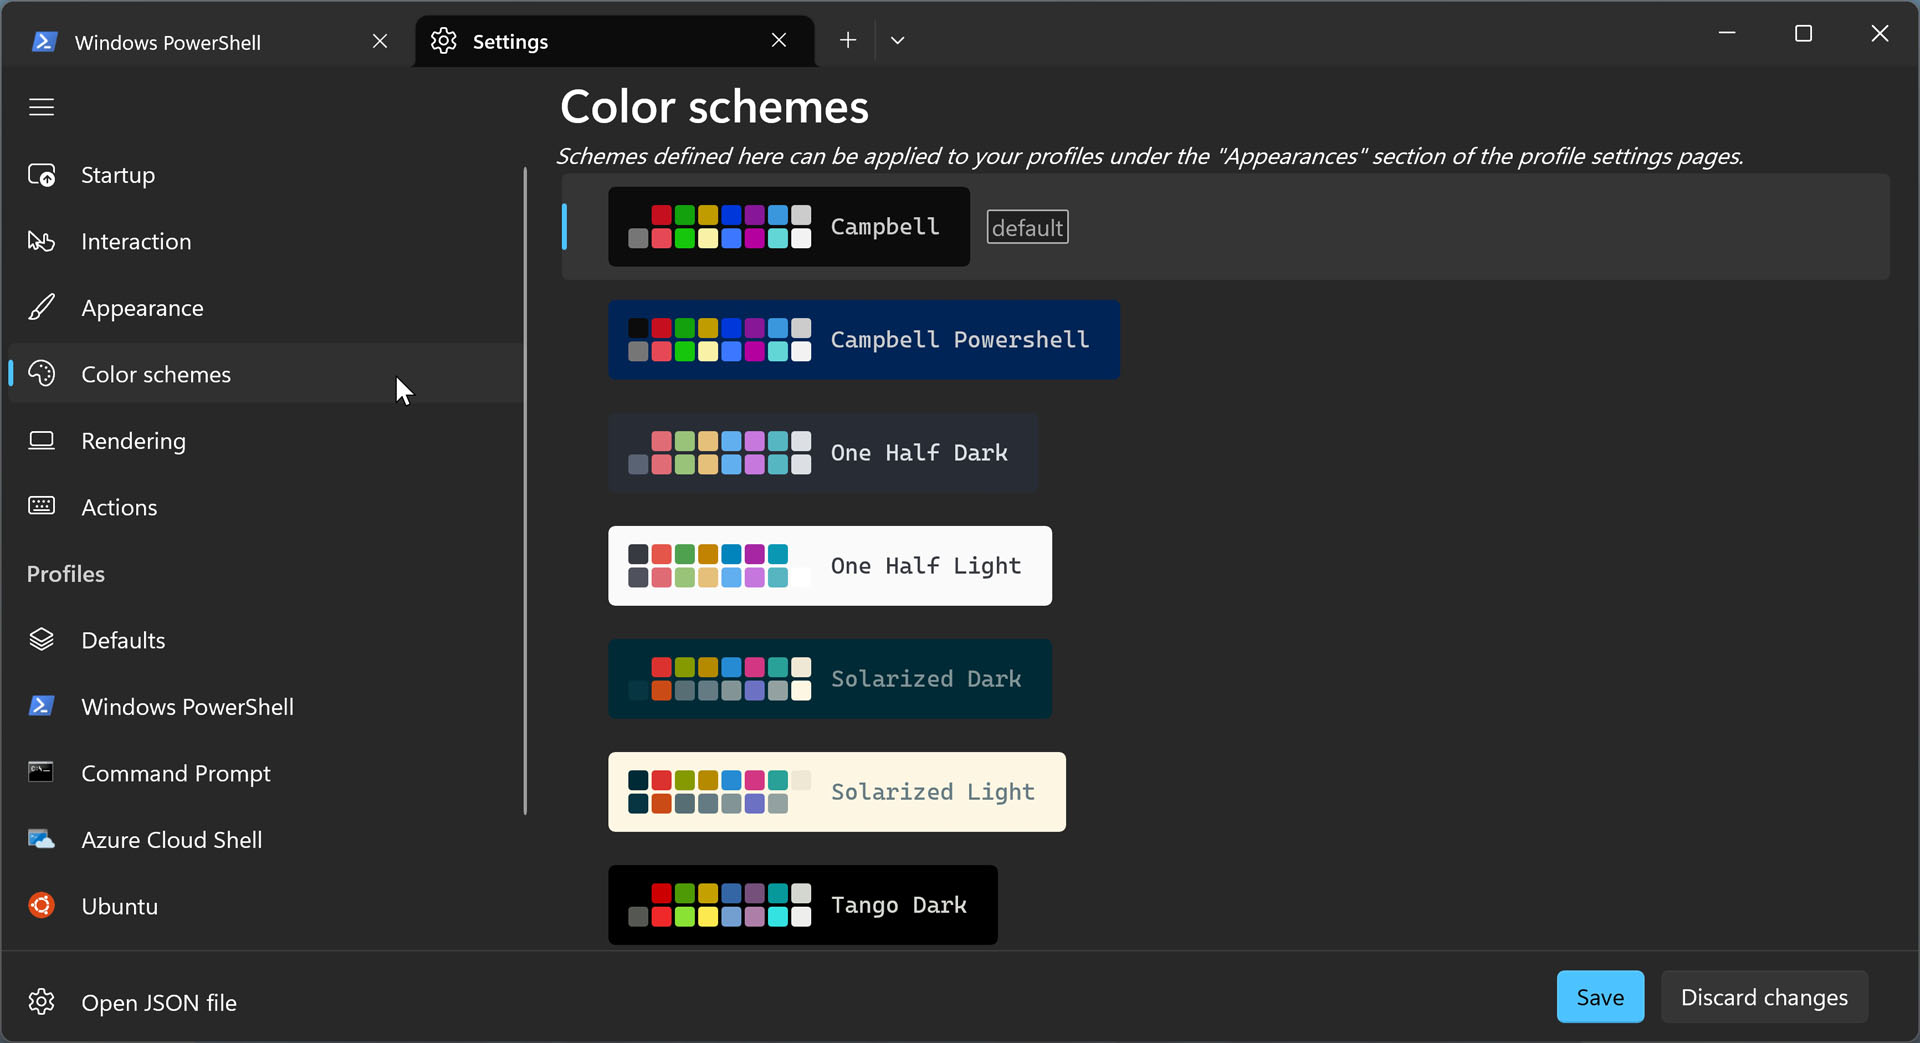
Color schemes. By default, Terminal uses a theme called Campbell that features a black background and colored text. But you can change the default theme to your liking, edit existing themes, or add new themes of your own here.
Configure a profile
As noted previously, Terminal supports multiple profiles, each representing an individual command-line environment. You can configure how each profile looks and works in the Profiles section of Terminal settings. There, you will find a section called Defaults with settings that apply to all profiles and then individual sections for each configured profile.
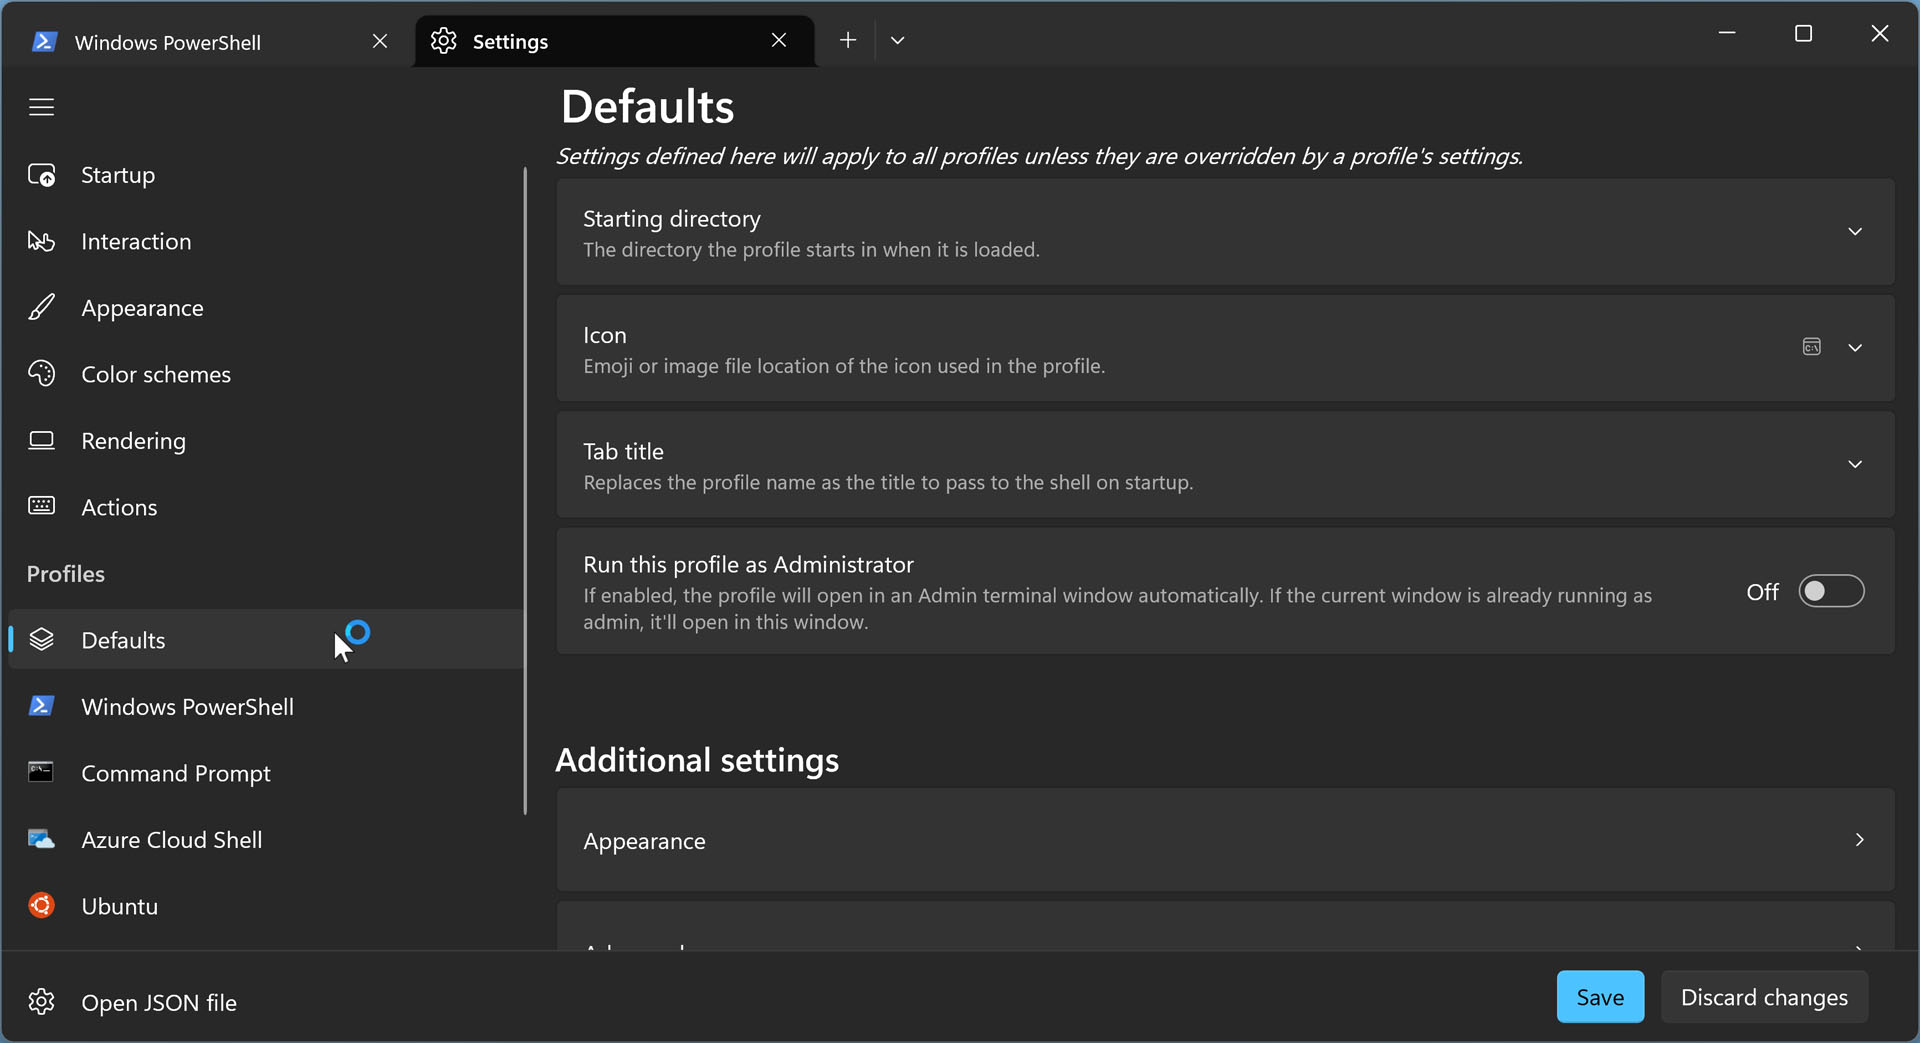
Most of the settings you see here—name, starting directory, icon, tab title, and so on—are fairly obvious, but if you dig into the Appearance and Advanced sections of each profile, you will find some fun options. And key among them are:
Appearance > Background image. Here, you can set the background of the profile to a specific image or just use the same image used for the Desktop wallpaper.
Appearance > Transparency. This set of options lets you set the background opacity of the Terminal window–its level of translucency–and, optionally, enable a so-called Acrylic material effect to the translucency.
![]()
You can’t enable the Acrylic material effect if you use a background image.
Control Terminal with the Command Palette
The Command Palette is used to find and run actions, which are commands used to control the Terminal application. As noted above, you can open the Command Palette via the “Open a new tab” split button or by typing CTRL + SHIFT + P. The Command Palette lists available actions alphabetically. So you can scroll through the list to find the action you need, or you can start typing and the Command Palette will filter the list based on what you’ve typed.
If you’re getting started with Terminal, the Command Palette is a great way to browse available commands and the place to go when you’re stuck. For example, while you can open a second command-line environment in a new tab by using the “Open a new tab” menu, the tooltip that appears lets you know that you can alternatively open that second environment in a new pane instead by holding down the ALT key when you make your selection. This splits the window vertically, but what if you want to split it horizontally instead?
Command Palette to the rescue: you can type pane to discover all of the actions related to panes. And among them is “toggle pane split orientation,” which toggles the panes between vertical and horizontal orientations.
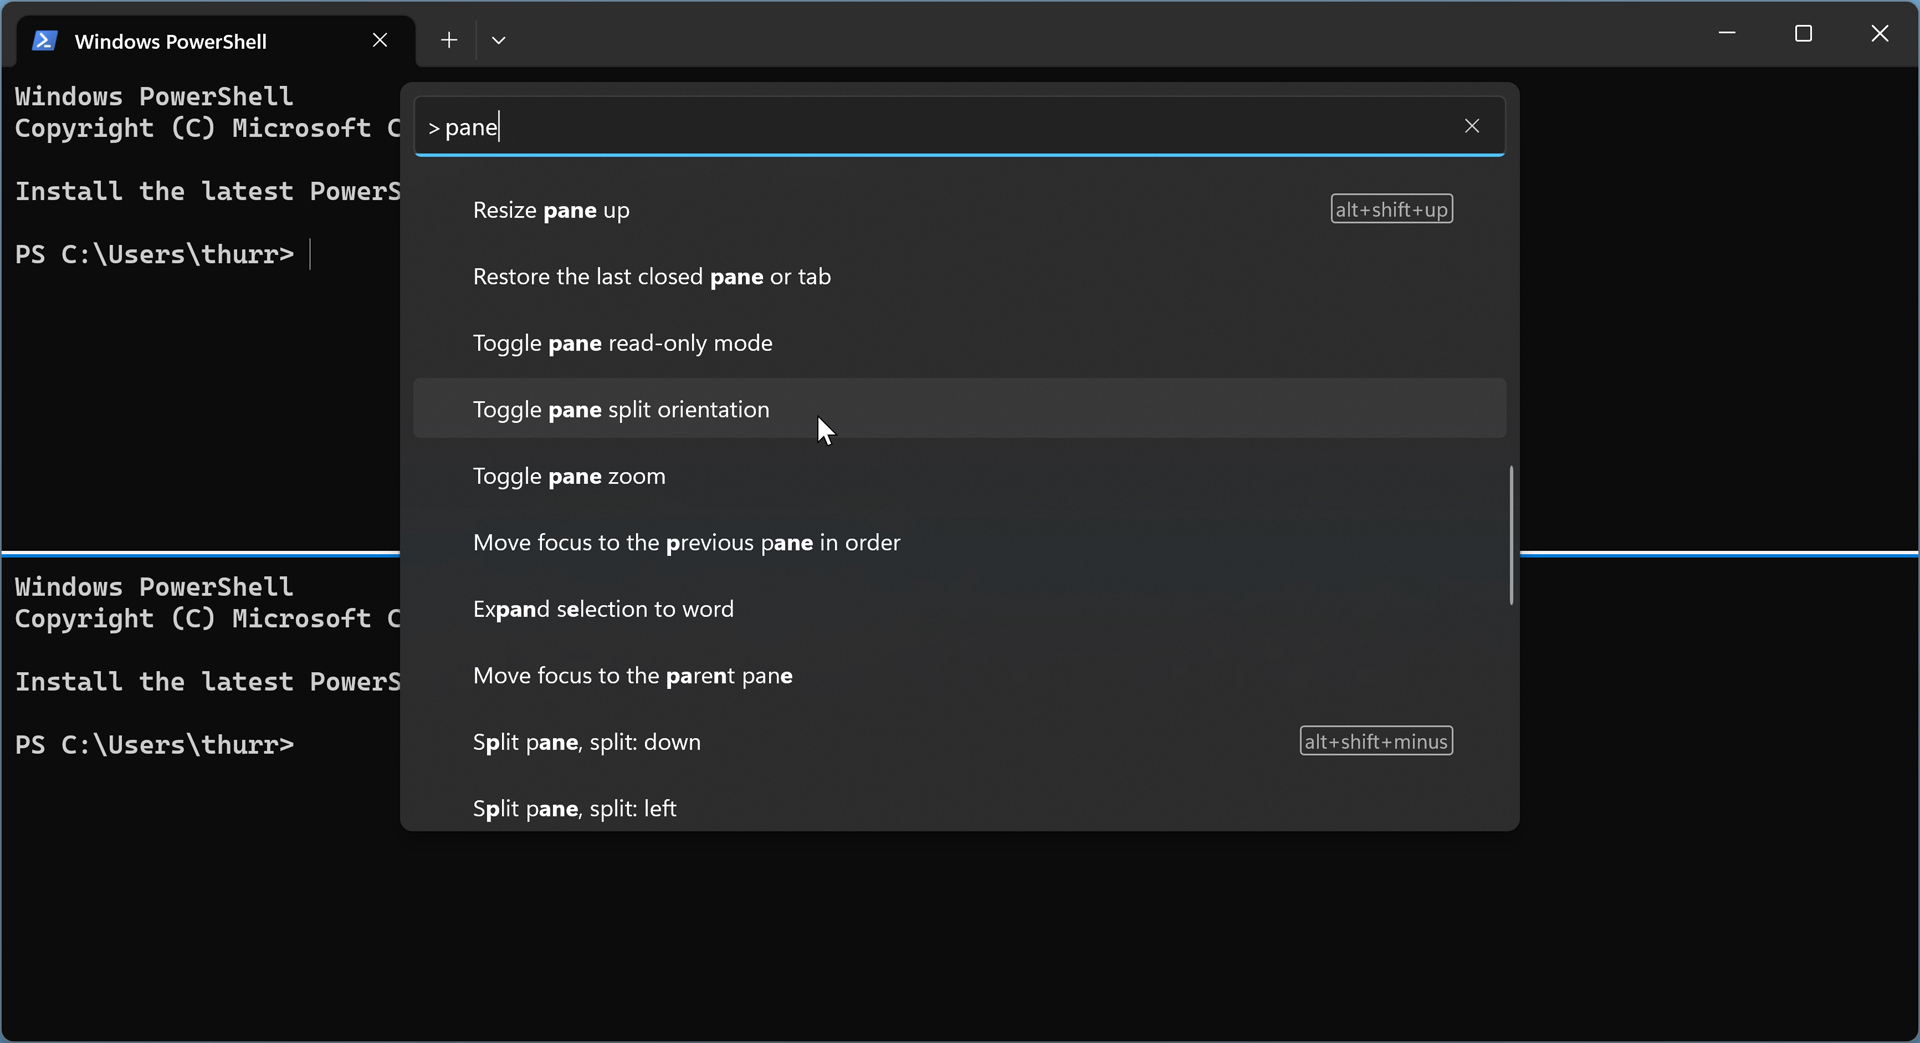
The Command Palette also shows keyboard shortcuts for available actions, which can be useful for anyone using this command line tool: if you can remember a shortcut, that’s always the fastest way to get something done.

This is beyond the scope of this book, but Terminal also lets you create your own actions, each of which can be accessed through the Command Palette or with its own unique keyboard shortcut. You do so in Terminal settings, on the Actions page.
Use Terminal in Focus mode
Terminal supports a Focus mode that hides the app’s title bar and tabs so you can focus on the command line environment you’re using. It’s an especially interesting option for those with multiple display setups who wish to use Terminal full-screen on its own display.
To enable Focus mode, open the Command Palette, type focus mode, and tap ENTER. Terminal takes on a svelte new look.
And if you are going to use Terminal in a full-screen mode, type F11 to put the app into full-screen.
To exit Focus mode, just repeat the same steps: open the Command Palette, type focus mode, and tap ENTER.
Go to a specific folder more easily
While each command line environment you use in Terminal supports its own set of commands and whatever specific syntax, one thing is common to all of them: it can be a bit tedious to get to a specific folder because of all the typing involved. Fortunately, Terminal does what it can to make this easier. Here are some tips.
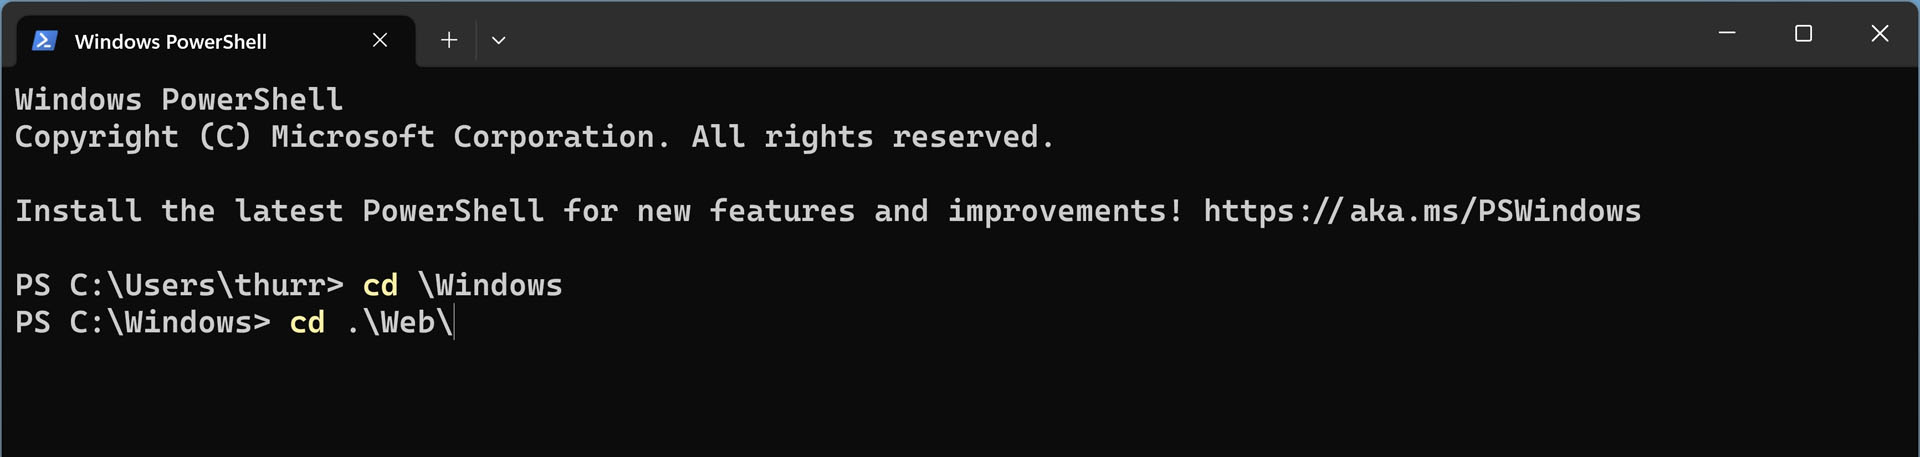
Folder auto-completion. When you are navigating into a new folder (or folder structure), you can use auto-complete to move more quickly. This is especially true when you know the name of the folder(s) you are trying to traverse. For example, if you are in C:\Windows and wish to navigate to the Web folder, you can type cd w and then hit TAB to autocomplete the first folder name that starts with w. If the first name that comes up isn’t correct, just hit TAB until the right one does appear.
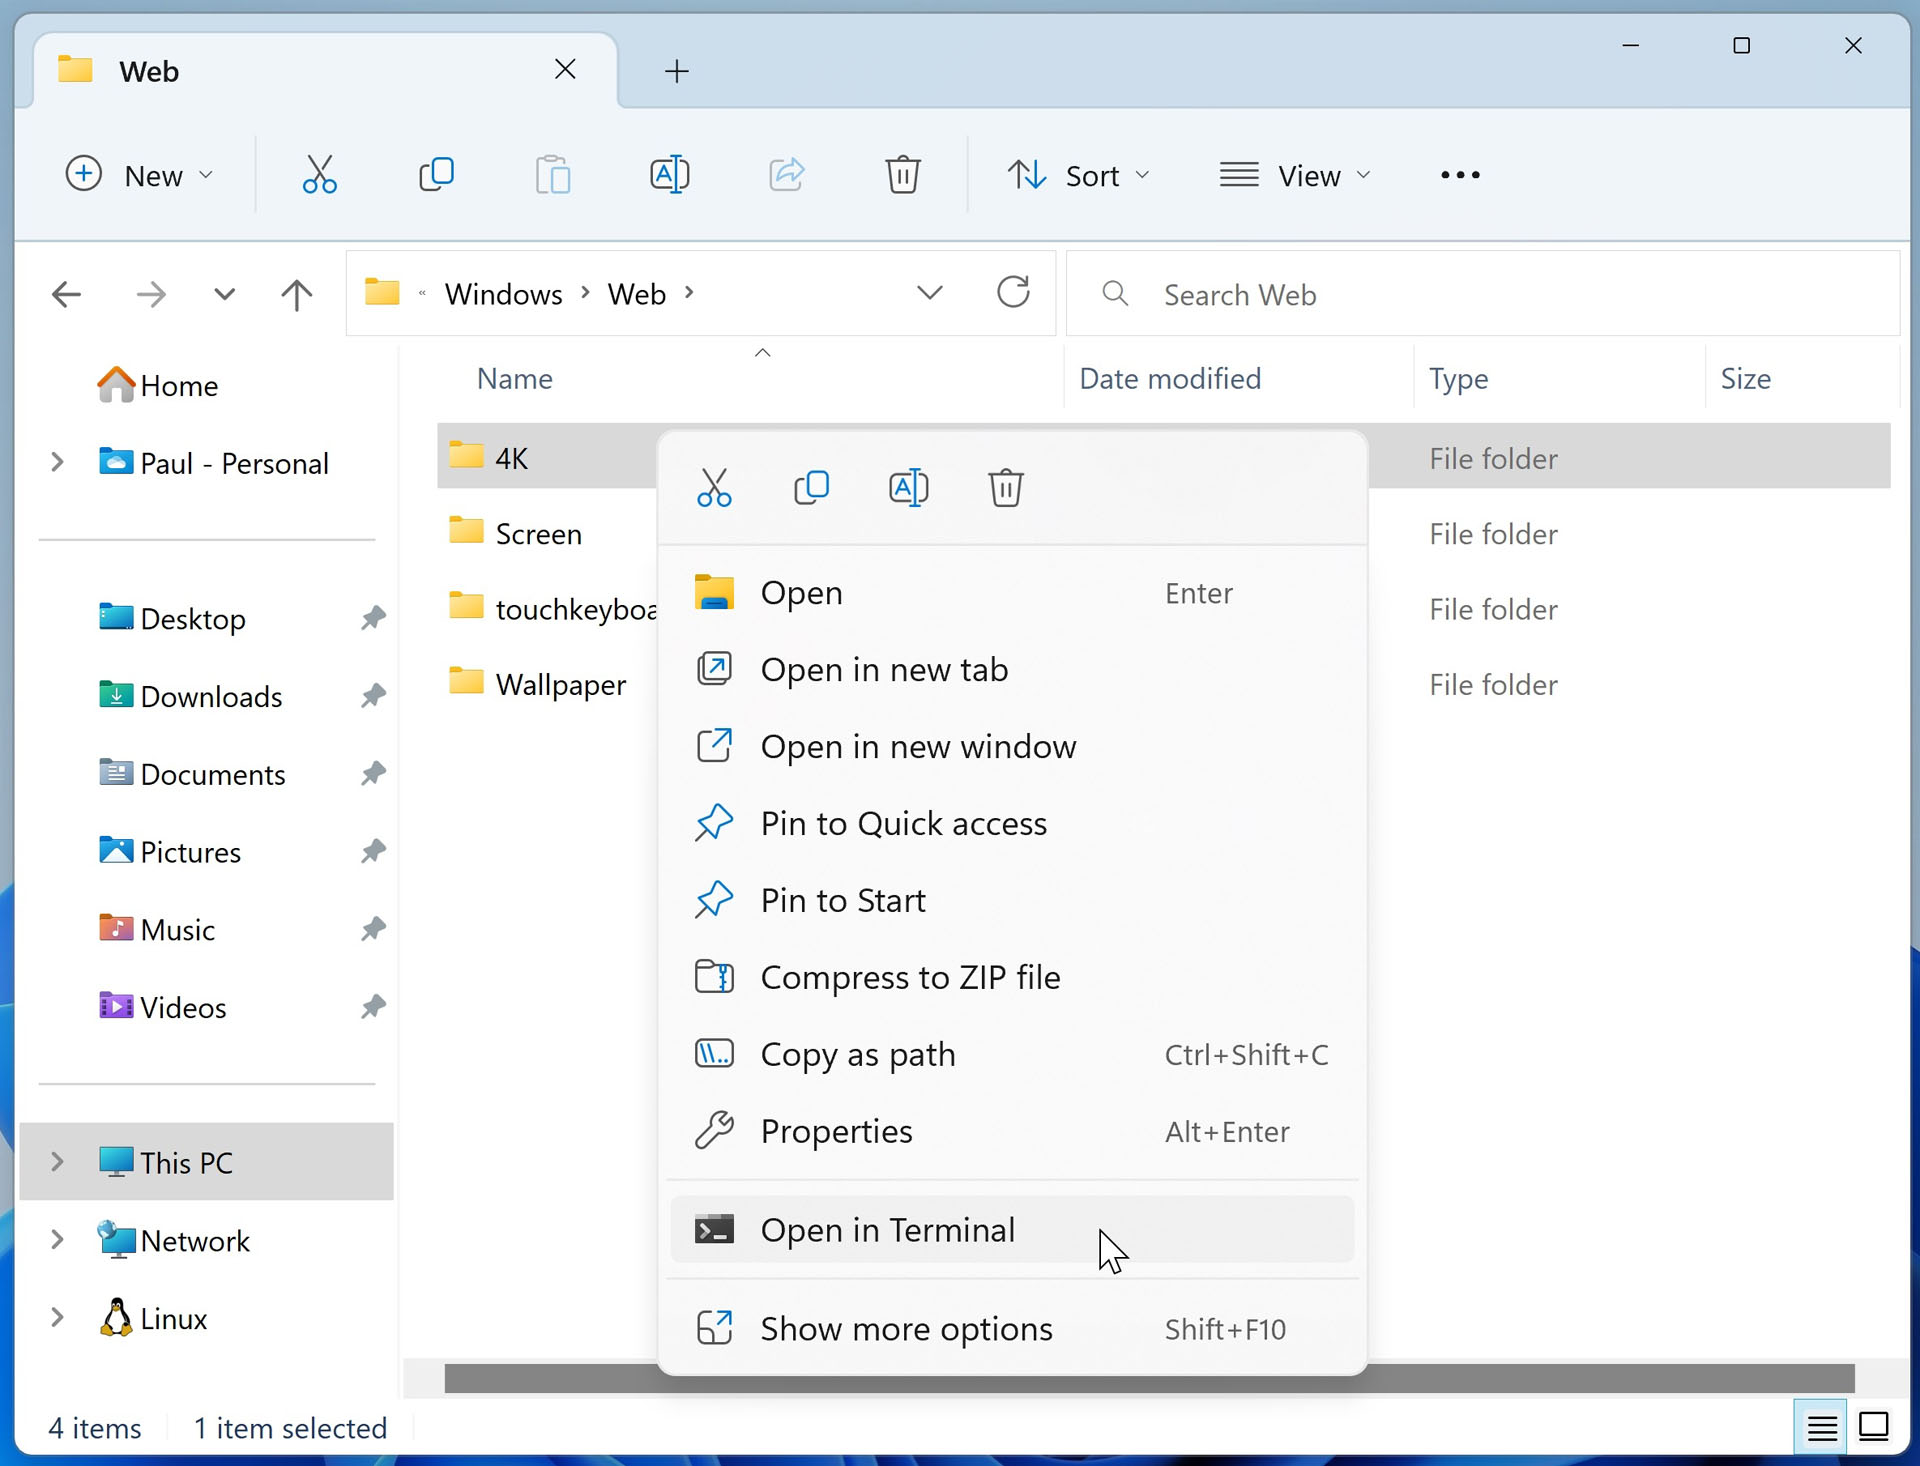
Open Terminal to a specific folder. If you have a long and complex folder location to get to and don’t mind using Terminal’s default profile (typically Windows PowerShell), you can navigate to the location of the containing folder in File Explorer and then right-click the folder you wish to be in and select “Open in Terminal” from the context menu that appears.

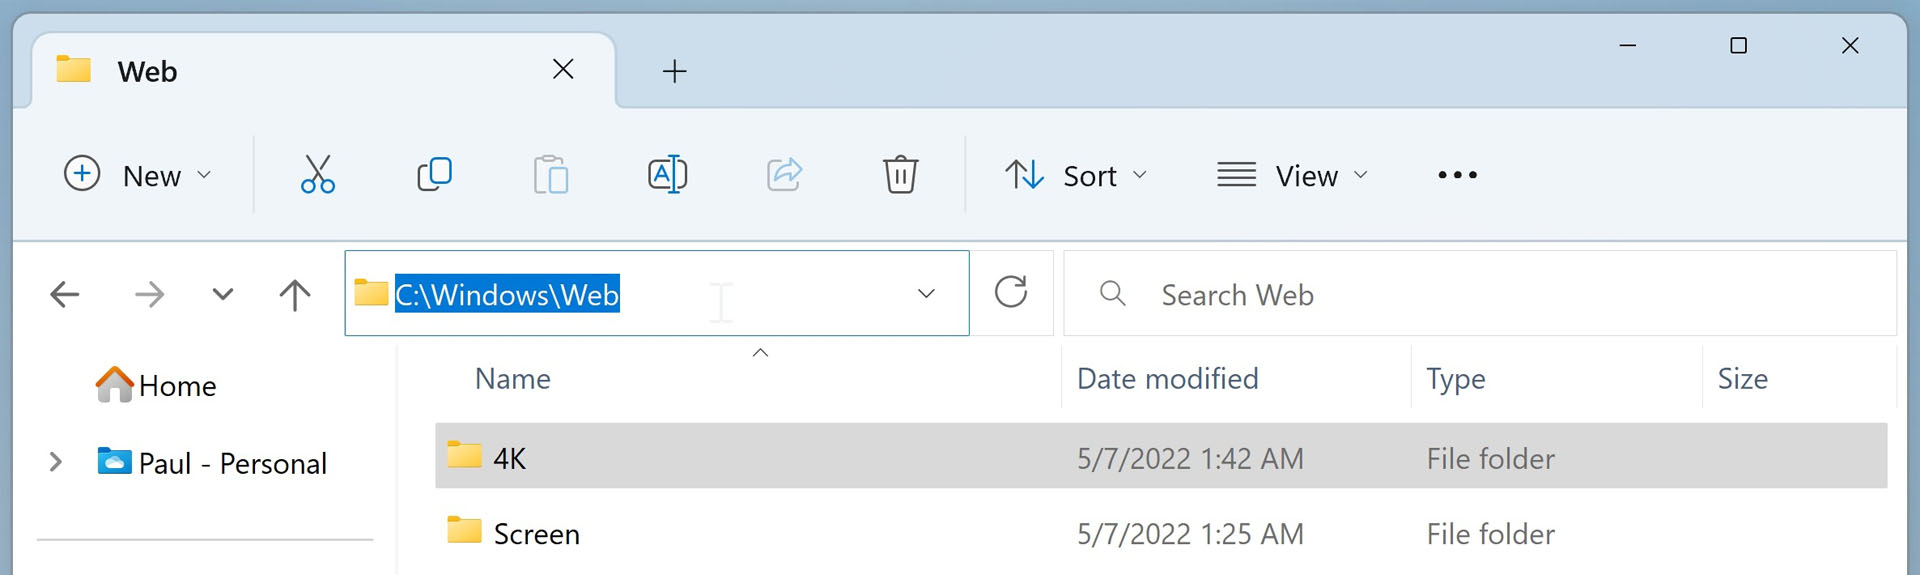
Use File Explorer to get the path. If you have a long and complex folder location to get to and you need to use a specific Terminal profile, you can navigate to the location of the folder in File Explorer, and select the contents of its address bar (type ALT + D), which is the path to that folder. Then, open Terminal with the profile you need and type cd followed by CTRL + V (for Paste) and then ENTER.
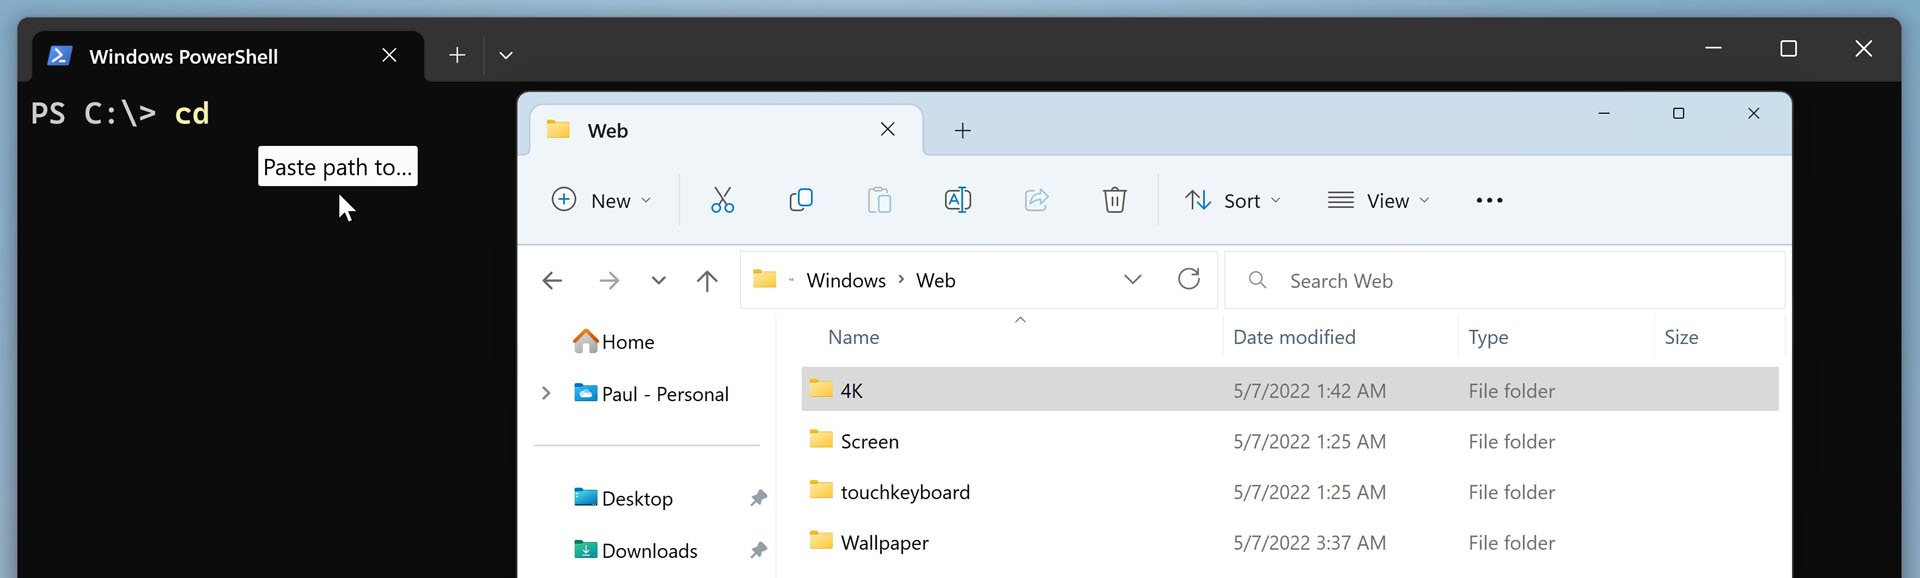
Drag and drop a folder. If you have a long and complex folder location to get to, type cd in Terminal. Then, navigate to the location of the containing folder in File Explorer, select the folder to which you wish to navigate, and then drag and drop it into Terminal. This will append the path to the command line, so you just need to hit ENTER to go there.

Gain unlimited access to Premium articles.
With technology shaping our everyday lives, how could we not dig deeper?
Thurrott Premium delivers an honest and thorough perspective about the technologies we use and rely on everyday. Discover deeper content as a Premium member.