Windows Package Manager
- Paul Thurrott
- Apr 30, 2023
-
3
The Windows Package Manager is a package management system designed to help you automate the installation, upgrading, configuring, and uninstalling of software applications in Windows 11. The trick is that it’s a command-line utility. But don’t let that bother you: it’s easy to learn and use, and there are third-party graphical front-ends if you get stuck.
Get to know the Windows Package Manager
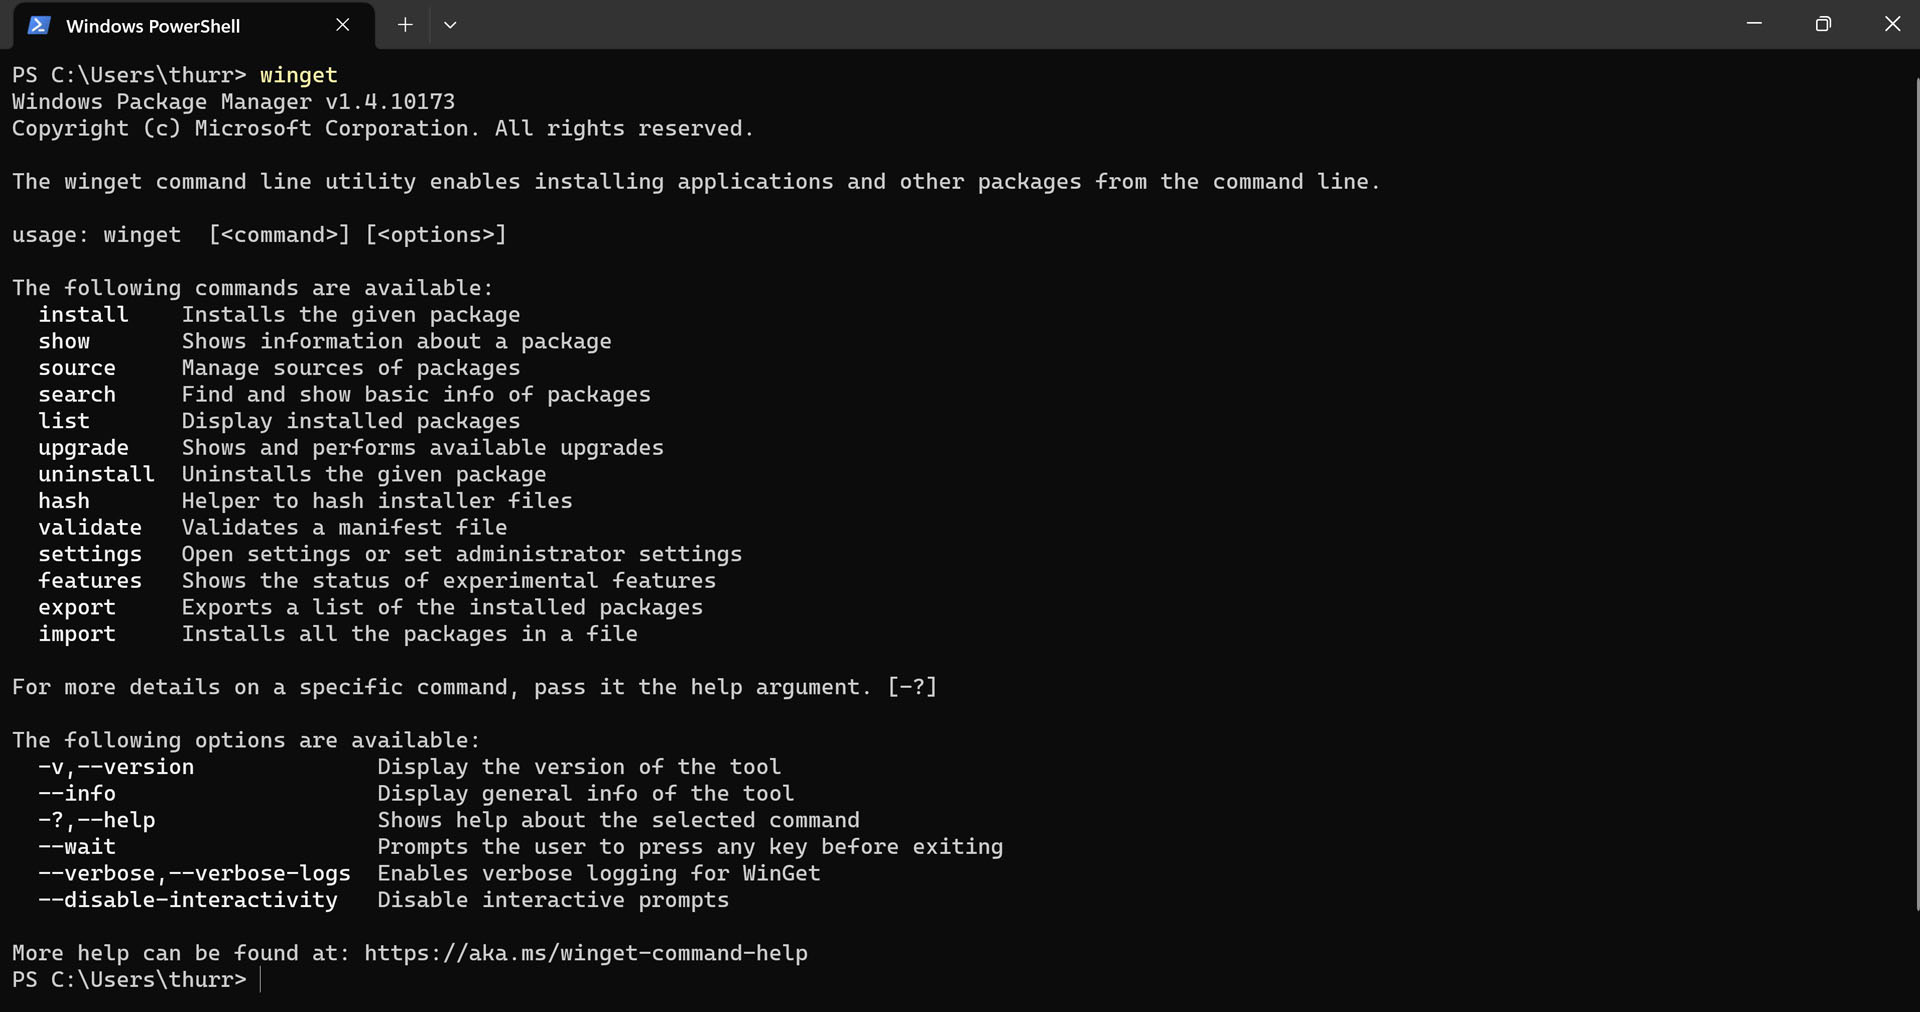
The Windows Package Manager is accessed using Windows PowerShell or the Command Prompt, typically via the Terminal application. Because it’s a command line application, having to type and retype Windows Package Manager would quickly get tedious, and so Microsoft has named this command using the much shorter moniker winget.
To get started, open Terminal and type the following command (followed by pressing ENTER):
>winget
The output describes the app, explains which command line arguments—separated into groups of commands and options—that winget accepts, and provides a link where you can learn more.
Learn more about app sources
Like other package managers, winget can be used to find apps and install them on your PC. Those apps are listed in repositories, and there are two configured by default, both of which are maintained by Microsoft: the Windows Package Manager app repository (winget) and the Microsoft Store (msstore). To see this, use the following command line:
>winget source list
Winget lets you add additional repositories, and it’s possible that your workplace or educational institution maintains such a thing. But most people are well-served by the default choices, which are trusted and secure.
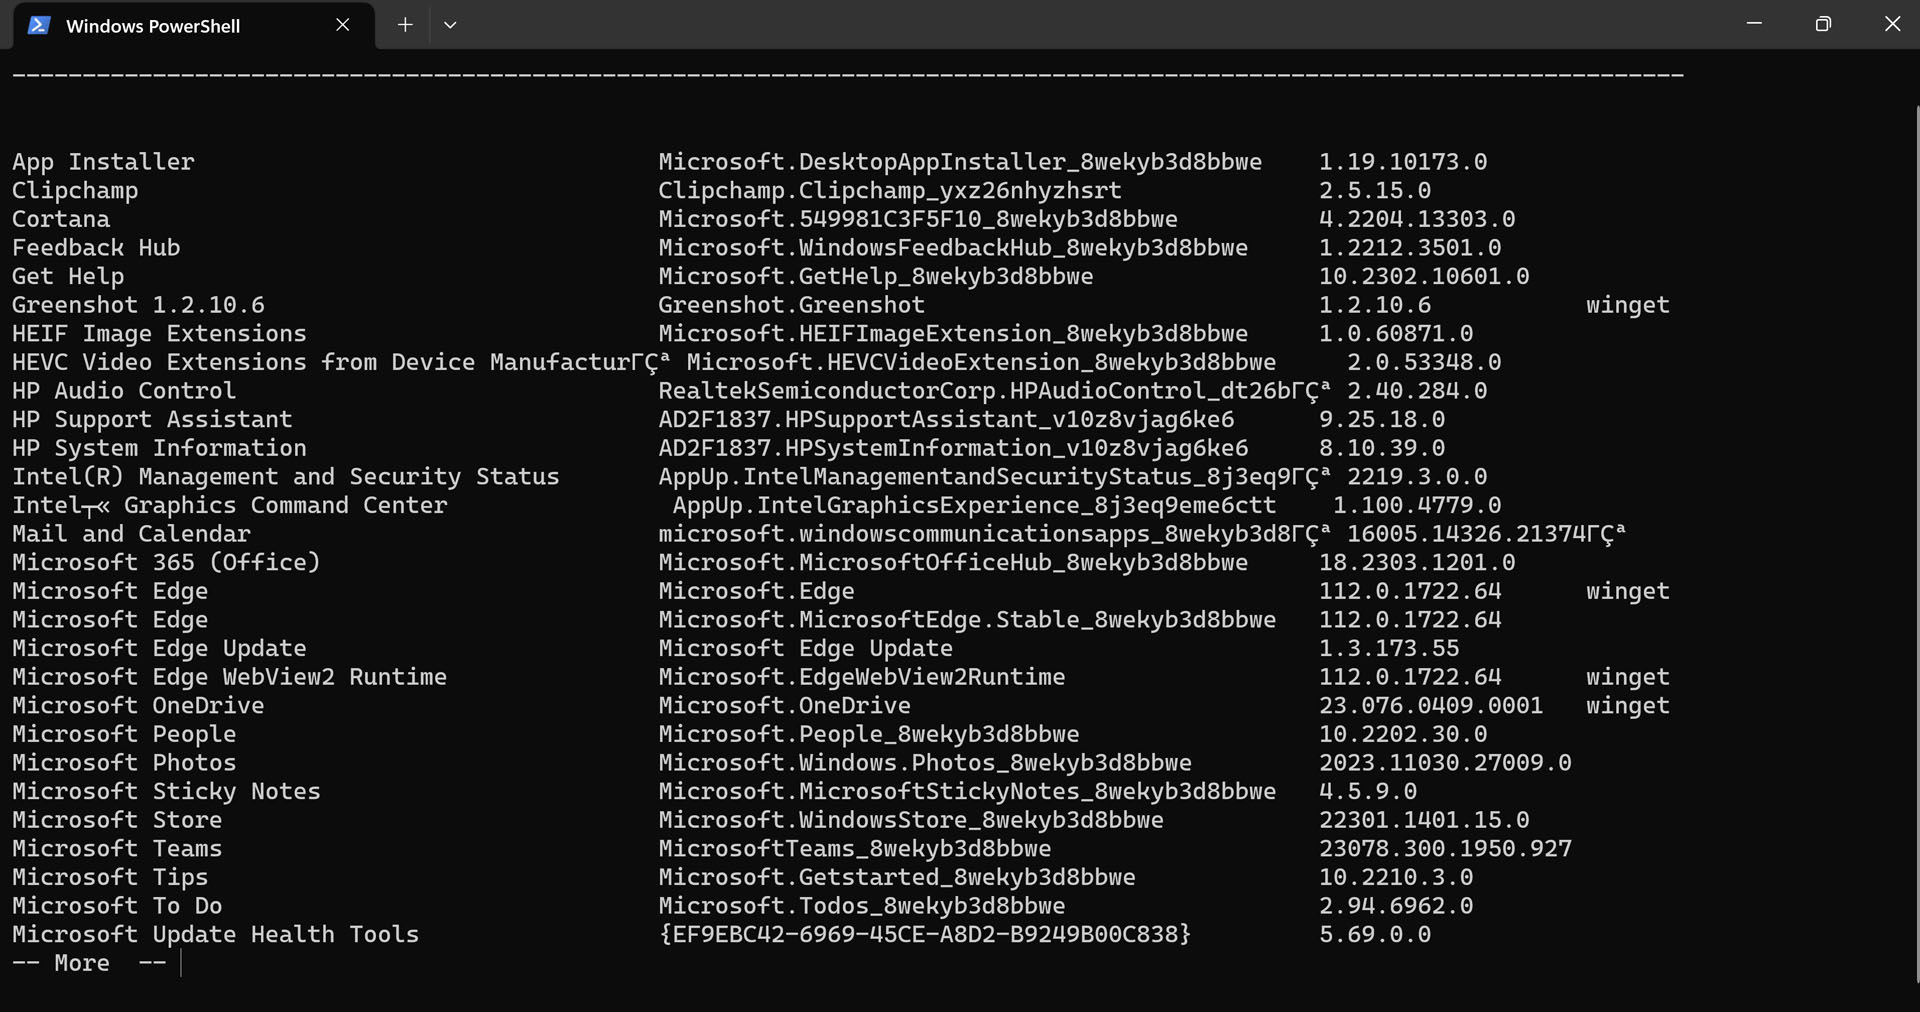
List the apps installed on your PC
To display a list of every app installed on your PC, regardless of source, use the following command line:
>winget list
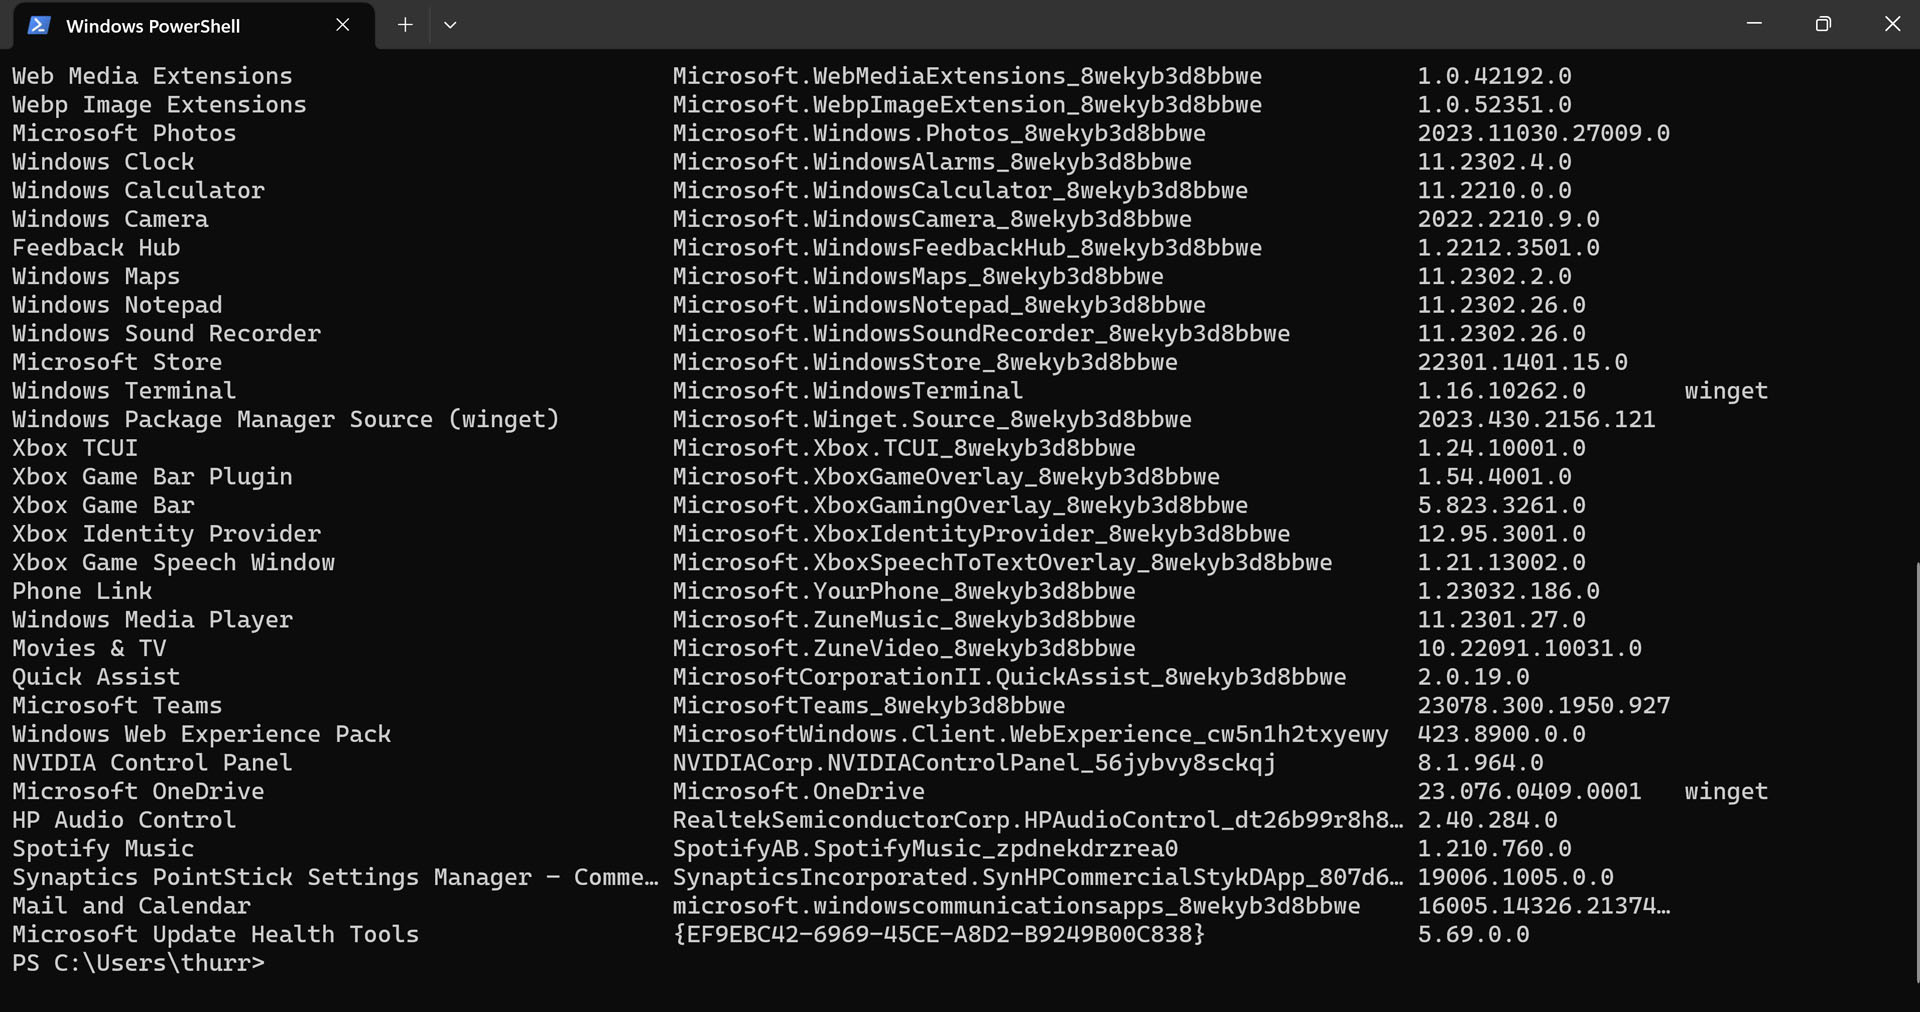
The issue, of course, is that this will be a long list, even if you’ve just installed Windows 11 for the first time. But you can pipe the output with the PowerShell more command to force the list to pause after displaying a page full of information. To move to each subsequent page of the list, tap the SPACE bar.
>winget list | more
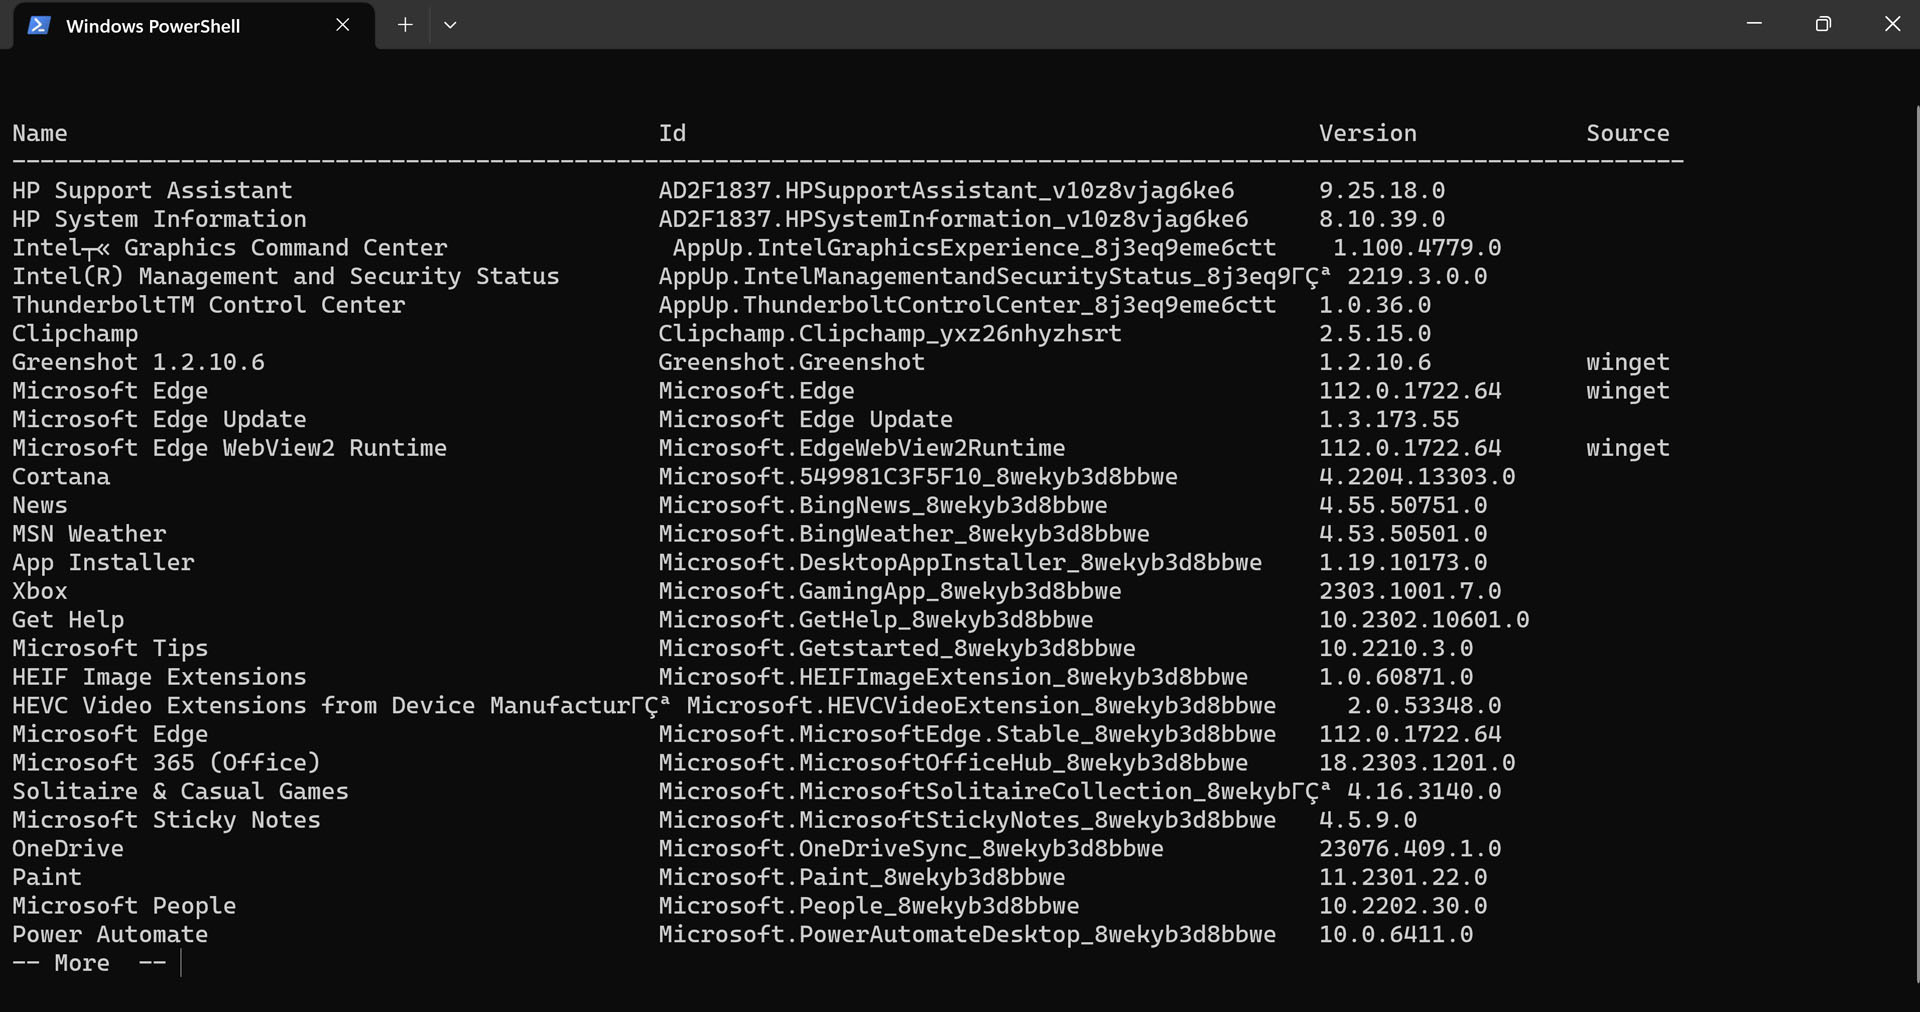

As you may be able to tell, the list provided by winget is sorted by Id and not Name, so it may appear to be non-alphabetical. If this bothers you, the following command line, which pipes the list to the PowerShell sort-object command, will display the list alphabetically by name.
>winget list | sort-object | more
OK, let’s move on to some key Windows Package Manager uses.
Find an app to install with the Windows Package Manager
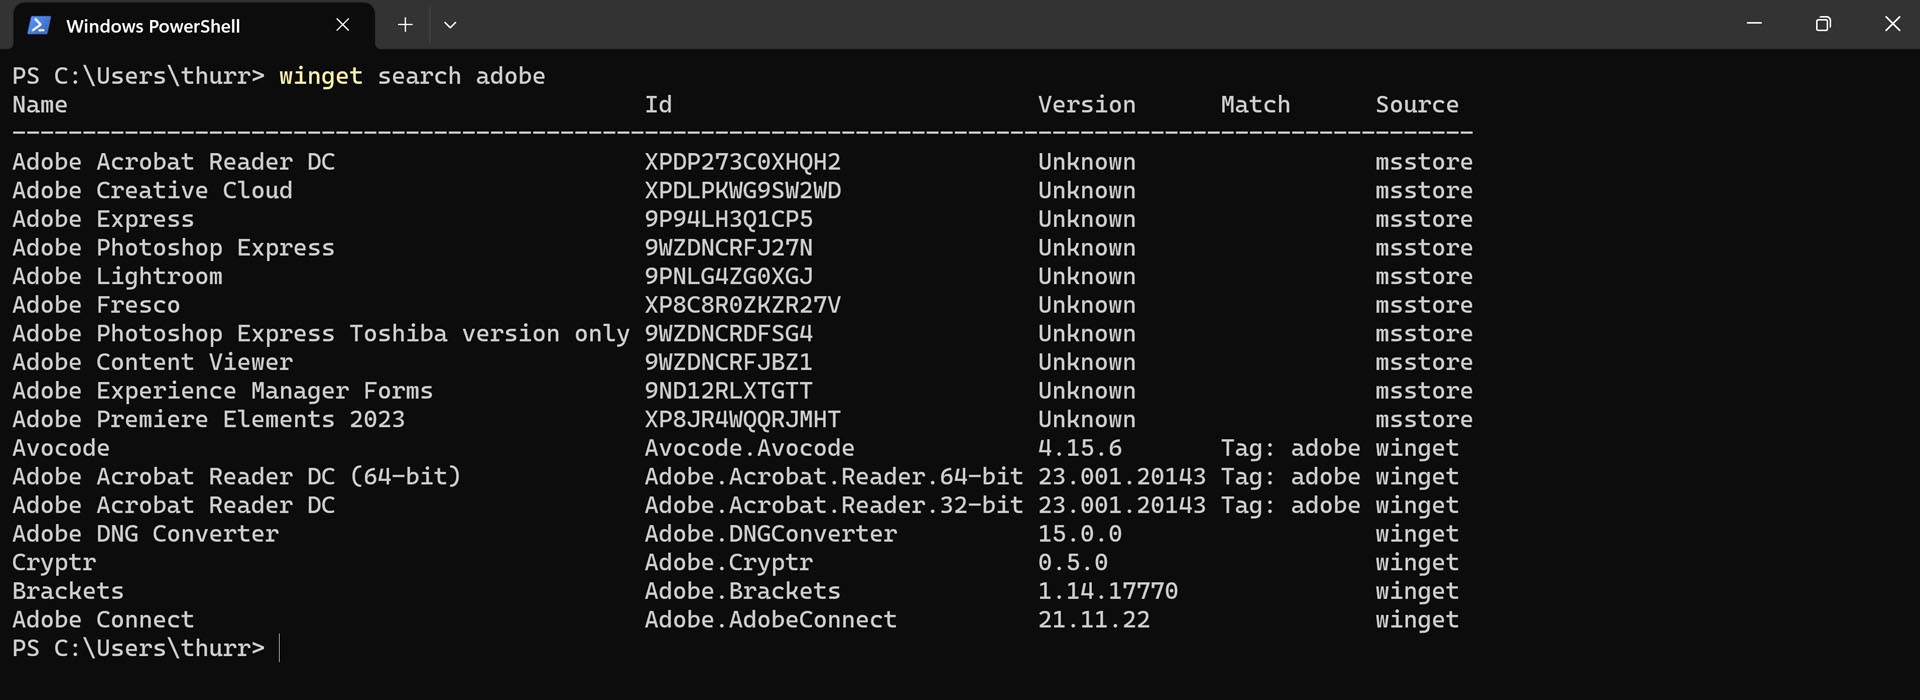
Winget has a search command that you can use to find apps to install. For example, if you want to see which Adobe apps are available in the default repositories, you can use the following:
>winget search adobe
The results list includes apps that come from the Microsoft Store (msstore) and the Windows Package Manager (winget) repositories, and you can see the source for each item in the Source column at the end.
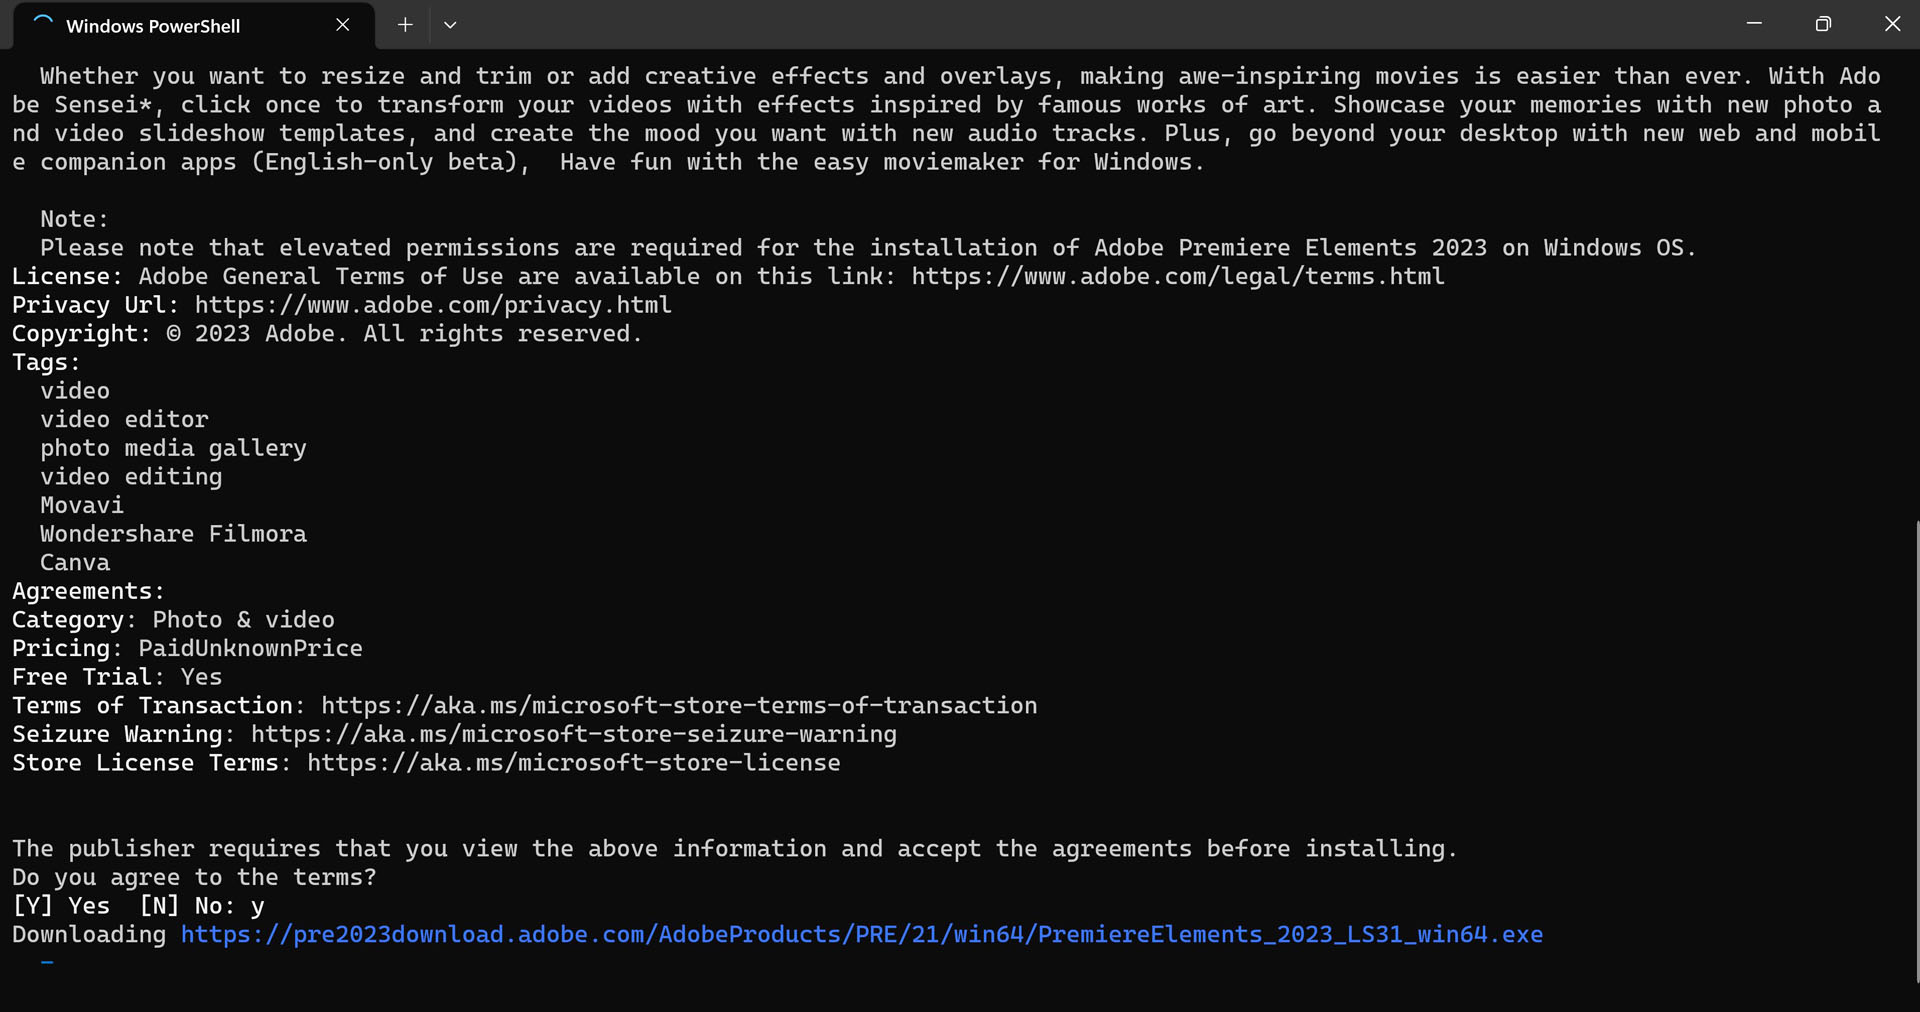
To install an app, you will use a command like the following:
>winget install [Name or Id]
For example, to install Adobe Premiere Elements 2023 from the Microsoft Store, you could use one of the following command lines:
>winget install "Adobe Premiere Elements 2023"
>winget install XP8JR4WQQRJMHT
Keep your apps up-to-date with the Windows Package Manager
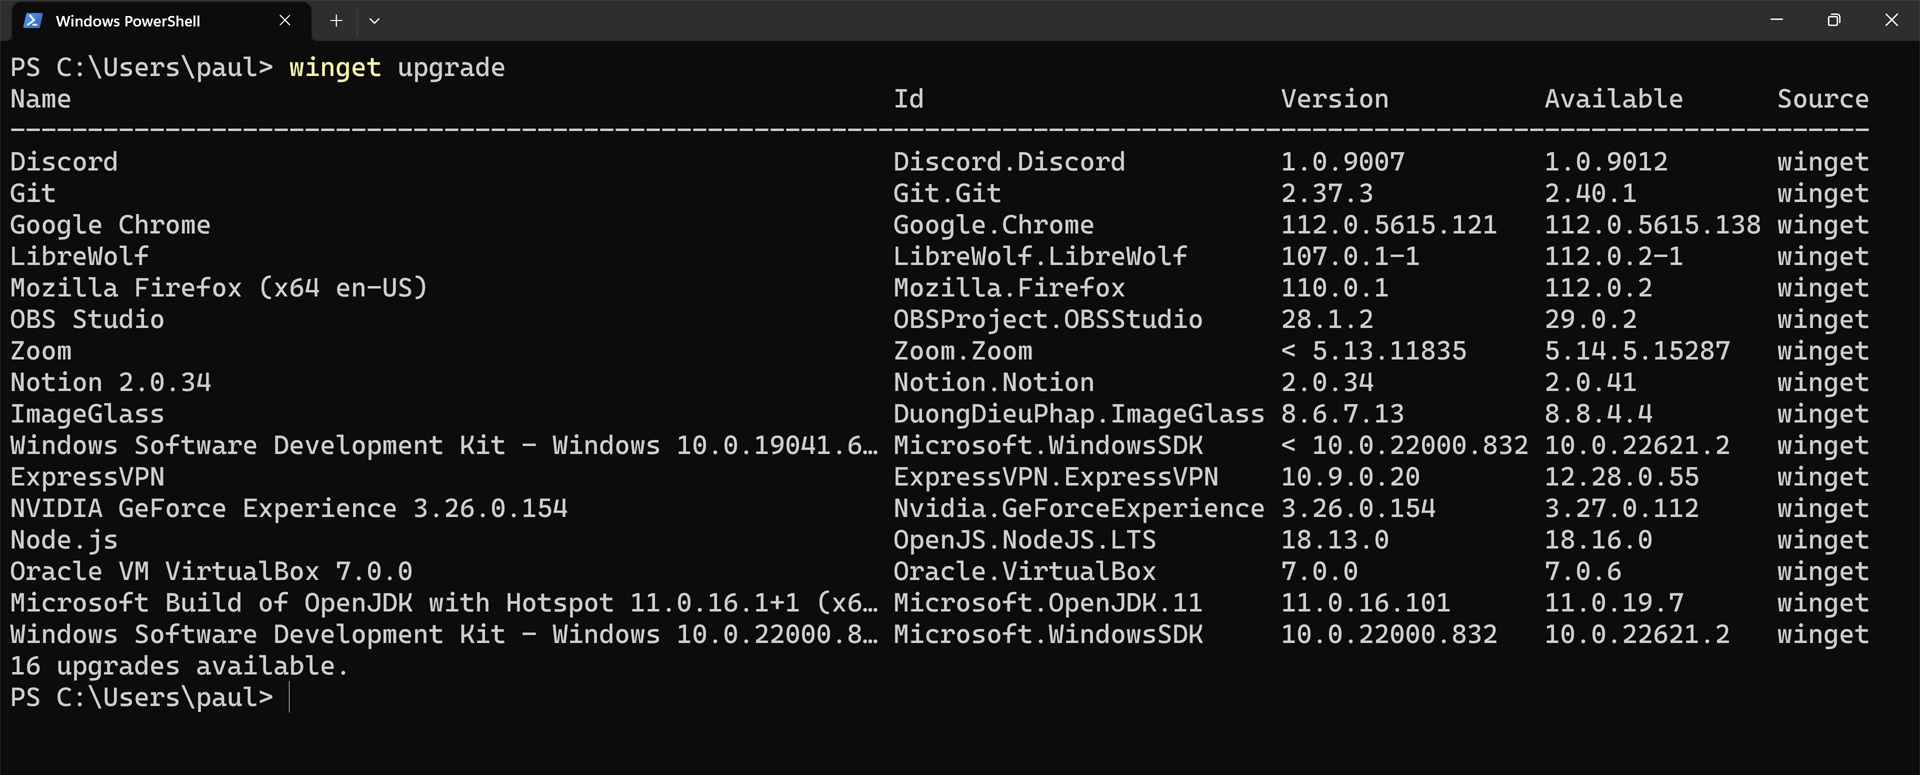
Winget has an upgrade command that can be used to discover which installed apps need to be updated, to upgrade individual apps, and to upgrade all of the apps with pending updates.
In its most basic usage, this command will tell you which apps need to be updated:
>winget upgrade
To update an individual app, you can use a command line like the following:
>winget upgrade [Name or Id]
For example, I can upgrade the application ImageGlass like so:
>winget upgrade ImageGlass

And if you run the winget upgrade command again, you will see that there is now one fewer app to update and that the app you updated is no longer in the list.
Of course, many times you will simply want to update every app that needs updating. To do so, use the following:
>winget upgrade --all
But it’s better to include the –include-unknown option because that will ensure that all apps, including those that do not report version information, are updated. (These versionless updates are ignored by winget upgrade because winget can’t be sure that the version in the repository is newer than the one on your PC.)
>winget upgrade --all --include-unknown
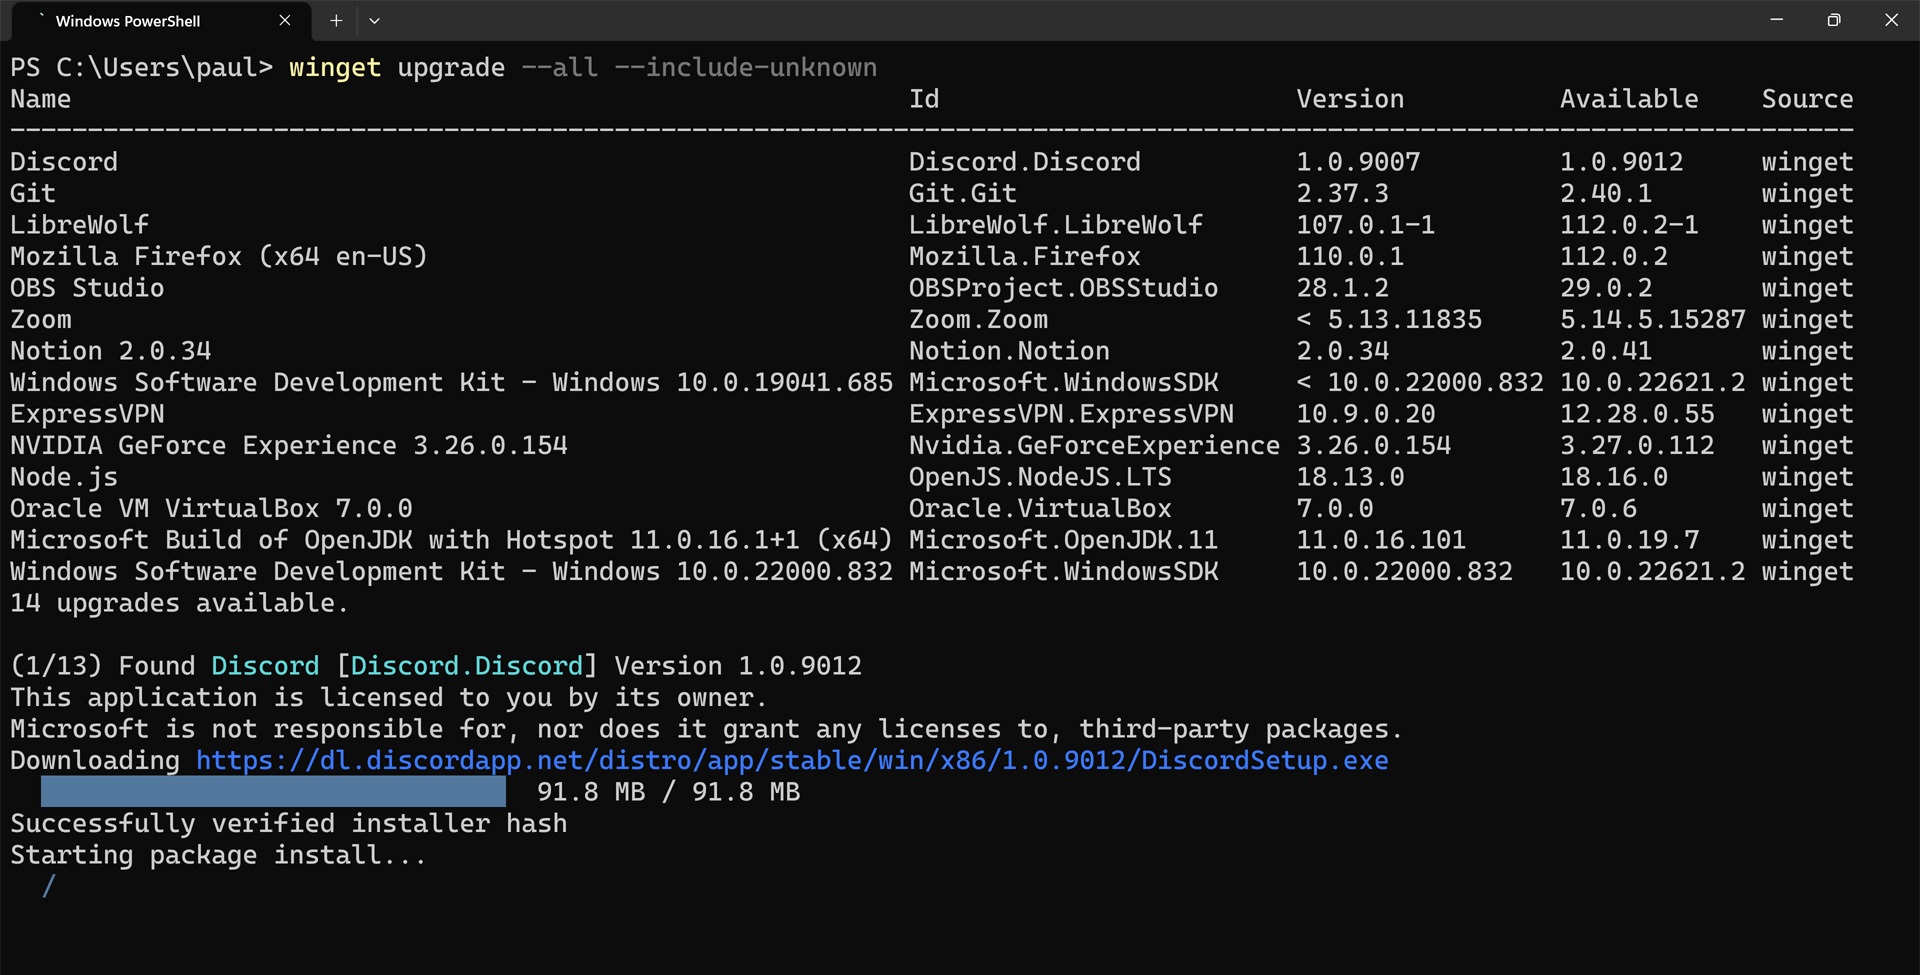

Depending on how many apps you have to update, this could take a while, and you may need to step through some interactive app setup routines. But once this is done, you can run winget upgrade again to make sure there are no more pending updates. It will report “No installed package found matching input criteria” if so.

Most apps will be updated automatically on their own, of course. Microsoft Store apps are managed by Microsoft, for example, and are kept up-to-date. And many web-based apps in the Windows Package Manager repository have their own mechanisms for keeping up-to-date. Regardless, it’s not a bad idea to check in with winget upgrade from time to time so you can catch any stragglers.
Bulk-install apps with the Windows Package Manager
When you use Reset This PC or buy a new PC and sign in to Windows 11 for the first time, you have several configuration tasks to complete. Among those tasks, you need to install the apps you need so that you can be productive. You can do so manually, of course, by browsing the Microsoft Store and searching the web. Or, you can automate this task using the Windows Package Manager and, optionally, a third-party tool.
Earlier in this chapter, we noted that you can use winget install to install a specific app. But you can also create a longer list of commands, each separated by a semi-colon (;), to install multiple apps at once. Then, you can execute that single command line to bulk-install as many apps as you want.
Doing this manually is tedious but possible. Just create the list of apps you wish to install, then use winget to find each app and, in turn, add the commands necessary to install it. Separate each with a semi-colon and, when done, execute the whole thing at once.
So let’s step through that. In this example, we’re going to try and install three alternate web browsers: Brave, Google Chrome, and Mozilla Firefox. In each case, we can use winget search [name] to find the exact name or Id, and to be clear, Id is always better because there are no spaces and you won’t need to worry about using single or double quotes. Then, we just need to list those names or Ids in a text document using Notepad and then build the command lines around them.
The Id for Brave is Brave.Brave, the Id for Google Chrome is Google.Chrome, and the Id for Mozilla Firefox is Mozilla.Firefox. So the full command line to install all three of these apps is:
>winget install --id=Brave.Brave -e ; winget install --id=Google.Chrome -e ; winget install --id=Mozilla.Firefox -e
The -e option ensures that winget installs the exact app noted by the Id.
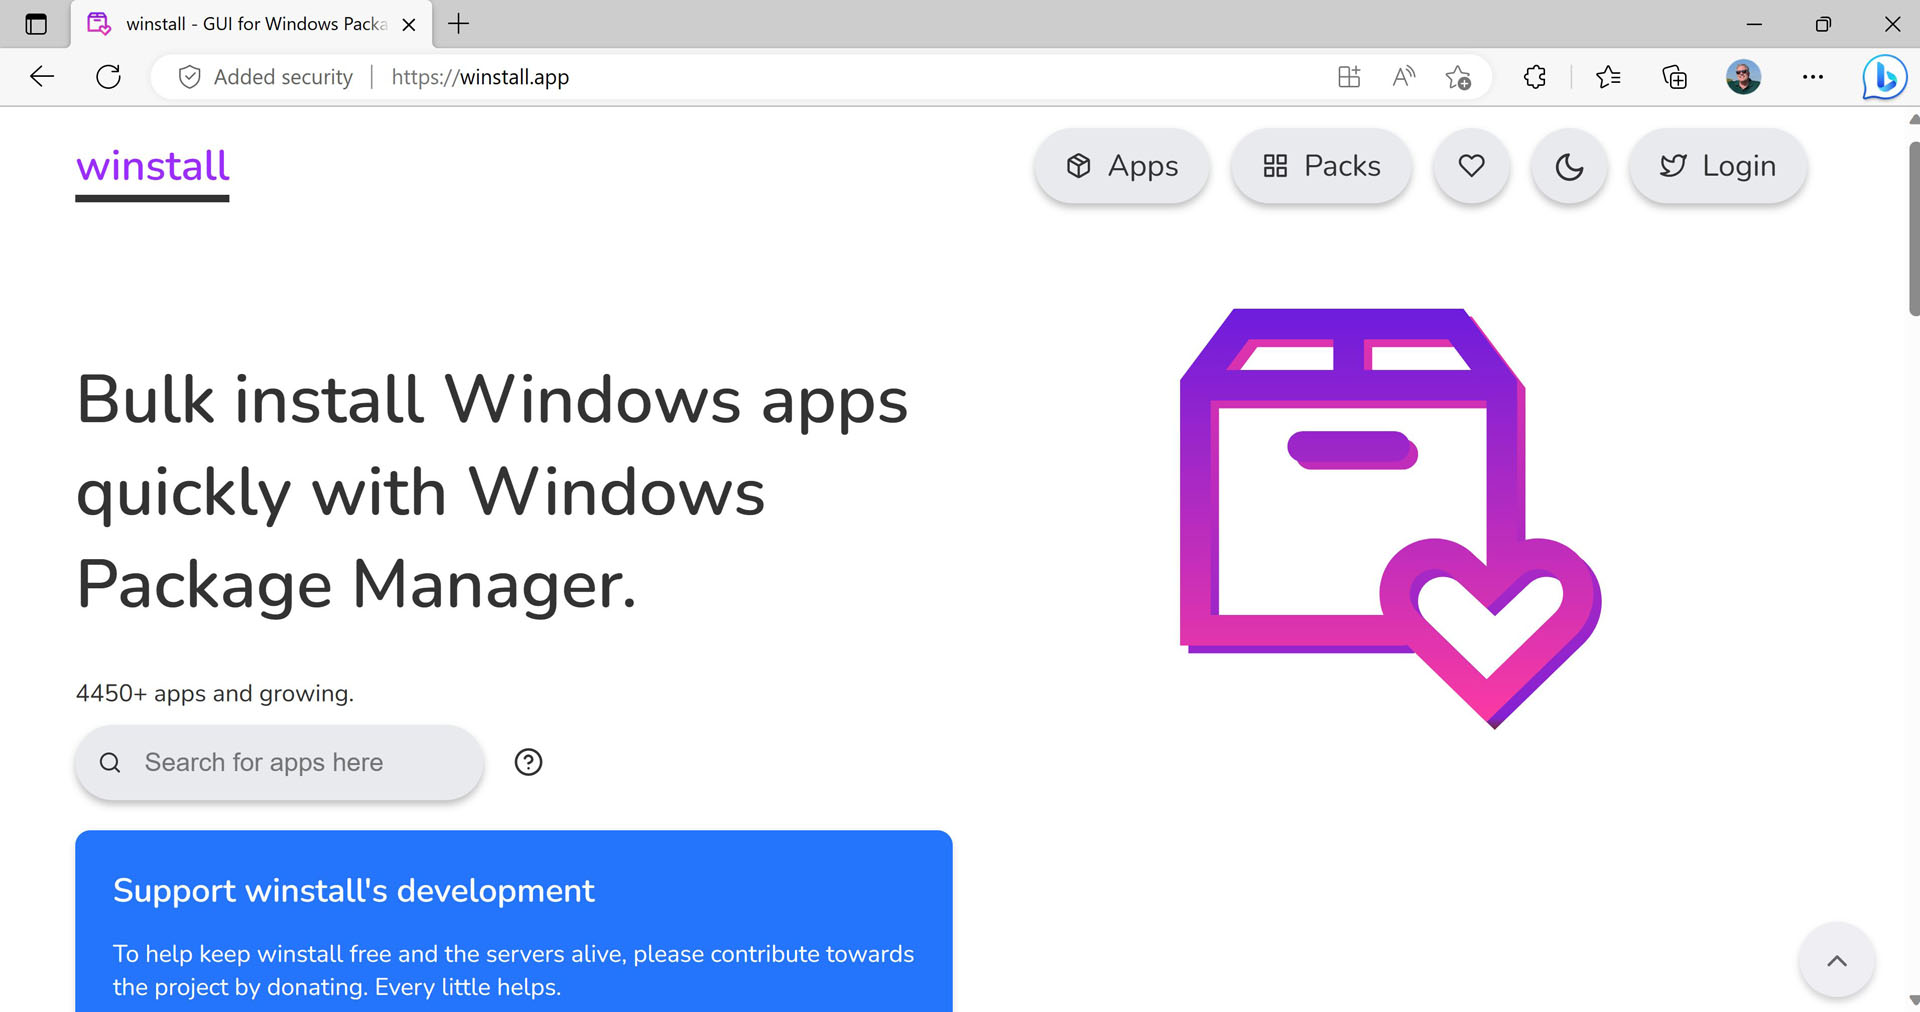
That works, of course. But there is an easier way, and this is especially useful if you have a long list of apps you wish to install: our friend Mehedi Hassan has created a website called Winstall that can be used to generate a command line or script for bulk-installing multiple apps with winget. All you have to do is search for each app and Winstall will create the necessary command line (or script) for you.
Using the same example as above, you can search for each browser in turn, clicking the “+” next to each to add it to the list. Then, when you’re done, click the “Generate script” button at the bottom of the page. Winstall will present Batch, PowerShell, and Winget Import versions of the command line, so select PowerShell and then “Copy to Clipboard.”
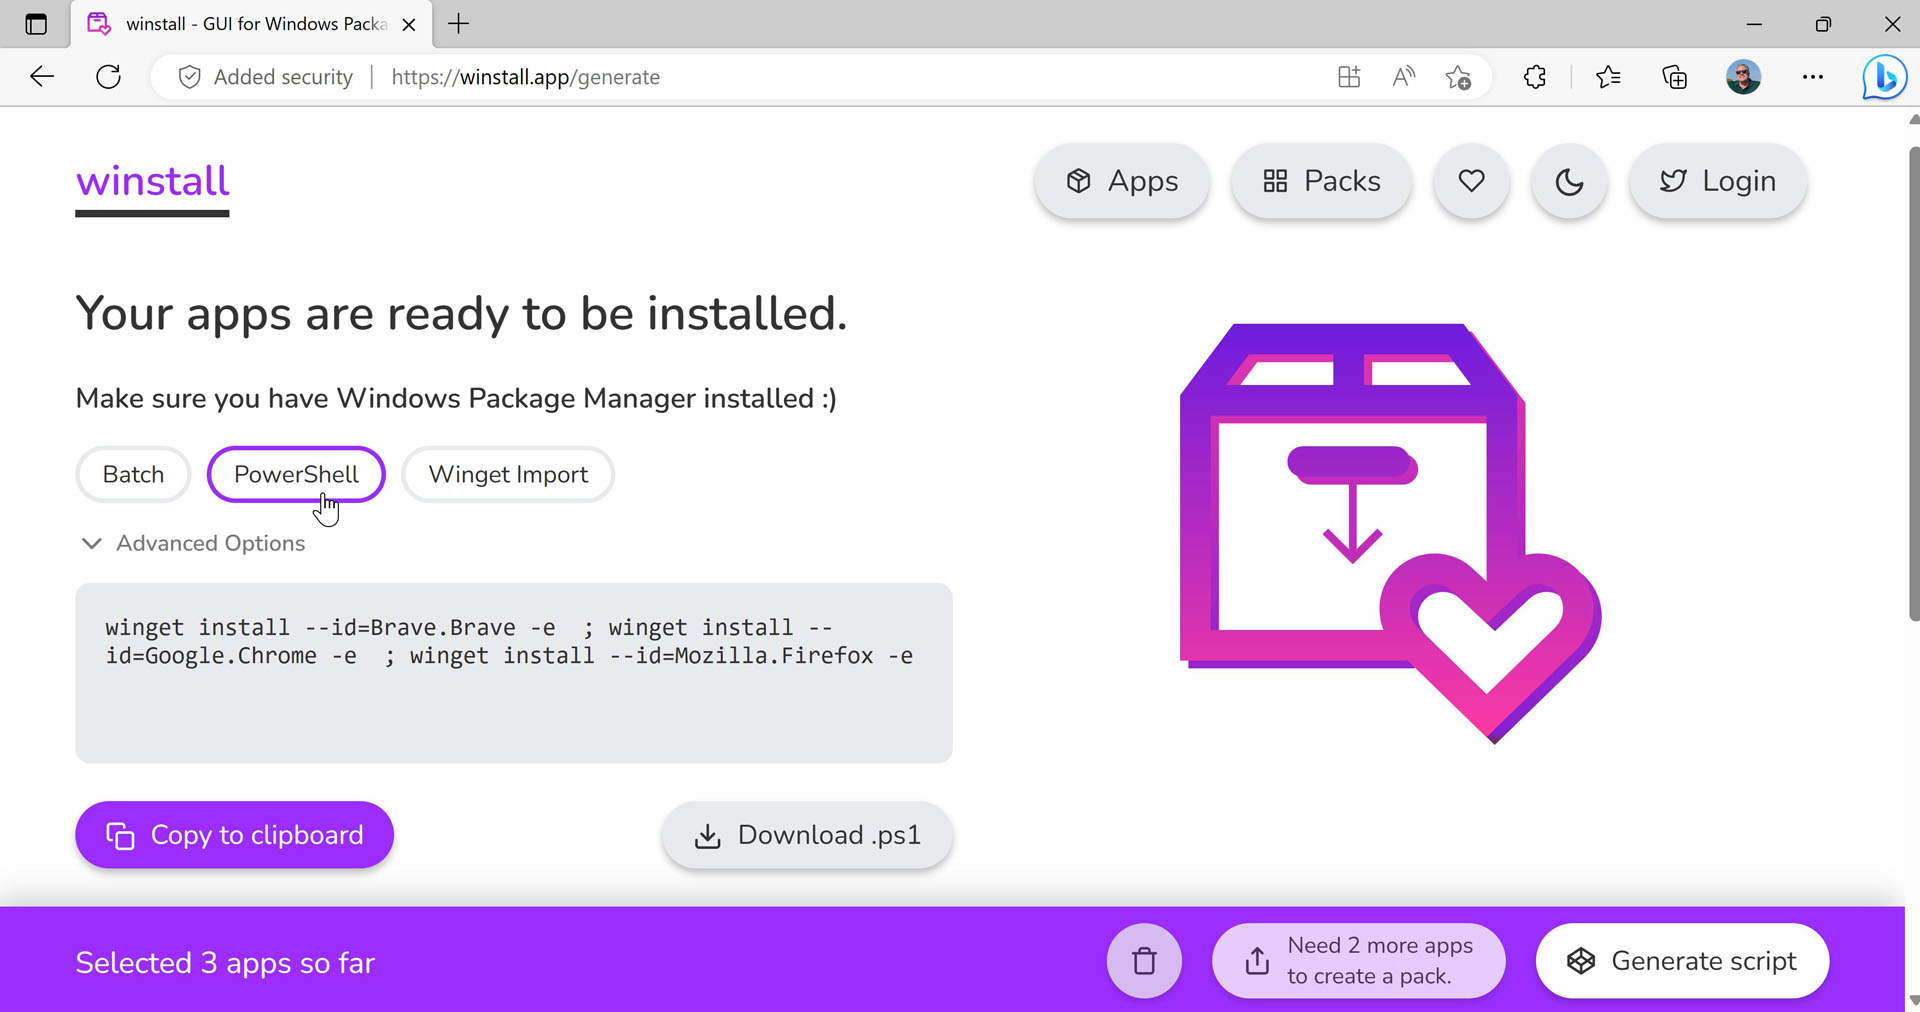
Then, you can paste that into a Terminal window to get those browsers installed. Or, paste it into Notepad and save it as a file you can reference later.

Gain unlimited access to Premium articles.
With technology shaping our everyday lives, how could we not dig deeper?
Thurrott Premium delivers an honest and thorough perspective about the technologies we use and rely on everyday. Discover deeper content as a Premium member.