Camera
- Paul Thurrott
- Jul 01, 2023
-
1
Windows 11 comes with a basic Camera app that you can use to take photos and videos with your PC’s cameras. It even provides some scanning capabilities.
Get to know the Camera app
Anyone who has used the Camera app on their smartphone will find the Windows 11 Camera app to be immediately familiar. It provides a large viewfinder for the default camera and then sets of controls on the side(s) of the viewfinder.
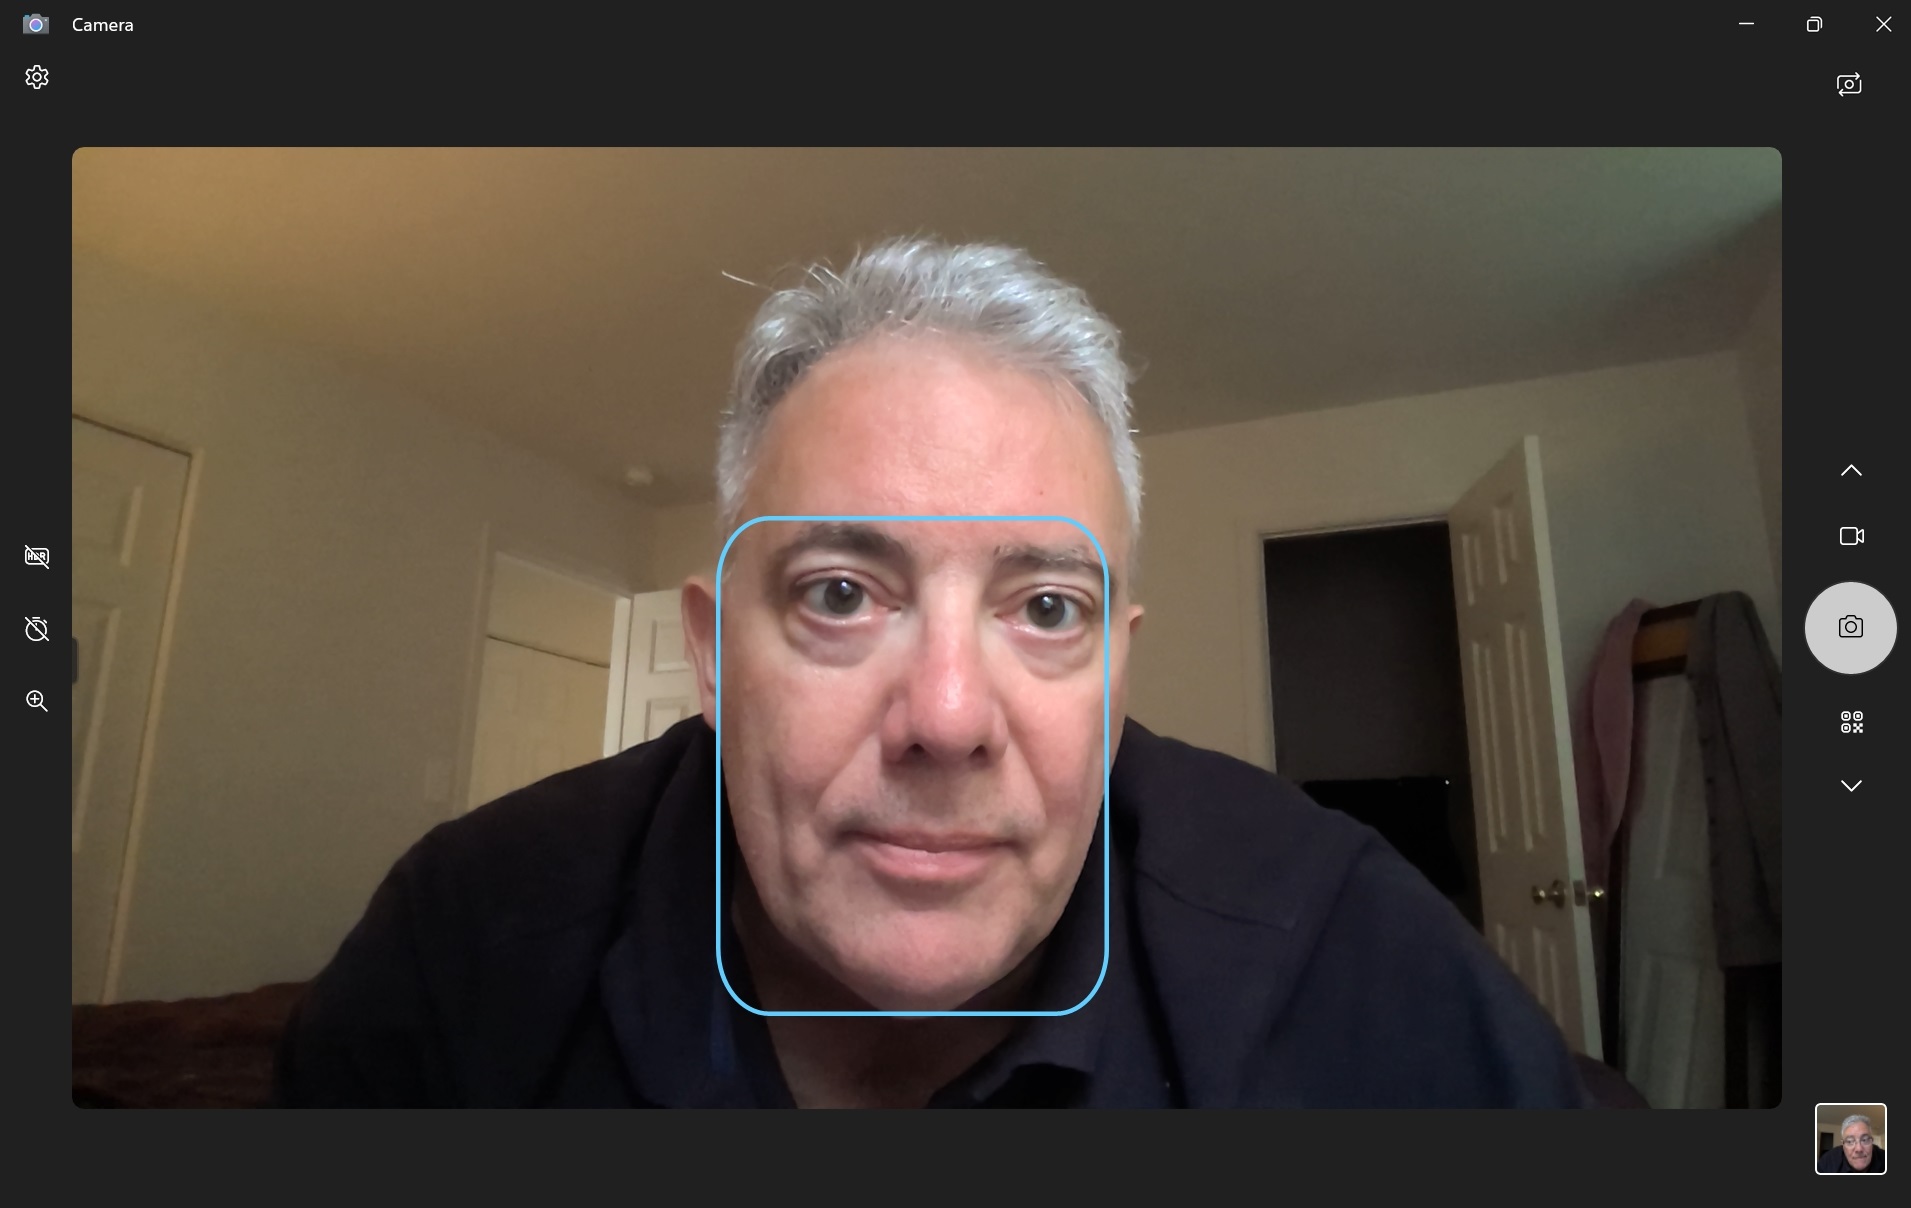
If your PC has two or more cameras attached to it, a “Change camera” button will appear at the top right of the app. You can click this to toggle between the available cameras.
Below that, you will see various buttons that let you select which mode the Camera app is in. It defaults to camera mode, but you can also switch to Video, Document, Whiteboard, or Bar Code modes.
Then, at the bottom right, you will find a Camera roll control that displays a still of the last photo or video you took with the app. If you click this item, the Camera app will display its Camera roll view, which lets you access any content you’ve captured during the current session.
In the Camera roll view, you move between the available content using the arrow keys on your keyboard, perform light editing (rotate, crop, etc.), share content, and so on. An “Open the Photos app” button in the top left will do as described and let you edit this and other Camera-captured content in the Photos app.
Click the “Back” (“<-“) button in the upper left corner of the Camera app window to leave the Camera roll view.
Configure the Camera app and your PC’s cameras
The Camera app offers a settings interface, but your PC’s cameras are configured elsewhere.
Configure the Camera app
The Camera app is configured in Camera settings, which is accessible via the Settings button in the upper left of the app window.
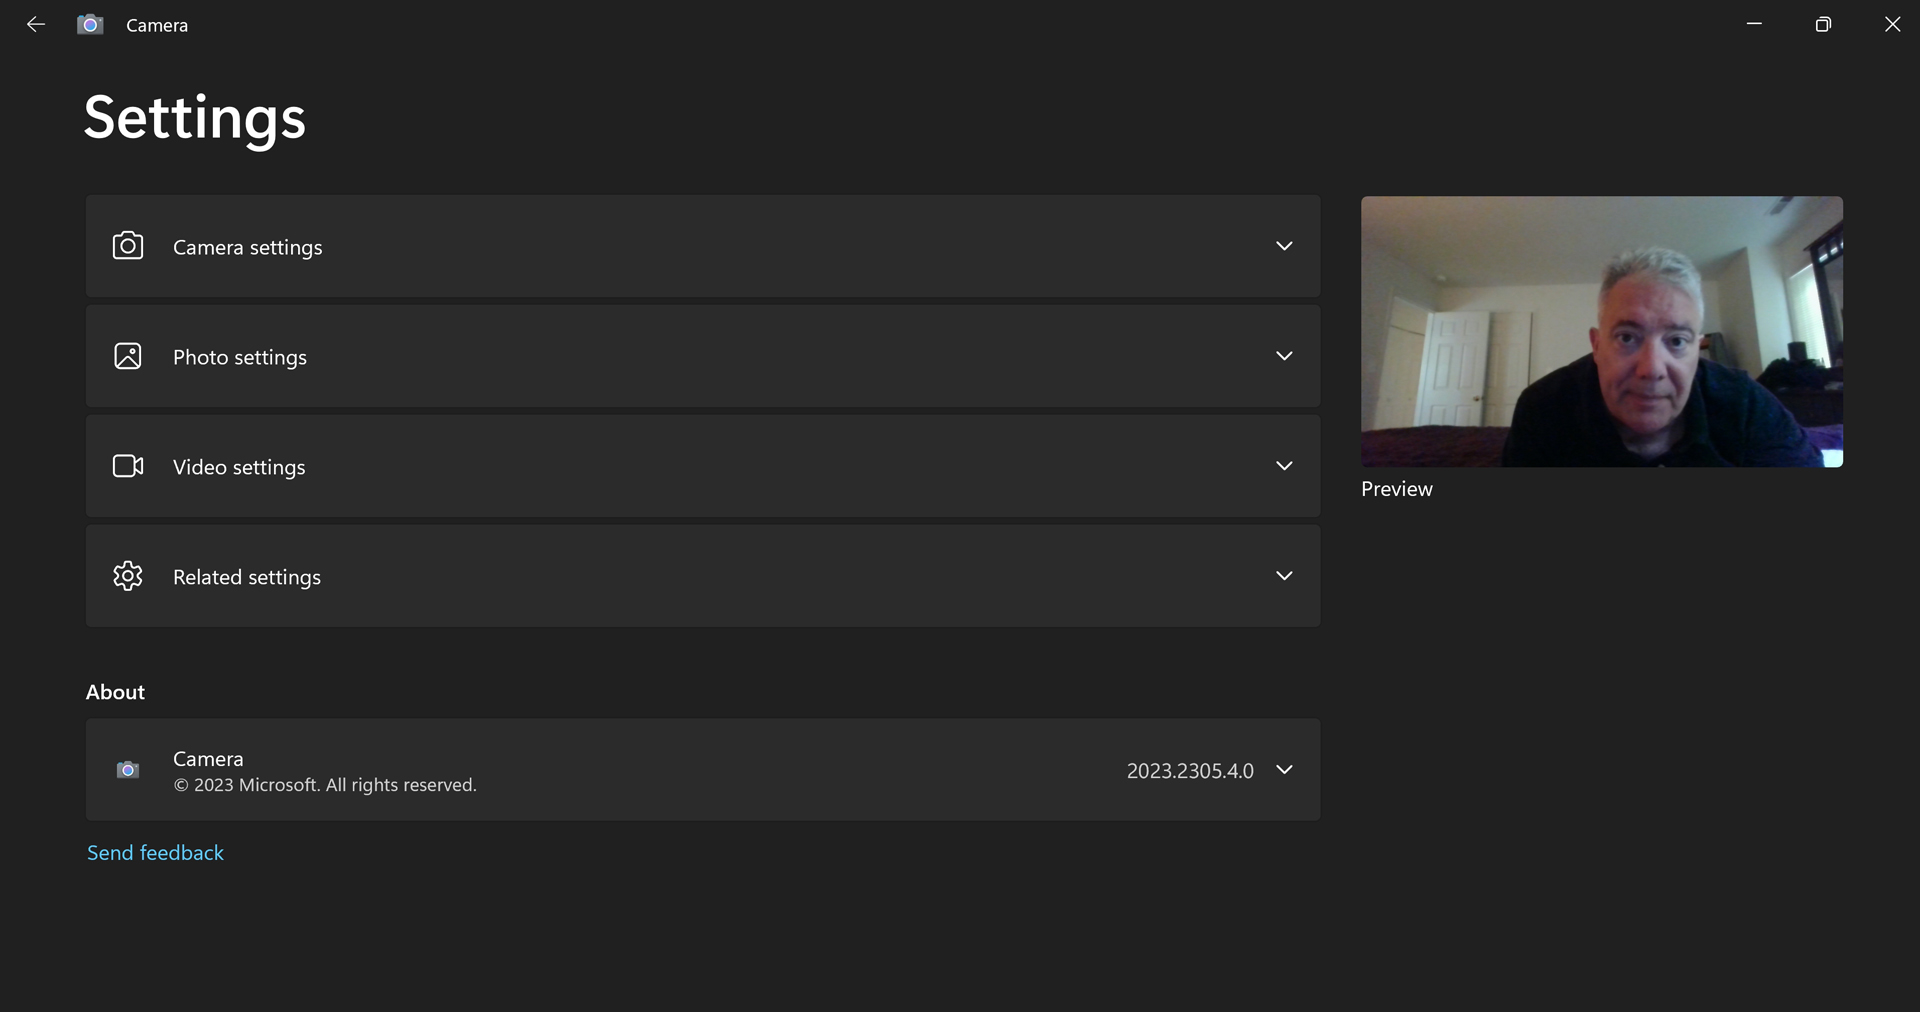
Key settings here include:
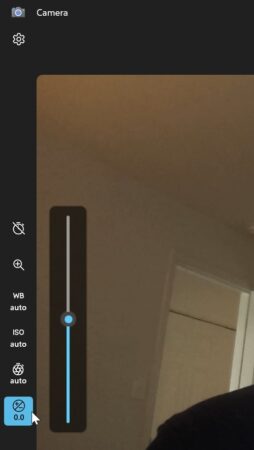
Camera settings, Show advanced controls for photos and videos. By default, the Camera app’s Camera mode provides a set of camera option buttons to the left of the viewfinder. These options vary by camera, but they can include such things as HDR, Photo timer, and Zoom. If you enable this option, you will see more controls in the Camera view (and in the Video view, which doesn’t typically display any option buttons.) These advanced controls can include Manual focus, Brightness, White balance, ISO, Shutter speed, and more.
Camera settings, Framing grid. The Camera app lets you optionally enable a framing grid of horizontal and vertical lines that can help you frame and compose the image or video you’re taking. There are several choices–Rule of thirds, Golden ratio, and others–each of which is based on a common photographic guideline.
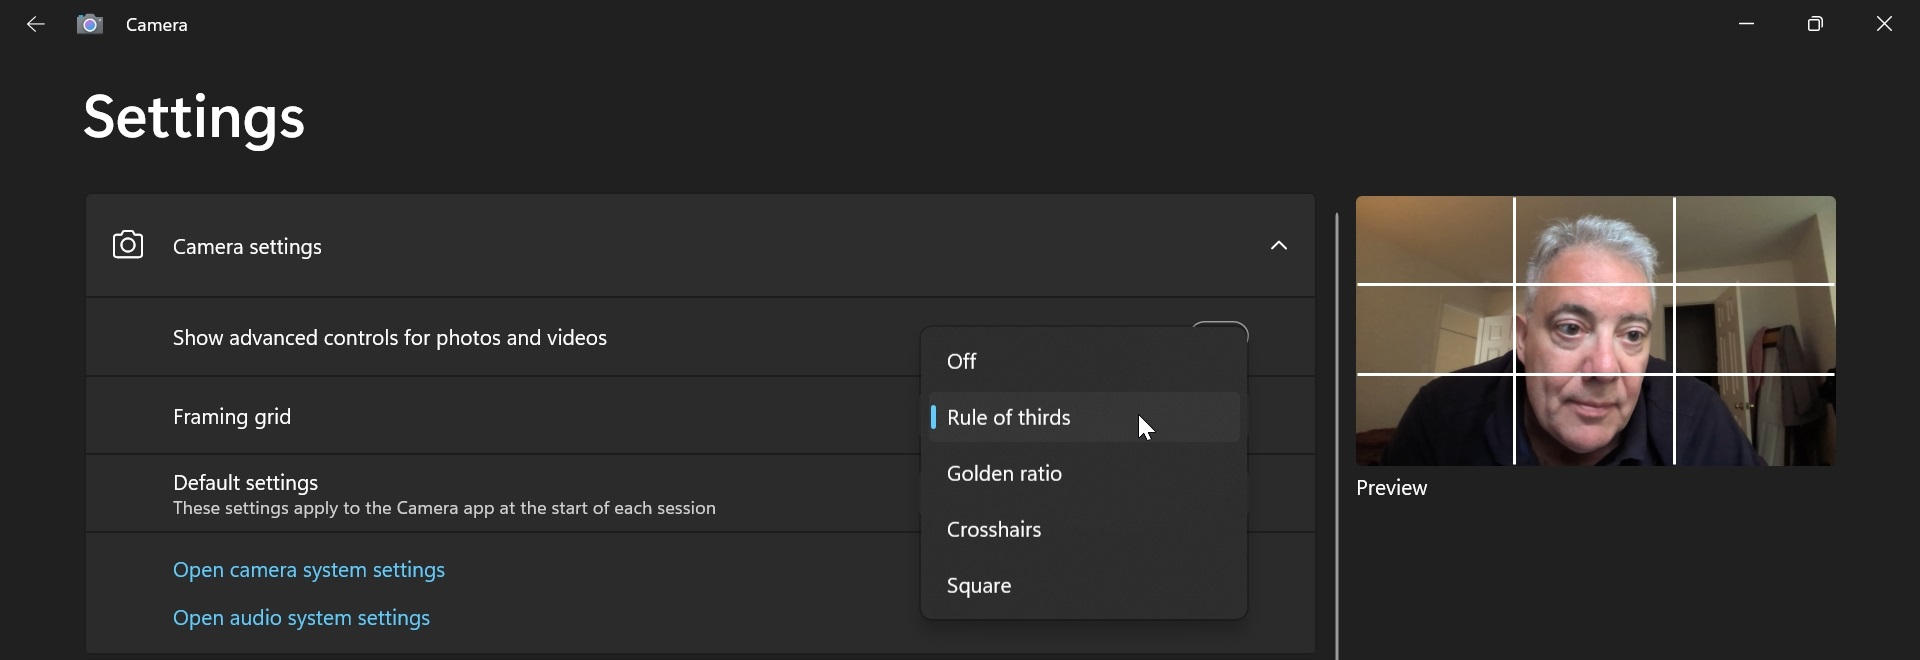
Photo settings, Photo quality. By default, the Camera app will take photos at the highest possible resolution supported by your camera. But you can use this setting to configure a different resolution and, in many cases, other aspect ratios too.
Photo settings, Time lapse. By default, the Camera app supports taking individual photos each time you click the Camera button. But if you enable this option, the Camera app will take multiple photos each time you click the Camera button and it will continue doing so until you click it again.
Video settings, Video quality. By default, the Camera app will record videos at 1080p (1920 x 1080) with a 16:9 aspect ratio at 30 fps (frames per second) or at the highest quality level supported by your camera, whichever is lower. But you can use this setting to configure a different video quality setting, depending on the capabilities of your camera.
Related settings, Choose whether camera can use location info. The first time you open the Camera app, you are prompted to decide whether to let it access your precise location. But you can use this link to navigate directly to Location settings in the Settings app where you can toggle this permission to your liking.
Configure your PC’s cameras
Separately from the Camera app, you can configure the cameras attached to your PC in the Settings app.
To do so, open Settings (WINKEY + I) and navigate to Bluetooth & devices > Cameras.
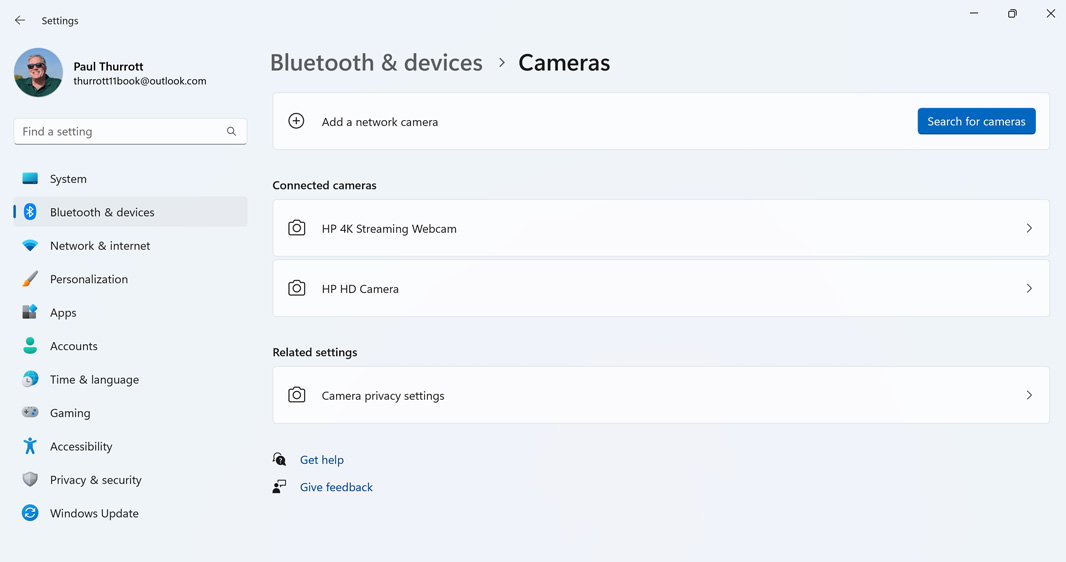
Then, select the camera you want to configure.
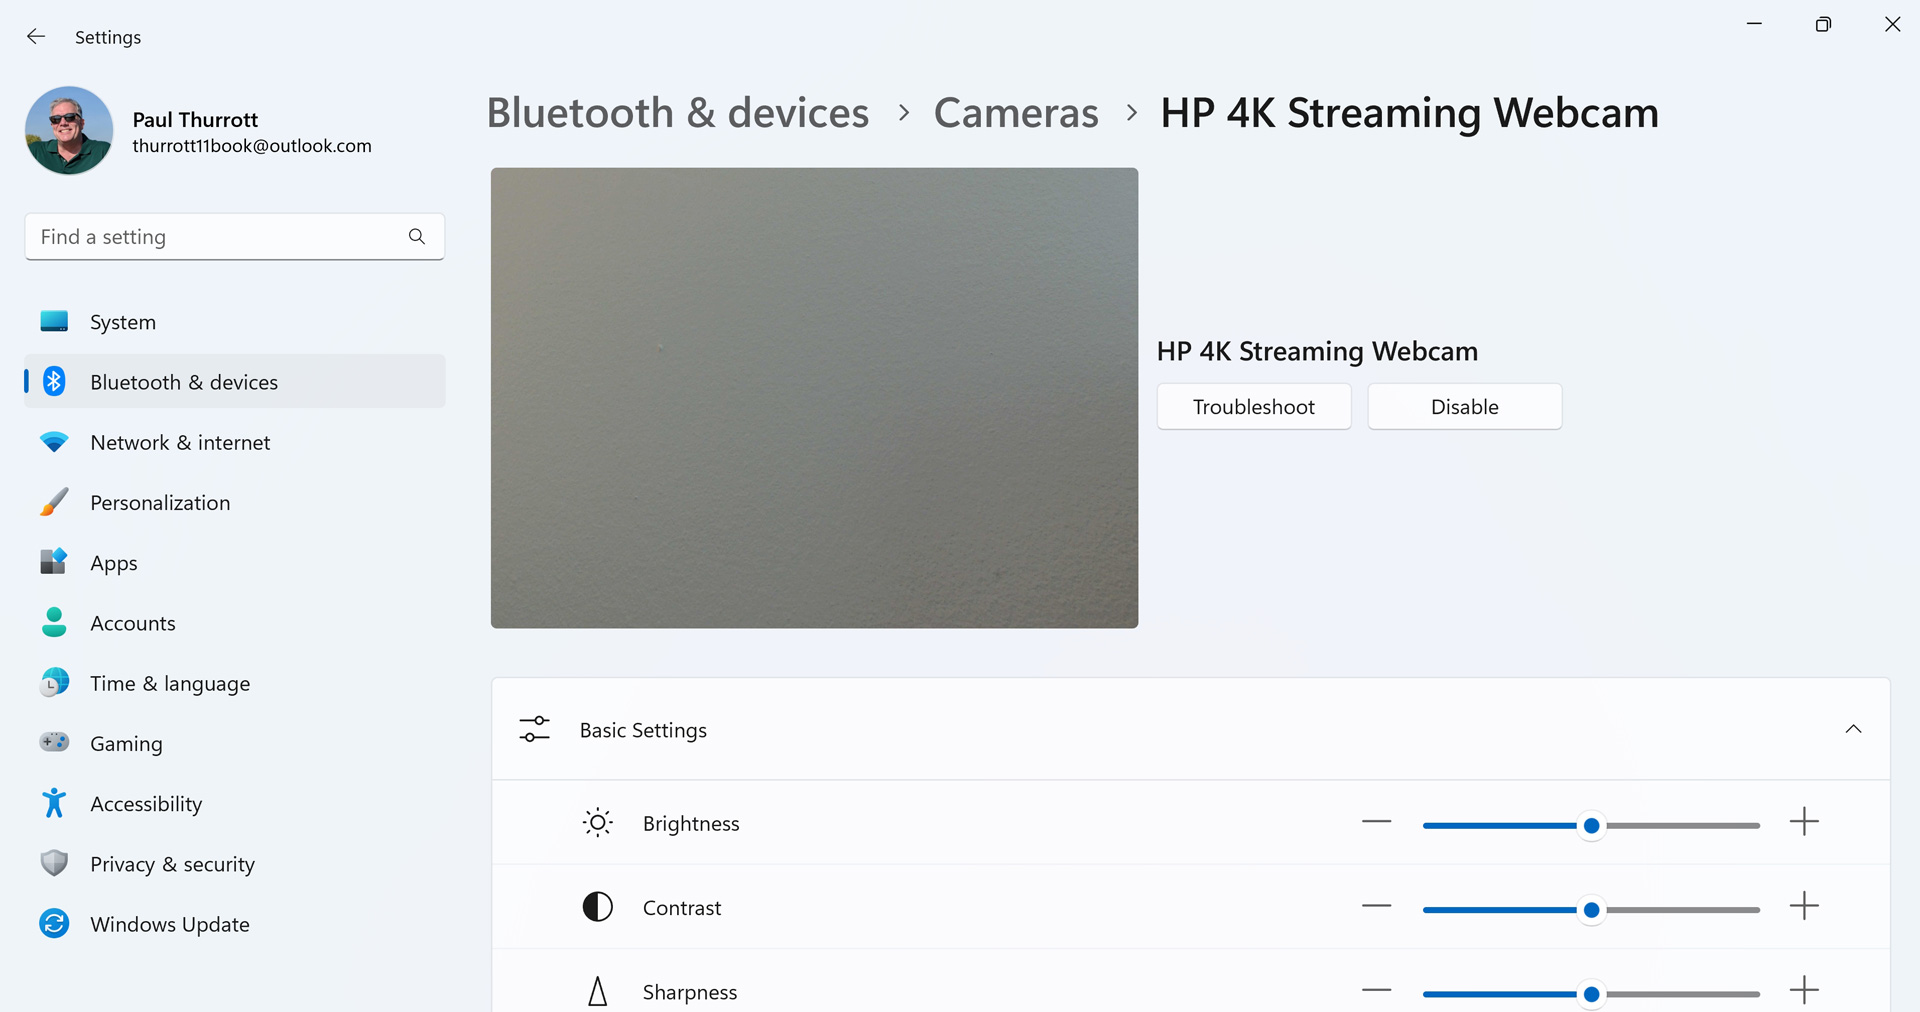
Here, you will find options for troubleshooting, disabling the camera, and, depending on the camera, settings like Contrast, Brightness, Sharpness, Saturation, Video rotation, and more.
Take a photo with the Camera app
Taking a photo is straightforward: ensure that the Camera app is in Camera mode using the buttons on the right—Camera mode is the default—frame and compose the object you are photographing, and then click the “Take photo” button.


As you do, the Camera app will flash and emit a camera shutter-like sound to indicate that it took the shot. And a thumbnail of the photo will appear in the Camera roll control in the bottom right.
Photos taken with the Camera app are stored in a Camera Roll folder in your Pictures folder. (This folder will be created the first time you take a picture or record a video.)
Take a video with the Camera app
To take a video, put the Camera app in Video mode using the buttons on the right, frame and compose the object you are recording, and then click the “Take video” button to begin recording.


When you do, the Camera mode buttons disappear and are replaced by prominent Stop (“Stop taking video”) and Pause (“Pause video recording”) buttons. Also, the elapsed time counter in the middle bottom of the viewfinder provides a live view of the recording time.
Click “Stop taking video” when you’re done recording. A thumbnail of the video will appear in the Camera roll control in the bottom right.
The “Pause video recording” button lets you pause the recording and then restart it without having to make a separate video file.
As with photos, videos taken with the Camera app are stored in a Camera Roll folder in your Pictures folder. (This folder will be created the first time you take a picture or record a video.)
Scan a document, whiteboard, or barcode with the Camera app
In addition to taking photos and videos, the Camera app also supports scanning a document, a whiteboard, or a bar code using separate Camera modes for each.
Some of these capabilities are hardware-dependent, so you may only see a subset of these choices on your own PC.
The Document and Whiteboard modes work similarly: as you frame the subject, the Camera app will highlight the document or whiteboard to indicate that that is the part of the scene that it will scan.
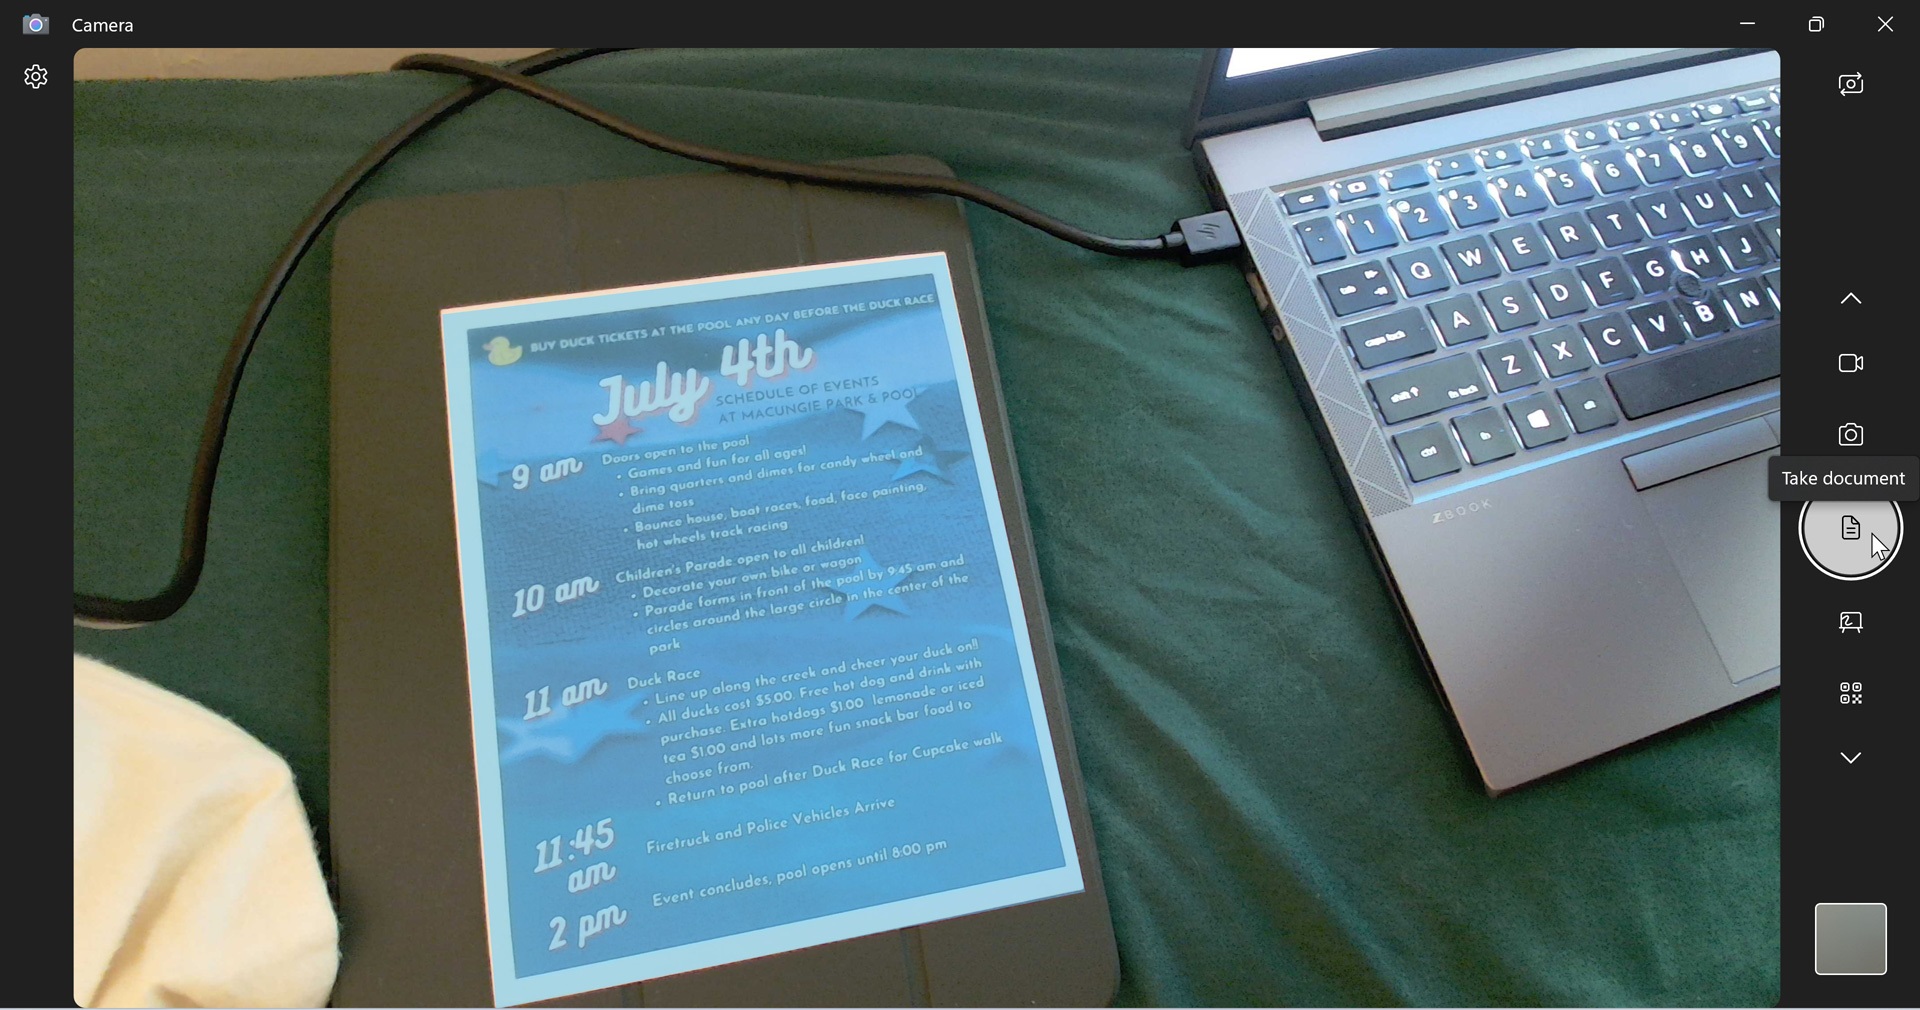
Click the “Take document” button to scan the image. Camera will scan the scene, crop it to the document, and straighten it so that it looks correct. Then, it will quickly display a preview of the final image.

Barcode mode works as it does on your smartphone: just point your PC’s camera at a QR code or other barcode, and the Camera app will translate it into human-readable text.
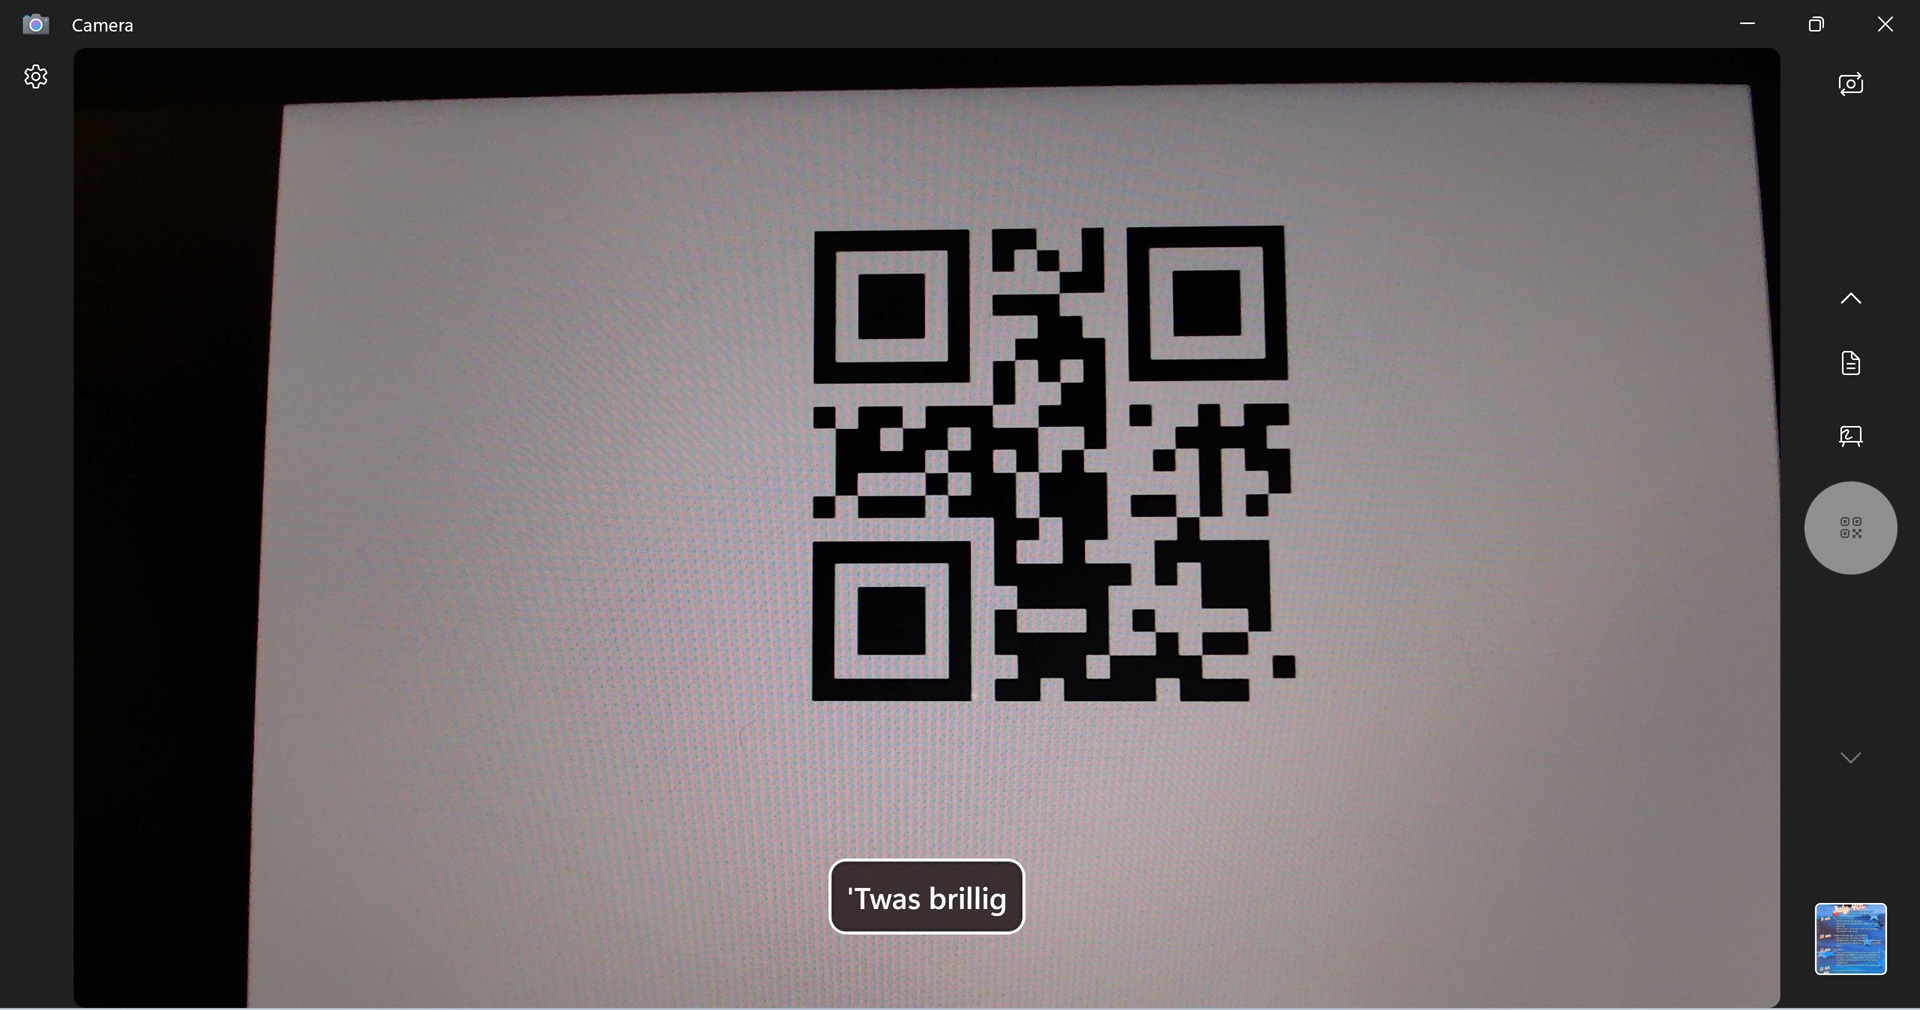
More often than not, these codes display a web address. If this is the case, you can click the text to display that web page using Microsoft Edge.

Gain unlimited access to Premium articles.
With technology shaping our everyday lives, how could we not dig deeper?
Thurrott Premium delivers an honest and thorough perspective about the technologies we use and rely on everyday. Discover deeper content as a Premium member.