Passkeys and Security Keys
- Paul Thurrott
- Jan 04, 2024
-
3
The passwords we use to protect our online accounts are insecure and easily compromised. For this reason, Microsoft has been working with industry partners for decades to create and standardize new ways to reduce our reliance on passwords and improve the security of our accounts and the private data they contain. The ultimate goal is to eliminate passwords all-together: In this passwordless world, we can authenticate–prove who we are–using methods that are more secure and easier than typing a password.
This isn’t just a theory: Depending on which online accounts and devices you use, you can go passwordless right now. That’s because these more modern account security methods have been broadly implemented, not just by Microsoft, but also by Amazon, Apple, Google, and most other companies that provide online accounts, software platforms, app developers, and devices like PCs, phones, and tablets.
For its part, Microsoft has added support for two-step verification to its Microsoft accounts for consumers and Microsoft work or school accounts for businesses and other organizations, and it even allows users to remove the passwords from these accounts.
On PCs, Microsoft lets customers use these accounts to securely sign in to Windows 11 with Windows Hello PIN (personal information number) and biometric sign-in capabilities. And when the back-end security protections in the online accounts and the front-end authentication protections in Windows are used together, passwordless isn’t just possible, it’s more secure and more convenient.
The key to this magic is a new passwordless authentication technology called passkeys. Passkeys solve all the problems with passwords, and because they are the simplest-possible form of two-step verification, they’re even easier to use than smartphone-based authenticator apps, and passkey usage has not surprisingly expanded dramatically in recent years.
To support this change, Microsoft has added passkey support to its online accounts and to Windows 11. On PCs, passkeys are stored in the encrypted storage inside the Trusted Platform Module (TPM) security chip in your PC, and you can seamlessly and securely sign in to any online accounts that support passkeys on the web or in apps using Windows Hello PIN or biometric authentication. Windows 11 version 23H2 even includes a new passkey management interface too.
Additionally, Microsoft has long supported a related technology, security keys, that now makes passkeys more portable–meaning you can use them directly on multiple PCs and other devices rather than saving a unique passkey for each account on each PC you use–at the expense of making them also more difficult to use. We don’t recommend security keys for most readers, but you may be forced to use one by your workplace or educational institution.
Confused? It’s not you: Security is a difficult topic with a lot of jargon, and it’s important to get this right. But this will all make more sense as we step through how passkeys and security keys work in Windows 11.
So let’s dive right in.
Manage the passkeys on your PC
As you may know, you are required to configure a Windows Hello PIN the first time you sign in to Windows 11 on a PC using a Microsoft account (or Microsoft work or school account), as most people do. You are likewise encouraged to further improve sign-in security by configuring Windows Hello facial and/or fingerprint recognition, depending on which capabilities are available on that PC.
But something less obvious also happens the first time you sign in to Windows 11 using a Microsoft account (or work or school account): The system silently creates a passkey for that account and stores it in your PC’s TPM security chip. To see this, open the Settings app and navigate to Account > Passkey settings.
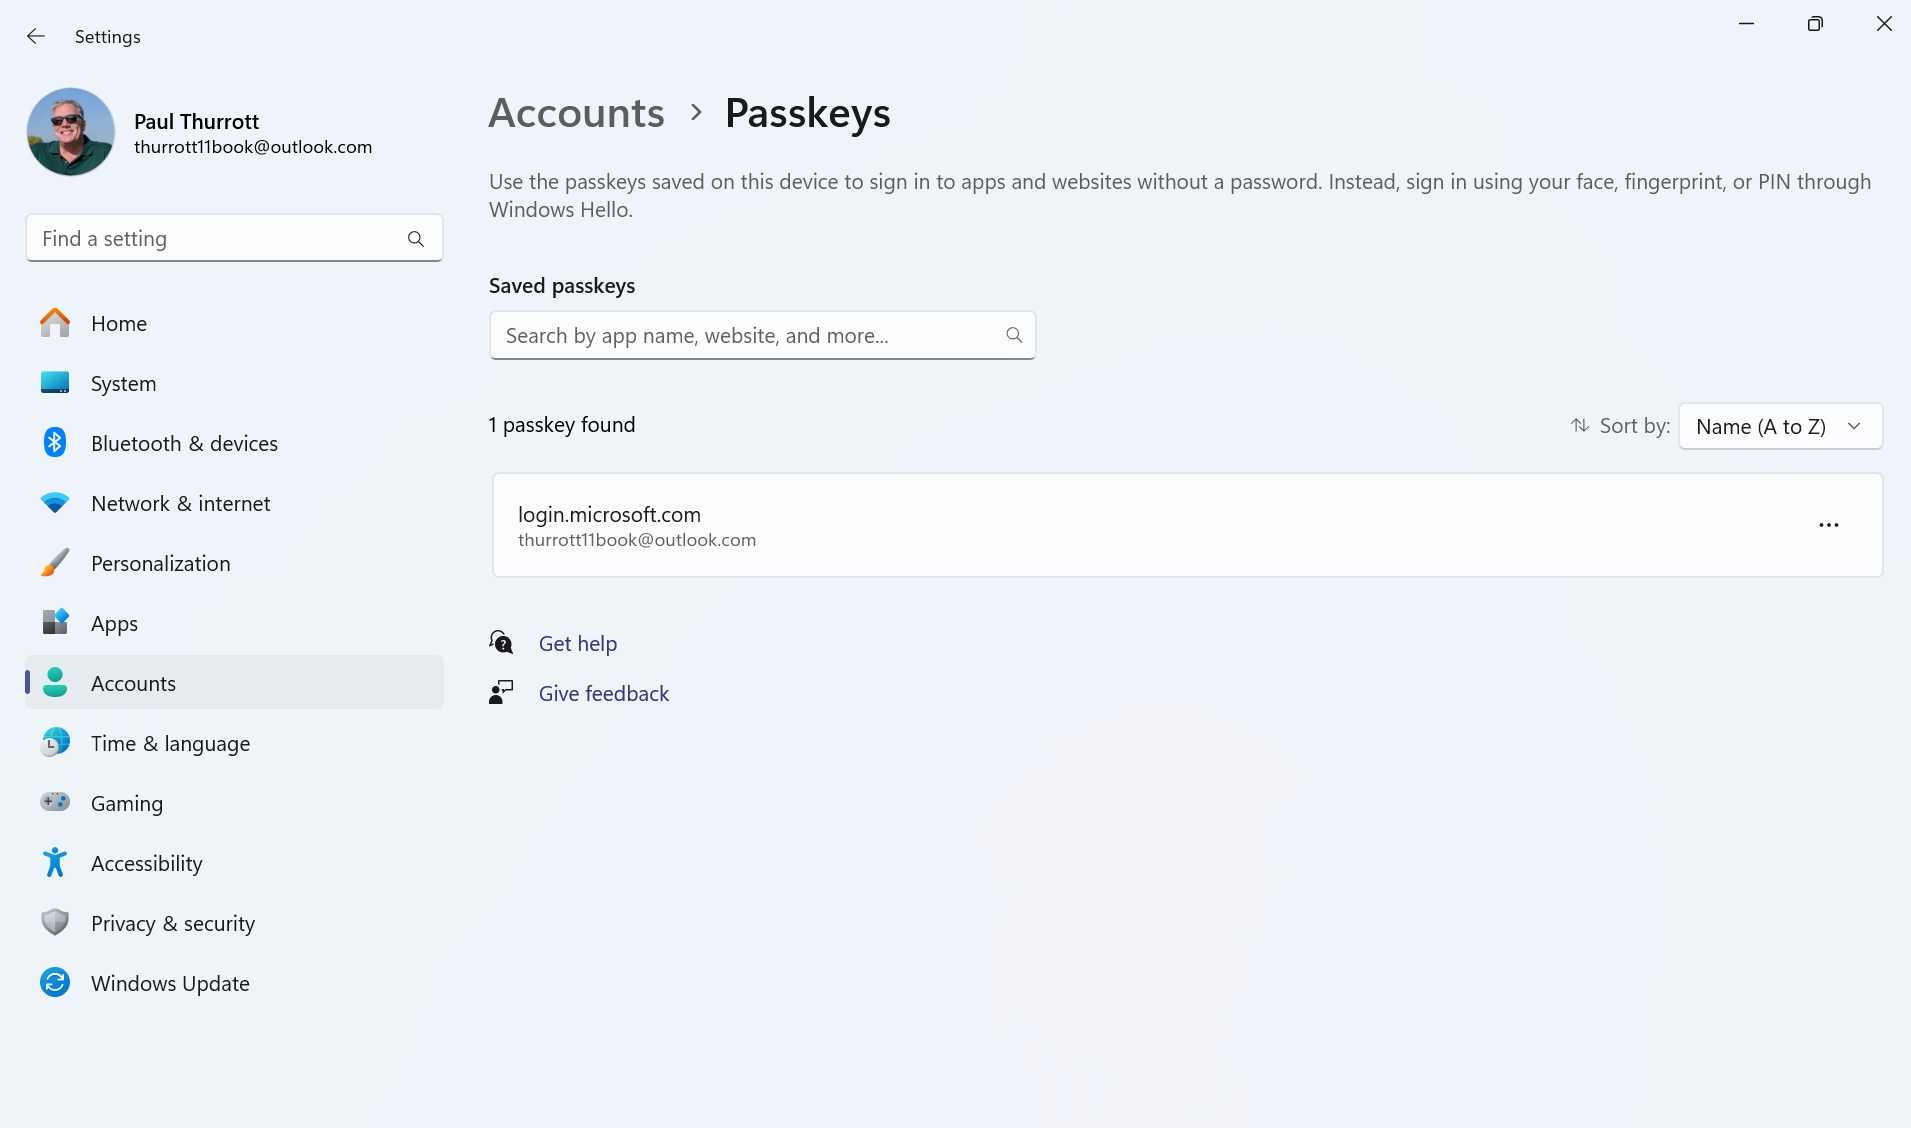
Here, you will see a list of all the passkeys stored on this PC. If you look here immediately after signing in to Windows 11 for the first time, you’ll see just the one passkey that is associated with your Microsoft account (or Microsoft work or school account). This passkey is unique in that you can’t delete it while signed in because it’s used by Windows Hello to prove your identity when you sign in and as needed for later authentication in apps, websites, and the system.
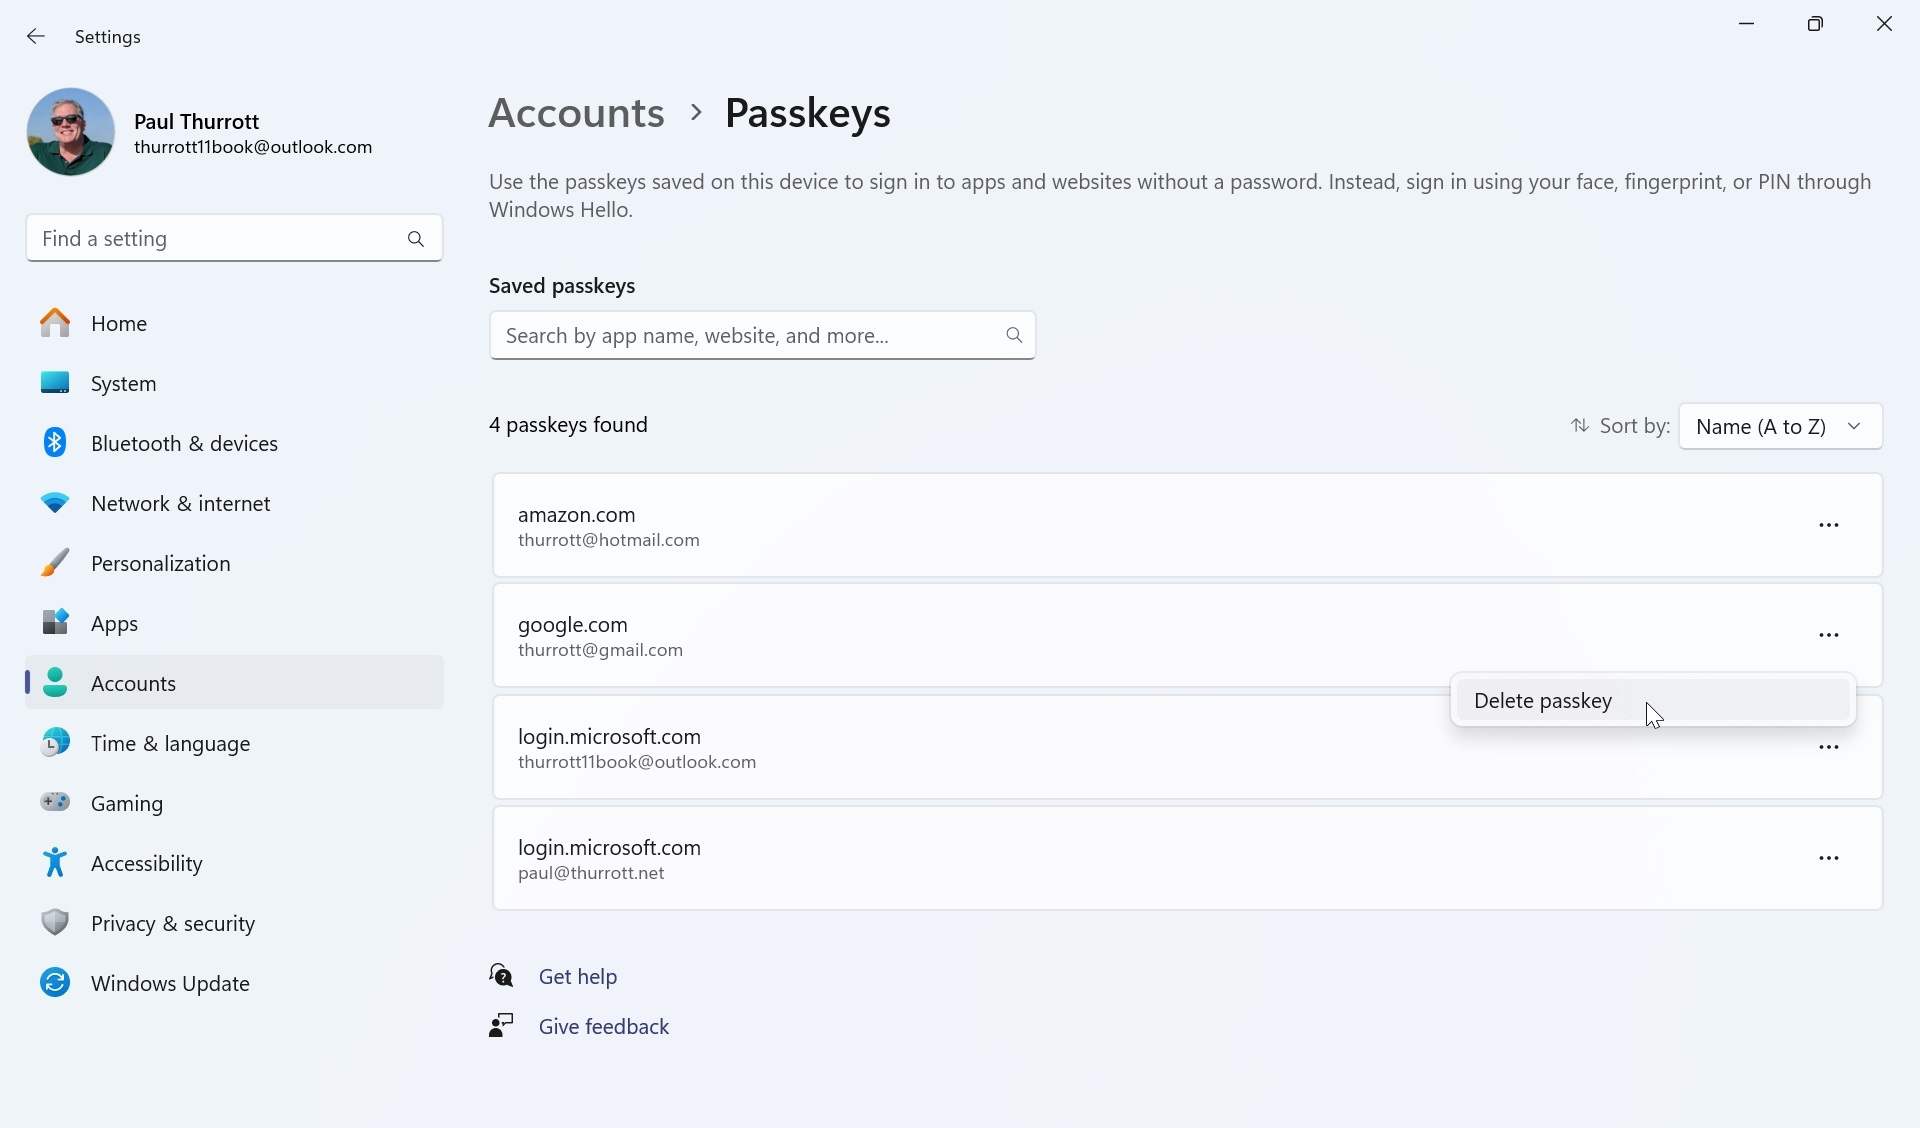
If you start using passkeys with other online account as discussed below, however, you will see multiple passkey entries here. And you can delete those passkeys, eliminating their seamless Windows Hello-based sign-in functionality.
To delete a passkey, click the “See more” (“…”) button next to the passkey and then select “Delete passkey.” You will be prompted with a warning to make sure this is what you want.
If you have multiple account sign-ins on the PC, you can also delete the passkey for those other accounts, and those users will need to re-authenticate the next time they try to sign in. The only passkey you can’t delete is the one for an account that’s currently signed in.
And that’s that for passkey management. You can see which passkeys are saved to your PC and delete the ones you don’t want to use anymore.
Use your Microsoft account passkey to sign in to a website
For the most part, Windows 11 automatically passes through your sign-in account credentials wherever they’re needed. For example, if you sign in to Windows 11 with a Microsoft account, open the Microsoft Edge web browser, and then navigate to the Outlook.com website, you won’t usually be prompted to sign in. Because you already authenticated securely with Windows Hello, the system knows it’s you and passes through your credentials.
That doesn’t make for much of a demo. But with a little creativity, we can still see this passkey, which was automatically created on your PC the first time you signed in to Windows, in action.
To do so, open a new InPrivate window in Microsoft Edge. Then, navigate to Outlook.com and click “Sign in.” You will be presented with a standard Microsoft account sign-in screen.
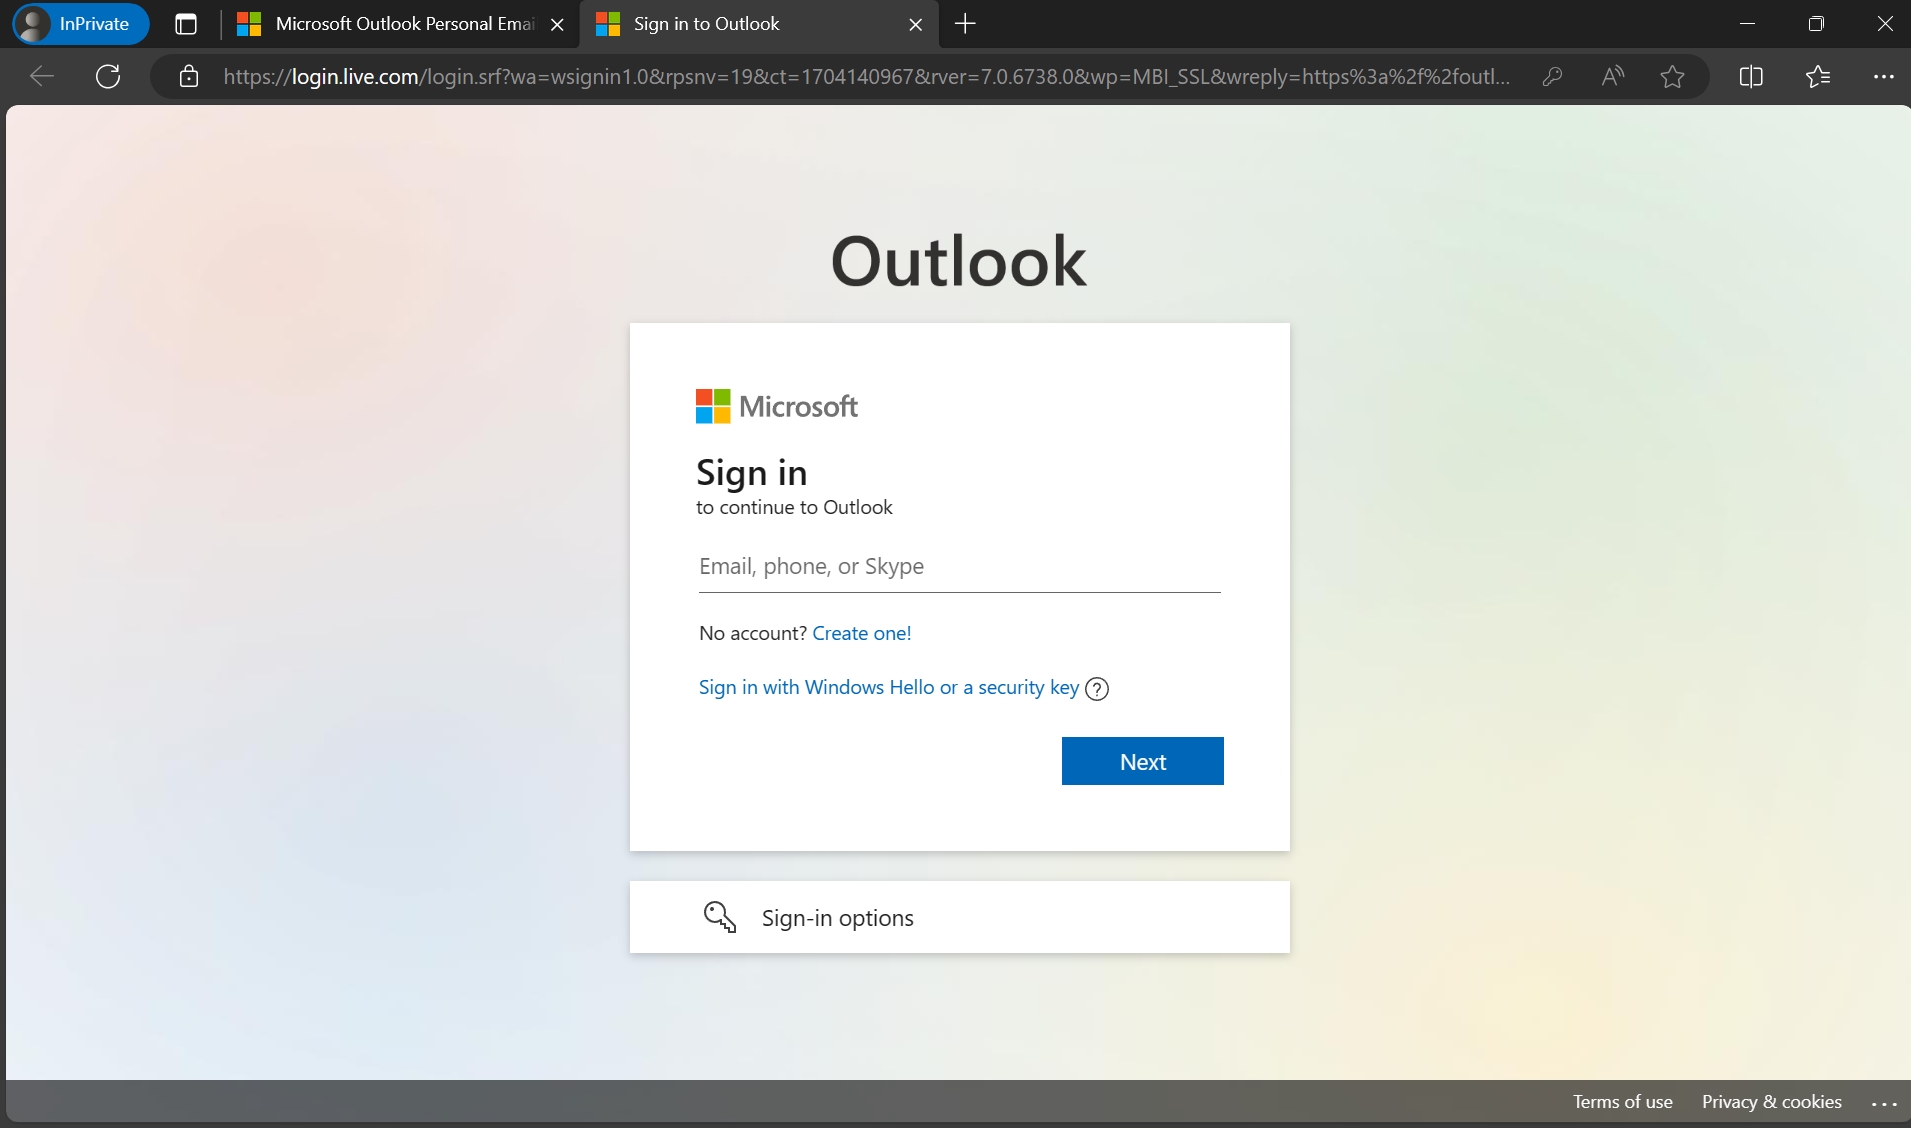
You could sign in normally here, as your web browser or a password manager probably have access to your account credentials. But instead, click “Sign in with Windows Hello or a security key.” When you do, Microsoft Edge will prompt you to use the passkey that’s already stored on this PC.

Select the correct account if necessary and then click “Next.” You will be prompted to authenticate with whatever Windows Hello method(s) you have configured.
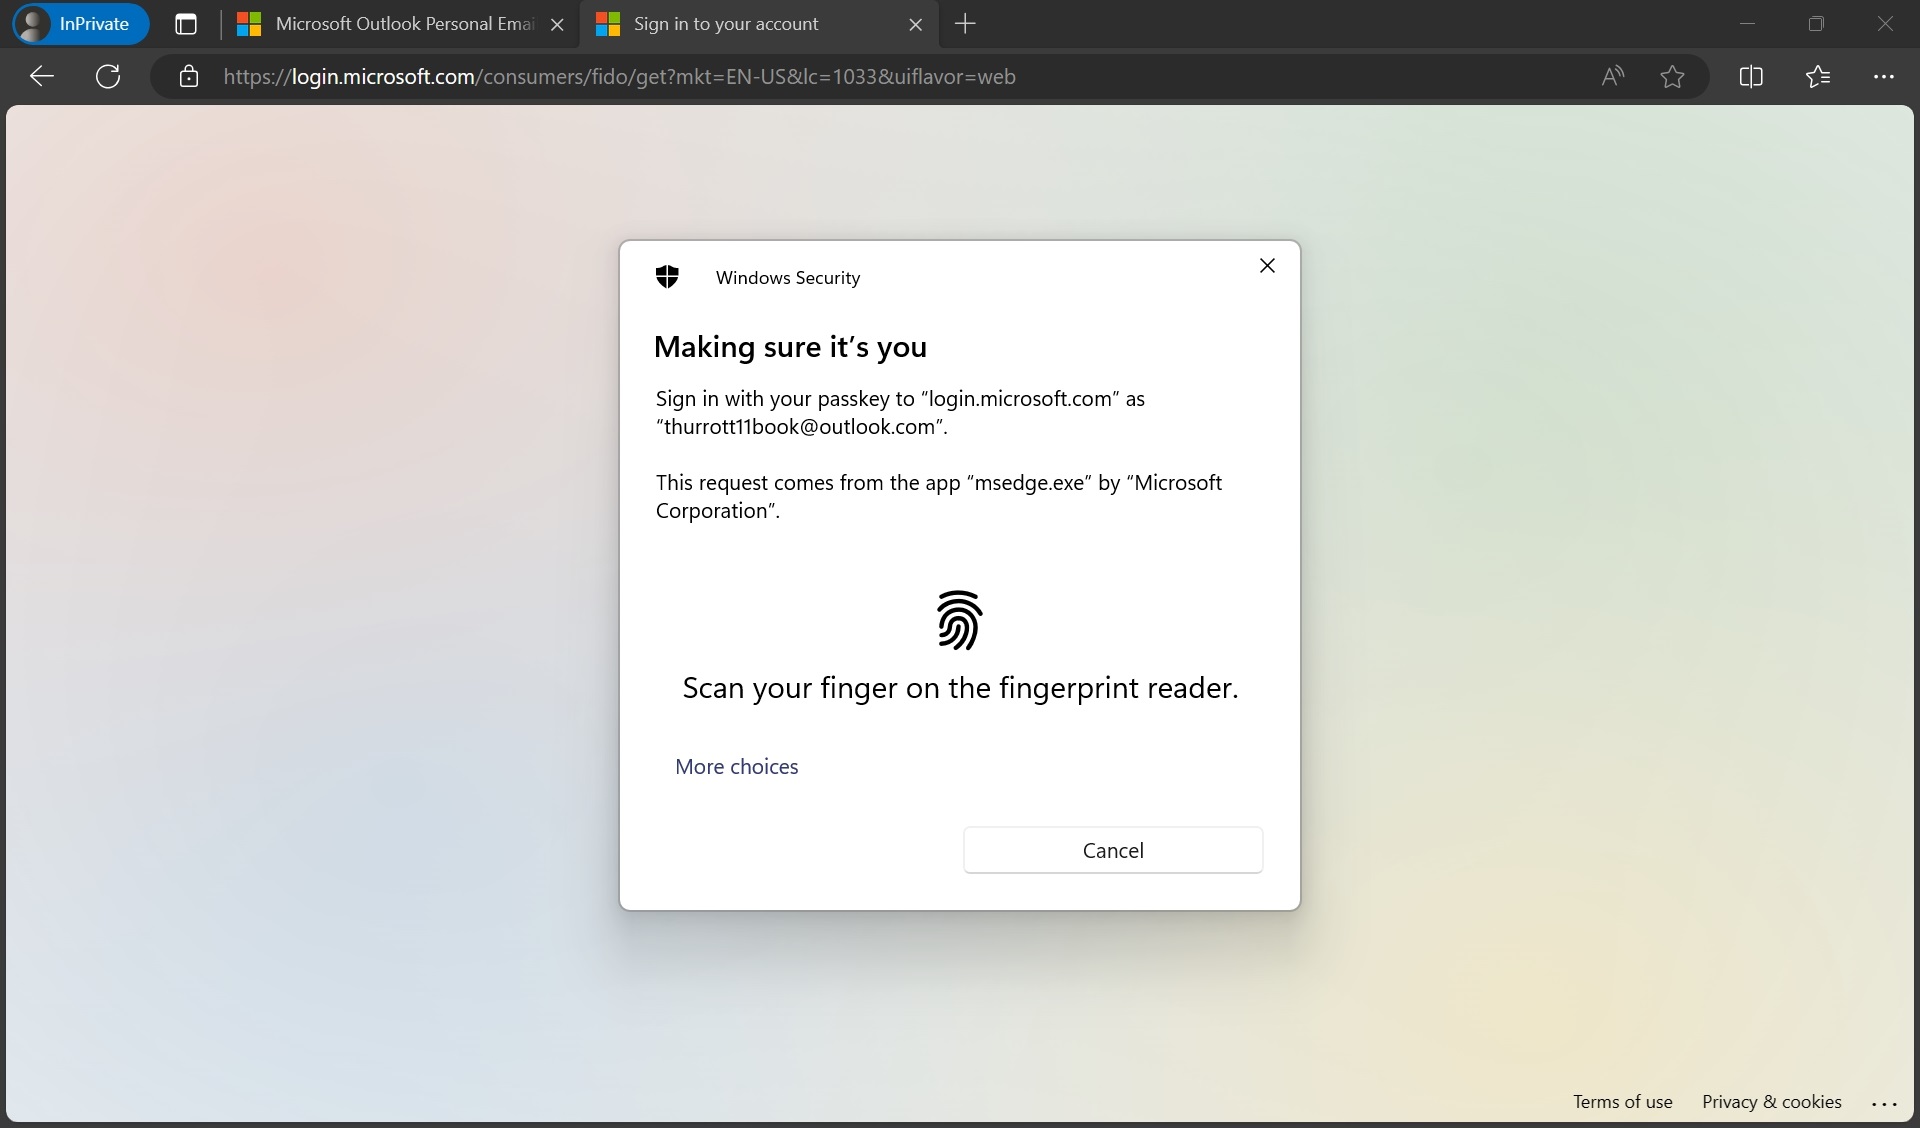
Once you authenticate and skip past the “Stay signed in?” prompt, you’re in: You securely signed in to a Microsoft website using a passkey that you probably didn’t even know was on your computer. And because you used Windows Hello, that sign in was seamless, and you didn’t have to type your username or password, or use an authenticator app on your phone or any other two-step verification method.
Create a passkey for a Microsoft account
As noted previously, Windows 11 automatically stores a passkey for the Microsoft account you used to sign in on this PC. But what if you have other Microsoft accounts, or sign in to your PC with a Microsoft work or school account, and want to seamlessly access your Microsoft account using a passkey?
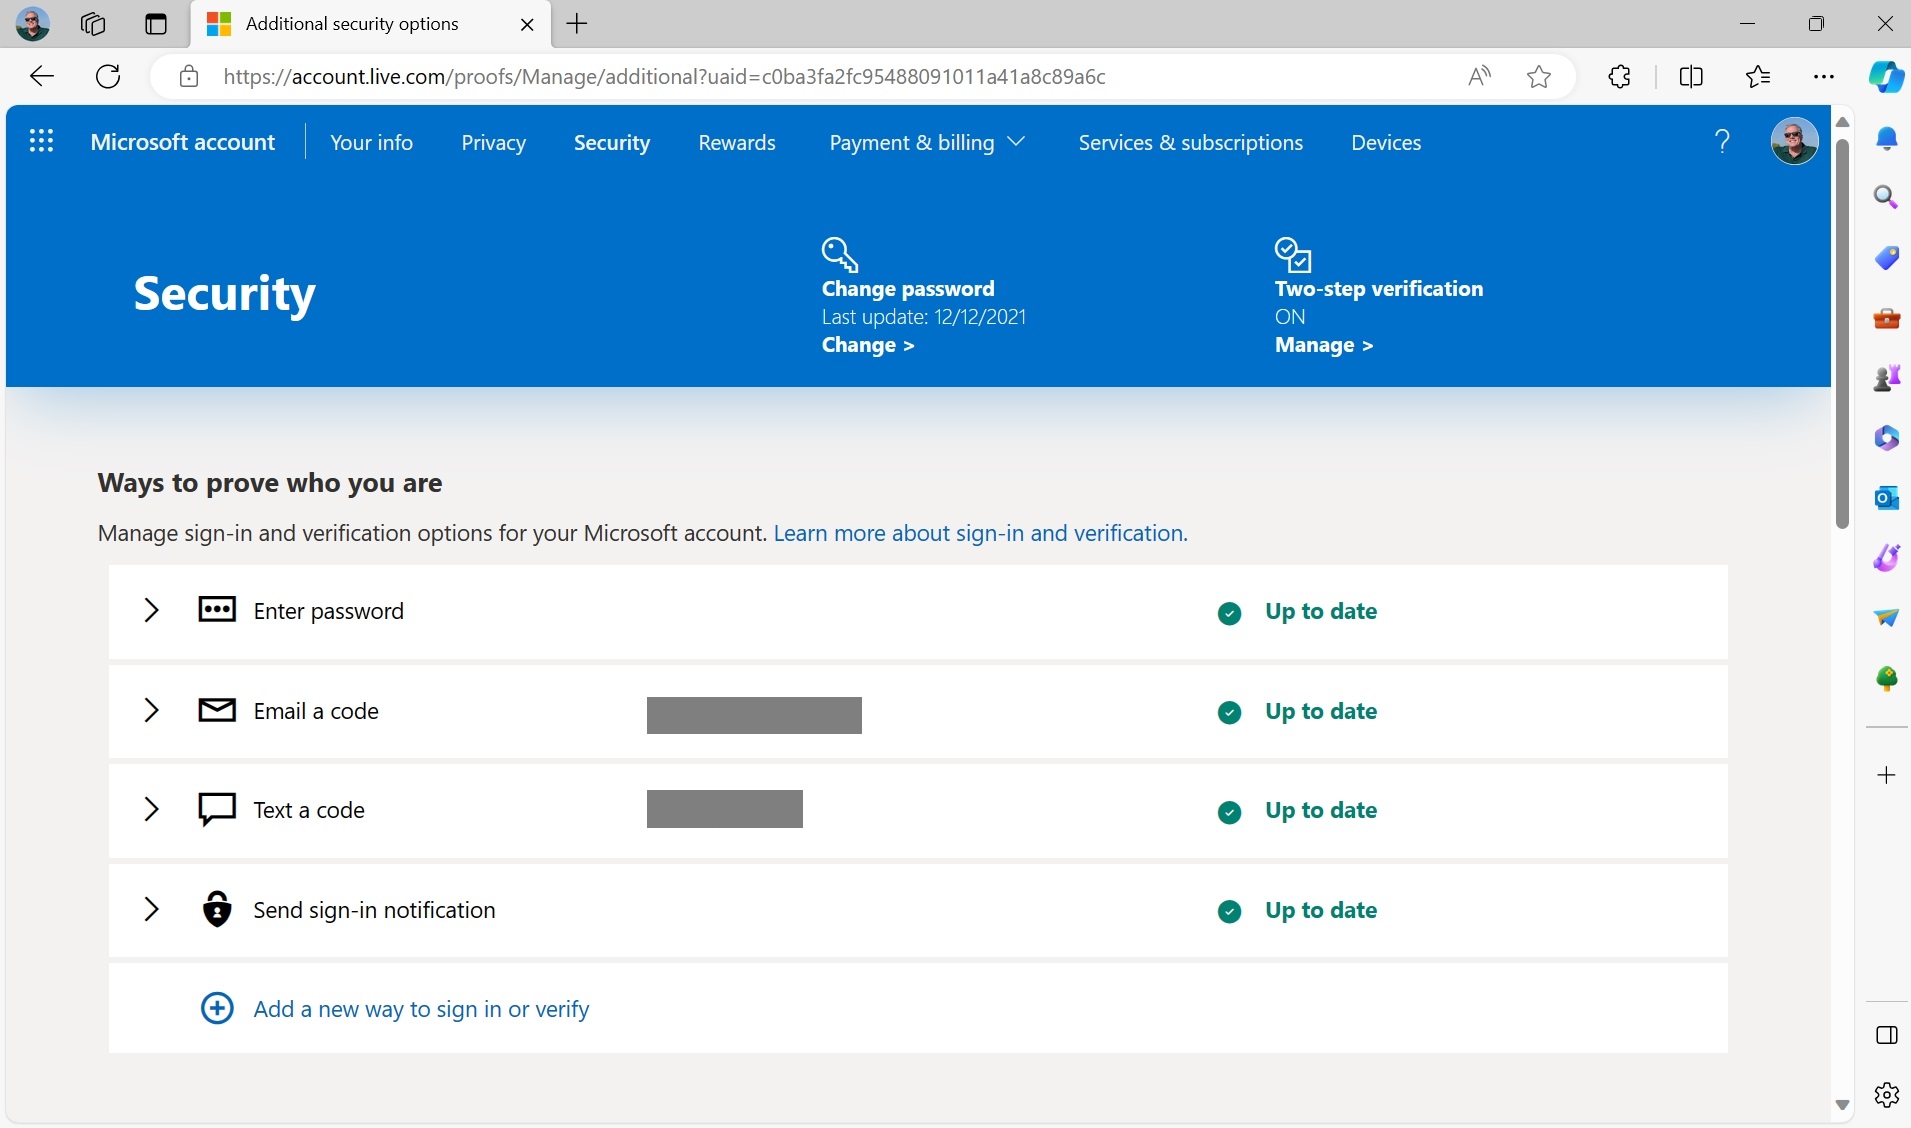
You can can create a passkey for any Microsoft account on the PC you’re currently at the Microsoft account website. You just need to sign in to that account normally as prompted and then navigate to the Additional security options page, authenticating as prompted.
Because Windows 11 passes through the credentials for the Microsoft account you signed in to Windows with, this can be difficult to do in Microsoft Edge. If possible, create the passkey for this secondary Microsoft account using another web browser to avoid any issues.
Then, under “Ways to prove who you are,” click “Add a new way to sign in or verify.” The “Select an additional way to verify or sign in” dialog appears.
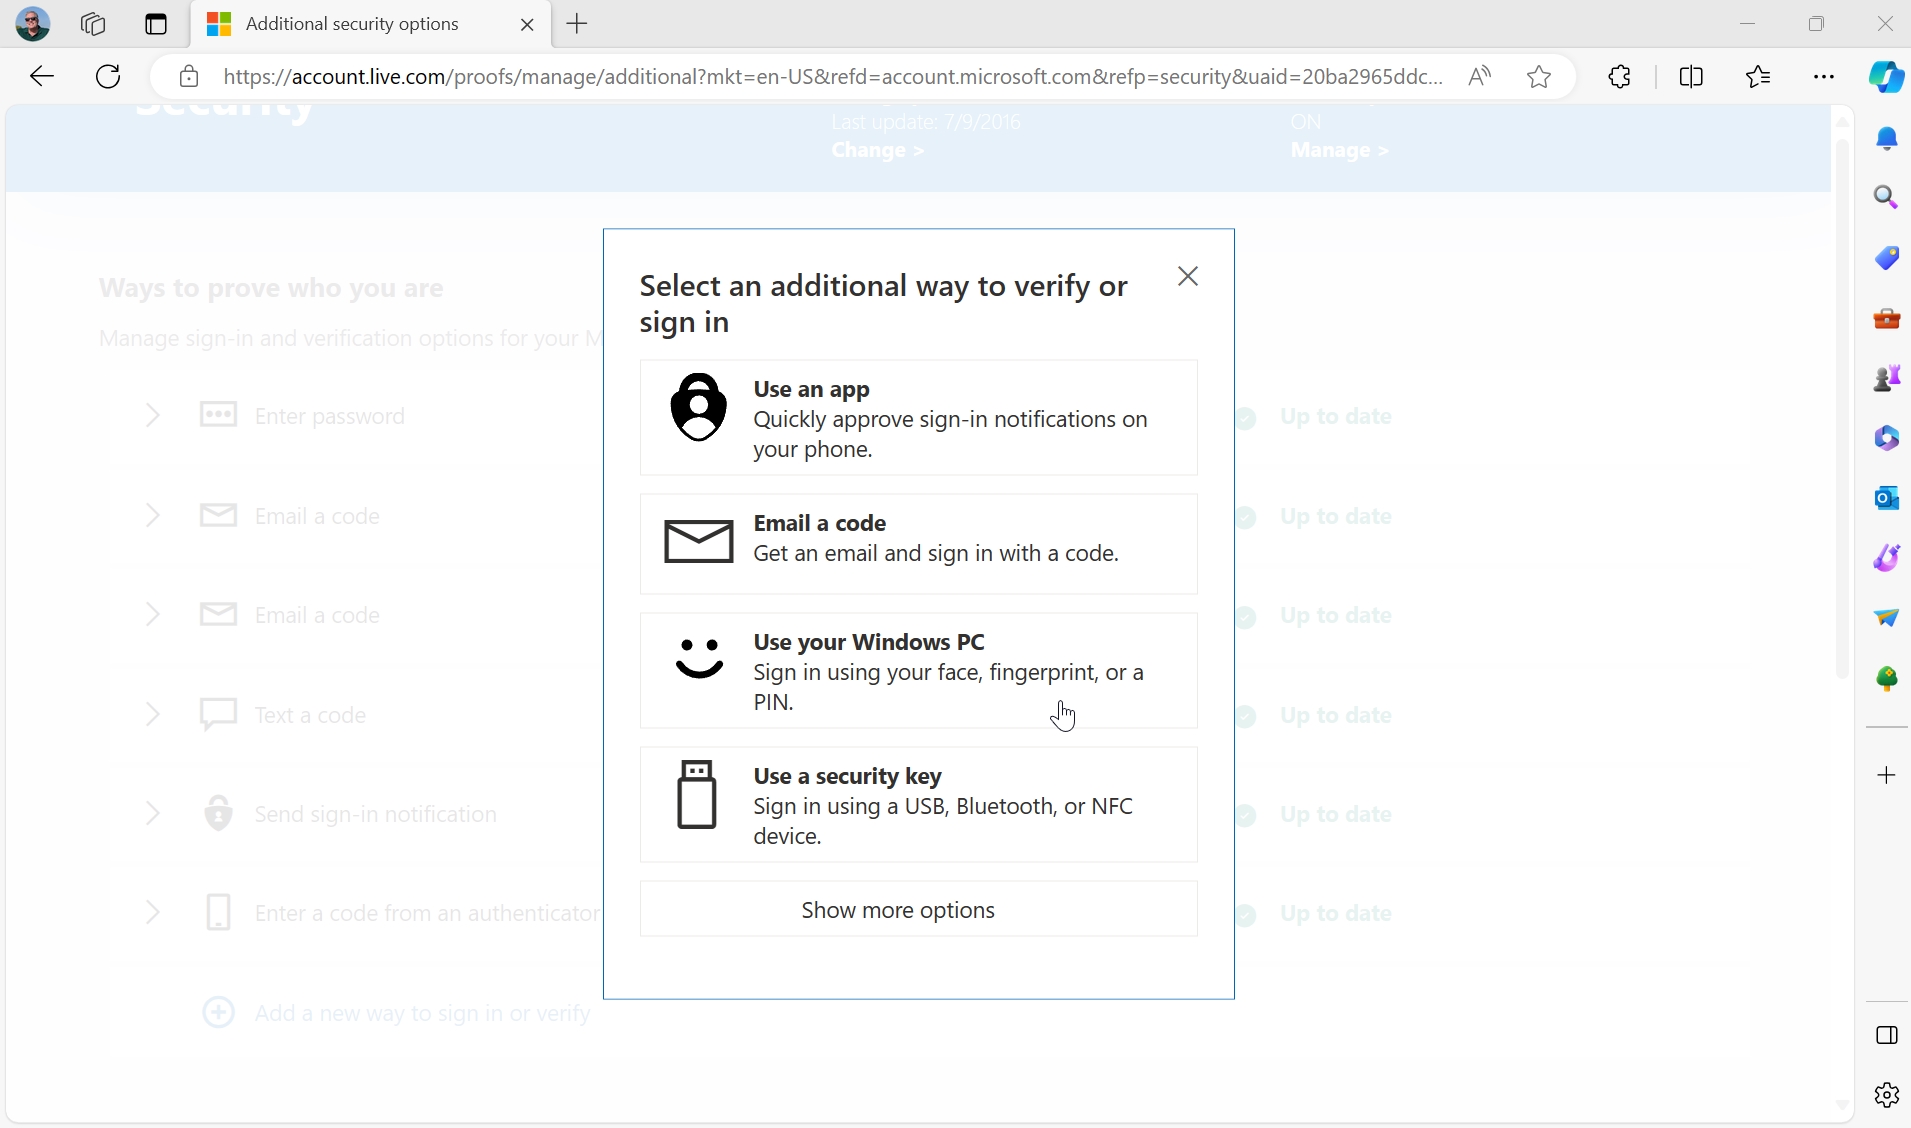
Click “Use your Windows PC.” The “Use Windows Hello to sign in to your account” page appears.
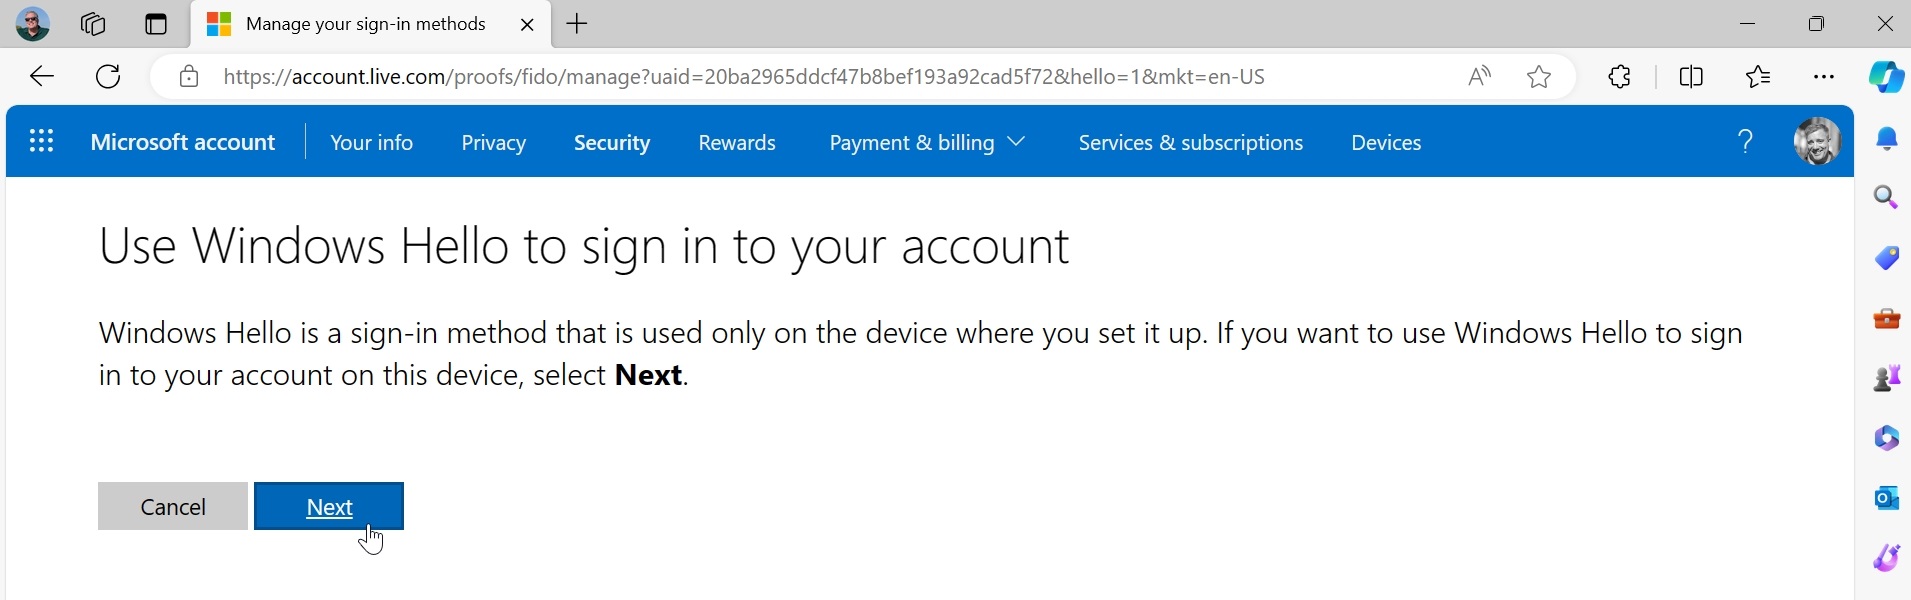
Click “Next.” Windows 11 will then prompt you to authenticate your PC sign-in using Windows Hello PIN, facial recognition, or fingerprint recognition. (This will vary according to which methods you’ve configured. And you can click “More choices” here to choose a different method than the one presented.)
Once you’ve authenticated your identity using Windows Hello, the account credential is stored in the TPM security chip on your PC. And the Microsoft account website will note that you can now use Windows Hello to sign in to this account in the future, instead of your password (or a phone-based verification method). You can sign in as needed using the method described in the previous section.
We focus on Microsoft accounts here because most readers use this account to sign in to Windows. But Microsoft work or school accounts work similarly. For example, you configure a passkey (or security key) for your Microsoft work or school account on the Security Info page on the Microsoft My Account website.
Save and use a passkey for another online account
Passkeys aren’t just for your Microsoft account, of course. Most major online account providers–Amazon, Apple, Google, and many others–support this authentication technology, and you can store passkeys for them in Windows 11 and later securely access those accounts with Windows Hello just as you do with your Microsoft account.
How this works varies a bit by account, so we will examine two common account types.
Save and use a passkey for your Amazon account
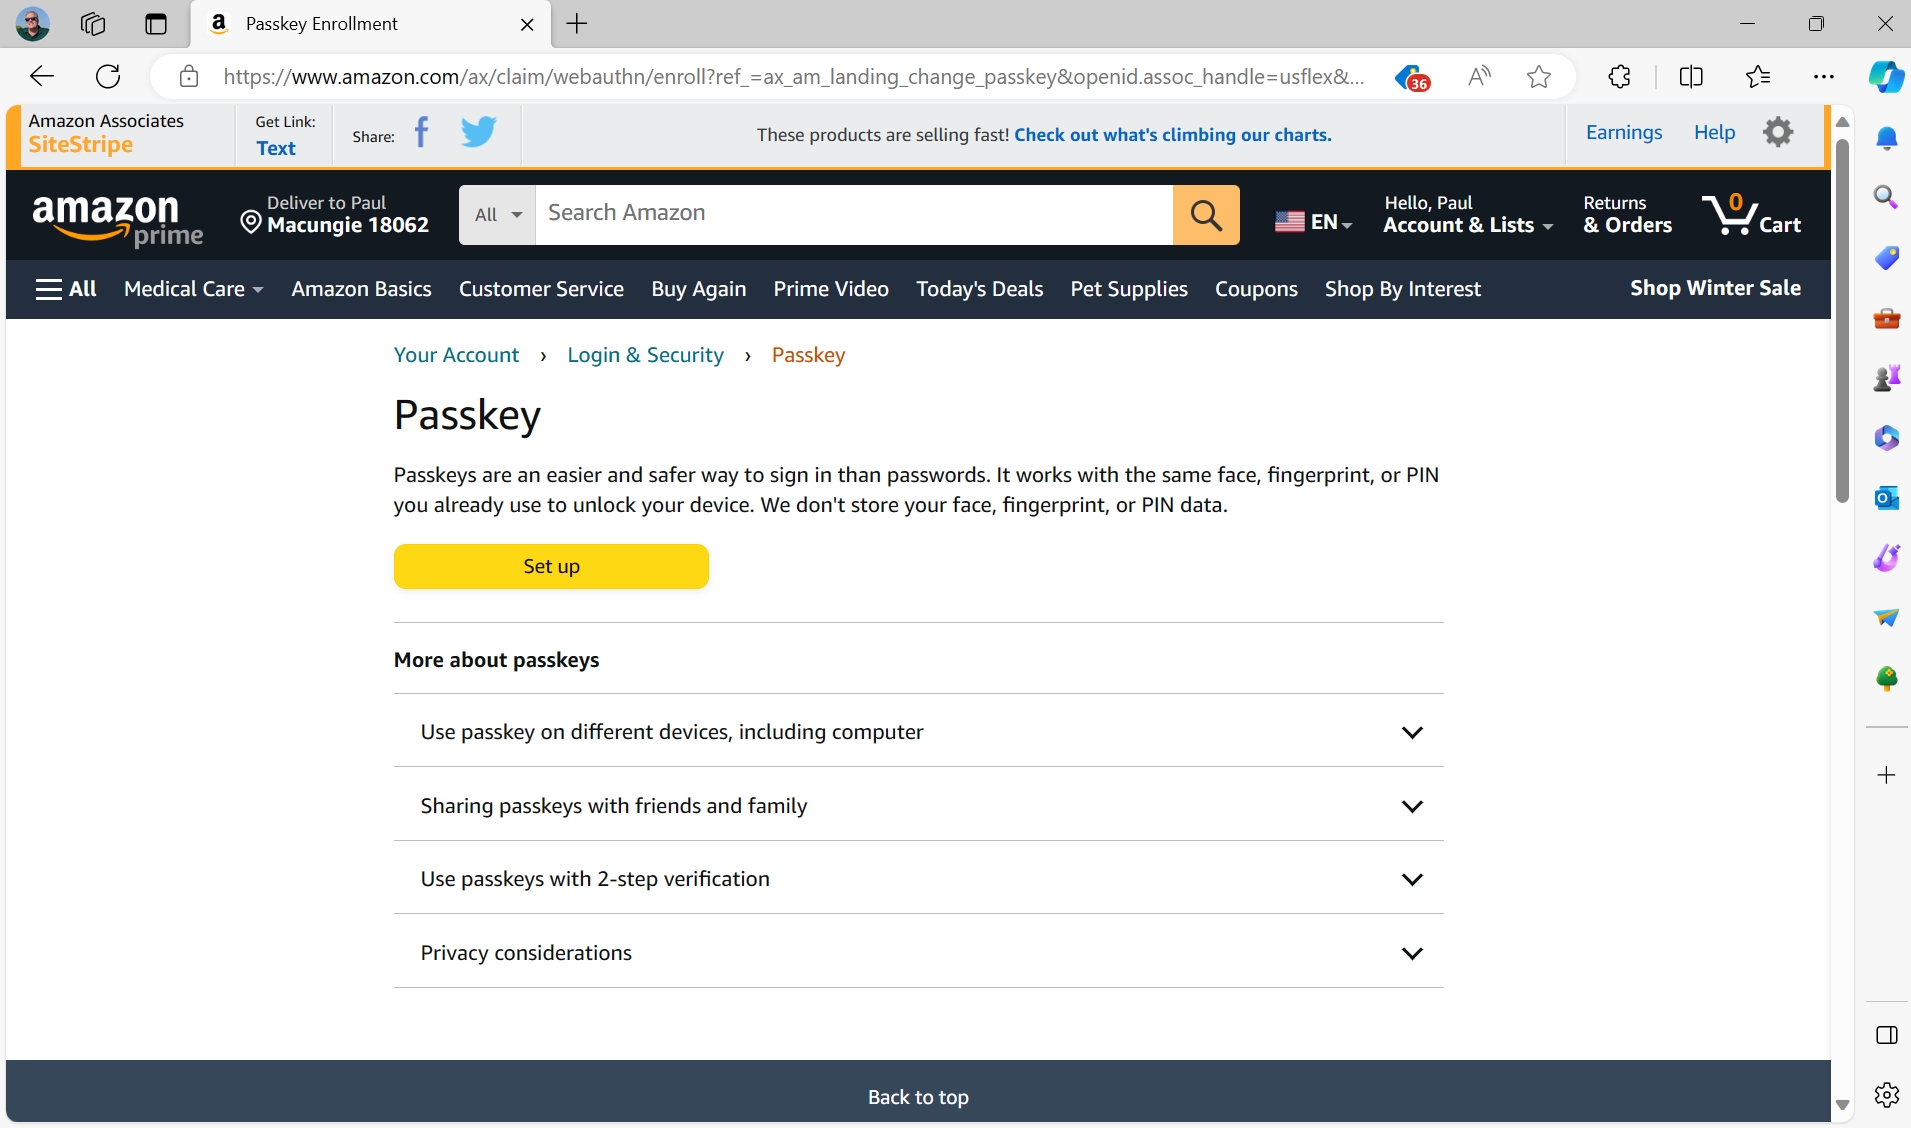
Amazon customers need to enable passkey support for their account first. To do so, open a web browser, navigate to Amazon.com, and sign in as needed. Then, navigate to the Login & security page (Accounts & Lists > Account > Login & security) and click “Set up” next to “Passkey.” Amazon will then display a screen that explains what passkeys are.
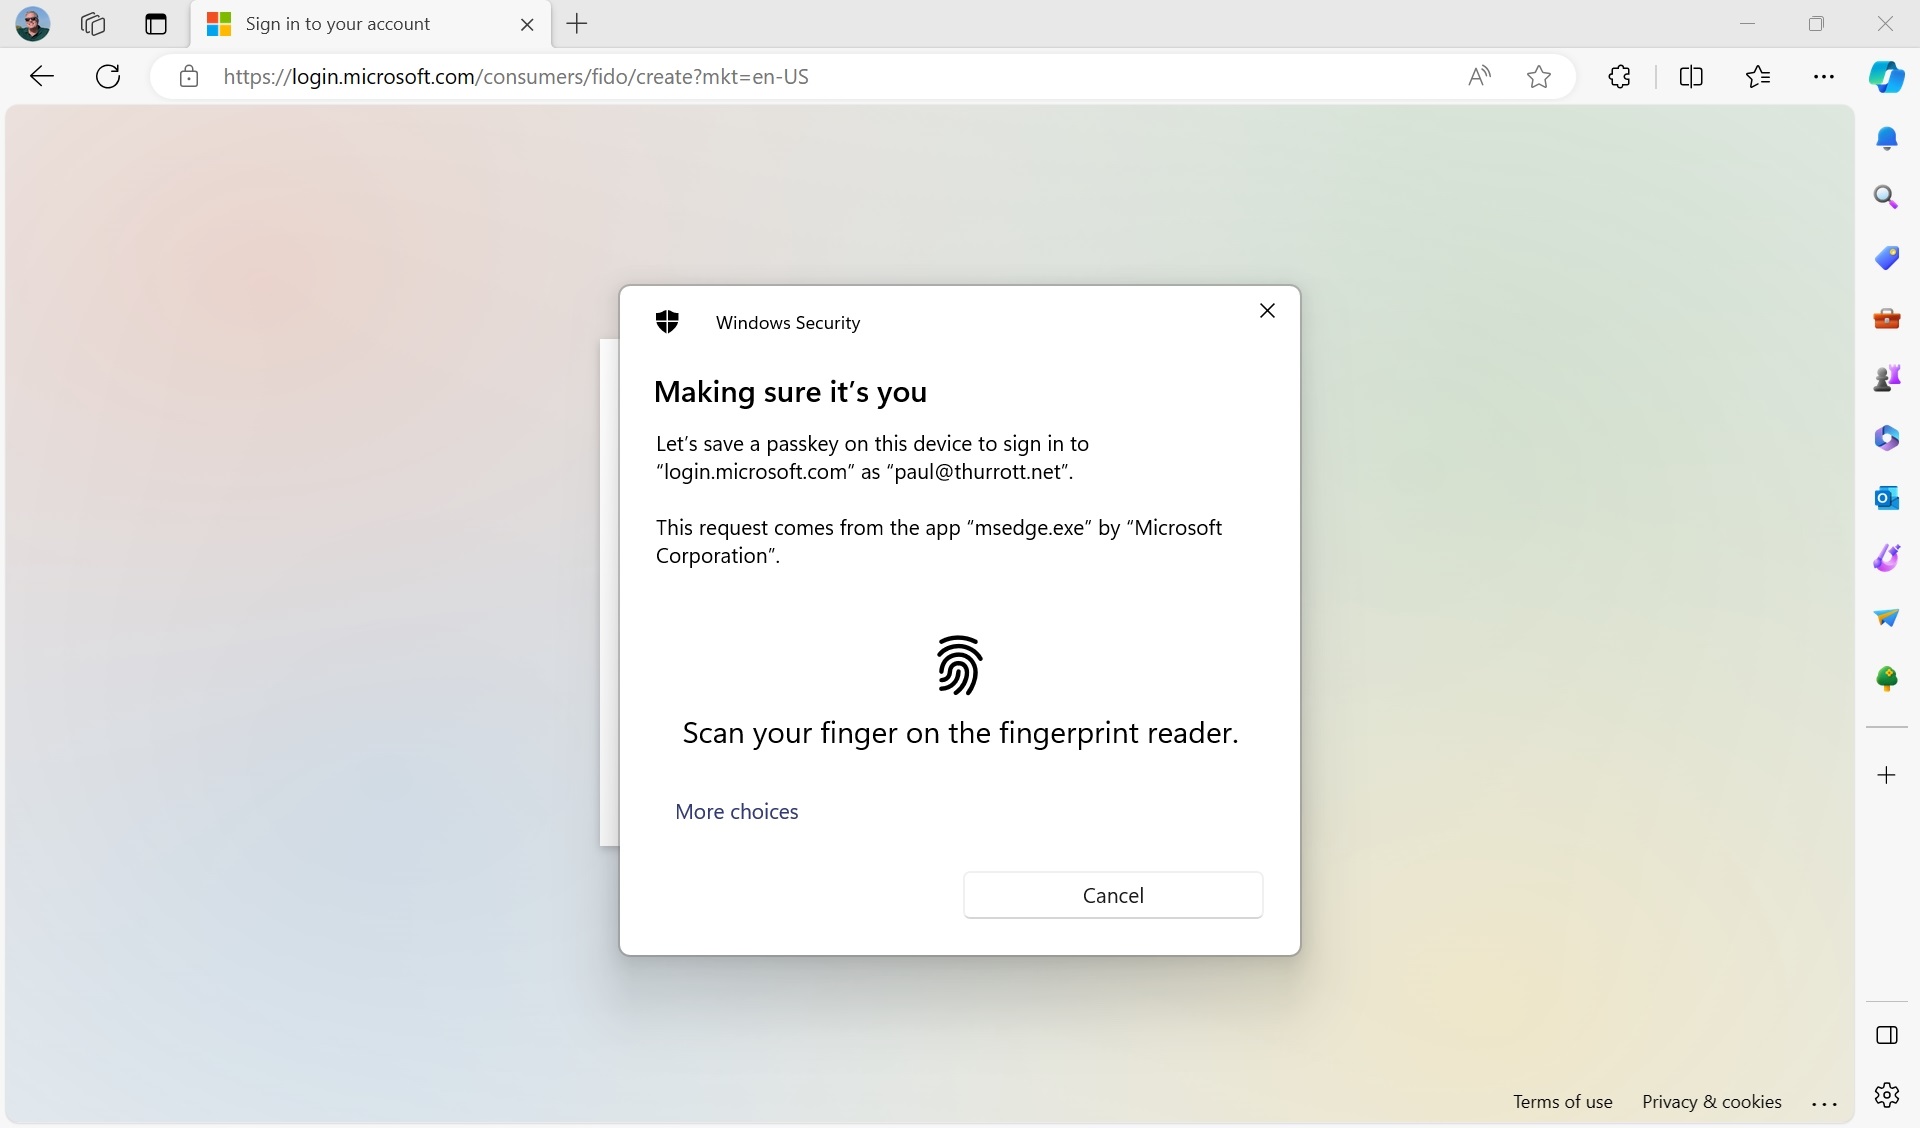
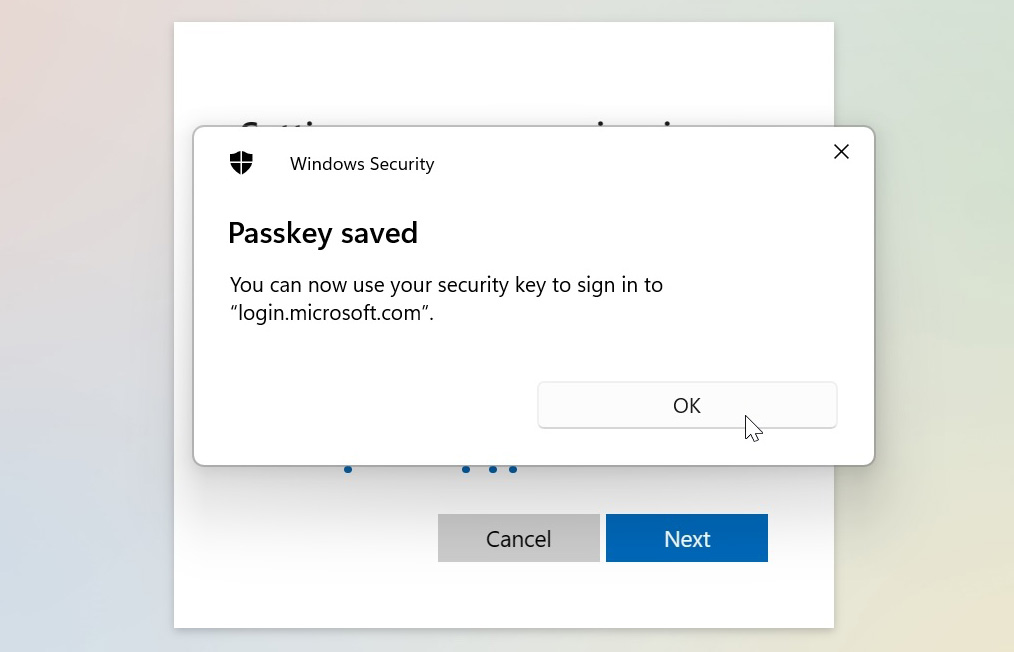
Click “Set up.” A Windows Security window appears so that you can authenticate with Windows Hello.
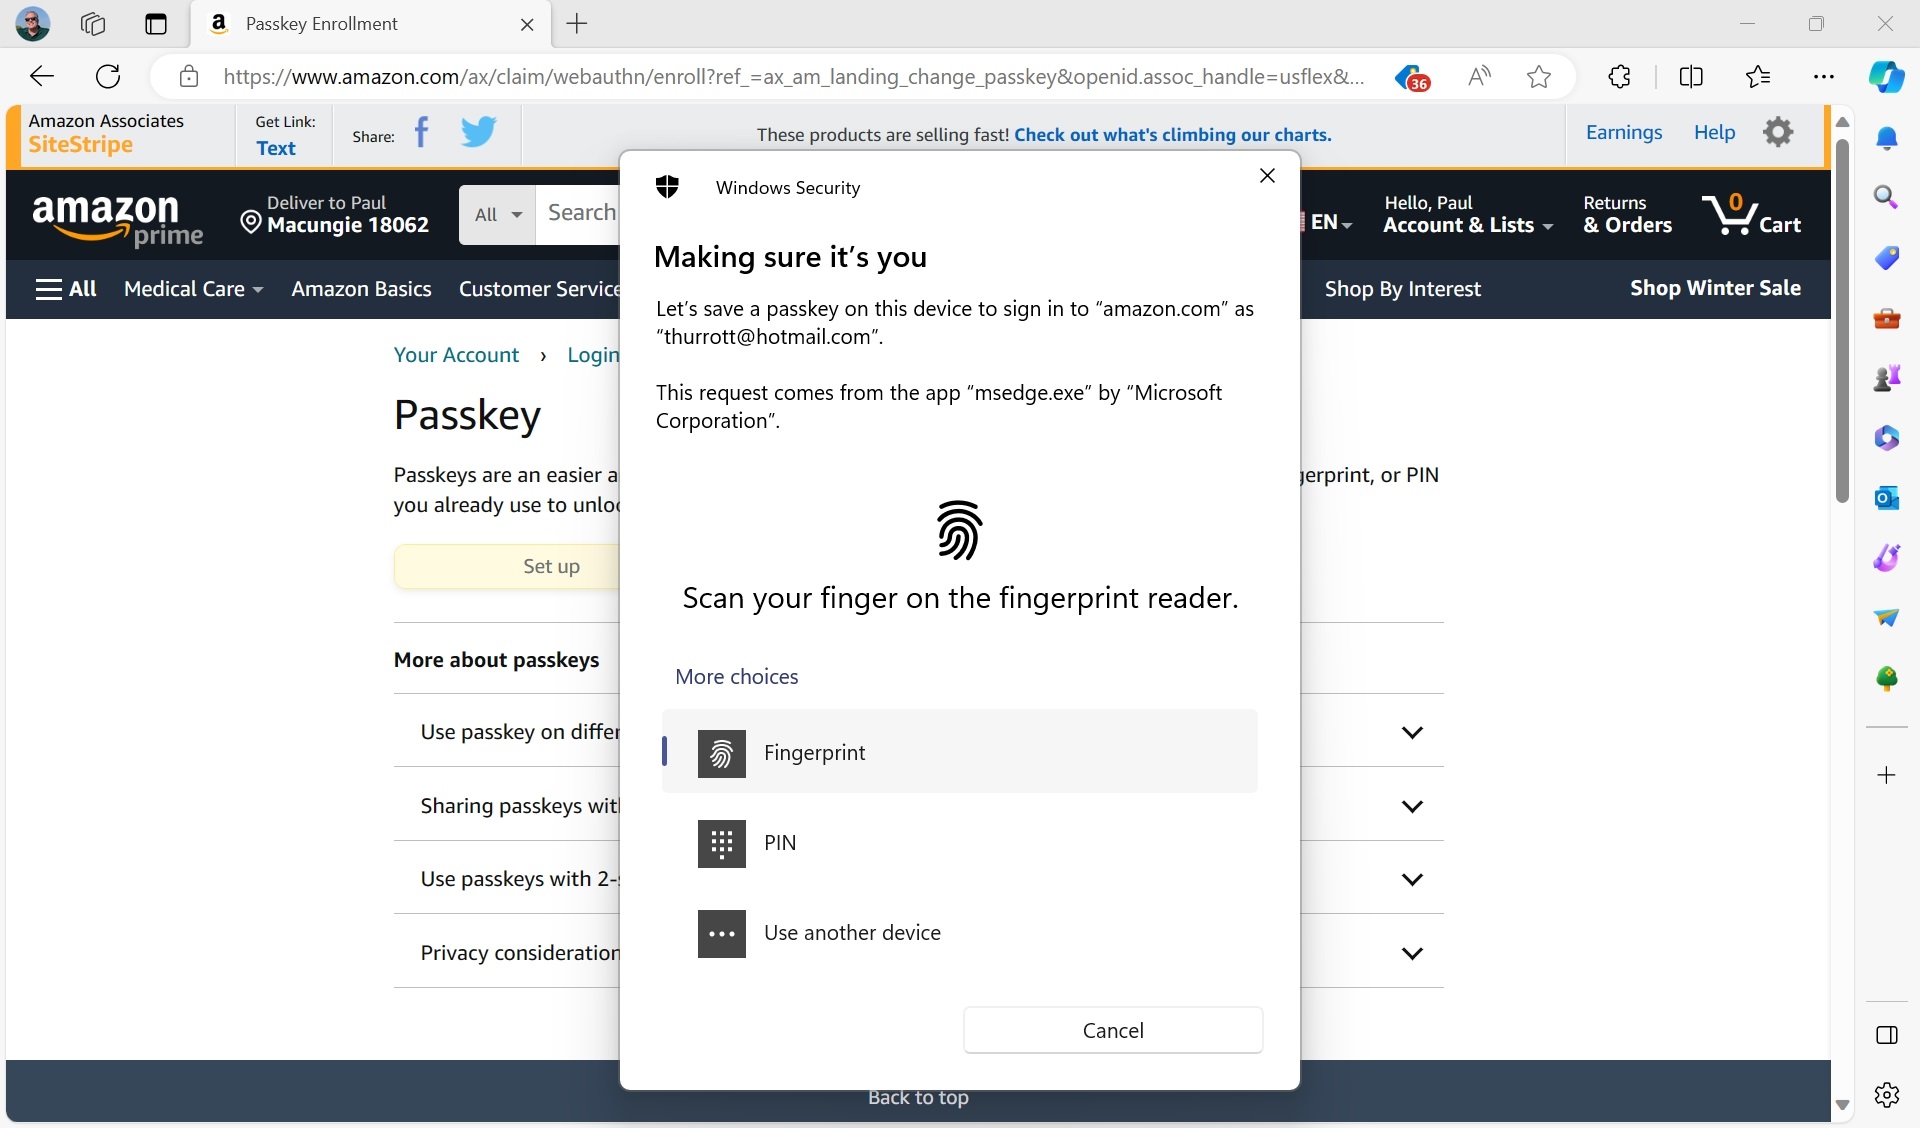
Once you successfully authenticate, it will confirm that the passkey was saved on your PC. Click “OK.”
Depending on how you configure your account on Amazon, you may never need to explicitly sign in again on that PC. But if you do need to sign in later, you’ll be prompted to enter your email address normally and can then just use the passkey option, bypassing your password entirely.
Save and use a passkey for your Google account
Google aggressively pushes users of its online accounts to create passkeys on all the devices they use. So the first time you sign in to Google.com or some other Google website with your Google account, you will typically be prompted to store a Windows Hello-protected passkey on your PC.
If you aren’t, you can do this manually by visiting the Google account website and navigating to the Passkeys page (Security > Passkeys) and clicking “Create a passkey.”
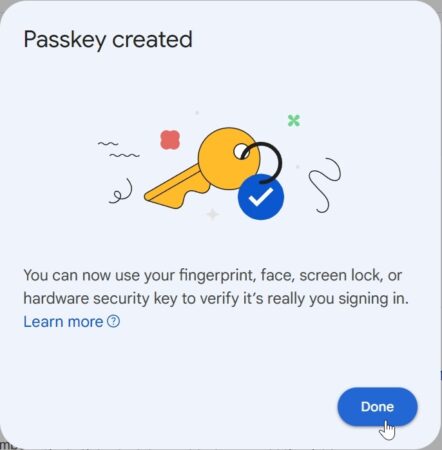
If you accept this offer, Google will explain that your sign-in information will now be stored on this PC, and it will prompt you to authenticate yourself with Windows Hello. Going forward, you can sign in to your Gmail/Google account using just your email address and the locally stored passkey that’s unlocked with Windows Hello.
Use a security key to further protect your Microsoft account and other online accounts
Most individuals will find that using some combination of passkeys (for those accounts that support it) and a smartphone-based authenticator app (for those that do not) provides the right mix of convenience and security when it comes to authenticating their Microsoft account and other online accounts. But more advanced users with heightened security concerns may want to use a security key when possible instead.
You can learn more about using your Microsoft account with an authenticator app on your phone in the Secure Your Microsoft Account chapter.
A security key is another way to securely authenticate your identity using a form of two-step verification so that you can access an online account. These devices are small portable fobs that you can carry around in your pocket or on a keychain, and have with you at all times. Like the TPM security chip in your PC, security keys can store multiple passkeys in secure onboard storage, each representing the credentials for a different online account. And they work similarly to Windows Hello from a sign in perspective by offering an additional PIN-based identity verification.
Because security keys are portable, the passkeys they contain can be used on multiple PCs and other devices, which means that security key-based passkeys are a bit more versatile than PC-based passkeys (which are locked to that one device). But smartphones can store passkeys too, and since most people have their phone nearby at all times, using an authenticator app on a phone is typically the most convenient option.
Security keys are also more complex to use than passkeys. They require you to have an additional device with you, and they add additional steps each time you have to authenticate yourself. Their small size also makes them easy to lose or leave behind.
That said, thanks to the way that sign-ins work in Windows and elsewhere, you can always use an alternative sign-in method if your security key is left behind.
In the good news department, security keys work with multiple devices, not just PCs but also smartphones and tablets, Chromebooks, Macs, and even Linux PCs. They can also use various connection types, including USB-A, USB-C, Lightning (for older Apple iPhones and iPads), and NFC, which works wirelessly. As with passkeys, security keys are supported by all major browsers, including Microsoft Edge, Google Chrome, Apple Safari, Mozilla Firefox, and all Chromium-based browsers (Brave, Opera, Vivaldi, and so on).
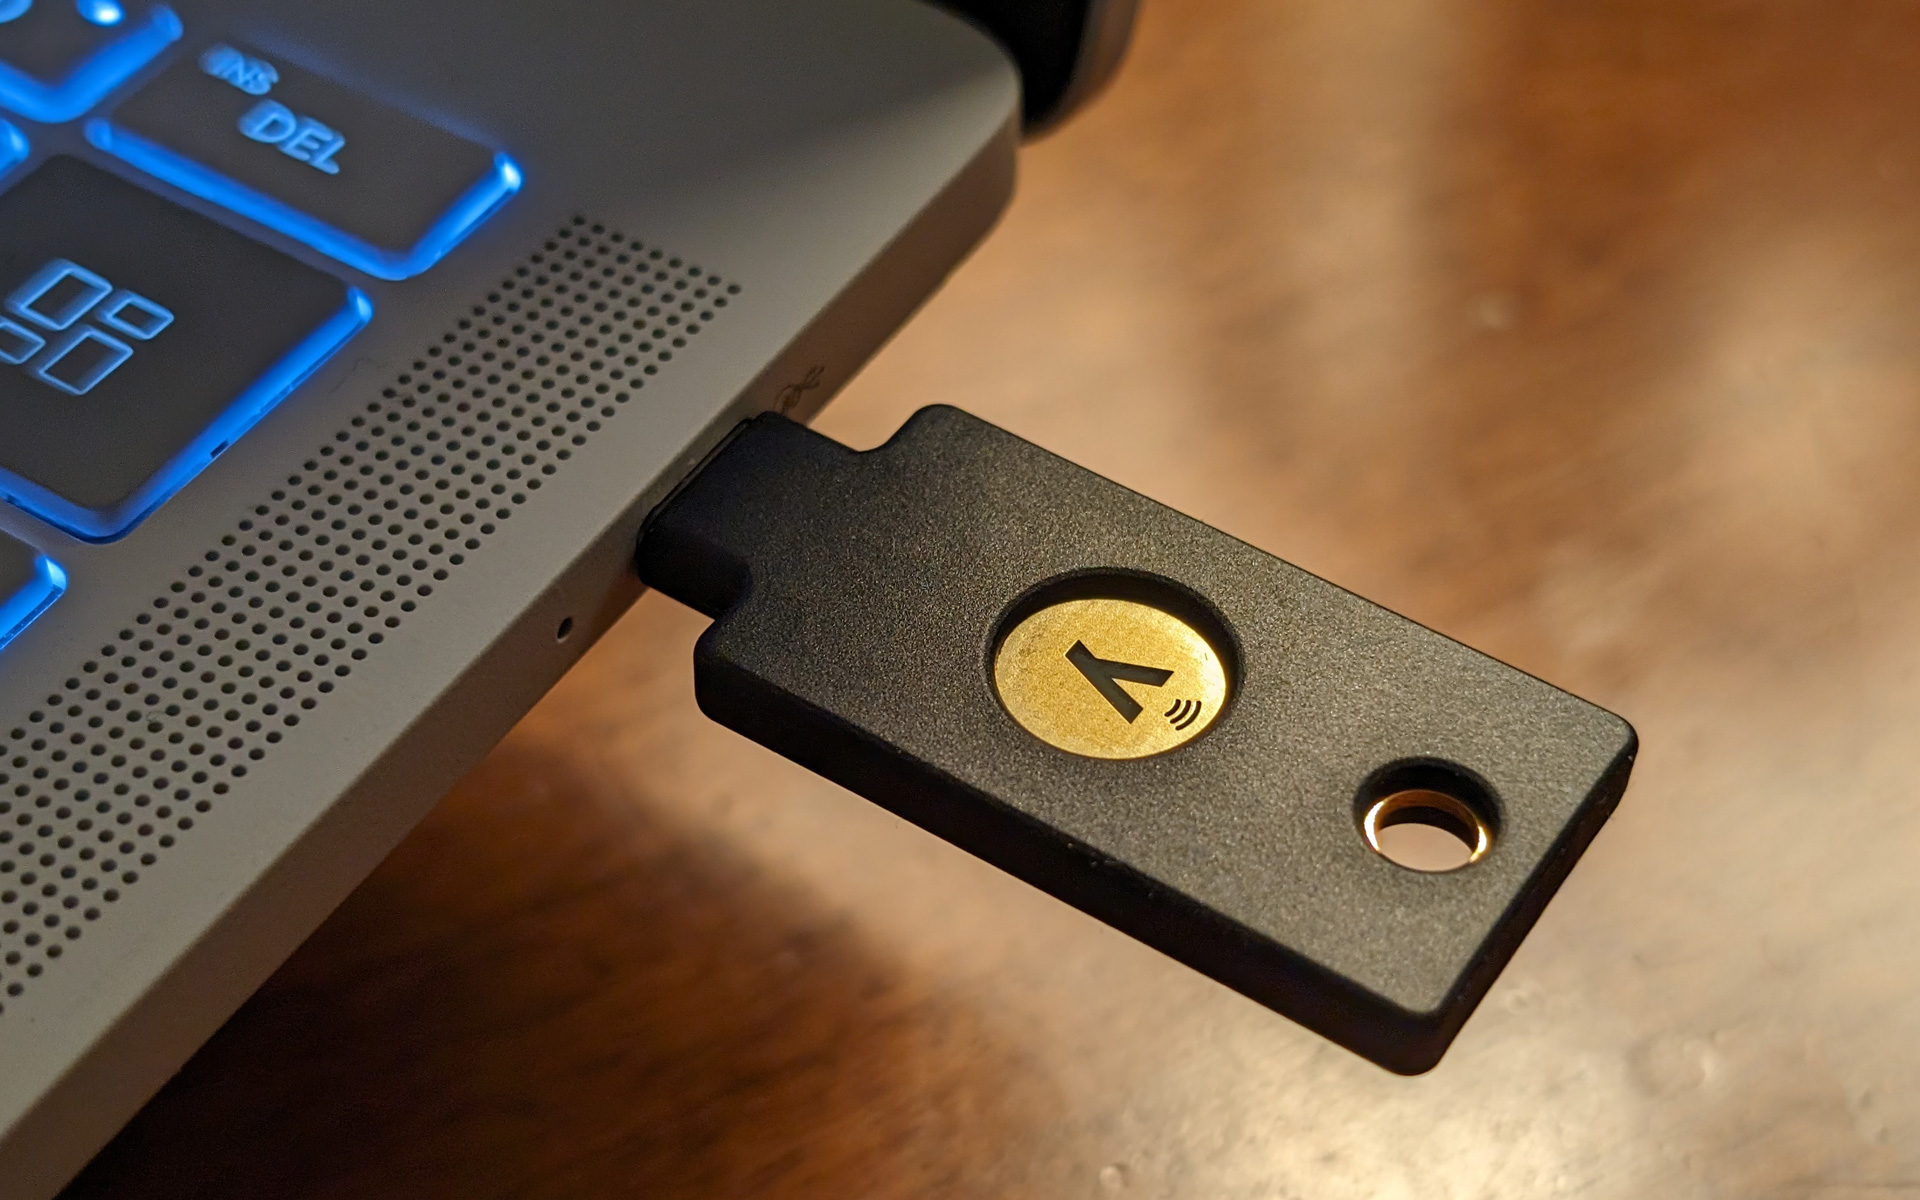
Finally, while there are many security key choices out there, the most popular is the YubiKey family of security keys made by Yubico, which cost $50 to $75 per key.
Set up a new security key in Windows 11
A security key doesn’t do anything out of the box, and if you plug it into your PC or a mobile device, nothing happens. That’s intentional, as you will register your security key separately with each online account you use, and each may use a slightly different onboarding process.
But Windows 11 does offer a basic security key management interface that lets you configure a PIN for the device–similar to the PIN you set up for your Windows 11 sign-in account–and factory reset it if needed, removing all its stored passkeys.
This interface is found in the Settings app. To find it, open Settings and navigate to Accounts > Sign-in options. There, you will find a “Security key” item under “Ways to sign in.”
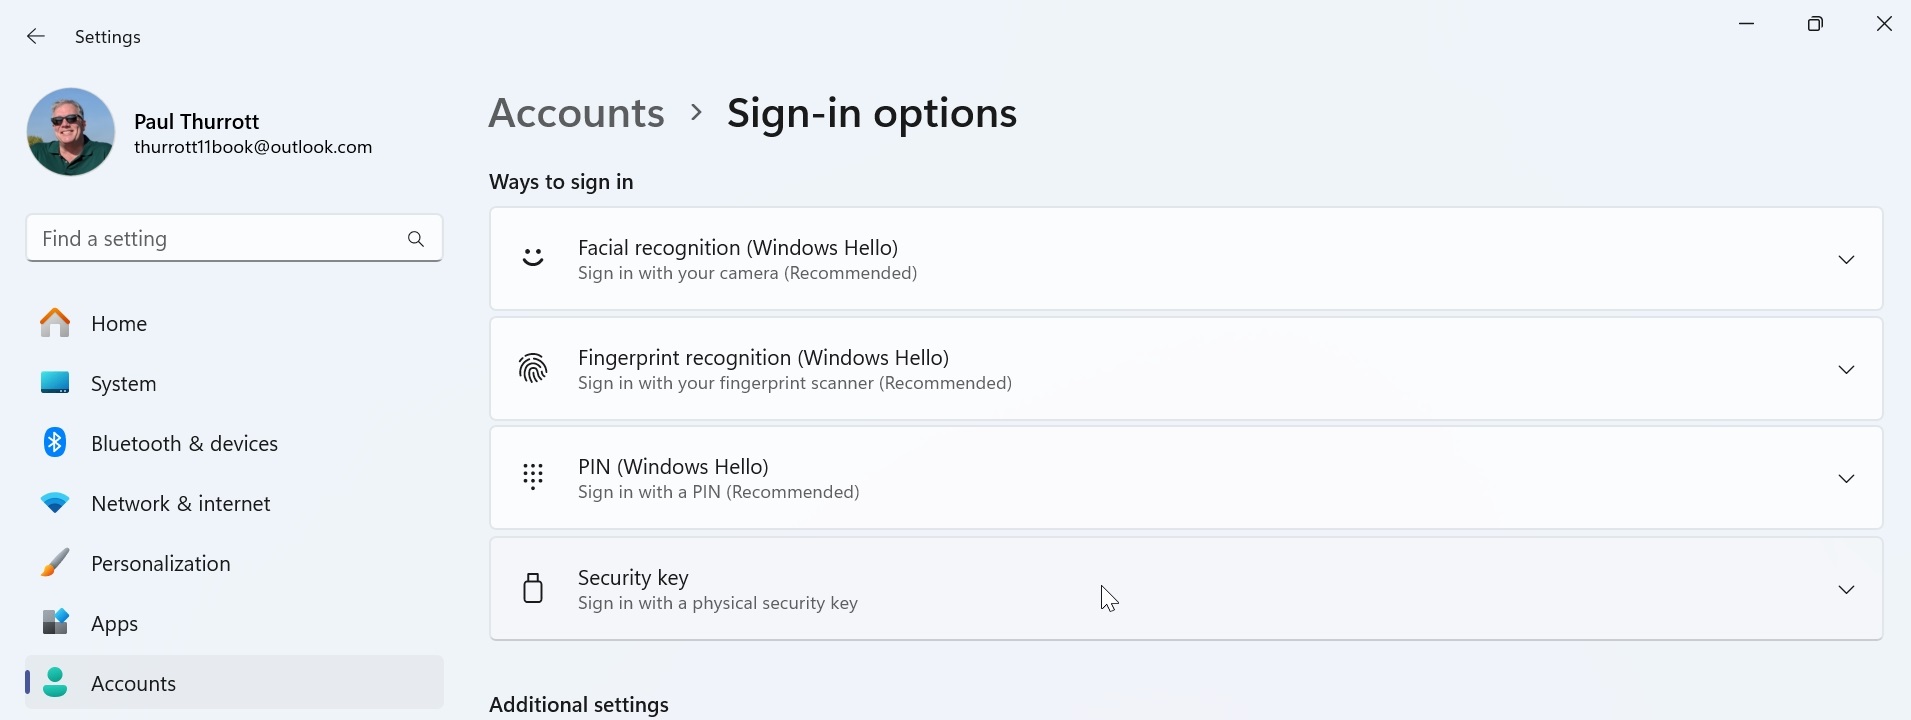
If you click it, the “Security key” item expands to reveal a “Manage” button. To manage a security key, click “Manage.” You’ll be prompted to insert the key if it isn’t already. Otherwise, you’ll be prompted to “touch your security key.” When you do so, a “Windows Hello setup” window will appear with two options.
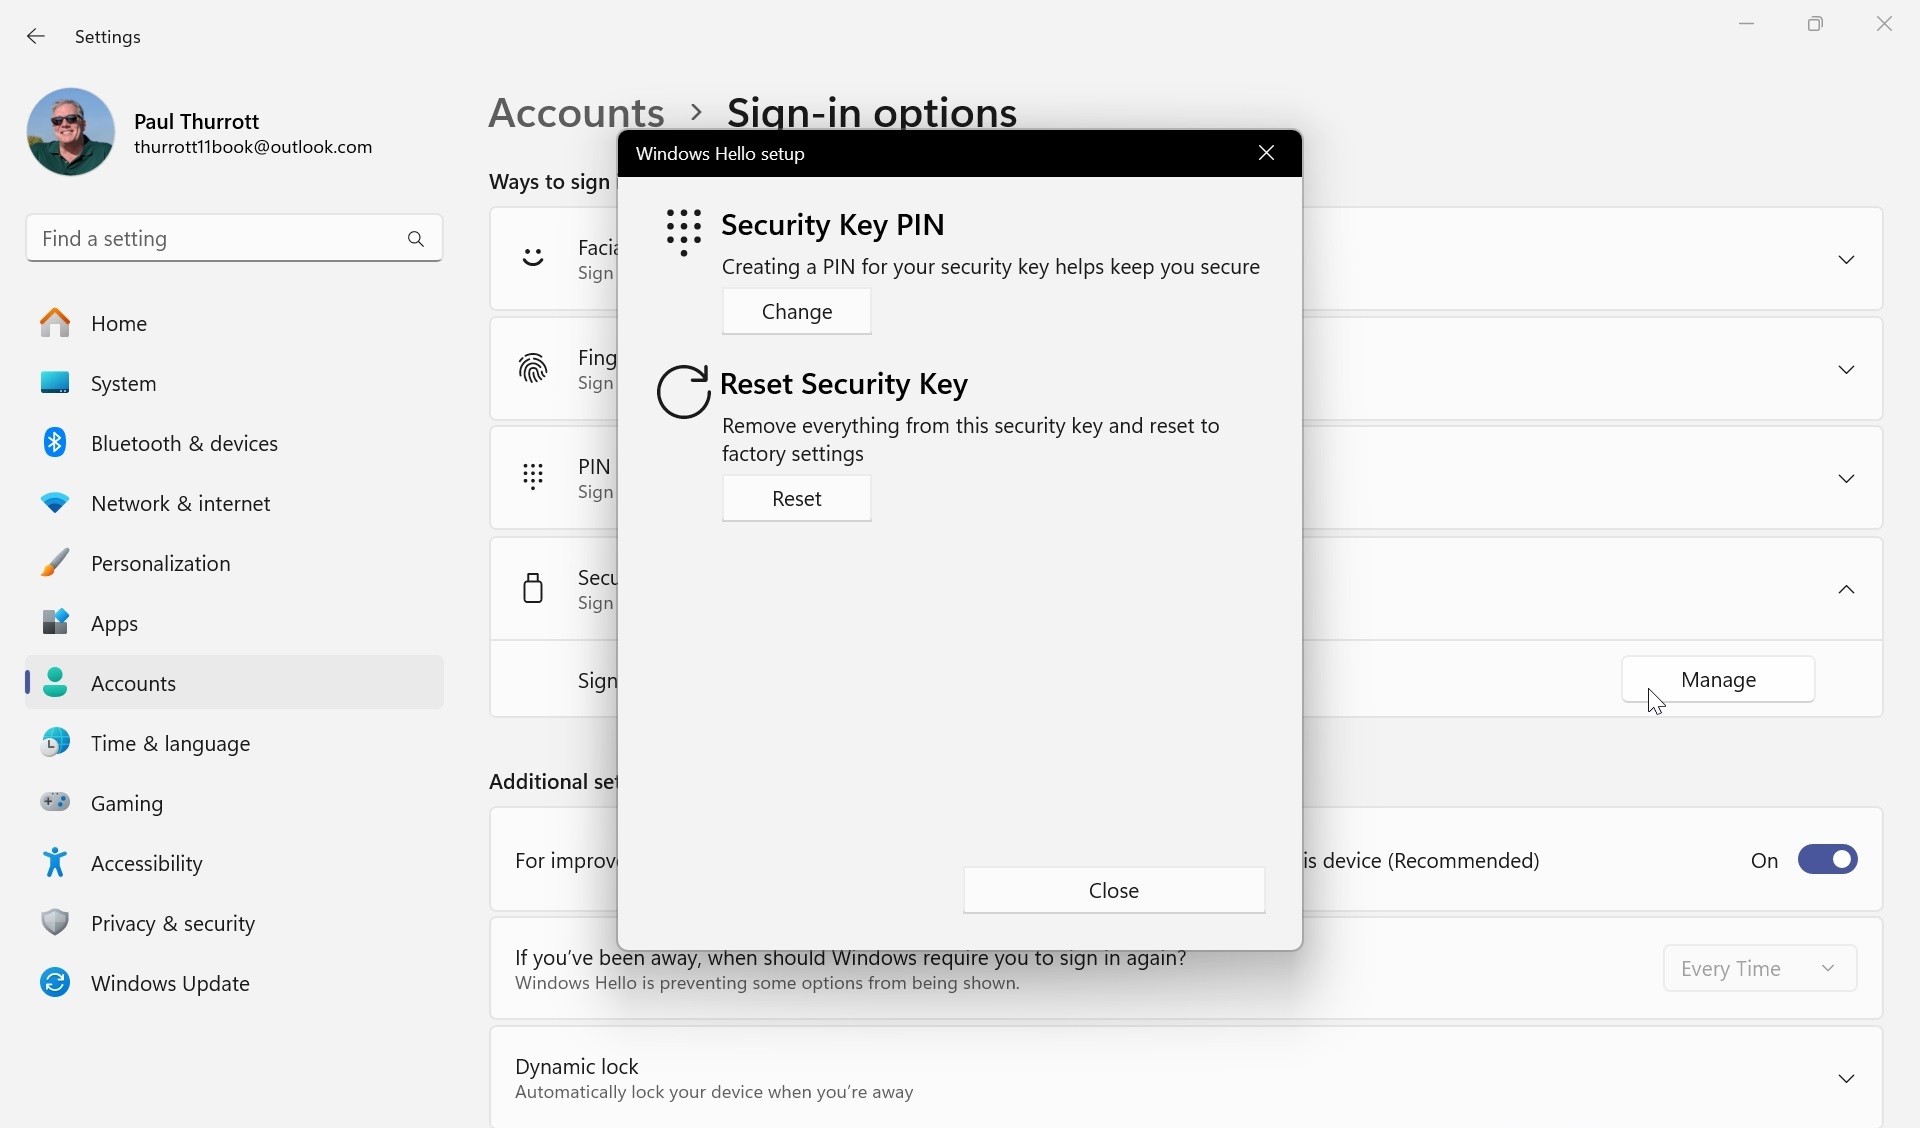
They are:
Security Key PIN. Click the “Add” button next to this option to create a PIN to the security key and an optionally additional layer of security. If you add a PIN, you will be required to type it each time you access a passkey on the key, in addition to pressing its integrated button.
If this is a new security key, you don’t need to add the PIN now. You will be prompted to do so when you add a passkey for your Microsoft account to the security key, as described later in this chapter.
Reset Security Key. If you click the “Reset” button next to this option, a short wizard will walk you through a process that will delete all the passkeys and other data on the key and reset it to its factory settings. (Among other things, it will remove any PIN you previously configured.)
While you can change the security pin’s PIN at any time using the same Settings app-based interface noted above, what you can’t do is remove the PIN. To do that, you can factory reset it as described above or contact the device maker and see if they offer a custom app or other method for removing the PIN.
Use your Microsoft account with a security key
Microsoft lets you save a passkey for your Microsoft account to a security key and then use that key to securely authenticate yourself on Windows 10- and 11-based PCs.
Add your Microsoft account to a security key
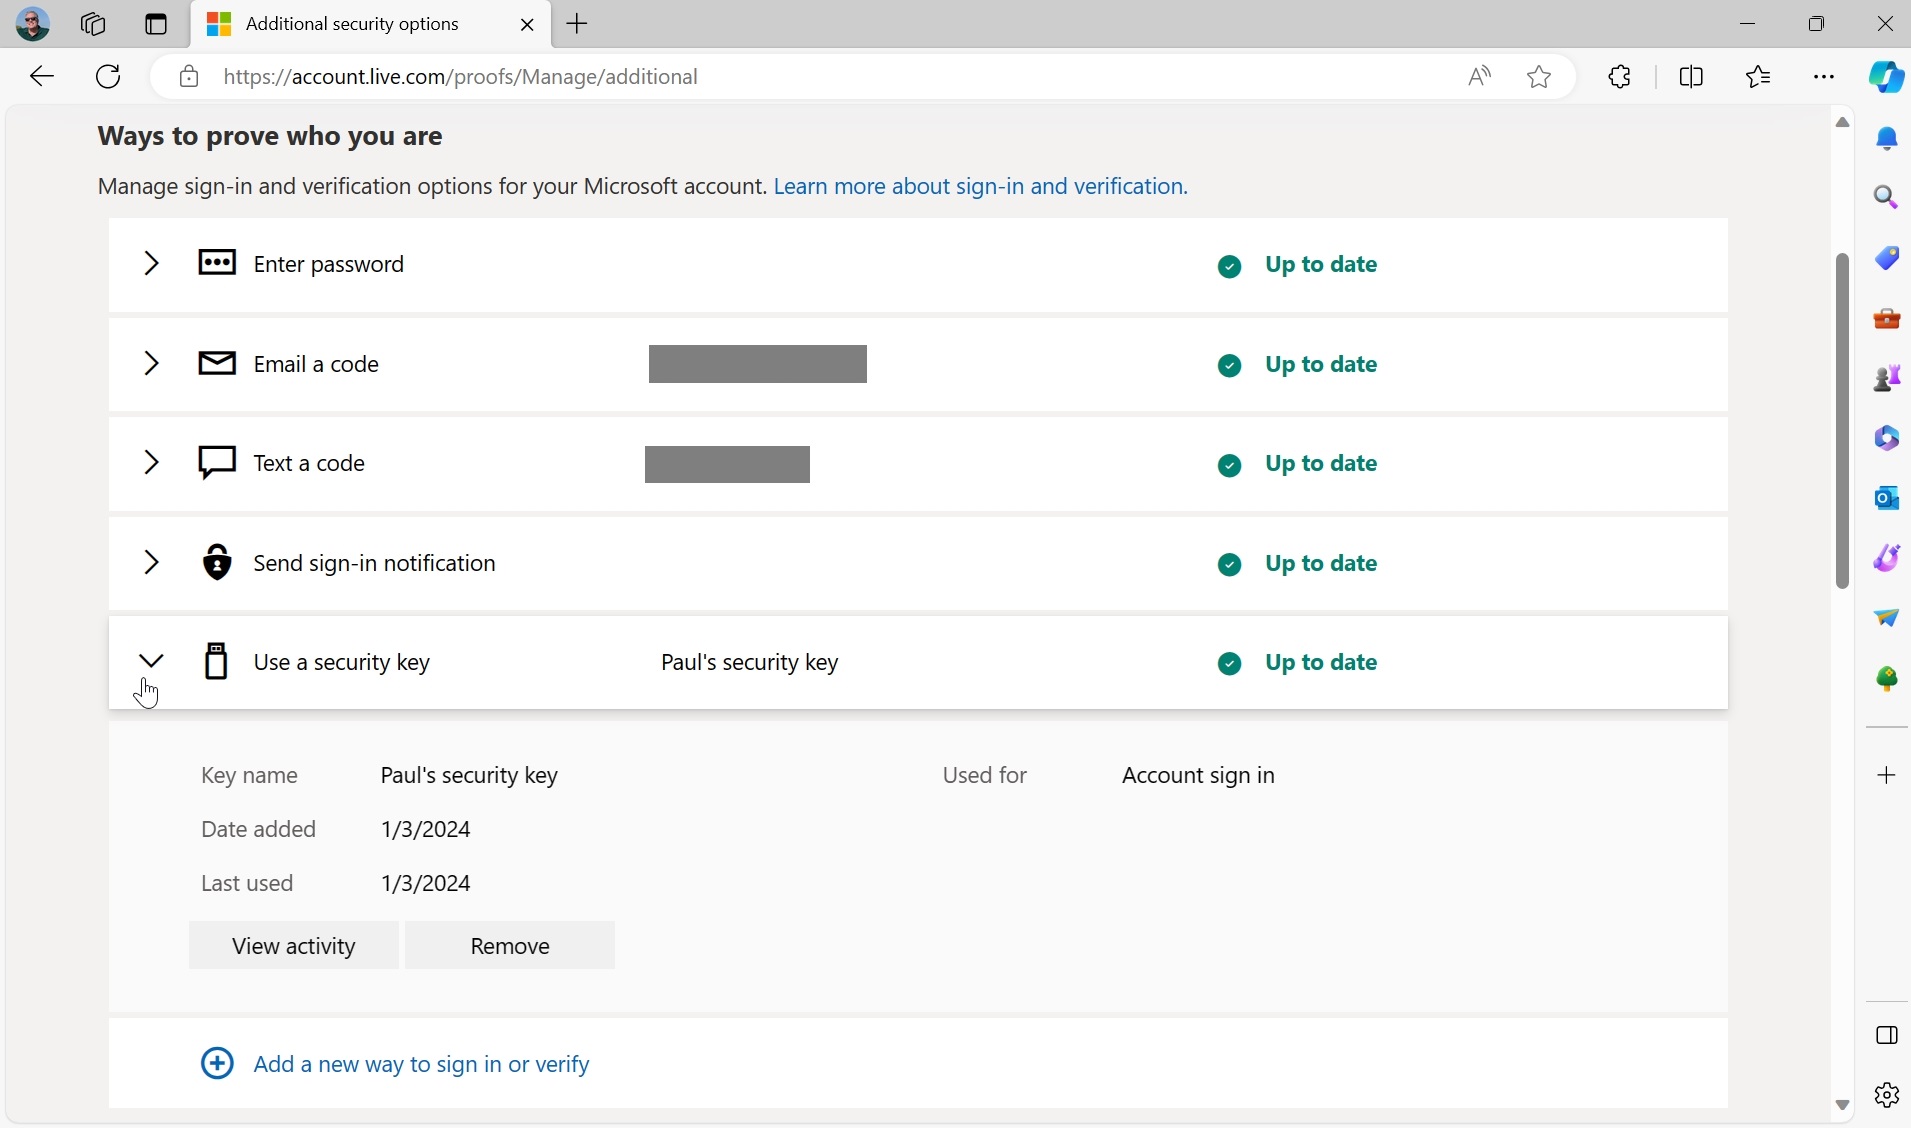
You add your Microsoft account to a security key the same way you add any other additional sign-in and security verification method, via the Additional security options page on the Microsoft Account website.
To do so, click “Add a new way to sign in or verify” under “Ways to prove who you are.” A “Select an additional way to verify or sign in” window appears.
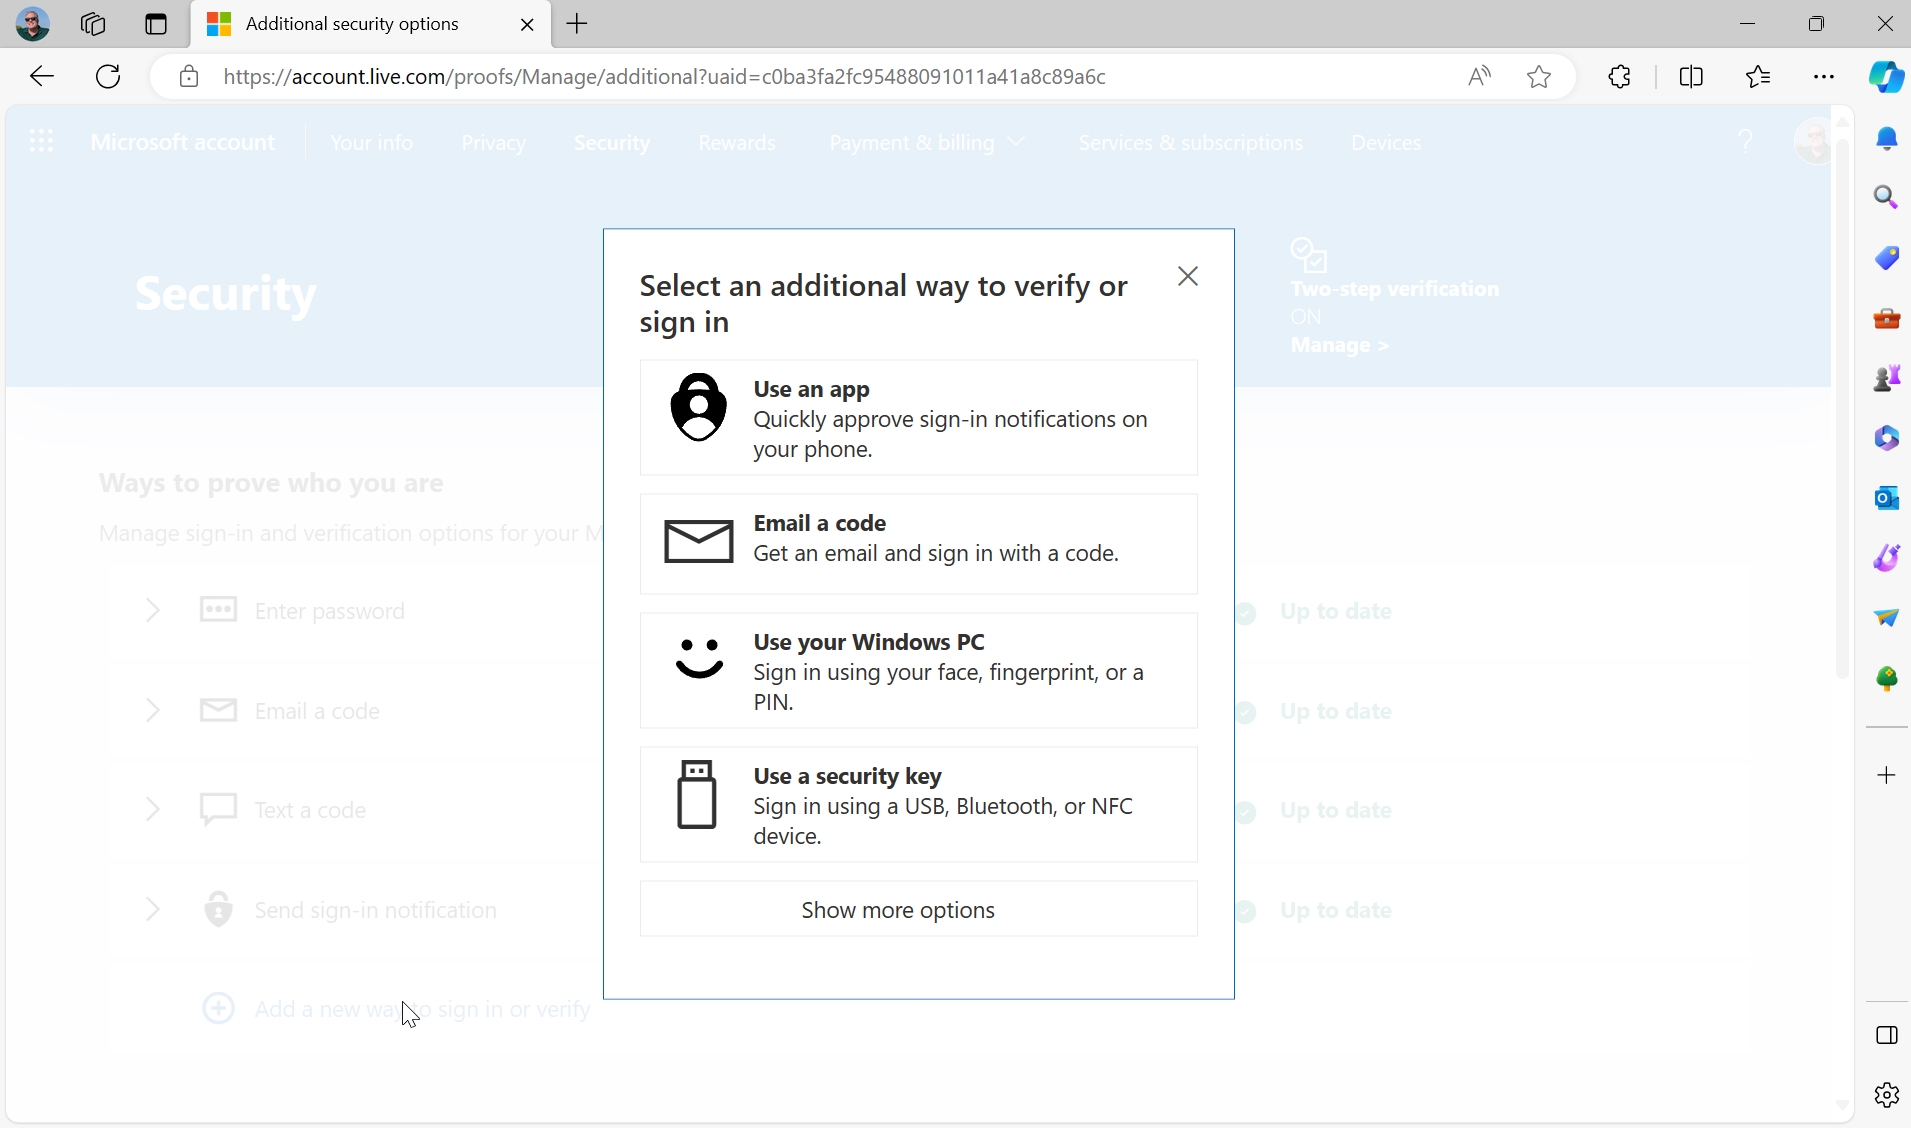
Click “Use a security key.” The Microsoft account website displays information about how using USB- and NFC-based security keys differs. (Here, we will assume a USB security key because most PCs don’t support NFC.)
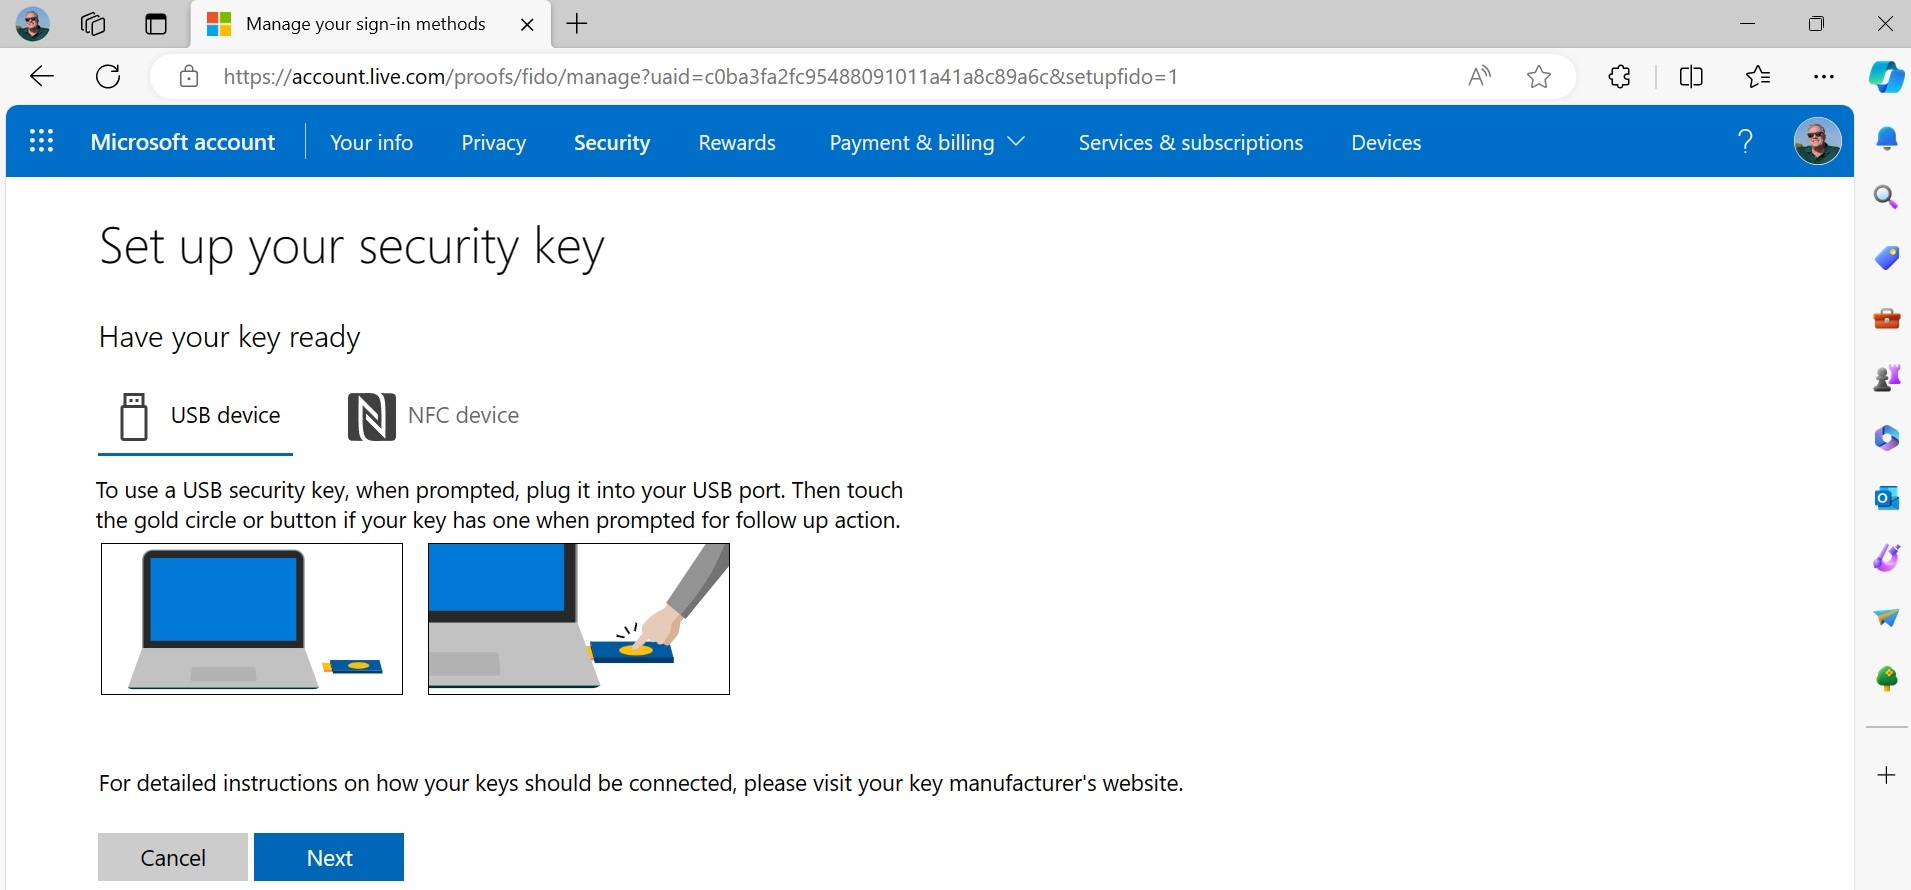
Click “Next.” A Windows Security window will appear, asking you to choose where to save a passkey.
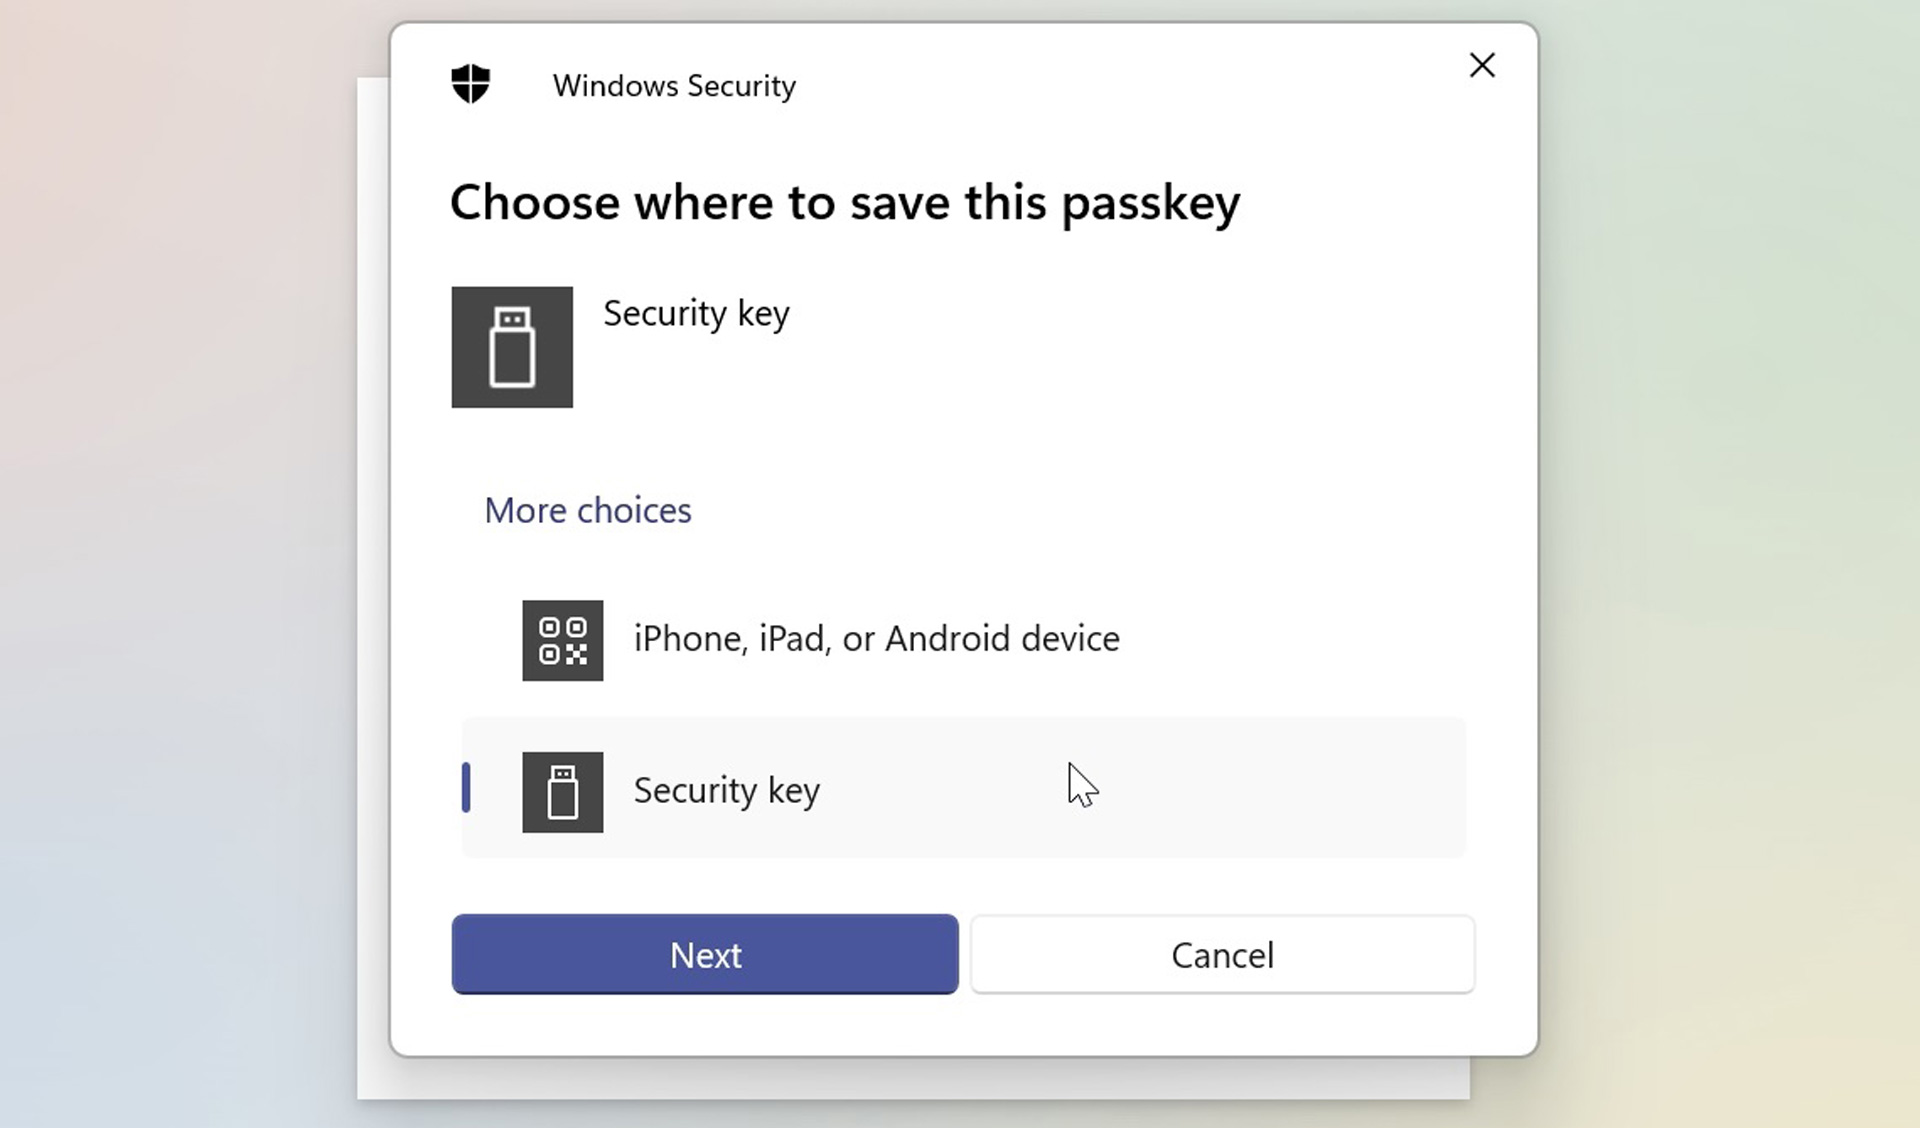
Click “Security key” and then “Next.” The first of two informational windows will appear.
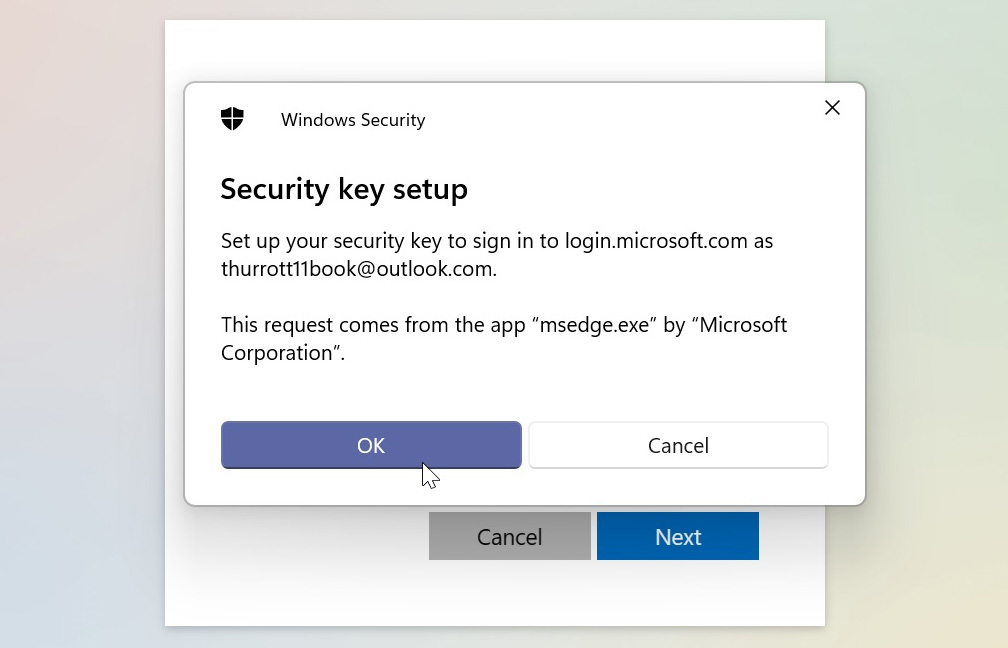
Click “OK” twice. You will be prompted to insert your security key if it’s not already plugged in to one of your PC’s USB ports. If your security key has a PIN configured, you will be prompted to enter that key. Otherwise, you will be prompted to create a new PIN for the security key.
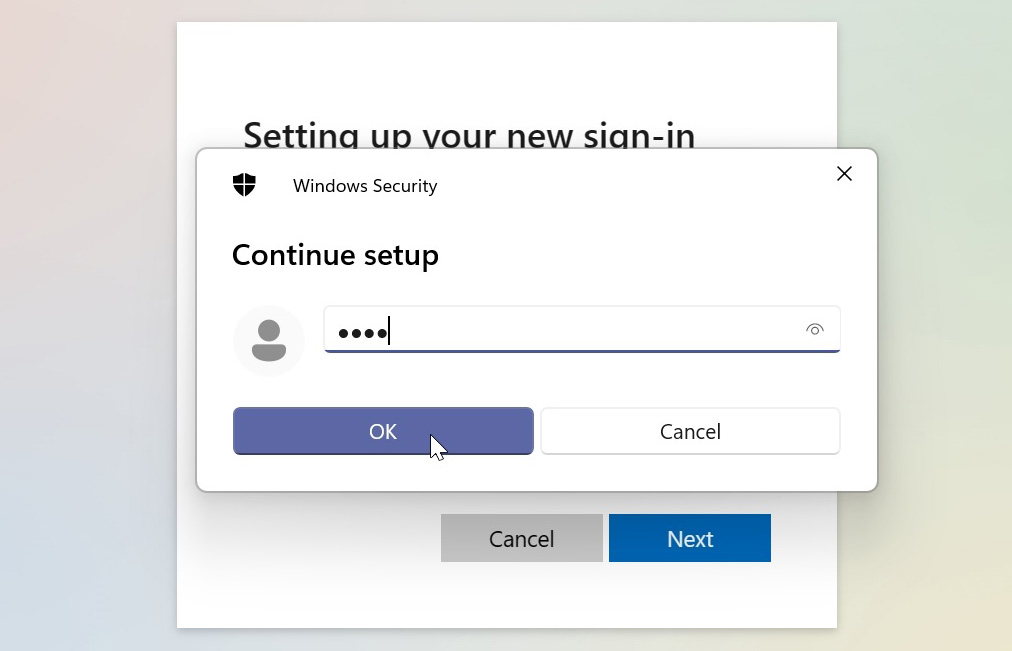

This is not optional: Microsoft requires your security key to be protected with a PIN before it will allow you to save a Microsoft account passkey to the device. So enter the same PIN twice and then click “OK.” You will be prompted to touch your security key.
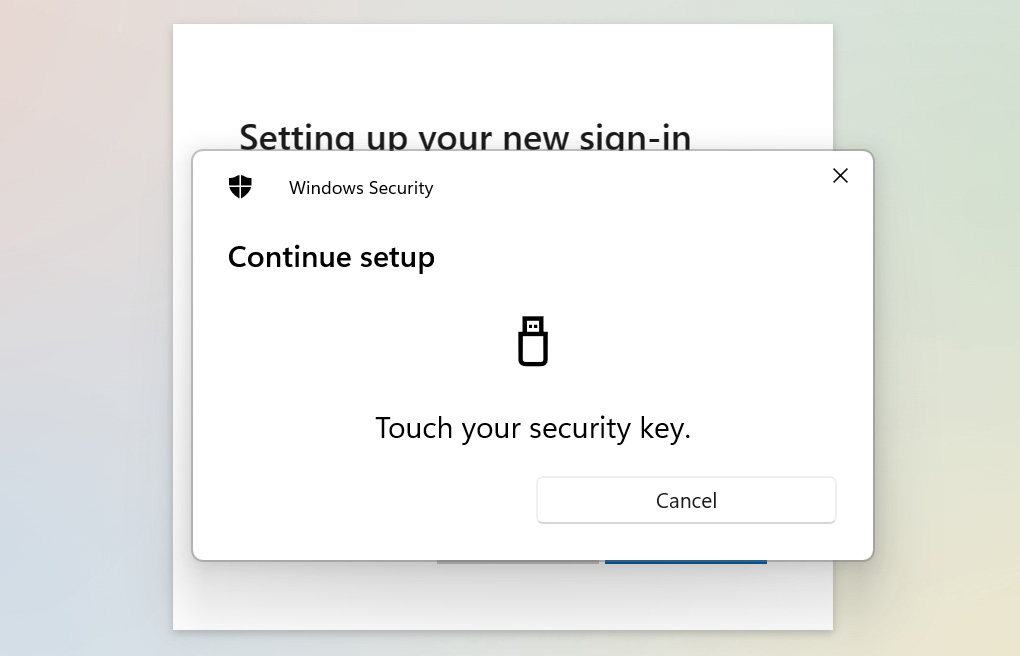
When you touch the gold circle on the key, Windows Security will report that the passkey has been saved.
Click “OK.” You will now be prompted to name the security key so you can easily recognize it in your list of additional sign in and verification methods.
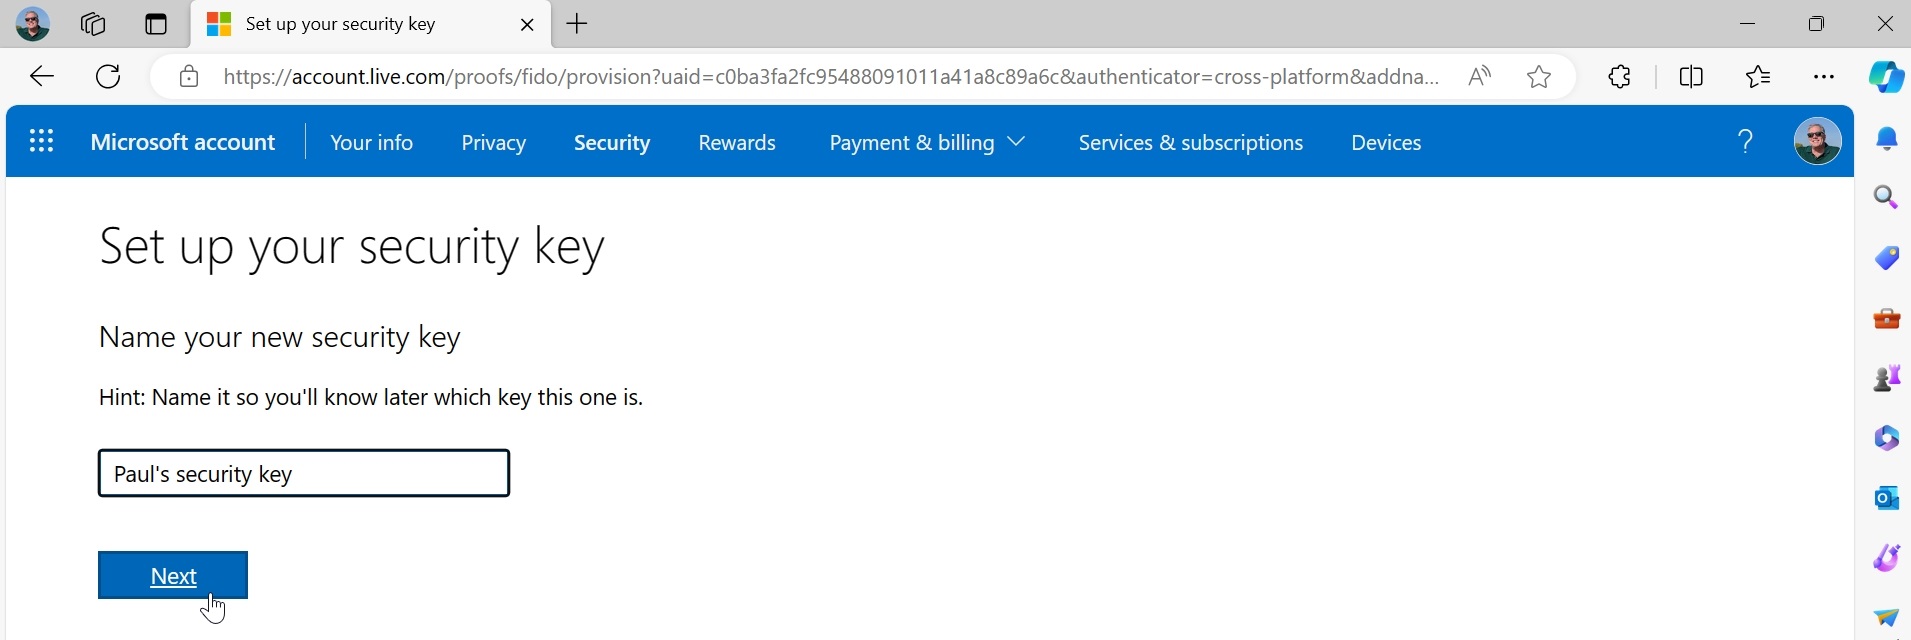
So give it a name (like “Paul’s security key”) and then click “Next.” Then, click “Got it” to finish the process. You will now see the security key listed in the list on the “Additional security options” page.

Sign in to a website or app in Windows 11 with your Microsoft account using a security key
Oddly, you can’t use a security key to sign in to Windows 11 with your Microsoft account on a day-to-day basis. Instead, you will continue to use a Windows Hello PIN or biometric sign-in option for that.
You can use a security key to authenticate your identity when you are first configuring your Microsoft account to sign in to Windows 11.
Instead, you can use your security key to sign in securely to your Microsoft account in other ways. For example, while Windows 11 automatically passes through your Microsoft account credentials to websites, apps, and system services by default, you will still occasionally need to authenticate yourself. And when that happens, you can use your security key to verify your identity.
This will happen automatically as needed, but you can test it for yourself by navigating to a Microsoft website like Office.com using a Microsoft Edge InPrivate window (or similar, if you use a different browser). When you try to sign in, you will be prompted with the traditional Microsoft account “Sign in” page.
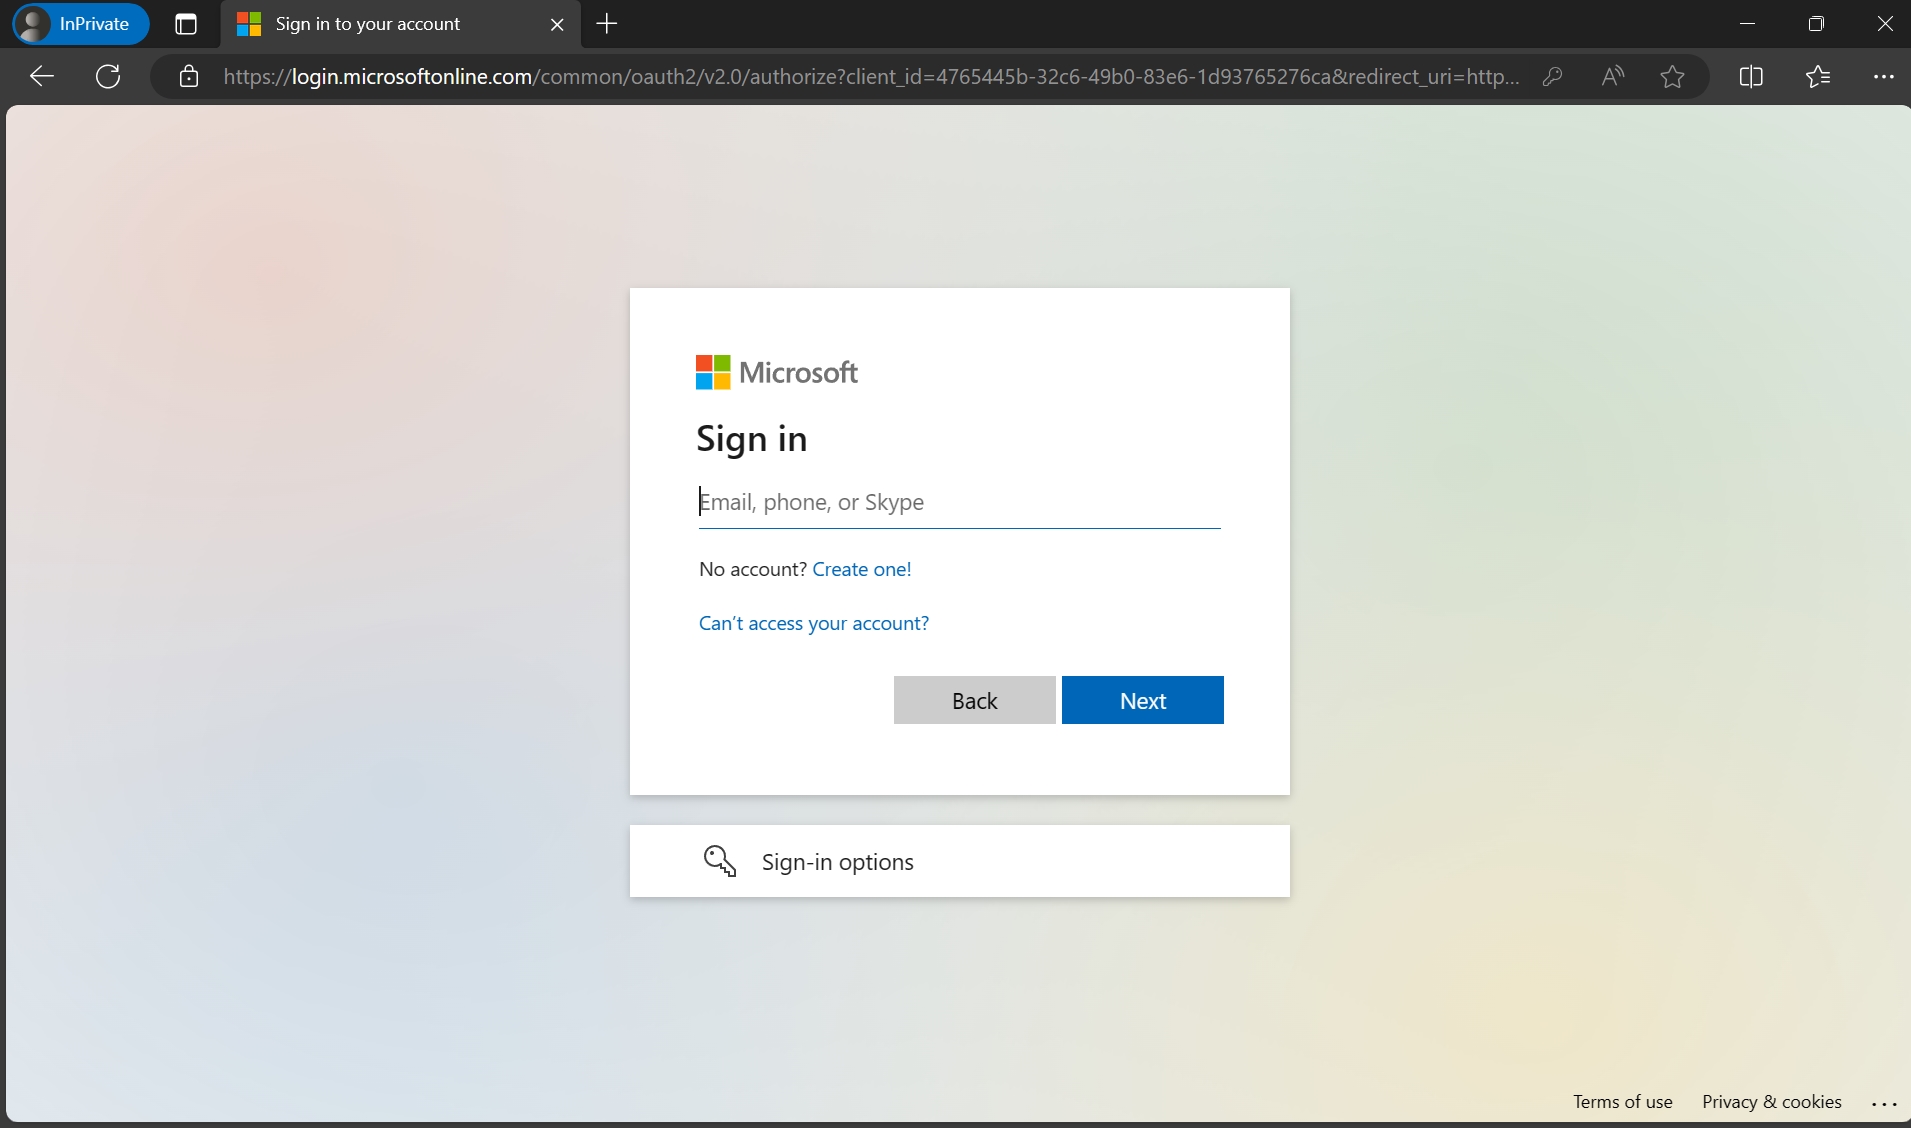
Instead of typing your email address, click “Sign-in options.”
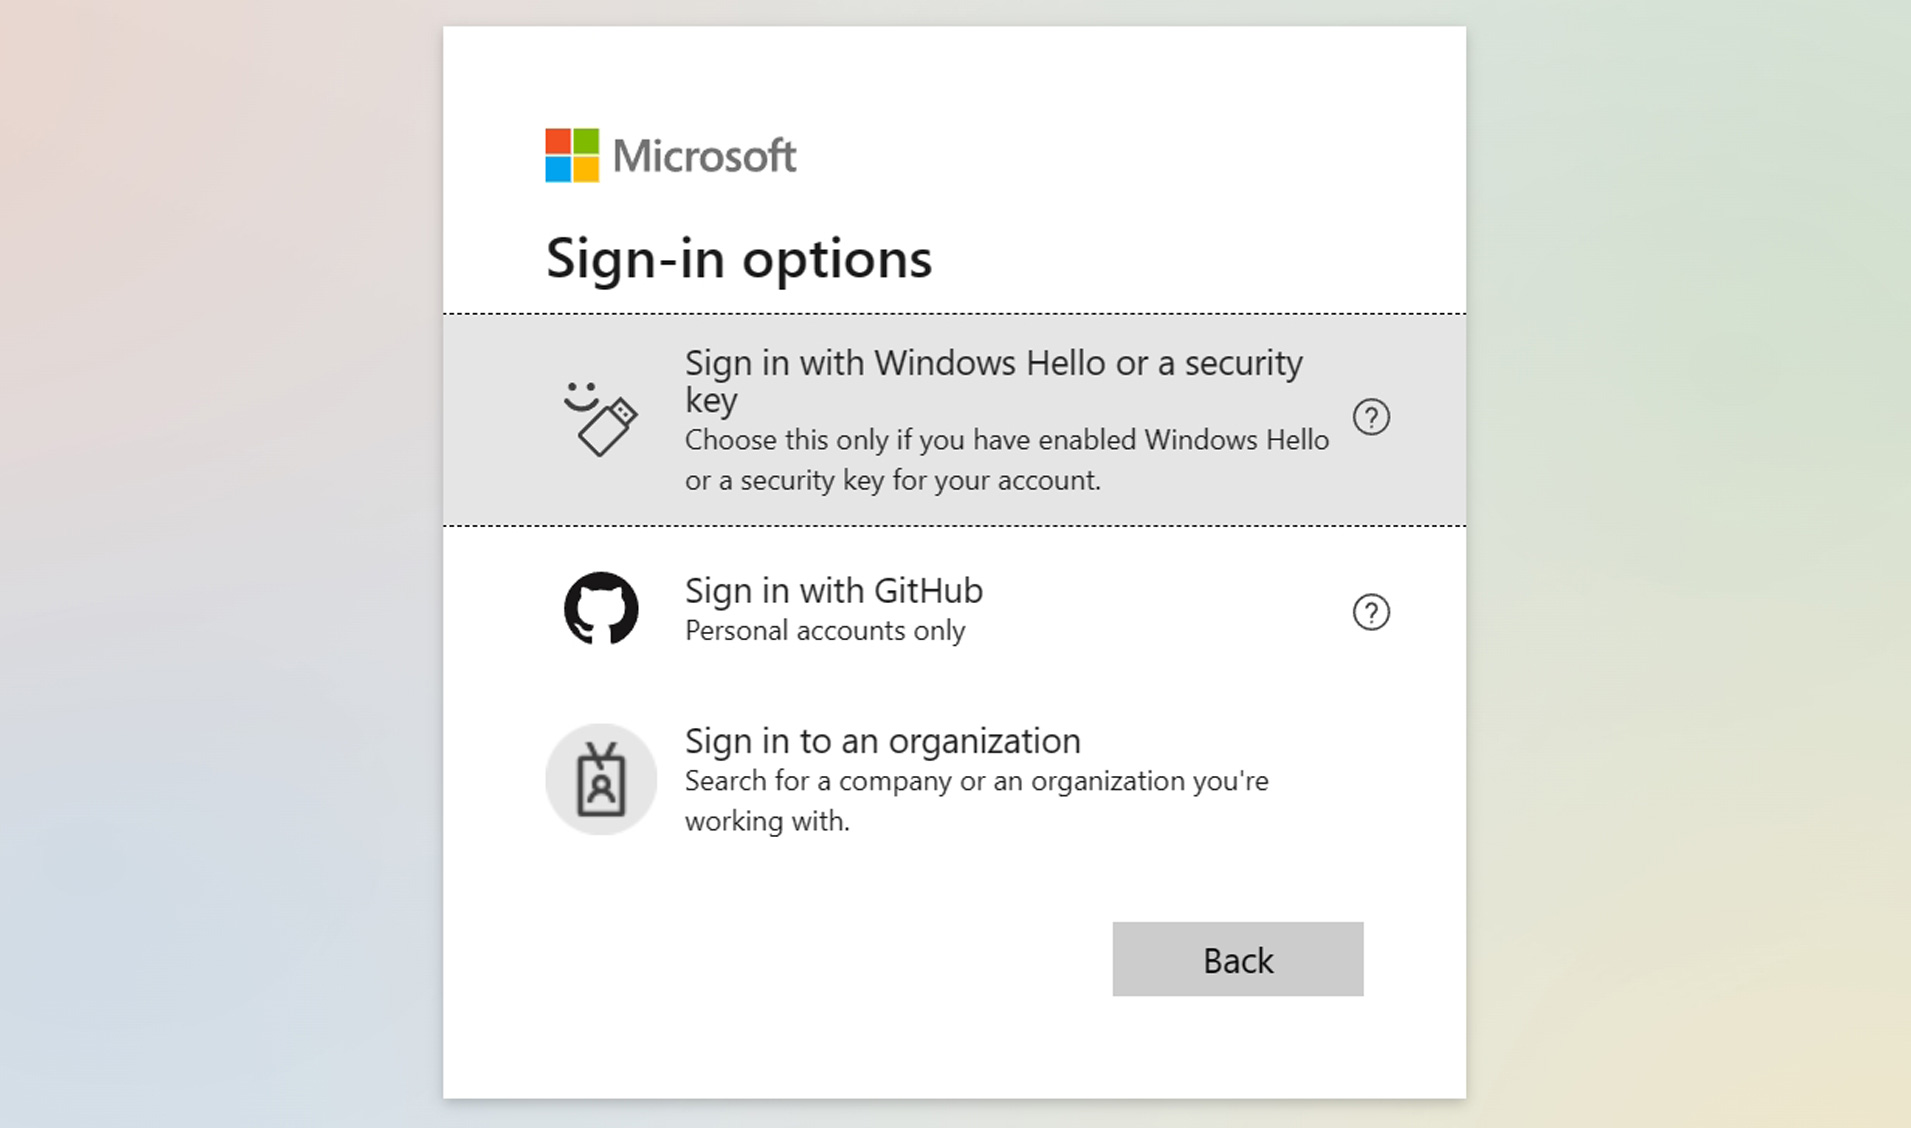
Here, click “Sign in with Windows Hello or a security key.” A flyout may appear and display a passkey that it found on the PC you’re using.
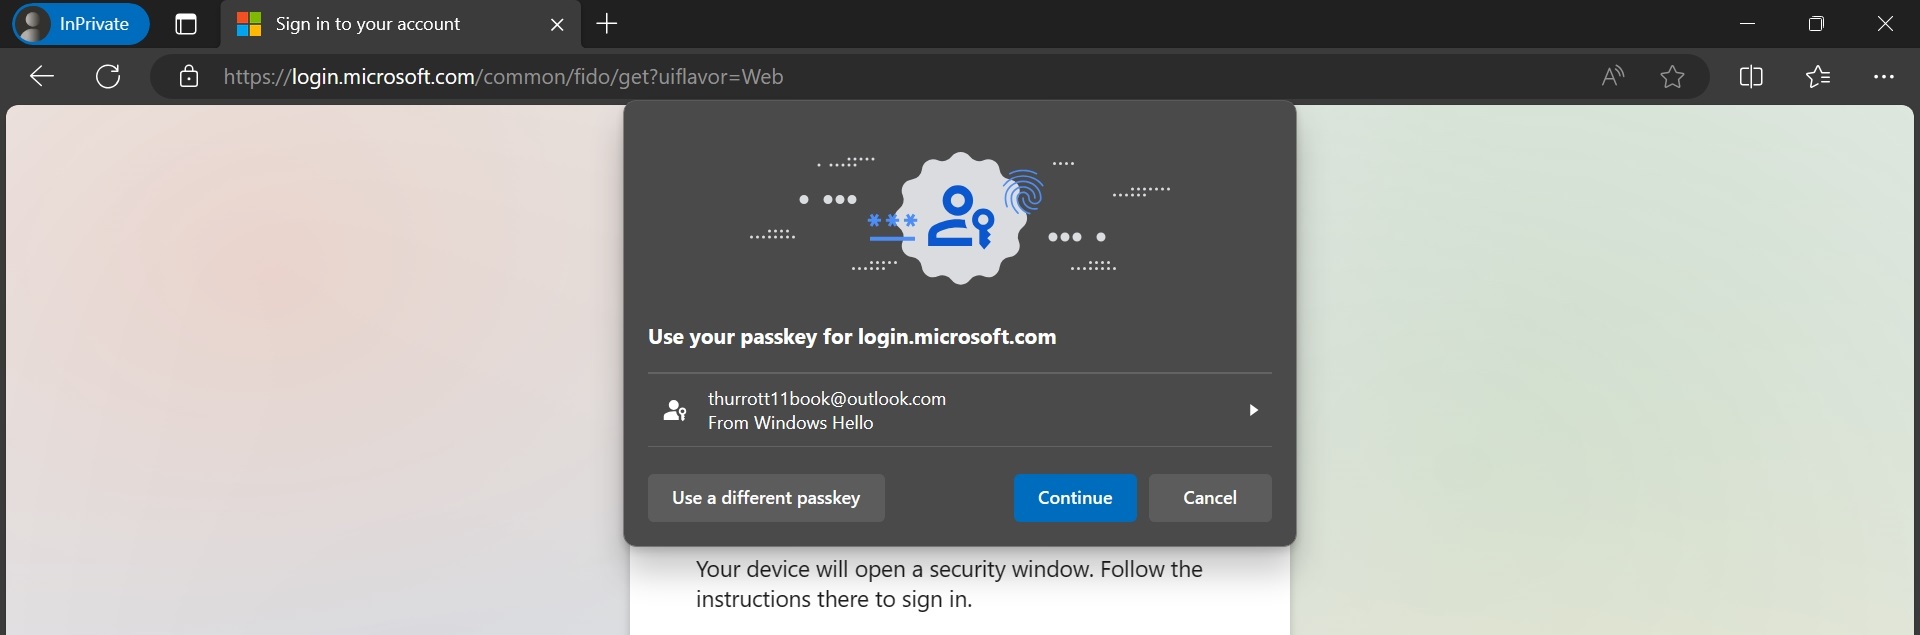
If so, click “Use another passkey.” You will now see “Use a phone, tablet, or security key” under “On other device.”
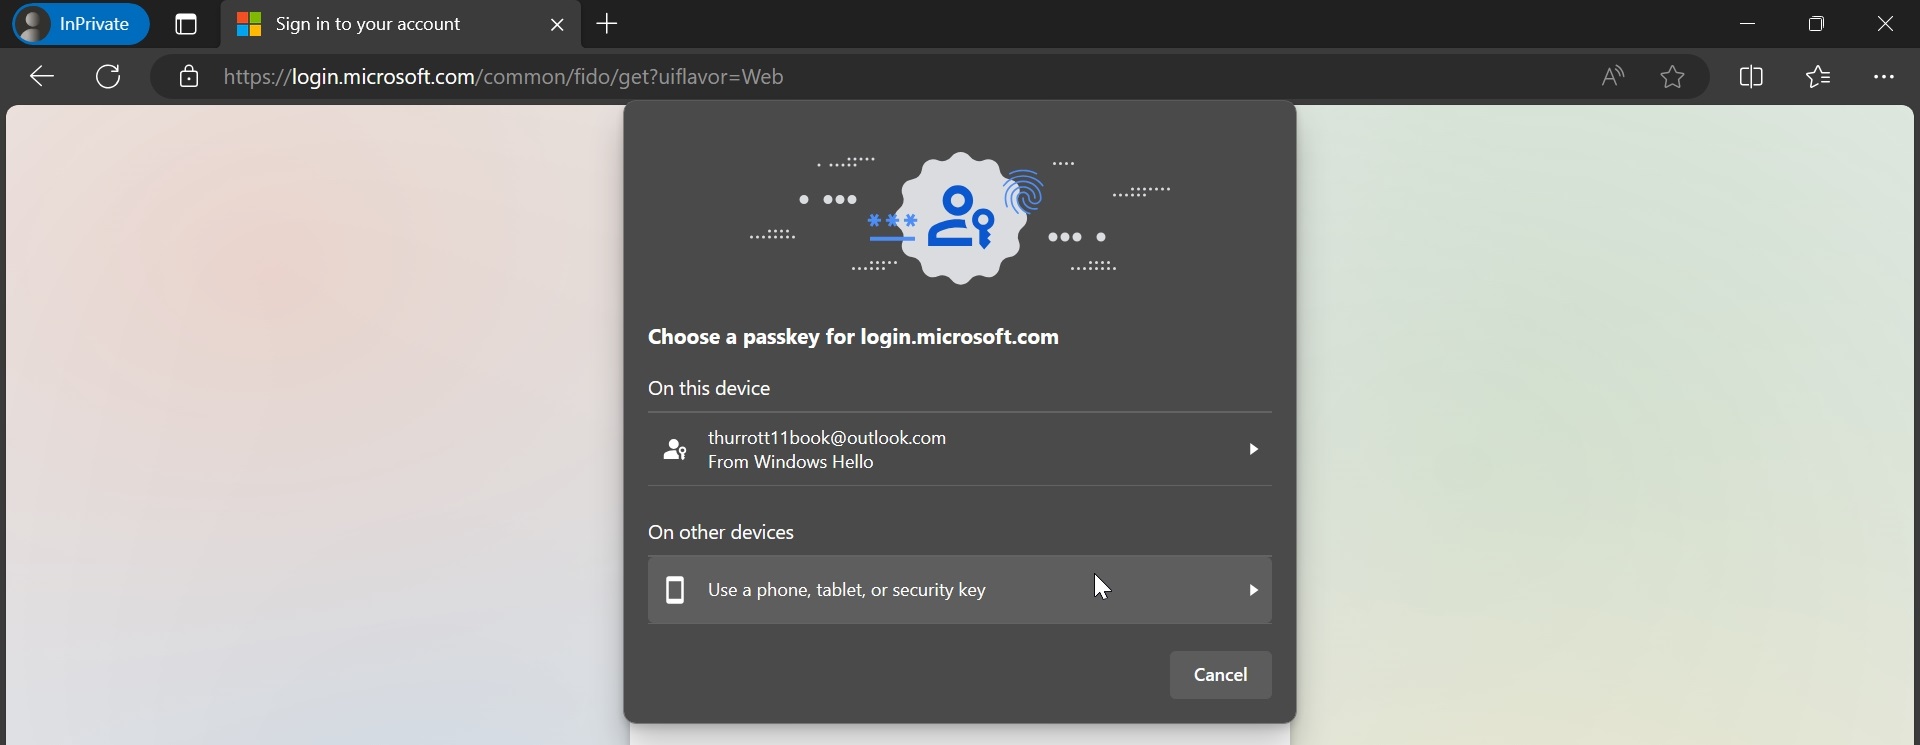
Click “Use a phone, tablet, or security key,” and a “Windows Security” window appears, asking you to sign in with Windows Hello or another sign in method.
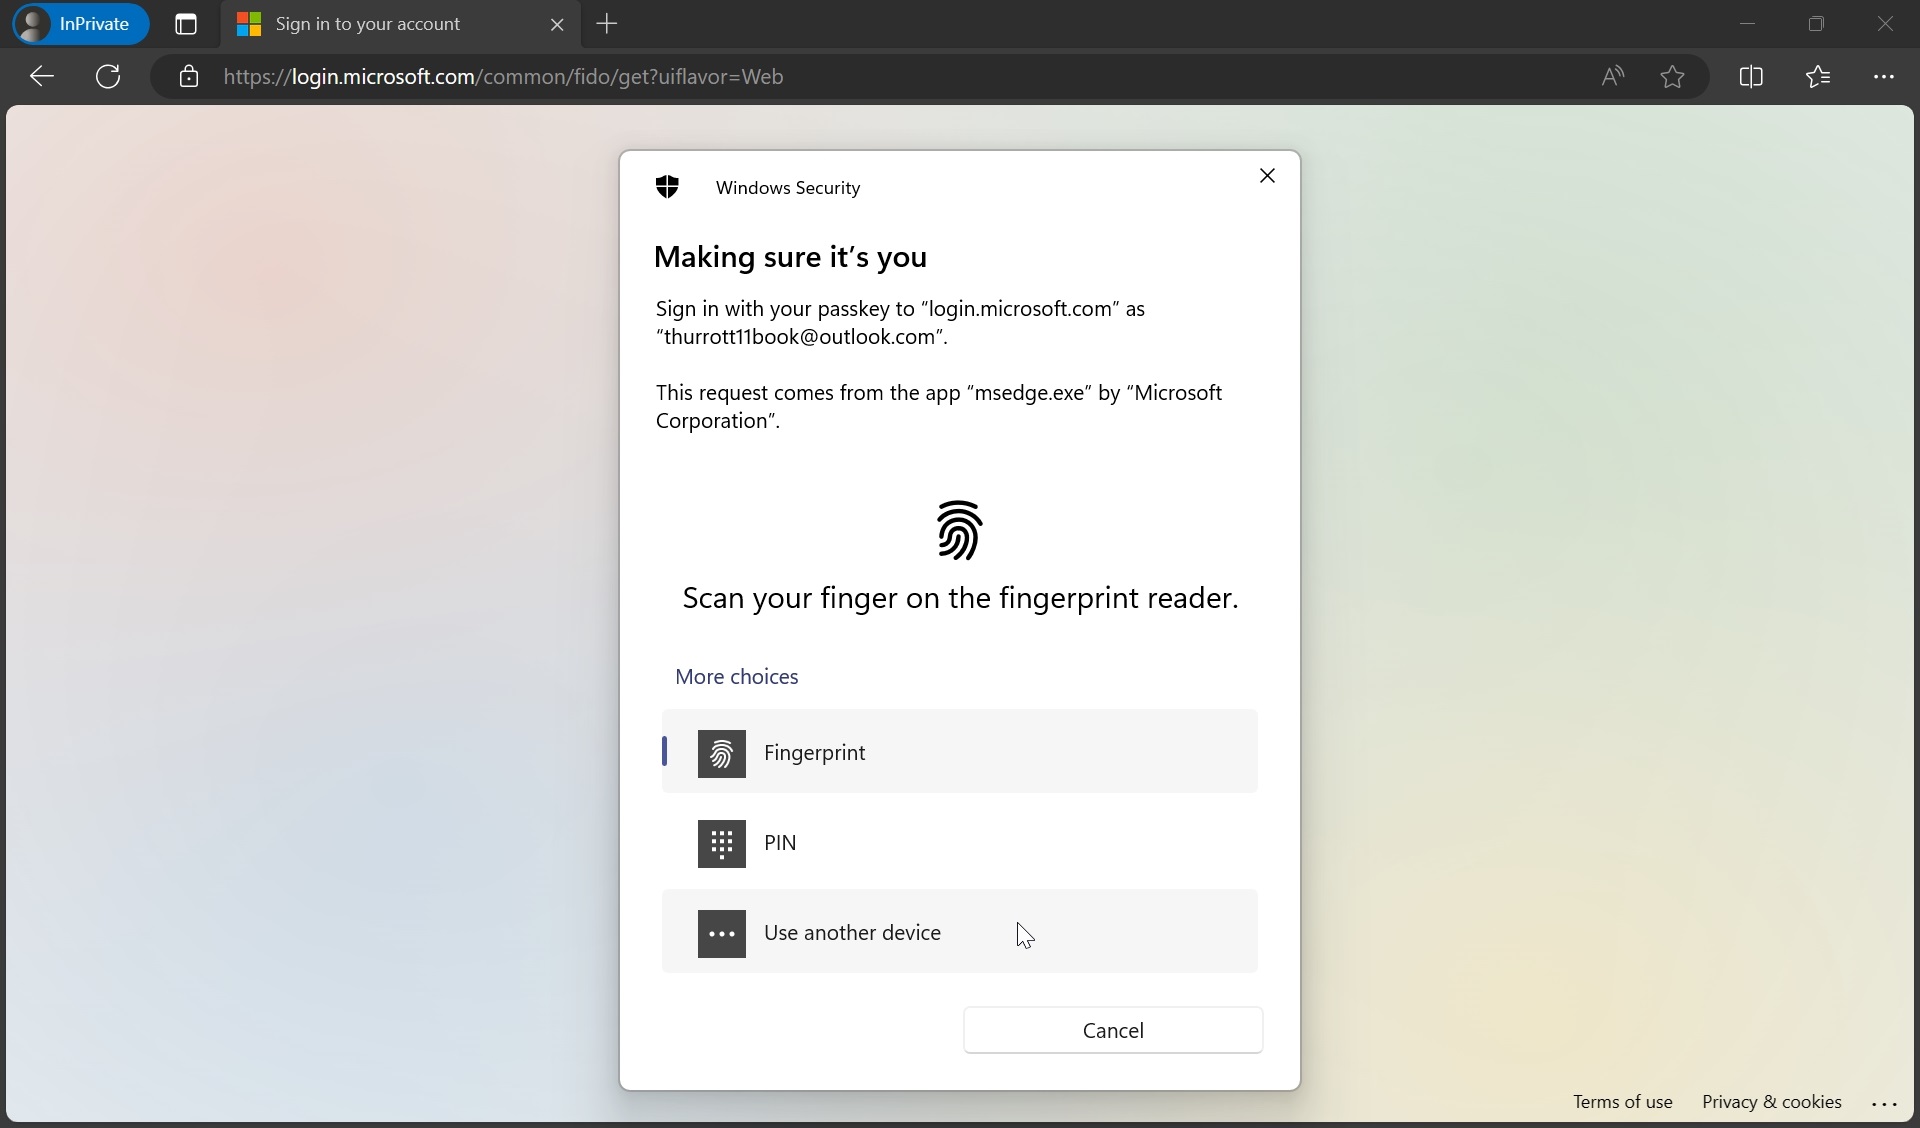
Click “Use another device,” and then “Security key” (under “More choices”), and then “Next.” If required, insert the security key and type its PIN as prompted. Then, click “OK.” You will be prompted to touch the security key. Do so.
You may also be prompted to choose the account (because security keys can contain passkeys for multiple account). After a prompt about staying signed in that won’t matter in this InPrivate window, you sign in and are presented with the Office.com website.
Signing in with a security key can be a bit tedious. But in real-world use, this process will get more streamlined as you use the key, and subsequent Windows Security windows will present the key up-front, rather than forcing you to find it under a “More choices” link. Also, the example above required more steps because there was a passkey on the PC, and passkeys are much more convenient than security keys.
Can you access your Microsoft account on mobile using a passkey or a security?
Passkeys and security keys are both very secure methods for accessing your Microsoft account on your PC, and passkeys are even more convenient than using a authenticator app. So it’s only natural to wonder whether you can use passkeys and security keys to access your Microsoft account on your mobile devices, like a phone or tablet.
Unfortunately, Microsoft does not natively support using either authentication with its online accounts on mobile. Instead, it expects Microsoft account and Microsoft work or school account holders to use Microsoft Authenticator or another authenticator app instead.
We discuss how to configure Microsoft Authenticator for your Microsoft account in the Secure Your Microsoft Account chapter.
But we hope to see Microsoft natively support passkeys and security keys for its online accounts on Android and Apple’s devices in the future. This would especially benefit users on Android tablets and iPads because few of them would use Microsoft Authenticator on those devices.
Technically, you can use a security key to access a Microsoft account passkey on Android devices, iPhones, and iPads. But doing so if difficult and inconsistent. And until that changes–we do expect to see Microsoft embrace passkeys more explicitly on mobile, at the very least–we can’t document how to make it work. For now, we recommend using Microsoft Authenticator or another authenticator app so that you can securely sign in to your Microsoft account (or Microsoft work or school account) on a mobile device. We will update the book when and if this changes.

Gain unlimited access to Premium articles.
With technology shaping our everyday lives, how could we not dig deeper?
Thurrott Premium delivers an honest and thorough perspective about the technologies we use and rely on everyday. Discover deeper content as a Premium member.