Microsoft Accounts (23H2)
- Paul Thurrott
- Feb 04, 2024
-
0
Windows 11 supports three types of sign-in accounts: Microsoft accounts, work or school accounts, and local accounts. Though we cover all three in this book, we focus largely on Microsoft accounts because they are the most common method used by individuals to sign in to the system.
Work or school accounts and local accounts each have their own chapters.
Microsoft sometimes refers to local accounts as offline accounts to differentiate them from online accounts like Microsoft accounts and work or school accounts.
Microsoft account basics
In the before times, Windows users would create a local account when they first signed in to Windows on a PC. But any configuration changes they subsequently made, or documents and other files they saved to that PC, would be unavailable when they used another computer. Worse, most of these accounts were not protected by even a password, leaving the personal data and other contents stored on the PC exposed to theft.
Today, Windows is more sophisticated, and most individuals sign in to Windows 11 with their Microsoft account instead of a local account. And because so much in Windows relies on you using this type of account, we usually assume that this is how you will be signing in to Windows. Indeed, Microsoft makes it very difficult not to sign in to Windows 11 with a Microsoft account (or work or school account, which is a bit like a Microsoft account for businesses and other managed organizations instead of individuals).
Some key benefits of using a Microsoft account include:
It’s more secure. Because you can configure your Microsoft account to require secure two-step verification methods, there’s no need to remember complicated passwords. Indeed, you can even remove the password from your Microsoft account if you’d like. Once it’s properly configured, a Microsoft account is more secure than a local account.
This topic is so important that it gets its own chapter. Check out Secure Your Microsoft Account for the details.
Some experiences require a Microsoft account. Some of the built-in experiences in Windows 11, like OneDrive file system integration, require a Microsoft account. If you sign in to the PC with a Microsoft account, Windows will pass through your sign in credentials and these experiences will work seamlessly. If you don’t, you may need to sign in to them individually.
Many in-box apps require a Microsoft account. Many of the in-box apps that come with Windows 11–like the Microsoft Store and Xbox–require a Microsoft account as well, as do many apps you download from the Store. Yes, you can manually sign in to those apps as needed, but when you sign in to Windows 11 with your Microsoft account, those apps work seamlessly.
It provides some back up and settings sync capabilities. With a Microsoft account, you can automatically sync key user folders like Desktop, Documents, Music, Pictures, and Videos with OneDrive. And some of your settings–including accessibility settings, saved passwords, language preferences, and more–are synced from PC to PC via your Microsoft account, providing a more consistent experience. There’s even a Windows Backup app to help you manage these capabilities.
Some built-in Windows 11 apps don’t require a Microsoft account at all. For example, while the new Outlook app does require you to connect it with at least one online account, it doesn’t have to be a Microsoft account. In fact, you can use it exclusively with a Gmail account if you’d like.
Microsoft account security basics
Before you do anything else, you should make sure that the Microsoft account you’re using with Windows 11 is as secure as possible.
Microsoft account security is a big topic, and for this reason, we gave it its own chapter, Secure Your Microsoft Account. We recommend reading that chapter thoroughly, but here are some high-level tips for those who just need a quick refresher.
You can’t configure the security of your account in Windows 11. Instead, you do so on the Microsoft Account website.
Recommended actions to take here include:
Fully and completely configure or update your personal information. In addition to an email address and password, your Microsoft account contains other personal information, including some that have security and privacy ramifications. All the items in your profile should be updated and accurate, especially your date of birth and country/locale. You do this from the Your info page on the Microsoft account website: Just click “Your info” in the site’s navigation bar.

Add or update the phone numbers and other secondary forms of security info you use to verify your identity. You can add one or more phone numbers and email addresses to your Microsoft account so that you can recover it if the account is hacked. Be sure to only add phone numbers and accounts that you own and control, and be sure to properly secure those accounts as well. To configure this information, navigate to Security > Advanced security options.
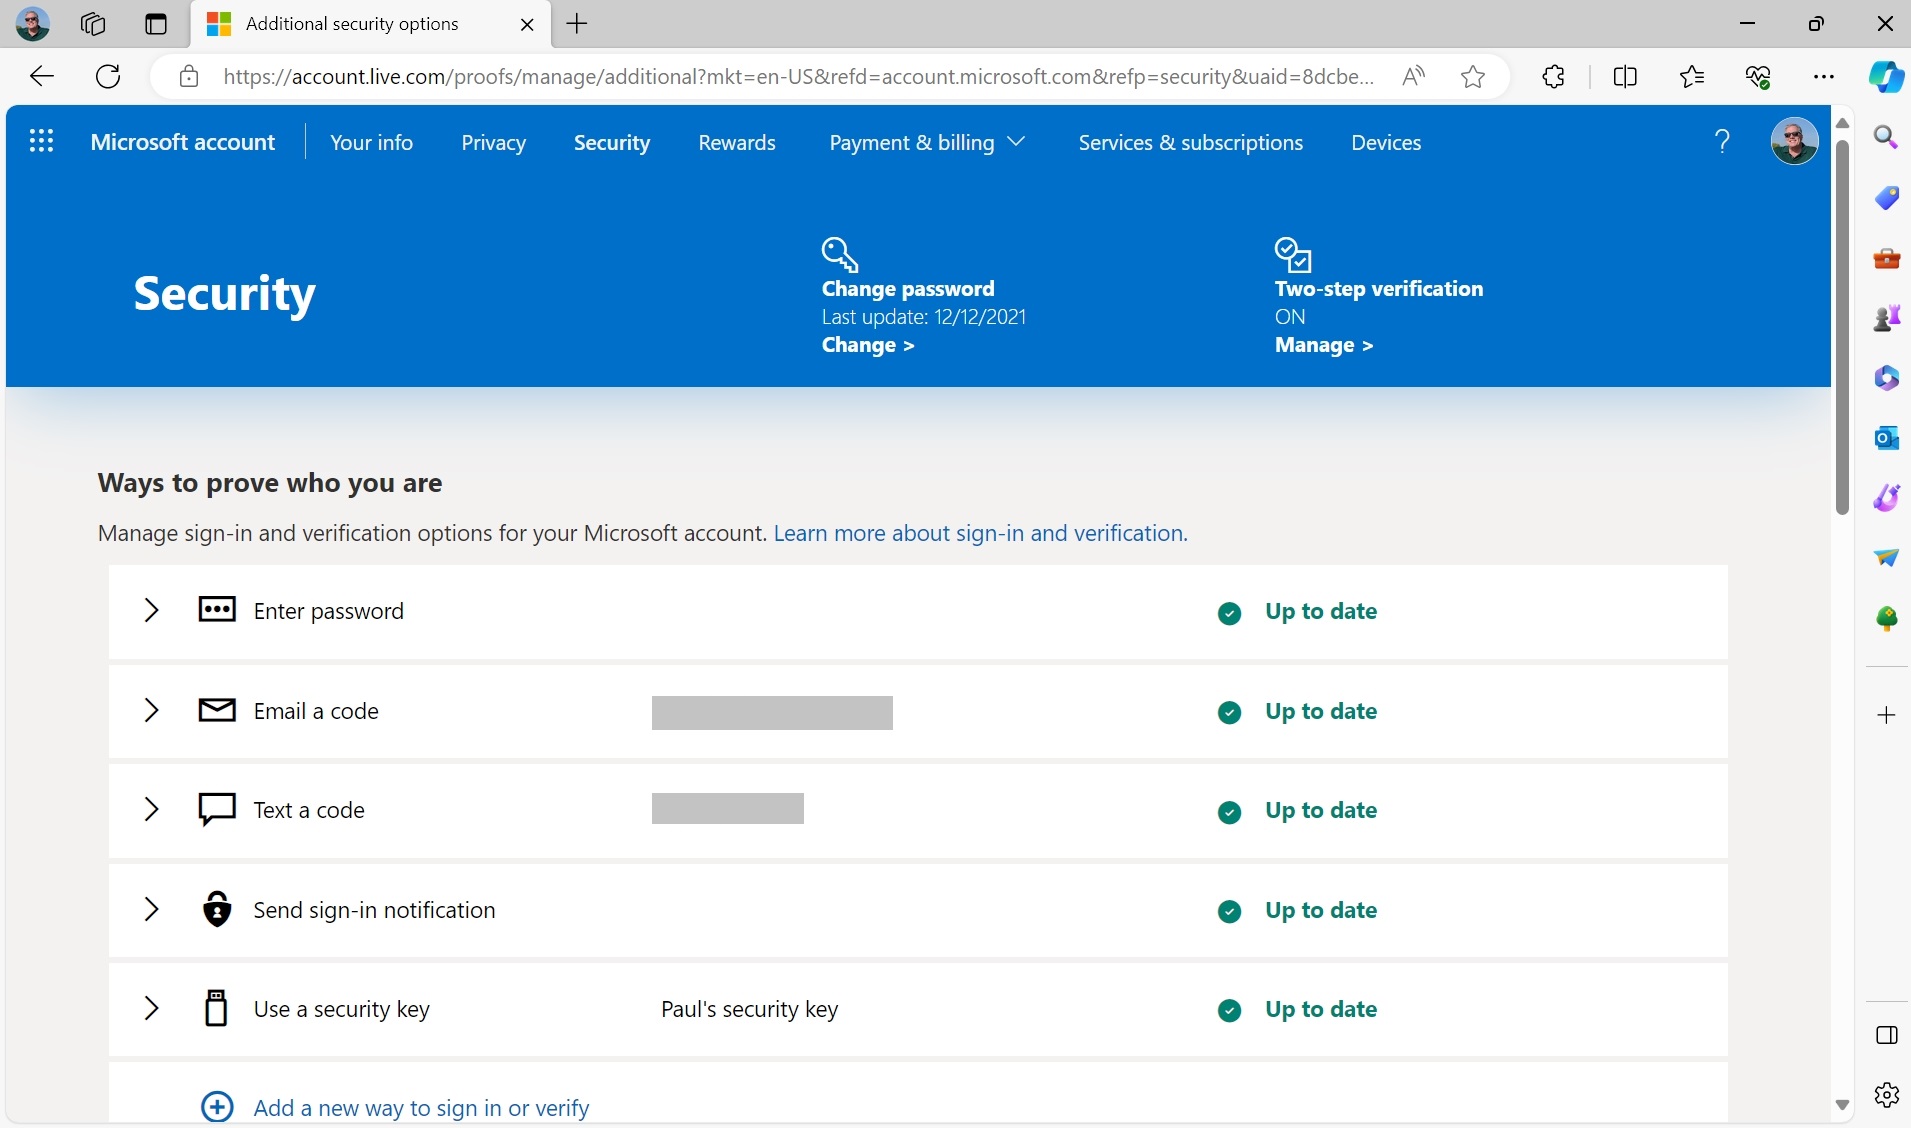
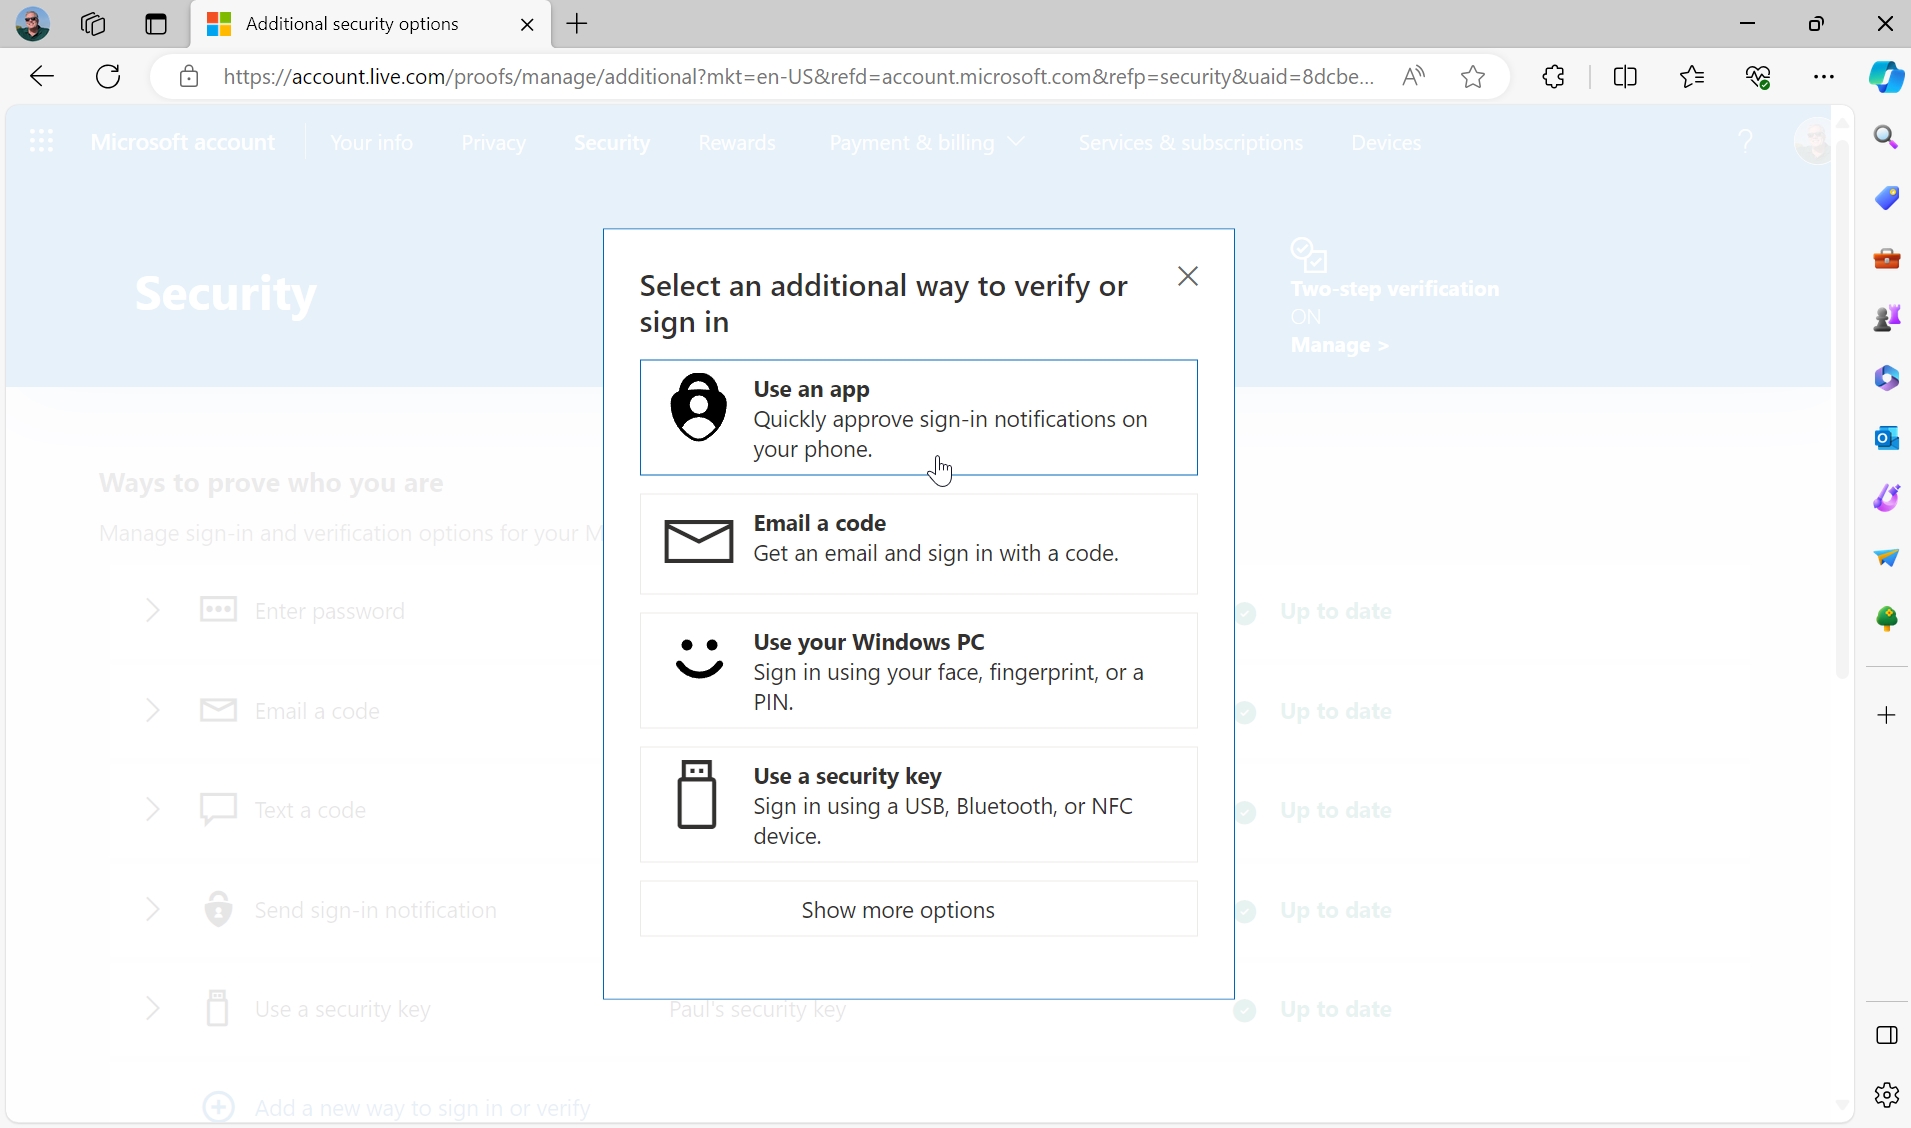
Use two-step verification to further secure your account. Microsoft supports a variety of two-step verification methods that further secure your account by forcing you to take an additional step each time you need to sign in or verify your Microsoft account credentials. The most common is an authenticator app like Microsoft Authenticator that displays sign in approval requests on your smartphone, which is itself protected with PIN or biometric sign in methods of its own. You add and configure two-step verification methods by navigating to Security > Advanced security options. Click “Add a new way to sign in or verify” to use an authenticator app.
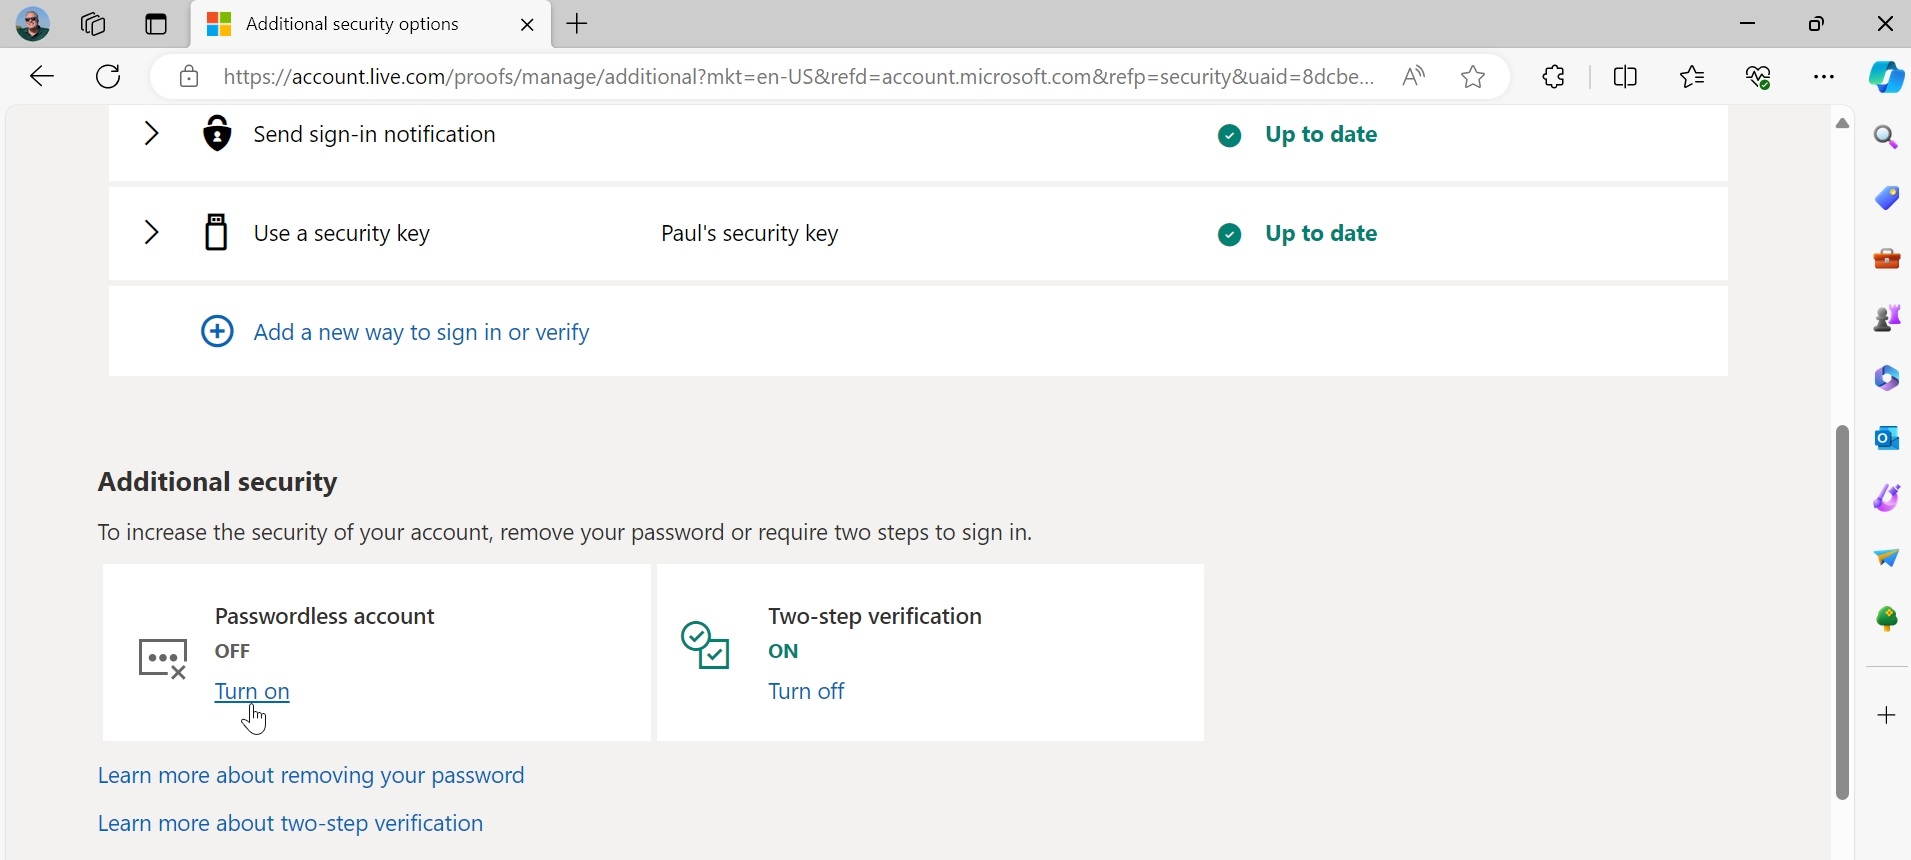
Remove the password from your Microsoft account. Two-step verification methods like those provided by an authenticator app allow you to access your Microsoft account in a passwordless manner: You just type in your email address and then respond to a prompt on your phone, and you’re in. But you can optionally make your Microsoft account truly passwordless by removing its most vulnerable component, the password. To do so, navigate to Security > Advanced security options and locate “Passwordless account” under “Additional security.”

We examine the benefits of passwordless and related account security features in Windows 11 in the Passkeys and Security Keys chapter.
Don’t be a statistic: A properly secured Microsoft account combined with a Windows Hello-based authentication method on each of your PCs will help ensure that your online account, personal information, and private data is always safe.
You can learn more about Windows Hello and related sign-in security features in the Windows Hello, Presence Sensing, and Dynamic Lock chapter.
Manage your Microsoft account in Windows 11
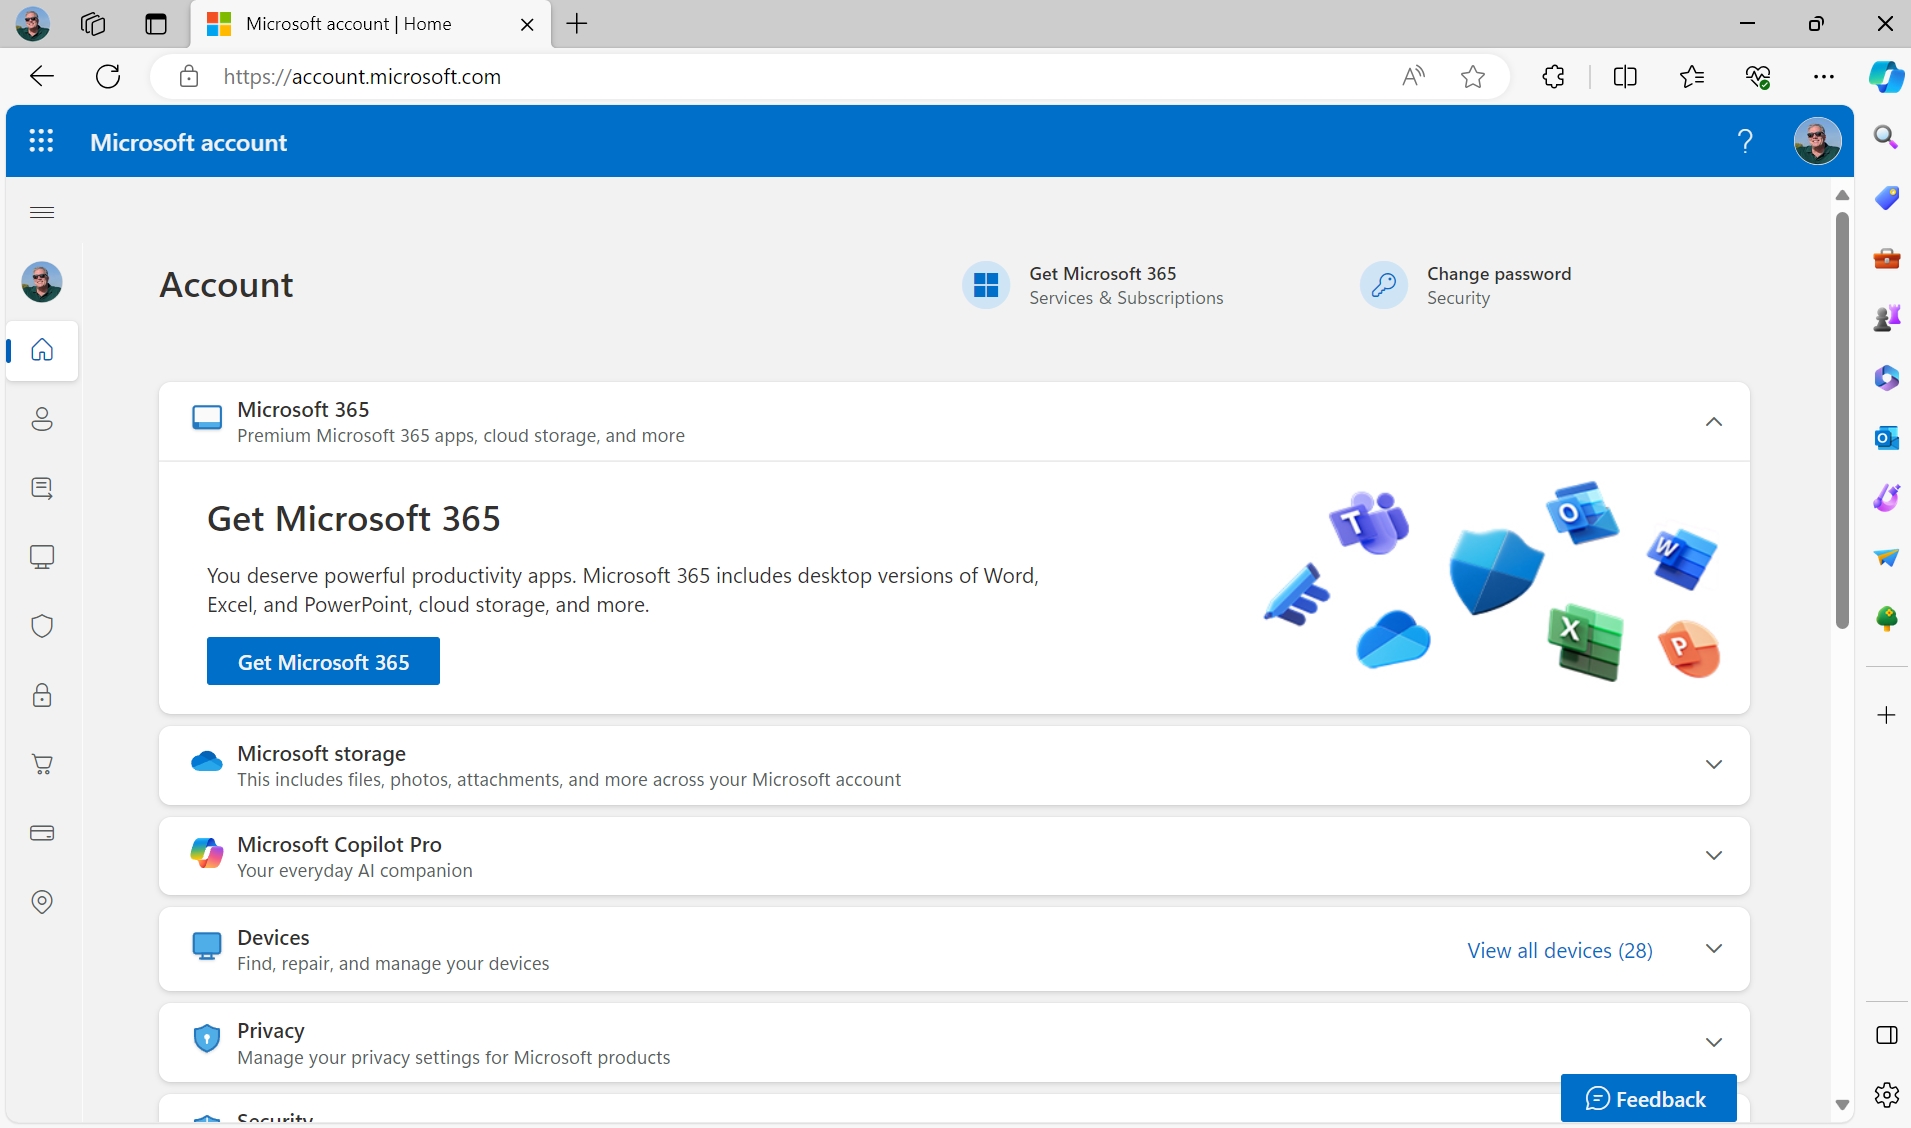
You manage your Microsoft account–and other accounts–in Windows 11 using Accounts settings, which is found by opening the Settings app and navigating to Accounts.
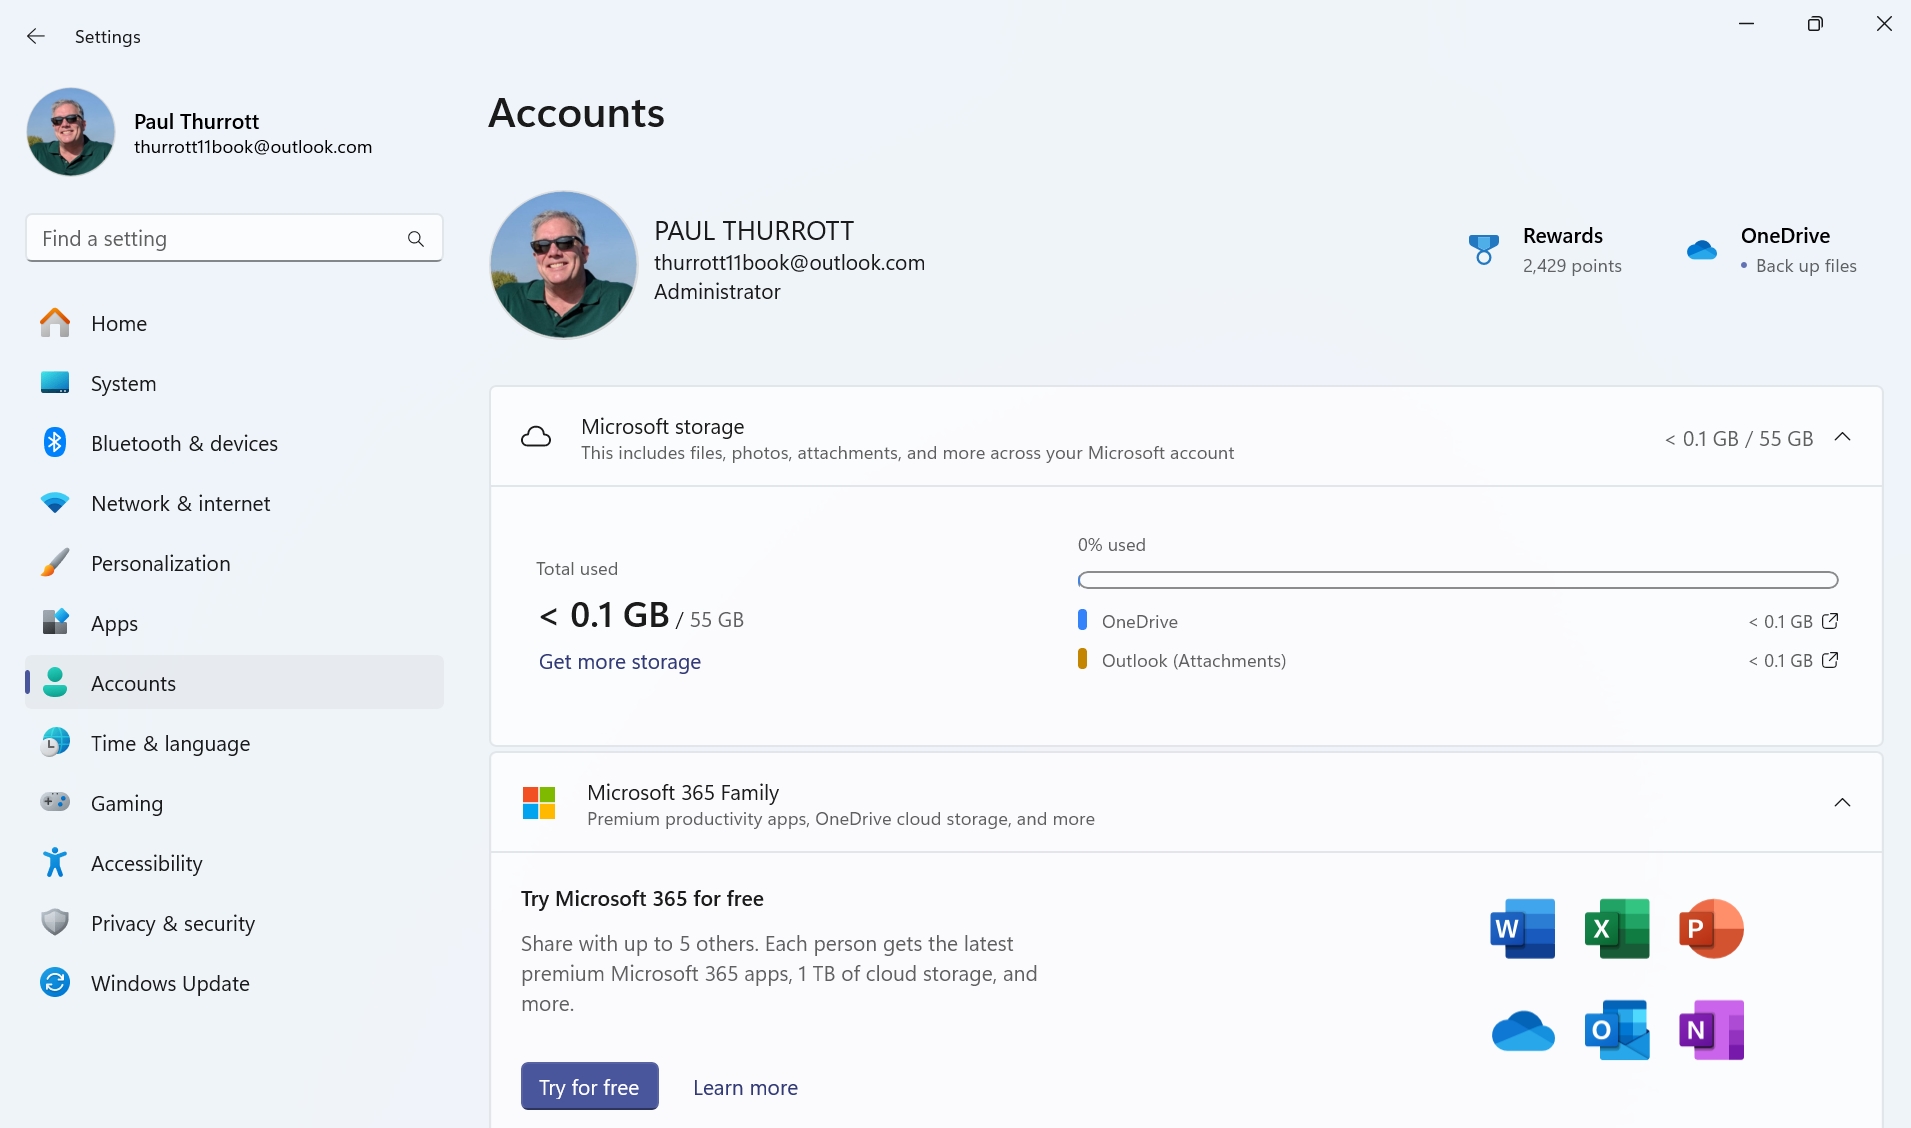
This Settings page provides a dashboard of sorts for your Microsoft account, with a header at the top that includes your profile image, your name, your email address, and your sign-in privileges (Administrator or Standard user) on the left and links for your Microsoft Rewards and OneDrive storage on the right.
Below that is a larger area that will display information about your Microsoft 365 Basic, Personal, or Family subscription, if available. Otherwise, you will see a “Microsoft storage” area dedicated to your OneDrive cloud storage usage.
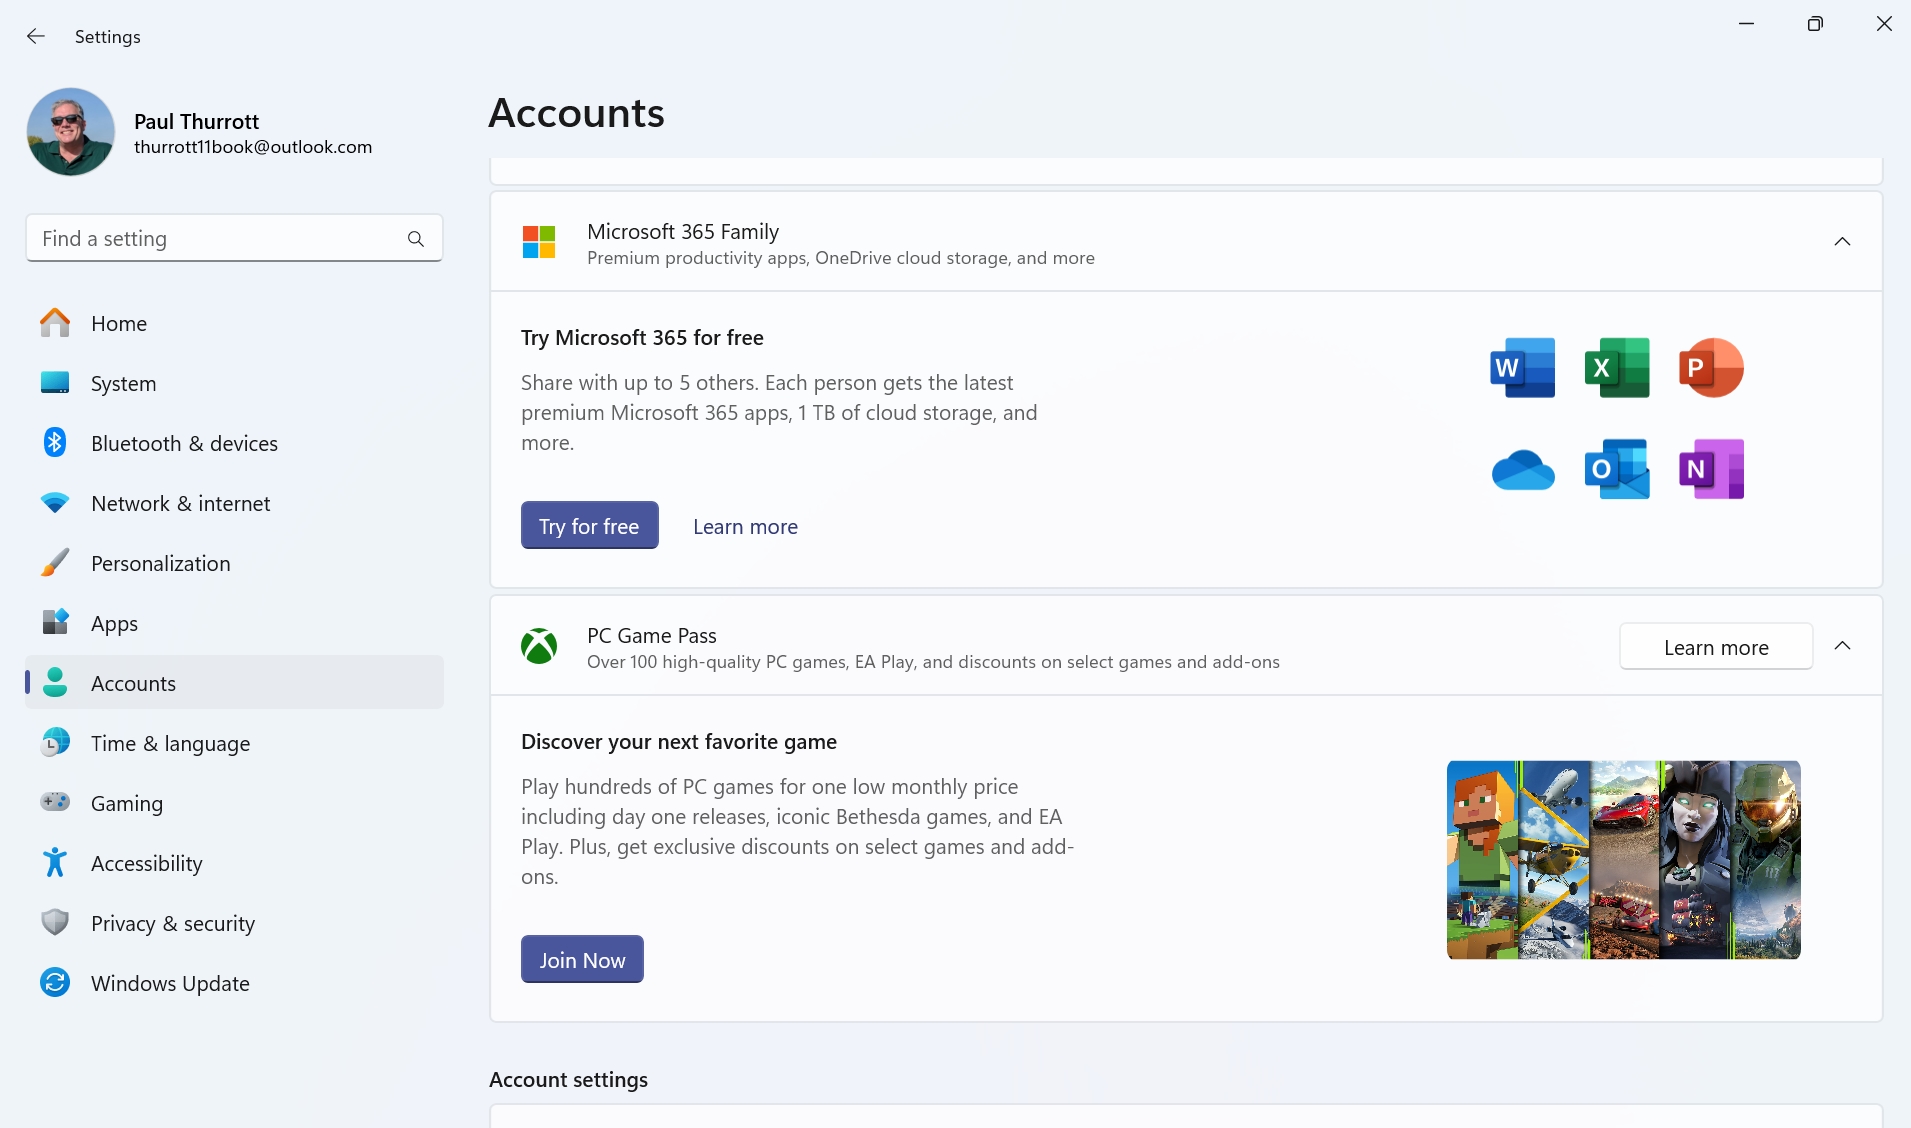
Below that, you will see an area dedicated to your Xbox Game Pass, PC Game Pass, or Xbox Game Pass Ultimate subscription, if available.
If you don’t have a Microsoft 365 and/or Xbox Game Pass subscription of any kind, Settings will instead display promotional blocks for each so you can learn more. These offerings aren’t going to subscribe to themselves.
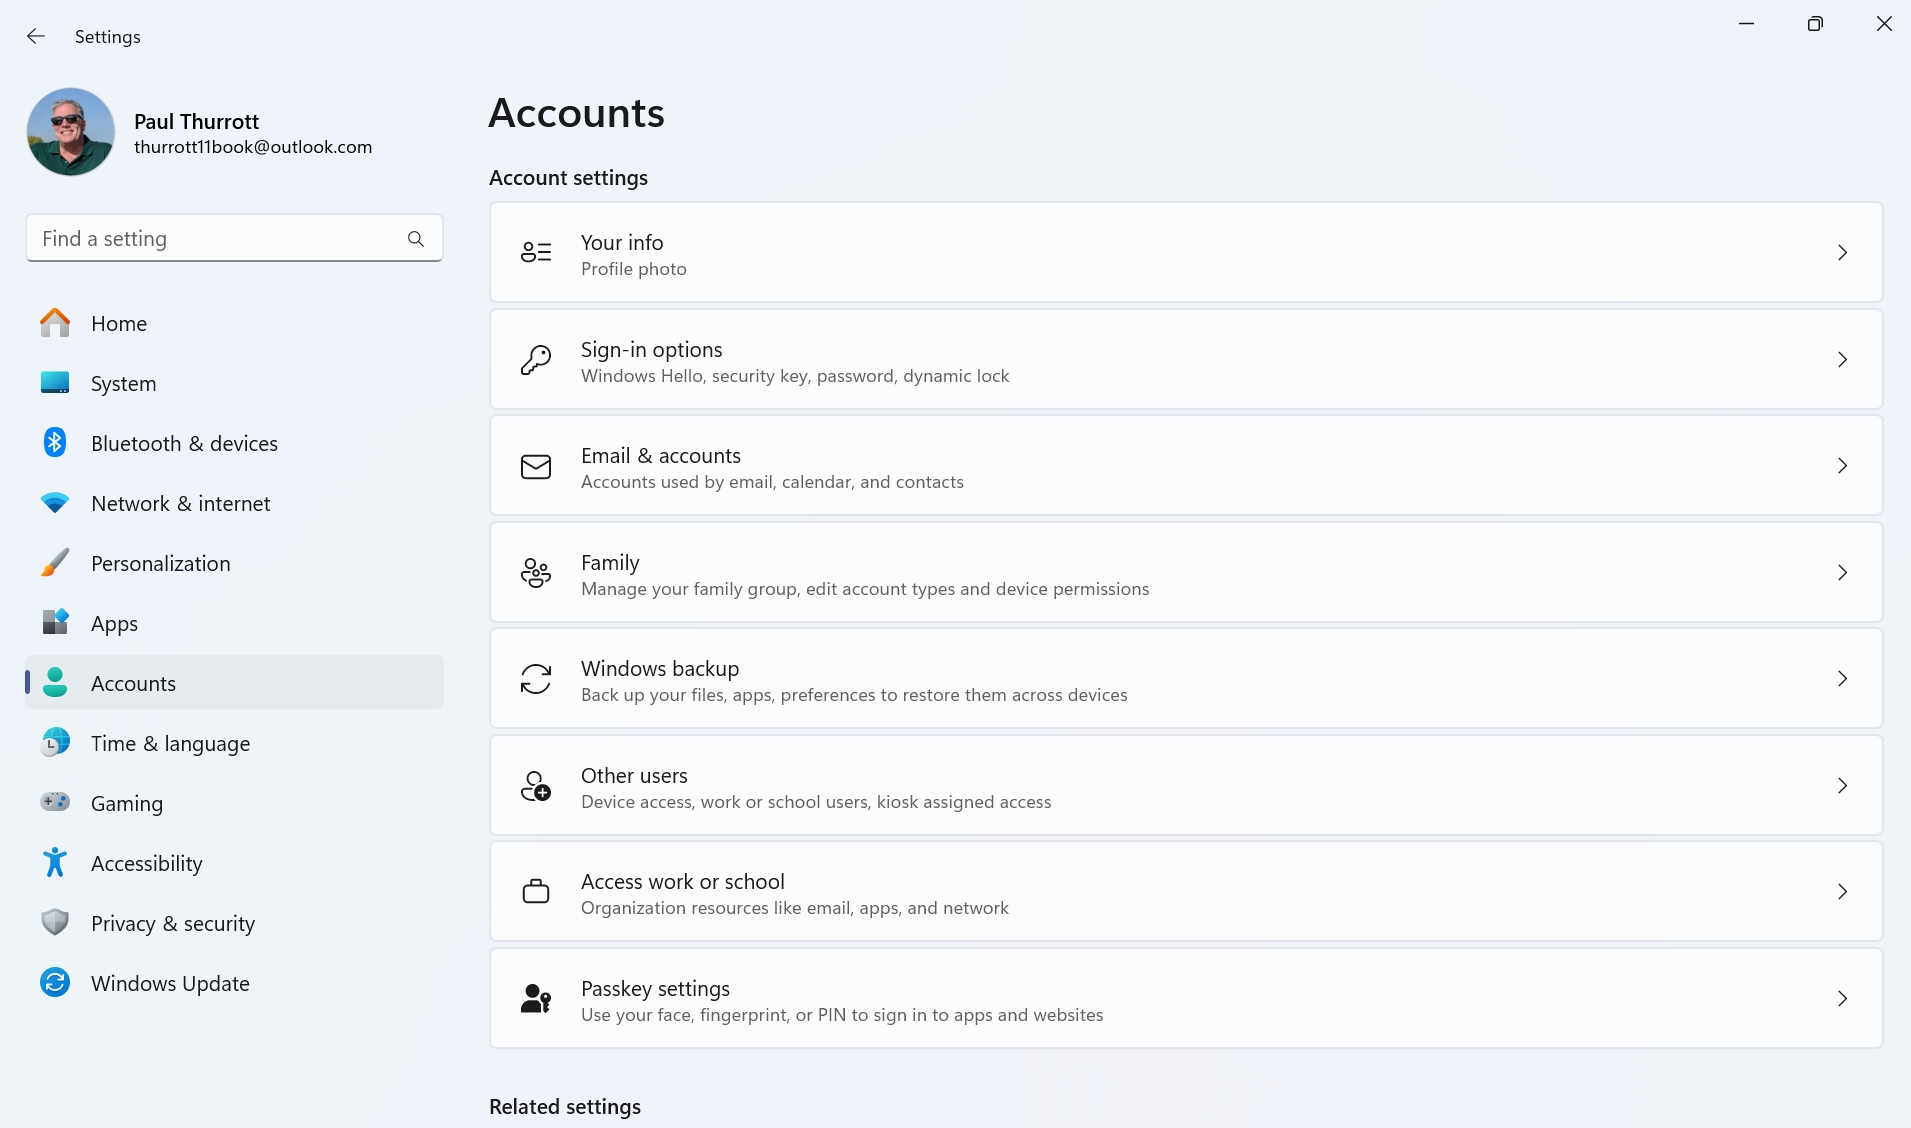
Below those areas, you will see links to various Settings sub-pages in the “Account settings” section that are covered throughout this section of the book. Here, we will cover a few options that are directly related to Microsoft account management.
Configure a user picture
By default, your sign-in account will use whatever photo is associated with your Microsoft account as its user picture. If you haven’t configured a photo, or would like to change it, you can do so in Settings > Accounts > Your info.
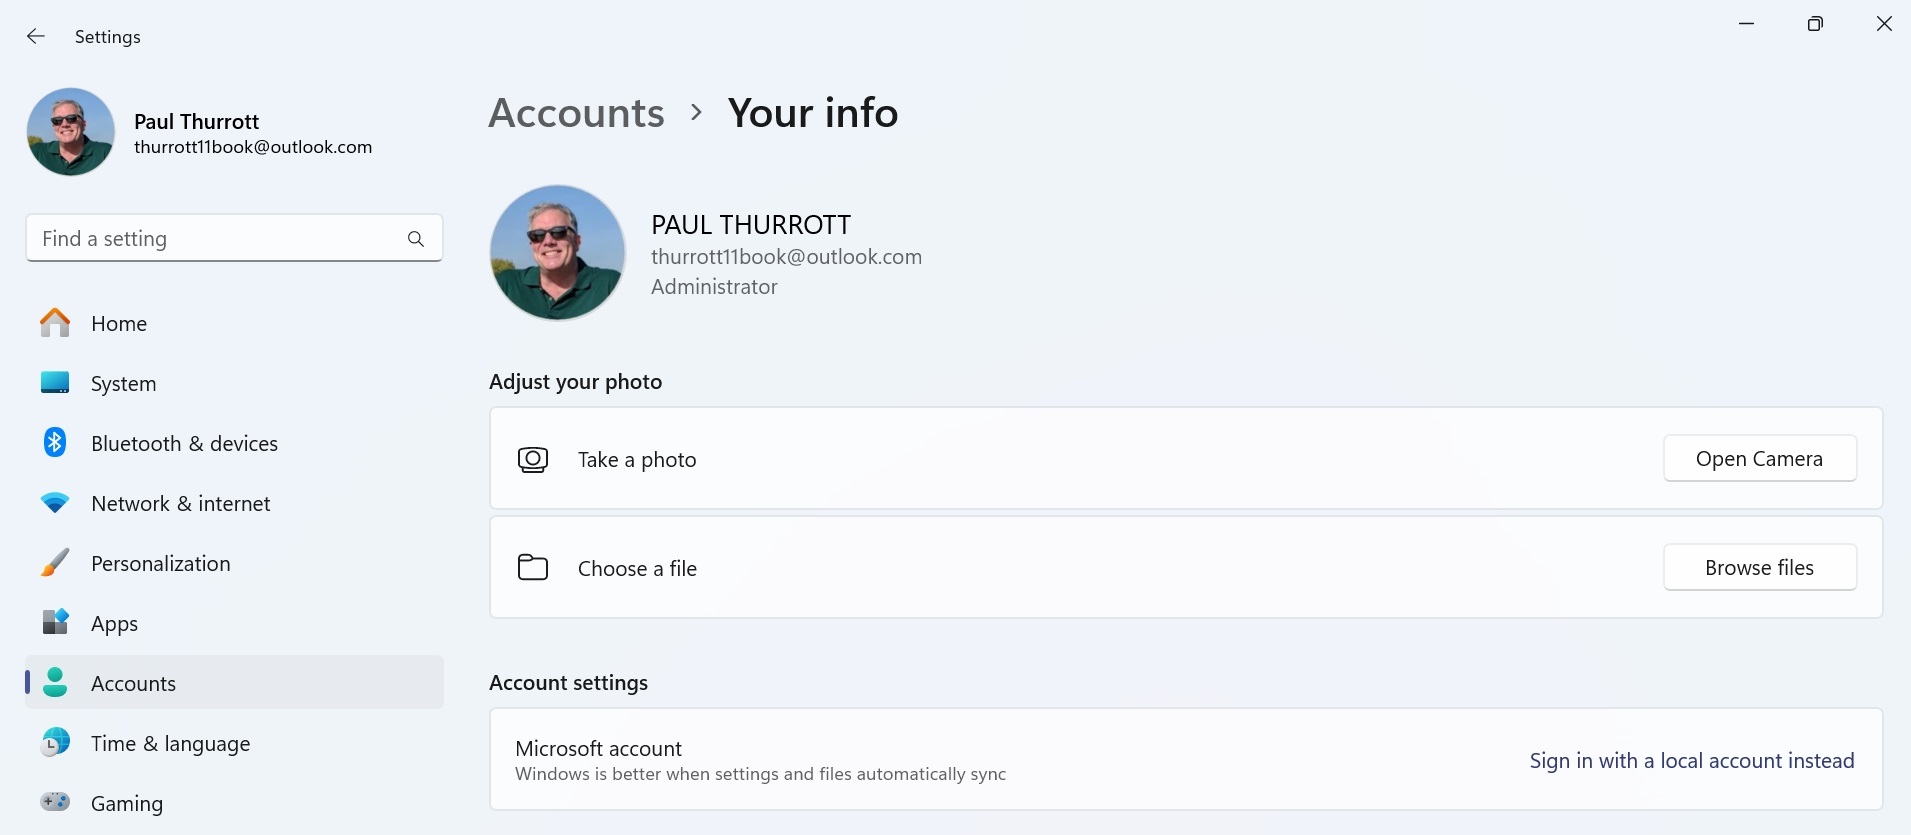
To do so, select “Open Camera” next to “Take a photo” or “Browse files” next to “Choose a file.” The former option will let you use your PC’s webcam to take a still shot. And the latter lets you find a photo you like using File Explorer. This is straightforward.
Convert your Microsoft account sign in to a local account
We don’t recommend doing this, but Windows 11 lets you convert your Microsoft account sign-in to a local account in Settings > Your info > Account settings. Doing so will remove your Microsoft account from the PC and replace it with a local account.

To be clear, this change will not impact your Microsoft account, just the sign-in you use on this PC.
Please refer to the Local accounts chapter for more information about offline accounts.
Configure sign-in options
When you first configured Windows 11 using the Windows Setup Out of Box Experience (OOBE), you were required to create a PIN, a four- (or more) digit alphanumeric code so that you could sign in to Windows 11 more easily than having to remember and type the potentially complex password associated with your Microsoft account. And depending on the capabilities of your PC, you may have also been given the opportunity to configure Windows Hello facial and/or fingerprint recognition for an even more seamless sign-in experience.
But you can configure each of these three sign-in methods–as well as related features like security keys, Dynamic lock, and, if available on your PC, Presence Sensing–at any time. To do so, open Settings and navigate to Accounts > Sign-in options.
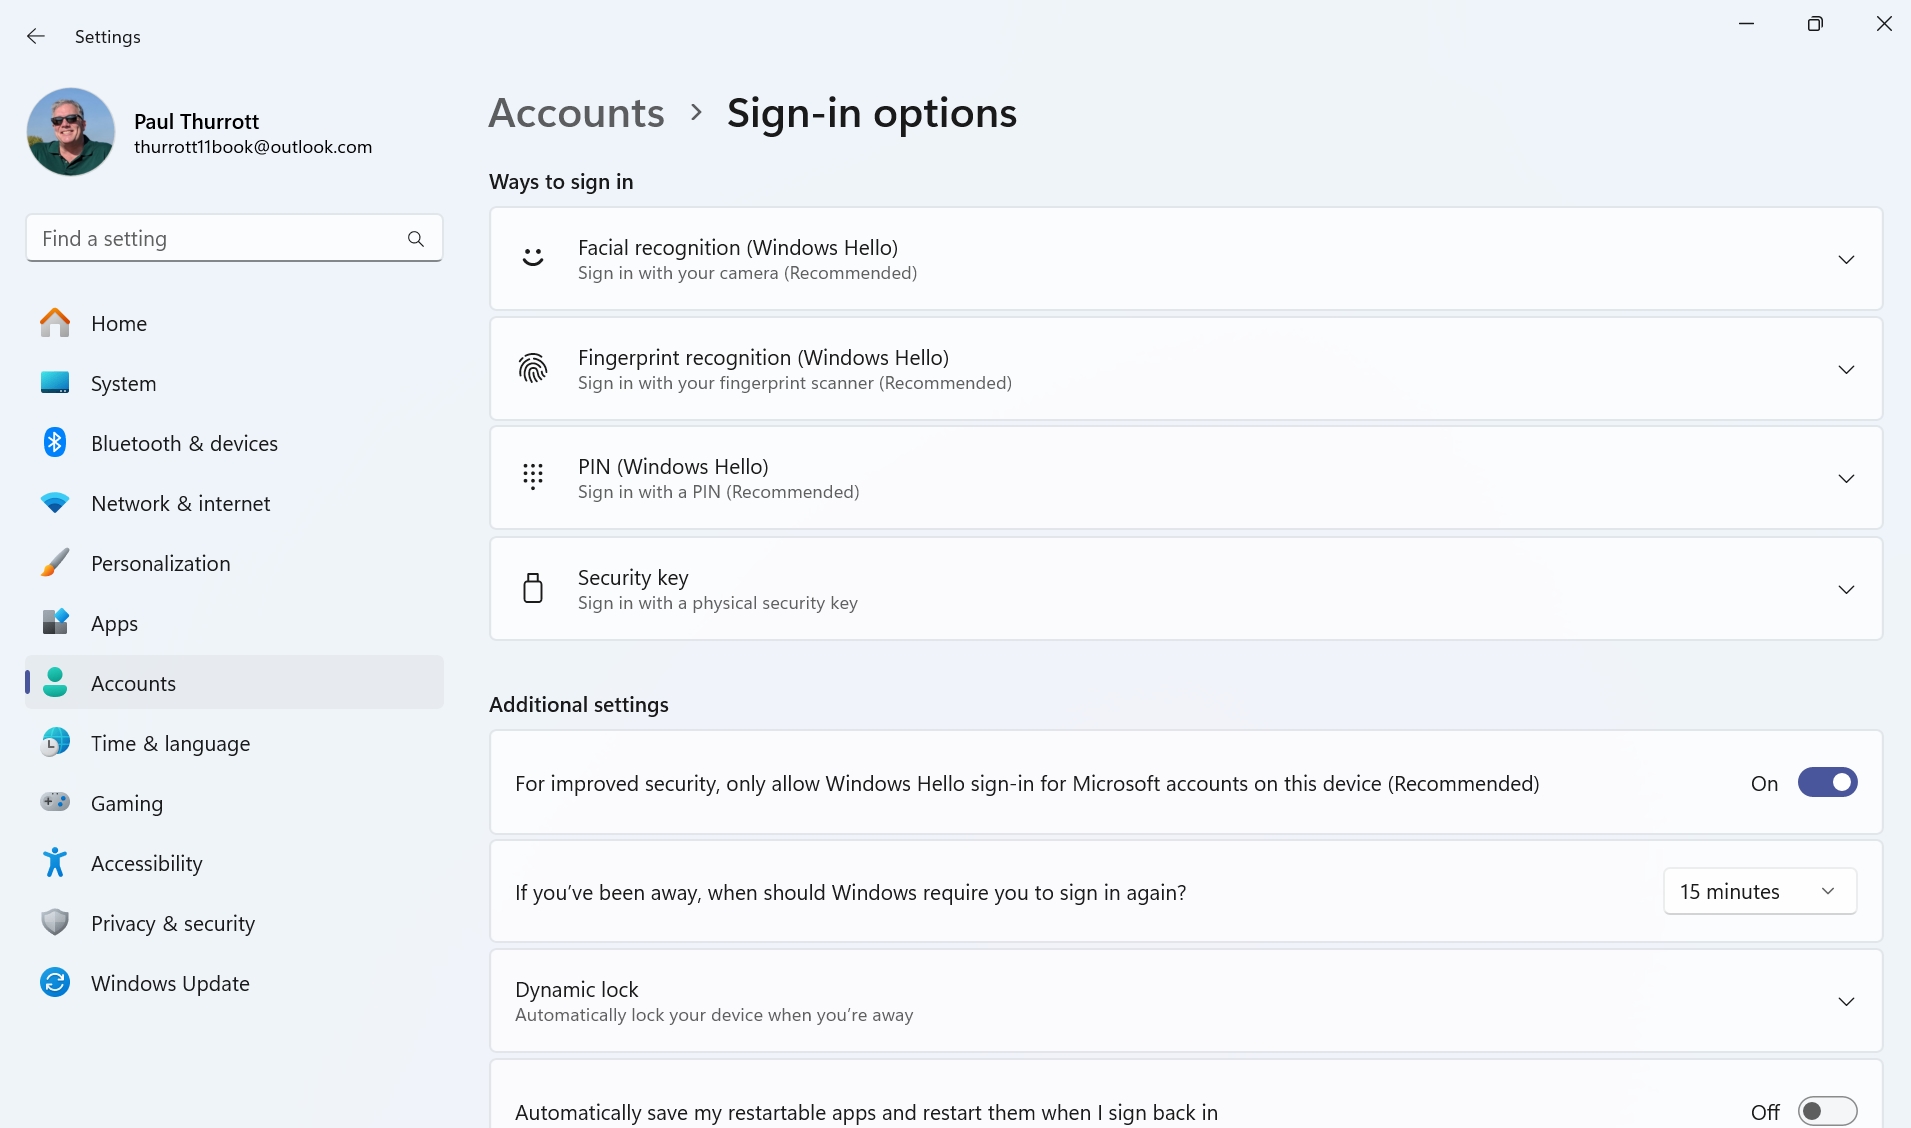
Please refer to the Windows Hello, Presence Sensing, and Dynamic Lock chapter for more information about those three features topics. You can learn more about security keys in the Passkeys and Security Keys chapter.
Configure accounts for email, calendar, and contacts
In addition to sign-in accounts, Windows 11 also supports other types of accounts that you will use in apps like Outlook. These types of accounts are created and managed in the Settings app by navigating to Accounts > Email & accounts.
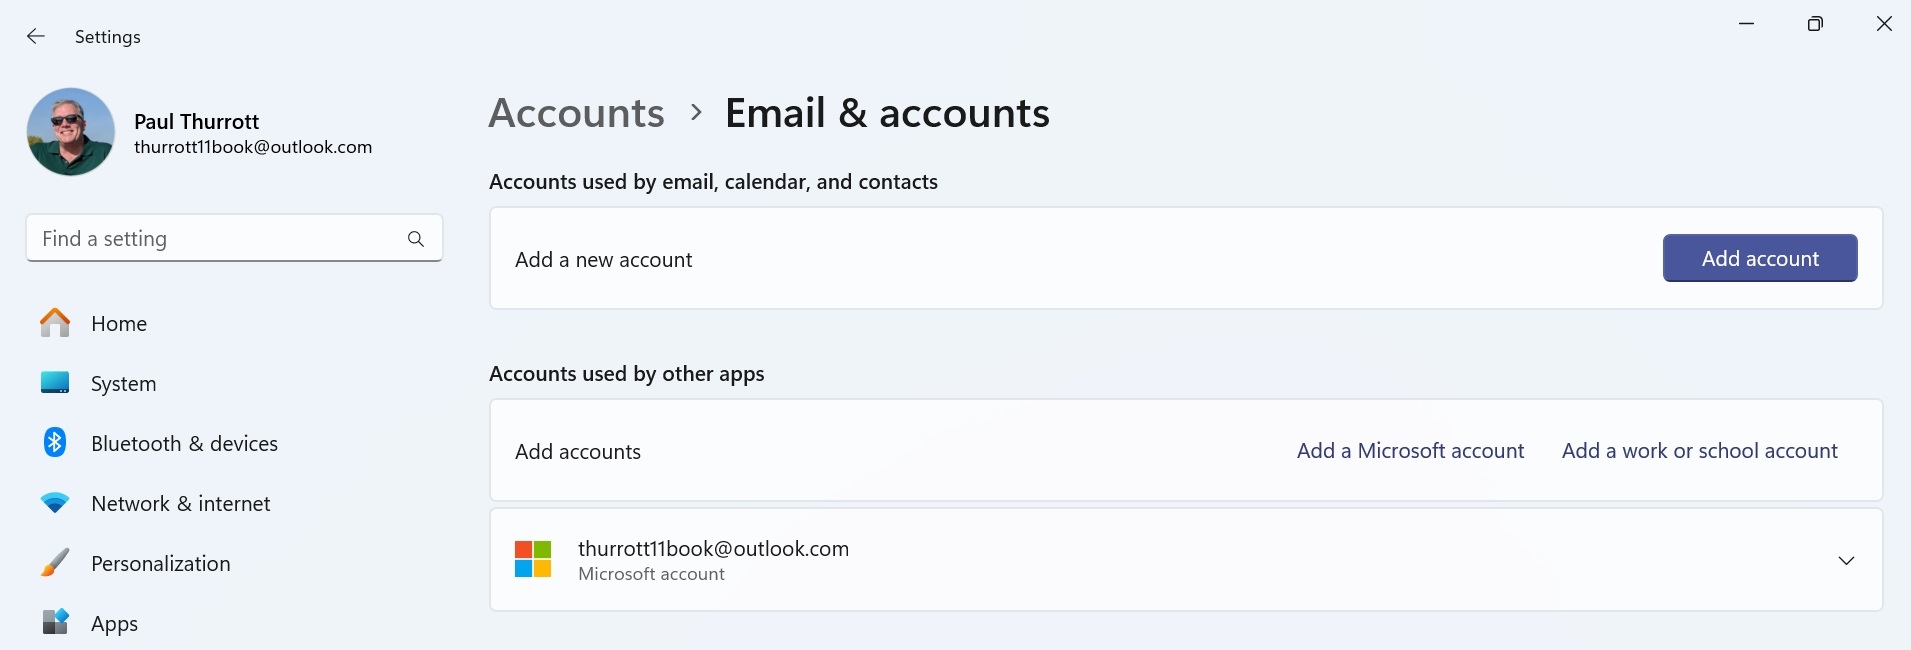
Please refer to the Email and Other Accounts chapter for more information about the types of accounts you can use for email, calendar, and contacts.
Configure apps backup and files and settings sync
When you sign in to Windows 11 with a Microsoft account, Windows 11 is configured to back up and sync a limited set of files, apps, and settings associated with that account. You configure these features using Windows backup settings, which is found in the Settings app by navigating to Accounts > Windows backup.
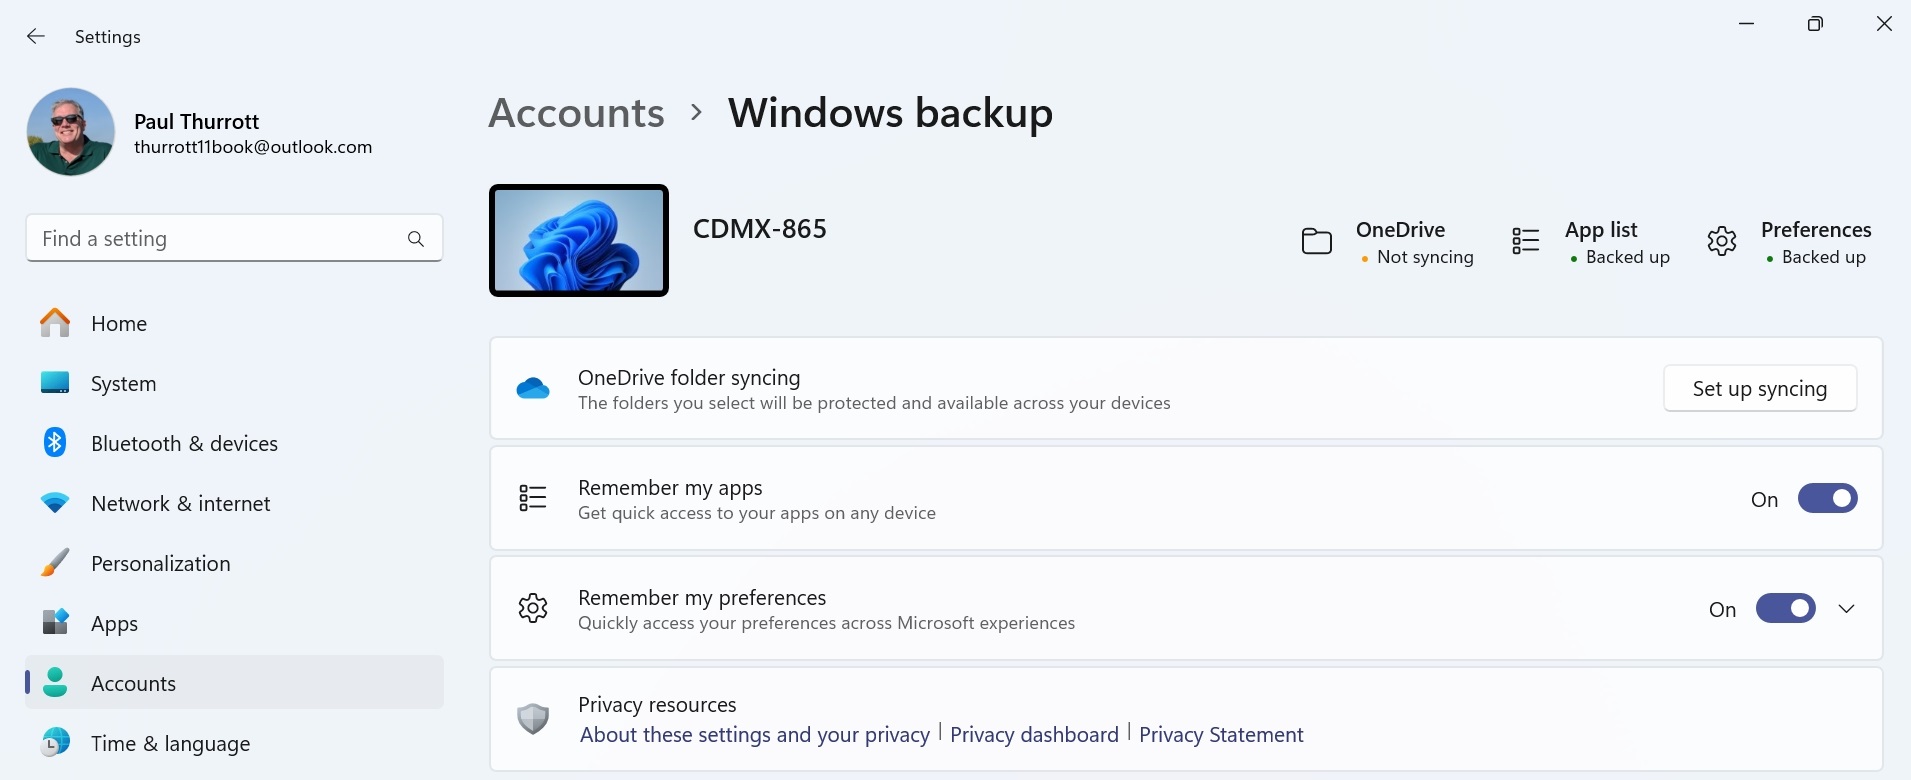
Here, you can configure OneDrive folder backup (via the settings interface in the OneDrive app), a limited form of app backup, and settings sync. Once these features are configured to your liking, you can use the Windows Backup app to create a backup in your Microsoft account. You don’t have to, as Windows 11 occasionally creates a new backup according to its own mysterious schedules. But using Windows Backup is immediate.
You can learn more about OneDrive folder backup in the OneDrive chapter.
So what’s the point of this backup?
When you set up Windows 11 on a new PC in the future, you can restore the backed up settings and apps during the Out of Box Experience, similar to, but more limited than, what we do when setting up a new smartphone.
Where did it go?
The list of settings Windows 11 lets you back up is quite short. And yes, it’s even less useful than the similar feature–called settings sync–from Windows 10, which synced more settings than does Windows 11. For example, Windows 11 no longer syncs your desktop theme and background, as before. And there are far more settings that do not sync. This is an area in which Microsoft could improve Windows dramatically but appears to be backpedaling.
Add and configure other sign-in accounts
Windows 11 also lets multiple people use the same PC. You do so by configuring multiple Microsoft account sign-in accounts in Other users.
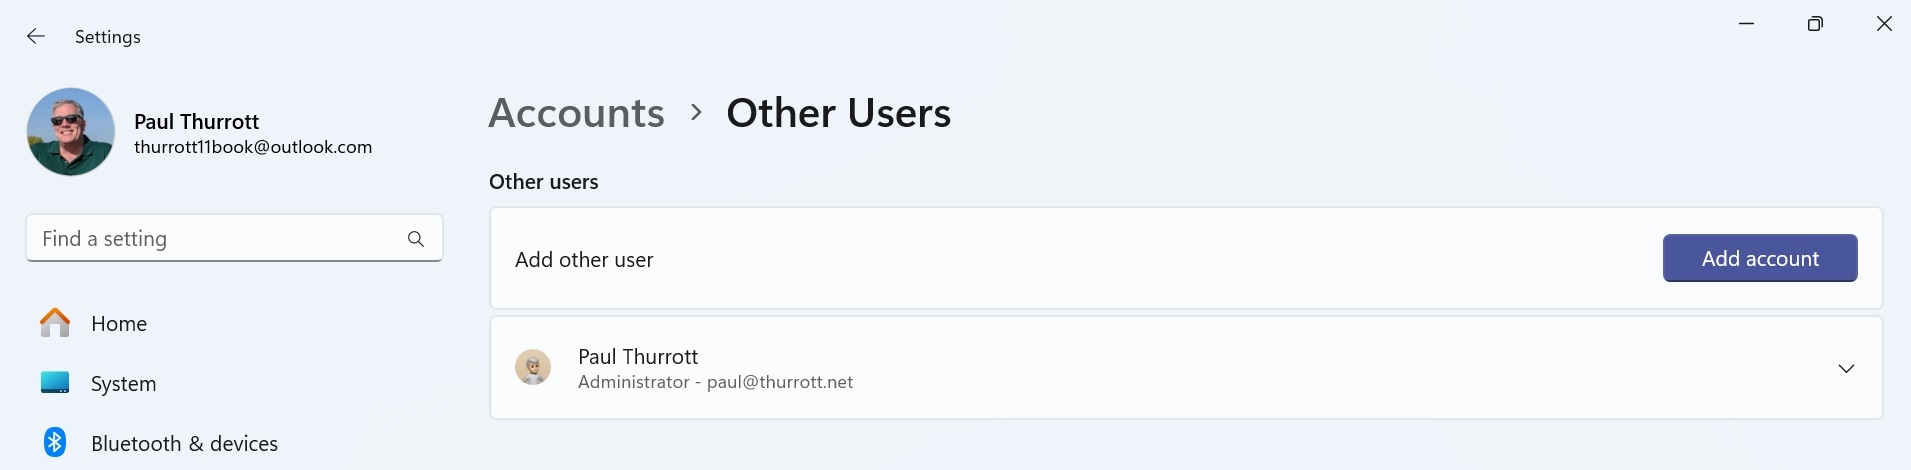
Please refer to the Multiple Accounts chapter for more information about creating, configuring, and using other sign-in accounts.
Manage passkeys
Windows 11 version 23H2 added a new management interface for passkeys, a modern online account authentication method that works much like Microsoft authenticator and other authenticator apps but without requiring a phone. That is, while you’re browsing the web, online accounts that support this standard will prompt you to save a passkey in the secure storage in your PC’s security chip so that you can then prove your identity using a PIN or Windows Hello facial or fingerprint recognition.
It’s not much to look at, but you can find this interface by opening the Settings app and navigating to Accounts > Passkey settings.

Windows 11 created a passkey for your Microsoft account when you first signed in to the system. So there will always be at least one account listed here, your sign-in account.
You can learn more about passkeys and how they work in Windows 11 in the Passkeys and Security Keys chapter.

Gain unlimited access to Premium articles.
With technology shaping our everyday lives, how could we not dig deeper?
Thurrott Premium delivers an honest and thorough perspective about the technologies we use and rely on everyday. Discover deeper content as a Premium member.